
'%20x='0'%20y='0'%20height='100%25'%20width='100%25'%20%0A%20%20%20%20%20%20%20%20%20%20xlink%3Ahref='data:image/jpg;base64,/9j/2wBDAAYEBQYFBAYGBQYHBwYIChAKCgkJChQODwwQFxQYGBcUFhYaHSUfGhsjHBYWICwgIyYnKSopGR8tMC0oMCUoKSj/2wBDAQcHBwoIChMKChMoGhYaKCgoKCgoKCgoKCgoKCgoKCgoKCgoKCgoKCgoKCgoKCgoKCgoKCgoKCgoKCgoKCgoKCj/wgARCAAGAAoDASIAAhEBAxEB/8QAFQABAQAAAAAAAAAAAAAAAAAABQb/2gAIAQEAAAAAlG//xAAUAQEAAAAAAAAAAAAAAAAAAAAG/9oACAECEAAAADP/xAAUAQEAAAAAAAAAAAAAAAAAAAAD/9oACAEDEAAAAE//xAAgEAACAQQBBQAAAAAAAAAAAAABAgQABREhEgMTFCIy/9oACAEBAAE/AJd9ToXS2wZCv5cnfoo7Y5/Ayd4HA0kmG6hjEGxmv//EABcRAQEBAQAAAAAAAAAAAAAAAAIBAAT/2gAIAQIBAT8A6DCTZv/EABYRAAMAAAAAAAAAAAAAAAAAAAACQf/aAAgBAwEBPwB4f//Z'%3E%3C/image%3E%3C/svg%3E)
Farming items in Minecraft is a very important aspect of any player's world. It gives them the opportunity to gather items reliably and consistently. Automatic farms are generally a self-generating resource that will collect lots of resources for the players while they go off and do other, more pressing tasks.
Here's how players can build an automatic pumpkin farm for their survival worlds in Minecraft.

A step-by-step guide for bulding an automatic pumpkin farm in Minecraft
Chart New Territories with the ultimate Minecraft Seed Generator!
Players can easily find pumpkins in grassy biomes. However, sometimes finding pumpkins can be a bit difficult when the players need them. The good news is that players can make an automatic farm that can generate enough pumpkins that the players will never run out of the items.
This build was created by NaMiature on YouTube and showcases the many uses of this wonderful pumpkin farm.
Step 1: Dig an 8-block-wide hole in the ground
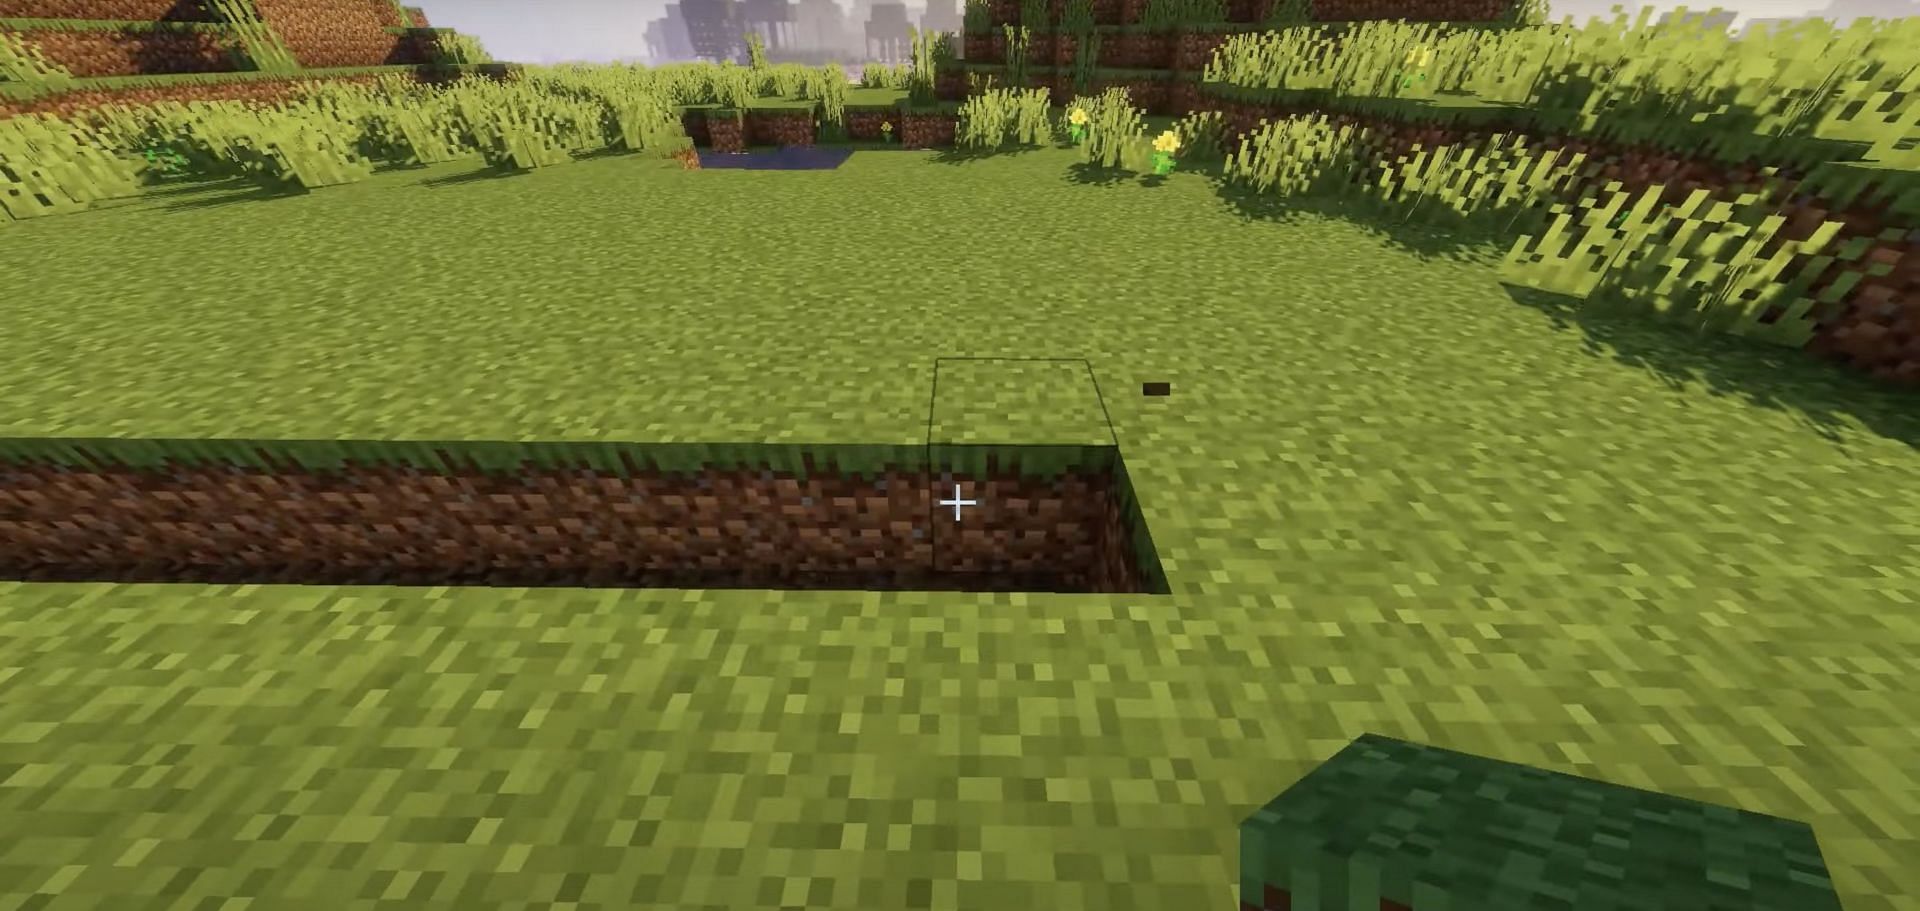
Players of Minecraft should start off the process by digging a hole in the ground that is 8 blocks wide.
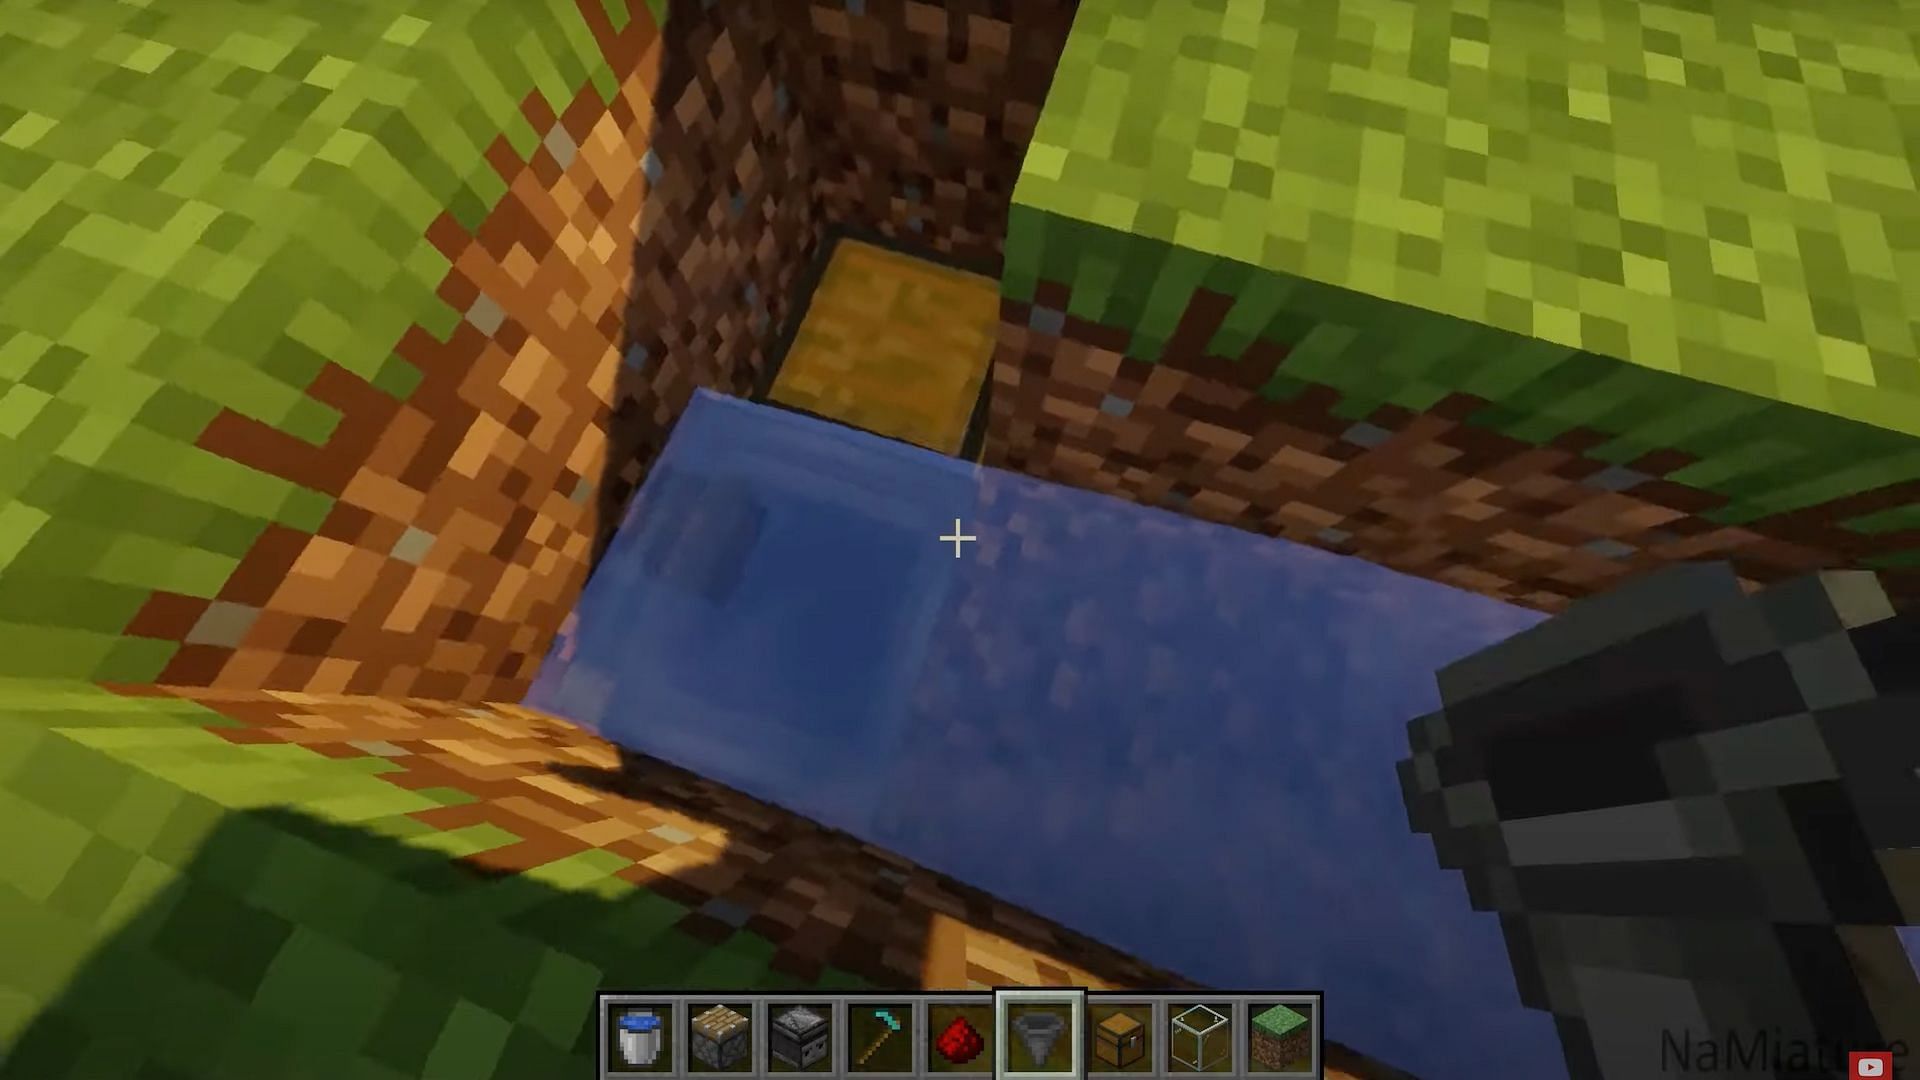
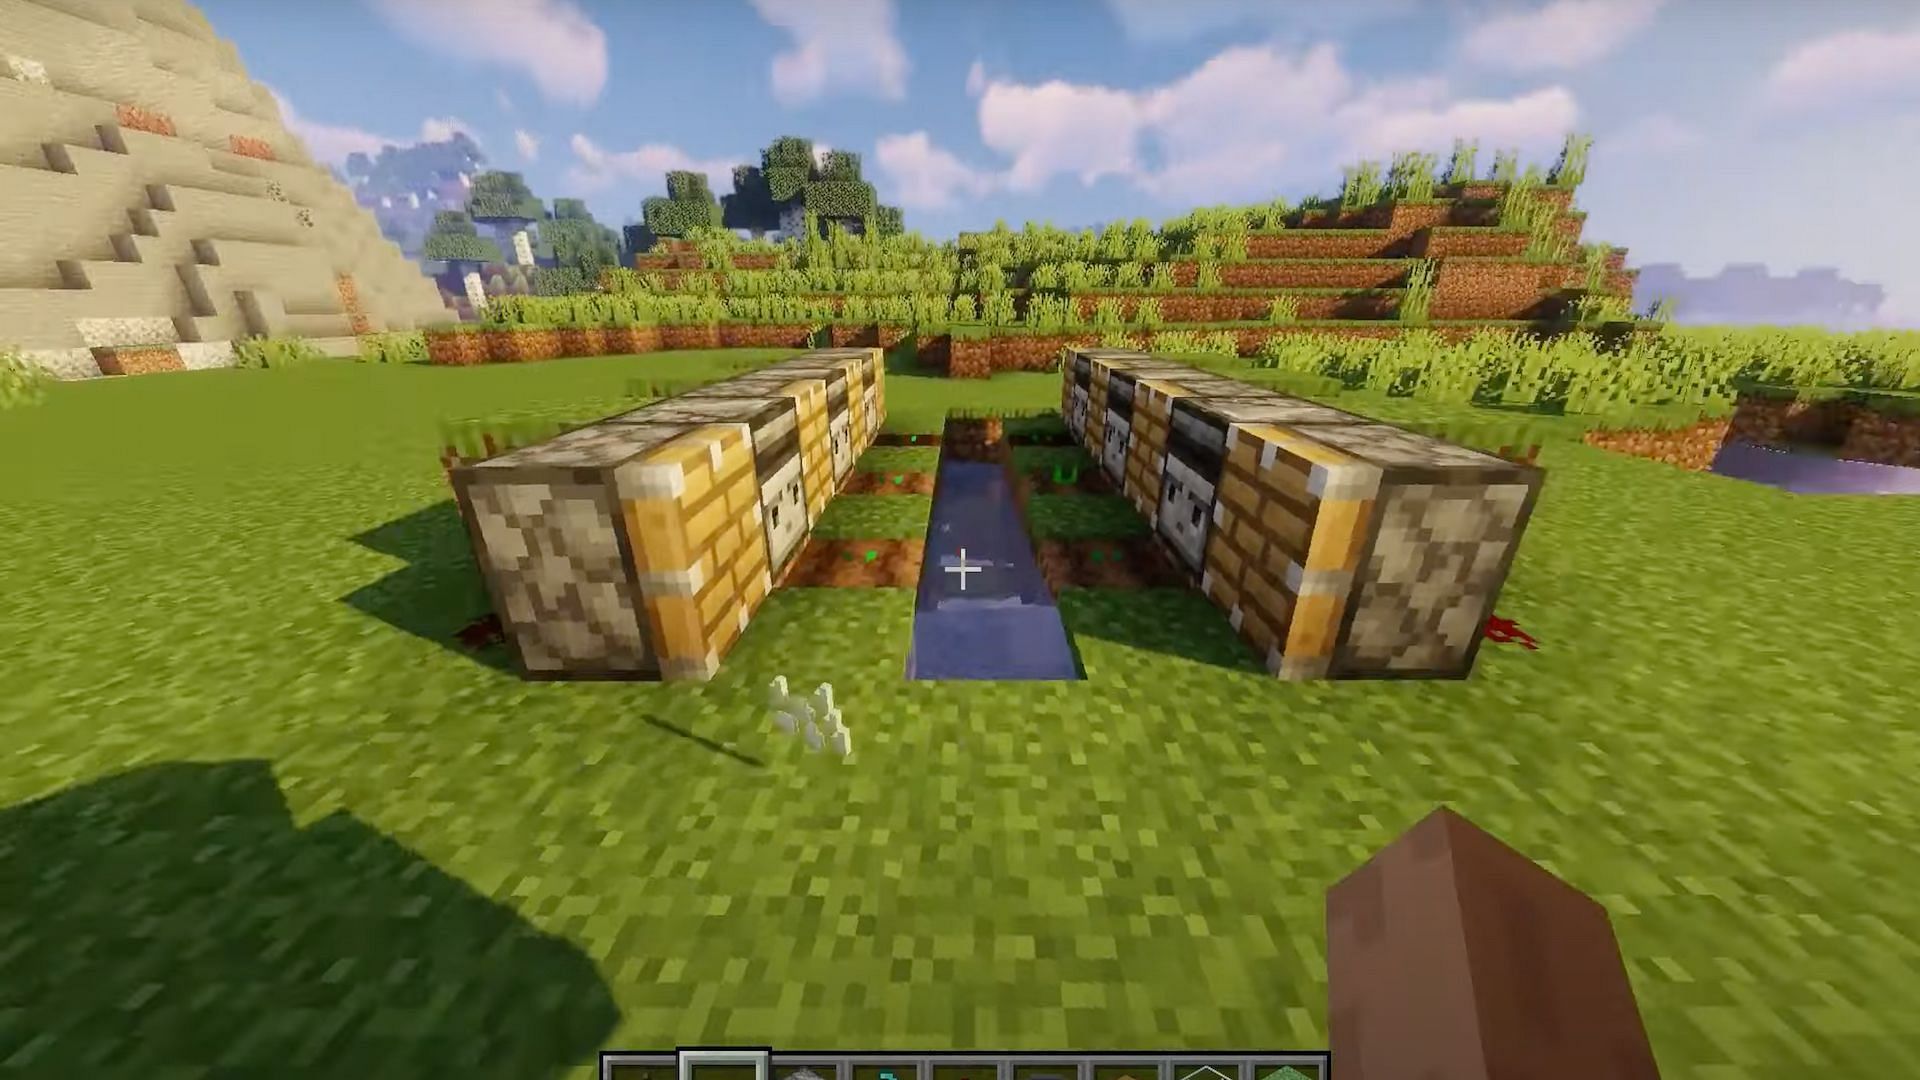
Step 2: Fill the end of the hole with water
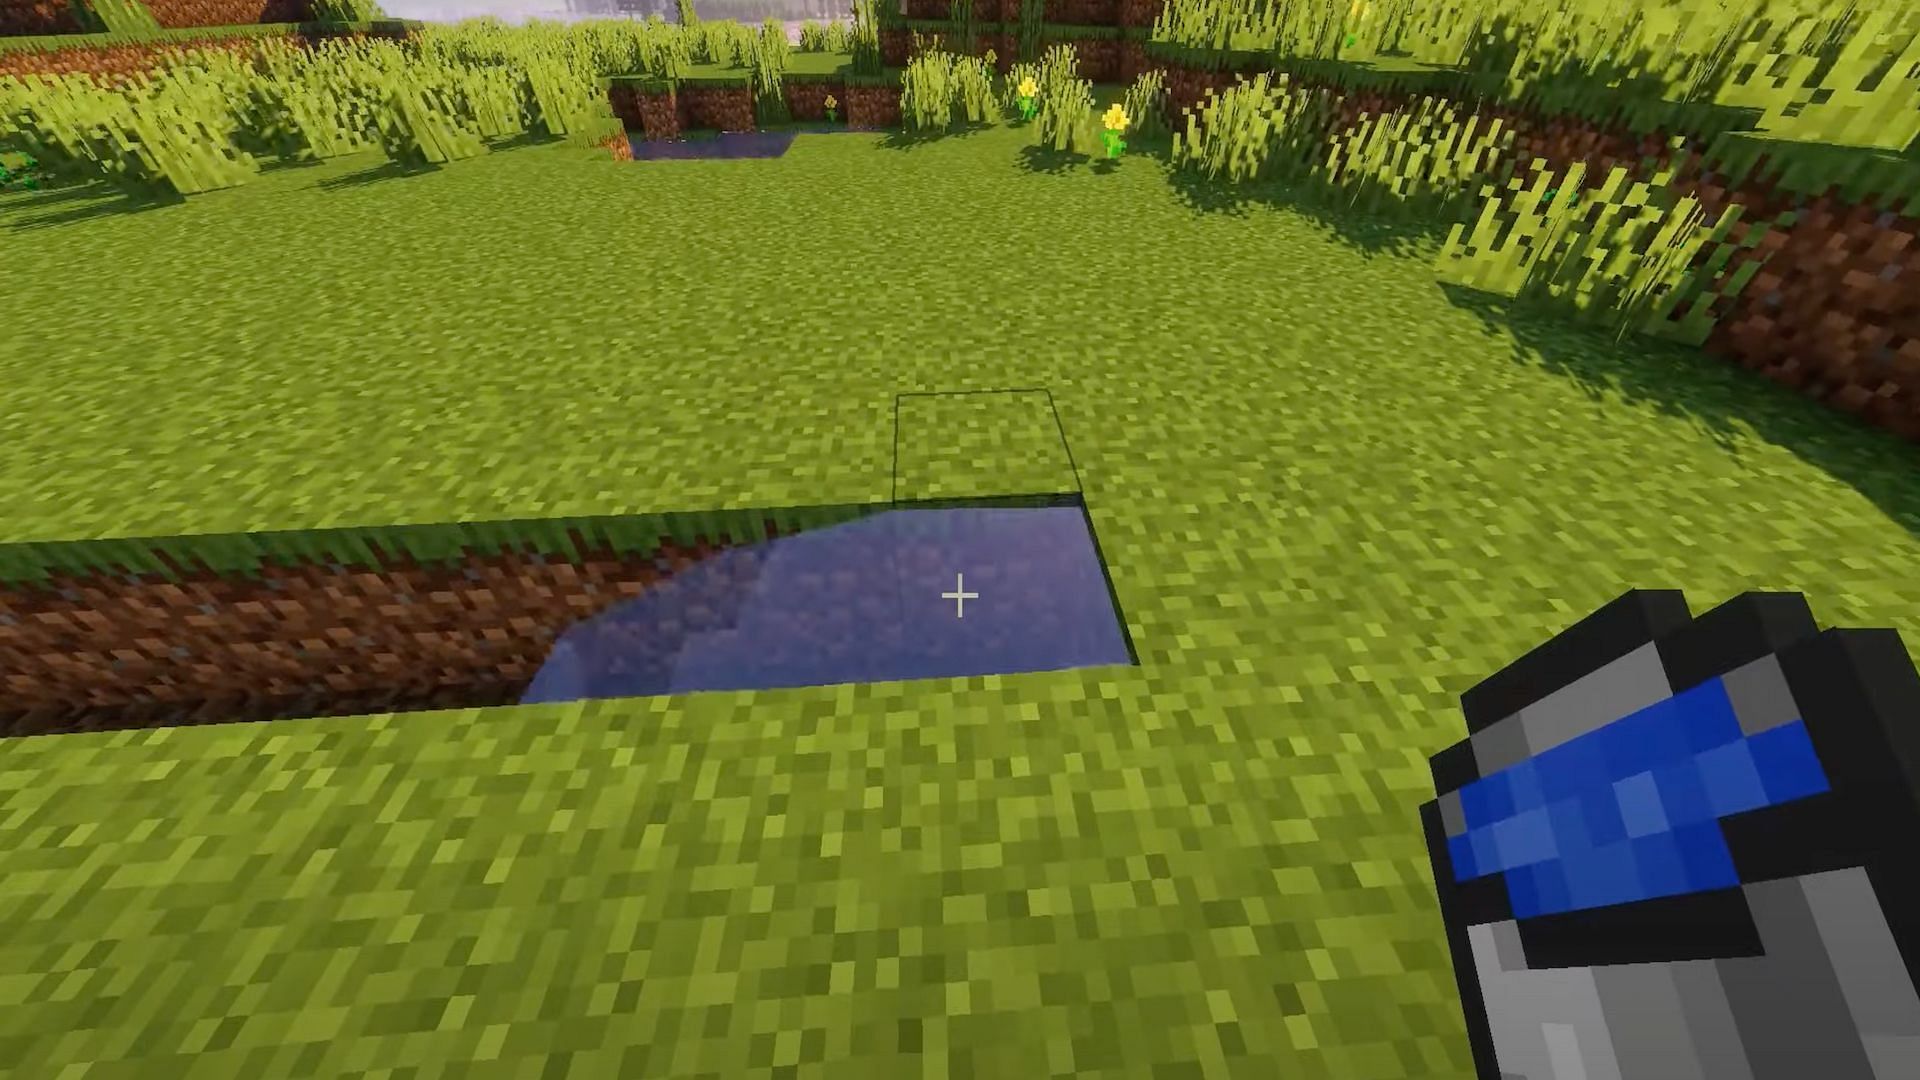
Players should fill the end of the hole they just made with water, using a water bucket. Having an endless supply of water source nearby is always a good thing in Minecraft.
Step 3: Dig out the end of the hole one block, and dig down two blocks
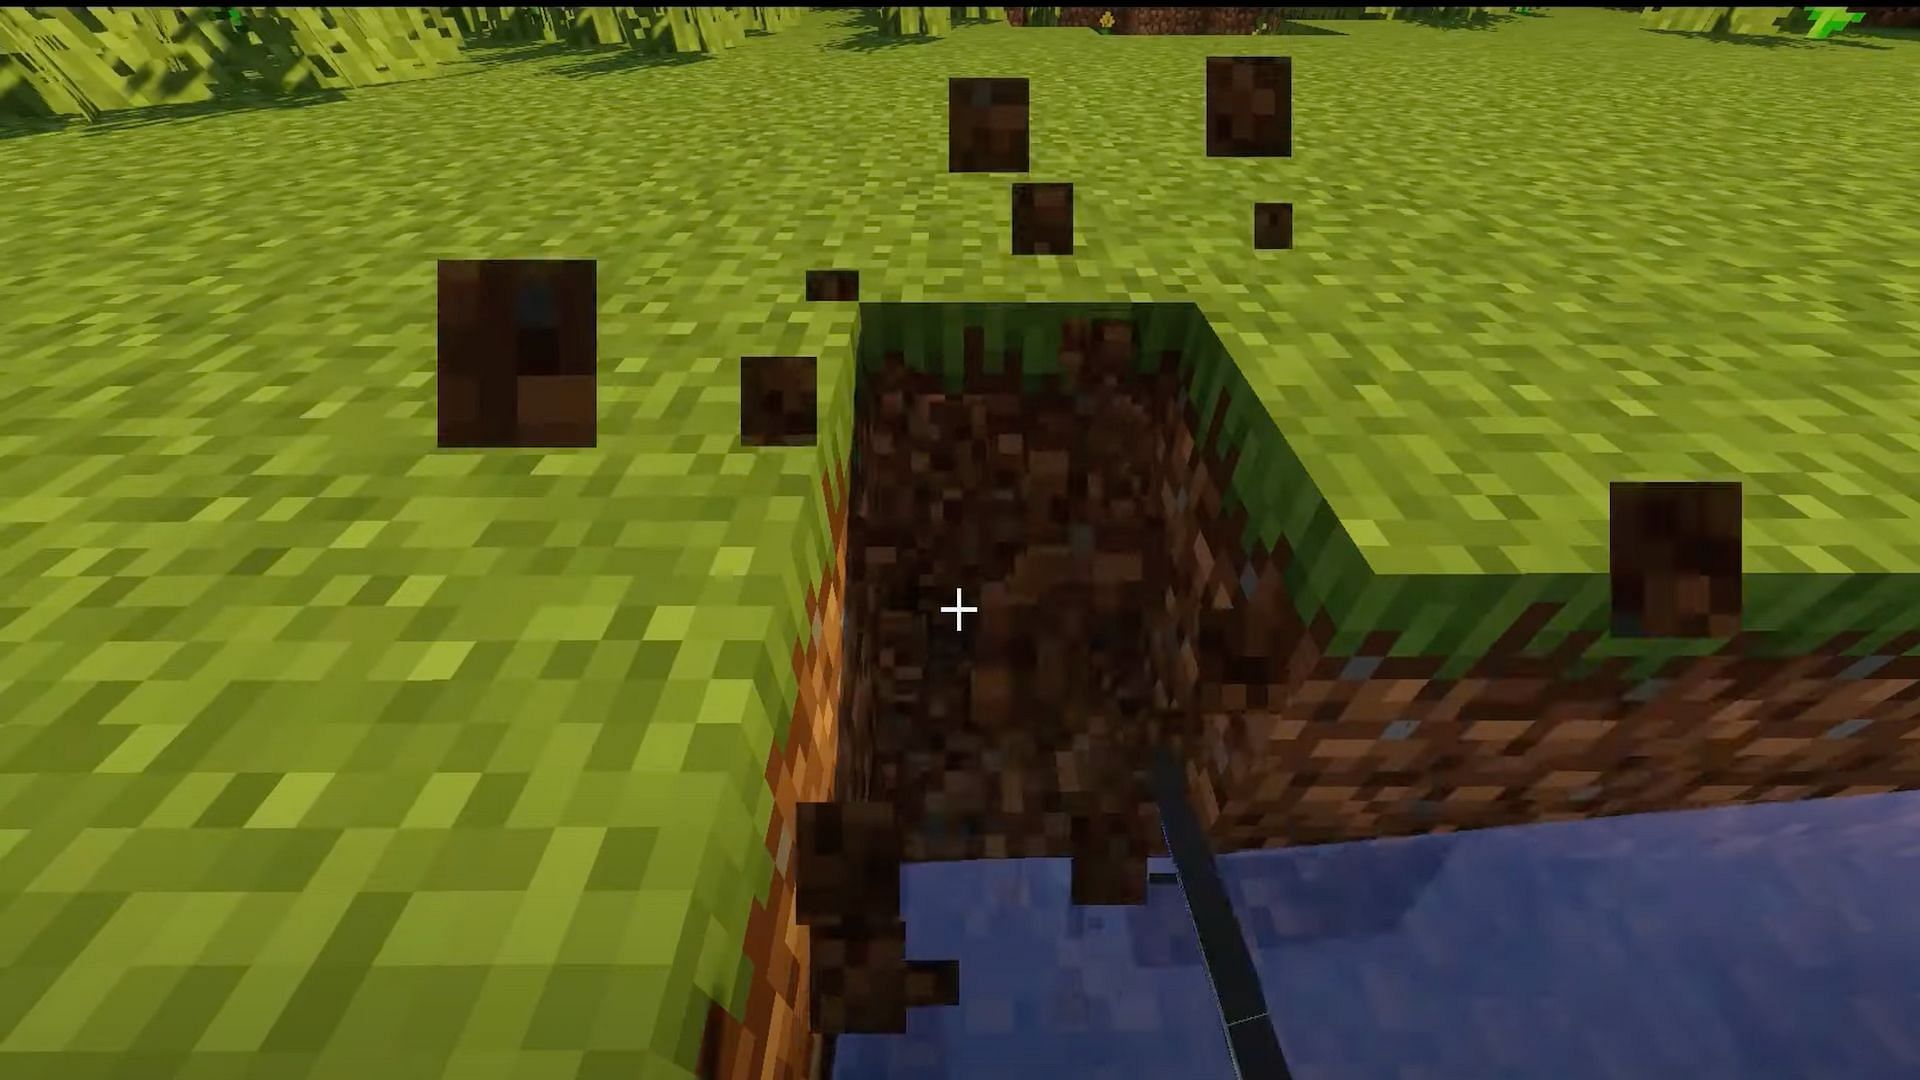
Players will need to go to the other end of the hole they created and dig one block out at one the end. They should ensure to dig two blocks down as well.
They should then also dig two blocks down on the end of the hole. This is so they can place a chest and a hopper.
Step 4: Fill in the holes just created with a hopper and a chest
Players will want to fill in the holes they just created with a hopper and a chest. This will allow the pumpkins that they harvest to automatically gather into the chest.
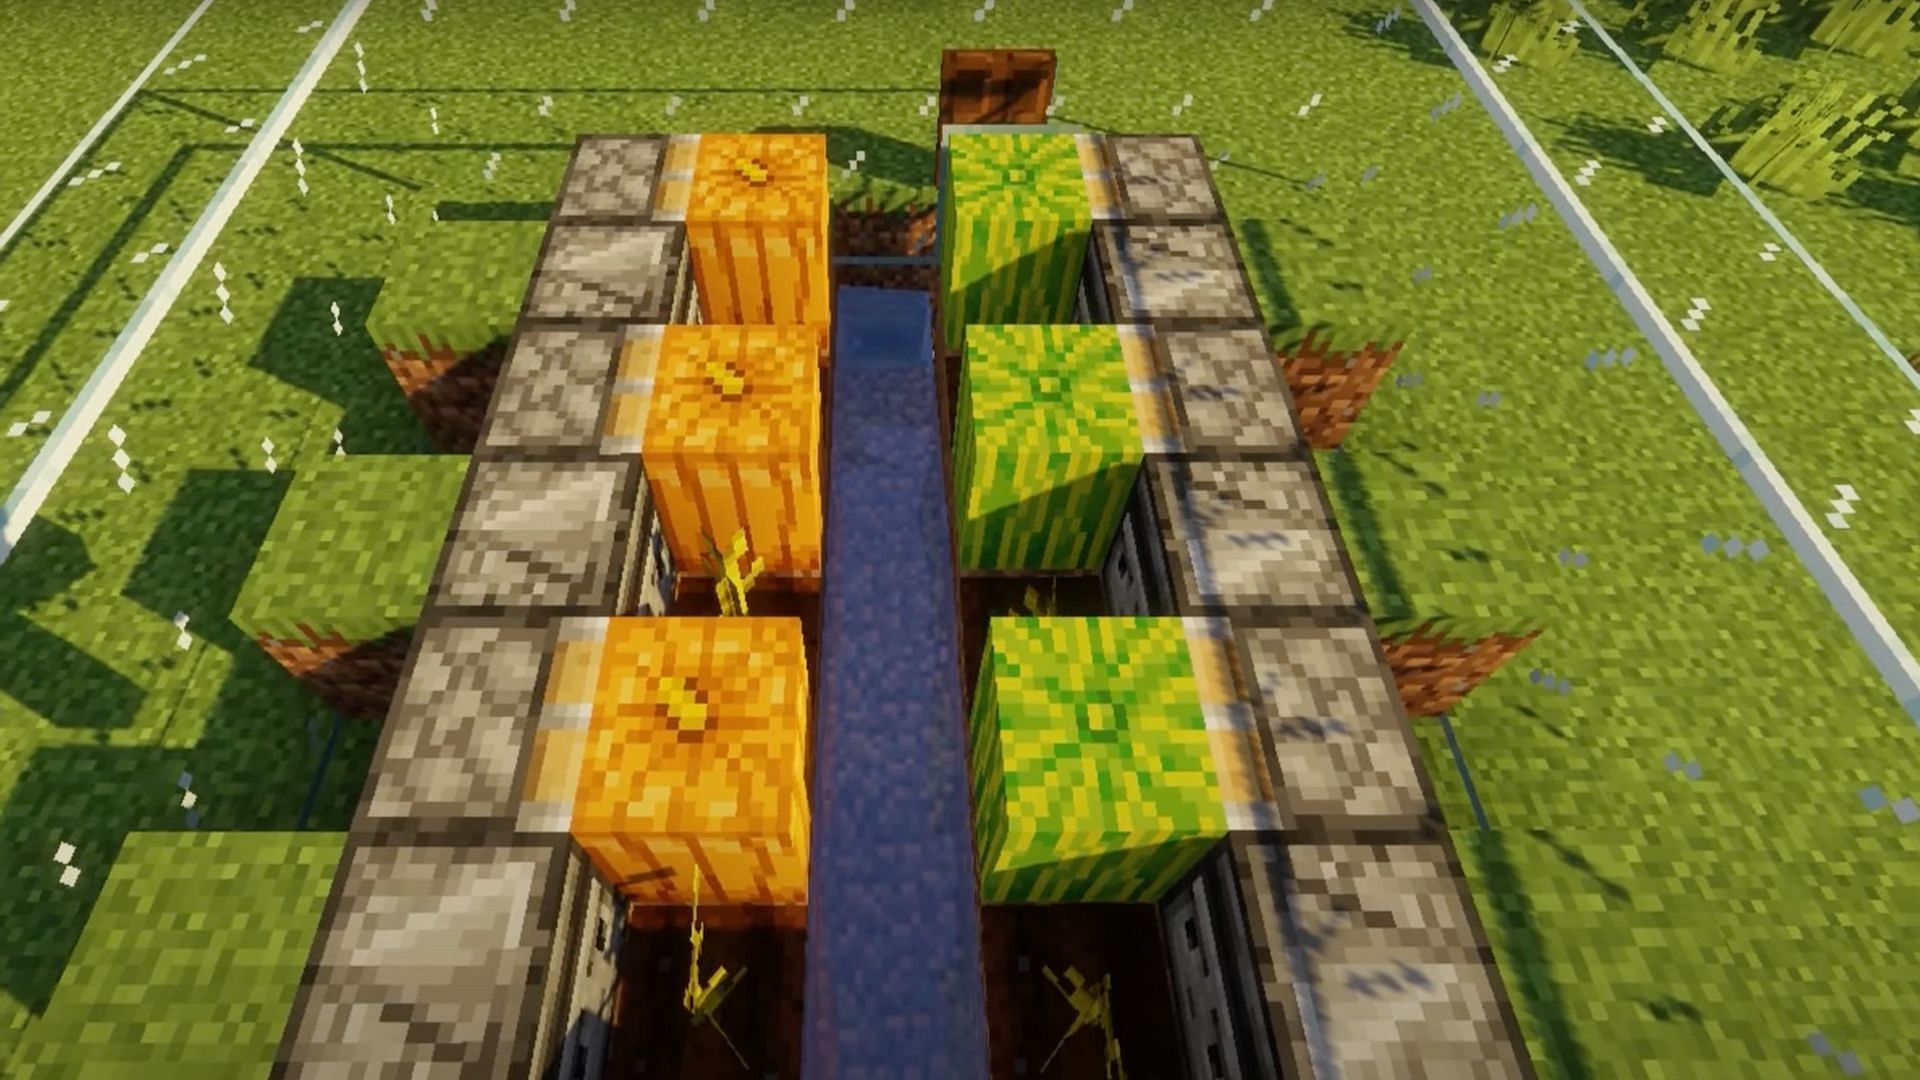
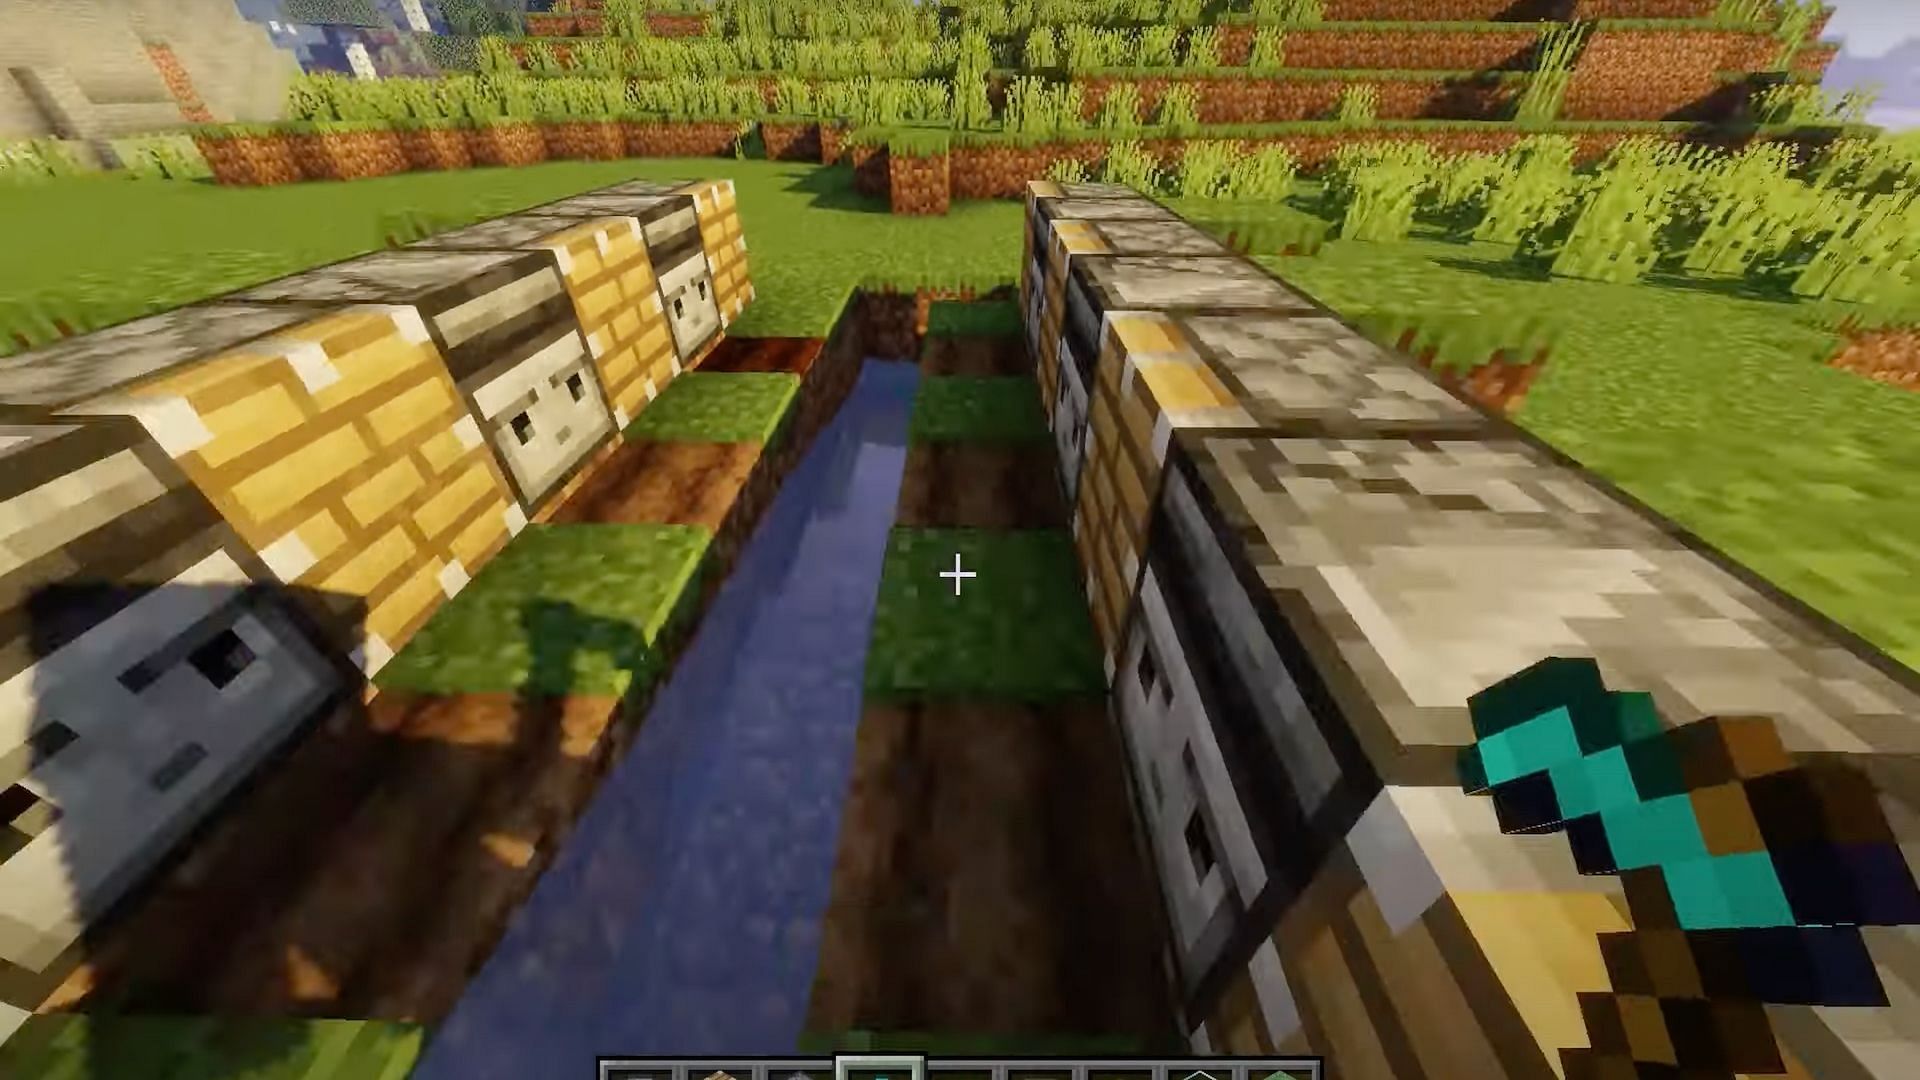
Step 5: Place pistons on every other block starting at the end of the hole
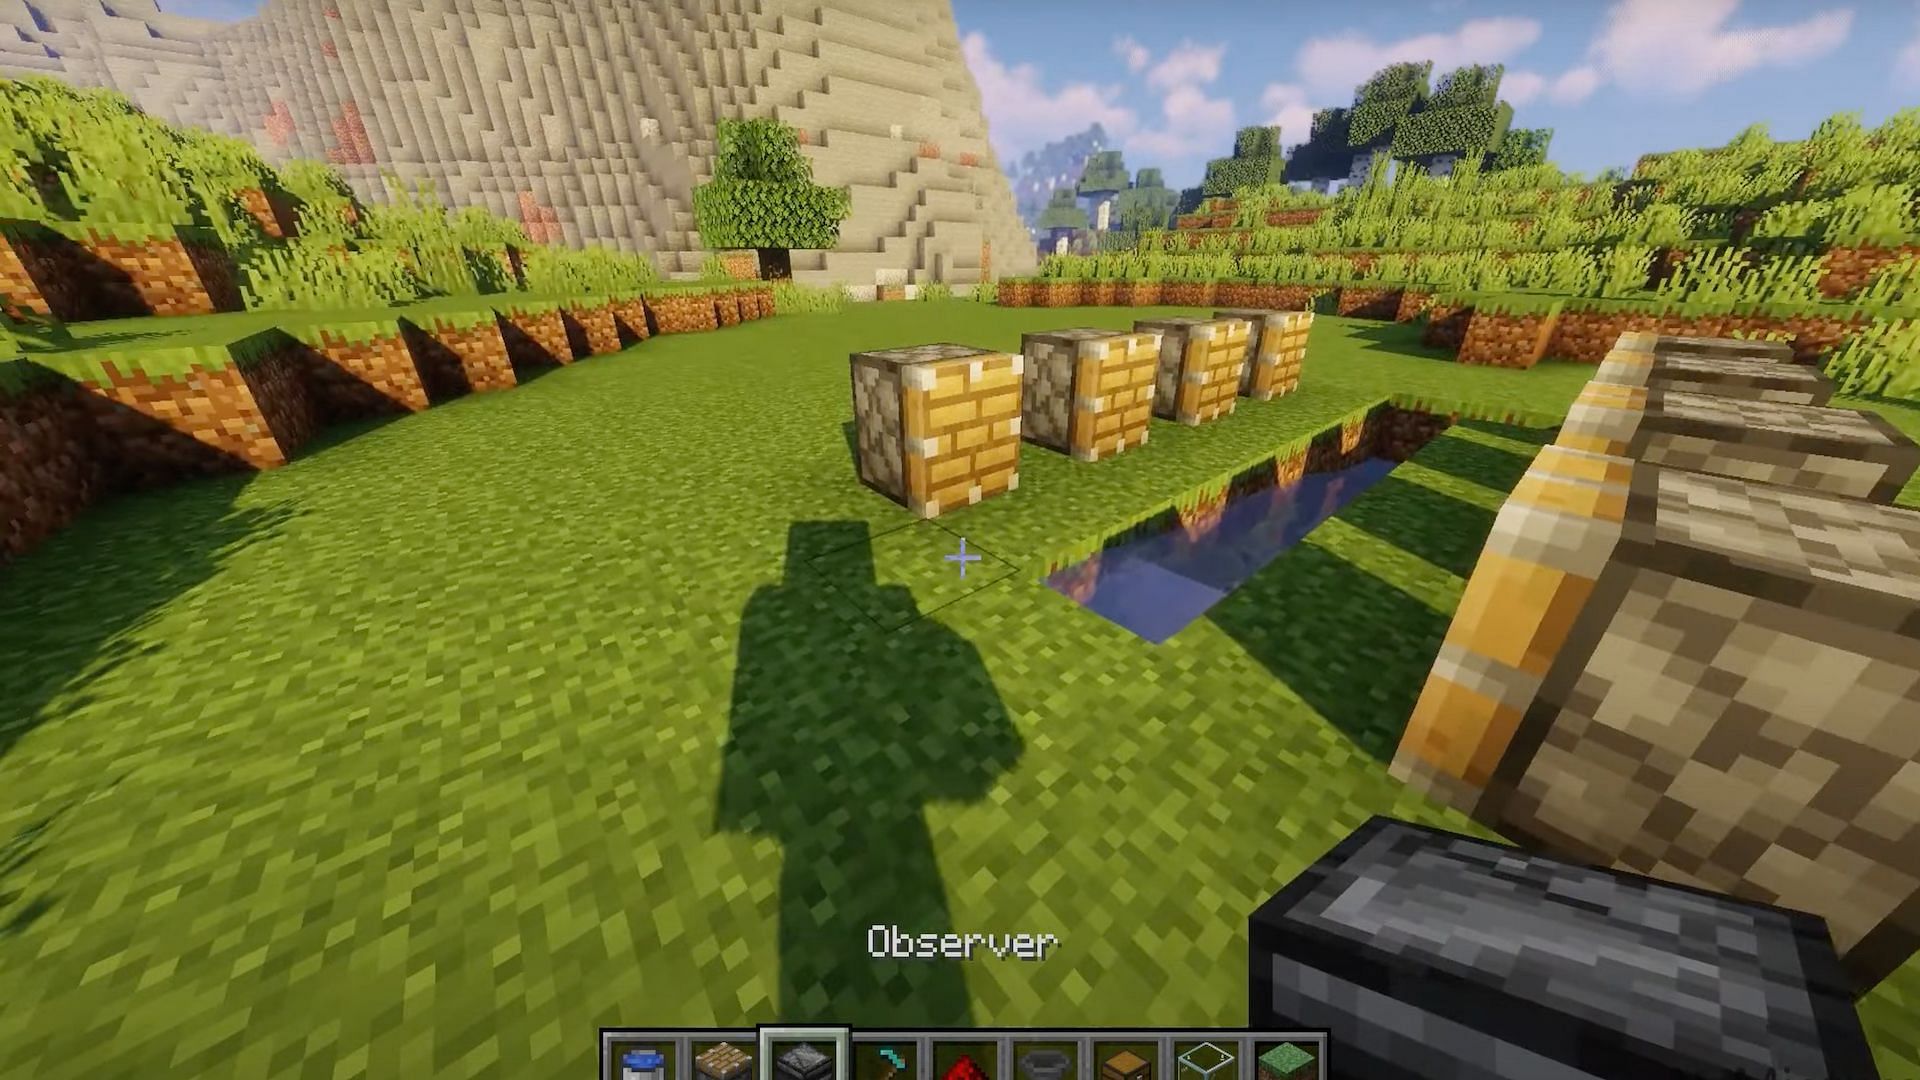
Minecraft players will want to place the pistons starting at the end of the hole. These need to be placed every other block, leaving room for players to put the observers in between them.
Step 6: Place observers in between the pistons
Minecraft players will want to ensure they place the observers in between the pistons. This is a very important step in the process, as the observers will allow the pistons to know when to go off to harvest the pumpkins.
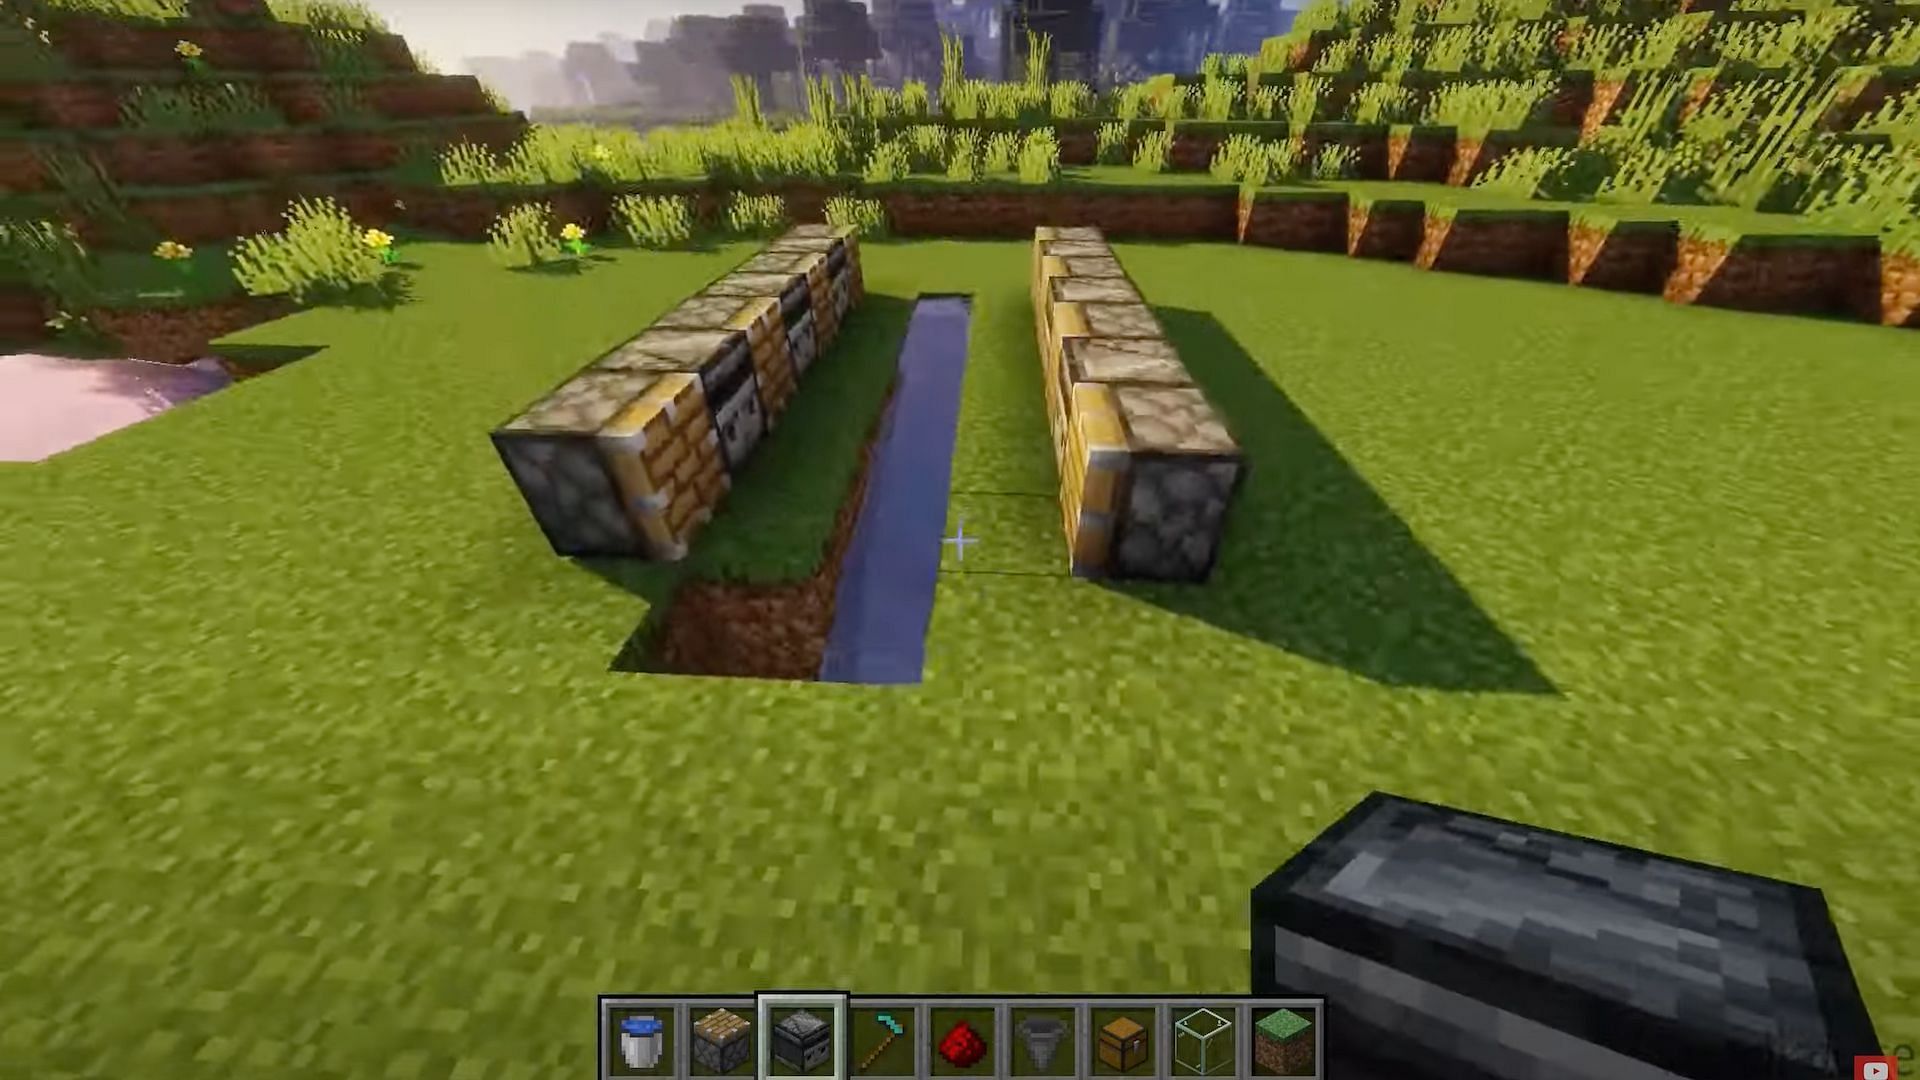
Step 7: Place blocks behind the observers
Players will need to place blocks behind the observers as they will be placing redstone dust behind the pistons which will help the blocks to function properly.
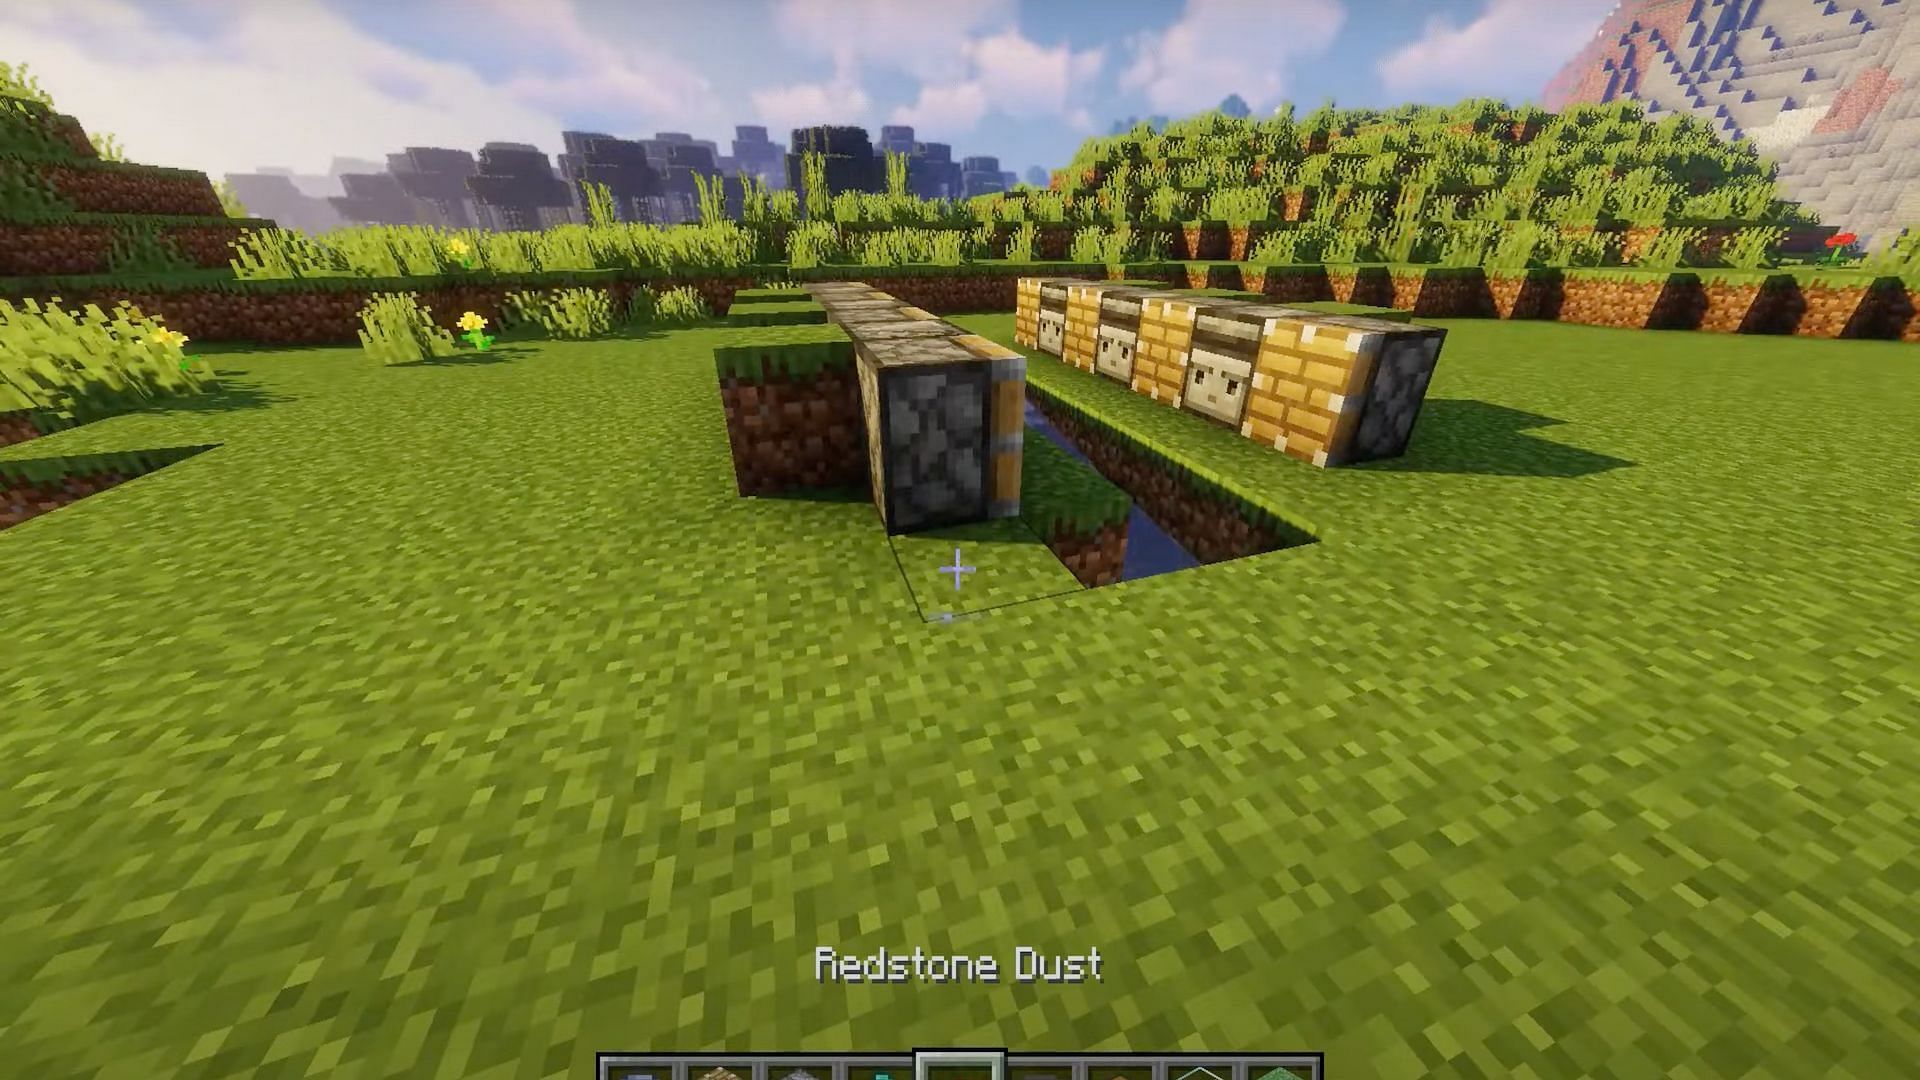
Step 8: Place redstone dust behind each of the pistons
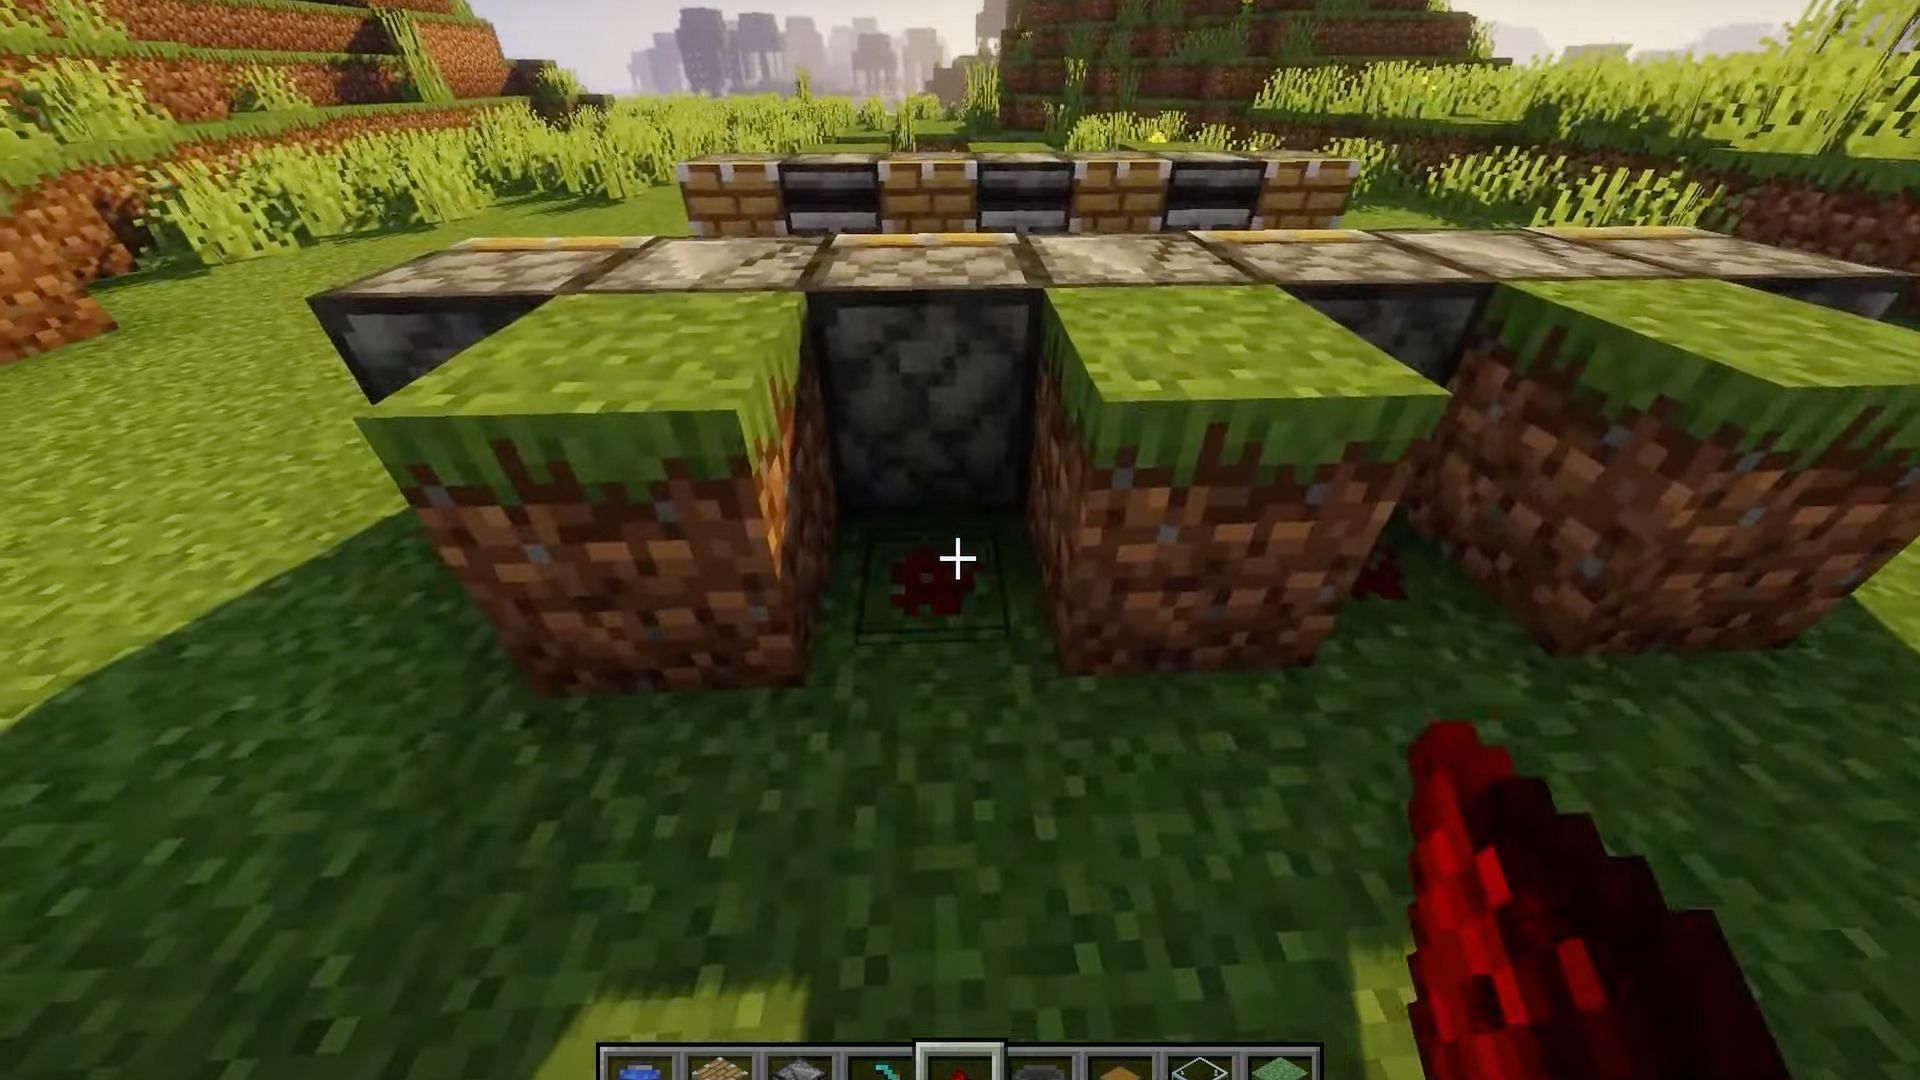
Players should then place redstone dust behind each one of the pistons, and they should ensure that they are the cross pattern versions of the redstone dust for it to function properly.
Step 9: Use a hoe on the soil in front of the observers
Players will need to use a hoe in front of the observers to till the soil so that they can plant the pumpkin seeds in front of them so the observers can detect the growth in front of them.
Step 10: Plant pumpkins seeds in front of the observers
Players will need to plant pumpkin seeds in front of the observers, so that they will see the pumpkins grow and then activate the pistons to farm the materials.
Step 11: Surround the farm with a 2-block-high wall to protect it and keep the pumpkins inside when harvested
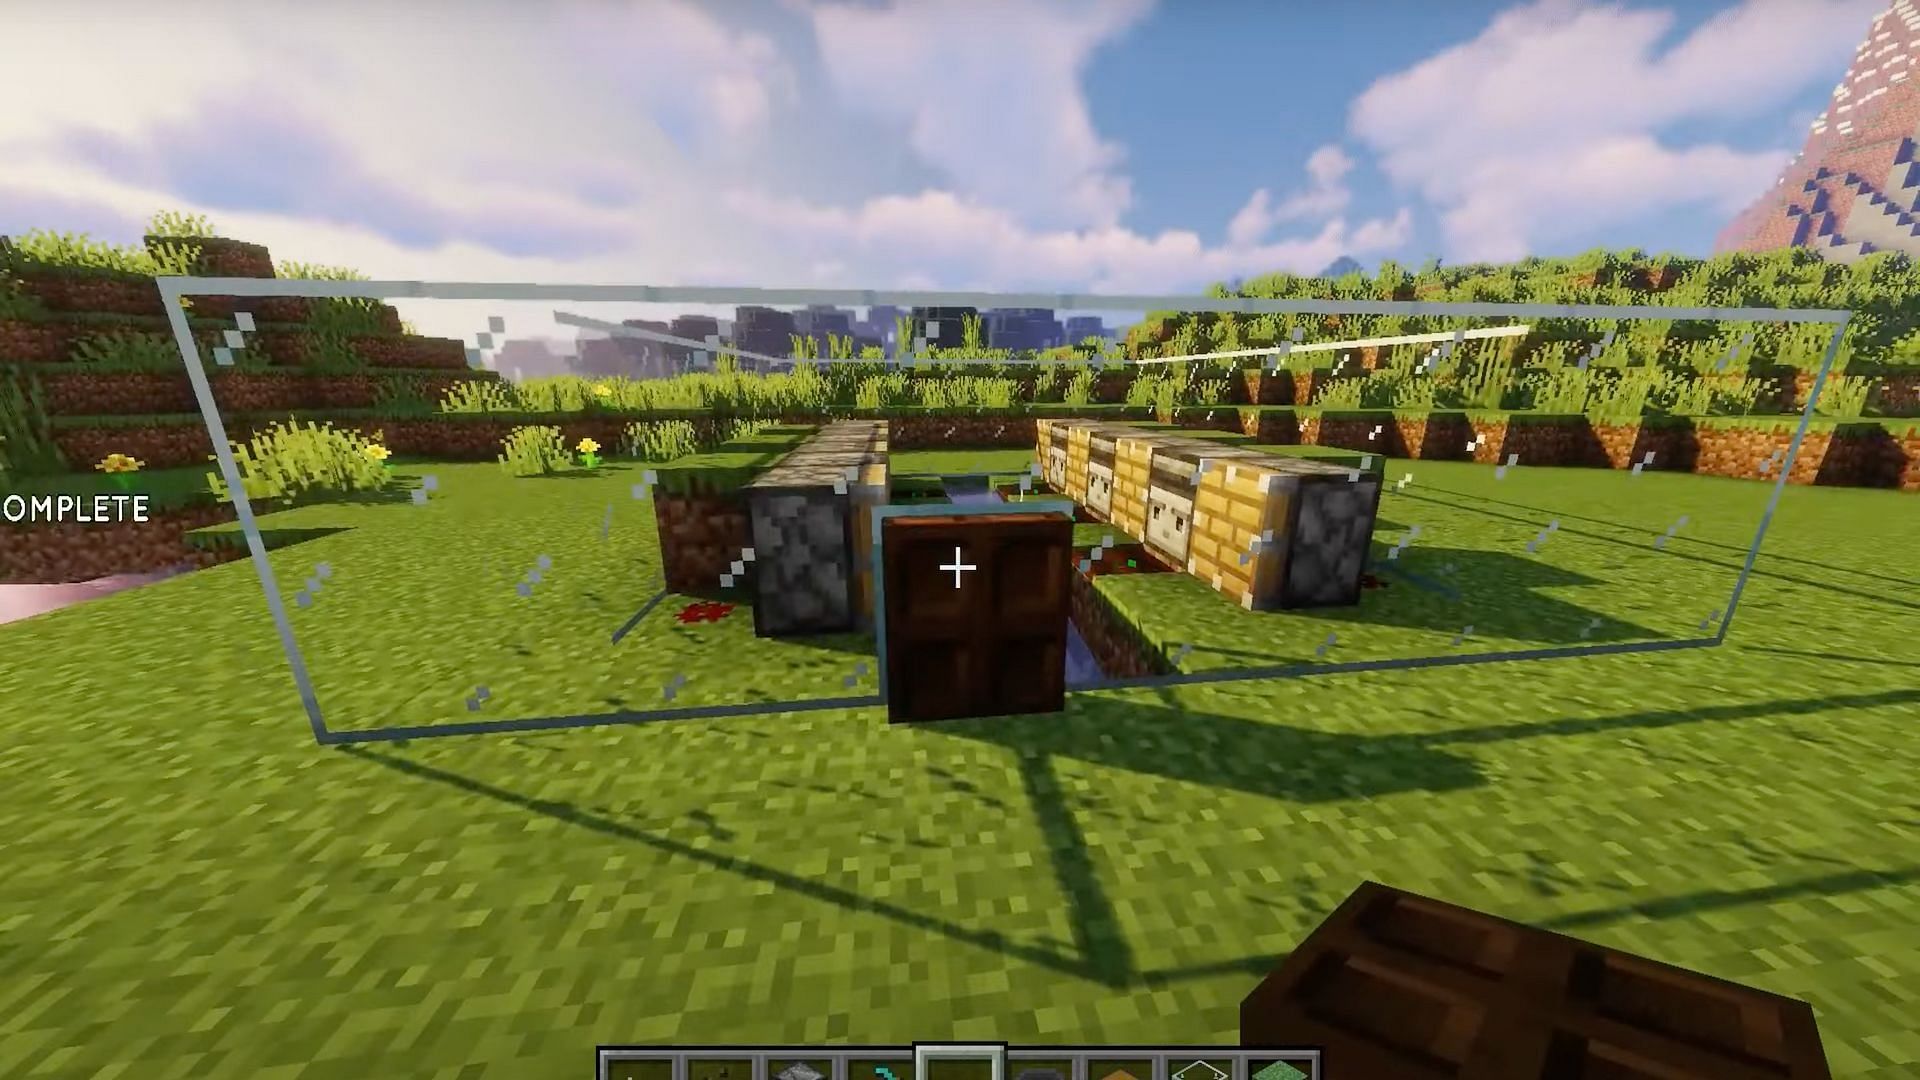
Once the players have finished with the farm, they should place a glass wall around it for protection as well as for the ability to contain anything inside the farm.

Uncover new worlds with our Minecraft Seed Generator!