
'%20x='0'%20y='0'%20height='100%25'%20width='100%25'%20%0A%20%20%20%20%20%20%20%20%20%20xlink%3Ahref='data:image/jpg;base64,/9j/2wBDAAYEBQYFBAYGBQYHBwYIChAKCgkJChQODwwQFxQYGBcUFhYaHSUfGhsjHBYWICwgIyYnKSopGR8tMC0oMCUoKSj/2wBDAQcHBwoIChMKChMoGhYaKCgoKCgoKCgoKCgoKCgoKCgoKCgoKCgoKCgoKCgoKCgoKCgoKCgoKCgoKCgoKCgoKCj/wgARCAAGAAoDASIAAhEBAxEB/8QAFgABAQEAAAAAAAAAAAAAAAAAAAQF/8QAFQEBAQAAAAAAAAAAAAAAAAAAAQX/2gAMAwEAAhADEAAAANOYjv8A/8QAIRAAAQIEBwAAAAAAAAAAAAAAAQIEAAMFFgYHEyJVkZP/2gAIAQEAAT8AvHELunLRSnDZnOIBTO0t/Yi+cyOQovgY/8QAGBEAAgMAAAAAAAAAAAAAAAAAAgMABDH/2gAIAQIBAT8AXYaWlP/EABYRAQEBAAAAAAAAAAAAAAAAAAEAEf/aAAgBAwEBPwBMv//Z'%3E%3C/image%3E%3C/svg%3E)
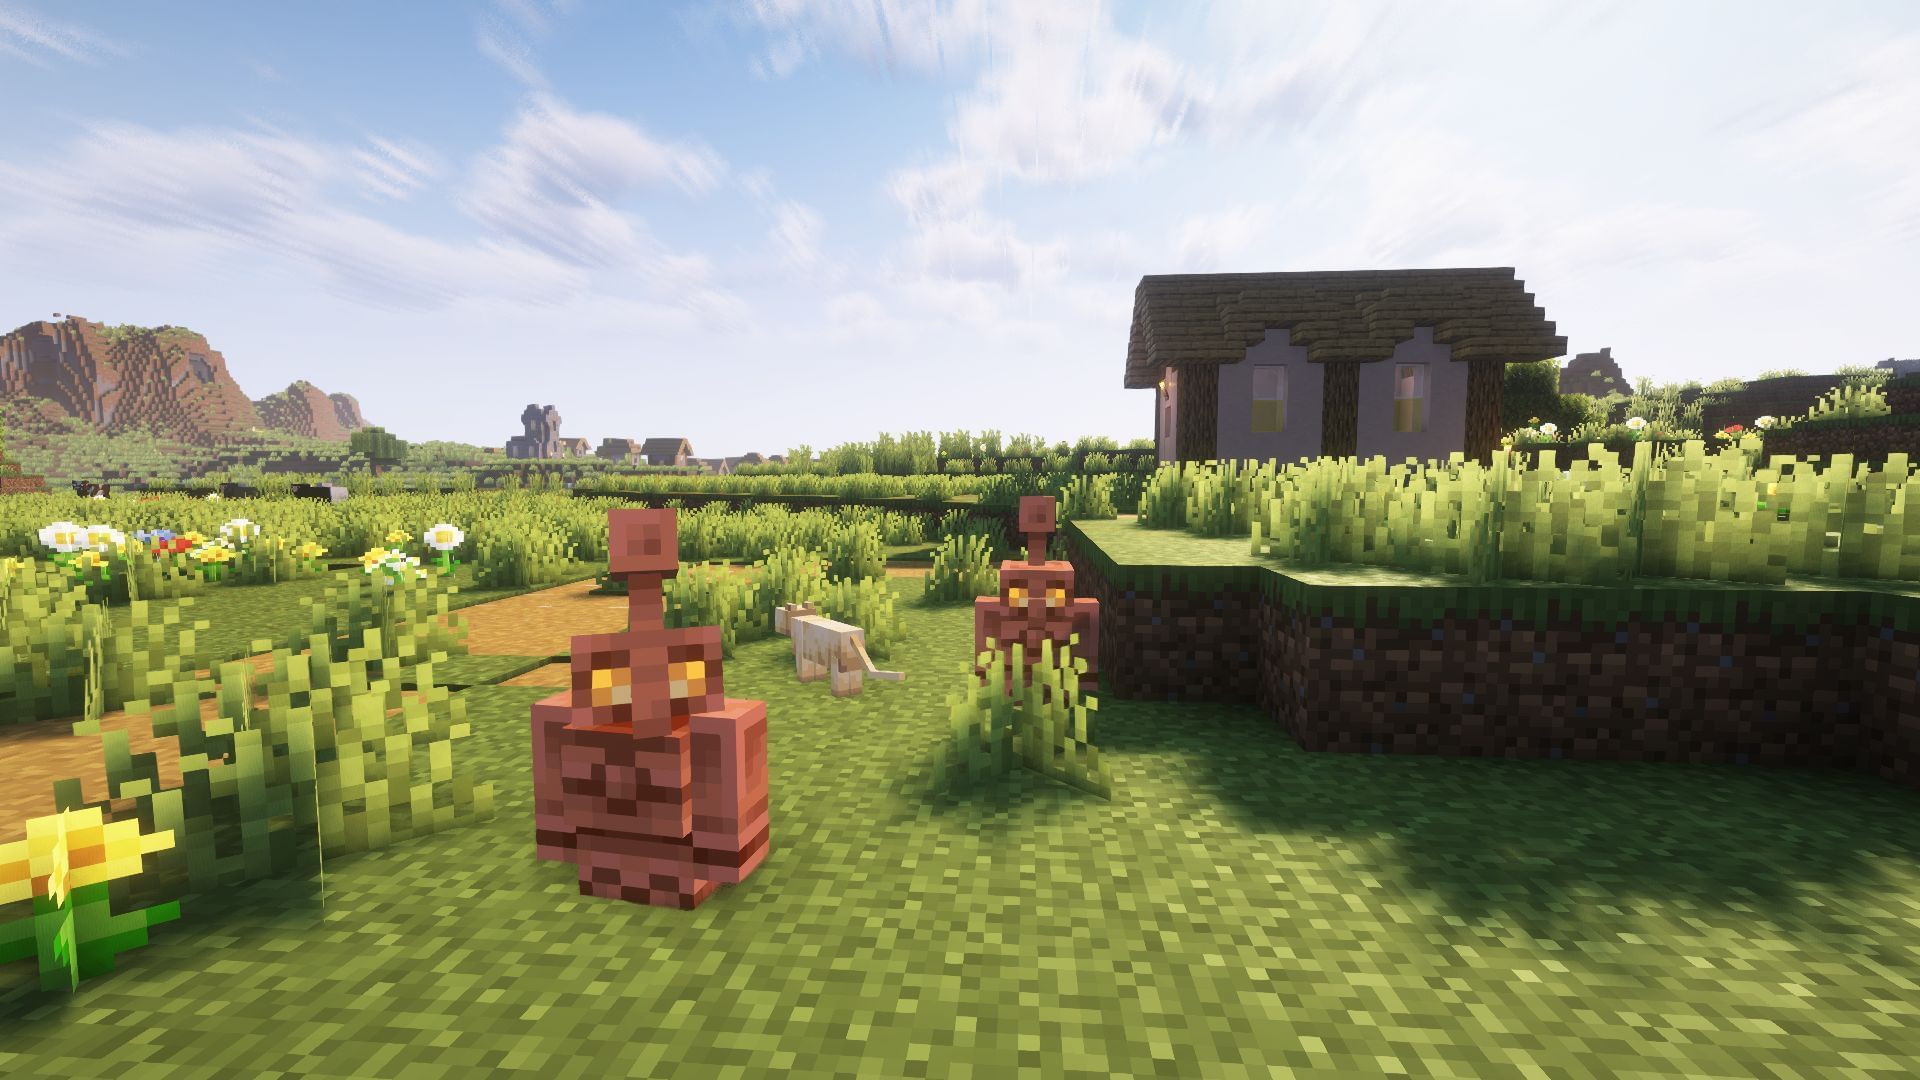
The latest Copper Age game drop is here, and players are wondering how they can install Minecraft 1.21.9 Iris Shaders to enhance the visual identity of their worlds. This popular mod enables gamers to utilize a variety of shader packs to modify the appearance of the vanilla world, offering numerous different styles and visual effects.
Here's how you can download and install Minecraft 1.21.9 Iris Shaders.

Guide to download and install Minecraft 1.21.9 Iris Shaders
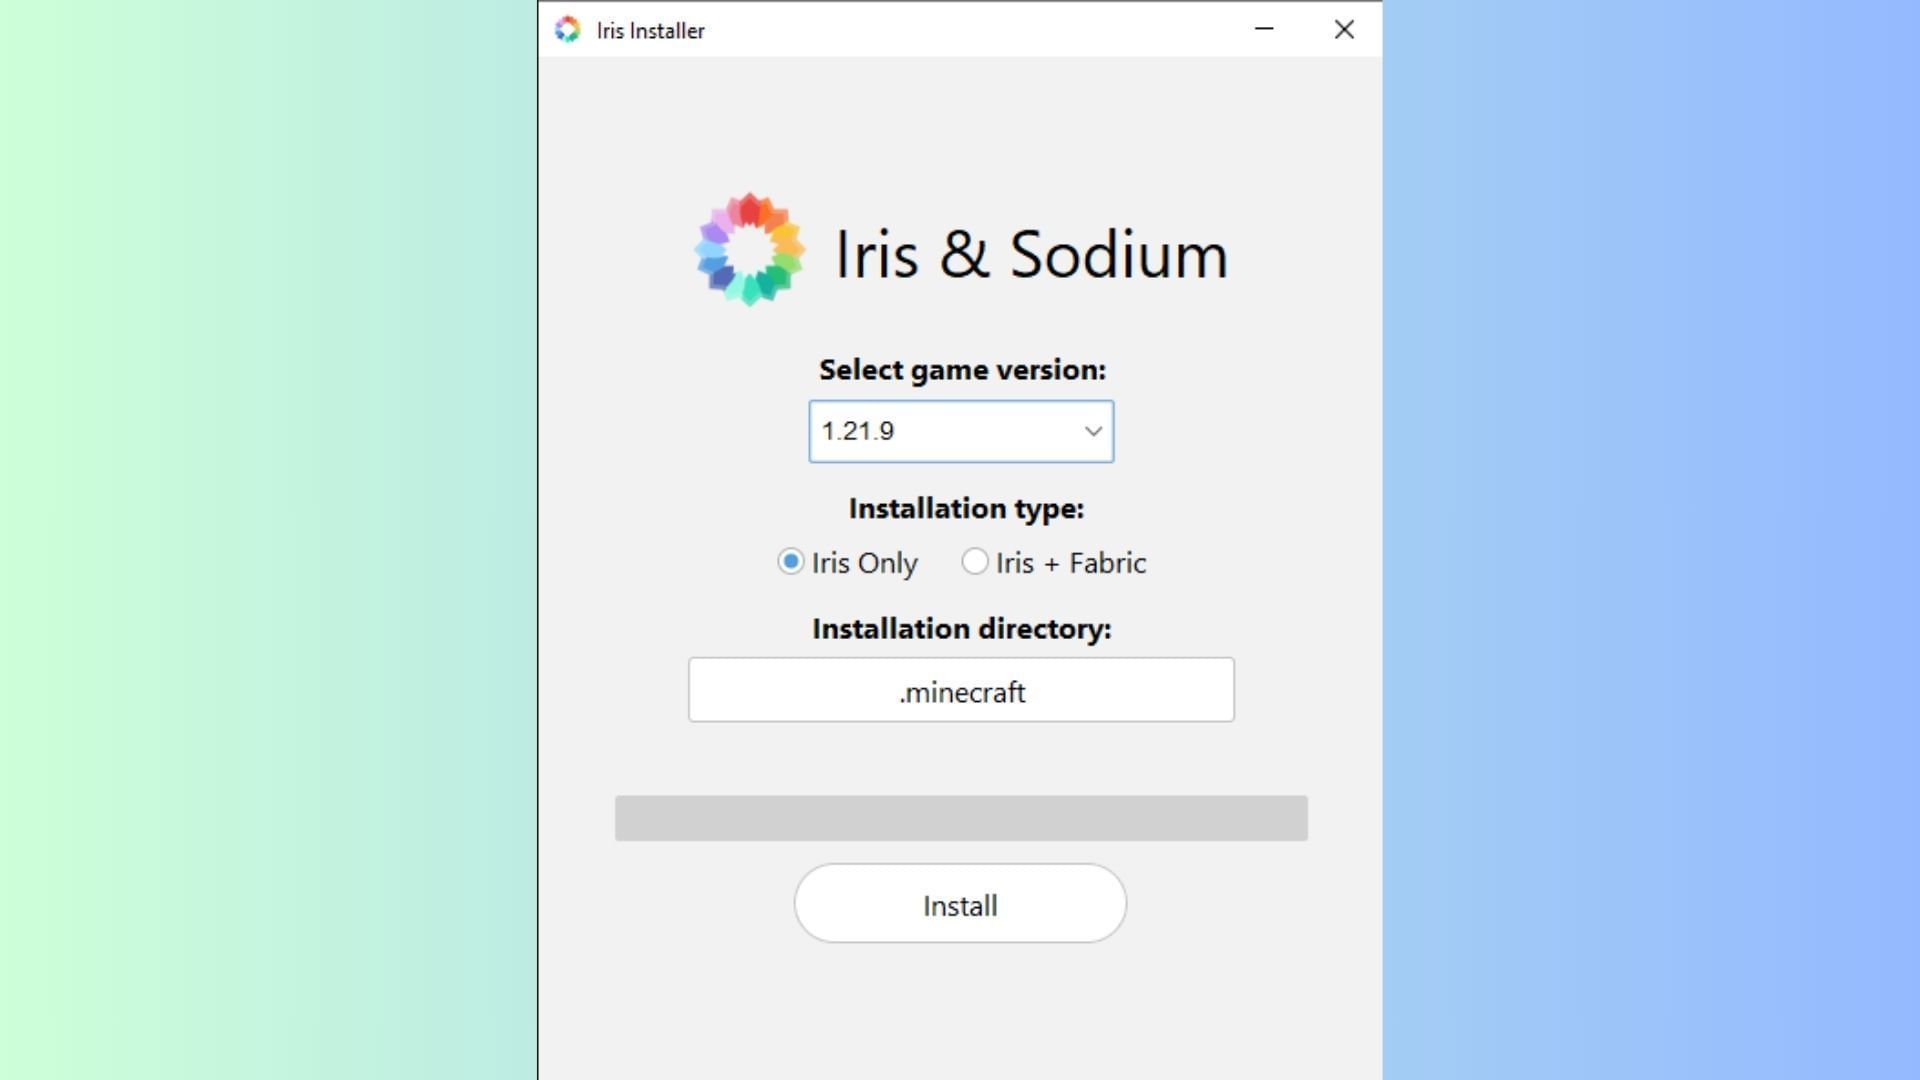
Chart New Territories with the ultimate Minecraft Seed Generator!
Iris Shaders is one of the most popular mods for installing and using shaders in Minecraft 1.21.9. It has a user-friendly interface and can be paired with mods like Distant Horizons, making it a popular choice for casual hobbyists and hardcore modpack builders.
Here's how you can install the Minecraft 1.21.9 Iris Shaders mod:
- Visit the official Iris Shaders website and download the universal JAR file for Iris Shaders.
- Run the JAR and make sure to select 1.21.9 as the version. If you have Fabric 1.21.9 installed, you can skip the bundled installation of Iris+Fabric. However, if you do not have the API, we recommend downloading the combination since it is a necessary dependency.
- Ensure that the installation directory is set to .minecraft.
- Once done, click the Install button to finish installing Iris Shaders on your device.
Once installed, head over to the Java edition of the game. Now, click on the dropdown menu and check to ensure it displays an instance of Minecraft with Iris Shaders 1.21.9 installed.
When you run the instance with Iris installed, you will get a message that the version might not support safety features — this is safe to ignore. Iris Shaders is one of the most popular Minecraft mods used by millions of players worldwide. You can also check the box to prevent future warning dialogs from popping up.
Also read: How to download Minecraft 1.21.9 Copper Age update for Java Edition
How to use Minecraft 1.21.9 Iris Shaders

Once you have successfully installed Minecraft 1.21.9 Iris Shaders, you can now use it to install and try out an array of shaders in your world.
Follow these steps to apply shaders using Minecraft 1.21.9 Iris Shaders:
- Download a shader of your choice from popular mod repositories like CurseForge or Modrinth.
- Open the instance of Minecraft with Iris Shaders installed.
- Head to the Options menu on the loading screen.
- Navigate to the Video settings tab. This will take you to the main interface of Iris Shaders, alongside an array of customization options.
- Now, click on the tab marked Shader Packs in the right corner.
- Click on the Open Shader Pack Folder button, which will open up the shaders directory.
- Next, drag and drop your downloaded shaders into this folder.
- Head back to the game. You will notice that the shader(s) you placed in the folder are now displayed in the list of available options.
- Click on the shader you wish to use and select the Apply button to apply and activate the modifications.
- Additionally, check out the Shader Pack Settings Tab to modify the behavior of the parameters in the pack to suit your play style and needs. Most compatible shaders will let you adjust features such as lighting, sky, water behavior, and more.
Once you are done, wait while the shader and visual assets from the pack get applied to your world. During this time, you might feel like the game is frozen — do not shut it down. Once finished, head back to the loading screen and create a new world or load an existing one to enjoy the visual changes of the shaders using Minecraft 1.21.9 Iris Shaders.
Also read: Bring Minecraft to life with this simple visual mod
Check out our other Minecraft articles:
- How to get and use the Reese's Sodium Options mod
- Cool ways to use shelves in Minecraft
- How to get boss mob spawn eggs in Minecraft
- How to sort items using a copper golem in Minecraft
- 4 best mods to bring mobs to life
- All the fishing enchantments explained

Uncover new worlds with our Minecraft Seed Generator!