
'%20x='0'%20y='0'%20height='100%25'%20width='100%25'%20%0A%20%20%20%20%20%20%20%20%20%20xlink%3Ahref='data:image/jpg;base64,/9j/2wBDAAYEBQYFBAYGBQYHBwYIChAKCgkJChQODwwQFxQYGBcUFhYaHSUfGhsjHBYWICwgIyYnKSopGR8tMC0oMCUoKSj/2wBDAQcHBwoIChMKChMoGhYaKCgoKCgoKCgoKCgoKCgoKCgoKCgoKCgoKCgoKCgoKCgoKCgoKCgoKCgoKCgoKCgoKCj/wgARCAAGAAoDASIAAhEBAxEB/8QAFQABAQAAAAAAAAAAAAAAAAAABQf/2gAIAQEAAAAAmzf/xAAUAQEAAAAAAAAAAAAAAAAAAAAG/9oACAECEAAAAE3/xAAUAQEAAAAAAAAAAAAAAAAAAAAF/9oACAEDEAAAABP/xAAiEAABAwMDBQAAAAAAAAAAAAACAQMFAAQhBhESFCRB0dL/2gAIAQEAAT8Aa1JIiPFJCQ28d0fumZ+8JoF6u8yKLl8/qv/EABcRAAMBAAAAAAAAAAAAAAAAAAABAhH/2gAIAQIBAT8AaVVlH//EABcRAQADAAAAAAAAAAAAAAAAAAEAETH/2gAIAQMBAT8Awsn/2Q=='%3E%3C/image%3E%3C/svg%3E)
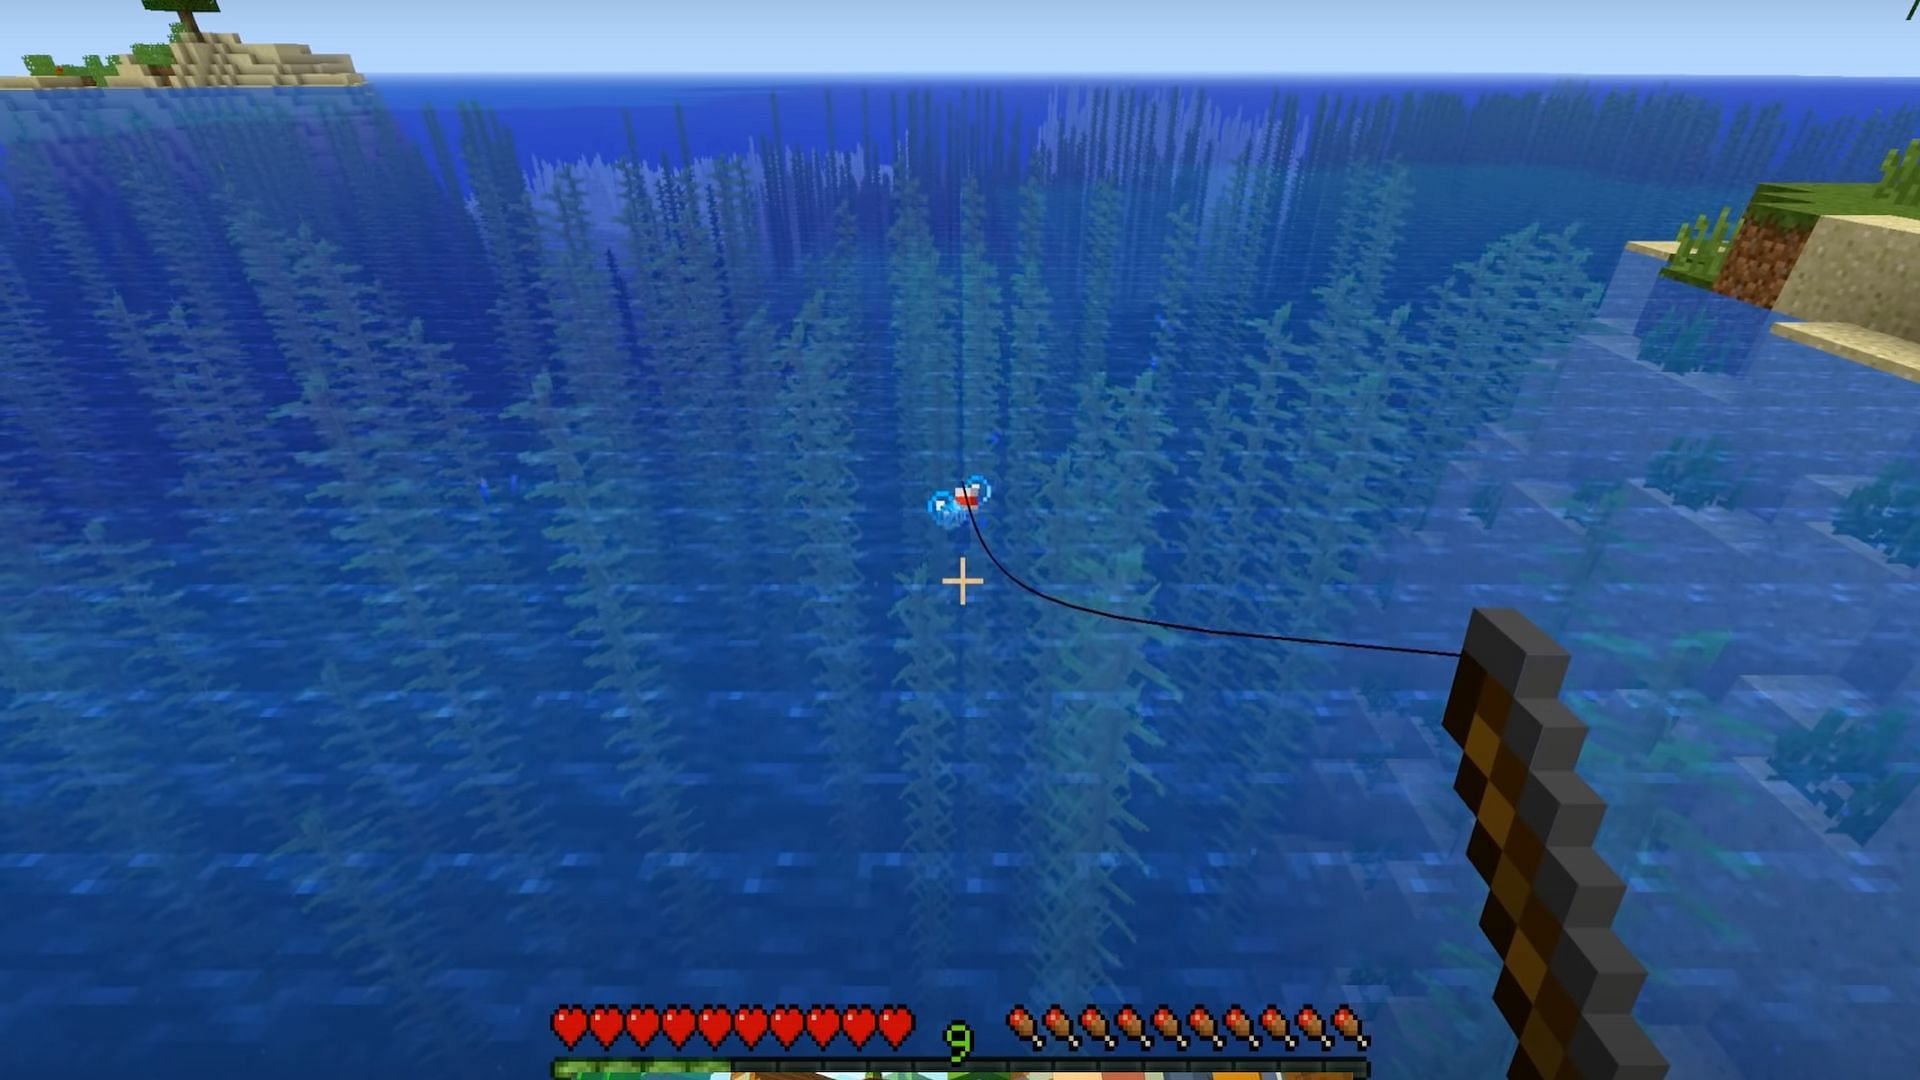
There are many different items that players can farm in Minecraft. From different blocks to materials and even mobs. Fish are aquatic mobs that players can find in various water sources within the game and can be found almost anywhere where there is water.
But gathering fish can take time, and fish farms can help players gain valuable food sources as well as XP orbs in Minecraft.

Minecraft Bedrock Edition: Step-by-step guide to making an automatic fish farm
Chart New Territories with the ultimate Minecraft Seed Generator!
There are a few different ways that players can gather fish in Minecraft. One of these ways is, of course, the standard method of fishing using a fishing rod. This is a reliable way for players to gather fish and other items.
Players can also collect fish in a water bucket and receive a bucket of that type of fish. Additionally, players can create different forms of automatic farms for fish in-game.
Types of fish in Minecraft
There are a few different types of fish in Minecraft. Each fish can be caught as a "raw" variety and can be cooked to increase the value of the hunger the fish will replenish when eaten. In addition, fish such as pufferfish can also drop items such as XP orbs, bonemeal (in Java Edition), or bones (Bedrock Edition).
Here are the variety of different fish available in Minecraft:
- Cod
- Salmon
- Pufferfish
- Tropical Fish
Making an automatic fish farm
As opposed to fishing manually, the purpose of an automatic fish farm is to enable players to gather fish and experience quickly, without making the player manually fish for the mobs themselves. There are a few different ways players can create a fish farm, and although the builds do vary, the goal is ultimately the same in gathering XP and resources with no player effort.
How to create an automatic fish farm in Minecraft
While there are many different types of automatic fish farm ideas in Minecraft, this simple fish farm created by YouTuber JC Playz features an easy-to-make build that most players should easily be able to replicate.
The first step is that players will need to gather the following resources:
- 3 Chests
- 2 Water Buckets
- 1 Lava Bucket
- 1 Hopper
- 1 Minecart with Hopper
- 2 Rails
- 10 Cobblestone Slabs
- 3 Ladders
- 2 Signs
- 1 Set of Cobblestone Stairs
- 8 Cobblestone Blocks
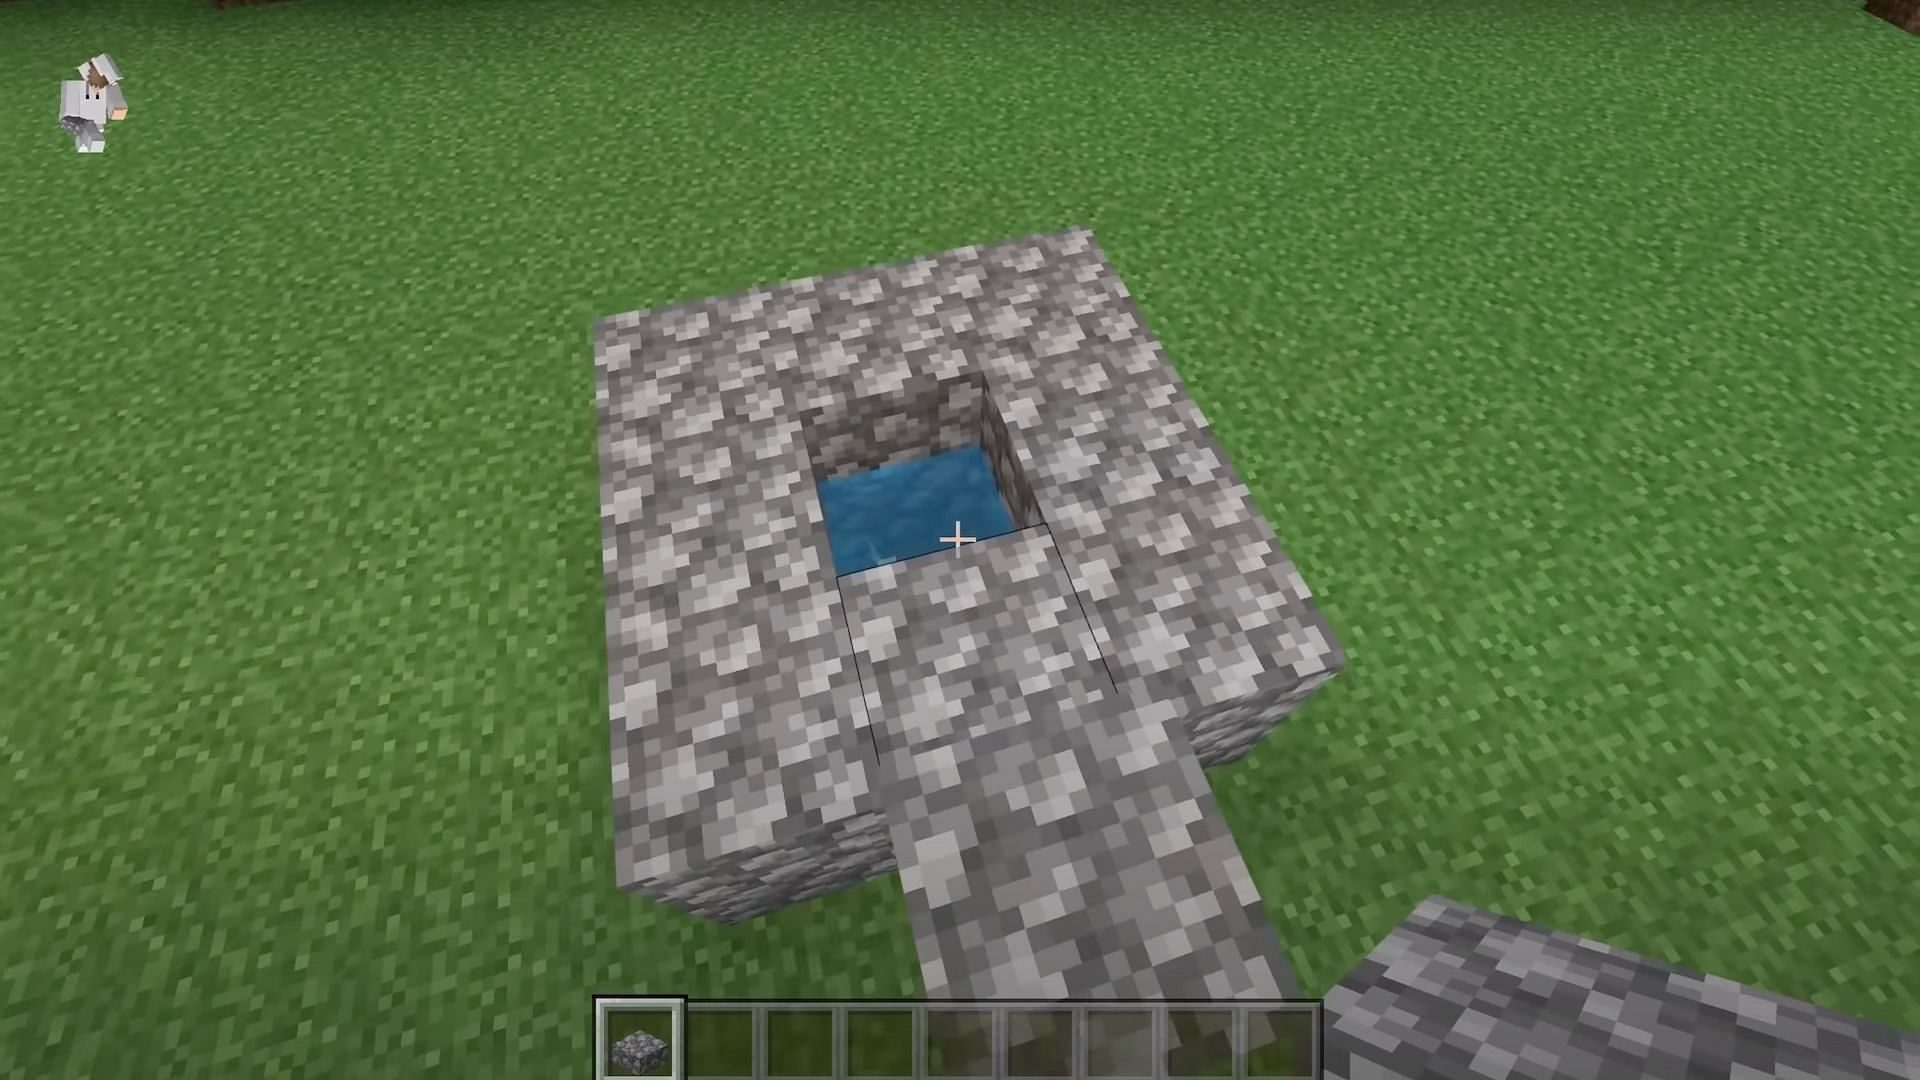
Step 1: Arrange 7 Cobblestone Blocks
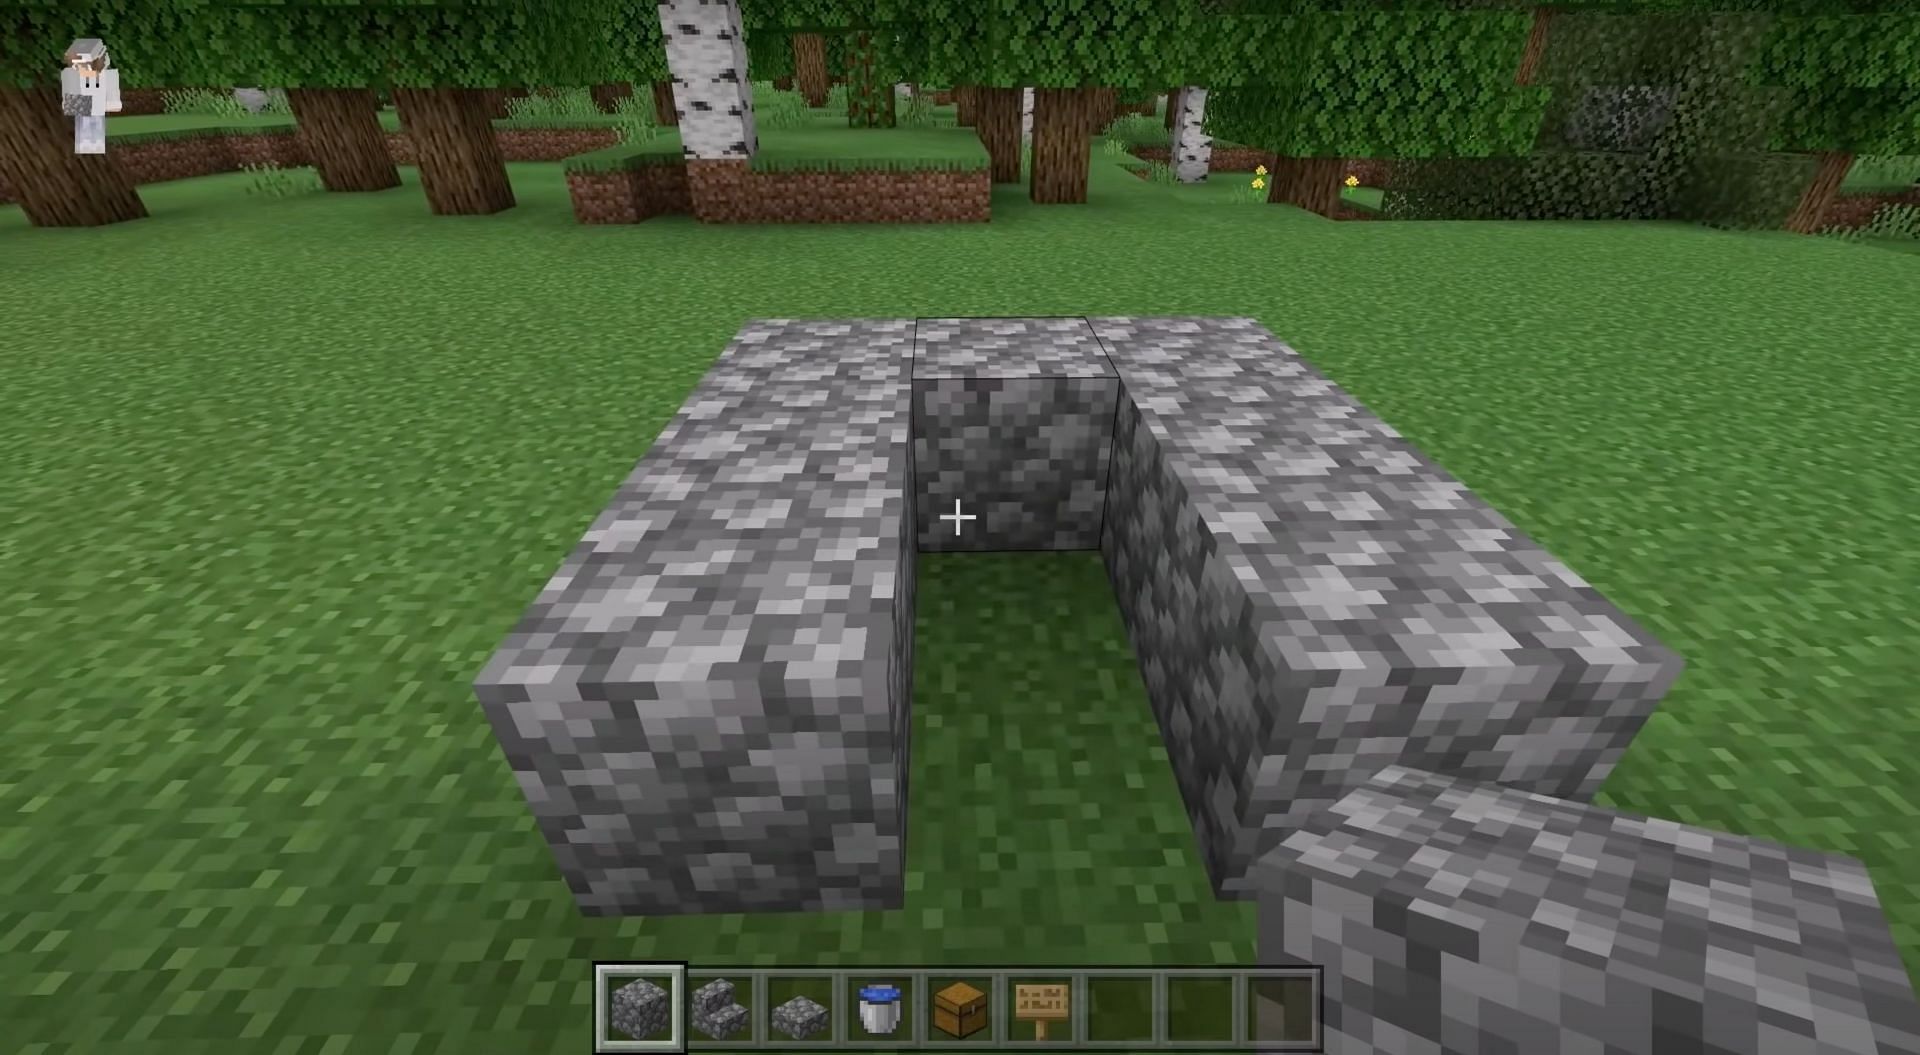
In order for players to begin this build, they will need to arrange their cobblestone blocks by placing 3 on the left side, 1 in the middle and 3 on the right side.
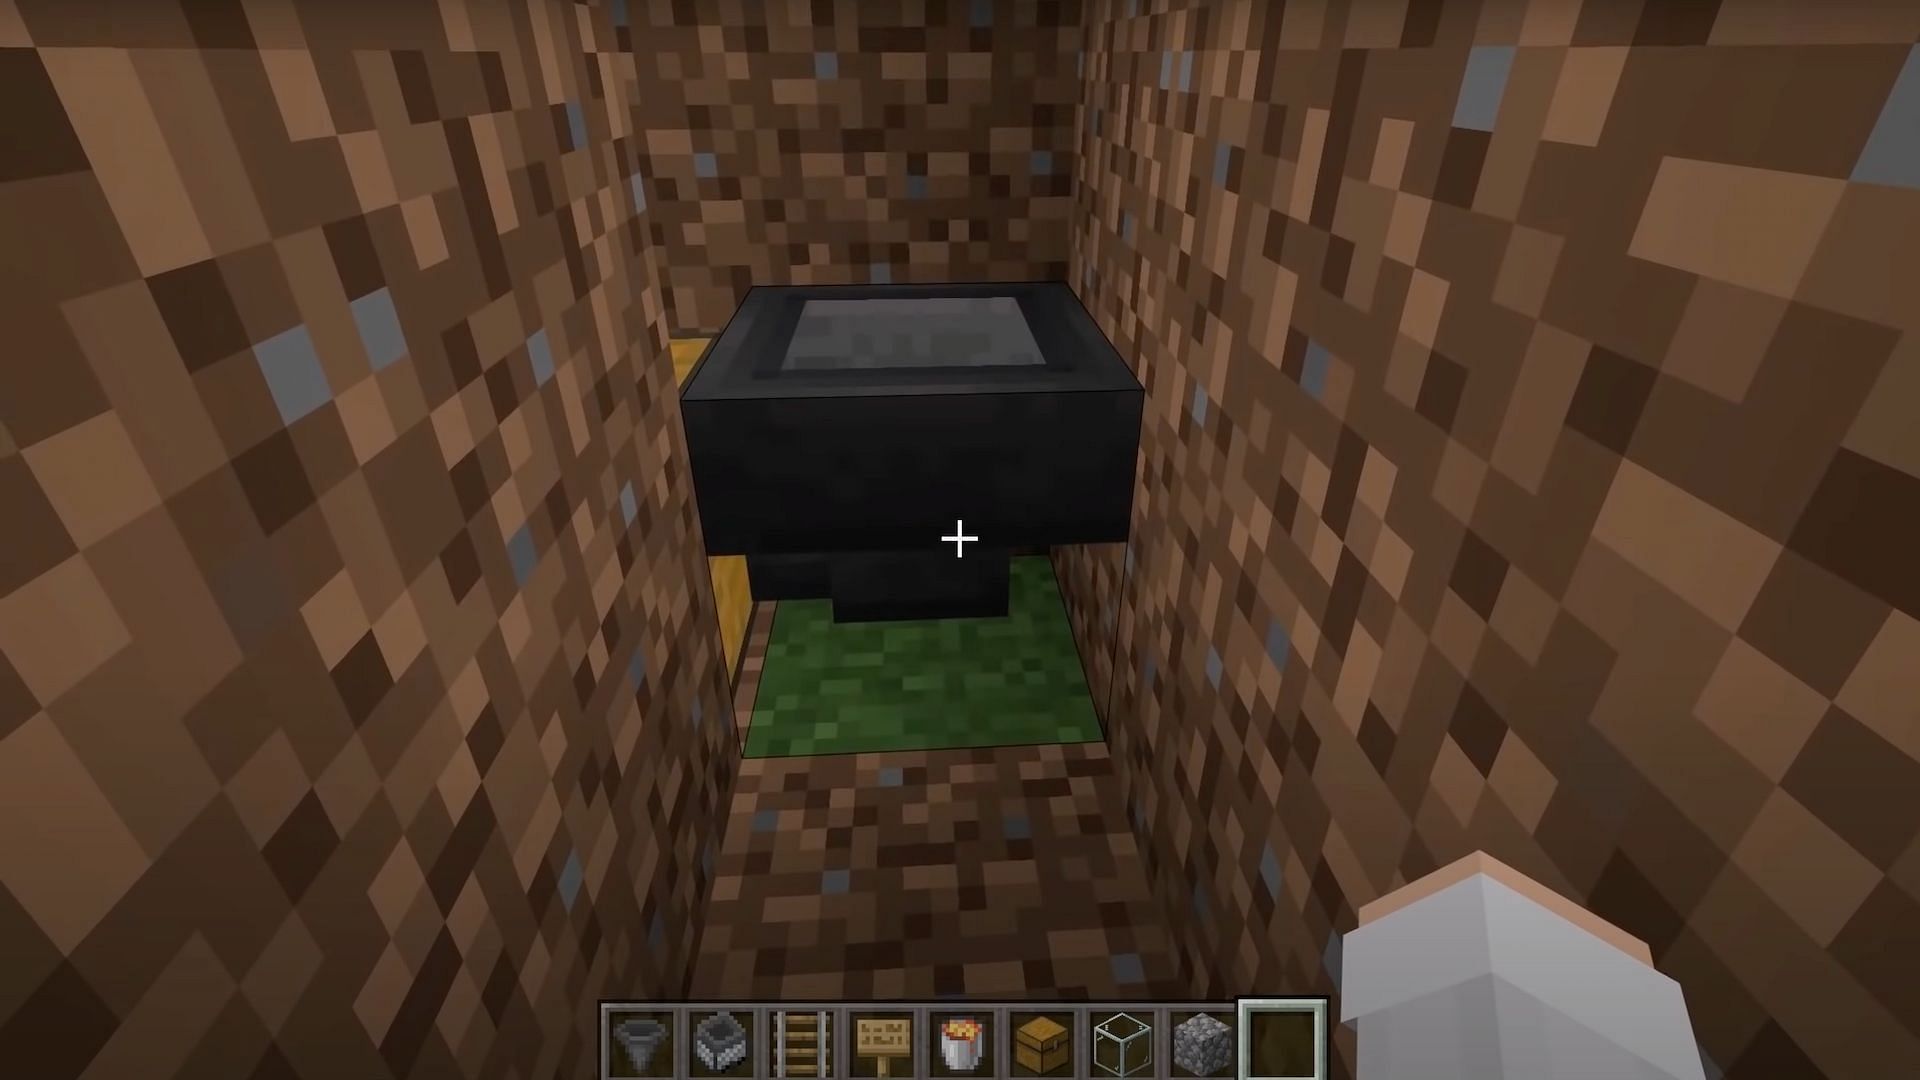
Step 2: Place down a chest
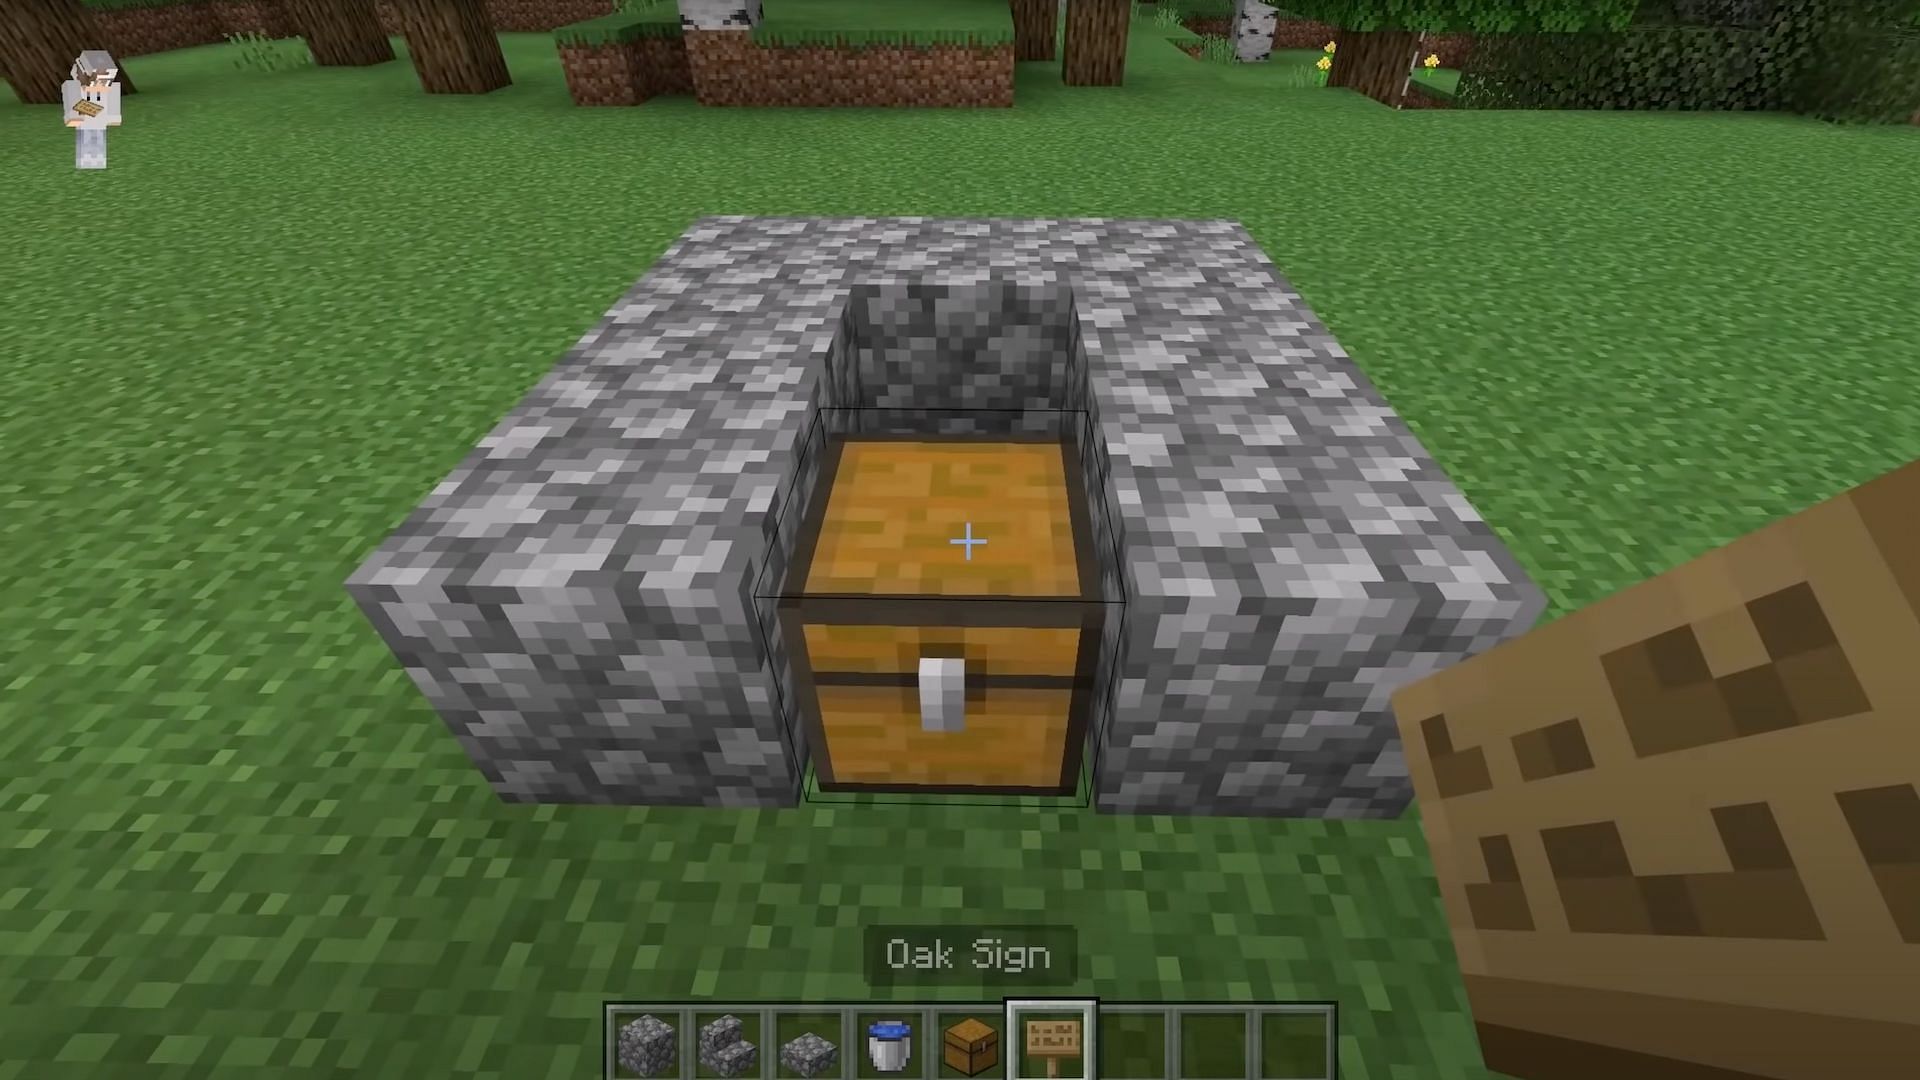
Minecraft players will now want to place a chest down in between the opening of the cobblestone blocks, making sure it is not placed against the back of the stone wall.
Step 3: Place a sign across the chest
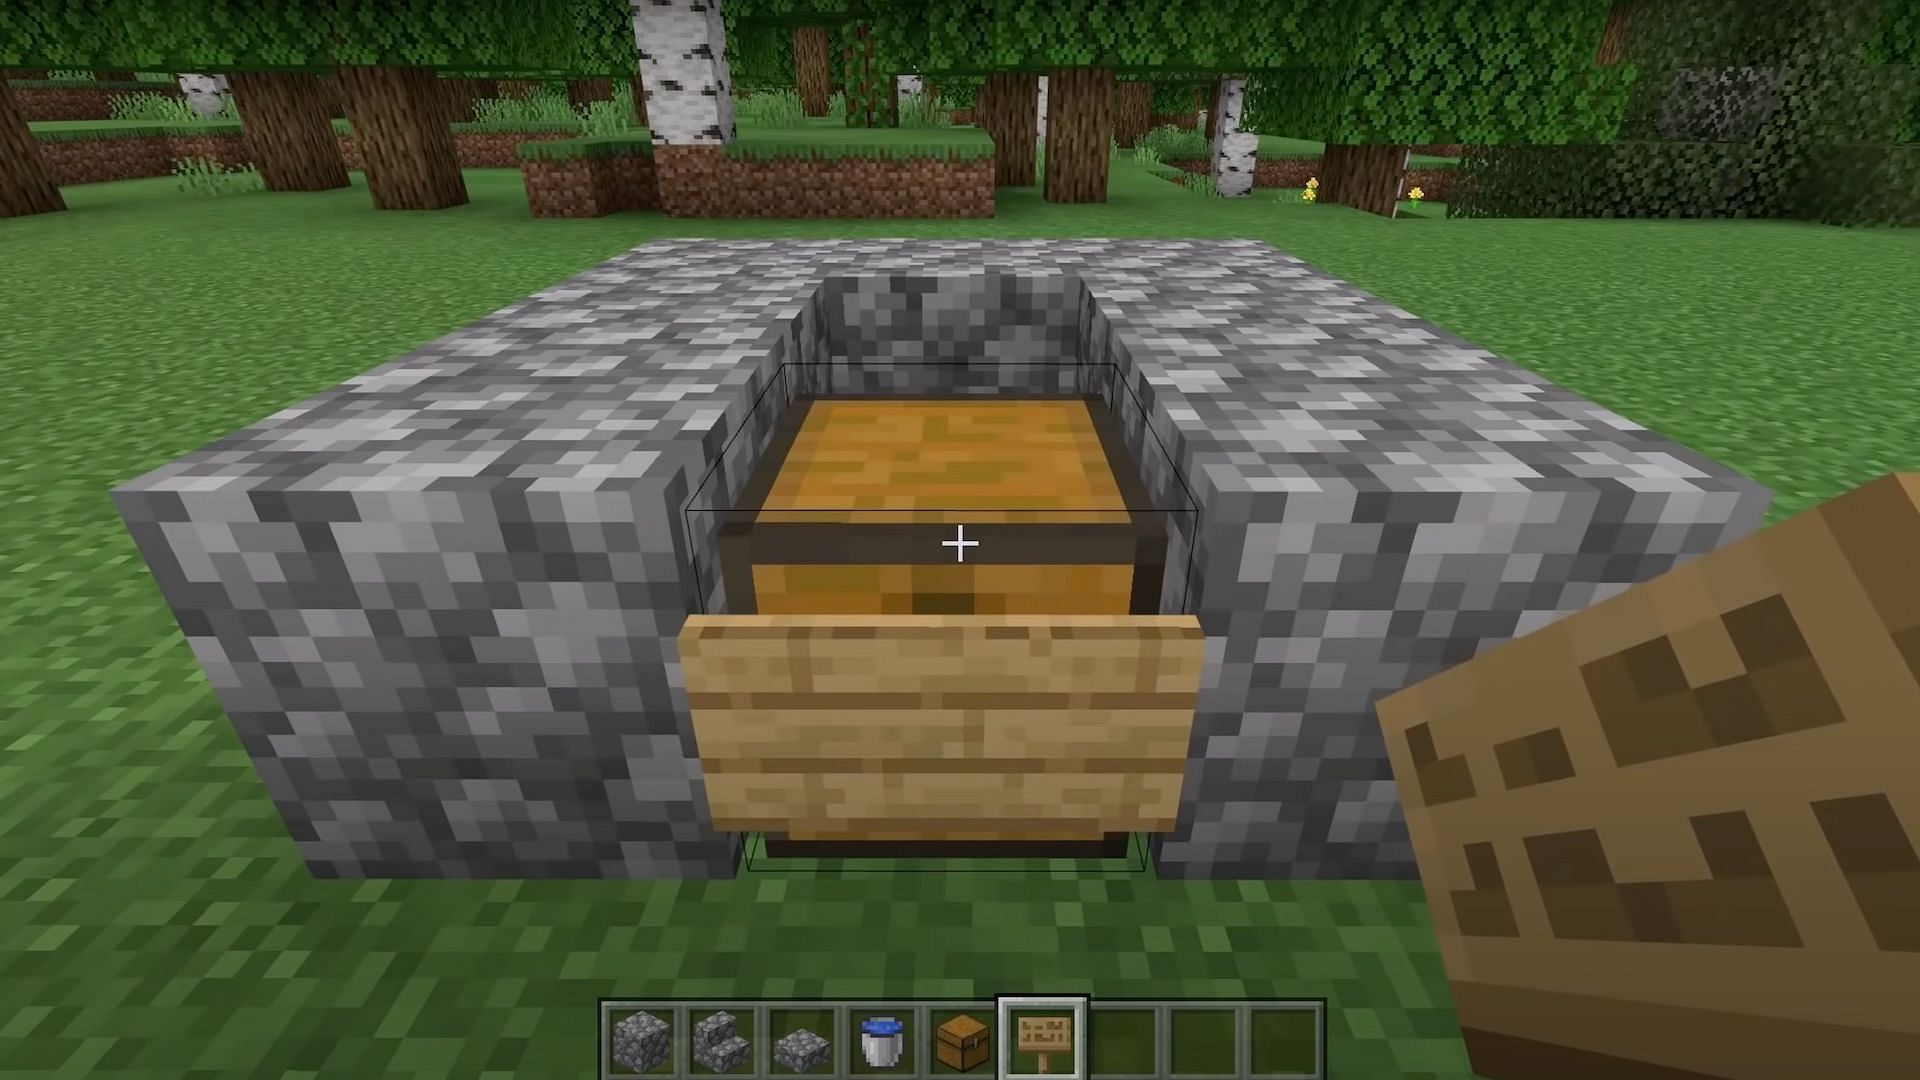
Players should now place a sign across the front of the chest. They do not need to input anything on the sign, so they should cancel out of that menu.
Step 4: Add water by clicking on the chest with the water bucket
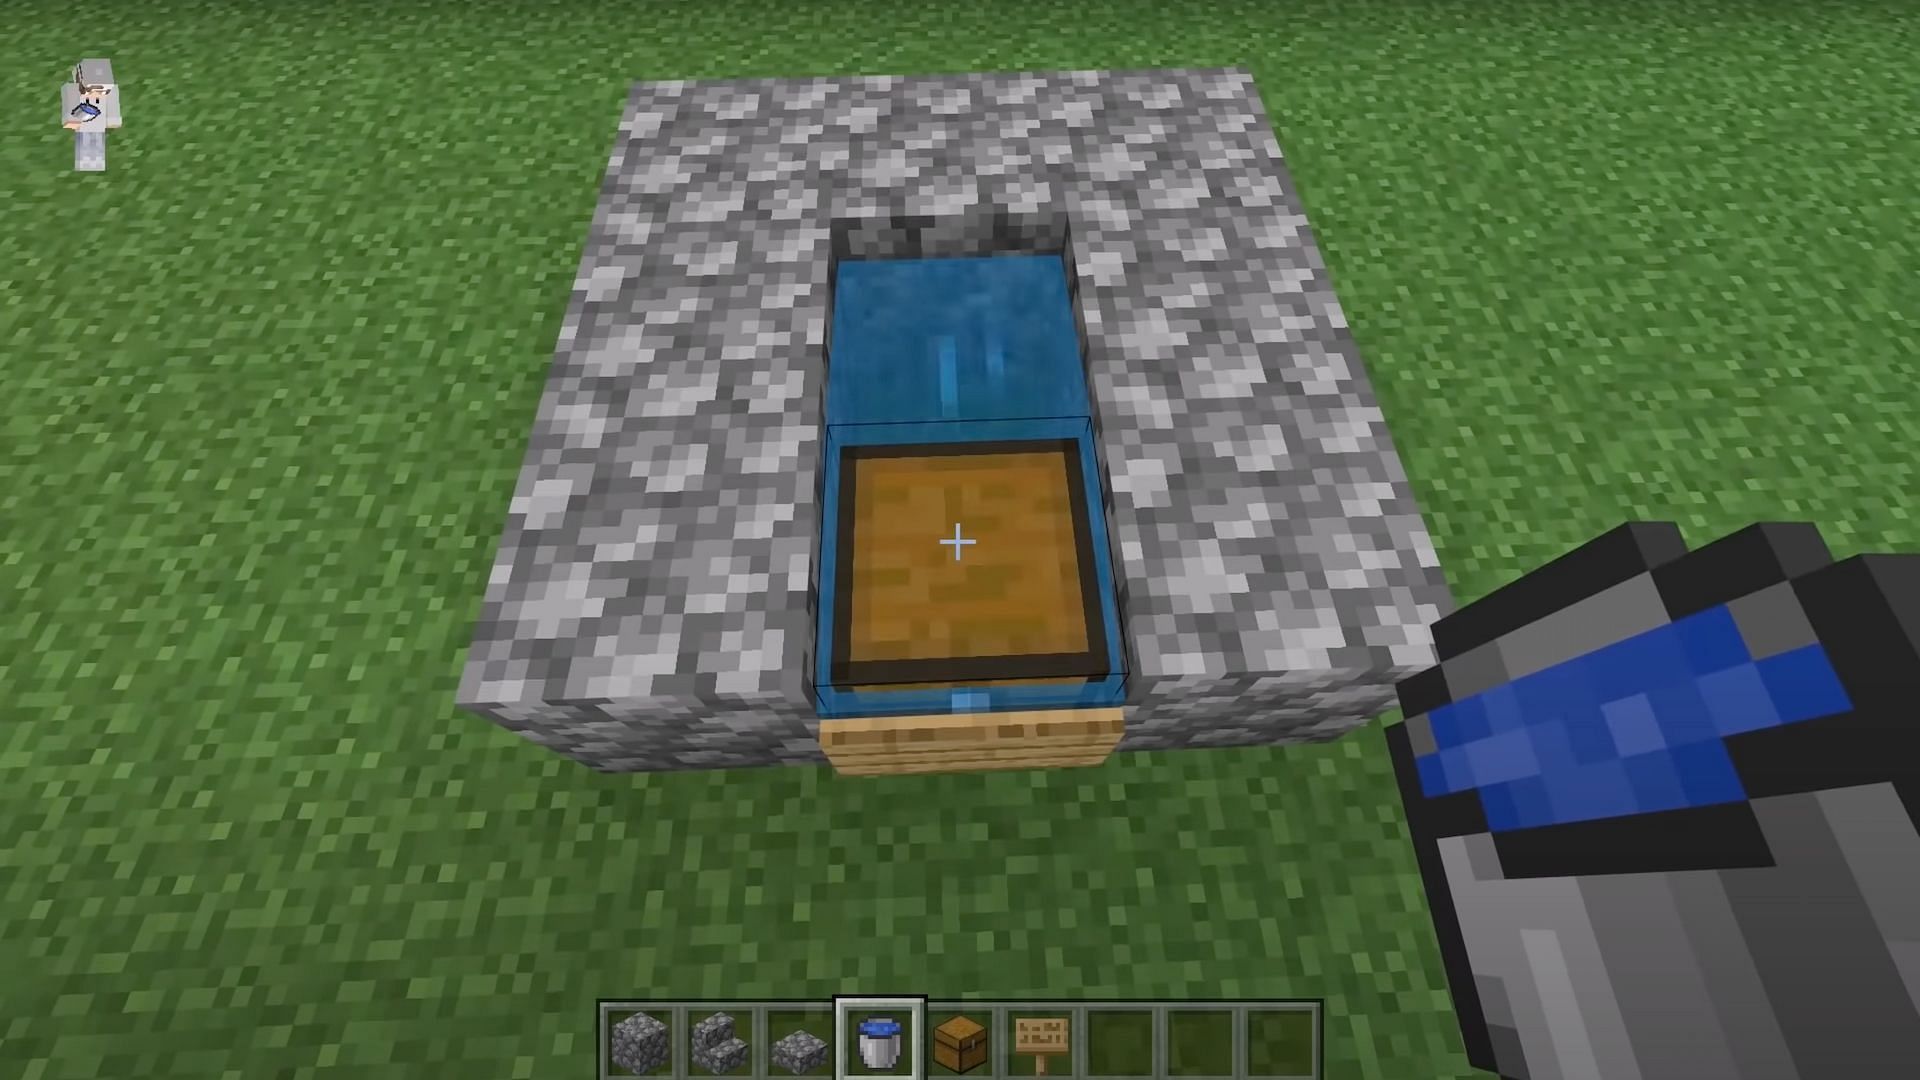
Next, Minecraft players should add water to the chest by using the water bucket on the chest. This will fill the interior of the build with water if done correctly.
Step 5: Dig a hole that is 4 blocks long and 4 blocks deep
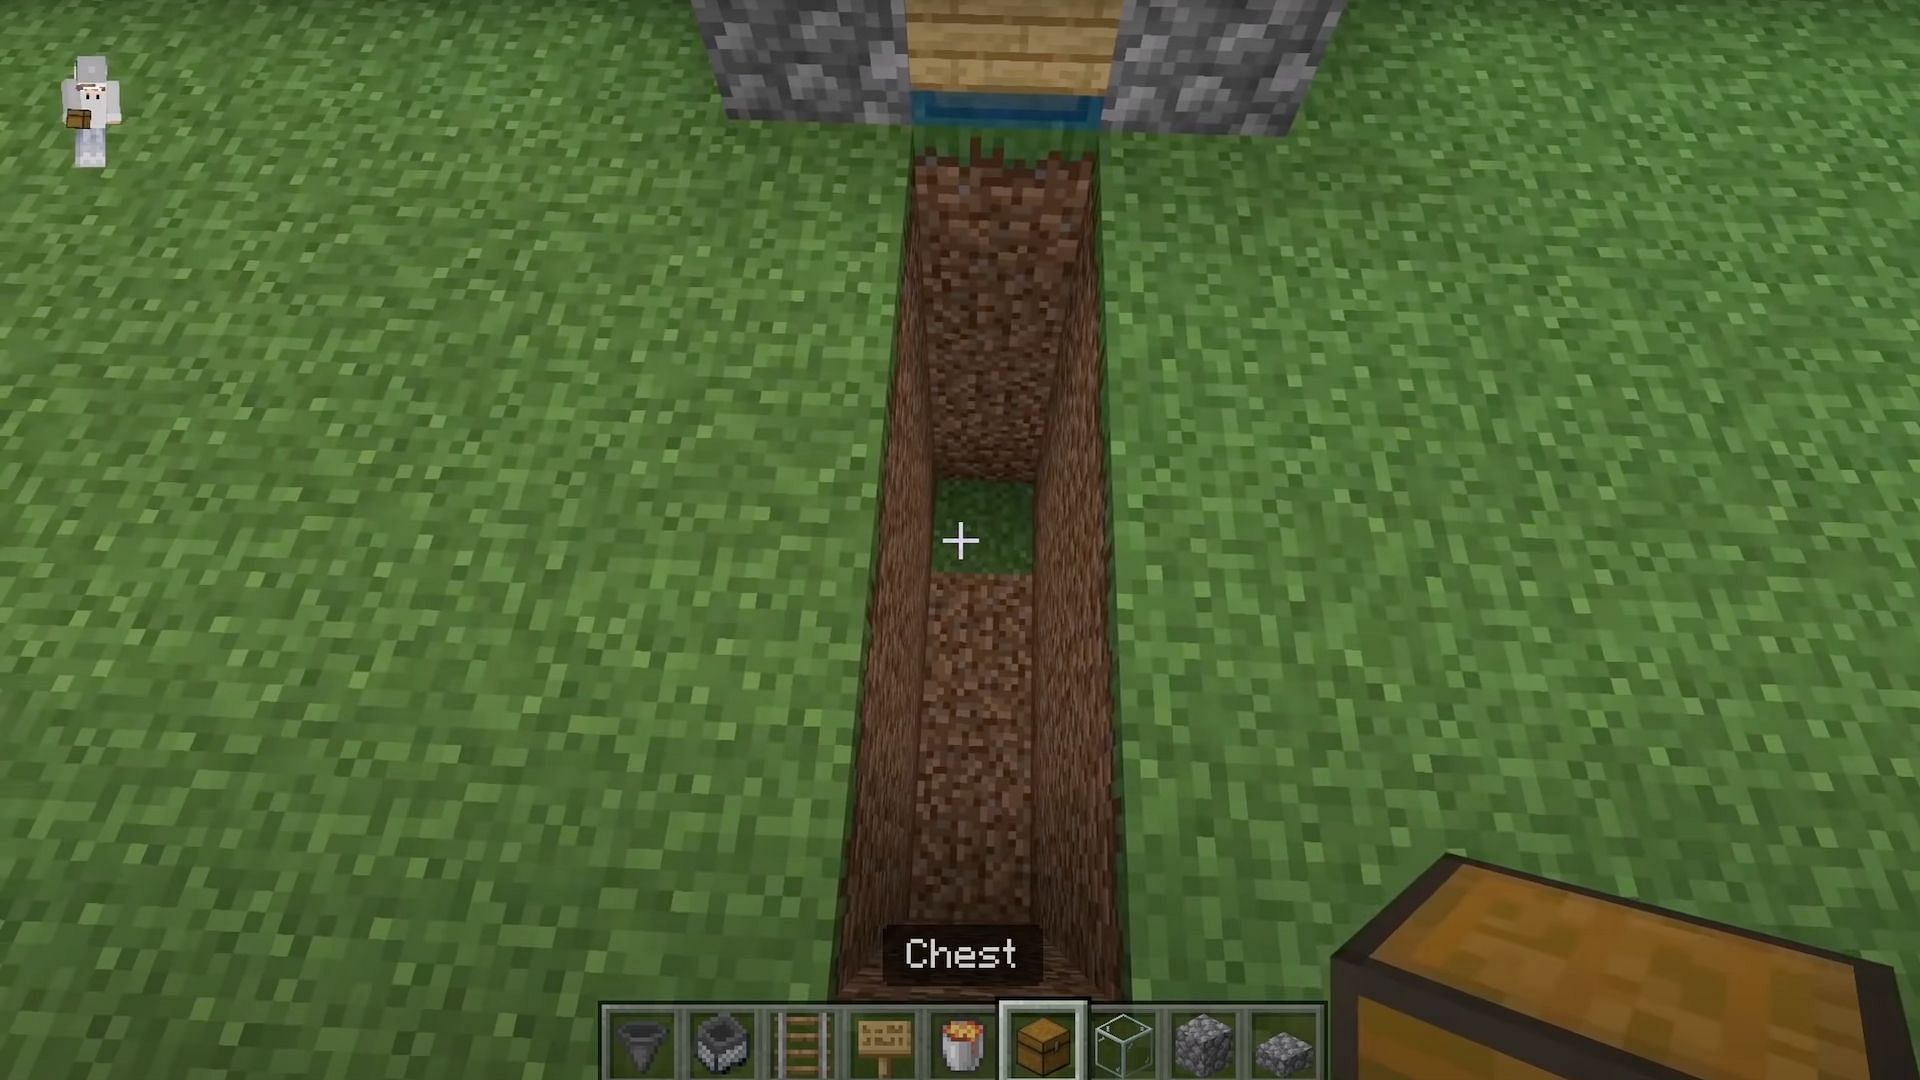
Players will now need to dig a hole that is 4 blocks long as well as 4 blocks deep. Players must count the hole from the spot directly next to the chest.
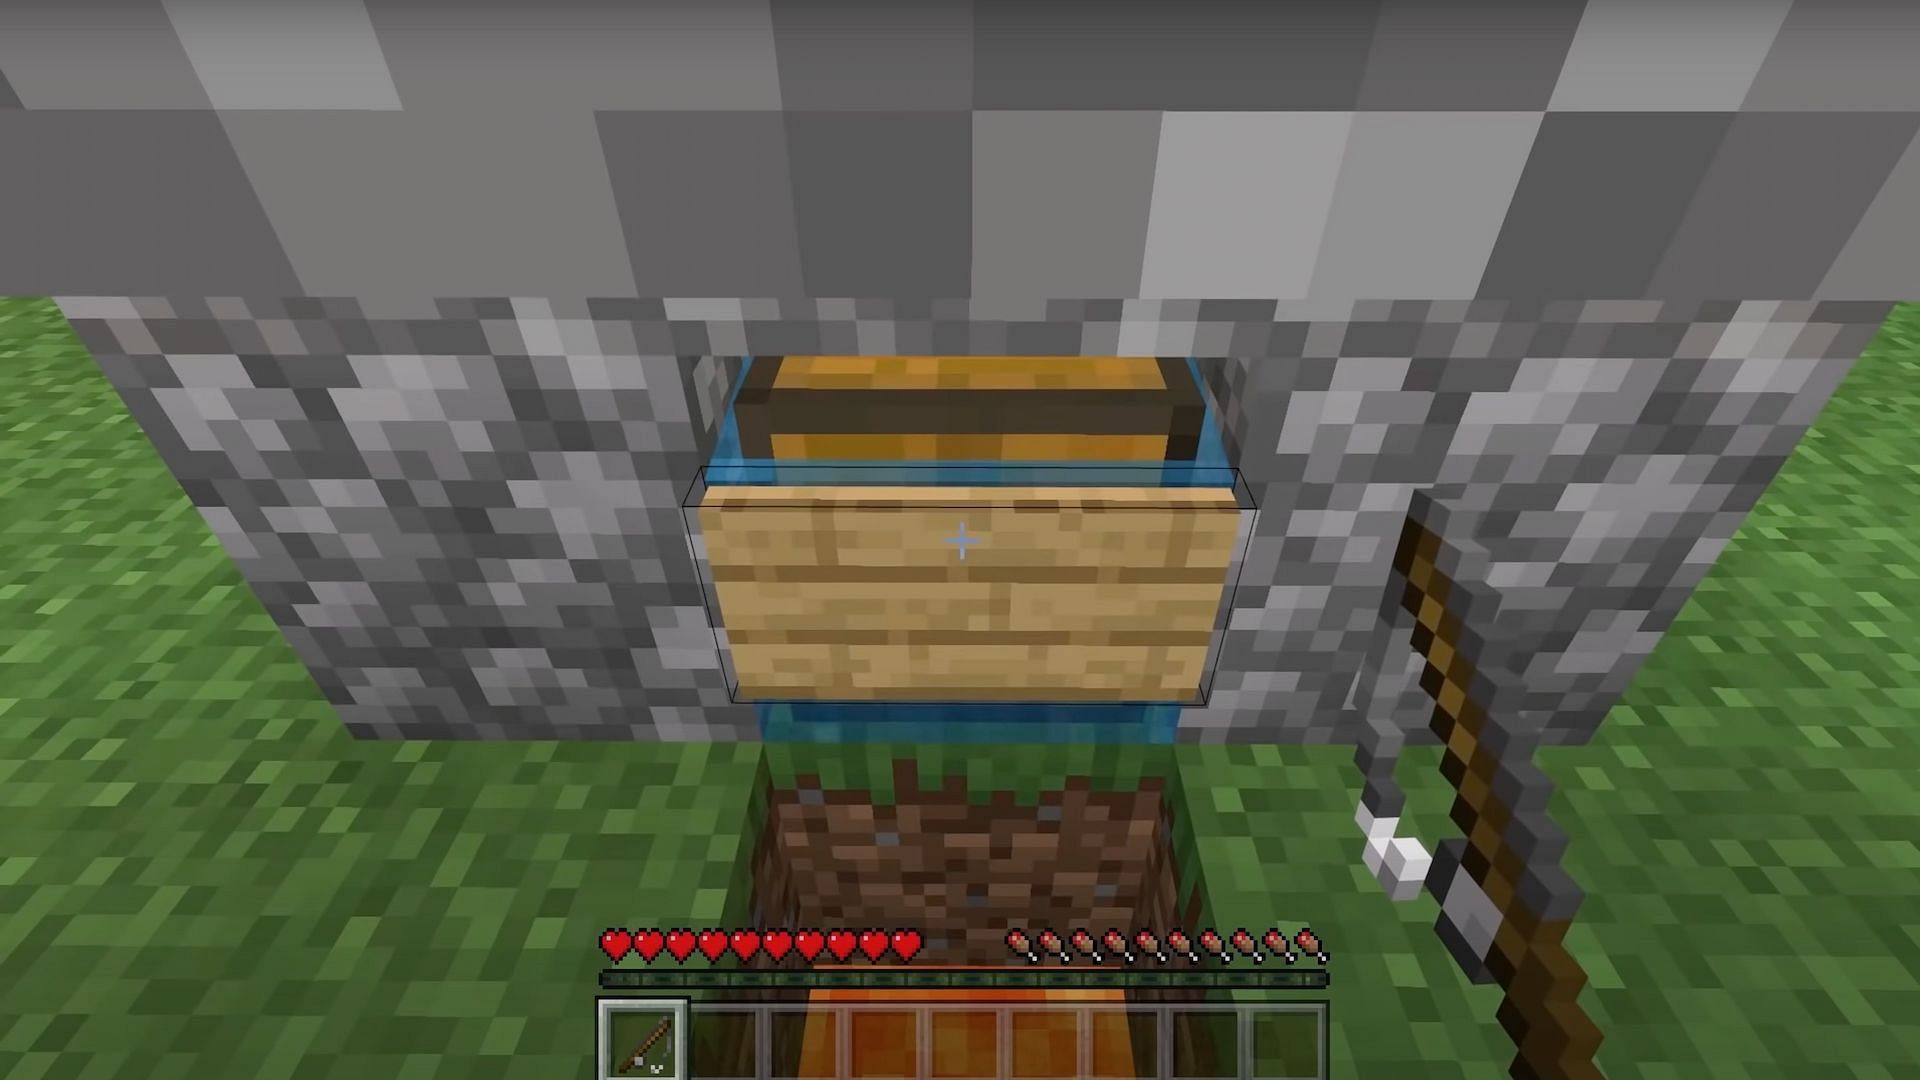
Step 6: Create a large chest in the middle of the hole
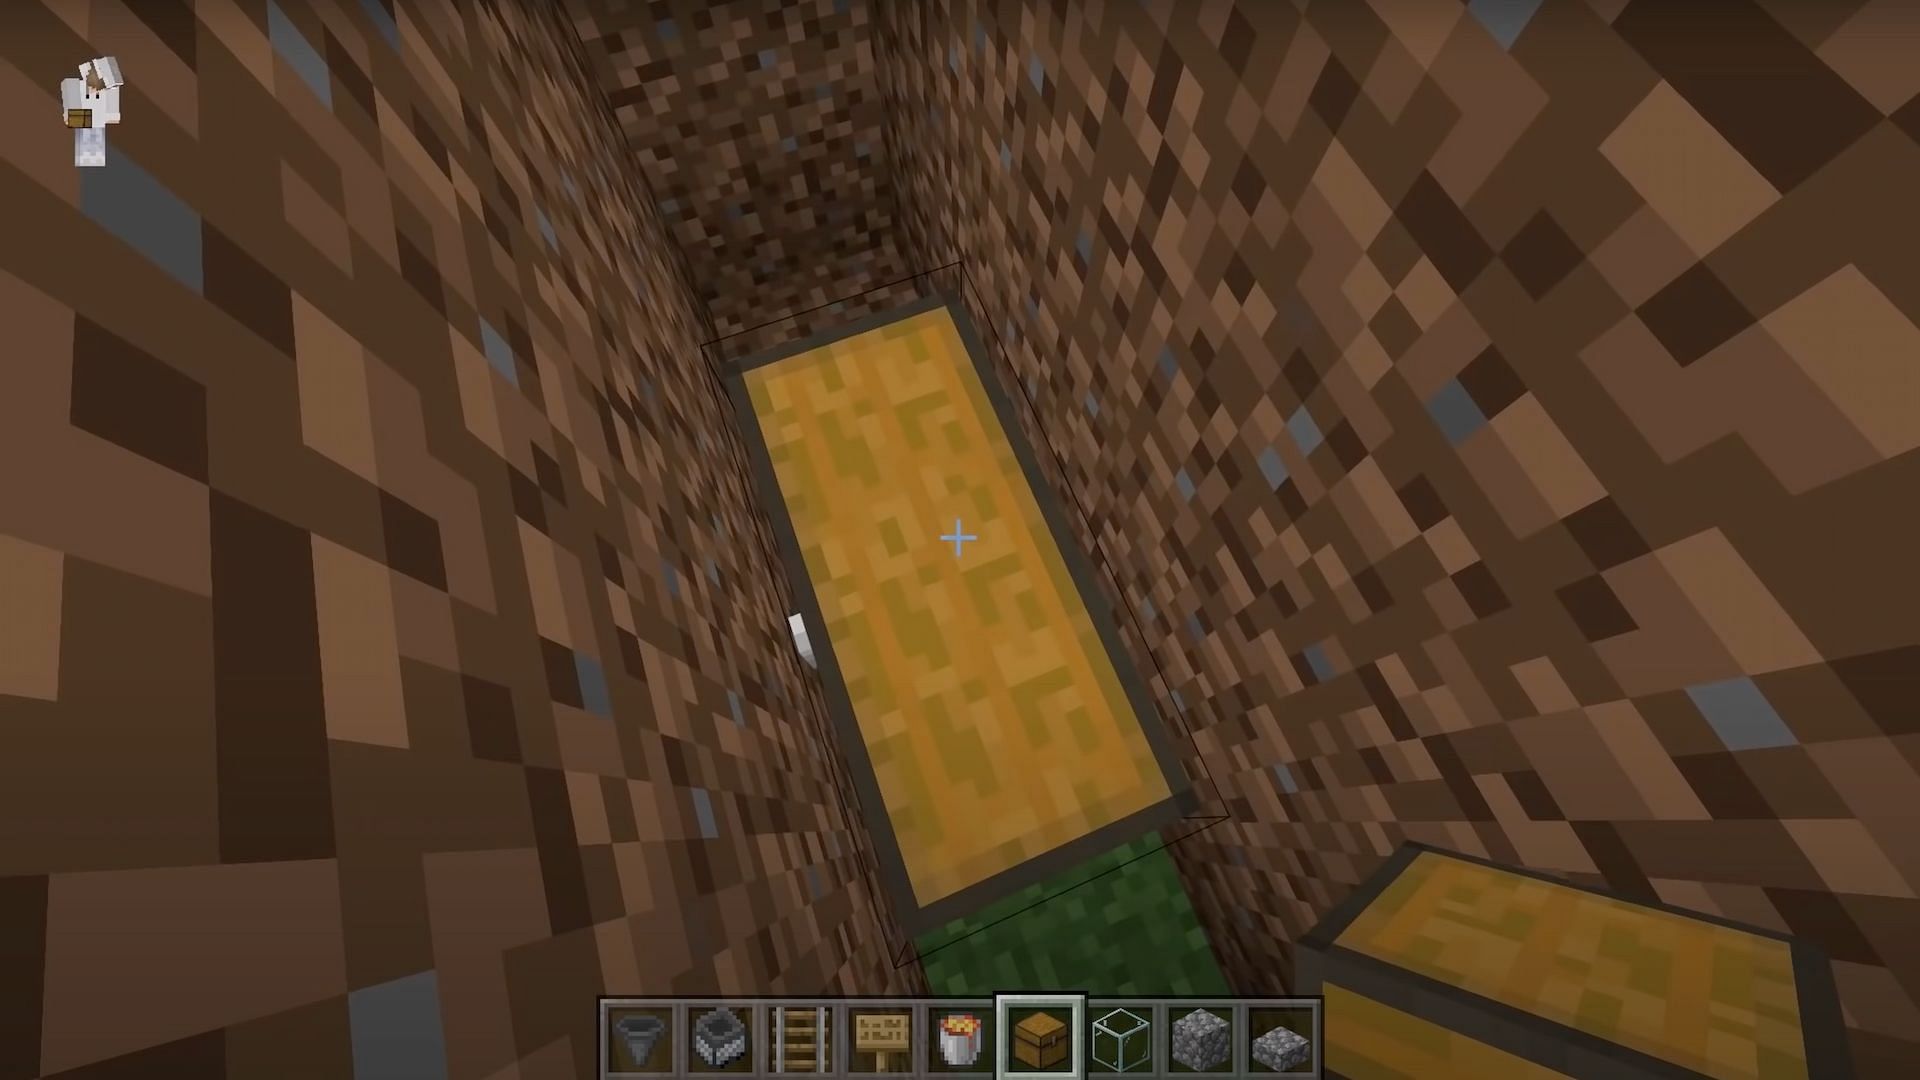
Players will need to use two chests in order to create a large chest at the bottom of the hole. They should place these chests sideways along the middle as this is the only way to get them to merge together.
Step 7: Place a hopper next to the chest
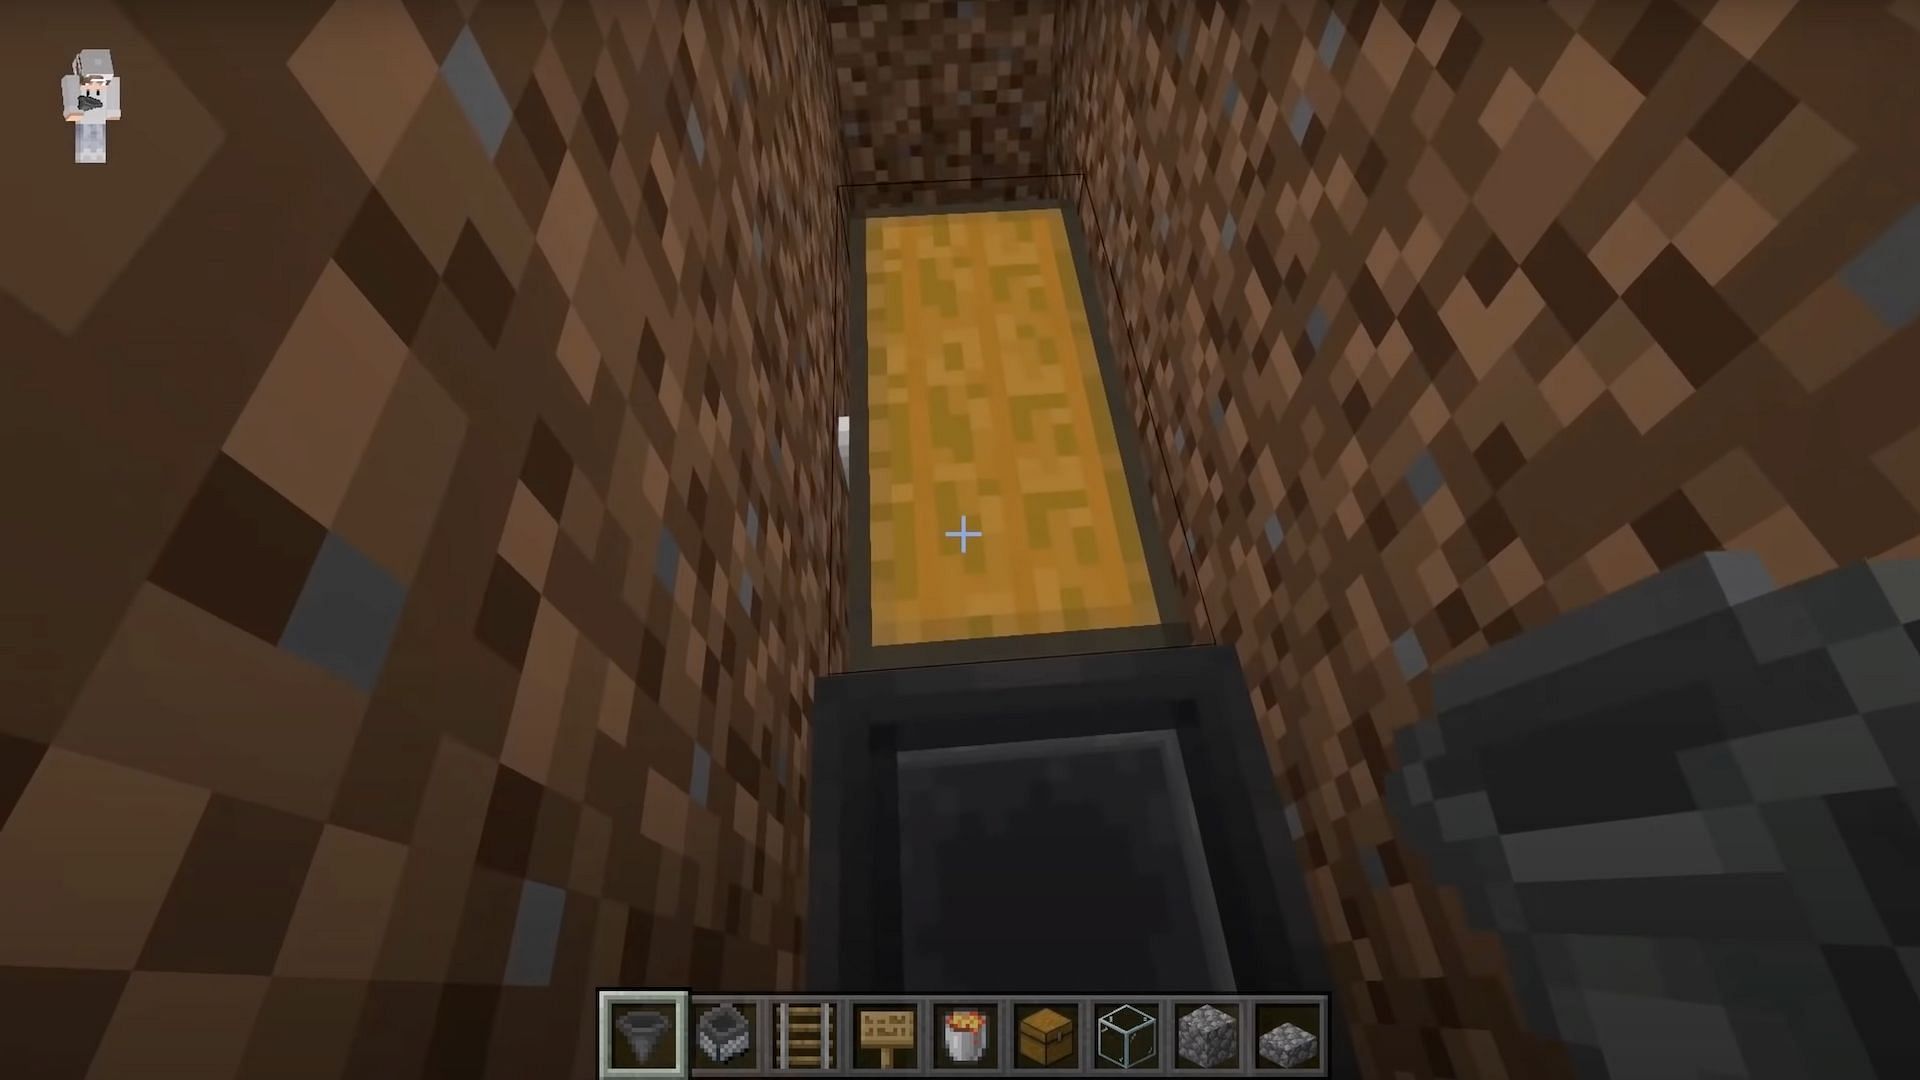
Players should now place the hopper directly next to the chest on the side nearest to the farm. This will ensure the items make it into the chest.
Step 8: Players should break 6 blocks next to the hopper
Once players have placed the hopper, they can break 6 blocks next to it in order to take a peek at it and make sure it is facing into the chest so that the items can be deposited.
Step 9: Replace the blocks and add a sign
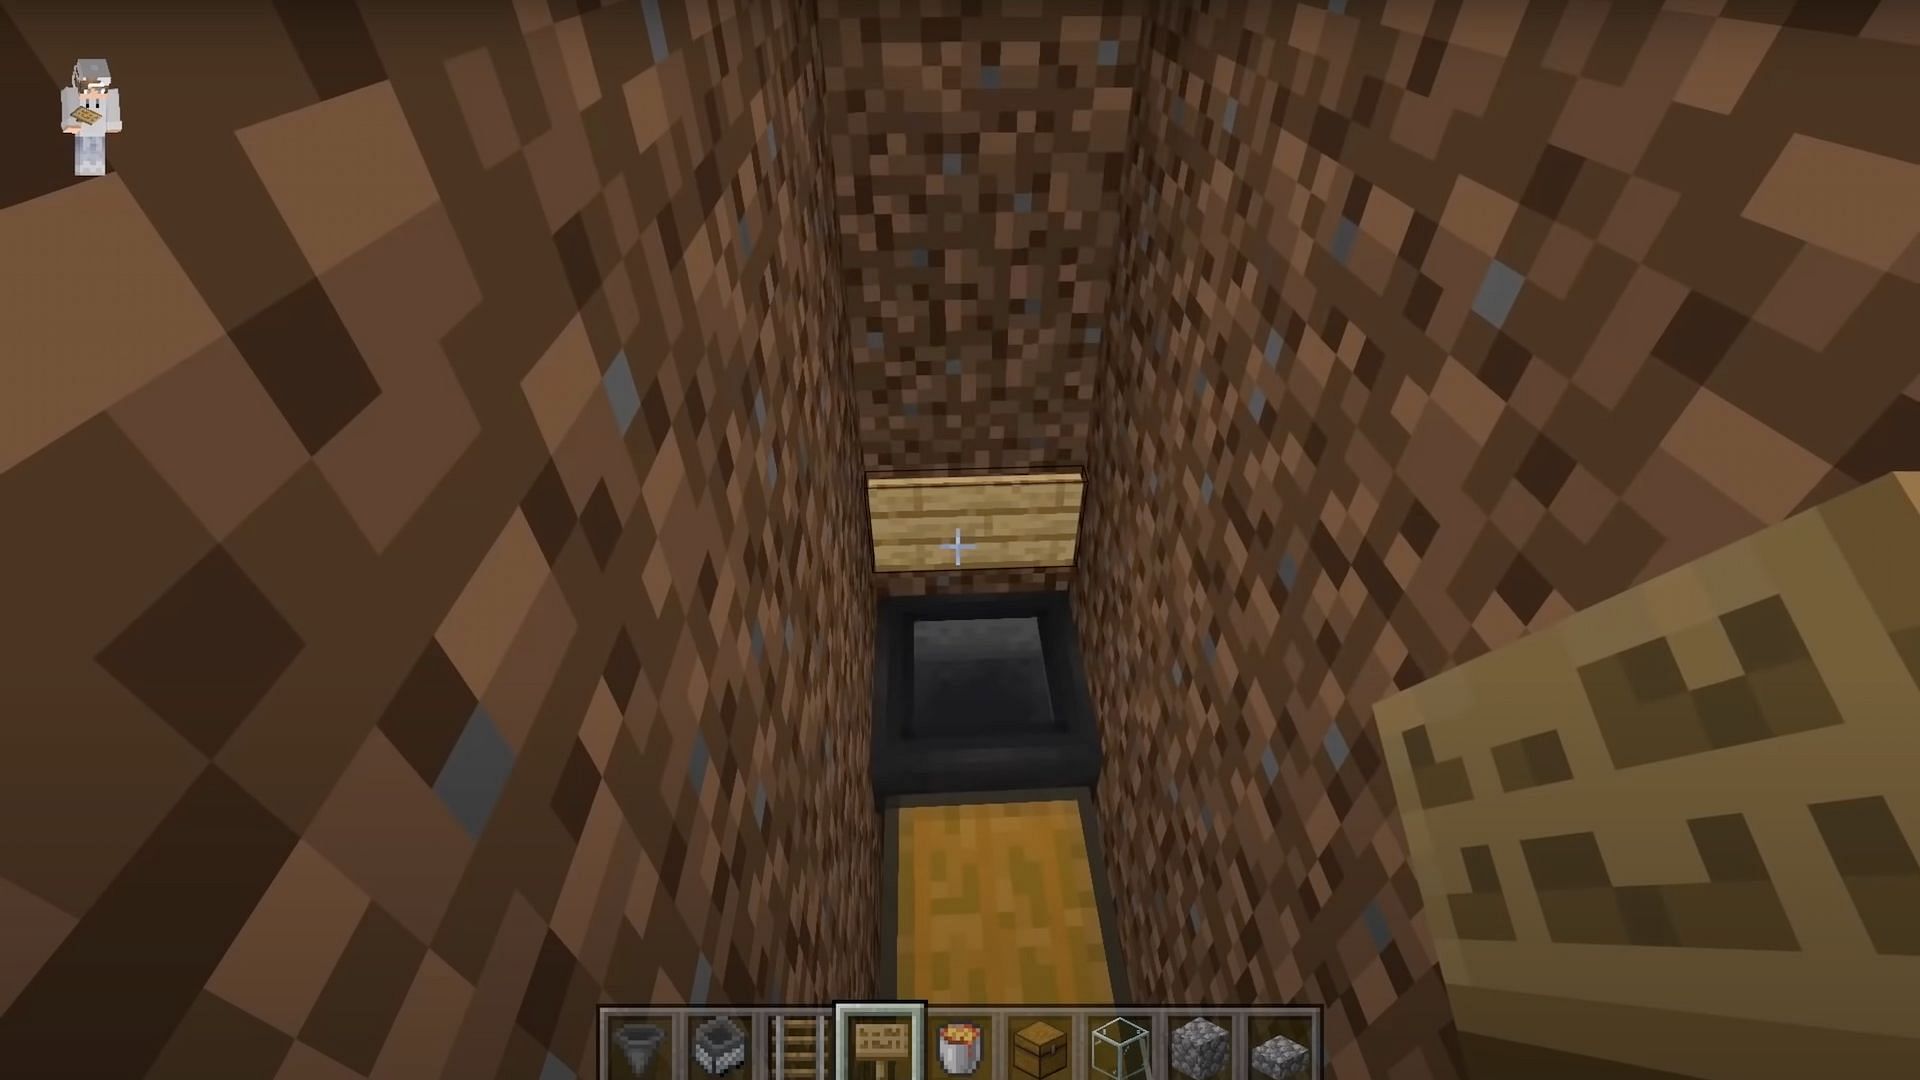
Once players verify the hopper is in place, they should place the sign above the hopper, and then replace the blocks that they had just removed to check on the status of the hopper.
Step 10: Add Blocks, Rails and Minecart with Hopper
Players will need to place two blocks on top of the chest. They will then place two rails on top of it, followed by the minecart with a hopper. Finally, players should push the minecart with hopper until it falls into the hopper as pictured above.
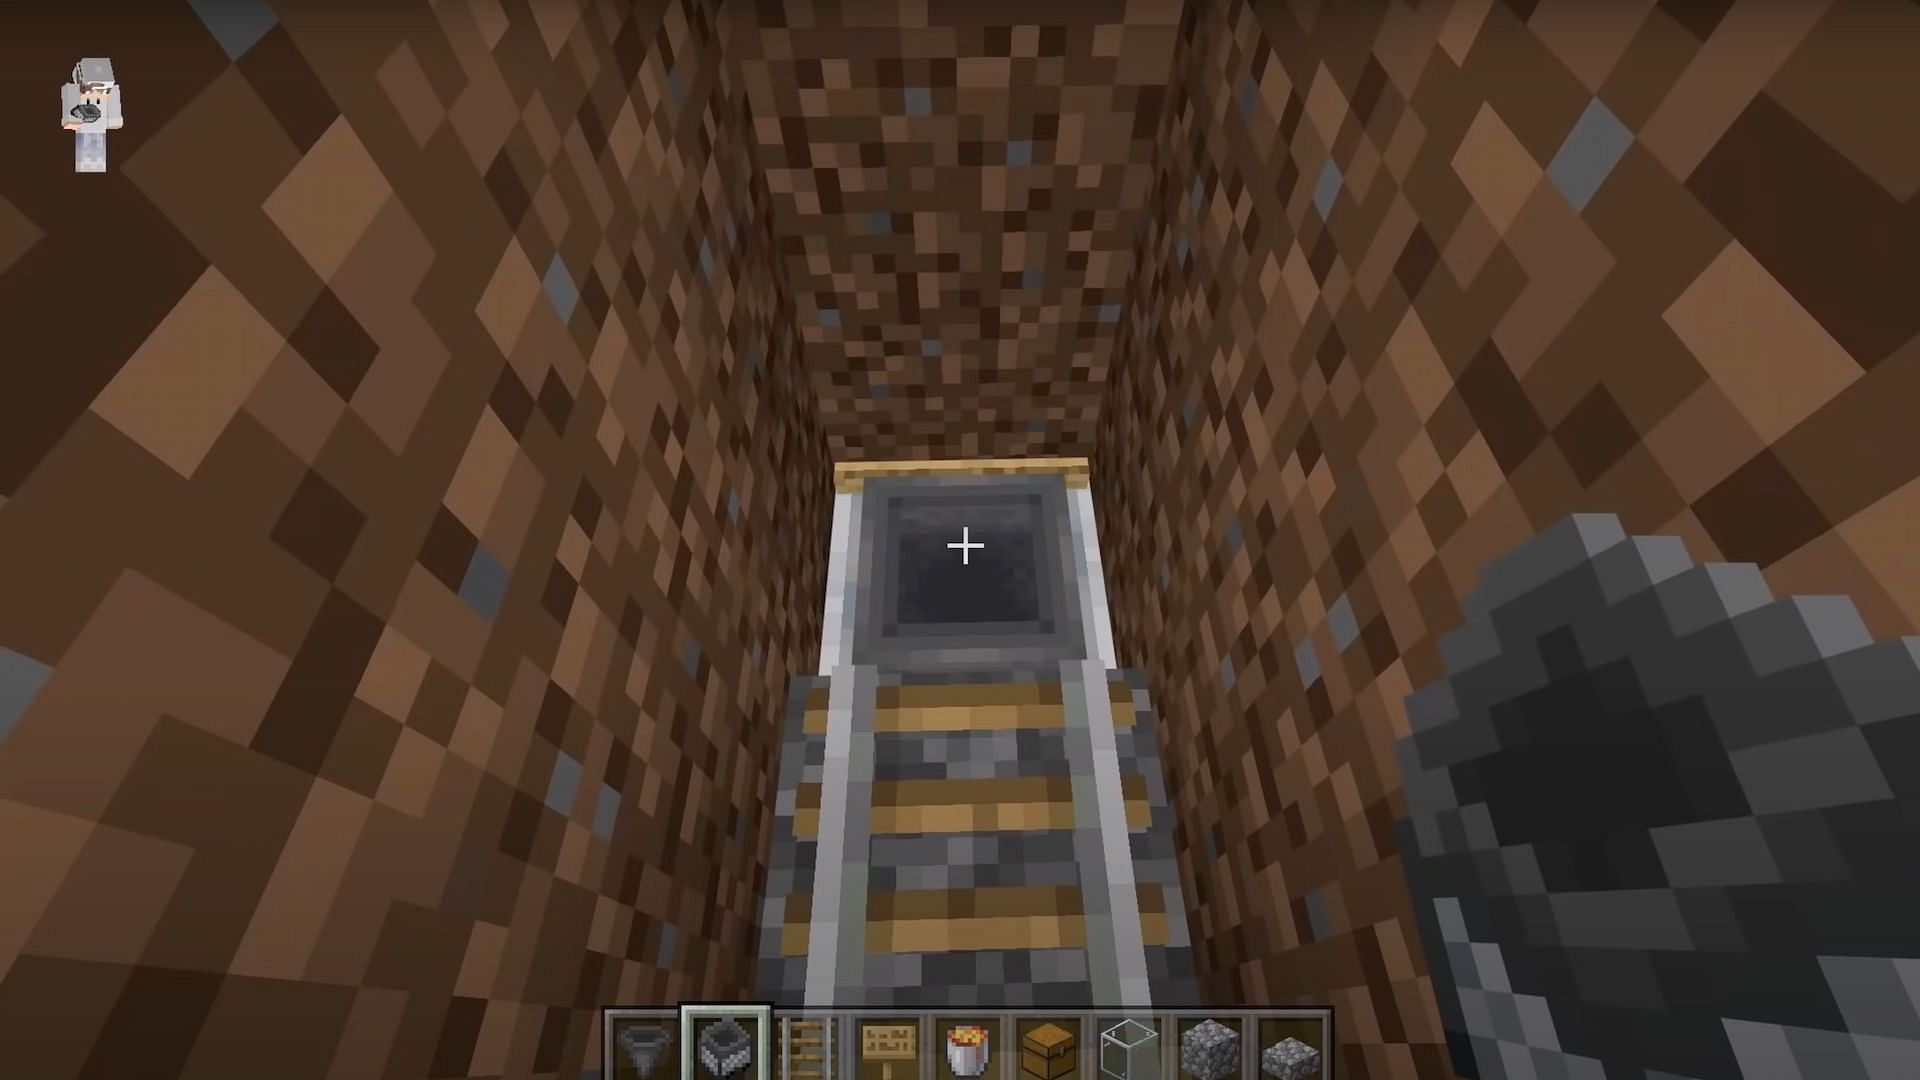
Step 11: Break the blocks and rails, and add glass
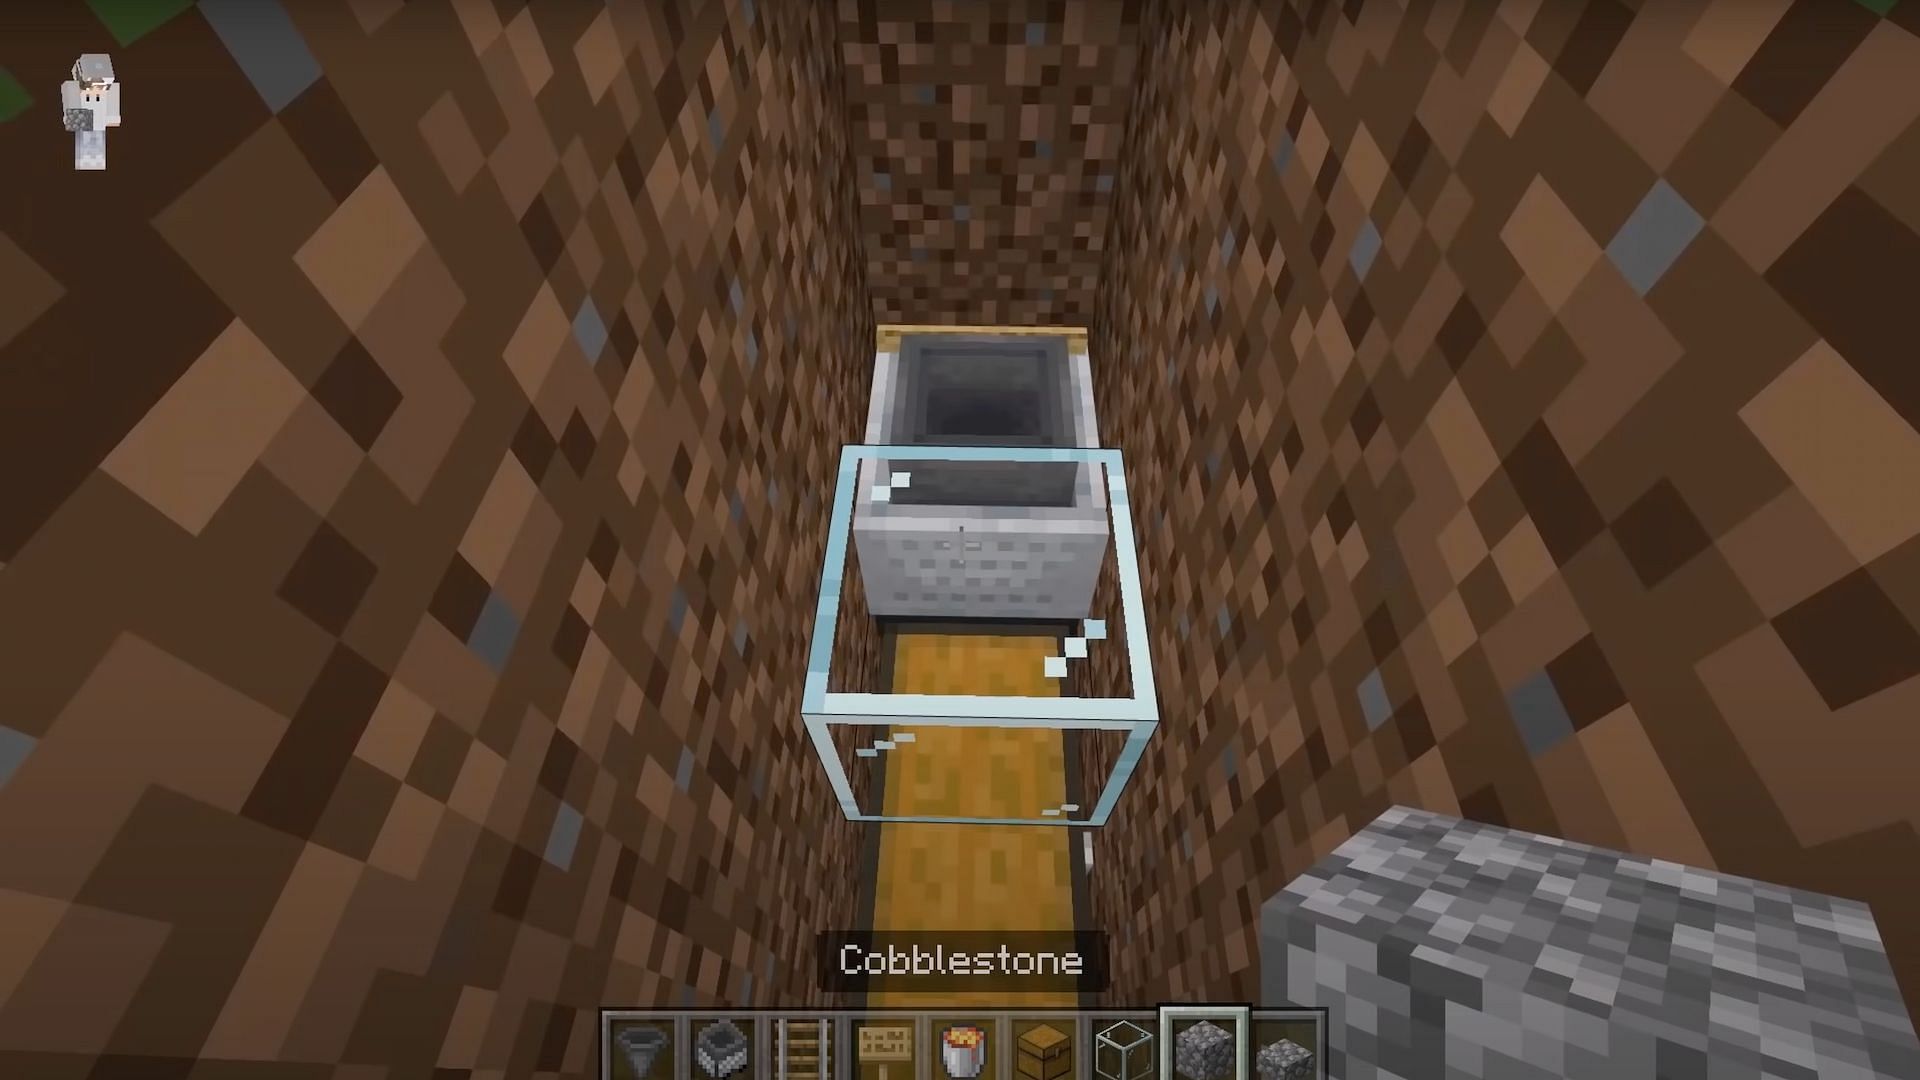
Minecraft players will want to break the two blocks and rails they just placed, and then place a glass block in front of the minecart with hopper.
Step 12: Place cobblestone block on top of glass, and then pour lava on the other side
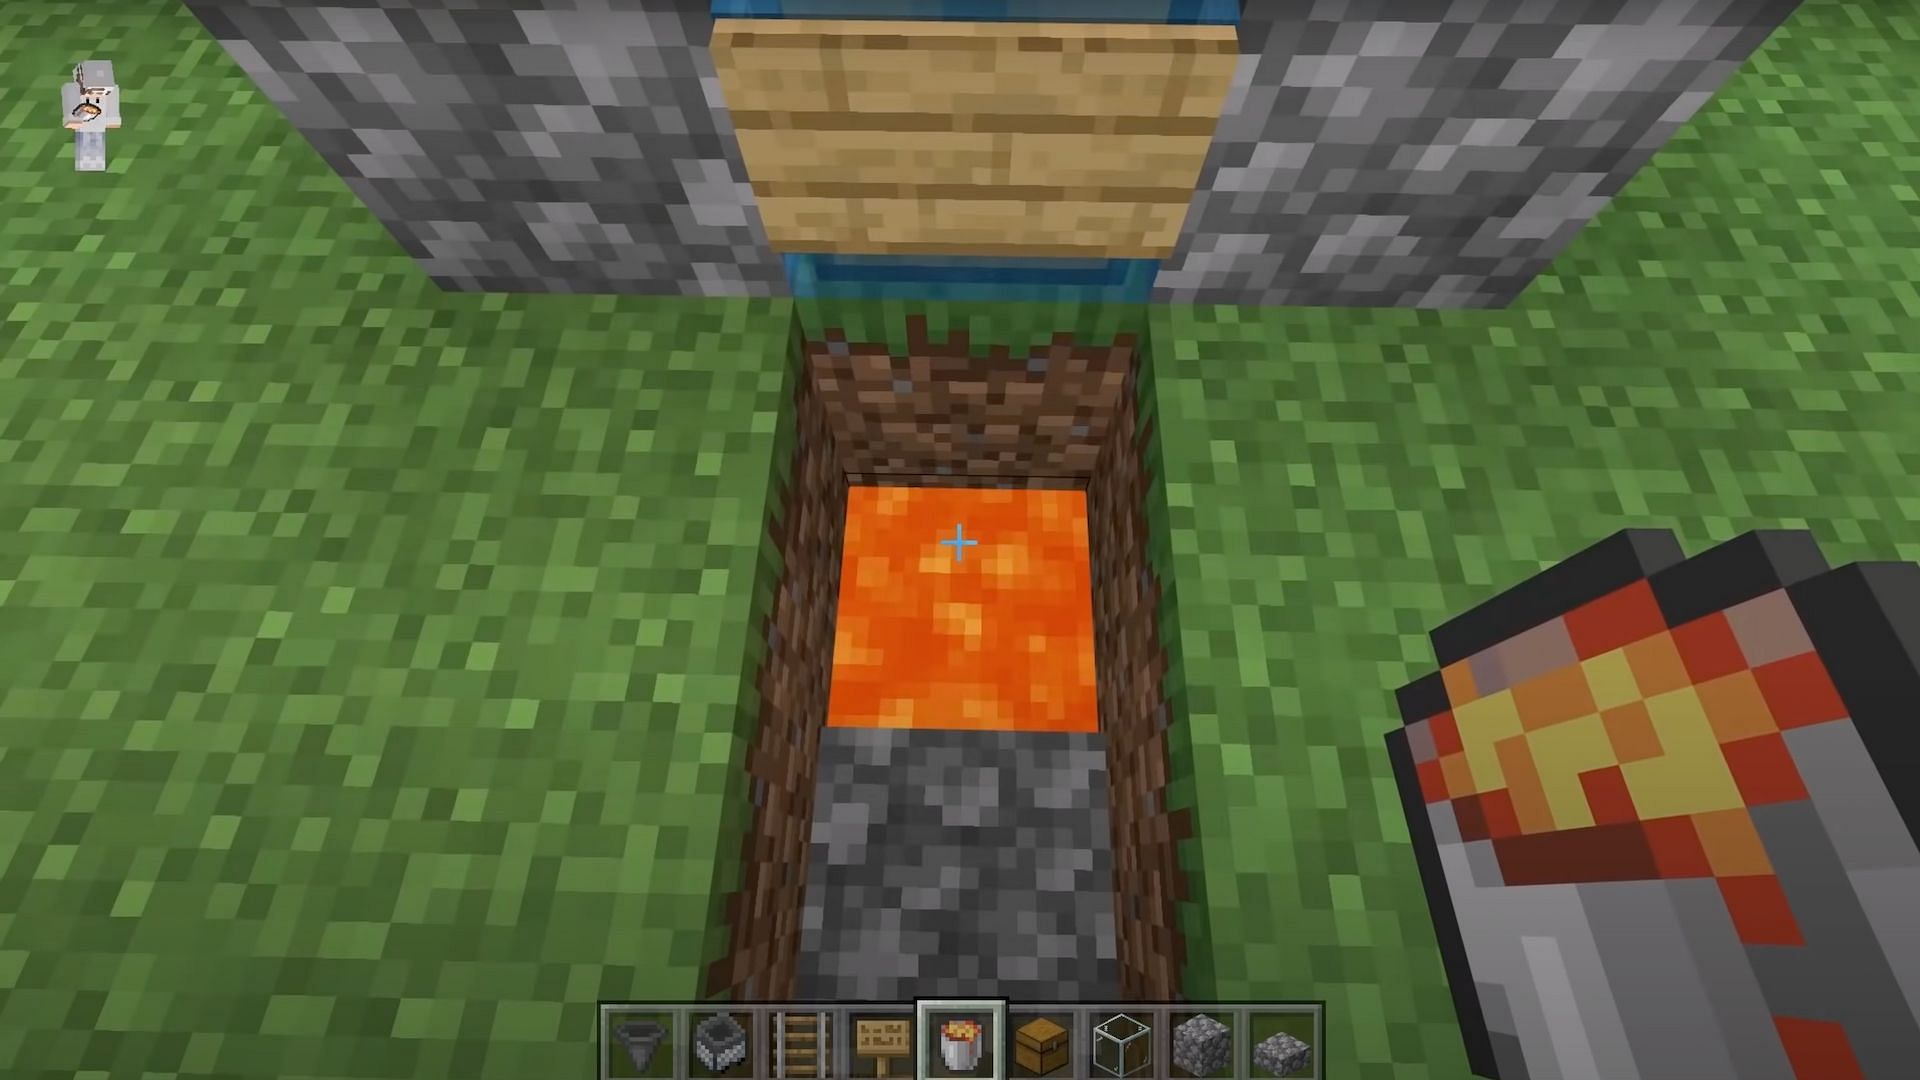
Once players have the glass down, they will need to place a cobblestone block on top of it. Then, players should pour lava on top of the minecart with hopper.
Step 13: Place a cobblestone block next to the large chest and place ladders
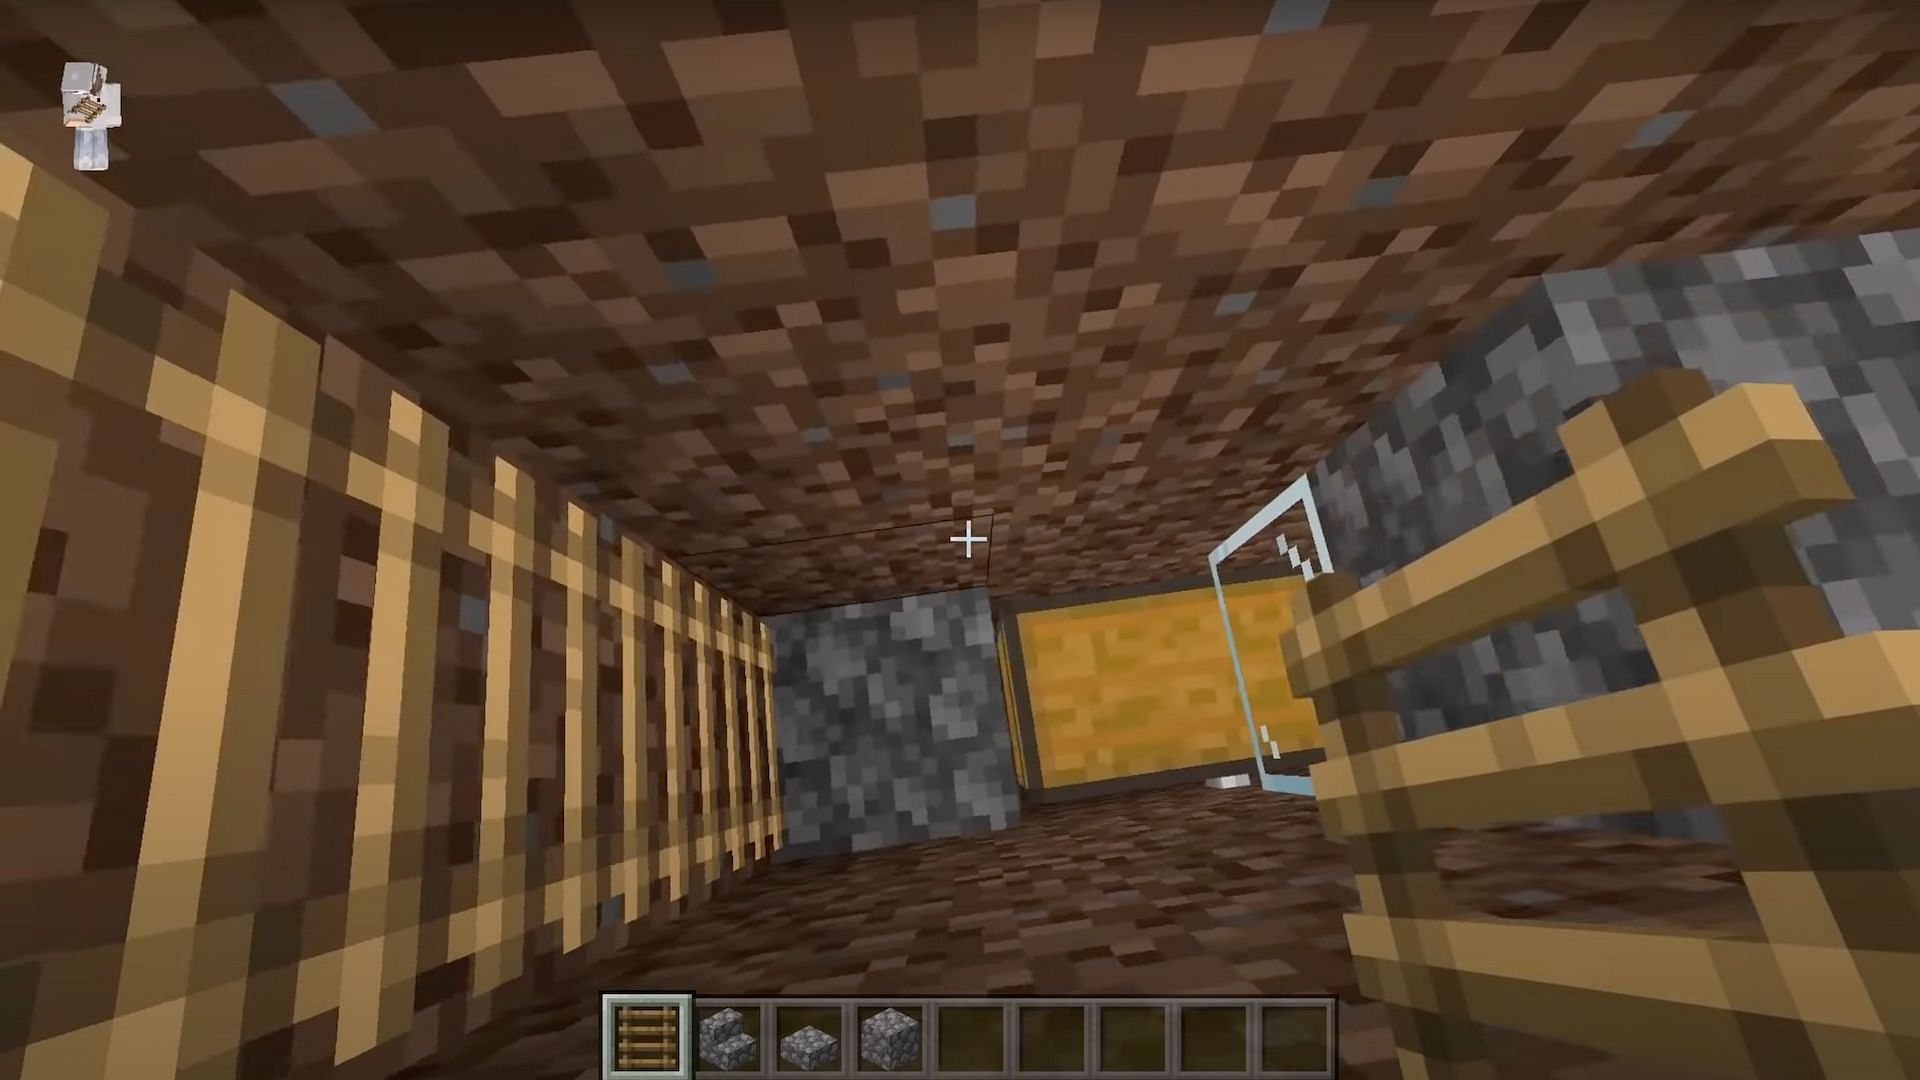
Players of Minecraft should now place a cobblestone block next to the large chest at the bottom of the hole. Then, they should place 3 ladders on top of the block. This will allow them easy access to the chest when they are ready to collect their items.
Step 14: Place the set of stairs and a slab
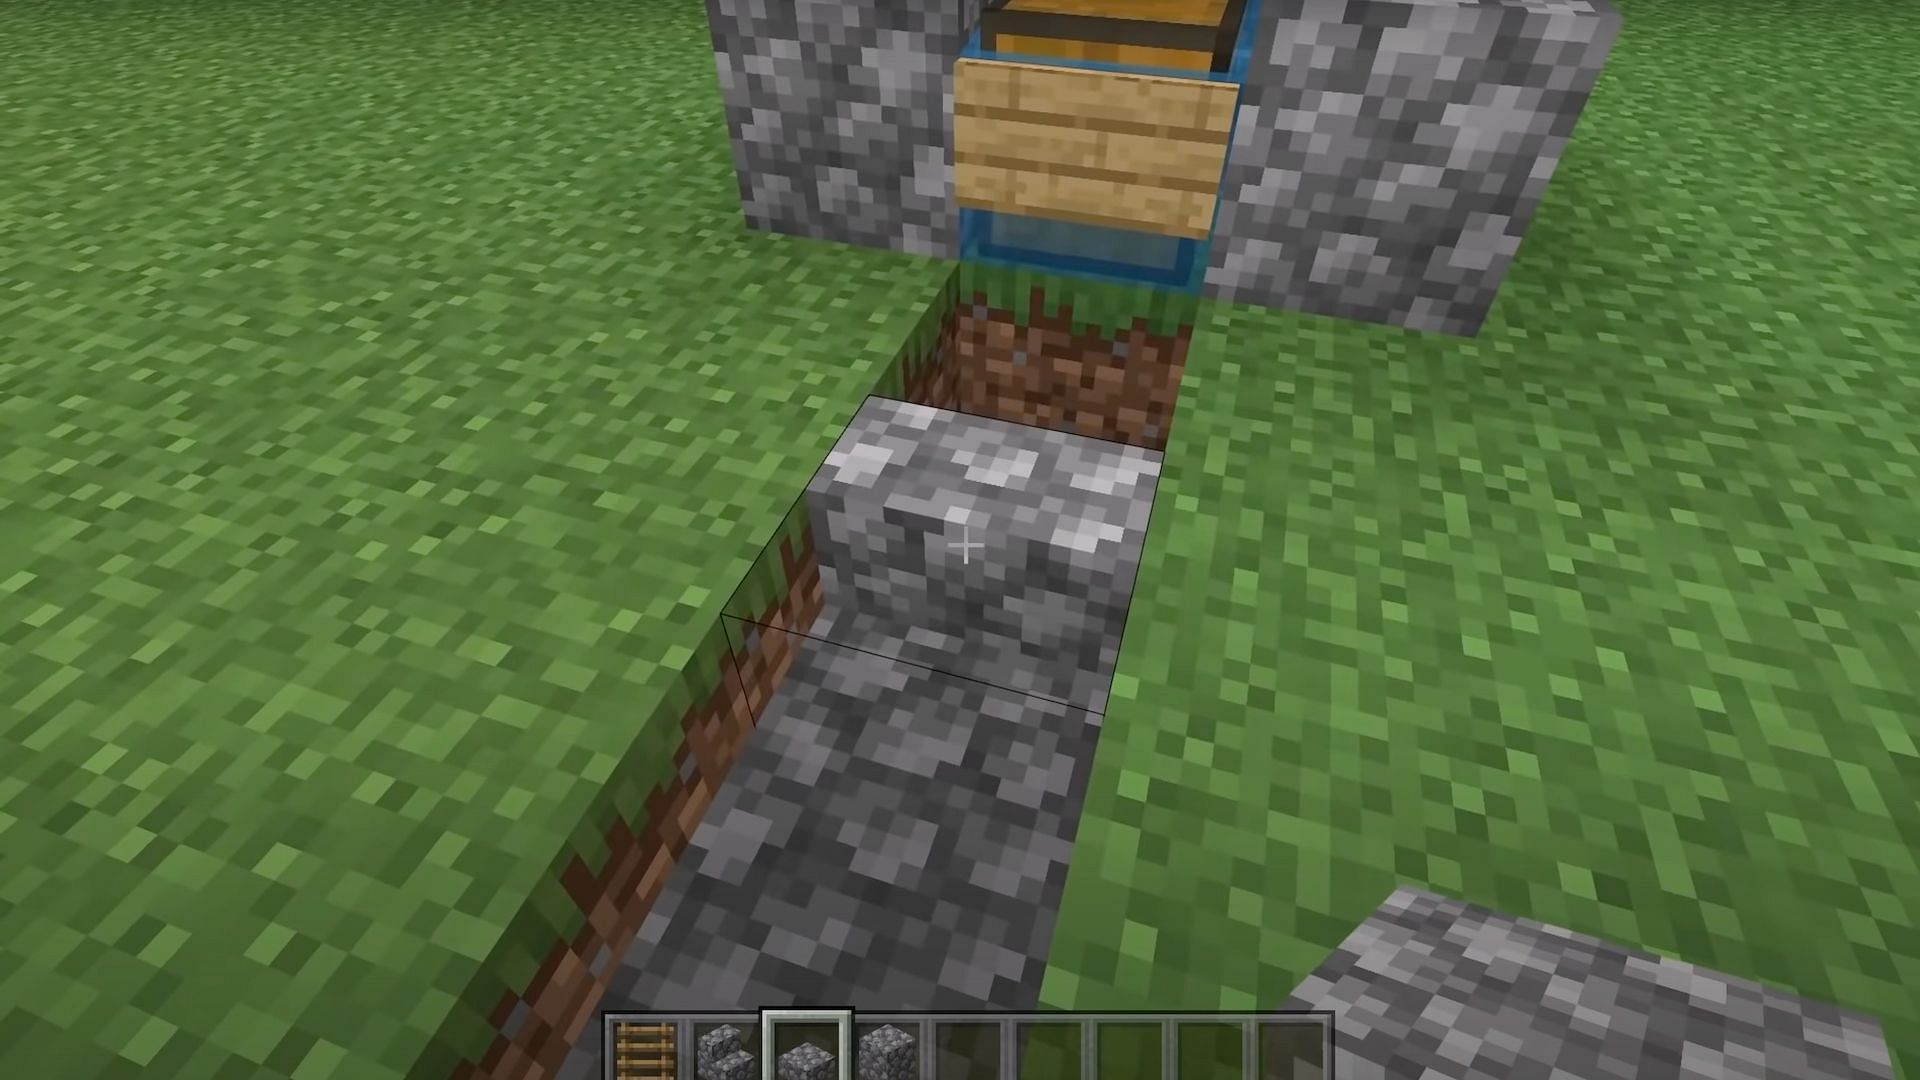
Players will want to put down a set of cobblestone stairs as well as a slab, so they have a place to stand when using the fish farm.
Step 15: Add a block and a slab to the front of the farm
Players of Minecraft will want to add a cobblestone block to the top of the chest and place a slab in front of it. This will prevent players from falling into the lava.
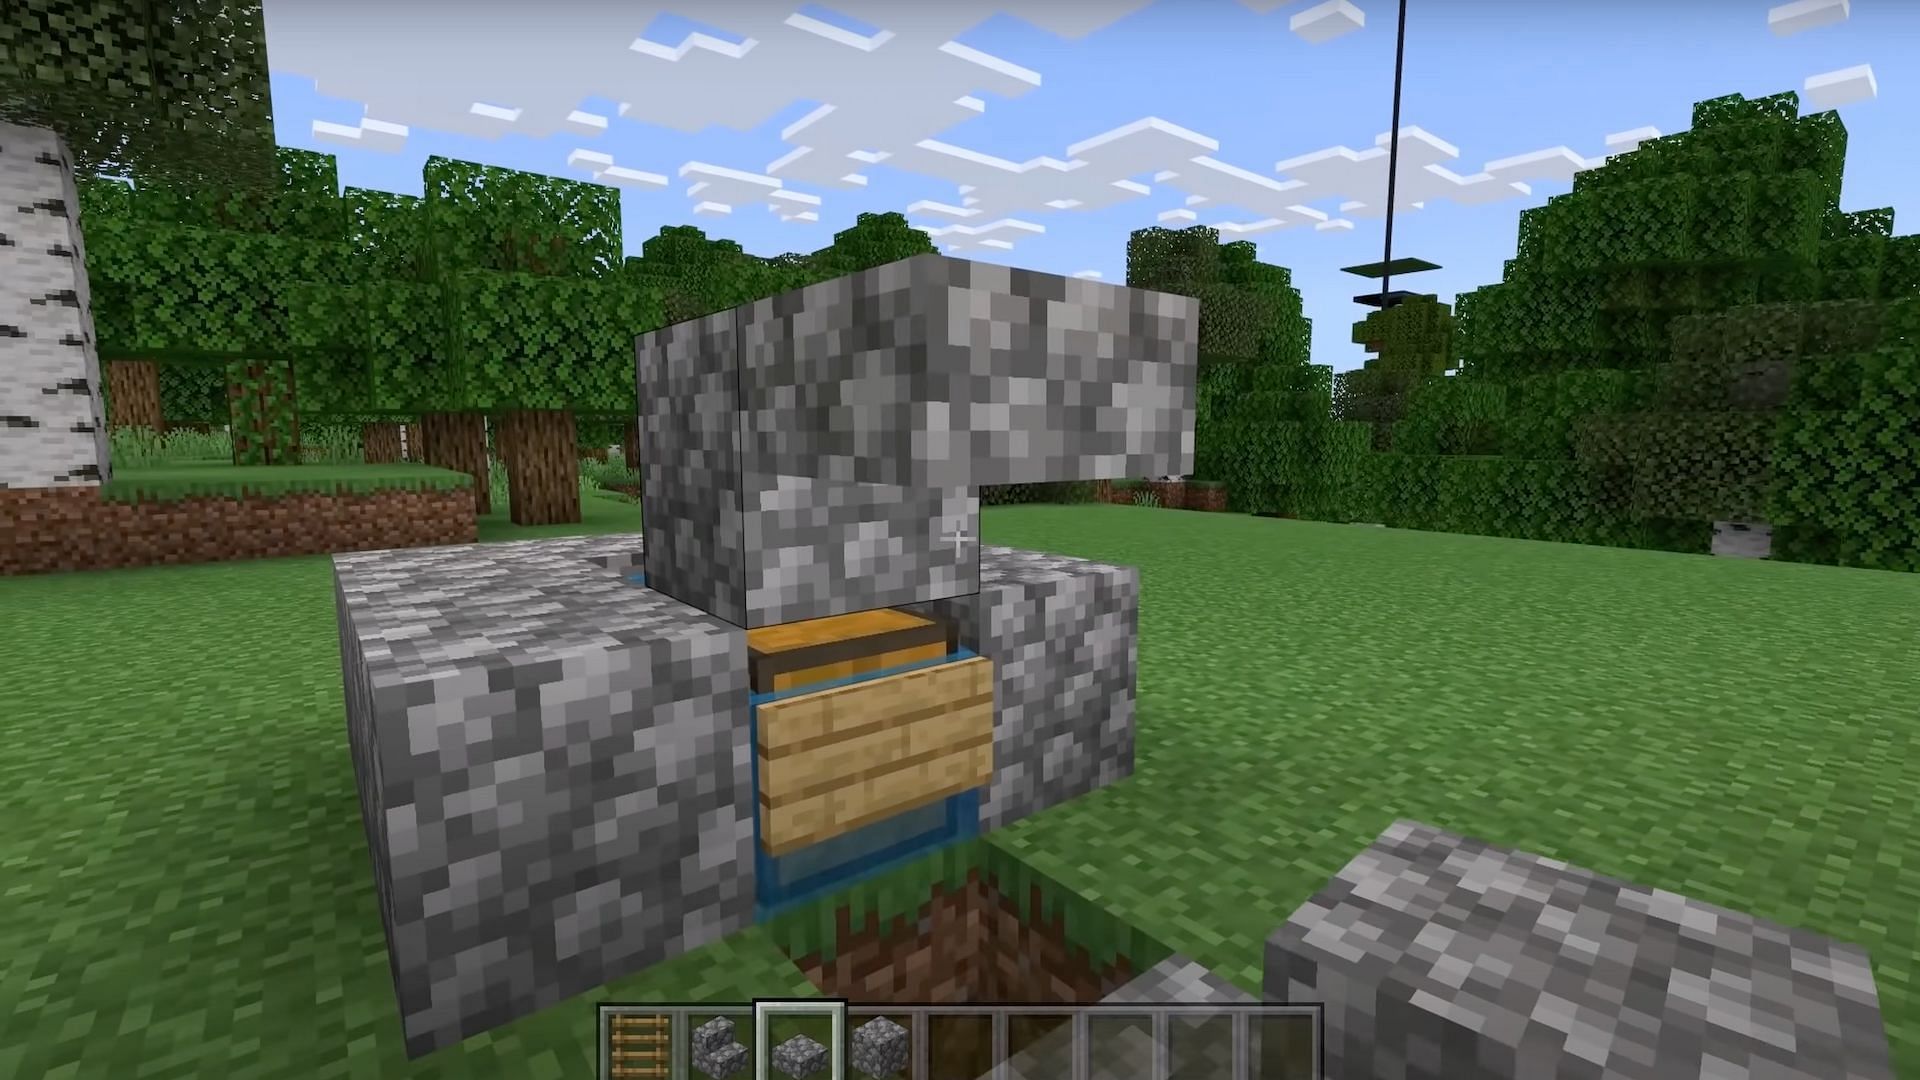
Step 16: Add 3 more blocks to the top of the farm
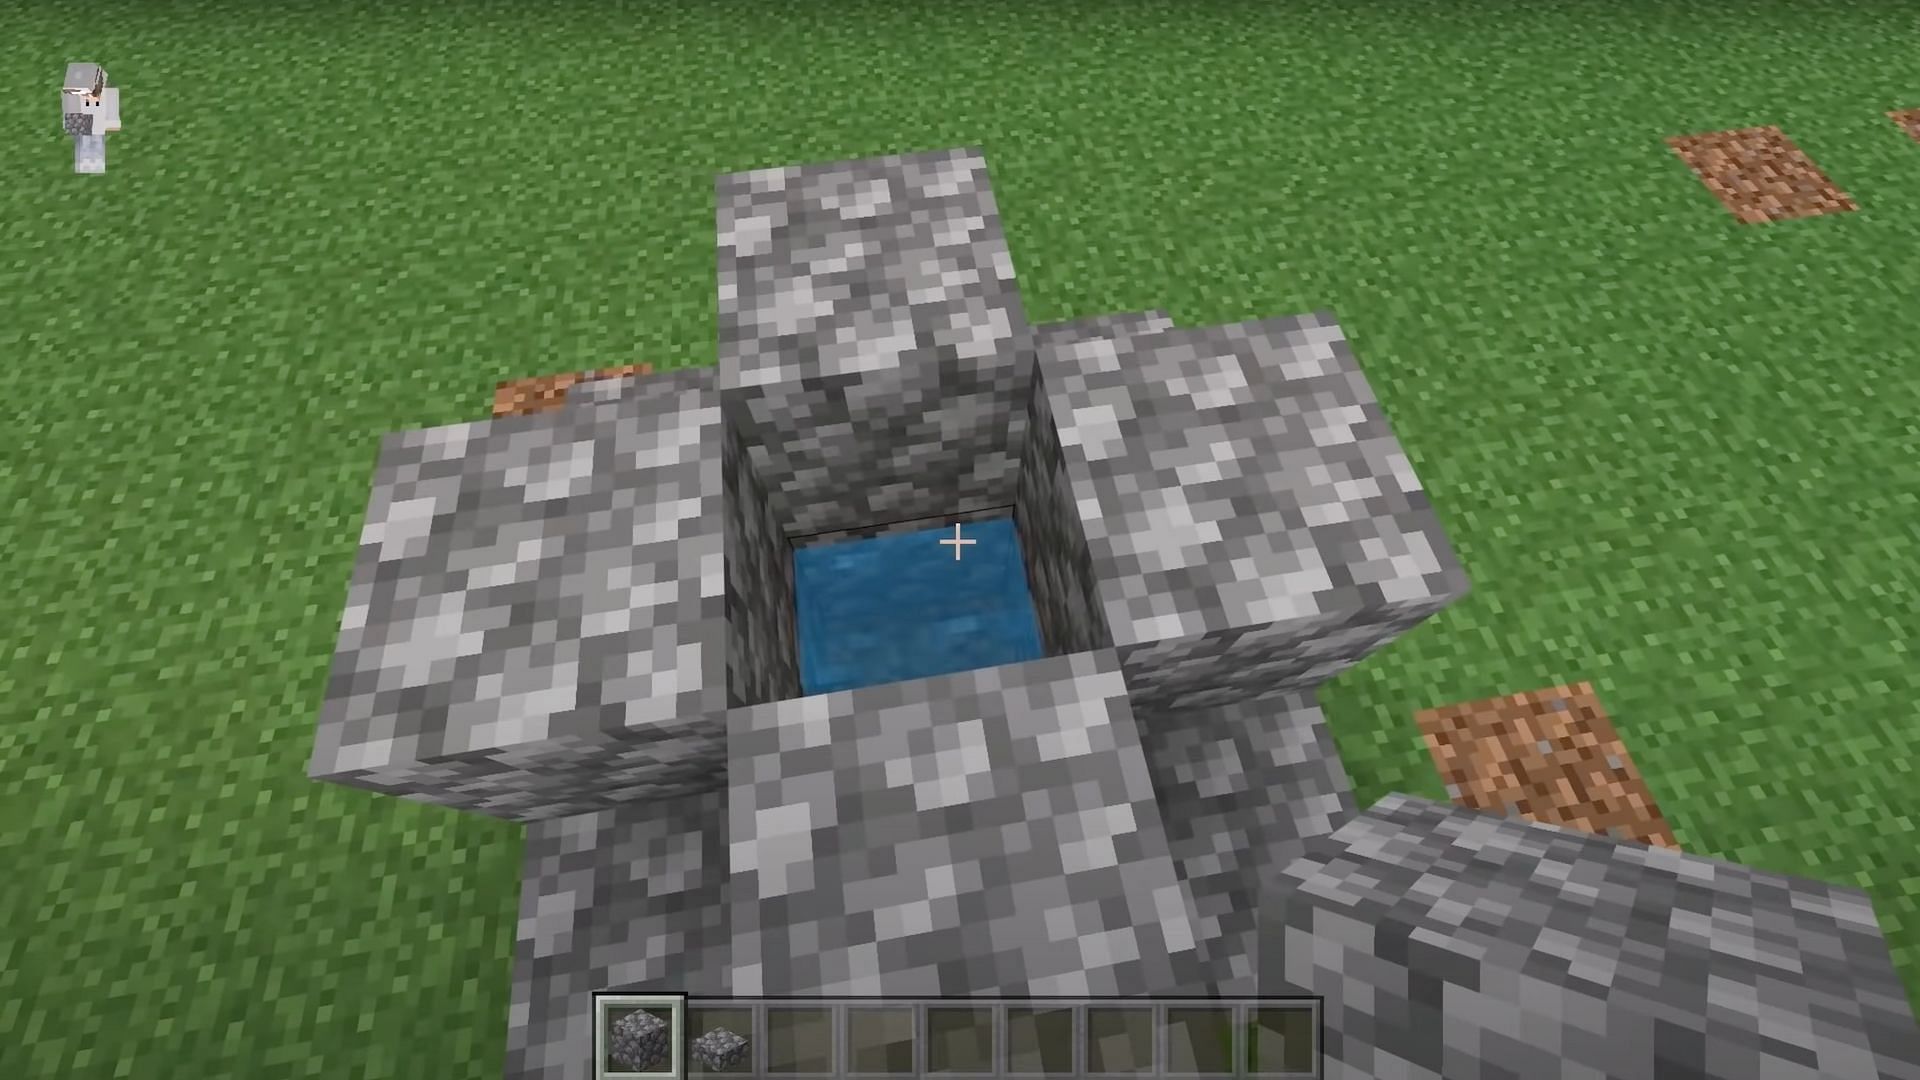
Players will need to take 3 more cobblestone blocks and place them around the water on top of the farm in a cross shape.
Step 17: Add slabs to the blocks next to the cobblestone blocks
Players should now add slabs next to all of the cobblestone blocks that they just placed.
Step 18: Catch a cod or salmon
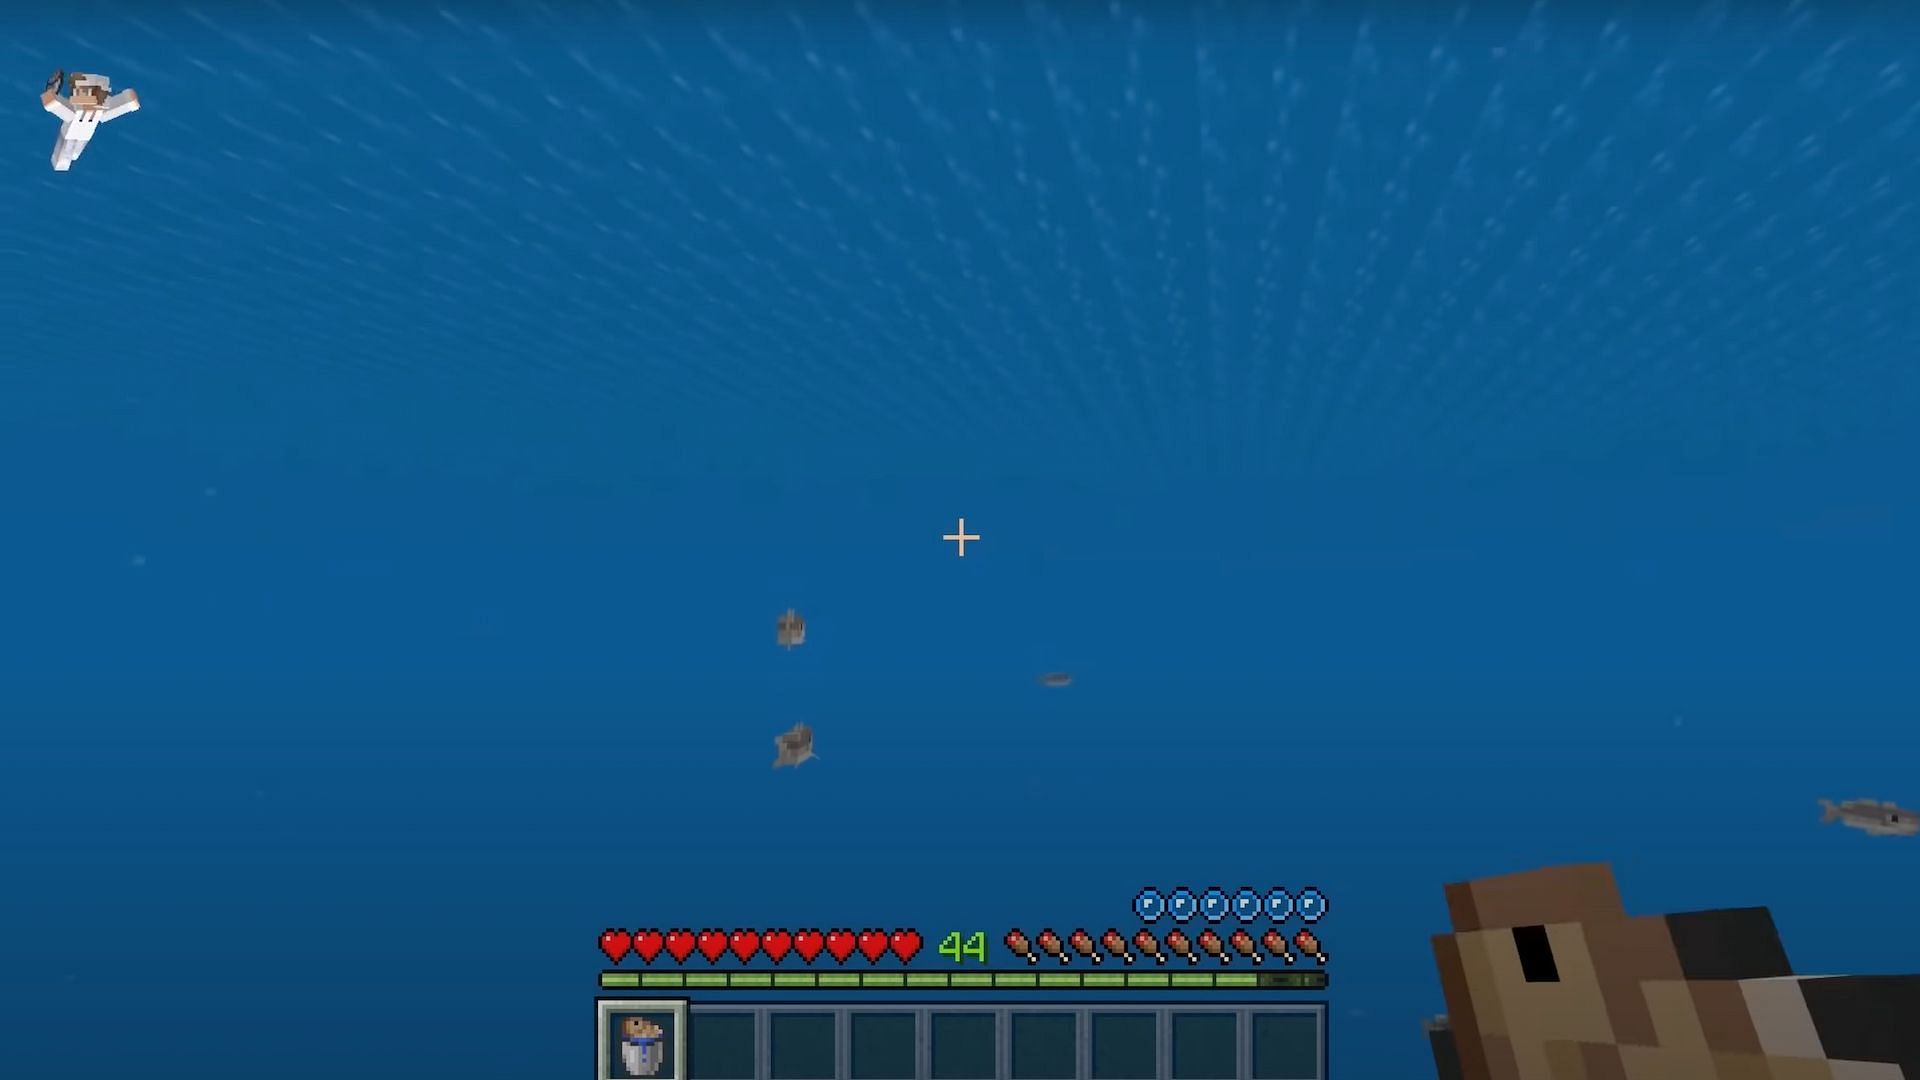
Players must now venture out into the world in search of a fish to add to their farm. They may catch either a cod or a salmon using a water bucket on a fish they want to capture. This will place the fish in the bucket.
Step 19: Add the fish to the farm
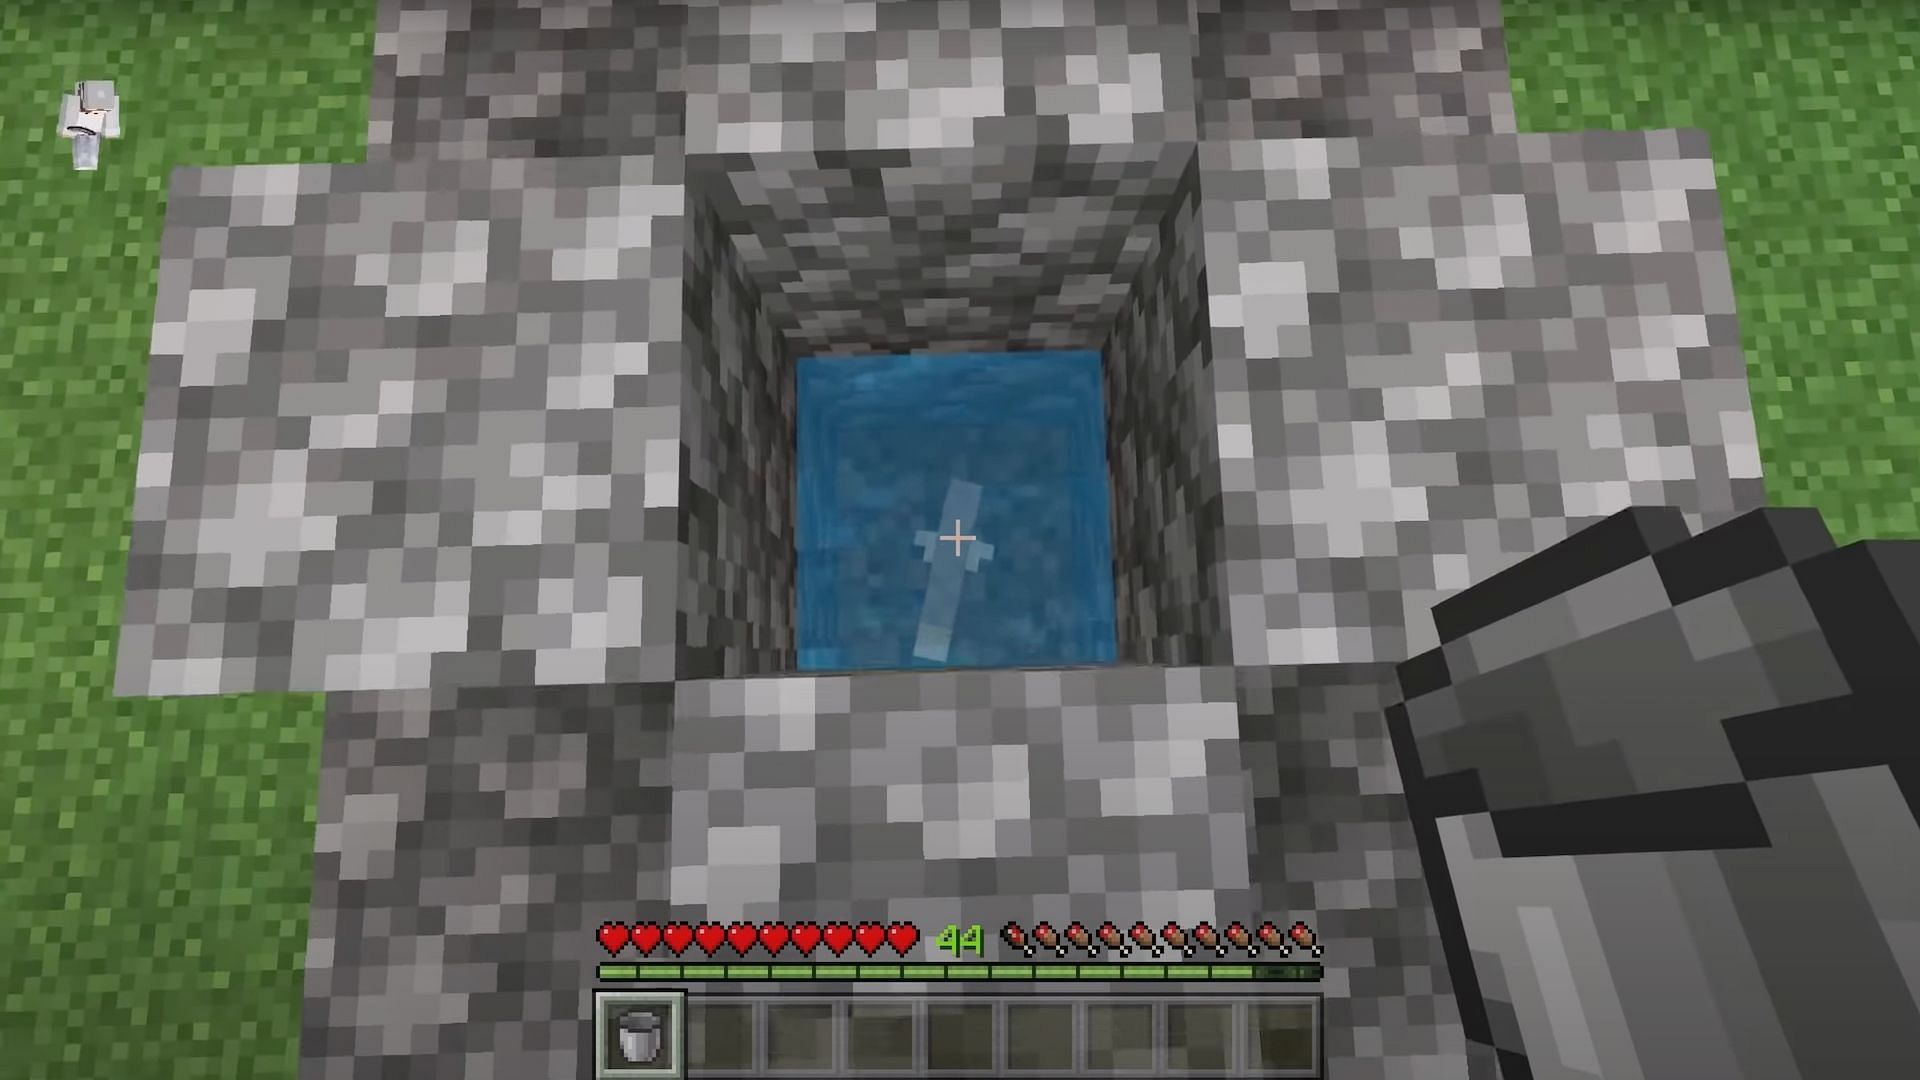
Players should now return to the farm and place the fish inside of it. If done correctly, they will see the fish swimming inside of it.
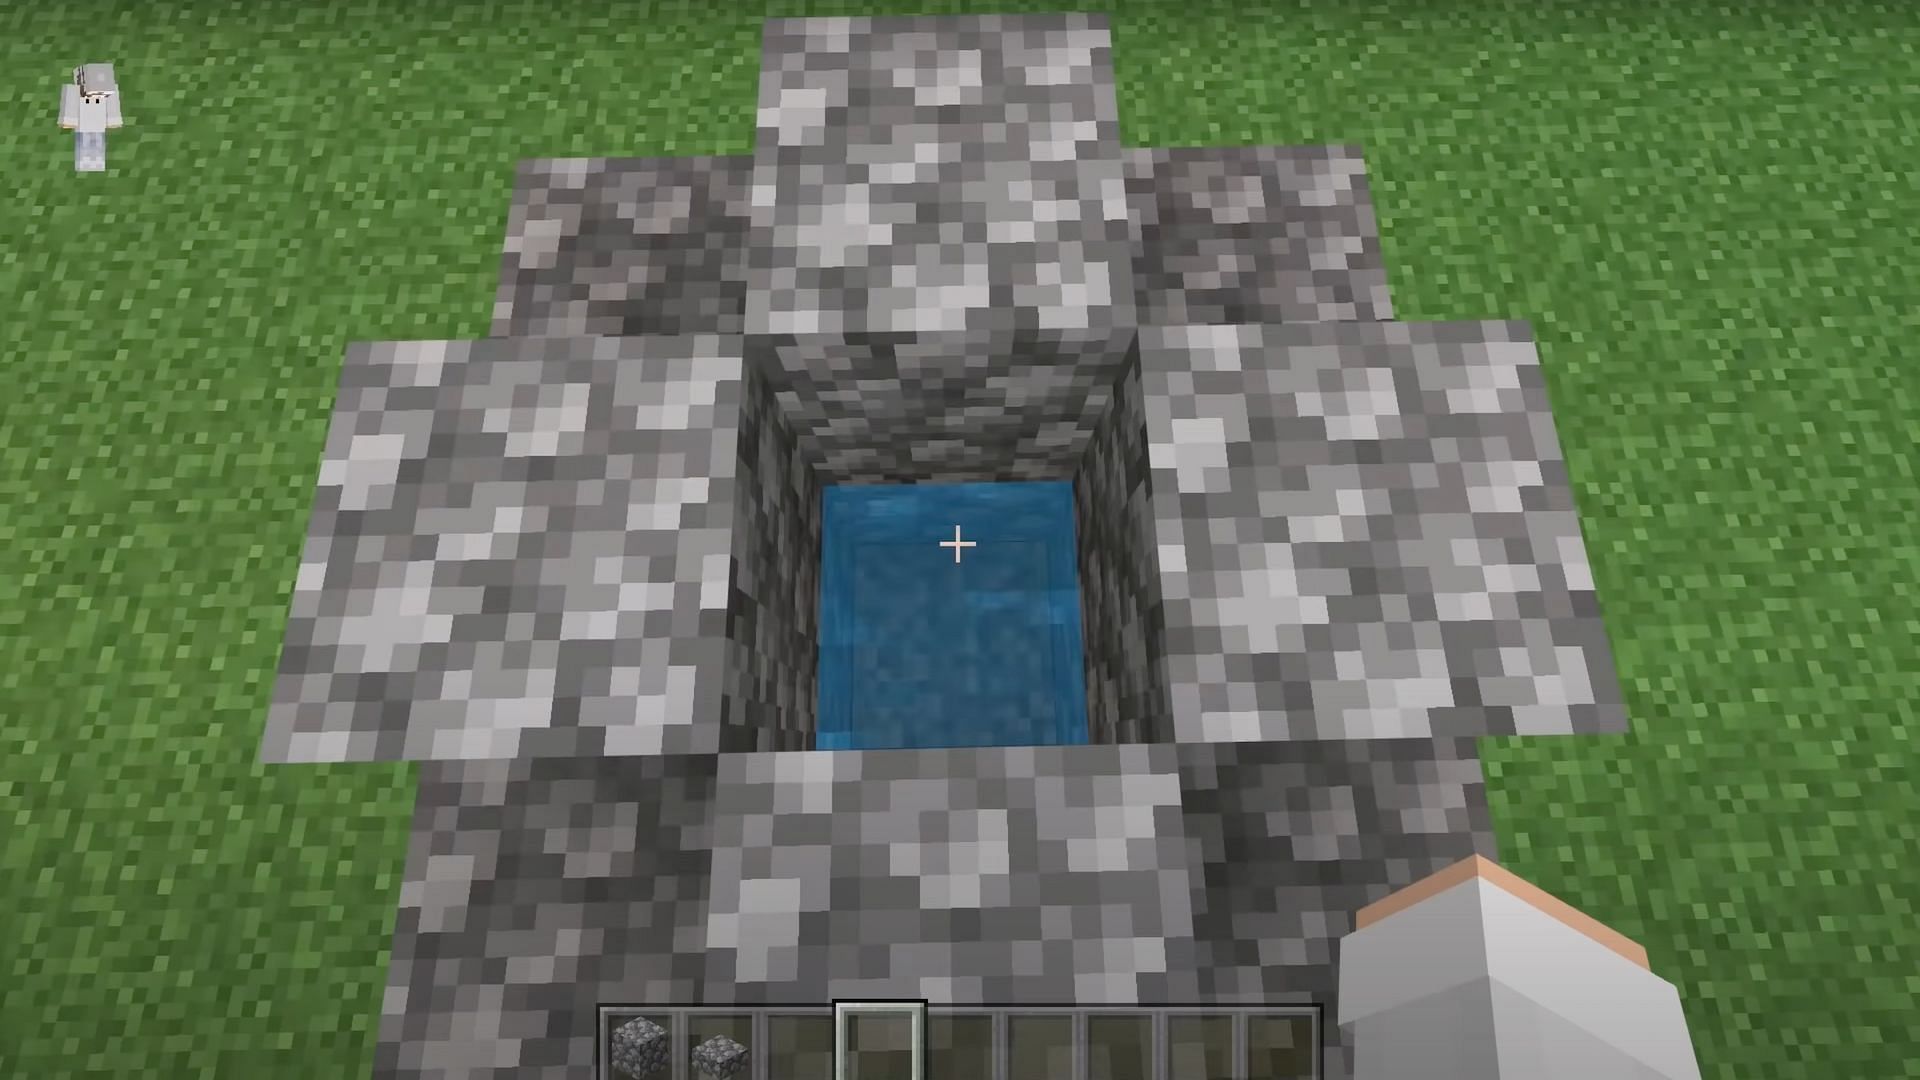
Step 20: Break the cobblestone blocks and replace them with slabs
Players of Minecraft will now want to break down the cobblestone blocks they have placed and replace them with slabs.
Step 21: Using the farm
Once players of Minecraft have completed their fish farm, it's time to use it. Players should use their fishing rod and aim their crosshairs at the top of the sign. Cast the line out, and players will be able to capture the fish, at which point the rod will automatically retract and the item will be collected in the chest below.

Uncover new worlds with our Minecraft Seed Generator!