

'%20x='0'%20y='0'%20height='100%25'%20width='100%25'%20%0A%20%20%20%20%20%20%20%20%20%20xlink%3Ahref='data:image/jpg;base64,/9j/2wBDAAYEBQYFBAYGBQYHBwYIChAKCgkJChQODwwQFxQYGBcUFhYaHSUfGhsjHBYWICwgIyYnKSopGR8tMC0oMCUoKSj/2wBDAQcHBwoIChMKChMoGhYaKCgoKCgoKCgoKCgoKCgoKCgoKCgoKCgoKCgoKCgoKCgoKCgoKCgoKCgoKCgoKCgoKCj/wgARCAAGAAoDASIAAhEBAxEB/8QAFgABAQEAAAAAAAAAAAAAAAAAAAUH/8QAFAEBAAAAAAAAAAAAAAAAAAAAAv/aAAwDAQACEAMQAAAAymWI/wD/xAAeEAACAQQDAQAAAAAAAAAAAAABAgMABBEhBRRBUf/aAAgBAQABPwC95FegssTSvMfZQMKPgxRu75SQJ9DWia//xAAUEQEAAAAAAAAAAAAAAAAAAAAA/9oACAECAQE/AH//xAAVEQEBAAAAAAAAAAAAAAAAAAAAAf/aAAgBAwEBPwCP/9k='%3E%3C/image%3E%3C/svg%3E)
After completing A Lot to Process in Borderlands 4, you can pick up two missions: One of them is Shadow of the Mountain. It takes you into Terminus Range, an area filled with caves, Kratch, and a gigantic mountain. You’ll meet the Augurs, and help them recover a rare, powerful relic. This is where the difficulty of BL4 really starts to spike, as well. The enemy packs are much bigger, filled with more annoying Badasses, and even the side content is higher level than normal.
I came through here around level 21, and the Safe Houses were guarded by level 24 enemies, making them much harder. If you have decent gear and powerful weapons (hopefully some great legendaries), these fights can be made a lot easier. It takes time, but here’s how to complete Shadow of the Mountain in Borderlands 4.
Shadow of the Mountain complete quest guide for Borderlands 4
Mission information
- Quest Giver: Zandra
- Location: Zandra’s Base
- Recommended Level: 15-20
- Approximate length of mission: 45 minutes to an hour and a half
Mission objectives
- Reach Terminus Range, Reach Belton’s Bore, Kill Order Forces
- Talk to Auger leaders, Find Defiant Calder, Kill Order forces
- Meet Defiant Calder, Follow Defiant Calder, Hack force field
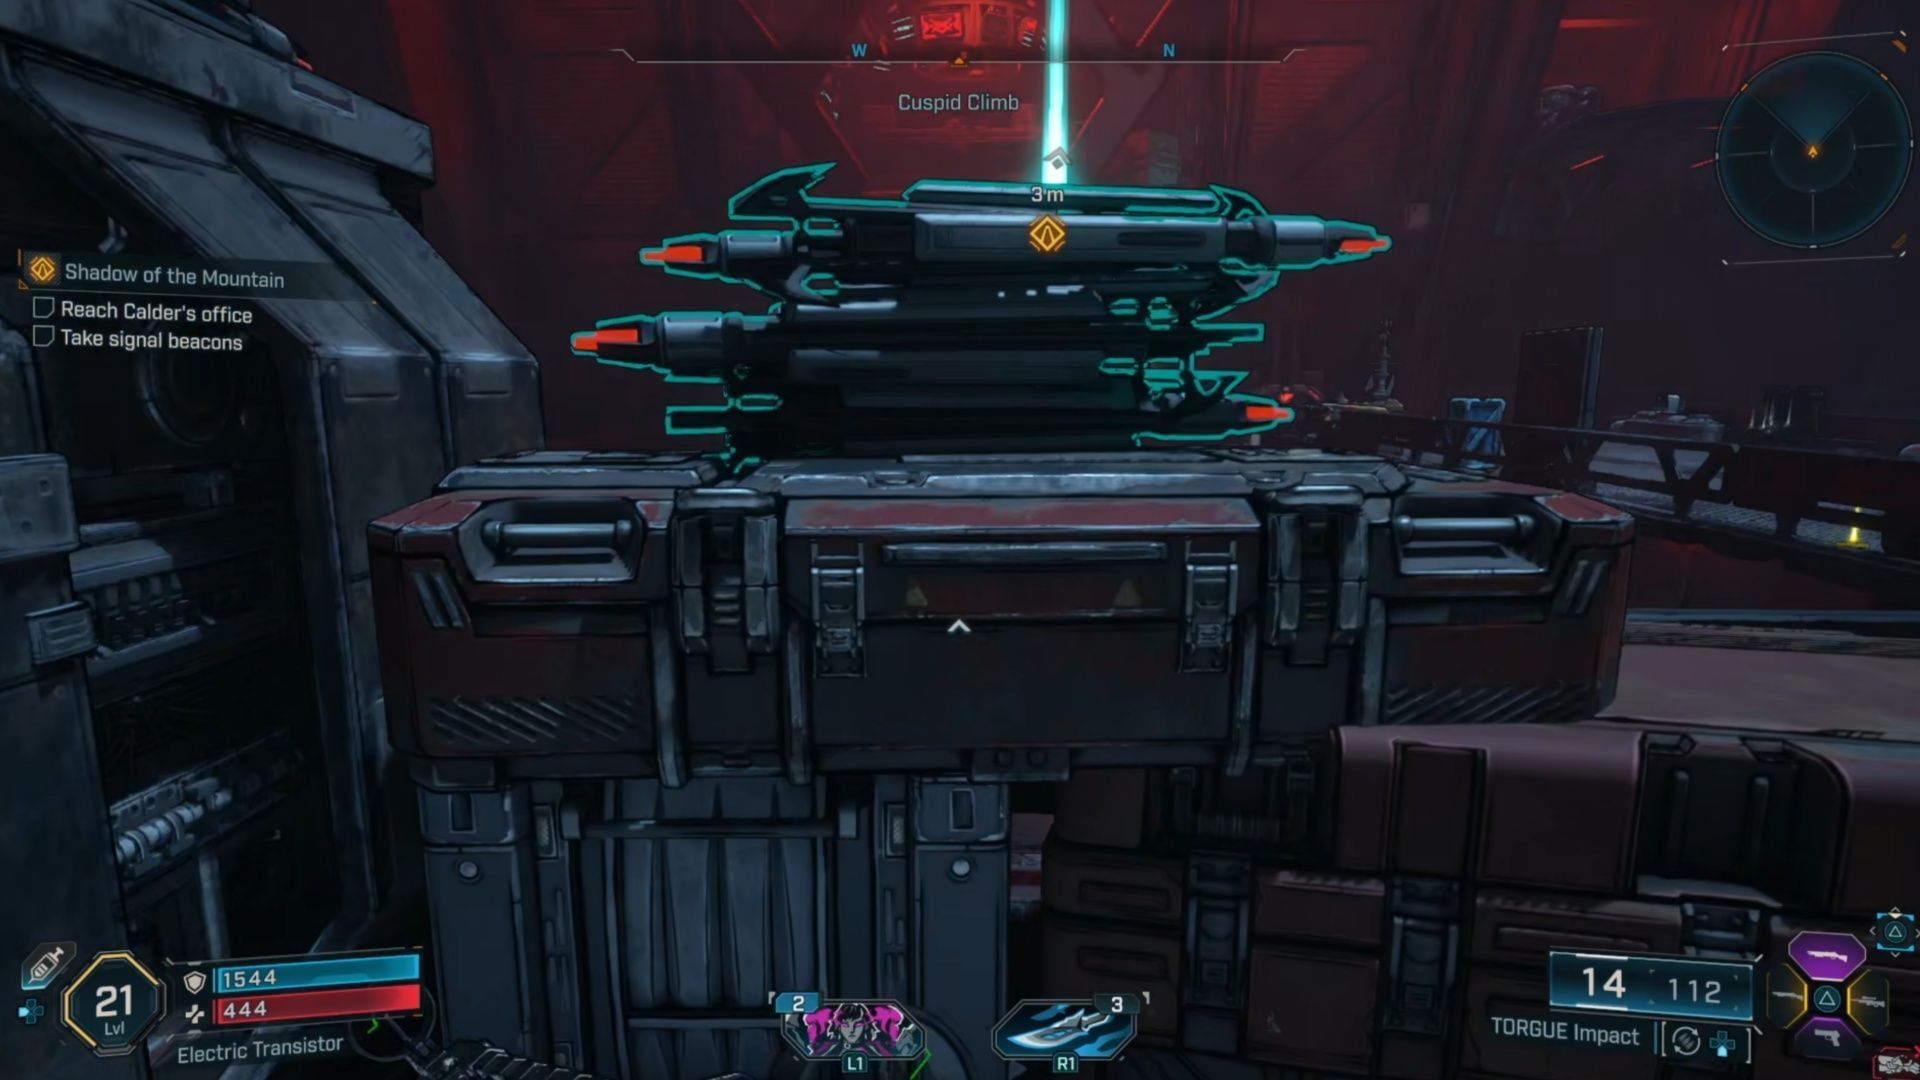
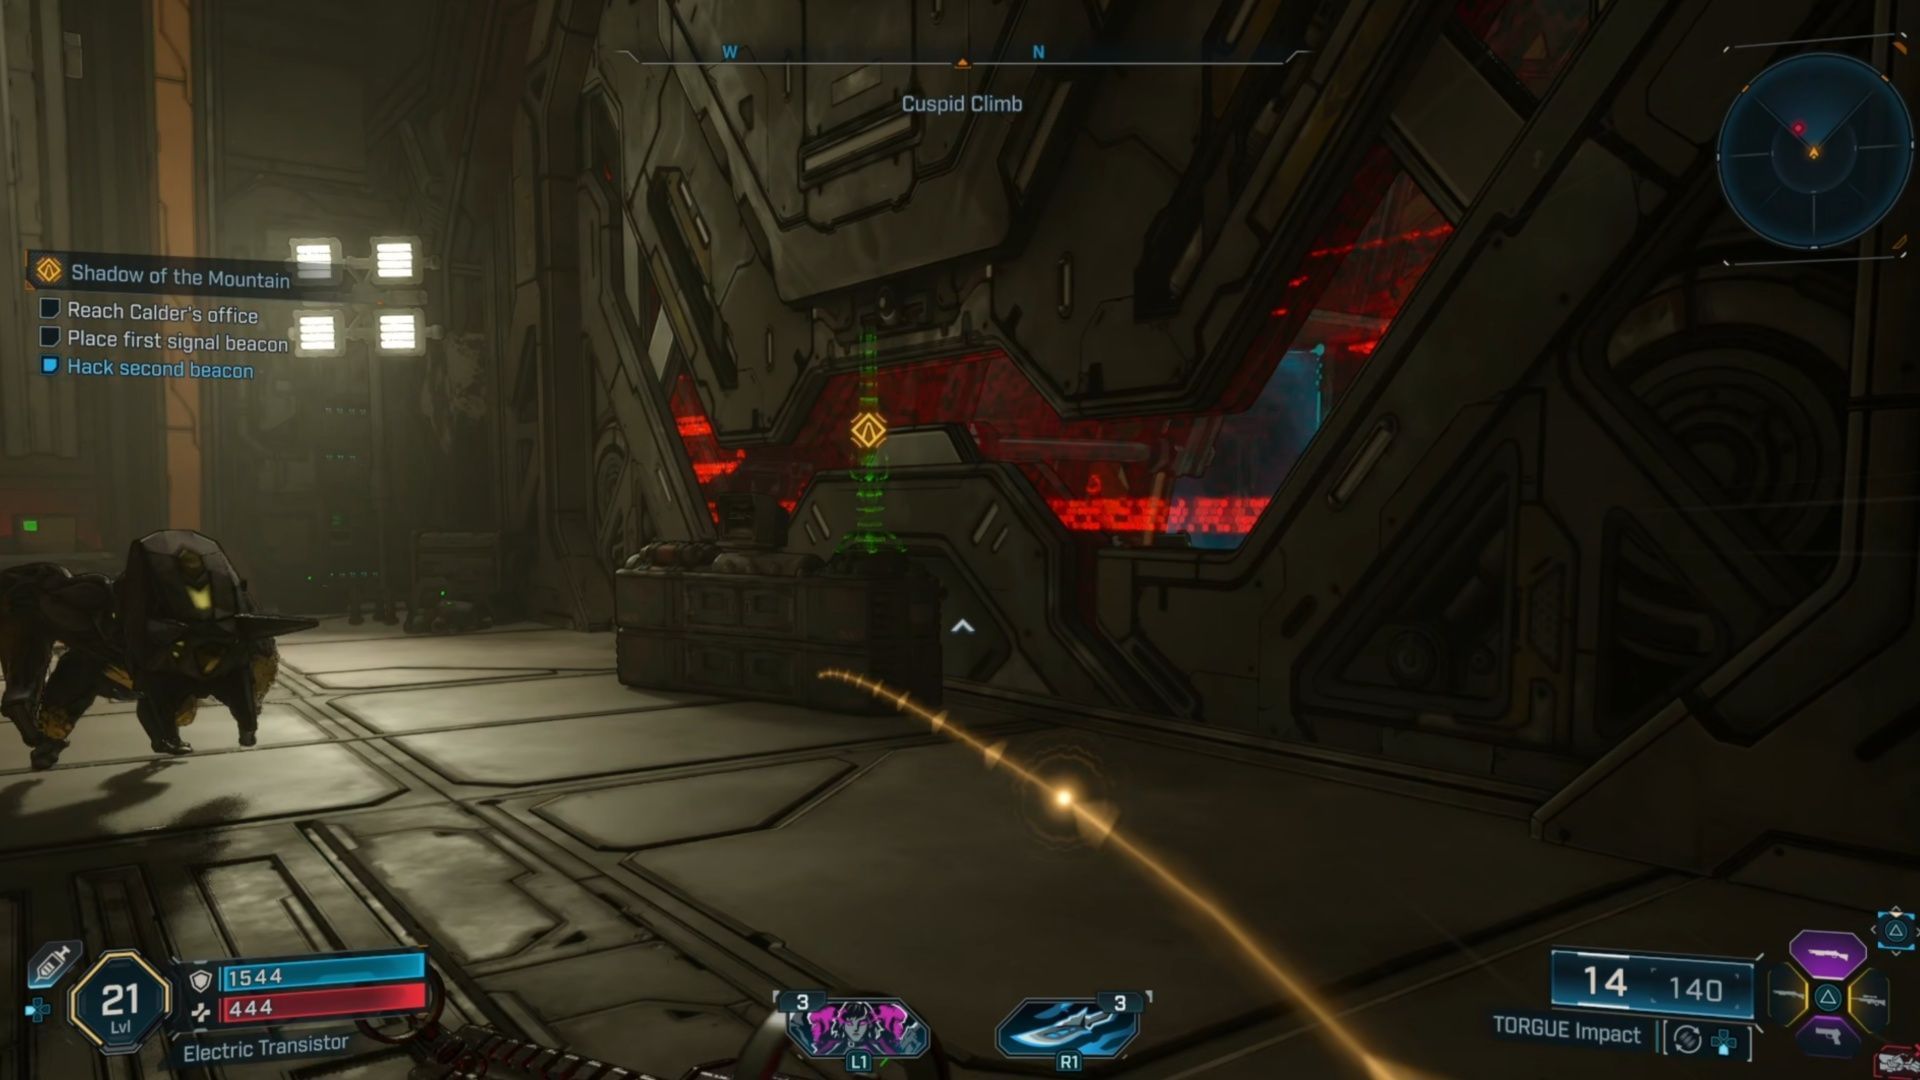
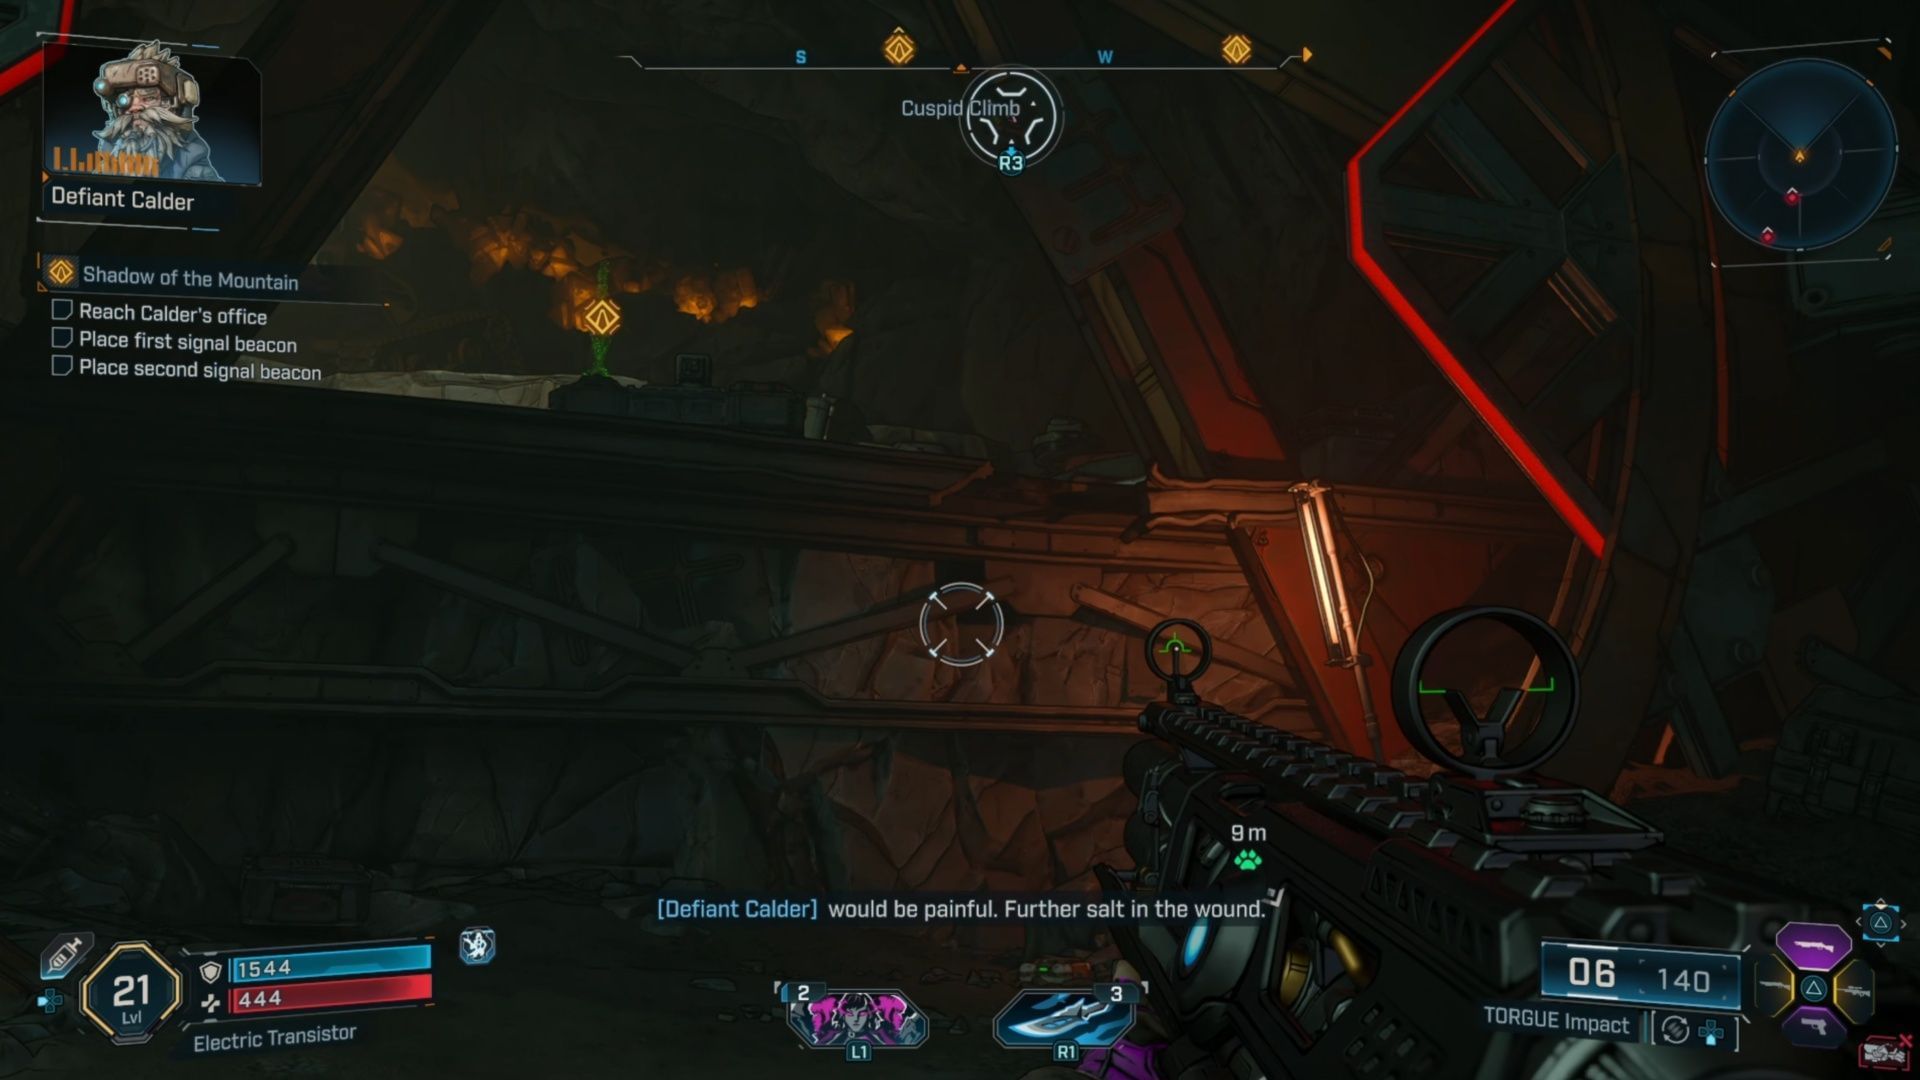
- Enter Clavehome, Reach Calder’s office and Take Signal Beacons
- Reach Calder’s office, Place signal beacons and hack signal beacons
- Reach Calder’s office, place signal beacons and hack signal beacons
- Reach Calder’s office, cross dig chamber
- Reach Calder’s office, place signal beacons and hack signal beacons
- Reach Calder’s office, Kill Skyspanner Kratch
- Reach Calder’s office, Hack office door, take relic
- Return to Belton’s Bore, follow Clader, Place Eridian relic
1) Reach Terminus Range, Reach Belton’s Bore, Kill Order Forces

You can start Shadow of the Mountain in Borderlands 4 anytime after you complete A Lot to Process but I chose to finish up Fadefield, by going through Idolator Sol and the Rush the Gate missions first. If you’ve taken the time to get the Silos in Fadefield, fast travel to Deep Seven, and ride your vehicle from there. Otherwise, you’ve got a potentially very long drive ahead of you. Well, longer. Before you can even get into Terminus Range, you’ll have to fight your way through Checkpoint Vermillion, and it’s full of annoying Synths and other Order forces.
Once you get through the Checkpoint, you’ll enter Terminus Range, and need to drive a very long way to get to Belton’s Bore. Just use your quest tracker and you’ll get there eventually. You can choose to fight the enemies, or just pass them by. It really depends on if you feel like you need XP or not.
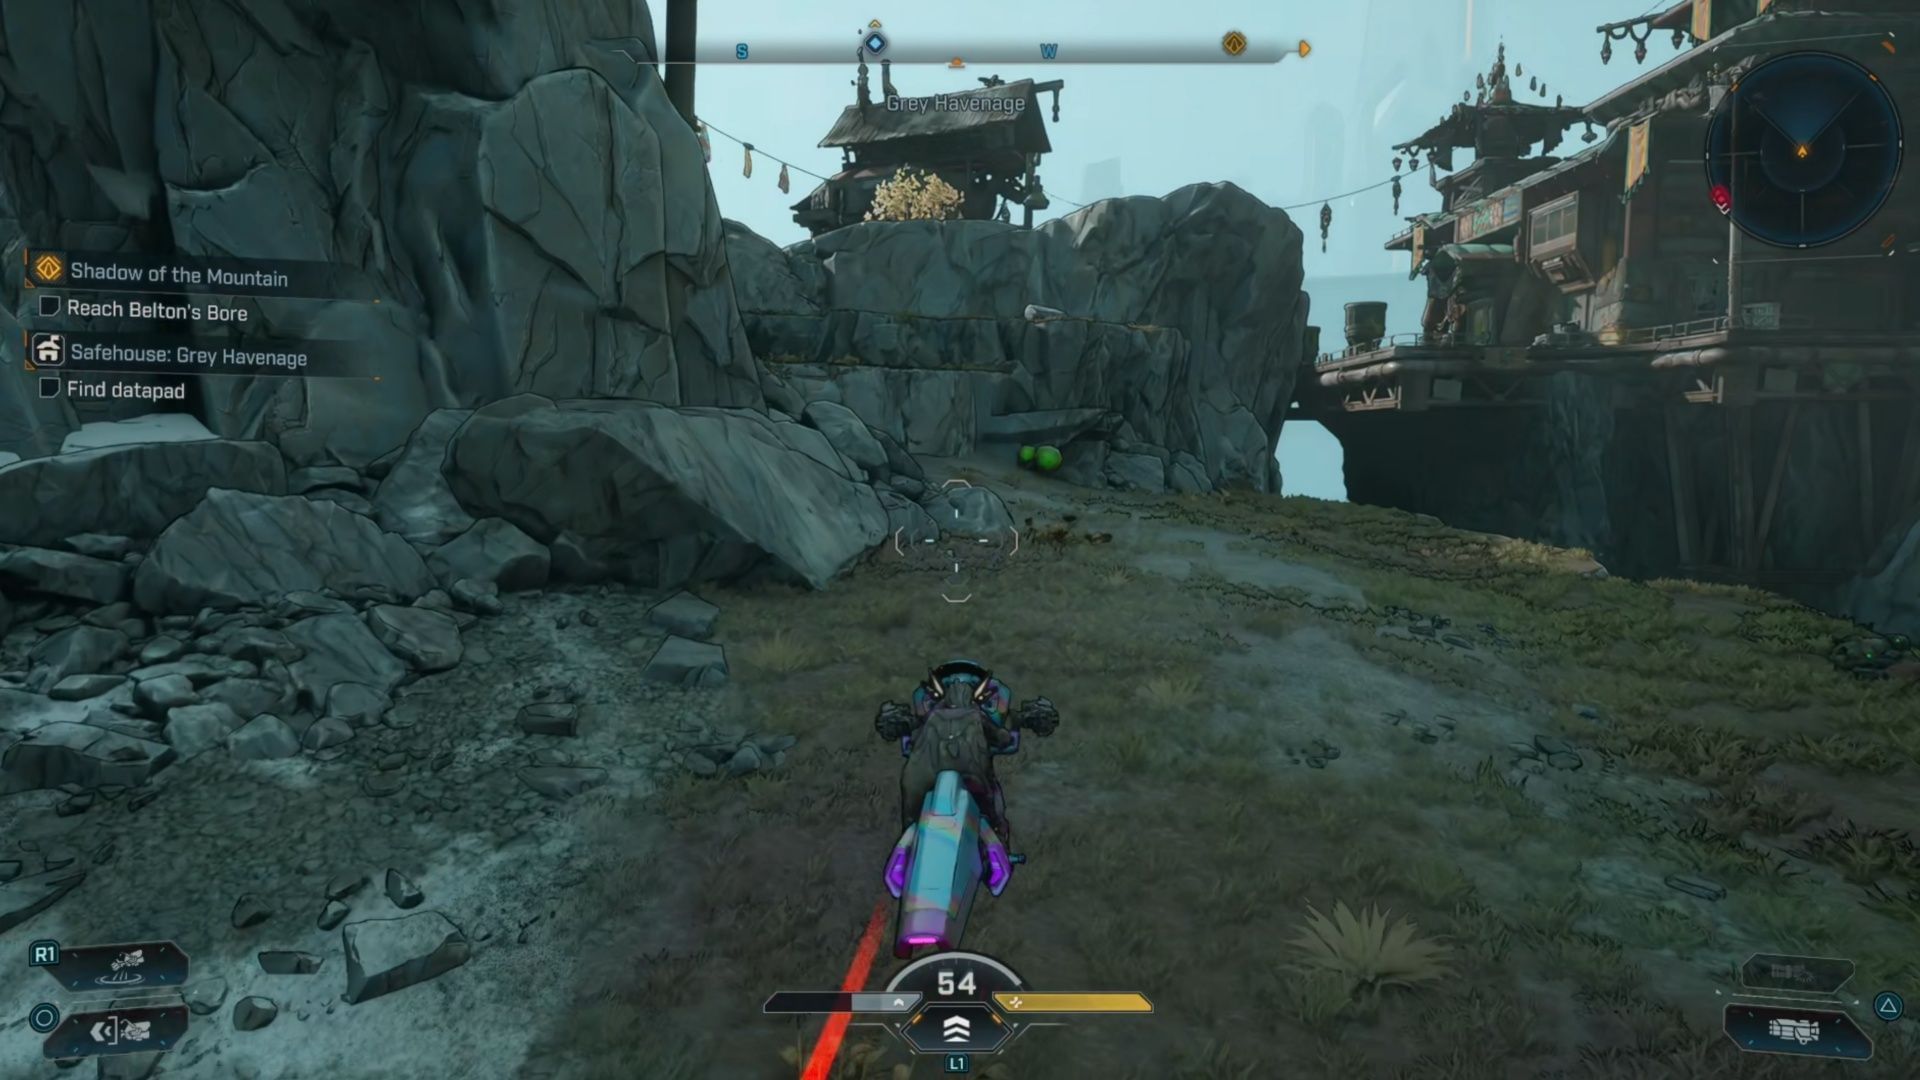
There’s also a Safe House on the way, and it will pop up on your activities as you get closer: Grey Havenage. You’ll have to do a small jumping puzzle to get the Datapad for it, but it’s not especially challenging. I recommend picking it up just to have another fast travel location.
Shortly after Grey Havenage, take the elevator that’s barring your path. It will take you to the top, and you’ll be immediately dumped into a fight with the Order forces. Take care of them, hop back on your vehicle, and resume the long drive to Belton’s Bore.
Upon arriving at Belton’s Bore, you’ll find the Order forces are hard at work harassing the Augers. This is arguably an easier fight than the ones you fought on the way here, thankfully. Eliminate them, and chat with the Augers.
2) Talk to Auger leaders, Find Defiant Calder, Kill Order forces

When you talk to the Auger leaders, they put the blame of their future misfortune on you. They feel (and probably rightly so) that the Order will blame the dead soldiers on the Augers. They’ll recommend that if you really want to fight the Order, you go find Defiant Calder, and you’ll be given a quest marker to go find him for the next step of this Borderlands 4 mission.
It’s a really long drive (again) to reach Defiant Calder, and on the way, you’ll come across another Safe Haven. This one is going to likely be several levels above you, and is riddled with Badasses and at least two Bulkheads.
You’ll see Heritage Opus along the way and can go do it if you wish. You’ll also find one of the Crawlers on the way, The Great Work. This one’s actually on the main path, though.Otherwise, proceed down the road where you’ll rescue Defiant Calder and Kill the Order forces. Like any good Vault Hunter in Borderlands 4 though, you’re going to slaughter these dorks. For a change of pace, it’s a pretty easy fight.
3) Meet Defiant Calder, Follow Defiant Calder, Hack force field
After the battle, head over and Meet Defiant Calder for Borderlands 4’s Shadow of the Mountain mission. The two of you will chat, and he’ll ask for your help. Since you can’t really say no, follow Defiant Calder, and then hack the nearby Force Field. You just have your ECHO Device to do it, and it takes no effort whatsoever.
Take a look at this setup, though, because you’re going to be doing quite a bit of this hacking in Clavehome. Thankfully you only need to get the items that will be required once. No farming necessary. When you’re ready, go inside, and begin the next part of this Borderlands 4 mission.
4) Enter Clavehome, Reach Calder’s office and Take Signal Beacons
The major object for this Borderlands 4 mission is to reach Calder’s office, but we won’t be doing that anytime soon. I’ve mentioned it in each step because it’s still our overarching goal for Shadow of the Mountain.
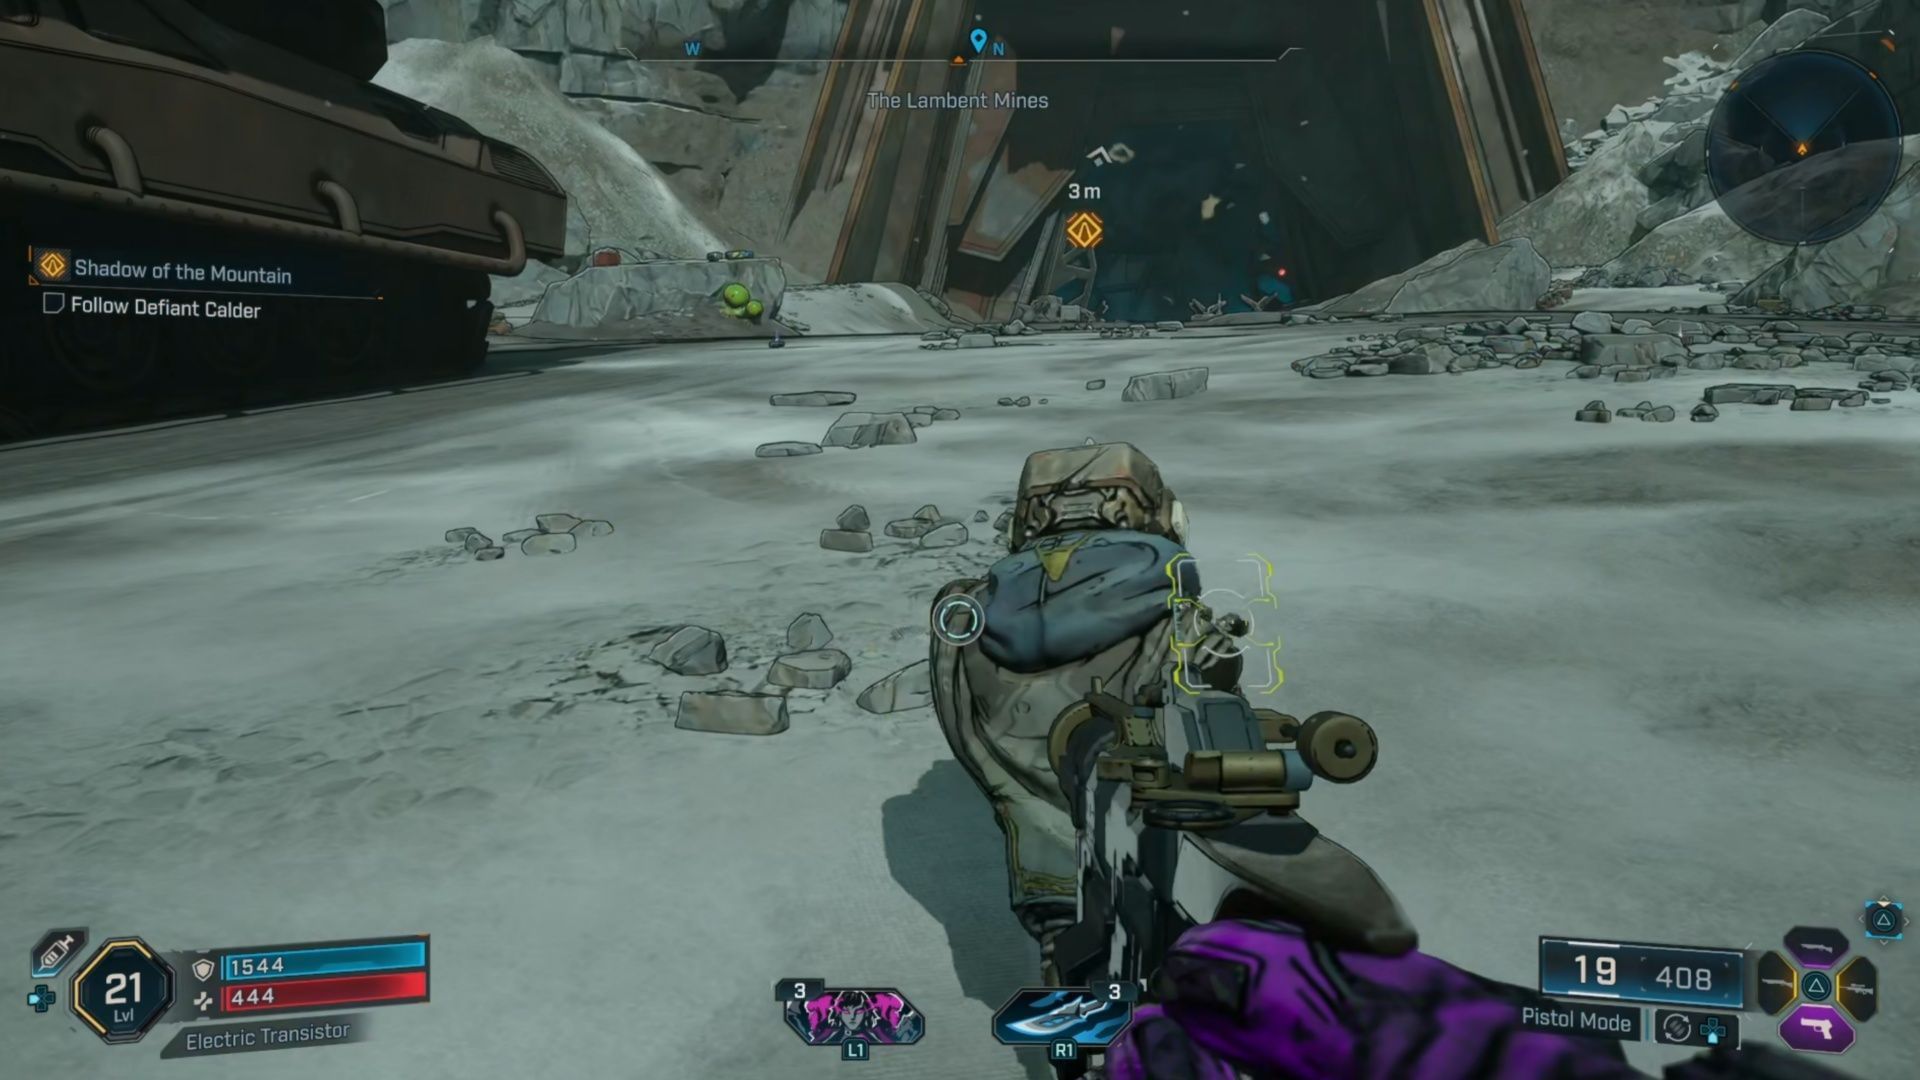
The Signal Beacons are in the first main room you get to, which is filled with Synths. Beware of the Bulkheads, because they often have elemental properties, and can really hit hard. Take your time going through the platforms in The Lambent Mines and defeat the synths.
There are quite a few Badasses too, as well as a Badass Hulkhead, among others. It’s unwise to rush to the middle of this fight, though. Take it in turns, going through sections and clearing enemies before moving on. You’ll find the Signal Beacons on the upper area, near where you first entered the Lambent Mine (where all the fighting kicked off). Your ECHO Device can lead you to them.
5) Reach Calder’s office, Place signal beacons and hack signal beacons

The next part of the Shadow of the Mountain mission in Borderlands 4 requires you to place and hack a pair of signal beacons. As you place one, you can go ahead and hack it immediately, so do that. They’ll have a green shimmer around them, and a quest marker. The ECHO Device will lead you right to them.
There’s two of them in this section, and they aren’t hidden in any tricky, weird areas. It’s also the first of a few of these things you’ll need to hack. This will break down the Force Field that prevents you from moving on.
6) Reach Calder’s office, place signal beacons and hack signal beacons
The next area will also immediately kick off with more fighting. You can’t start placing and hacking beacons until all of the enemies have been defeated, so take your time and push through this large open area. In addition to the Order foes, you’ll also start seeing Kratches, which tease the boss at the end of the area.
The Badasses in this section weren’t as bad, like the Badass Domination Engine, but once again, you also have to deal with two Bulkheads simultaneously. It’s truly one of the more annoying things in this part of the game. After clearing this area and moving on, you’ll get a call from Vile Lictor, the enemy commander of Terminus Range.
After a few more enemies, you’ll reach a dead end where you once more need to place signal beacons and hack signal beacons. To find the area for these, you’ll need to take a pair of Grapple Points that lead you higher and higher. The first Beacon is placed up here, and the second will be through the doorway up in this area. The ECHO Device can easily lead you there.
7) Reach Calder’s office, cross dig chamber

Placing the previous Signal Beacons will give you access to the Dig Chamber, which you need to cross as this part of the Borderlands 4 mission. Follow the path you opened up with the Signal Beacons, to find a switch to pull. This gives you access to the Dig Chamber. It’s gore filled, and clear that a slaughter took place.
You fight a lot of Kratches in this chamber, as well. Since I play Vex, the Specters really come in handy in picking these off in quick succession. There is also a Badass Kratch in here to deal with.
8) Reach Calder’s office, place signal beacons and hack signal beacons
After you clear out the Kratch swarm in this area of Borderlands 4, follow the quest marker to another force field. You can grapple up above it to place and hack one of the Signal Beacons. The second one requires you to backtrack a little, and Grapple up to the platforms above you.
They’re easy to find and hack, so don’t stress out about it. The ECHO Device will guide you right to the Grapple Point. When you’re done, head through the next room, and get ready for the boss fight: Skyspanner Kratch.
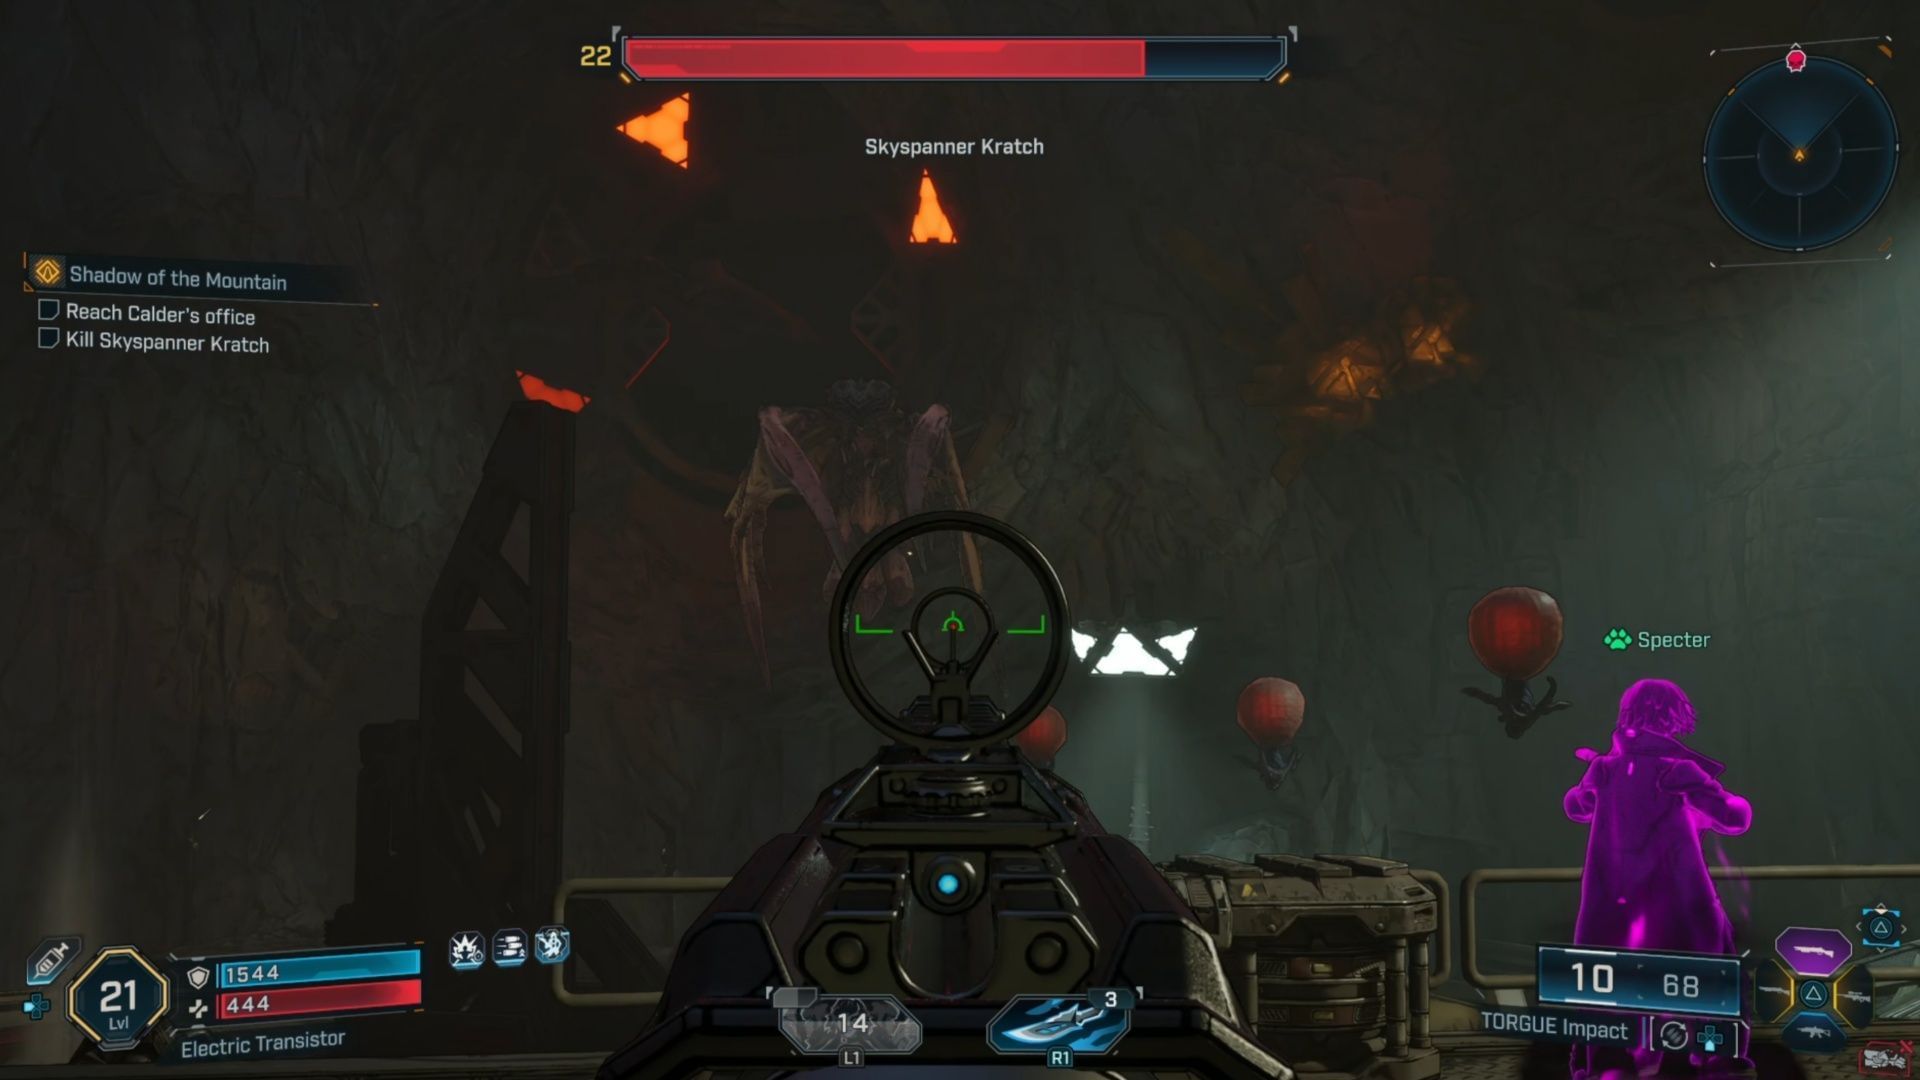
9) Reach Calder’s office, Kill Skyspanner Kratch
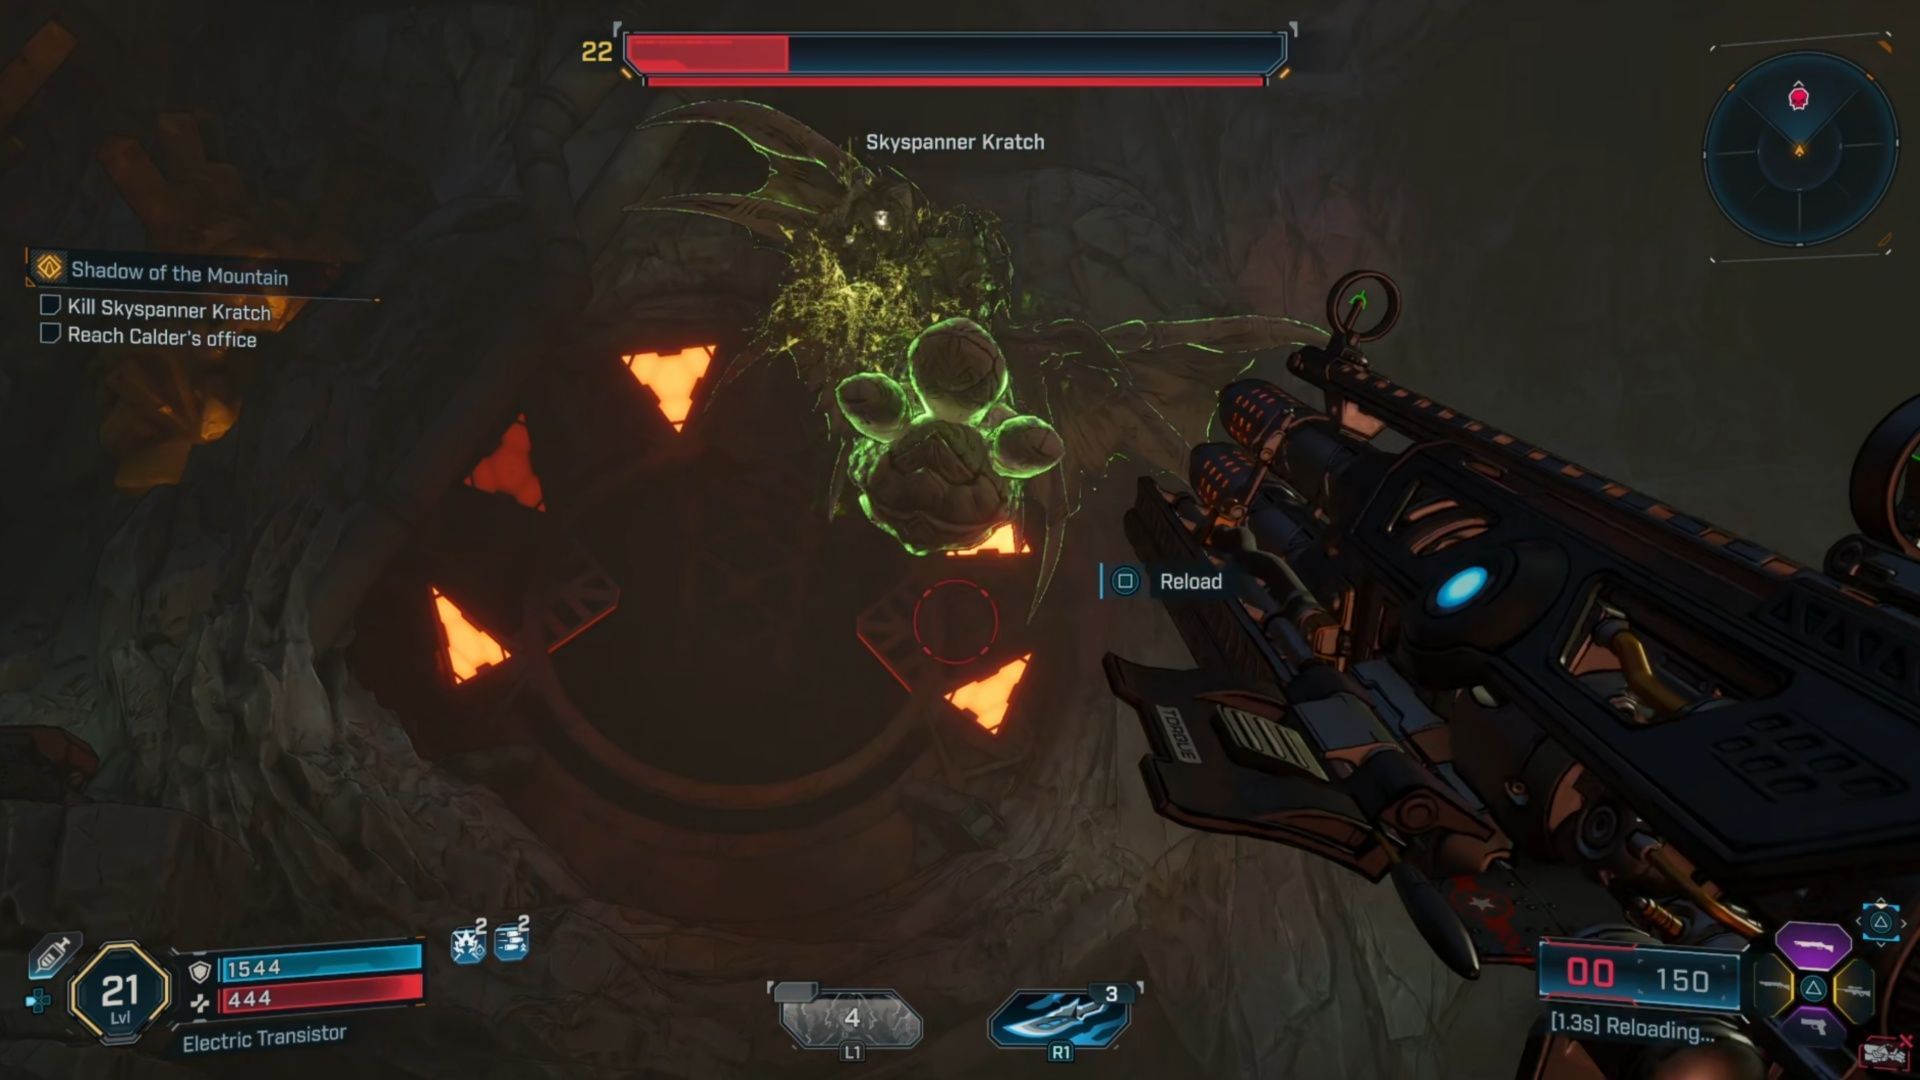
The Skyspanner Kratch is the first major boss of this section, and likely the first major boss after you leave the Fadefields. The Skyspanner Kratch fight in Borderlands 4 really wants you to move around this room to stay safe. You can spend most of the time on the center platform, but I wouldn’t.
When it starts summoning Balloons, I recommend moving to the far platform at the end, because you have more room to maneuver, and can easily take out the balloons.
You can also use them to get a Second Wind, should you die and one’s still on the screen. These balloons always have some kind of elemental damage attached to them, which can help you with the boss, and also hurt you a great deal if they get too close.
It appears if you blow them up when they’re near Skyspanner Kratch, whatever element they have will be inflicted onto the boss. That’s how I got Corrosive damage on the boss to shred through his health faster.
The Sonic Blasts he uses don’t hurt, but they can push you down into the acid that’s on the ground of this Borderlands 4 battle. This boss can also launch a swarm of what look like mini-bats that can easily take your whole health bar in one volley. You want to stay as far away as possible, and kite to the larger platform when balloons appear. When this fight is over, grab your loot,
10) Reach Calder’s office, Hack office door, take relic
Go to the larger platform at the far end of the room in Borderlands 4, and above the door, there’s a terminal for ECHO-4 to hack for you. This lets you into Calder’s office finally, where you can claim the Eridian Relic. Just enjoy the bit of story you get here, because it’s time to turn around and leave.
11) Return to Belton’s Bore, follow Calder, Place Eridian relic
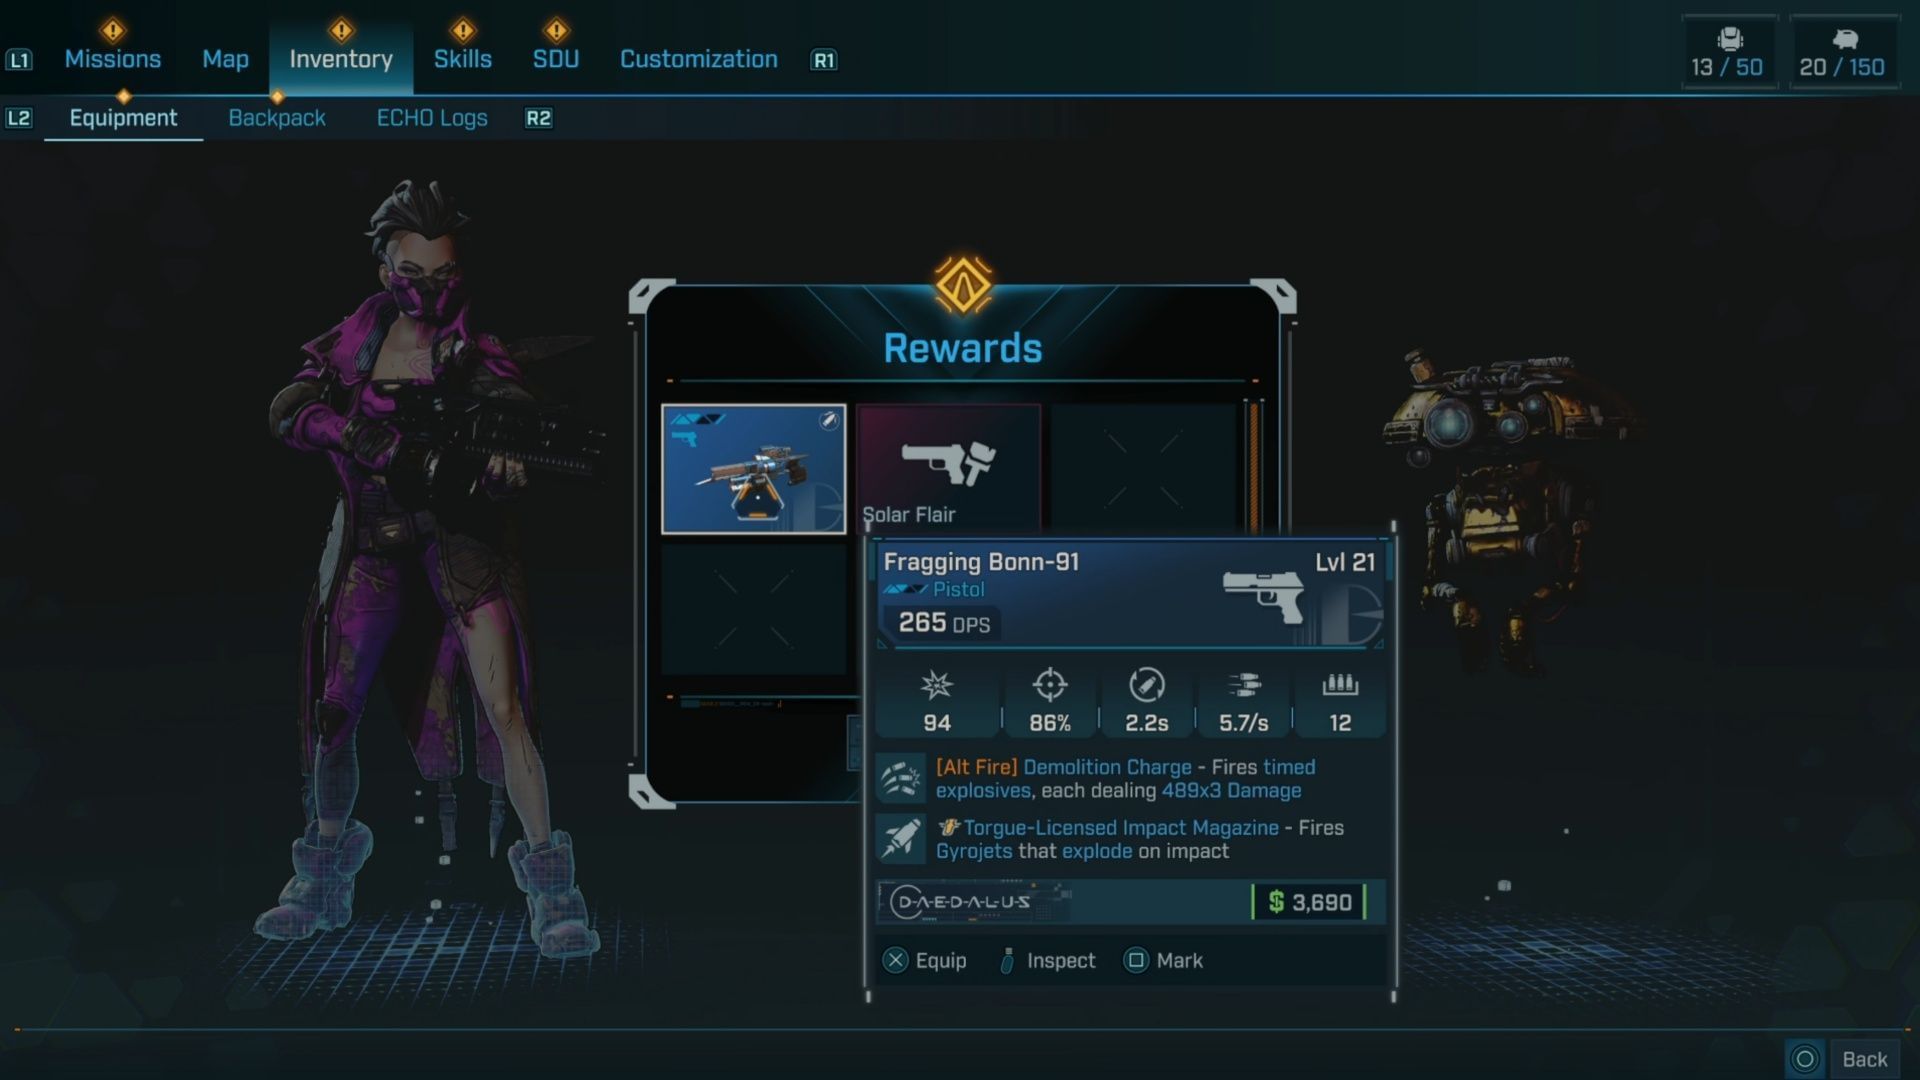
It’s a very long drive back to Belton’s Bore in Borderlands 4, even if you have a Safe House unlocked. You can’t fast travel here yet, so just drive all the way back, and after following Calder and speaking with the Augers, you can then place the Eridian Relic. This wraps up the quest, and grants you XP, Cash, Eridium, a Rare/Epic Pistol, and the Solar Flair Weapon Skin.
Check out our other Borderlands 4 guides and features
- All Weapon Manufacturers in Borderlands 4
- Who is the villain of Borderlands 4?
- What are Enhancements in Borderlands 4?
- Does Borderlands 4 have co-op and crossplay?
