
'%20x='0'%20y='0'%20height='100%25'%20width='100%25'%20%0A%20%20%20%20%20%20%20%20%20%20xlink%3Ahref='data:image/jpg;base64,/9j/2wBDAAYEBQYFBAYGBQYHBwYIChAKCgkJChQODwwQFxQYGBcUFhYaHSUfGhsjHBYWICwgIyYnKSopGR8tMC0oMCUoKSj/2wBDAQcHBwoIChMKChMoGhYaKCgoKCgoKCgoKCgoKCgoKCgoKCgoKCgoKCgoKCgoKCgoKCgoKCgoKCgoKCgoKCgoKCj/wgARCAAGAAoDASIAAhEBAxEB/8QAFgABAQEAAAAAAAAAAAAAAAAAAAIH/8QAFAEBAAAAAAAAAAAAAAAAAAAABP/aAAwDAQACEAMQAAAAziBR/wD/xAAhEAACAQMDBQAAAAAAAAAAAAABAwIEERIABhMFFCExUf/aAAgBAQABPwCo34UdrVNoIAoWEcamHjMT5vh9F9O3SprpsX01OE5GUcvdtf/EABURAQEAAAAAAAAAAAAAAAAAAAAR/9oACAECAQE/AI//xAAUEQEAAAAAAAAAAAAAAAAAAAAA/9oACAEDAQE/AH//2Q=='%3E%3C/image%3E%3C/svg%3E)
The Coil is one of the two primary activities that debuted in Destiny 2 Season of the Wish. The other activity is the Riven's Lair, which can be categorized as a more accessible version of The Coil. While The Coil puts forth random encounters and short runs, Riven's Lair throws tougher enemies, a rogue-like, alongside a scoring system with limited revivals.
This article will guide you through The Coil activity in Season of the Wish, including the modifiers, different encounters, and the scoring system.
Disclaimer: This article is subjective and relies solely on the writer's opinion.
Destiny 2: The Coil activity guide in Season of the Wish
The Coil has a total of four different encounters, each presenting other challenges, enemies, terrains, and bosses. To unlock The Coil, complete the Week 1 quest step of "Wishing All the Best." The Coil comes with the following modifiers:
- Overcharged weapon types
- Elemental threats
- Galvanized
- Epitaph
- Limited revives
- Togetherness: Health regen is reduced if fireteam members are not closed by.
- Extinguish: The game pushes everyone to orbit upon wipe.
- Multiplicity: Enemies become more challenging with more fire team members.
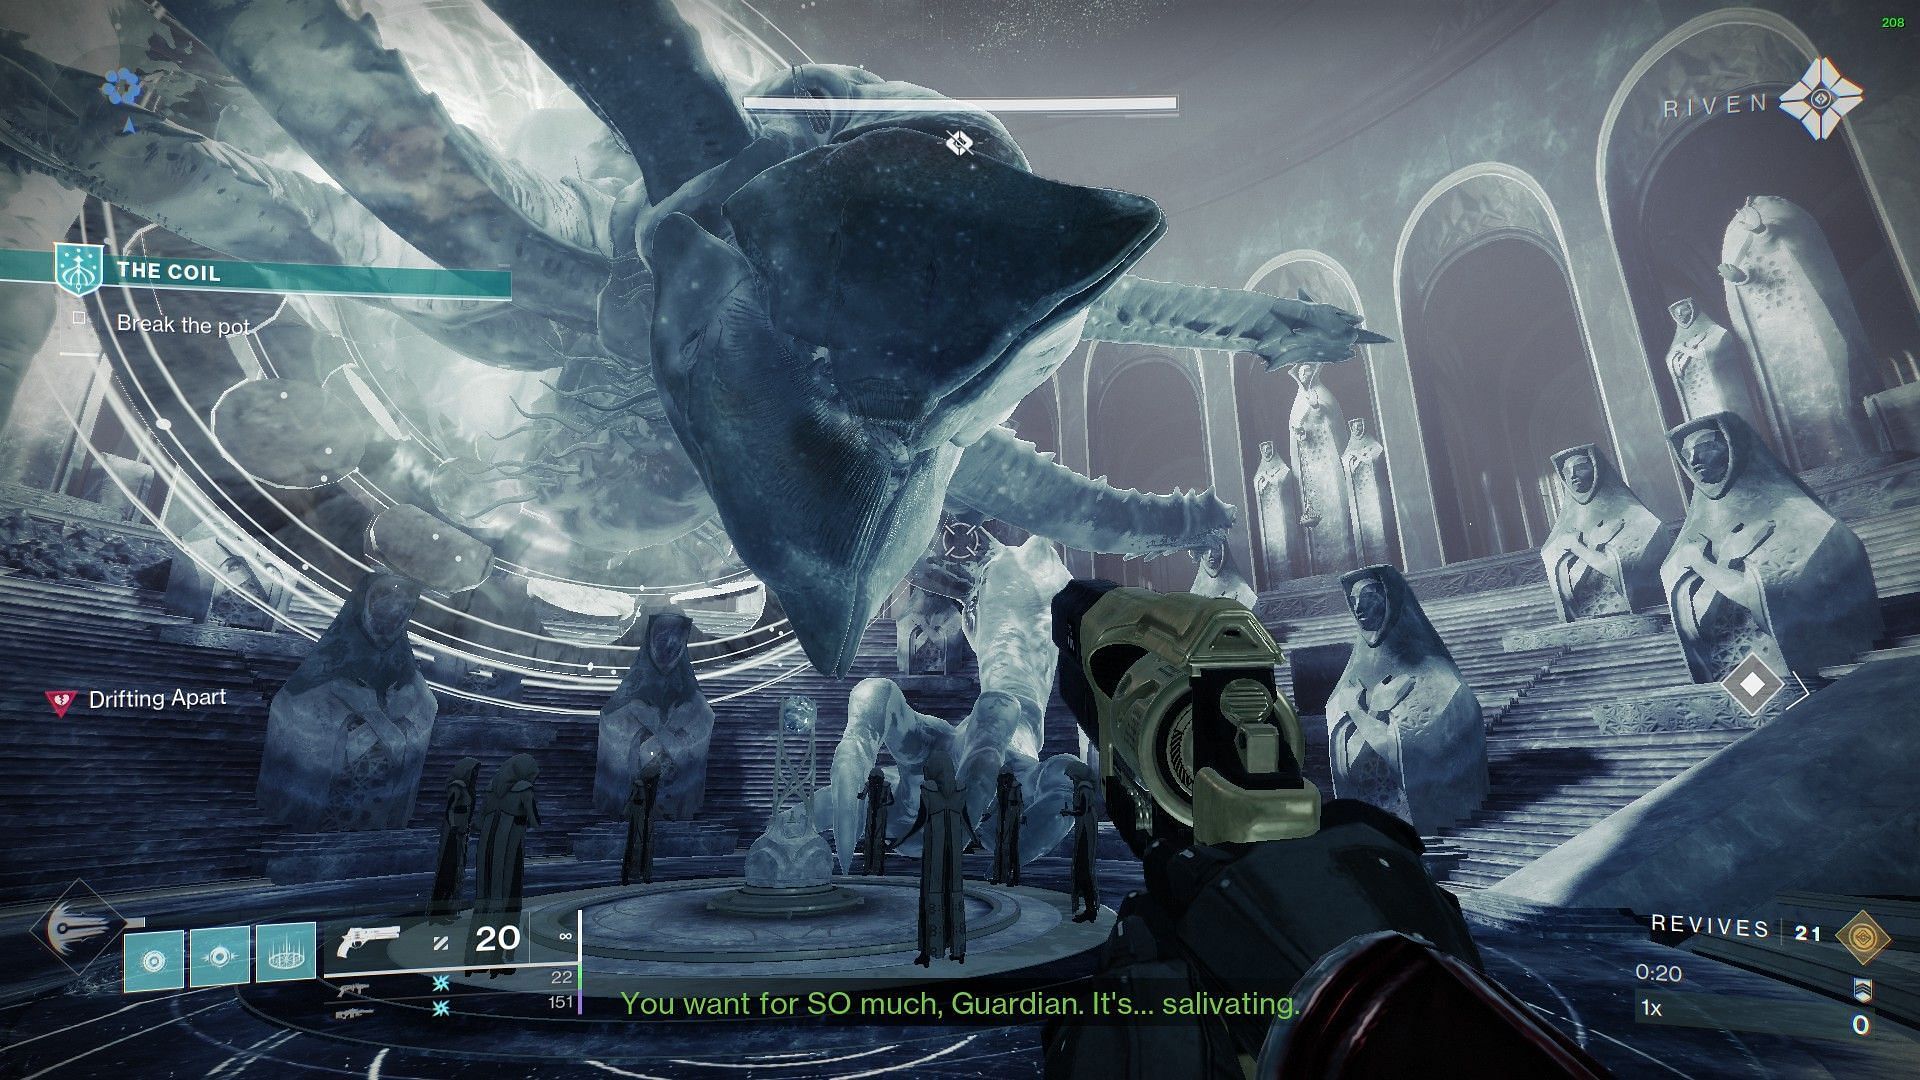
After starting the activity, you will see a small pot in front of Riven, which will reward Fused Wishing Glass upon breaking. This currency can be used to purchase buffs from Riven, ranging from Tier 1 for 100 Glasses all the way to Tier 3 for 400 Glasses.
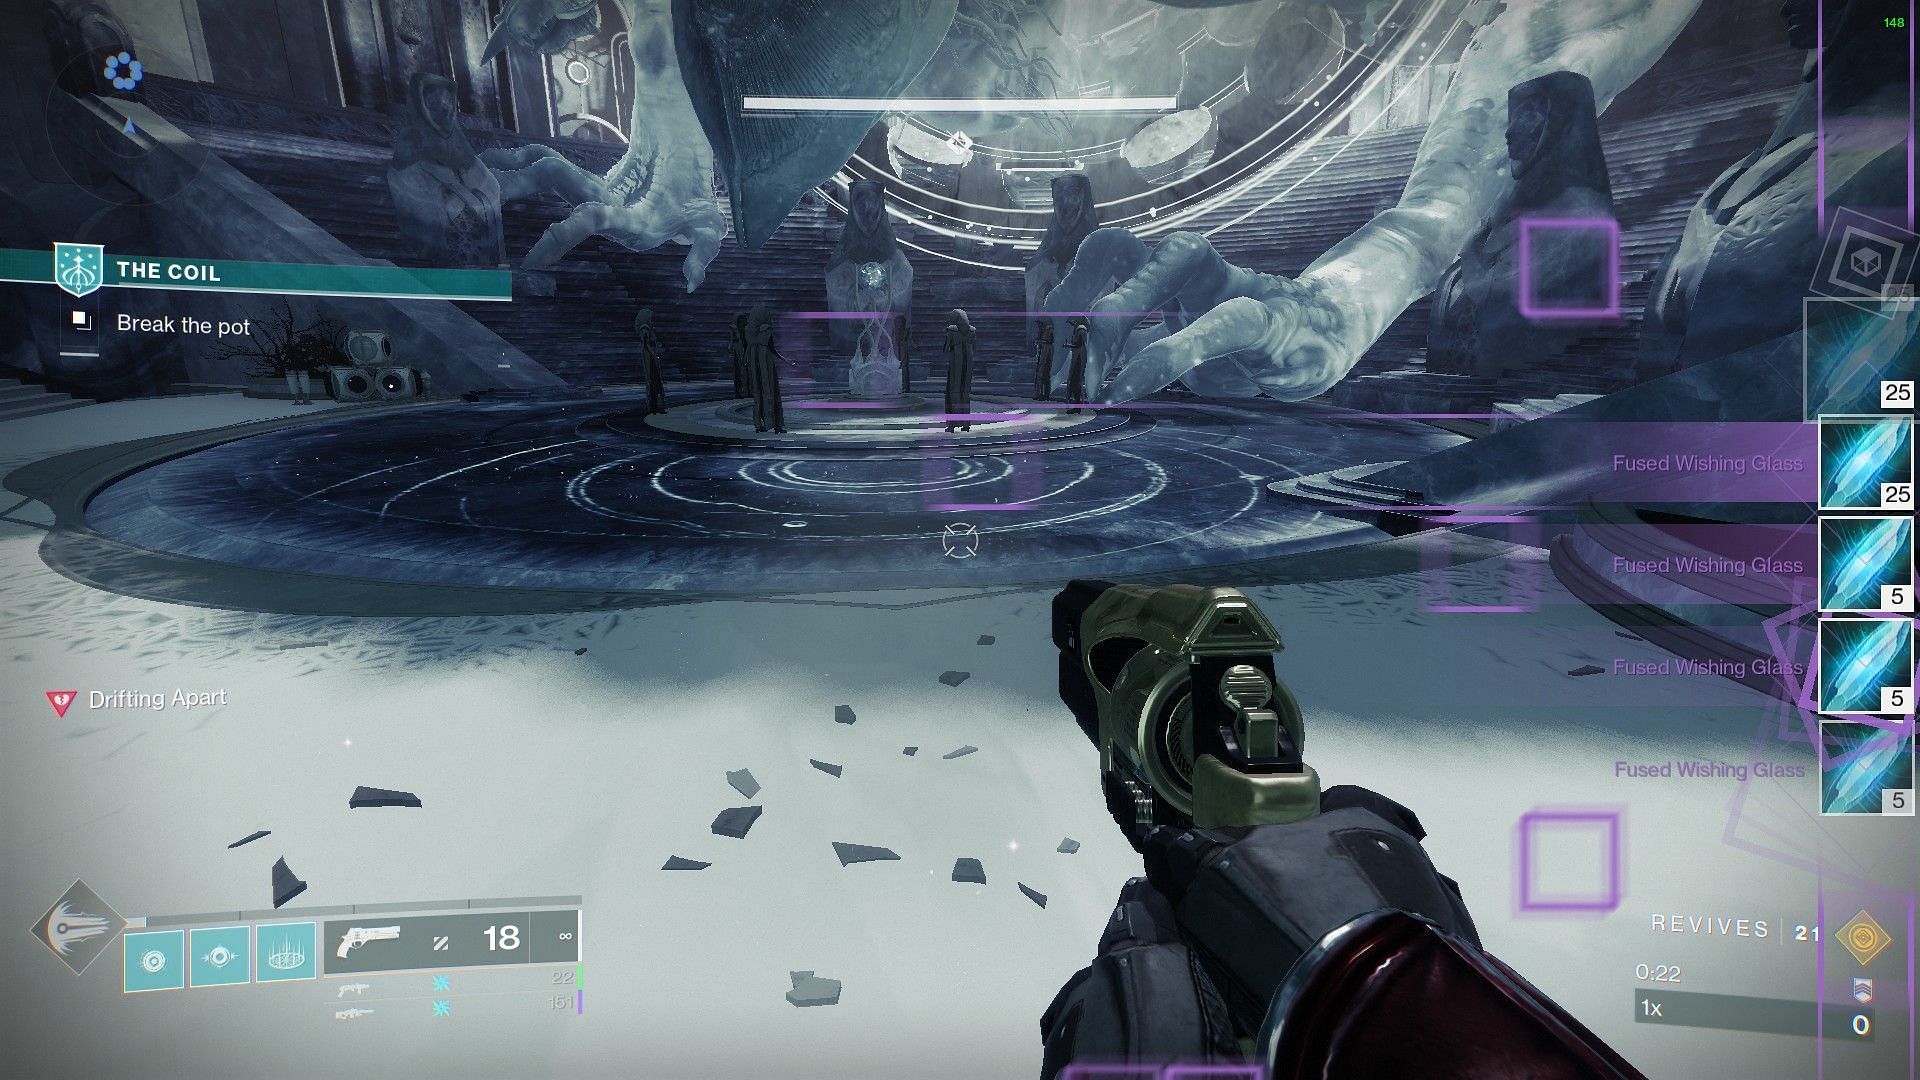
Once you have the buffs you want, head to the portal room to your left and stand on a plate to activate a path forward.
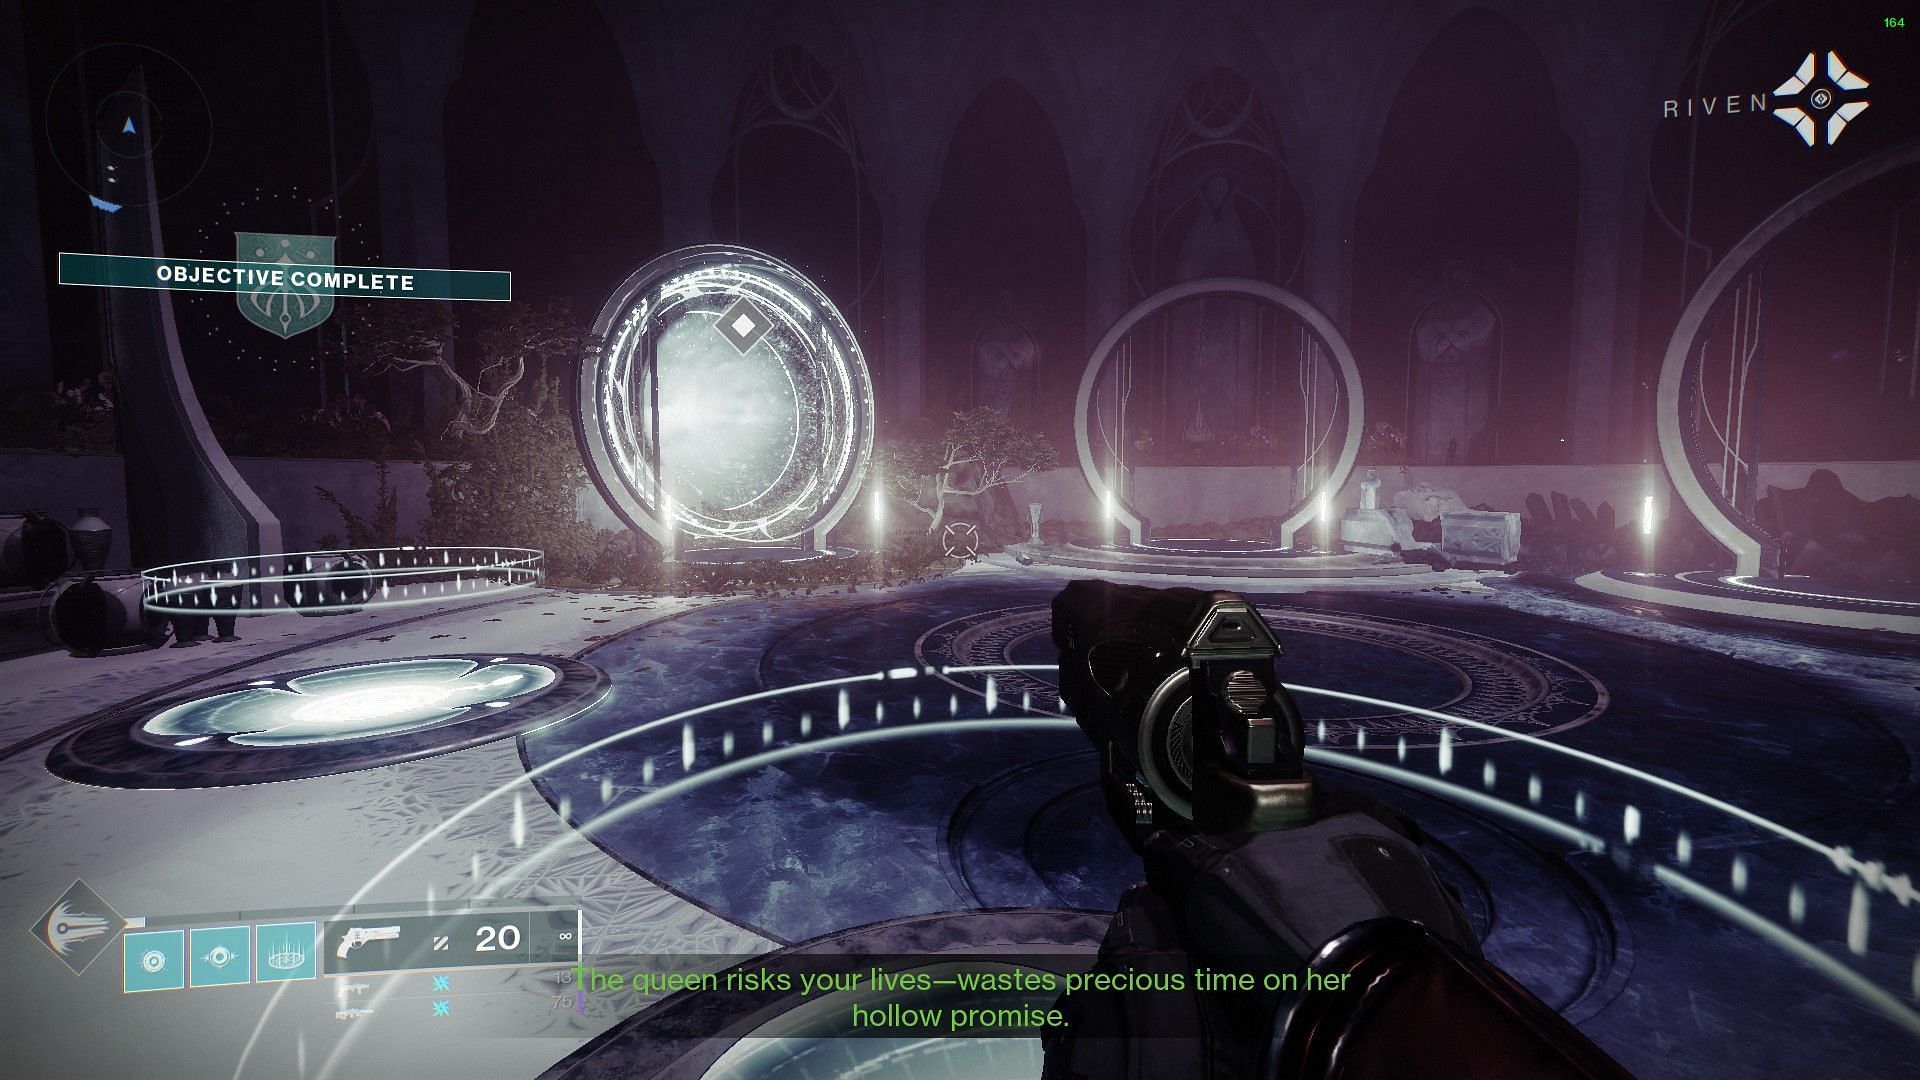
However, unlike Riven's Lair, The Coil can be continued up to four times after completing the first encounter. Enemies will have increased power each time, and completing them will also spawn extra rewards. You will be given the option to choose between a weapon and an armor chest.
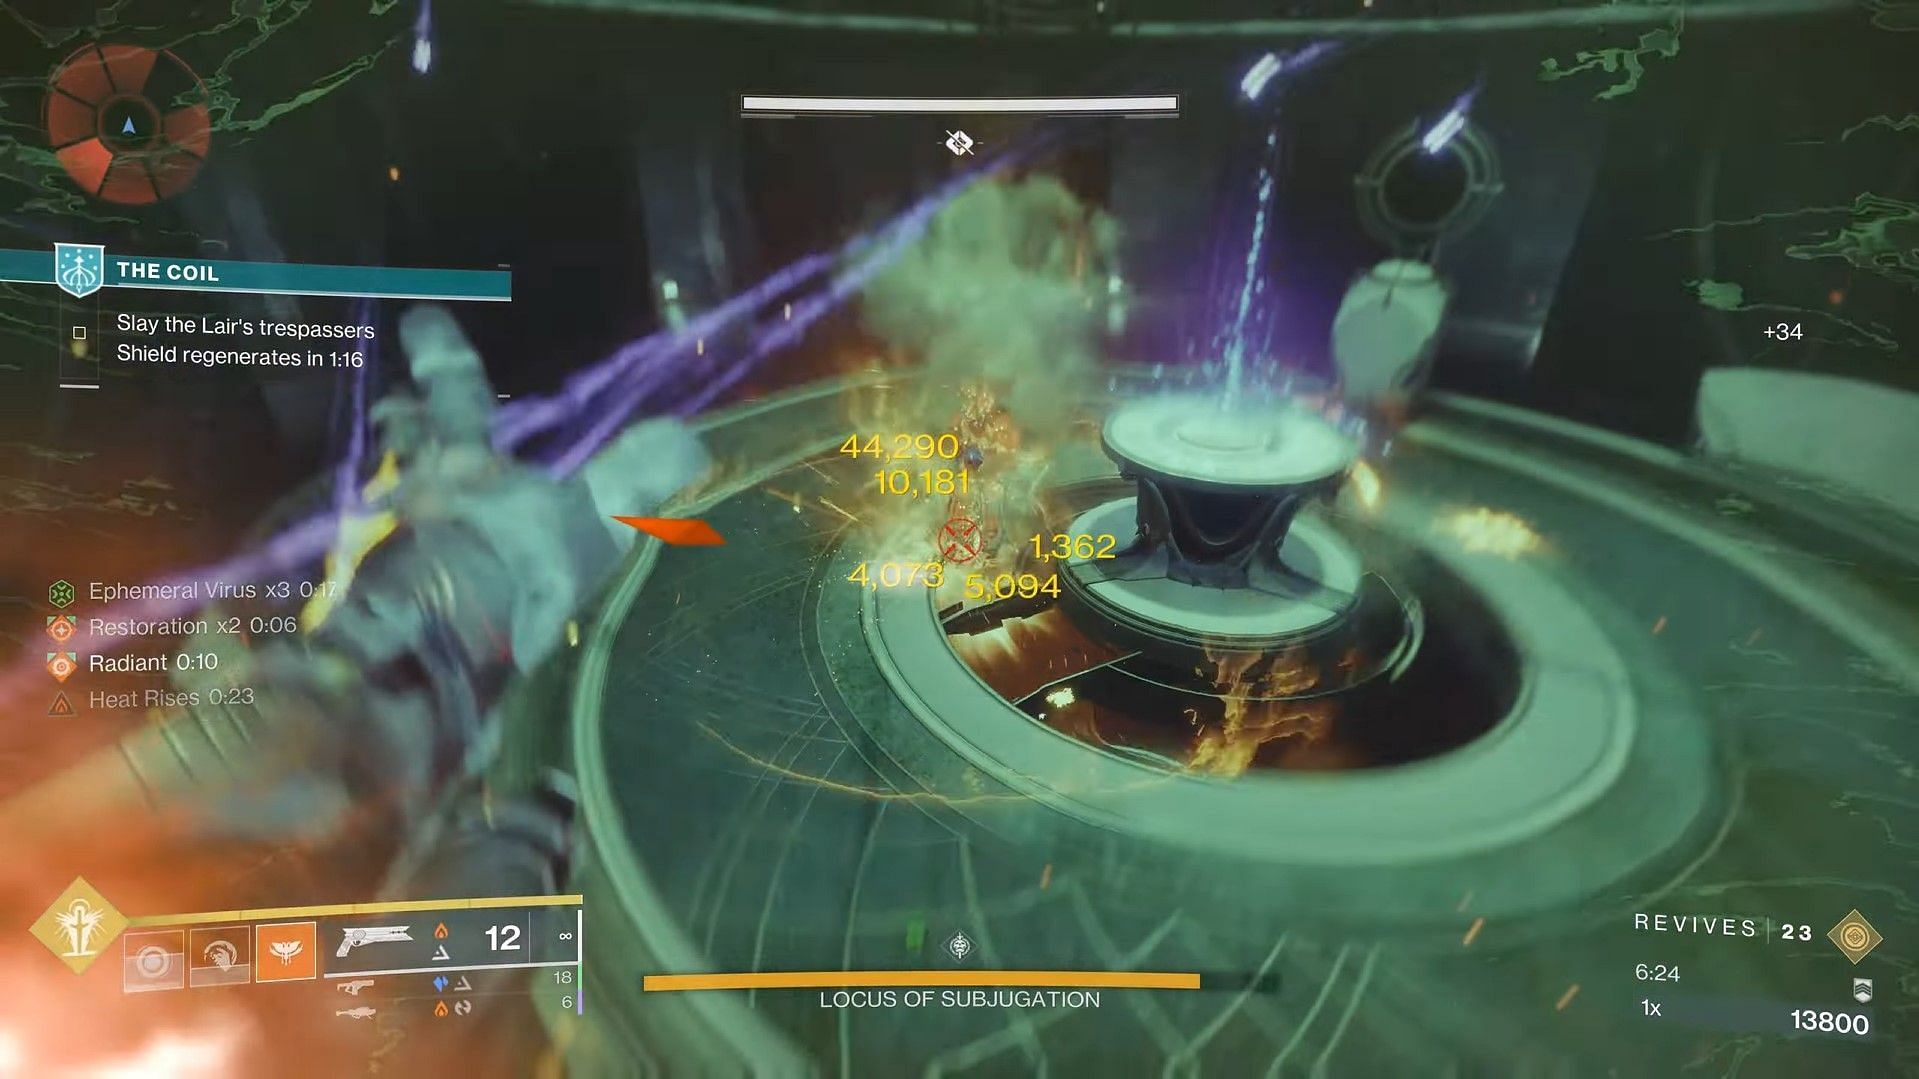
Encounter 1, Locus of Subjugation
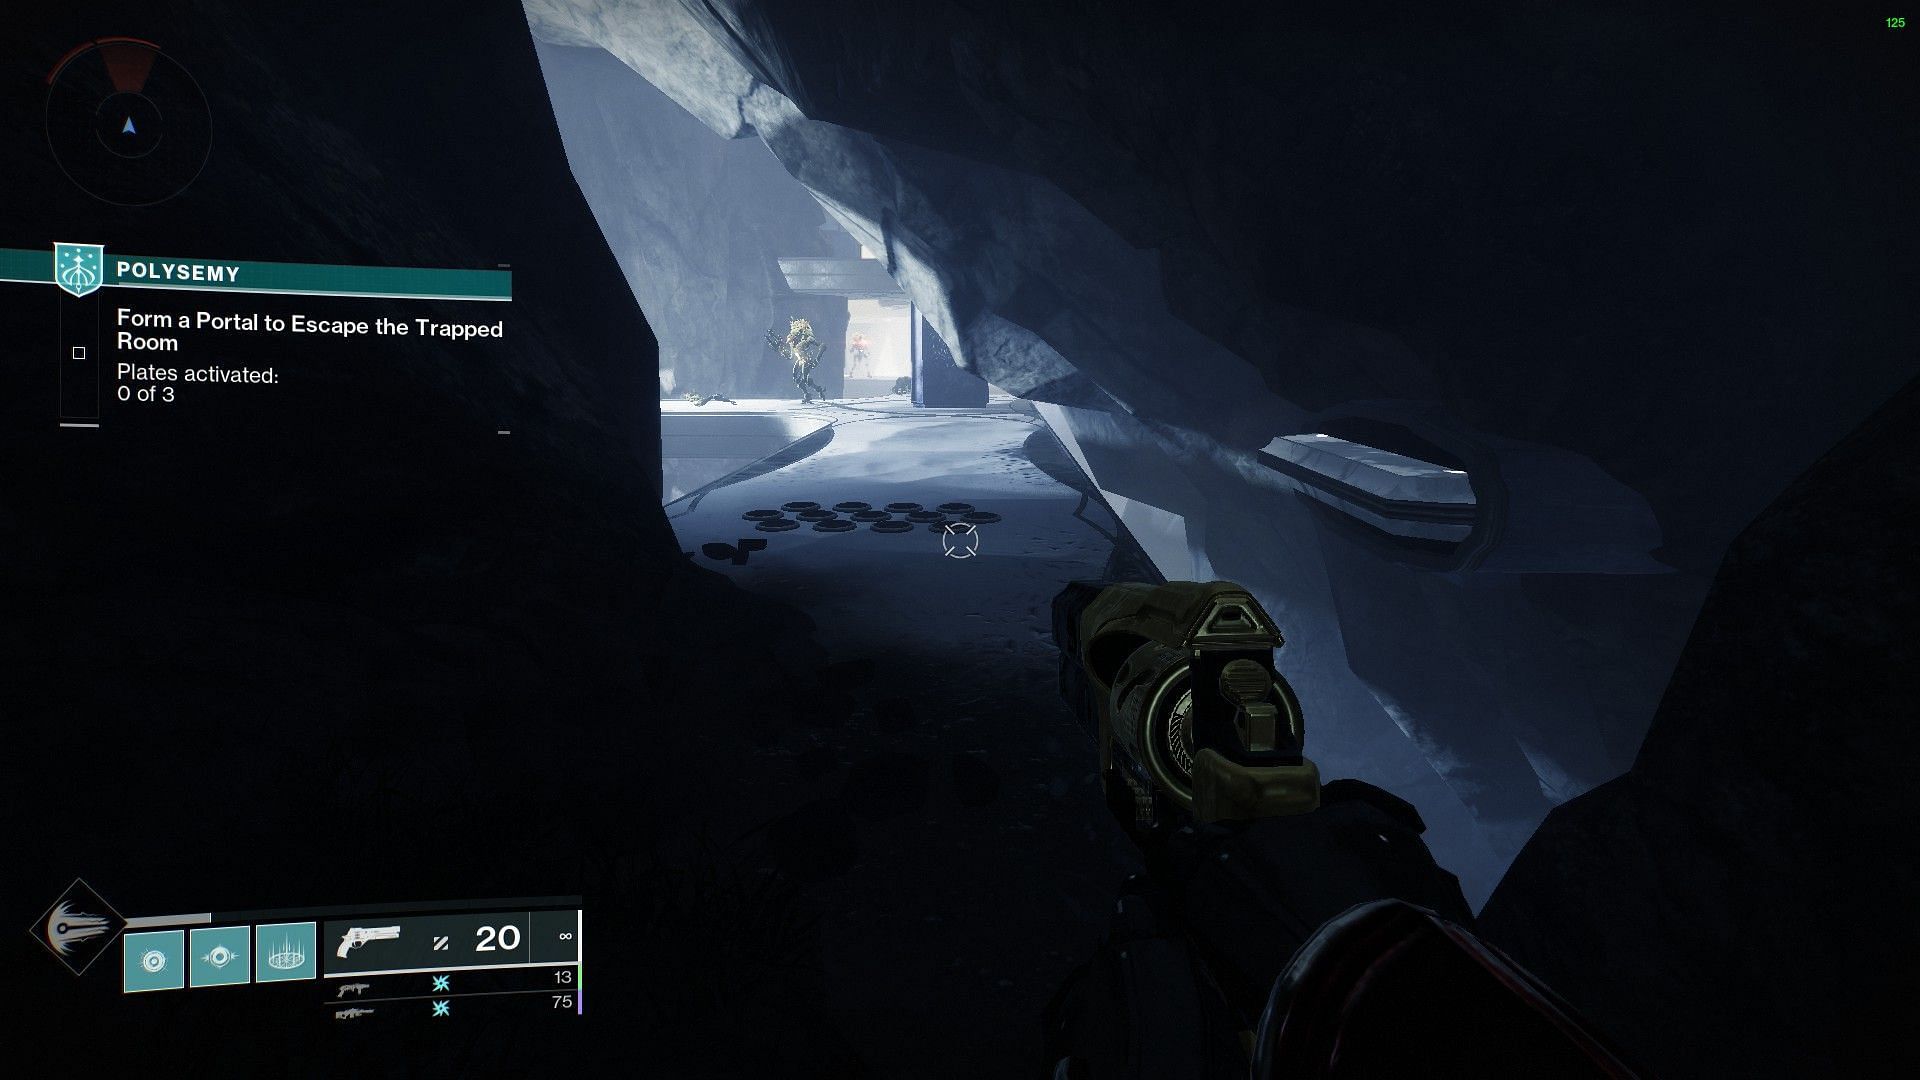
The first encounter will introduce you to a maze with poison debuffs. Carefully reach three plates, avoiding the poison clouds, and follow the waypoint to a portal. The objectives are as follows:
- Form a portal to escape the trapped room. Avoid getting poisoned in the process.
- Clear out the intruders from the Lair (basic extermination).
- Form another portal.
- Defeat Locus of Subjugation.
To defeat the Locus of Subjugation, first collect the Ephemeral Virus buff from the Mephitic Hosts Scorn Scorchers. Defeat the Well Protector Abomination and start damaging the boss' shield with the Virus buff. Once the shield is down, you will have a minute and thirty seconds to defeat the boss.
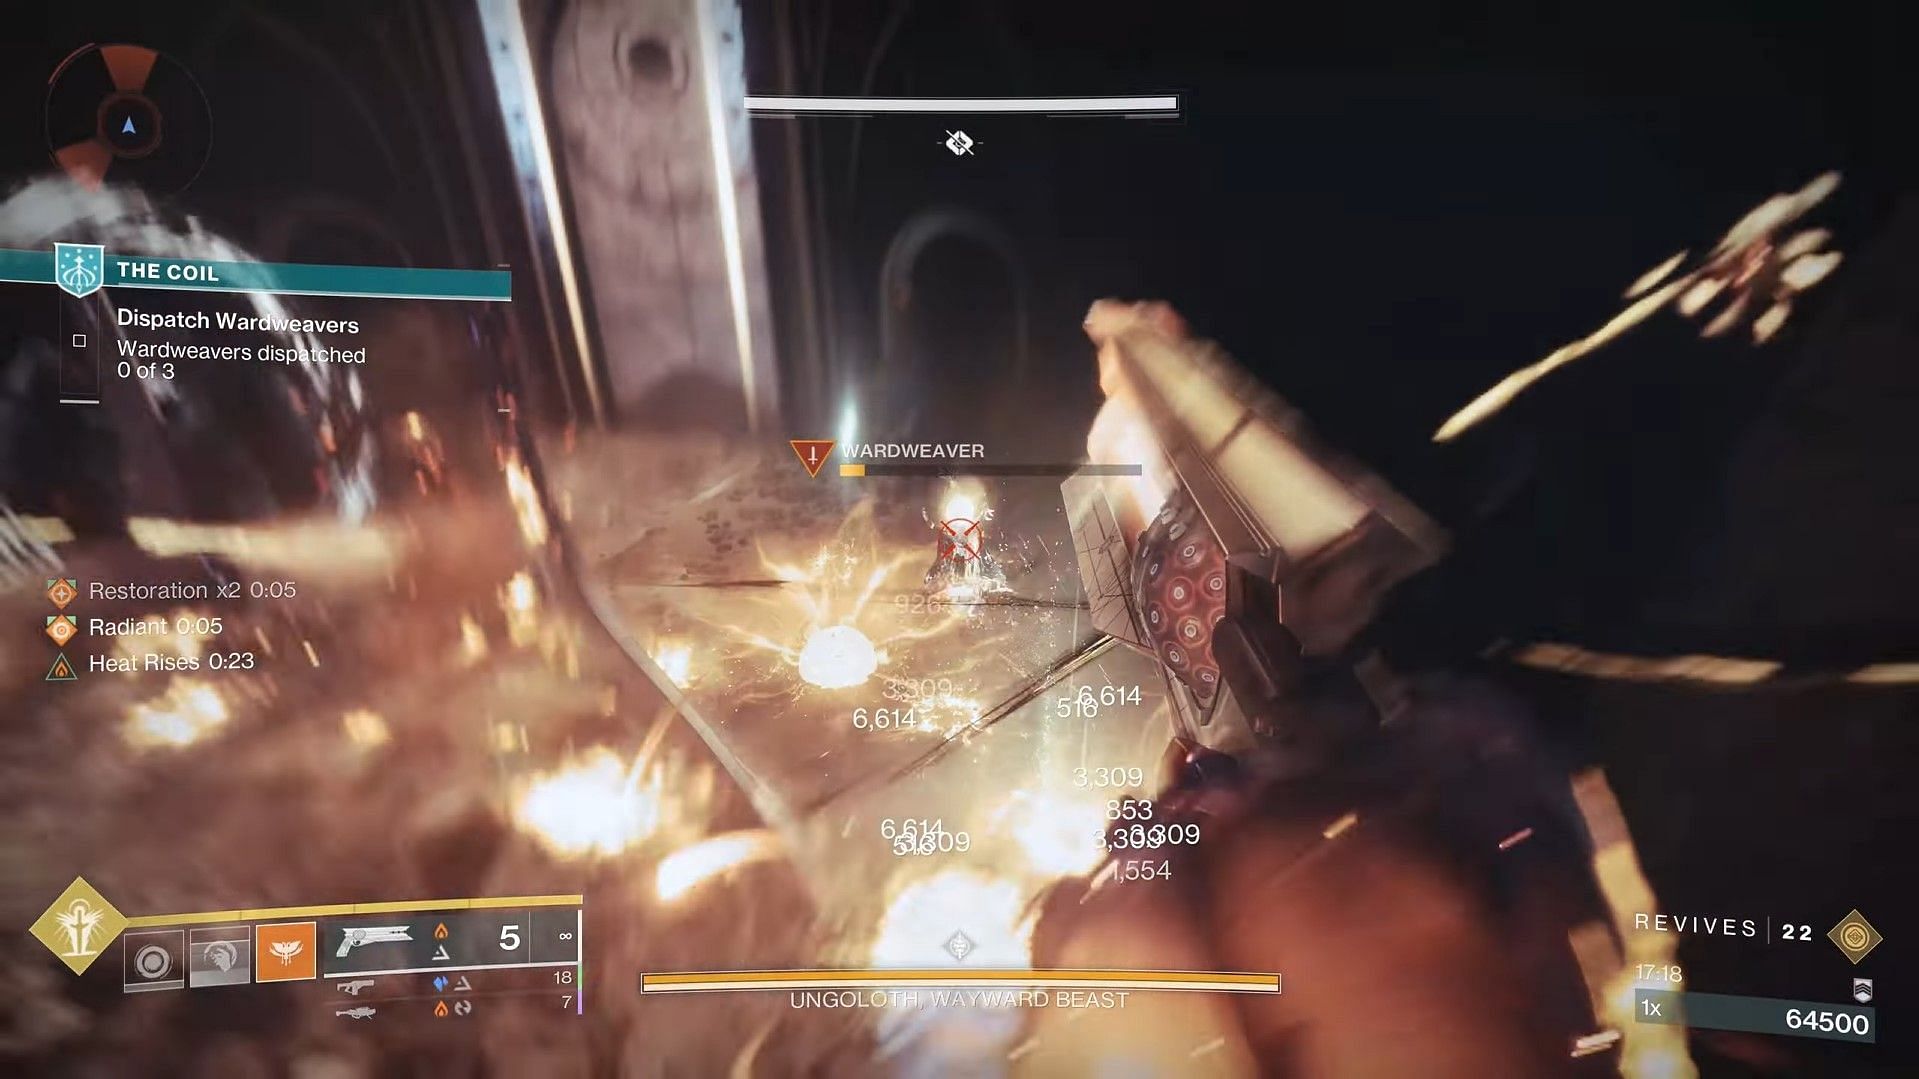
Encounter 2, Ungoloth
The second encounter will introduce the Pervading Darkness debuff, which can be cleansed by yellow lights on the floor. Head over to these lights and purge the buff. The objectives for this encounter are as follows:
- Form a portal to escape the trapped room. Cleanse the Pervading Darkness debuff from time to time.
- Clear out intruders from the Lair (extermination).
- Form a portal again by cleansing Pervading Darkness.
- Defeat Ungoloth.
To defeat Ungoloth, defeat the three Taken Wizards called "Wardweavers" in the arena. Once all three Wizards have been defeated, focus all your damage on defeating Ungoloth.
Encounter 3, Centroidal Mind
The traps are the only mechanics you must get accustomed to while traversing through the third encounter. Avoid stepping on anything resembling a series of dots, be it on the floor or the wall. The image below should provide a clear idea.
With that in mind, here are the objectives:
- Form a portal to escape the trapped room. Avoid getting pushed off by moving blades or stepping in front of spiked traps (image above).
- Clear away intruders by defeating everything.
- Form a portal again by avoiding the same traps.
- Defeat Centroidal Mind.
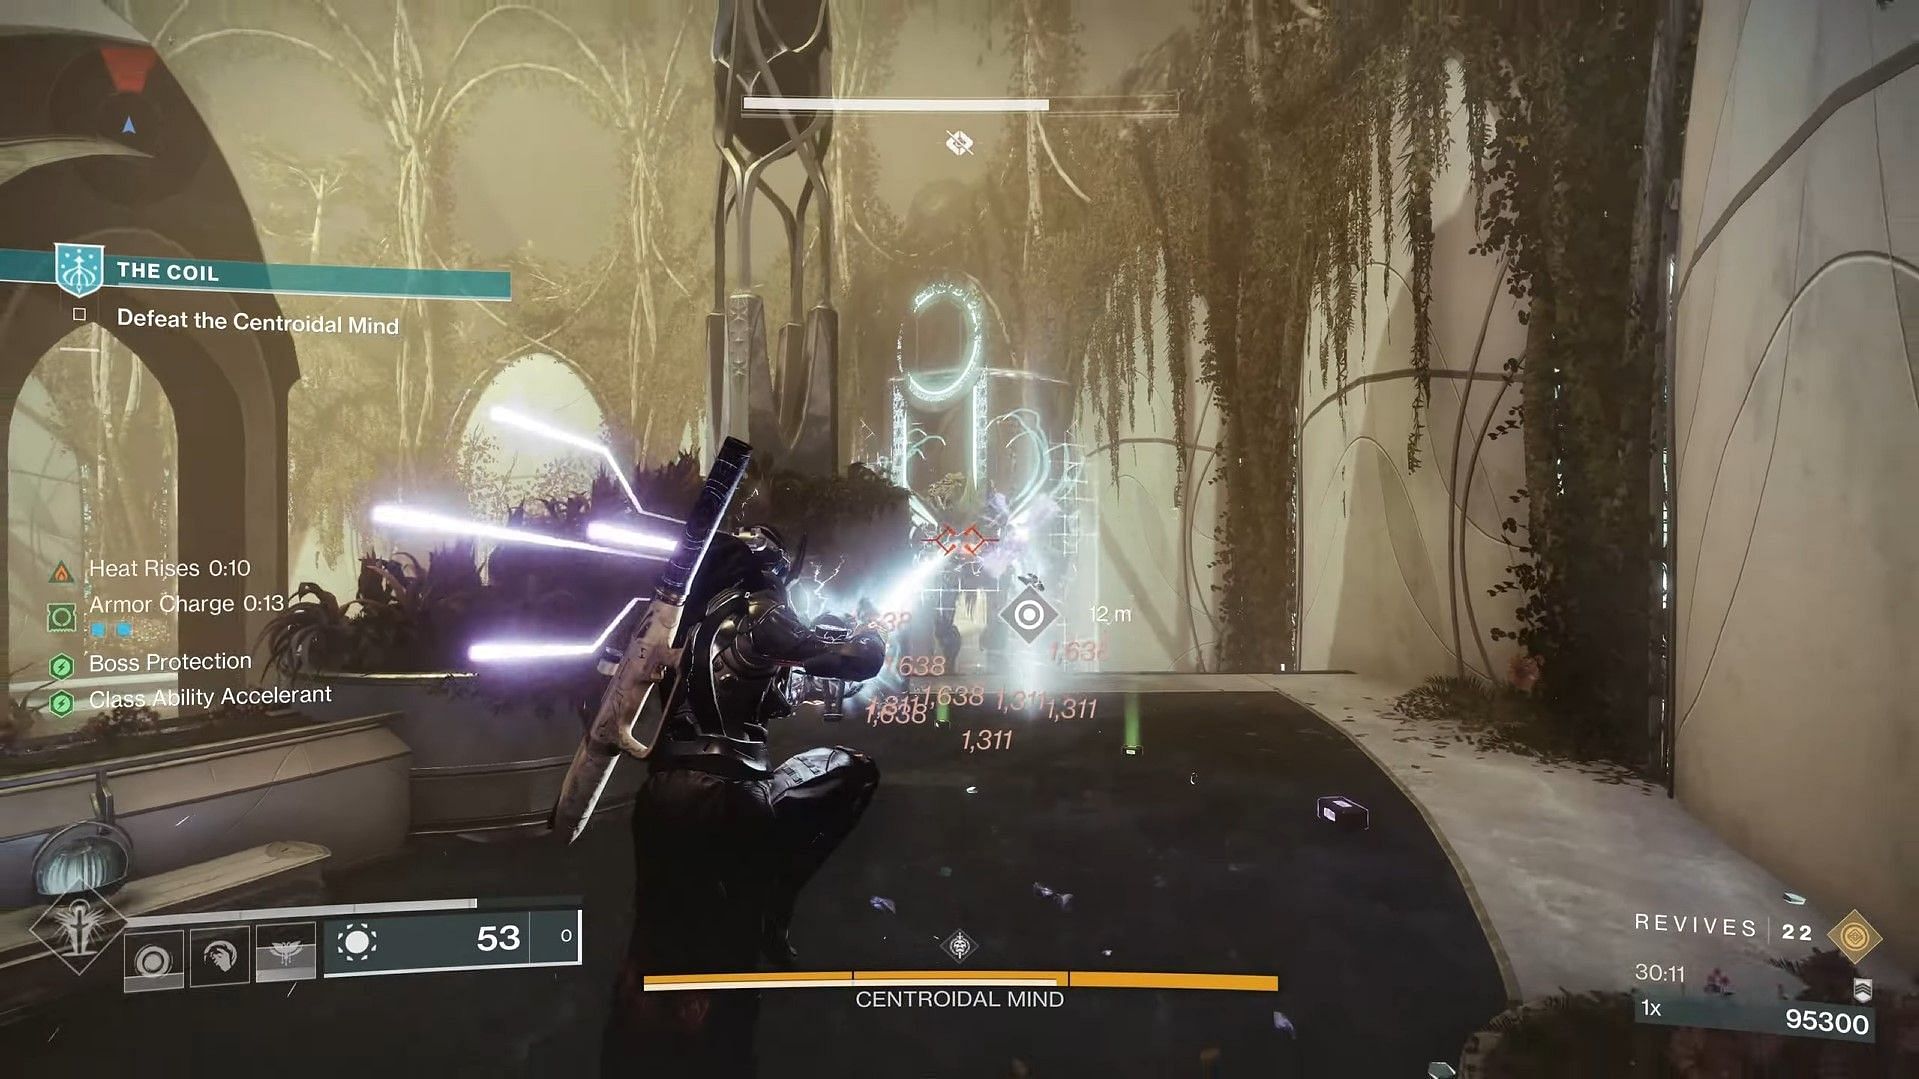
To defeat the Centroidal Mind, you must deplete its shield with the help of Arc charges from Arc Charged Minotaur. Look for these shining enemies, pick up the relic, and shoot at the boss. Repeat this process until his shield has been completely drained.
You will then have a minute and thirty seconds to damage the boss to the best of your ability.
Encounter 4, Roln'gur
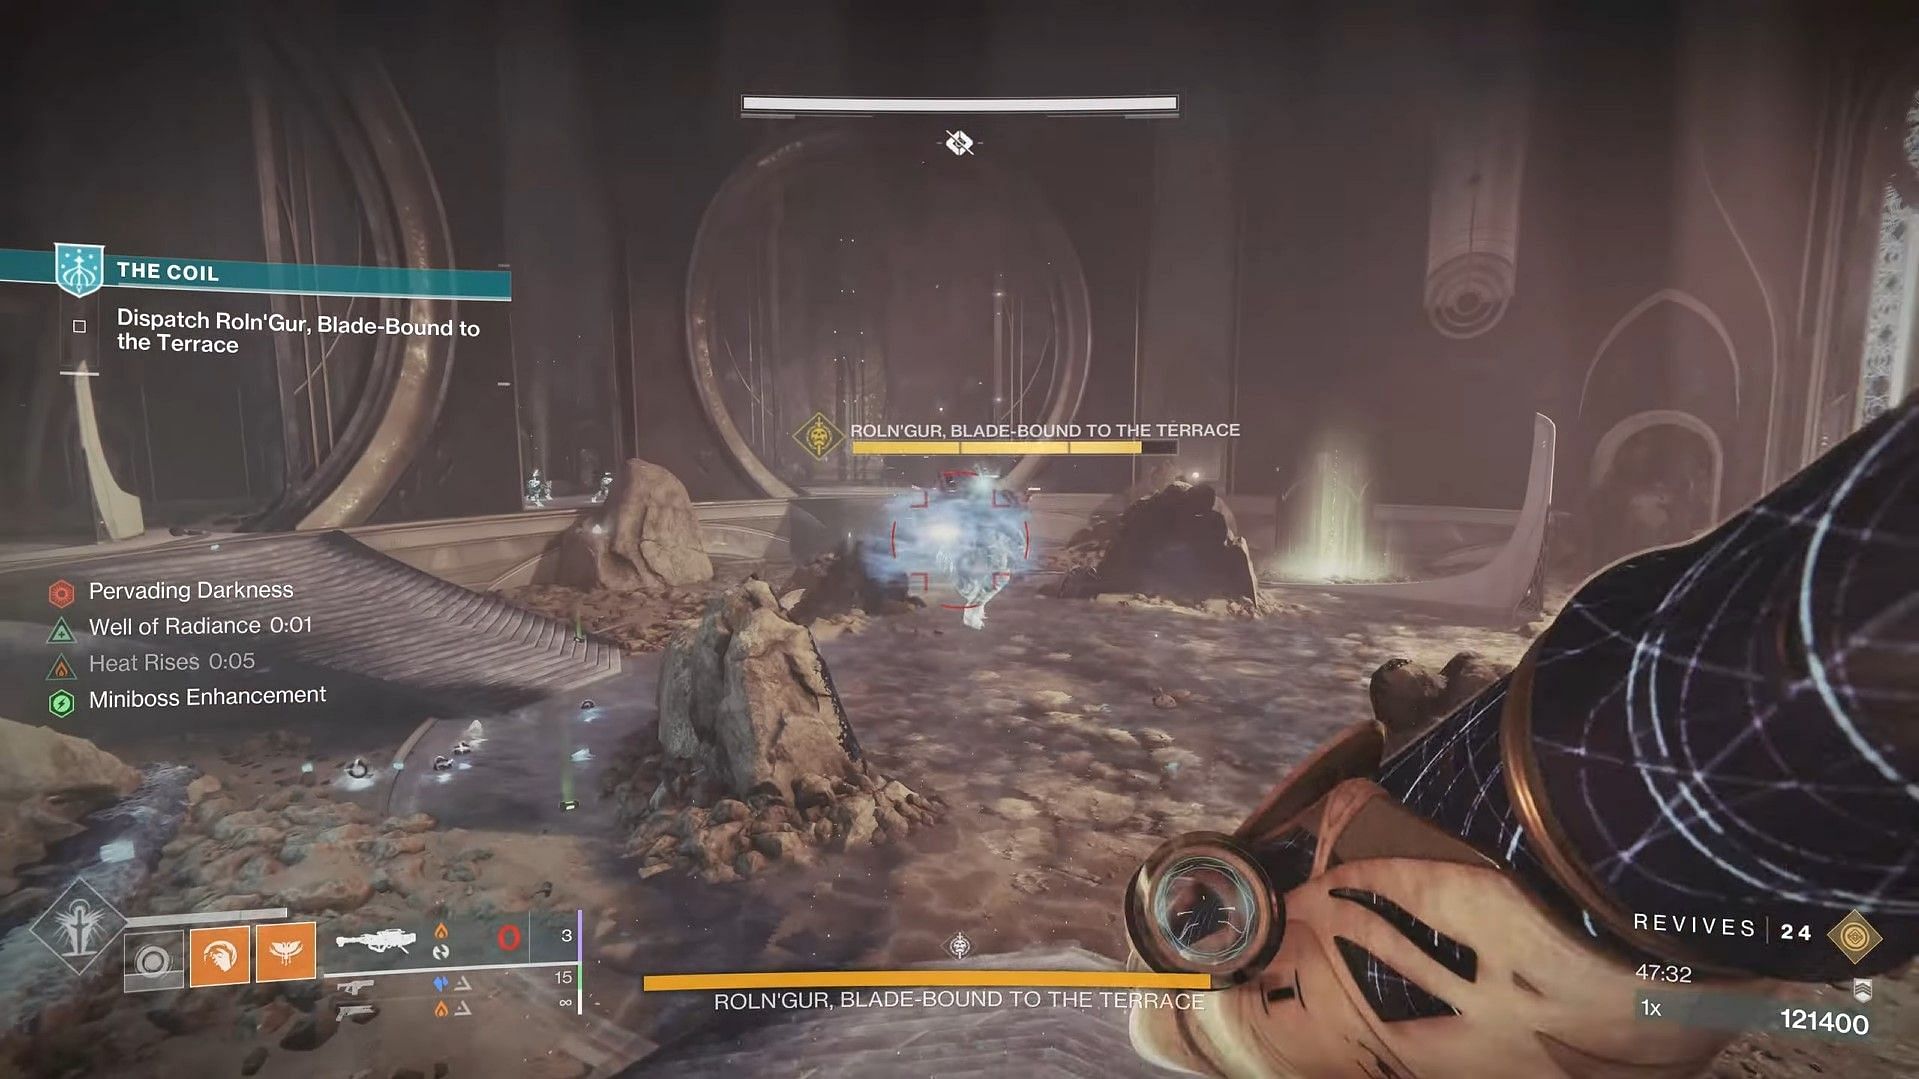
The final encounter of The Coil follows the exact mechanics of the second encounter, where you must cleanse your Pervading Darkness buff and defeat the final boss. While only the boss model might have changed, the way of starting the damage phase is the same as Encounter 2, involving Wardweavers.
Remember that breaking pots inside each encounter will also grant scores, and you can obtain hidden chests with higher scores.
