
'%20x='0'%20y='0'%20height='100%25'%20width='100%25'%20%0A%20%20%20%20%20%20%20%20%20%20xlink%3Ahref='data:image/jpg;base64,/9j/2wBDAAYEBQYFBAYGBQYHBwYIChAKCgkJChQODwwQFxQYGBcUFhYaHSUfGhsjHBYWICwgIyYnKSopGR8tMC0oMCUoKSj/2wBDAQcHBwoIChMKChMoGhYaKCgoKCgoKCgoKCgoKCgoKCgoKCgoKCgoKCgoKCgoKCgoKCgoKCgoKCgoKCgoKCgoKCj/wgARCAAGAAoDASIAAhEBAxEB/8QAFgABAQEAAAAAAAAAAAAAAAAAAAUH/8QAFQEBAQAAAAAAAAAAAAAAAAAAAgX/2gAMAwEAAhADEAAAAMYjFFf/xAAgEAABAwMFAQAAAAAAAAAAAAACAQMEAAUhBhETMqHR/9oACAEBAAE/AGtYT7c05A4opiTW4Gjaooe0V7lGSkrUbOei/a//xAAXEQADAQAAAAAAAAAAAAAAAAAAAQIR/9oACAECAQE/AJen/8QAFREBAQAAAAAAAAAAAAAAAAAAAEH/2gAIAQMBAT8Aj//Z'%3E%3C/image%3E%3C/svg%3E)
Destiny 2 Season of the Wish has taken players back to the Dreaming City, where everyone must aid the Queen for one final wish. However, things haven't gone as smoothly as planned for the Queensguard, as the wish granter wants a hefty sum of eggs in return. Hence, players must return to the home of the Awoken to complete objectives and gather secrets essential to the seasonal seals.
One such secret comes from familiar feline visitors in the Queen's domains, known as Starcats. Fourteen cats can be found throughout the season, with very few arriving weekly.
Week 1 of Season of the Wish has brought two Starcats into the game, one at the entrance of Blind Well and the other in one of the tilesets of Riven's Lair mission.
Where to find all Starcats in Destiny 2 Season of the Wish
Here is a summarized list of the Starcat locations in Season of the Wish. It is recommended to complete the seasonal weekly quest step once before venturing out.
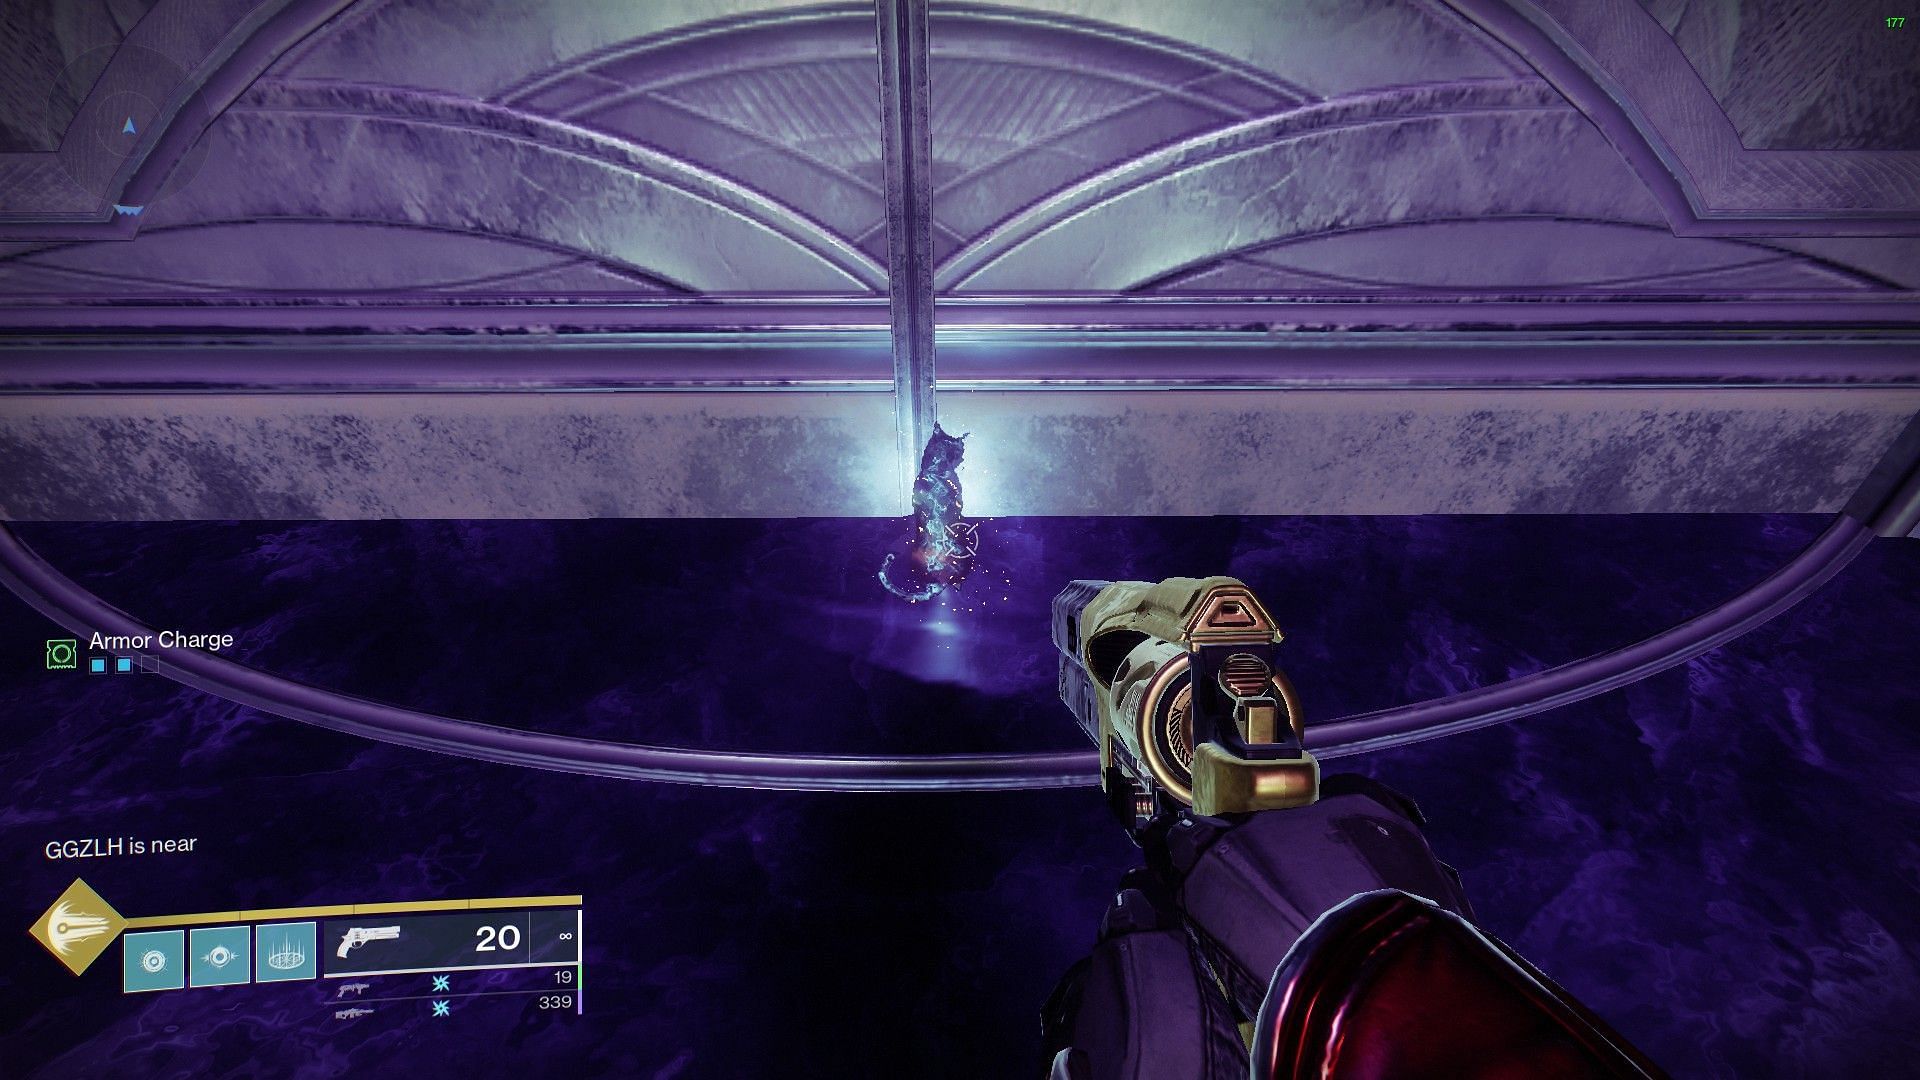
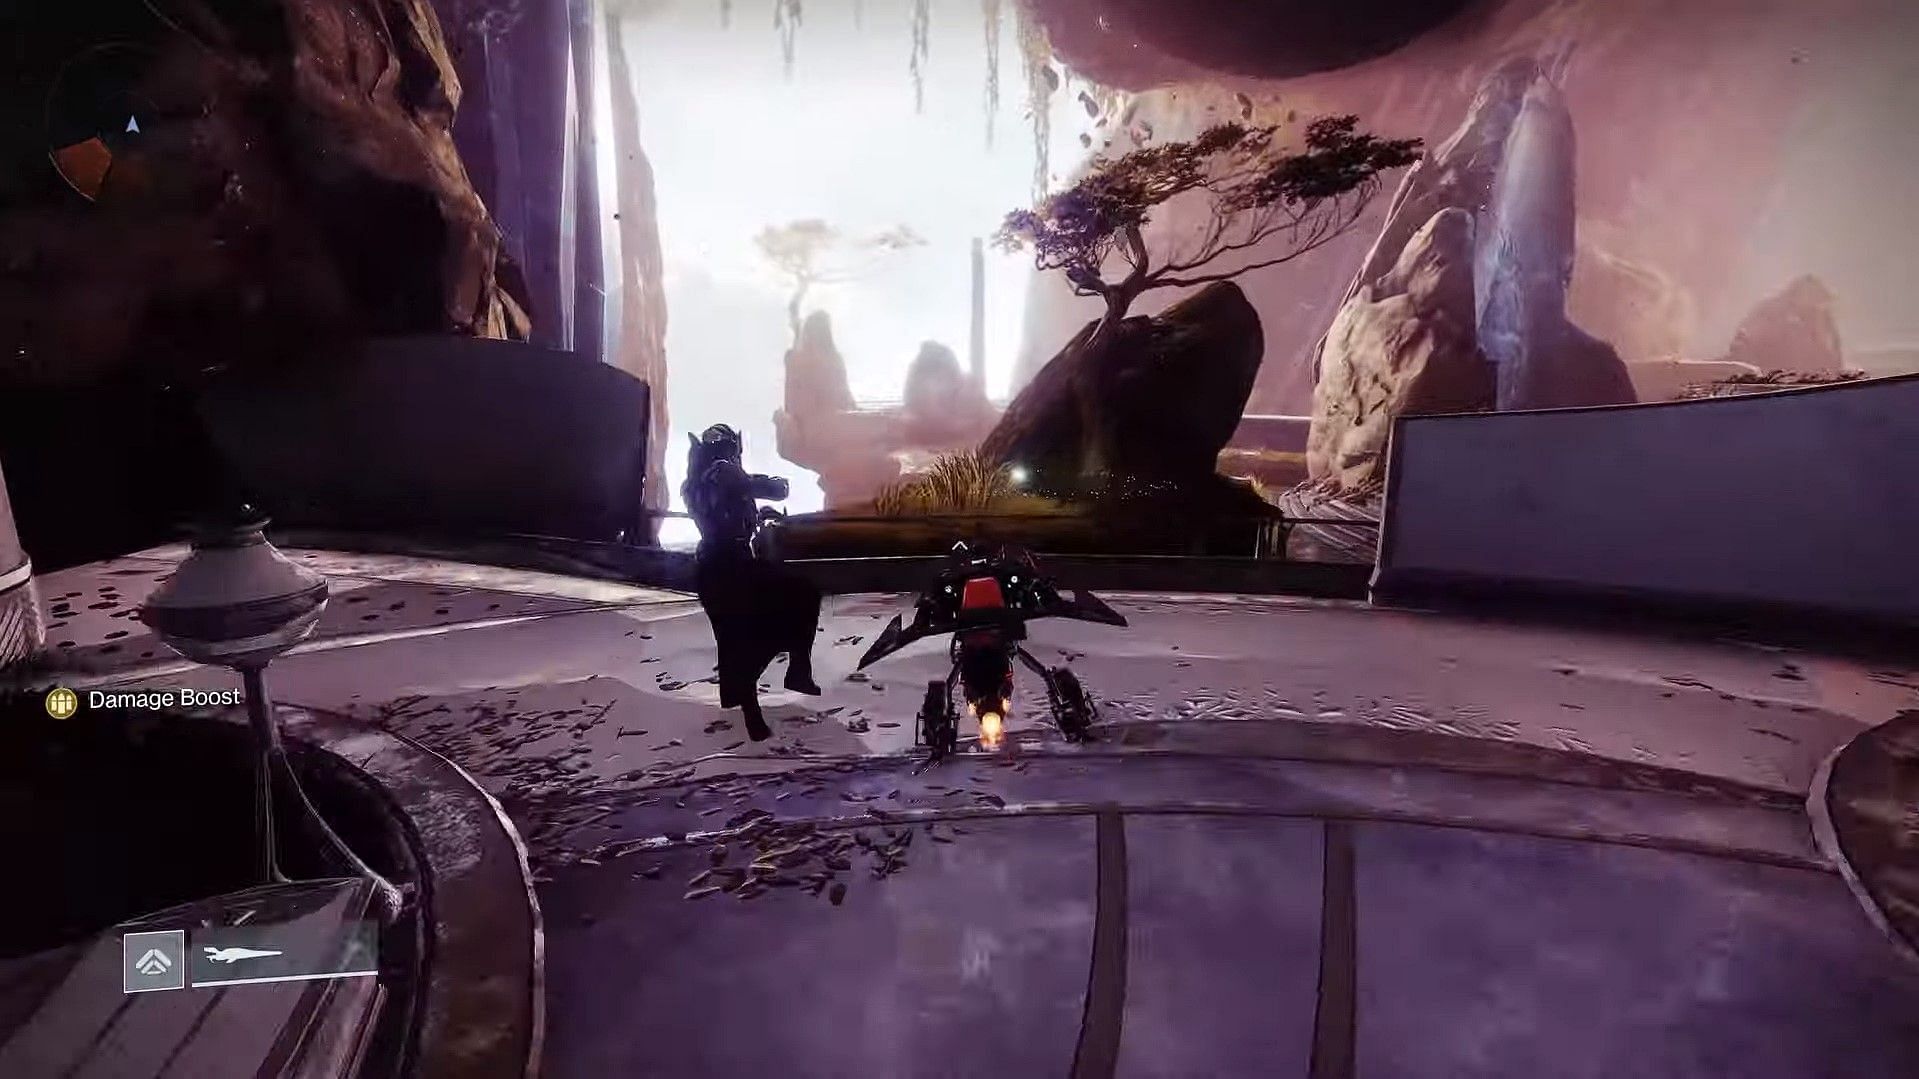
- The first Starcat can be found right at the door of the Blind Well's entrance.
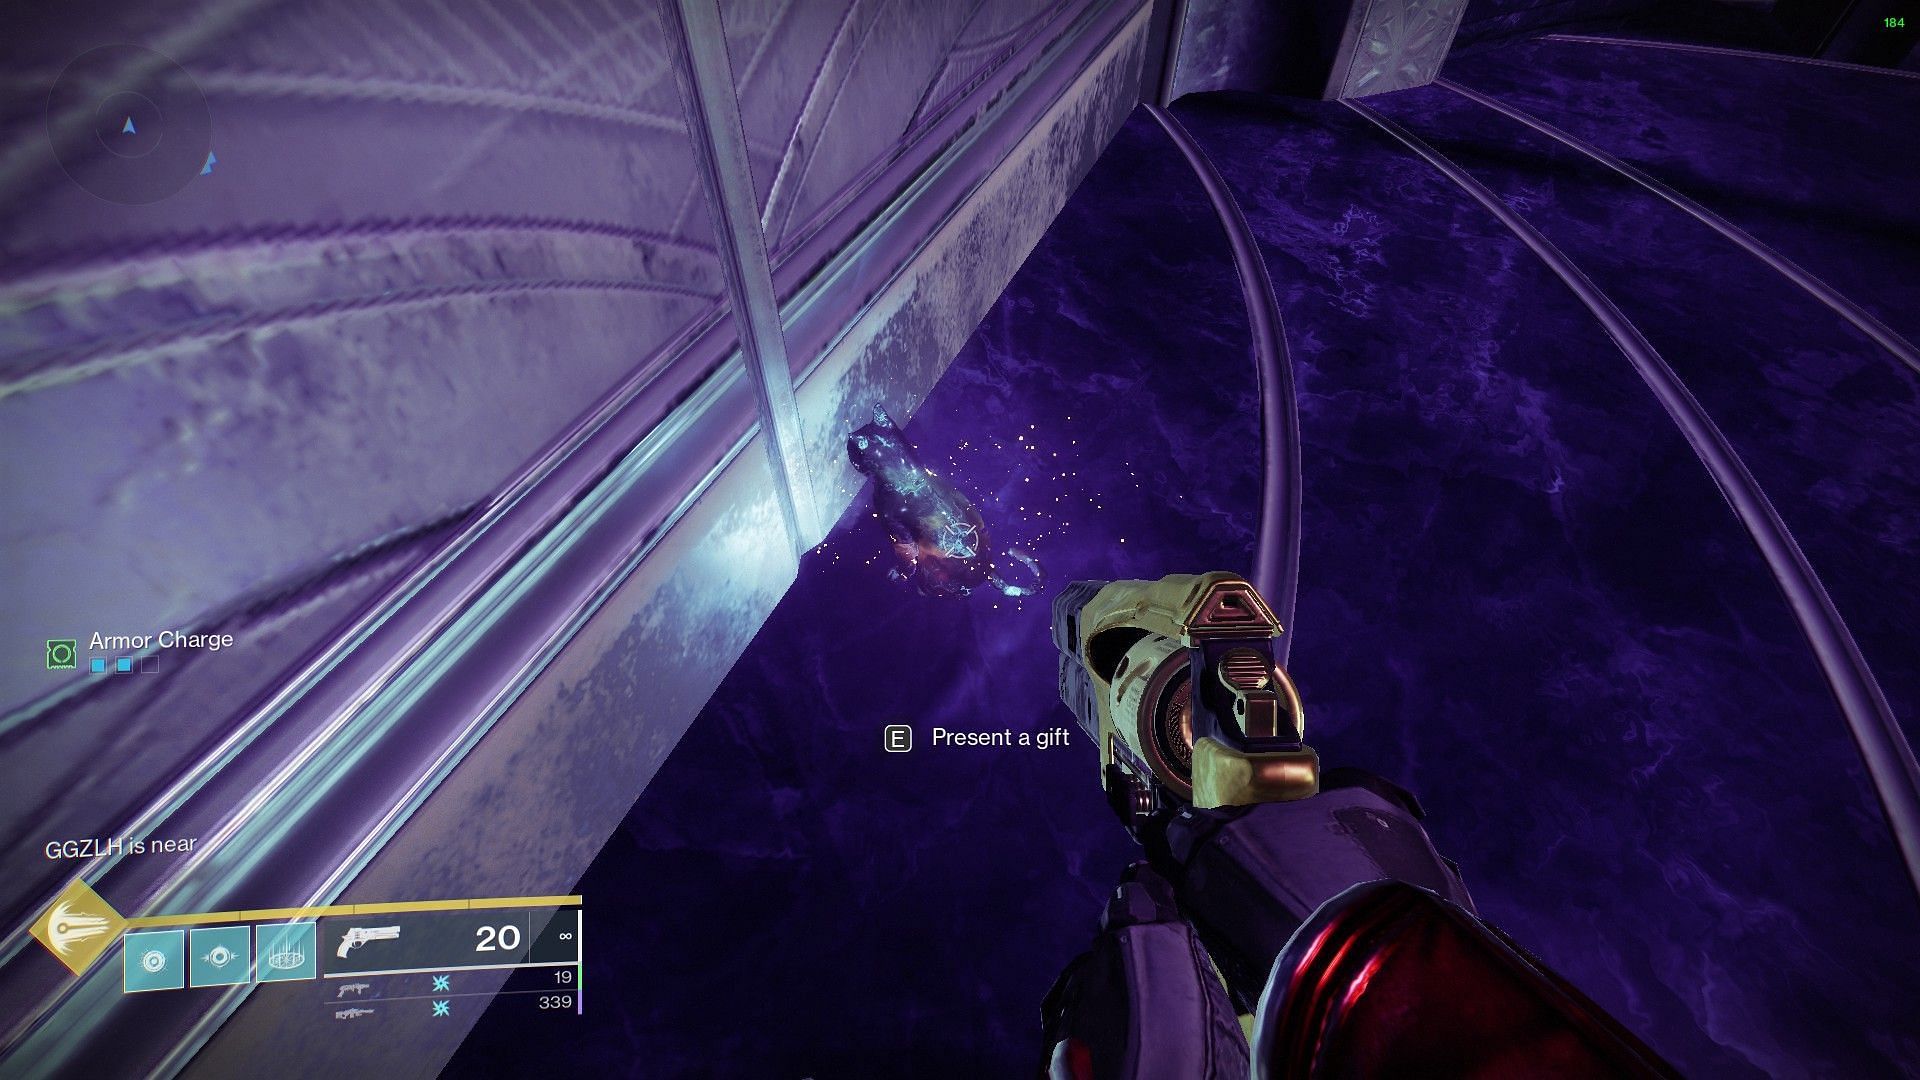
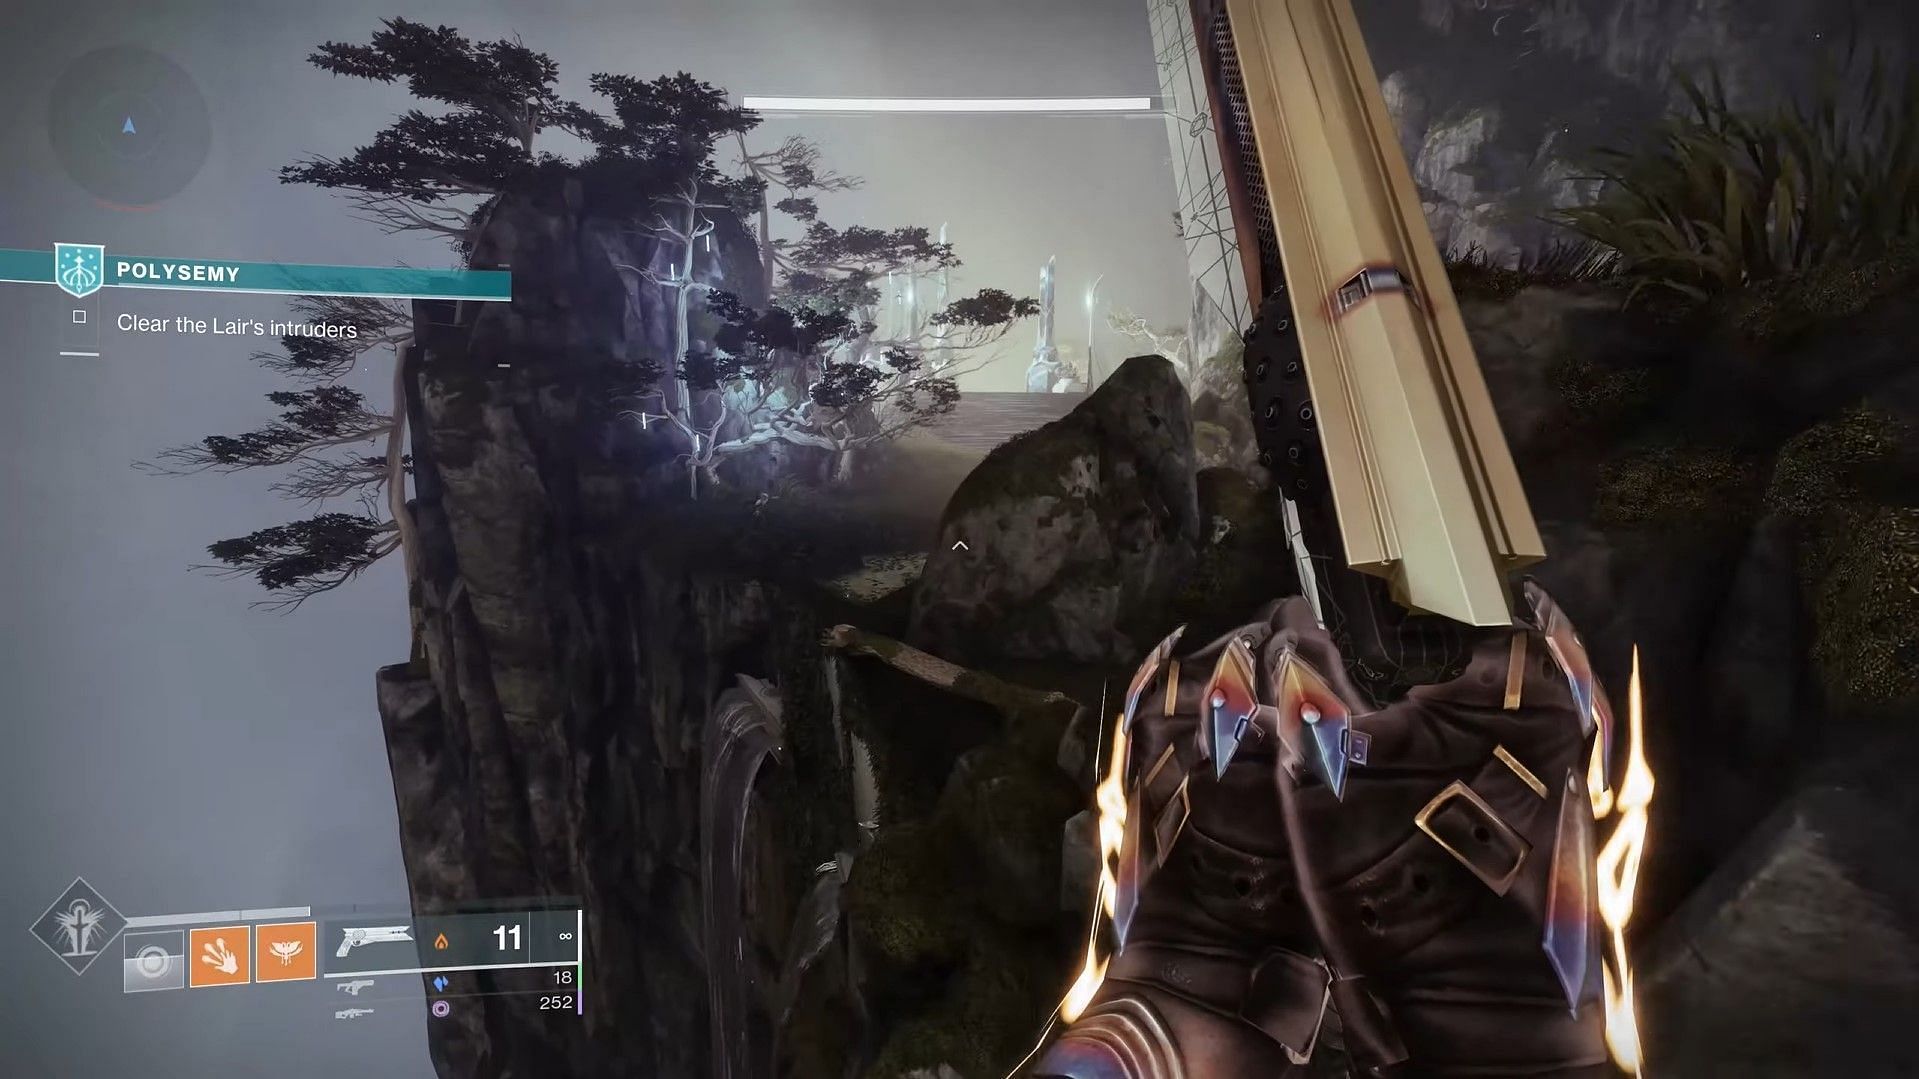
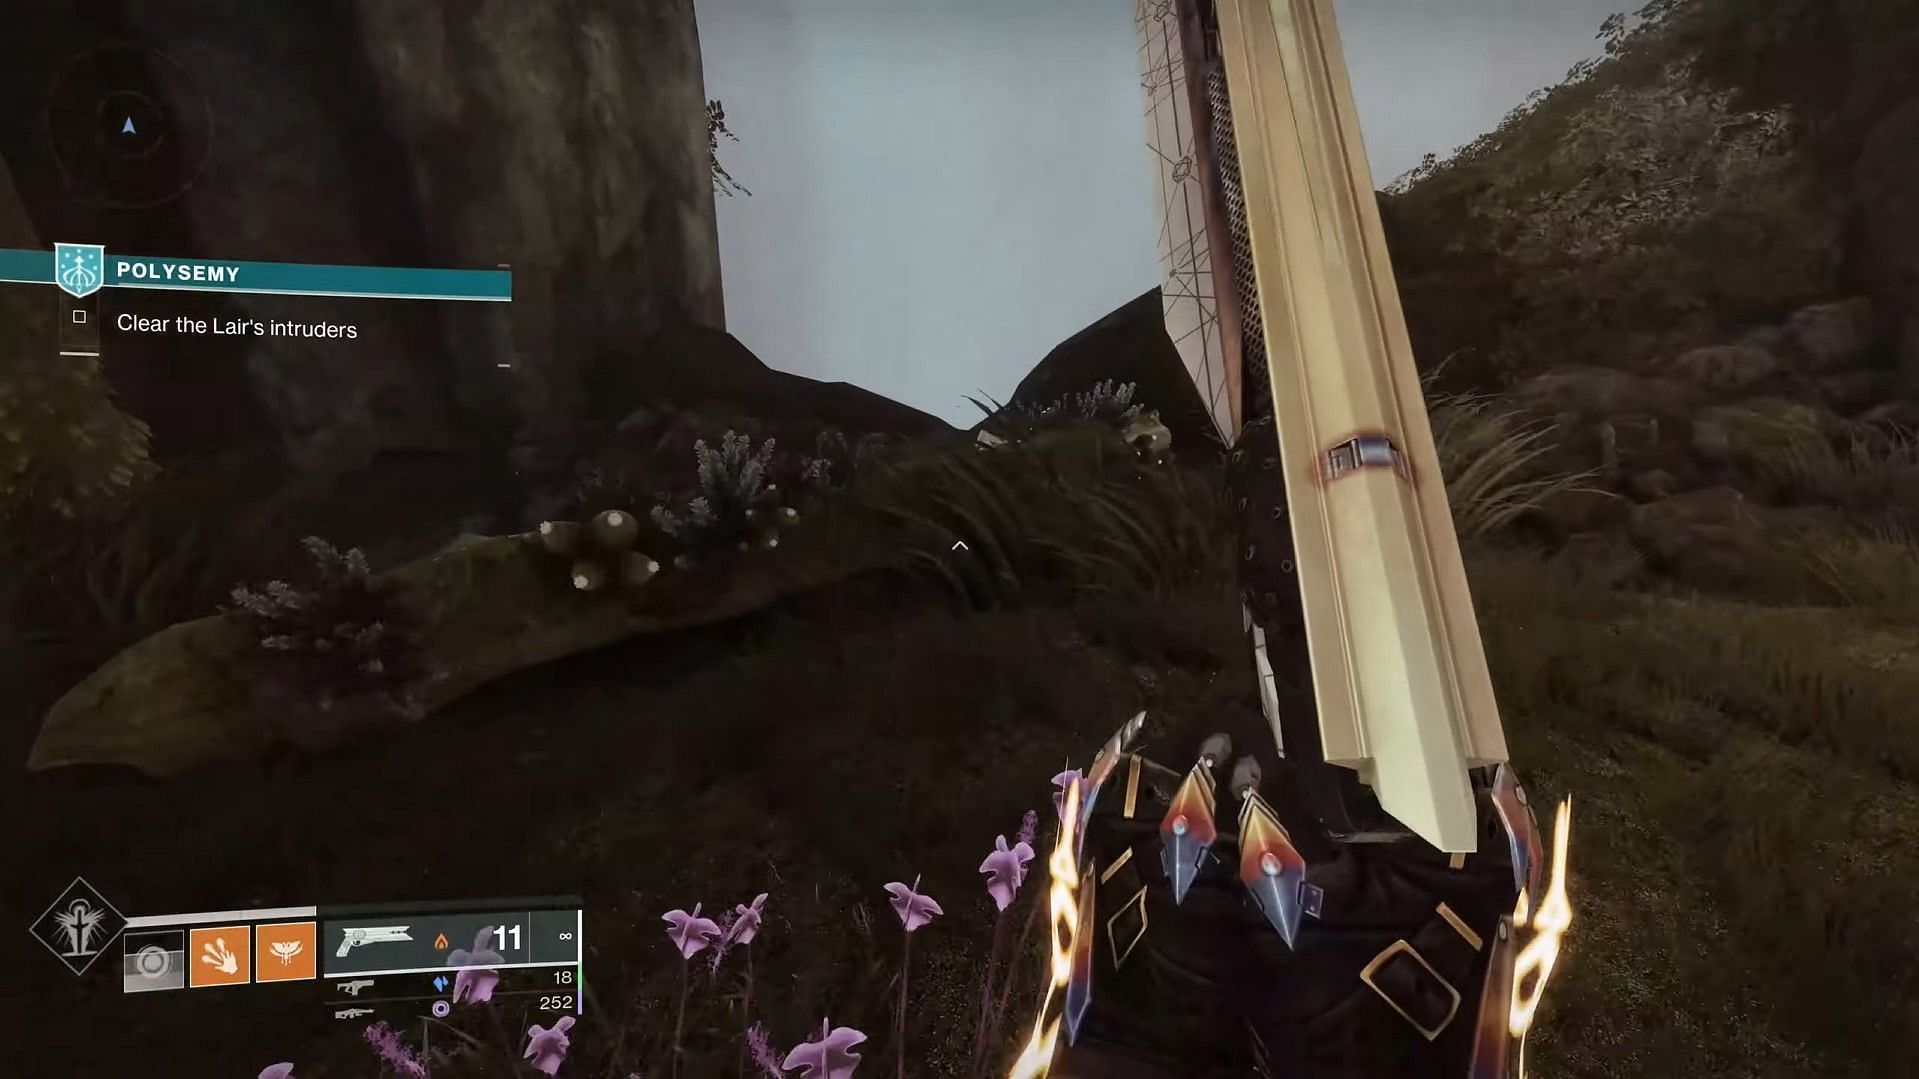
- The second Starcat can be found in one of Riven's Lair encounters, specifically in the Garden of Plenty after the "Polysemy" objective.
- The third Starcat can be found in the "Tautology" weekly story quest, or within a random Riven's Lair tileset.
- The fourth Starcat can be found near the chest of the "Chamber of Starlight" Lost Sector.
- The fifth Starcat can be found near the chest of the "Bay of Drowned Wishes" Lost Sector.
- The sixth Starcat can be found near the chest of the "Aphelion's Rest" Lost Sector.
- The seventh Starcat can be found in the Gnashing Chamber of The Coil or Riven's Lair.
- The eight Starcat can be found in the Apophasis mission, at the base of a tree to the right of a spawning point.
- The ninth Starcat can be found in the Spine of Keres, inside the building with planets.
- The tenth Starcat can be found in Harbinger's Seclude, past the Rheasilvia.
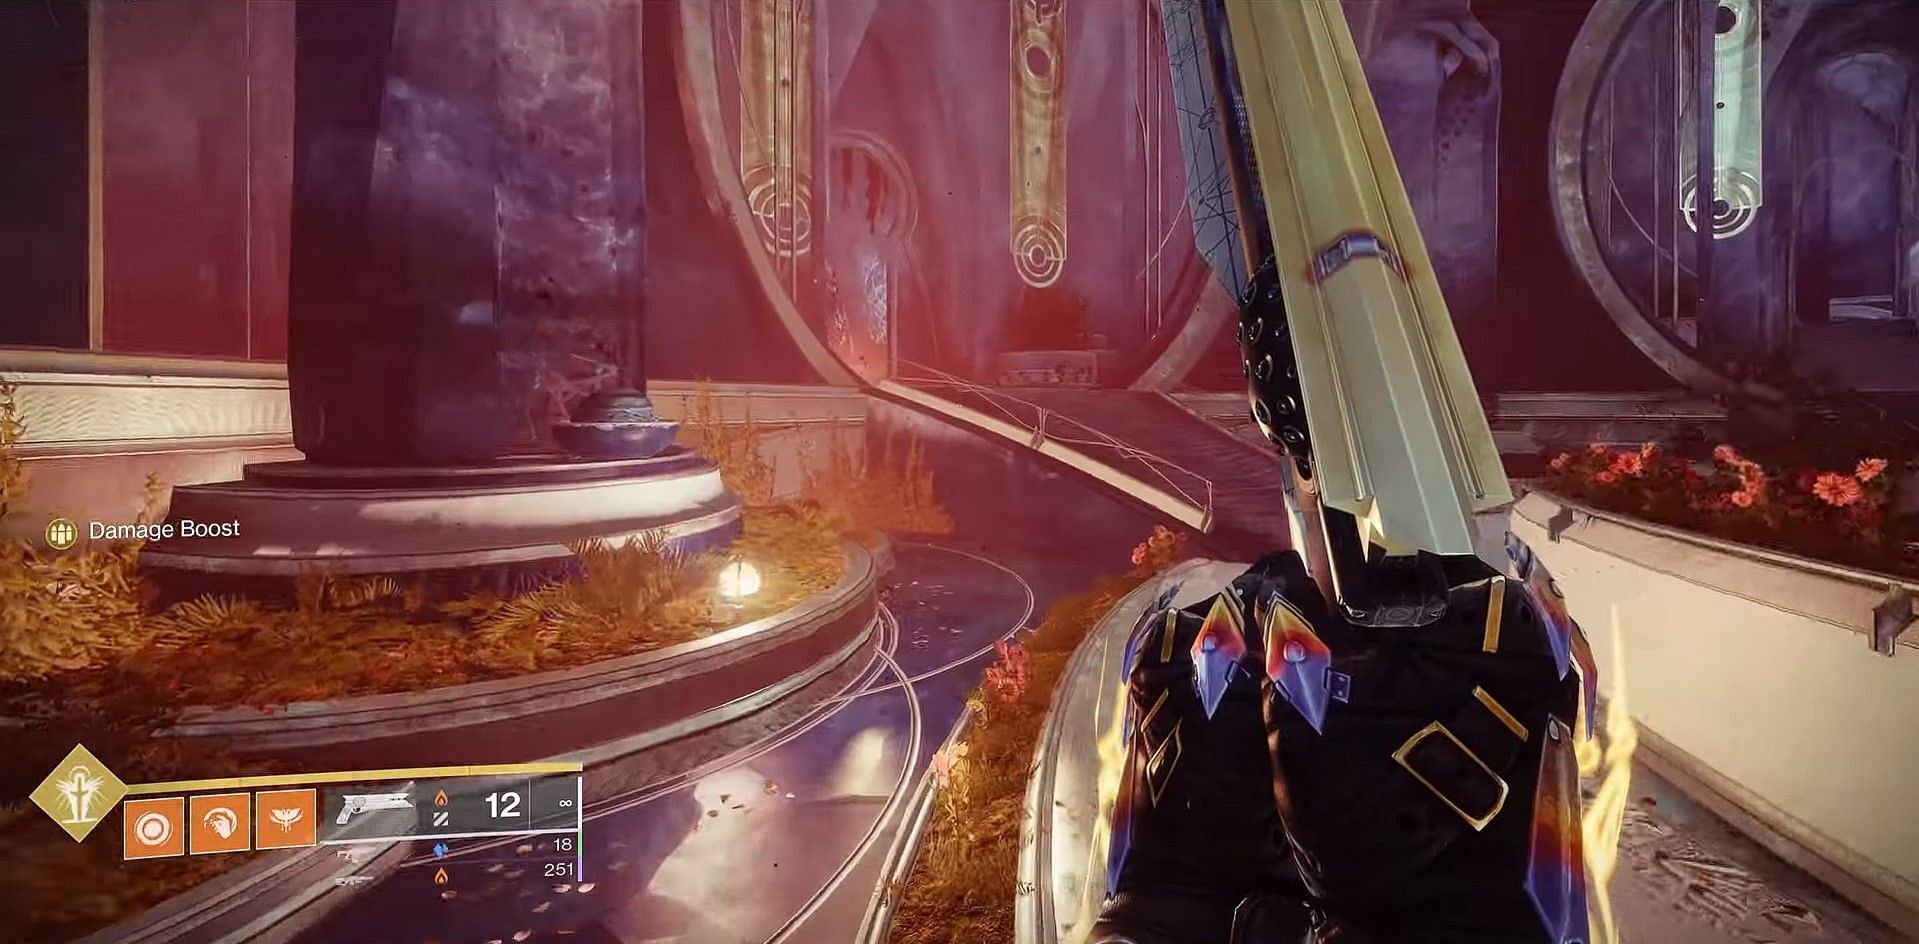
- The eleventh Starcat can be found in Confluence, following the Starcat in the Harbinger's Seclude.
- The twelfth Starcat can be found in the Garden of Esila, following the Confluence.
- The thirteenth Starcat can be found in the Chiasmus mission, specifically on the foot of a statue in space.
- The fourteenth Starcat can be found in the Synchysis mission, just before the portal within the statue room.
- The fifteenth Starcat can be found after completing all Exotic steps in Starcrossed. Head inside the portal and keep walking until you get the "Well-tended Garden" emblem to find the Starcat.
After you have placed offerings for all of the Starcats, the progression toward the "Familiar Felines" triumph under the Wishbearer seal should be 15 out of 15.
1) Starcat location #1
To find the first Starcat, open the Dreaming City map and load it into a Blind Well instance. It is best to assist players in an ongoing run of the activity. Once done, look towards the colossal entrance door on one side of the central well. The image below should provide a more precise idea.

Approach the cat and place your offering as asked. You will be rewarded with 100 Riven's Reputation EXP for the season and a random Dreaming City weapon.
The Starcat will disappear after you obtain the rewards.
2) Starcat location #2
Finding the second Starcat for Week 1 in Season 23 can be tricky, as it is locked behind a random encounter of Riven's Lair mission. To start, initiate the mission "Riven Lair" from the HELM map and look for the "Polysemy" objective at the start.
The whole mission is randomized with different enemies and maps, so keep resetting until you find Polysemy.
Keep progressing until you reach the final portal of the objective, "Escape through the Portal," which leads you to an open space, as shown below. The area is called the Garden of Plenty.
You can ignore all enemies and go straight towards the end of the road, past the waterfall. Just before the platform with multiple pillars, look to your left for a gap, as shown in the image below.
Place offerings to the Starcat underneath the gap to complete Week 1's quota.
3) Starcat location #3
Spawn after loading into the Tautology mission and progress by following the objectives. Eventually, you will come across a statue of a Techeun in front of you. The image below should provide a clearer idea of the room.

Turn right, and then another right to look for a blue pillar.
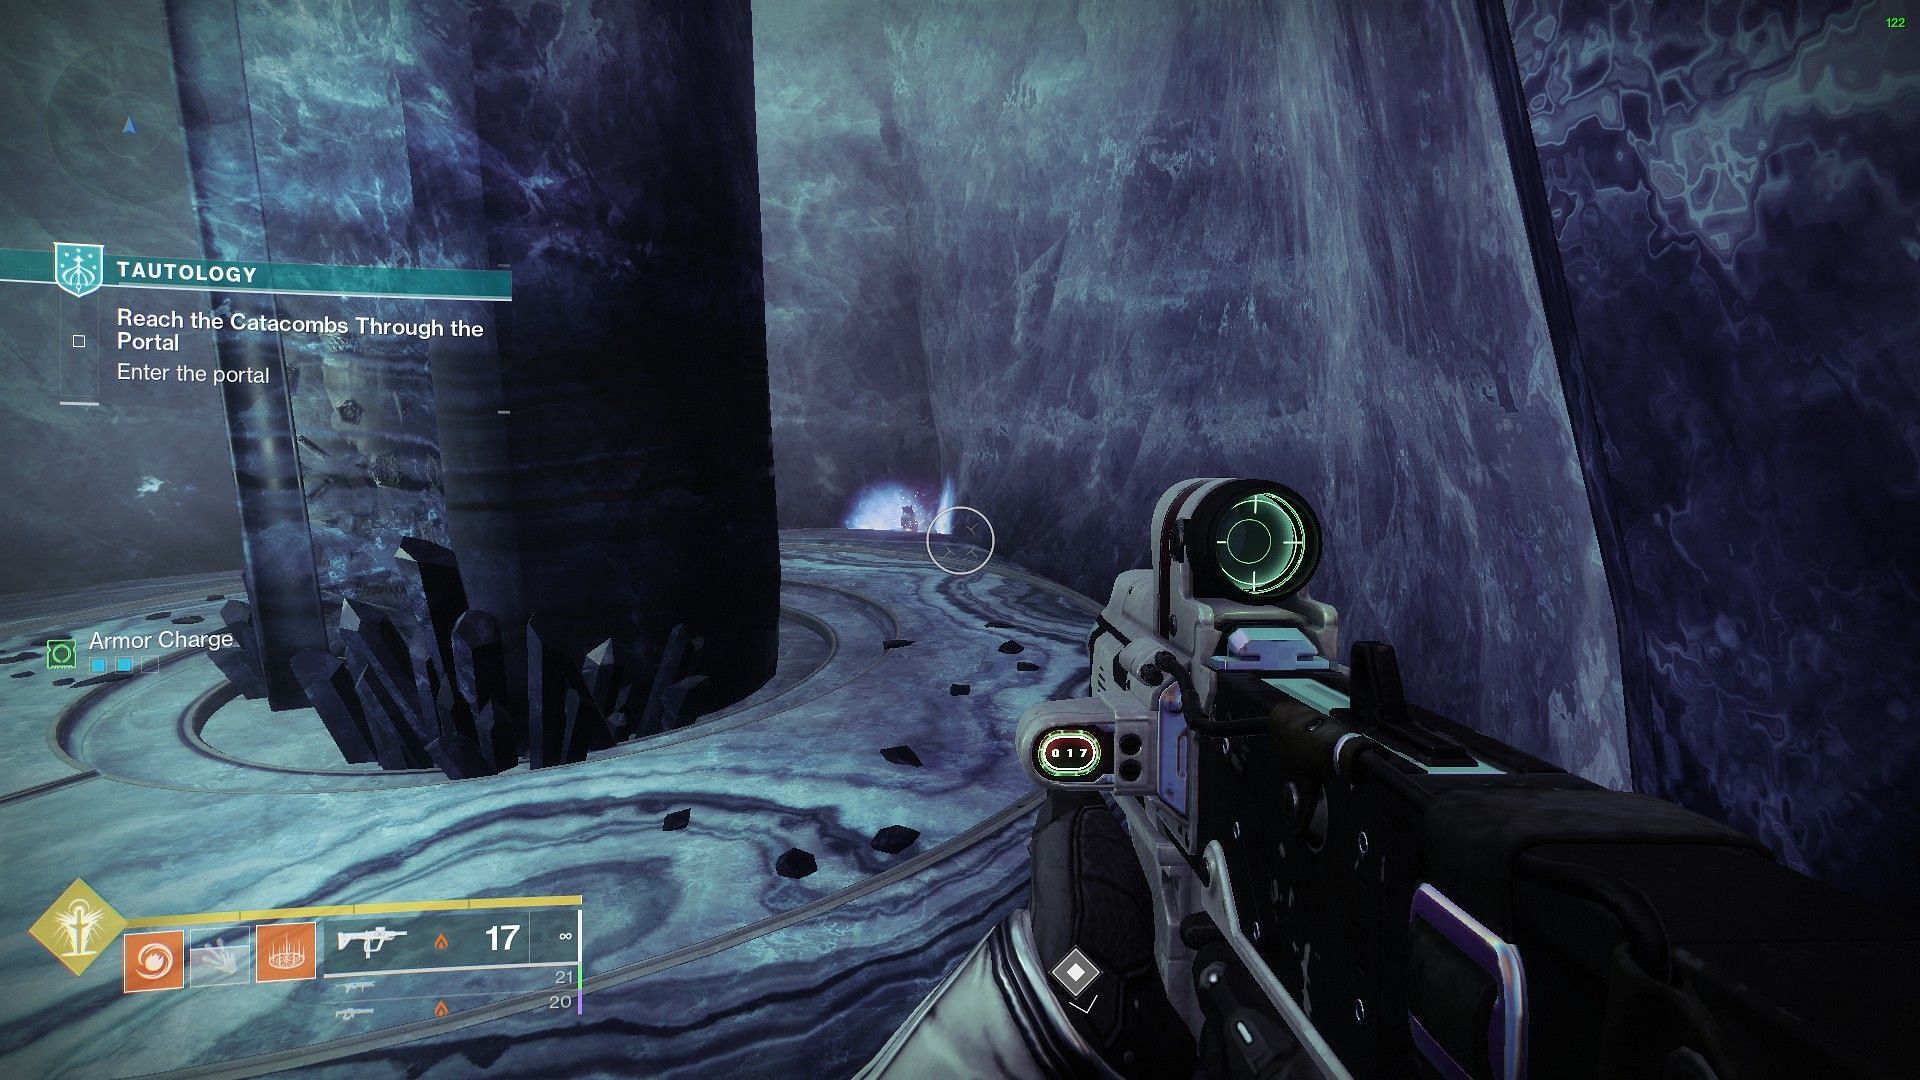
The Starcat should be located behind the pillar.
4) Starcat location #4
Spawn on the Divalian Mists and head for the Chamber of Starlight Lost Sector. Head to the boss room and look for the cat near where the Wizard boss spawns.
5) Starcat location #5
Spawn on the Divalian Mists and head for the Bay of Drowned Wishes Lost Sector. Fight to the boss and chest room, and look for the cat near the chest.
6) Starcat location #6
Go to the Aphelion's Rest Lost Sector, and fight through the enemies until you arrive in the boss room. Look for the Starcat inside the large bowl in the boss room.
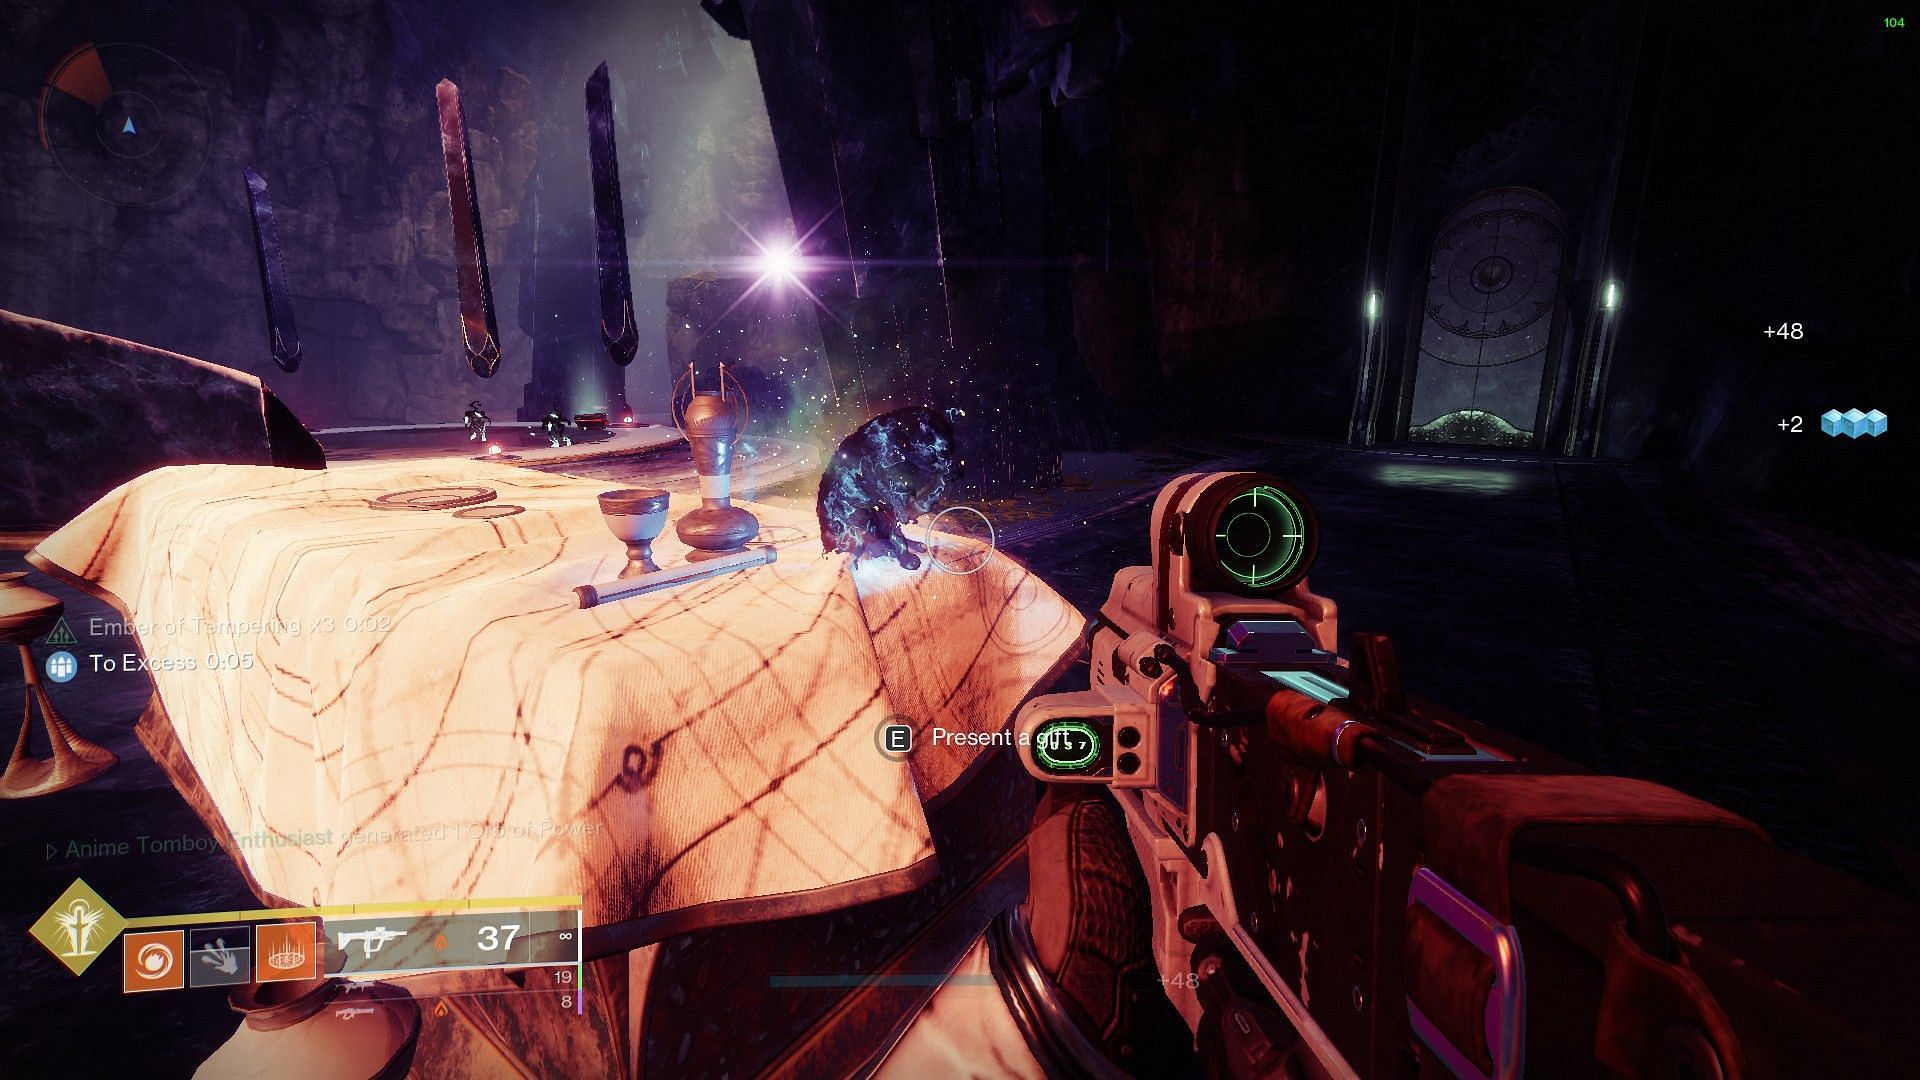
7) Starcat location #7
Launch The Coil activity and look for an encounter within the "Gnashing Chamber". The location resembles that of the Vault from Last Wish. The image below should provide a clearer idea.
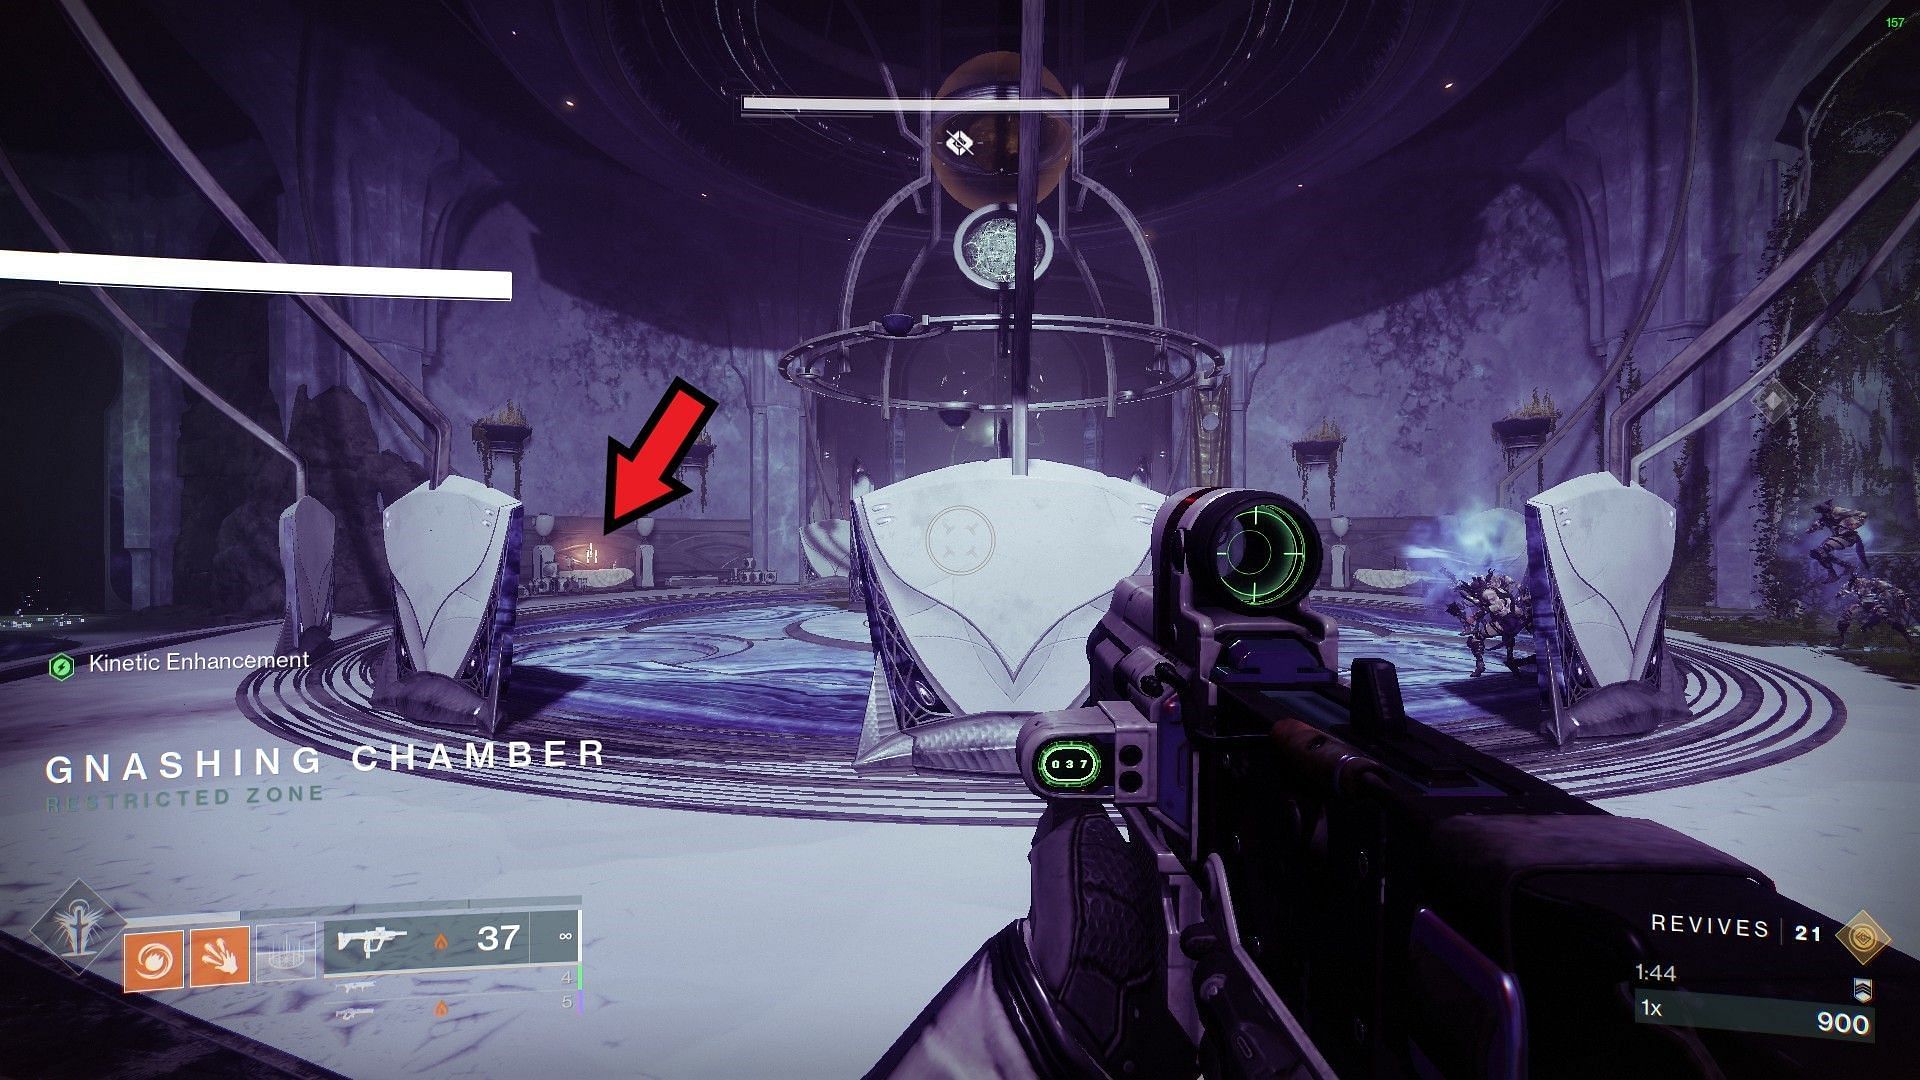
Approach the table to your left, as shown in the image above, and offer a gift.
8) Starcat location #8
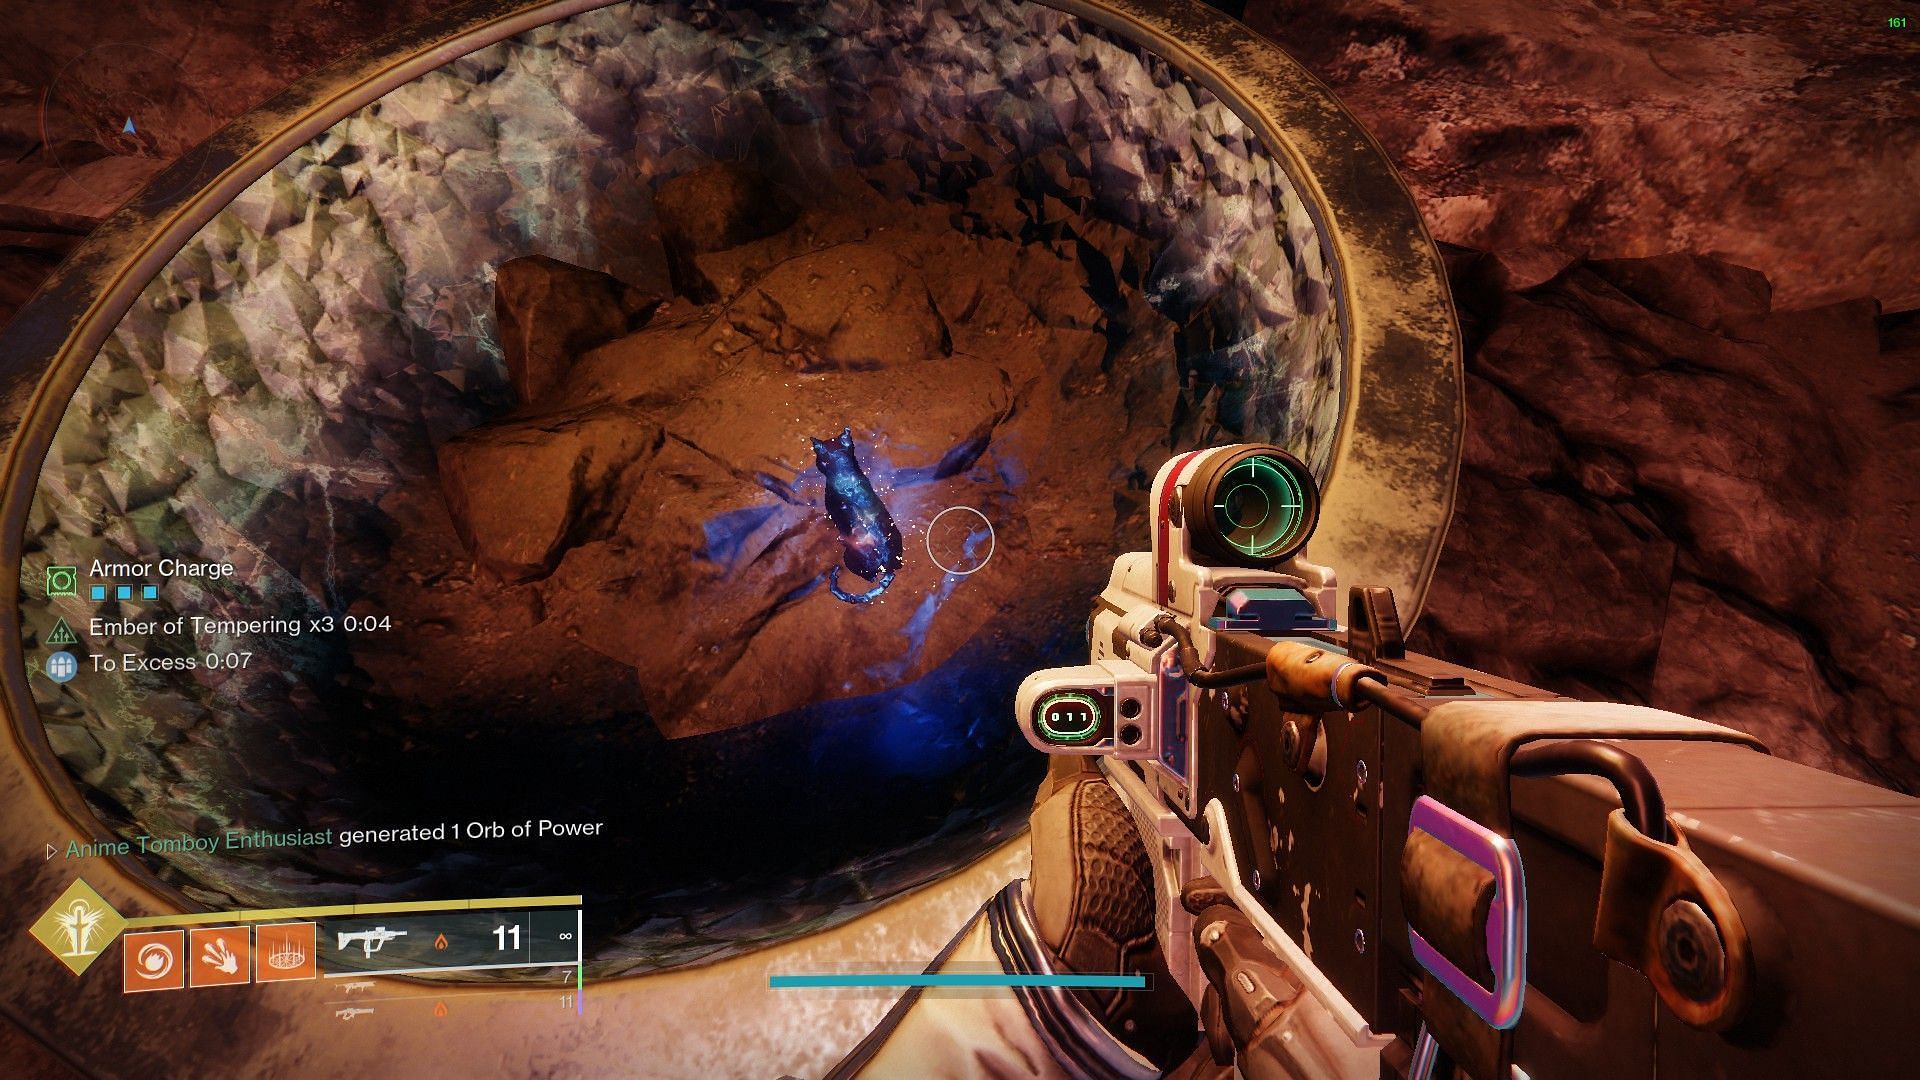
Launch the Apophasis mission in Season of the Wish and load into the first combat area. You have a chance to get this location randomly in The Coil of Riven's Lair as well. Once you spawn in, instead of heading towards the huge doorway, take a right and look for a tree. The image below should provide a clearer idea.
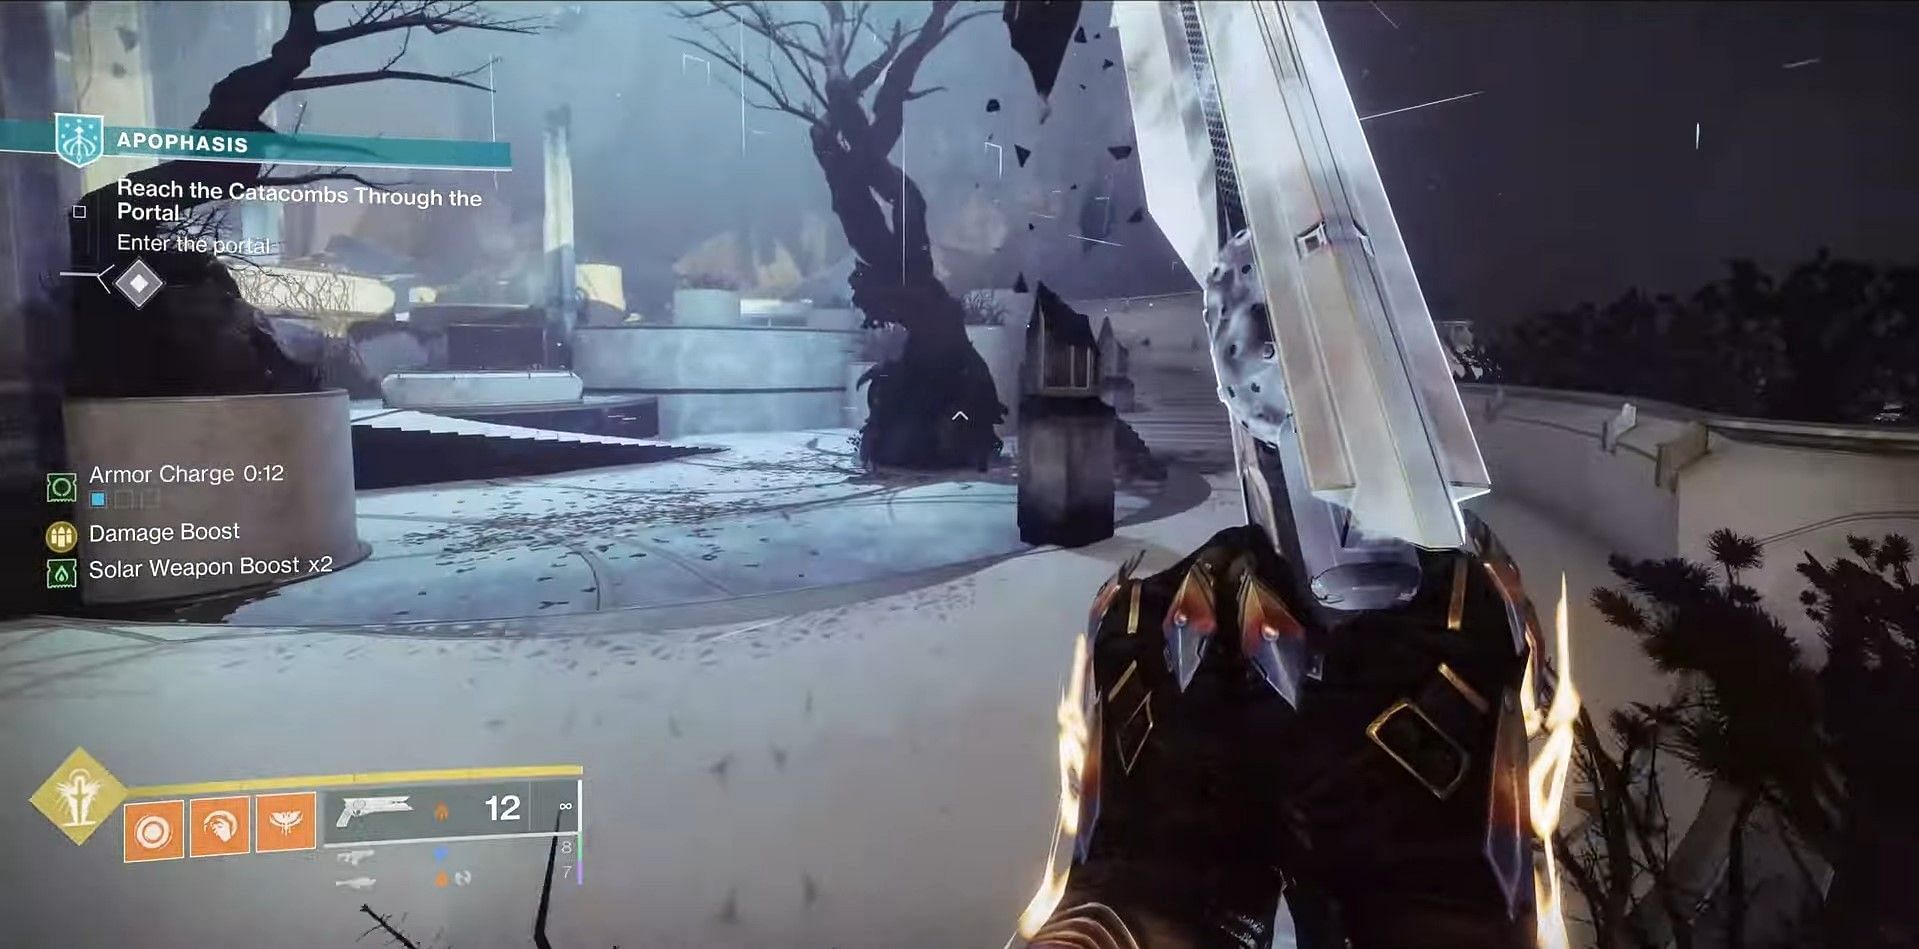
The cat should be located at the base of the tree.
9) Starcat location #9
Spawn on the Divalian Mists waypoint and take a left towards the Spine of Keres. Cross the gap and approach the building with floating planets inside, shown in the image below.
After entering the building, take the stairs to the left, and reach the Techeun location on the second floor.
The Starcat can be found just beside the Techeun.
10) Starcat location #10
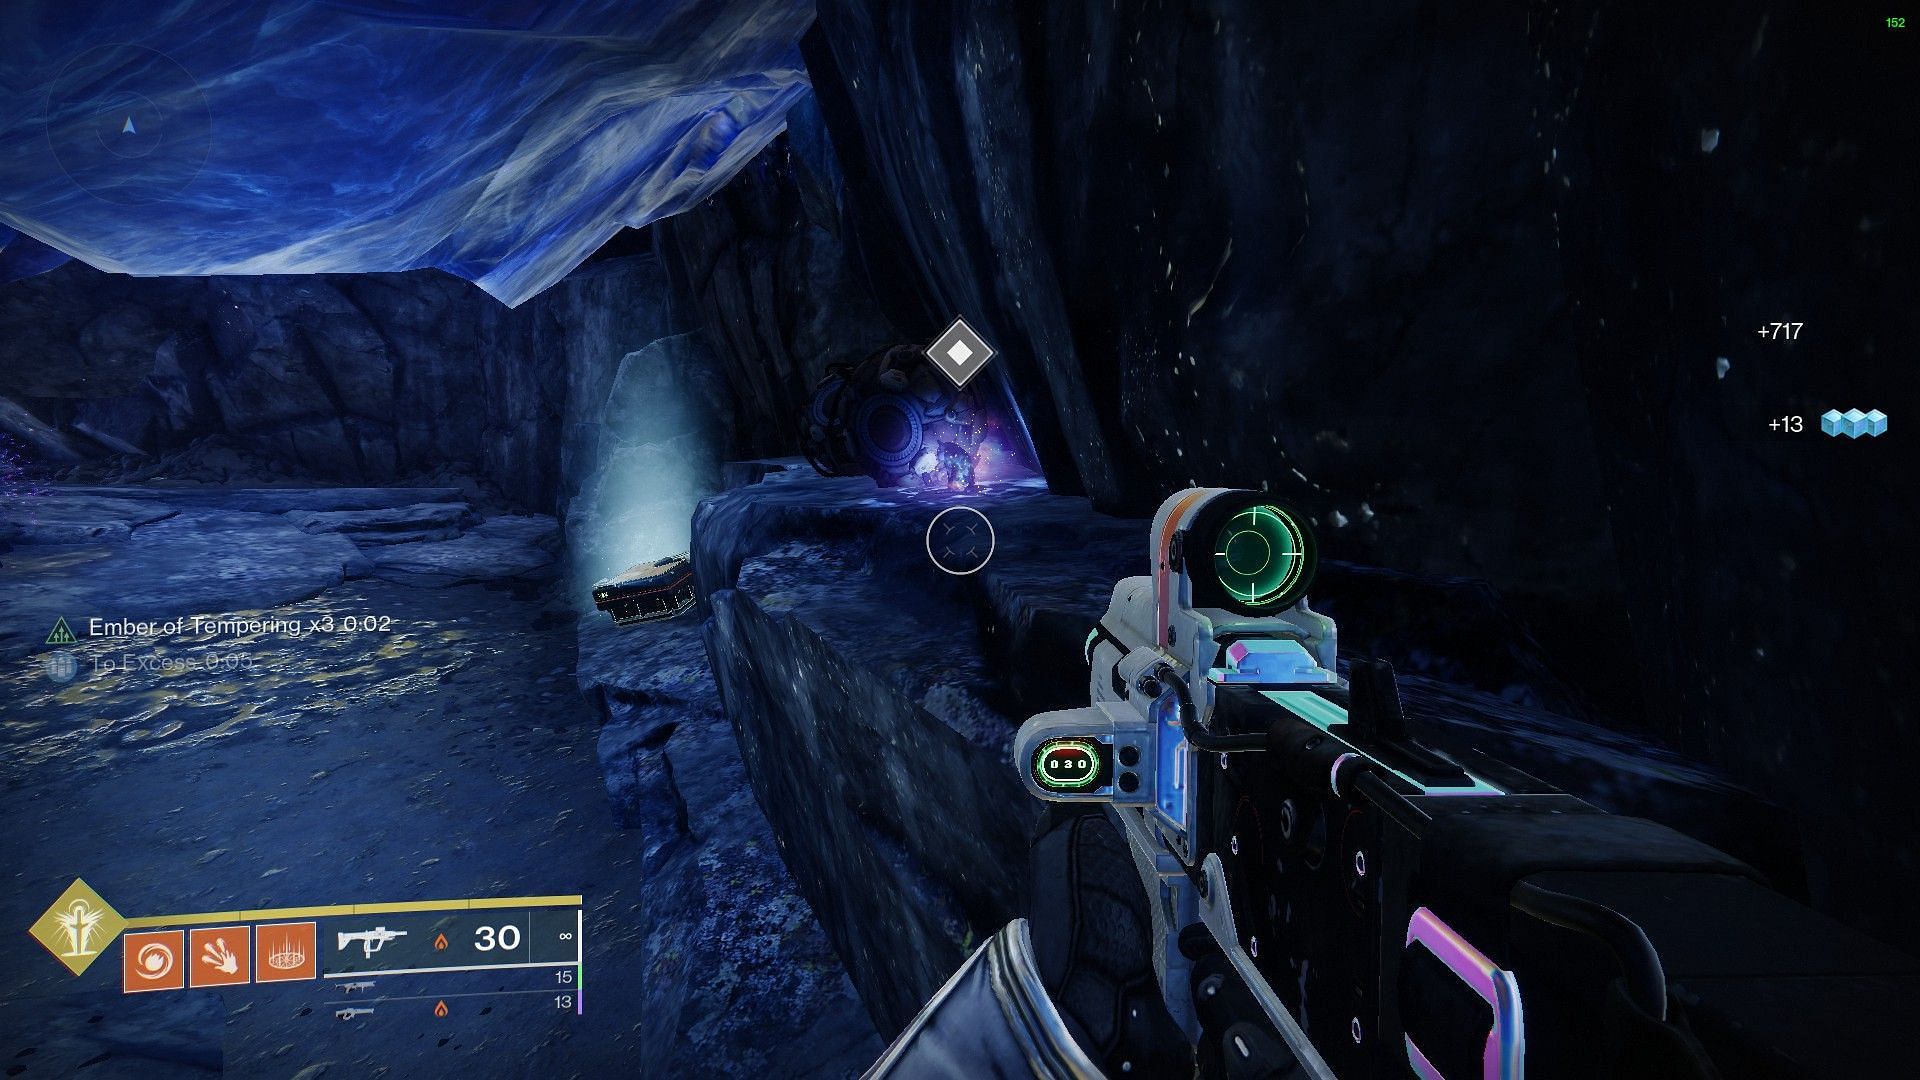
Spawn on Dreaming City and head to Rheasilvia. Here, head inside the Harbinger's Seclude, shown in the image below.

The correct path is to take the left after entering an open room with a huge Taken Blight and jump down, You will find a Taken portal inside a cave after jumping down. The image below should provide a clearer idea.
Follow the path to the room full of Techeun statues and an Ahamkara Bone. The Starcat can be found behind the Ahamkara bone.
11) Starcat location #11
Go back to the portal inside the cave after picking up the tenth Starcat, and follow the path to the original entrance of the Shattered Throne Dungeon.

For those who don't know, after entering the portal, take the long hallway and walk past the statue.
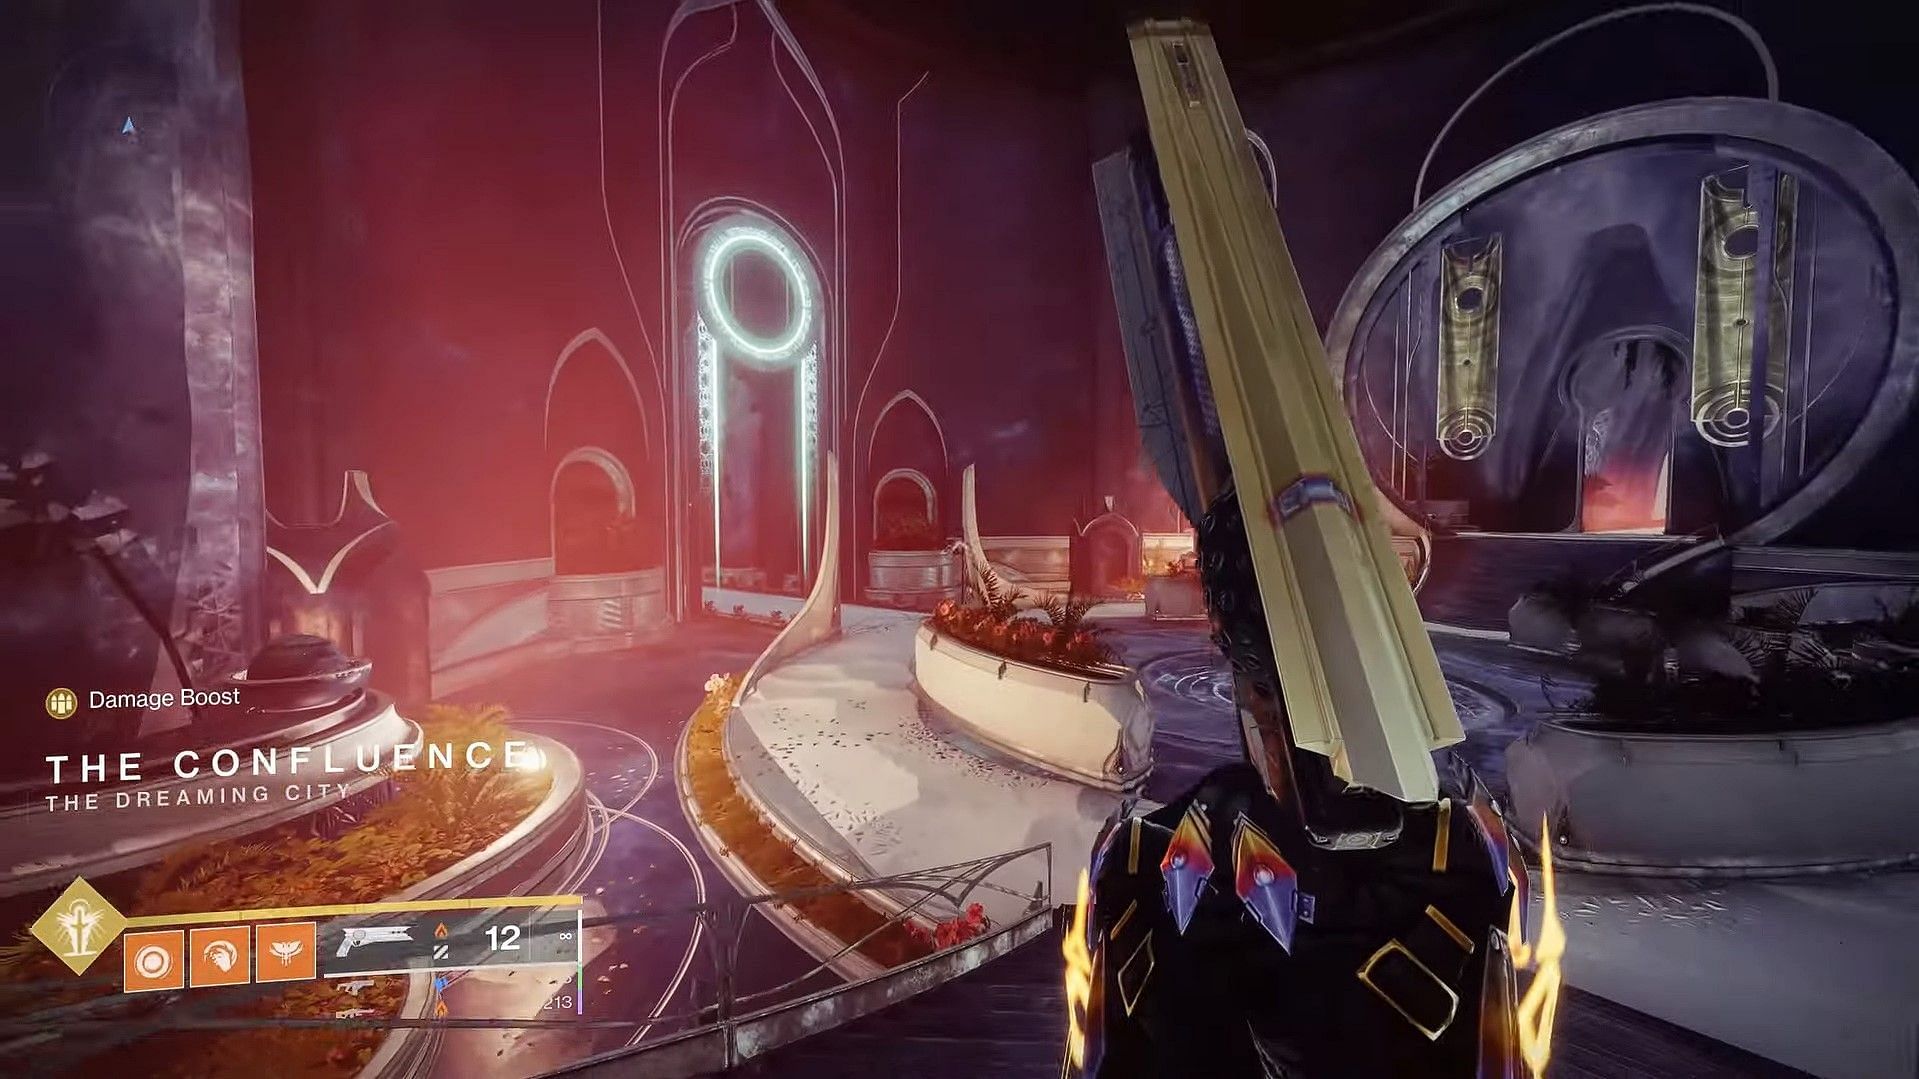
Once you come across the room with multiple entrances, take the left door and approach the closed portal door for the Starcat.
12) Starcat location #12
Walk outside the portal room and take the entrance to the left.
Go past the tree and take the first left until you see a portal. Once the portal takes you outside, take the door that leads to a few pillars and a group of Taken enemies.
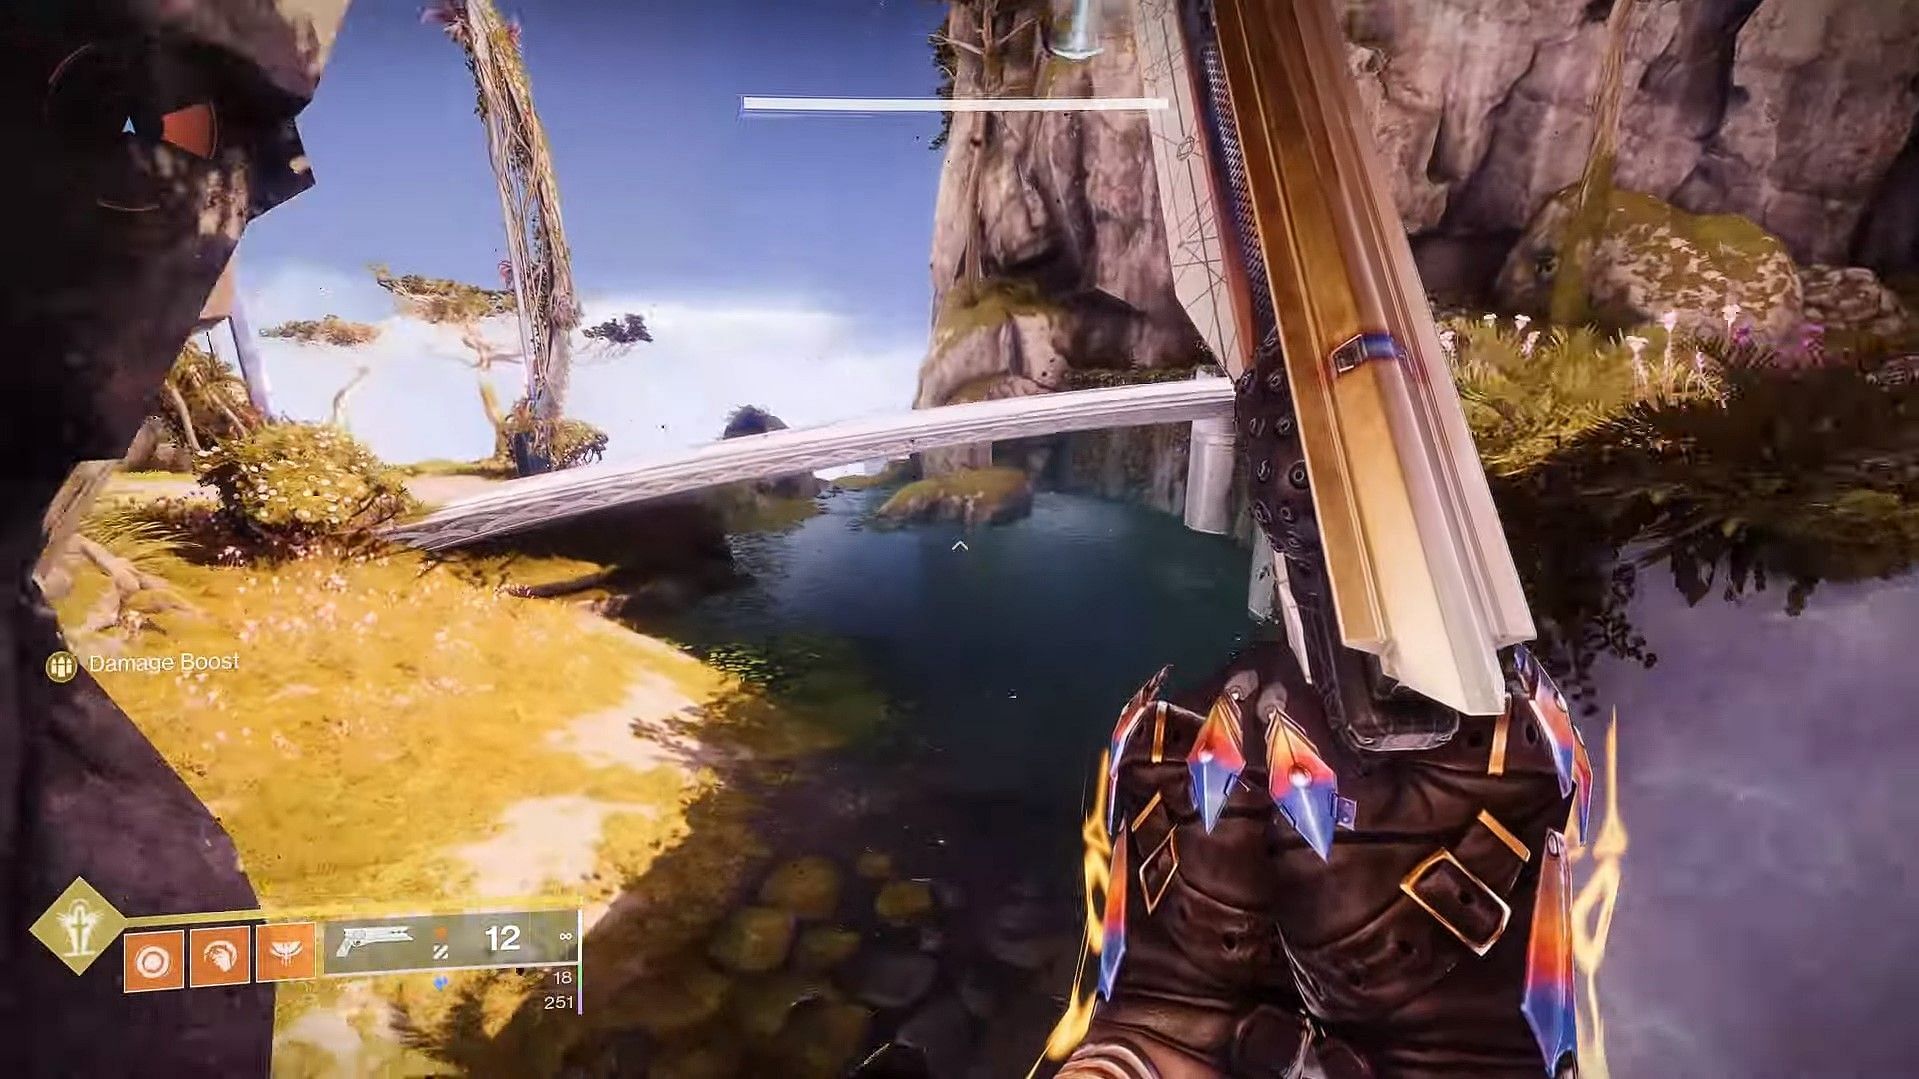
Go left until you see a small bridge on top of the pond. The Starcat can be found under this bridge.
13) Starcat location #13
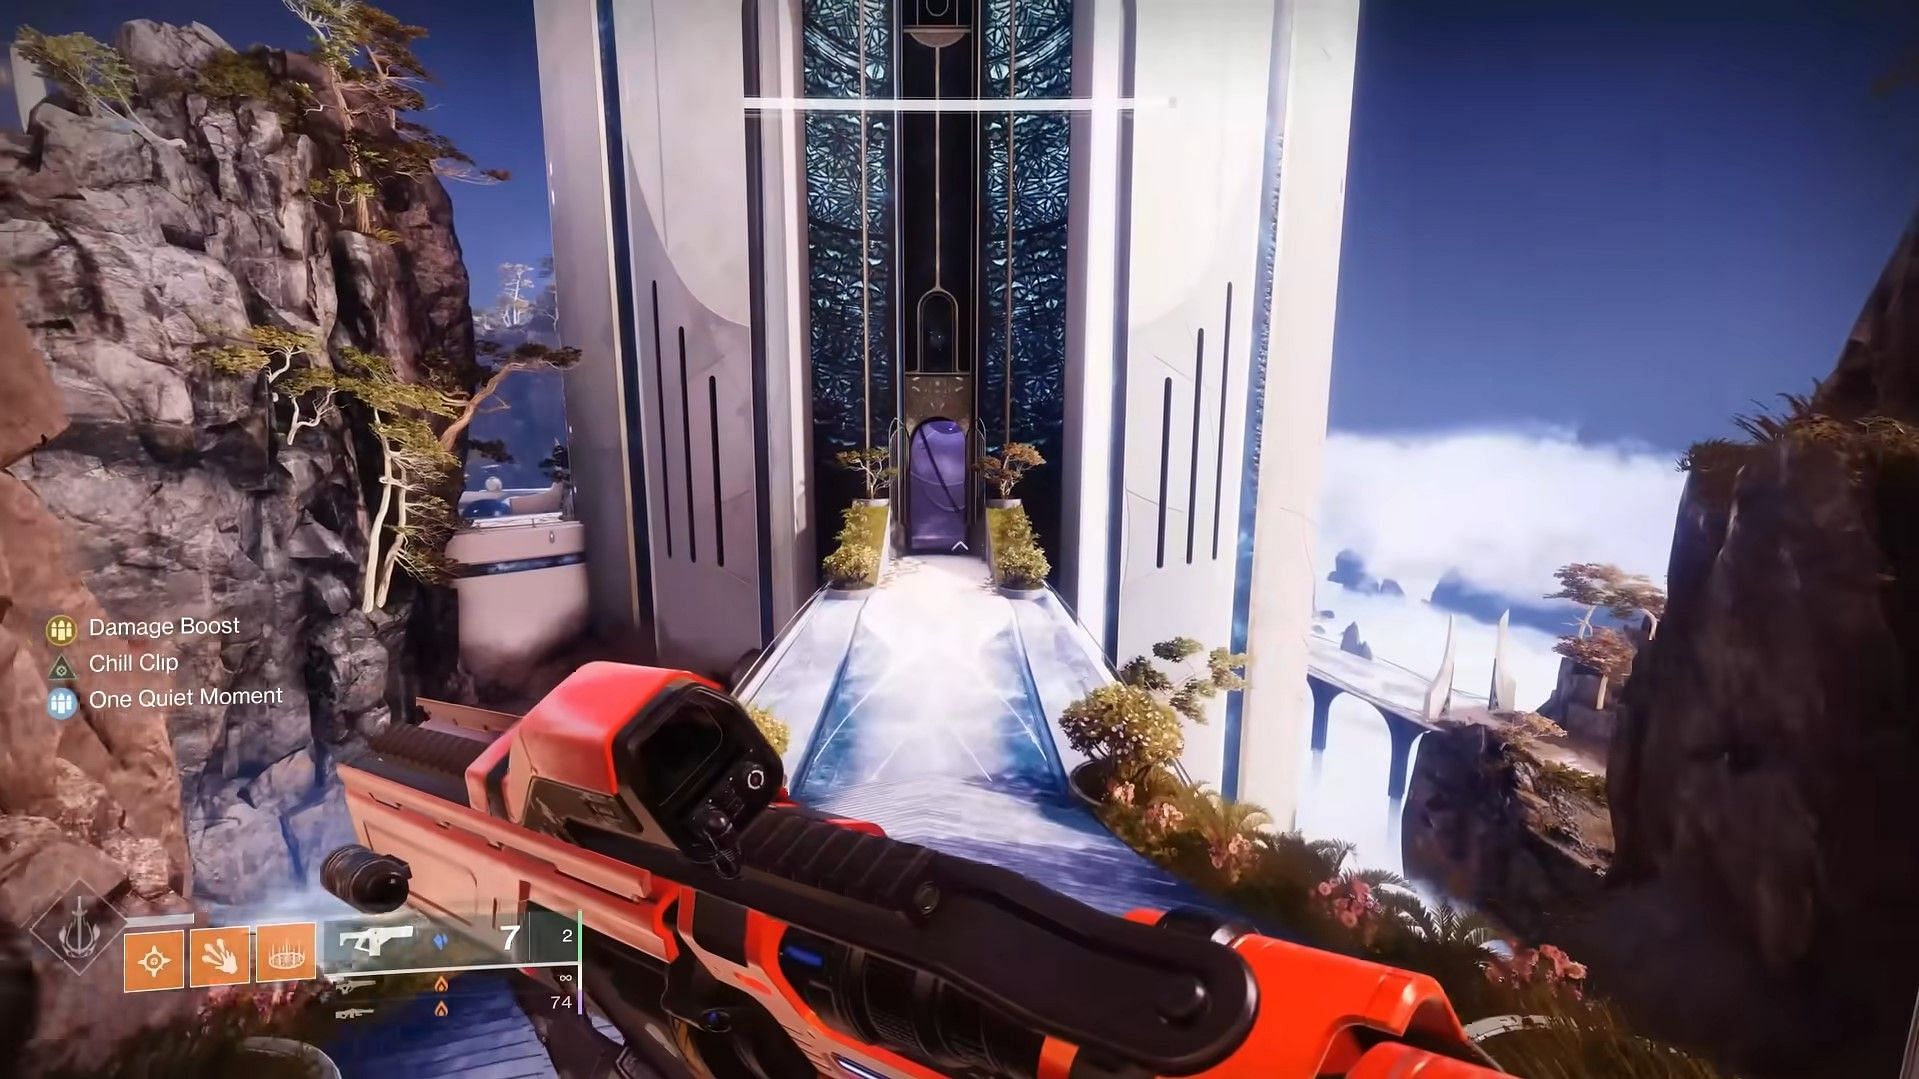
To find Starcat no. 13, start the seasonal Chiasmus mission and continue onward until you find yourself in a small tile set of outer space. The image below should give you a clearer idea of the location.
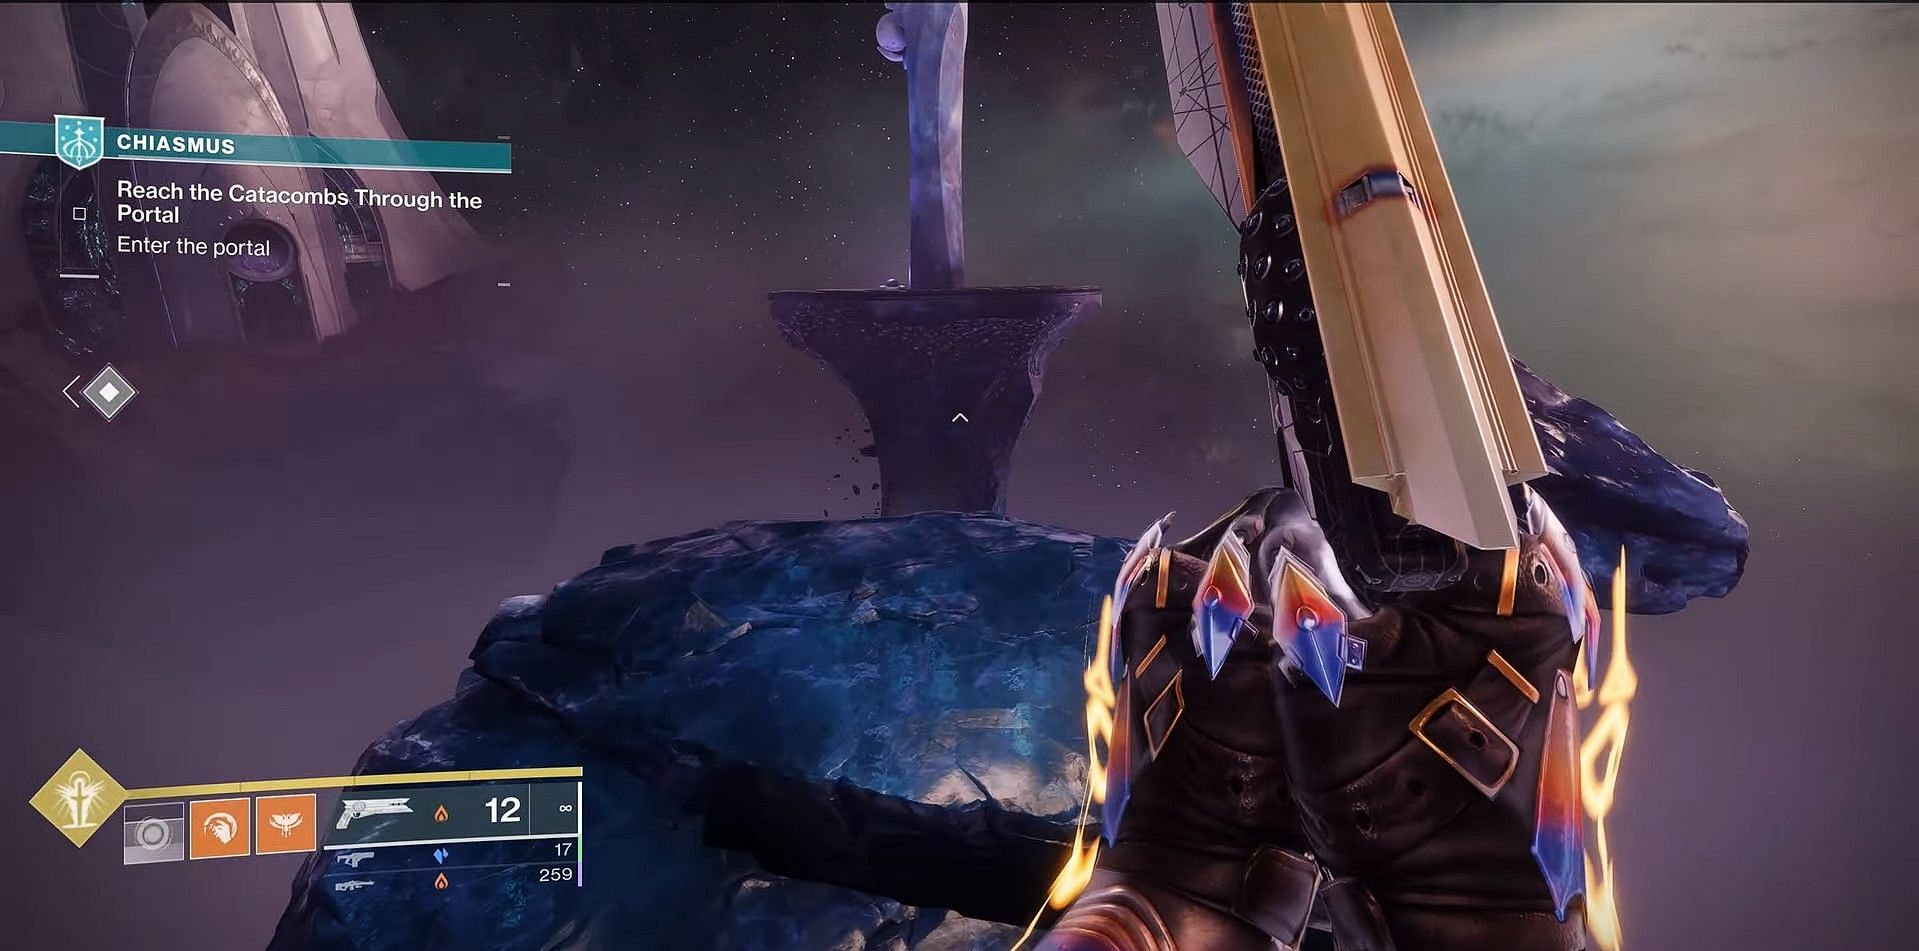
Once you spawn in, you will see a portal in the opposite direction. Turn right, and you will notice a statue in the distance. Approach and the Starcat will be present inside a small offering bowl at the foot of the statue.
14) Starcat location #14
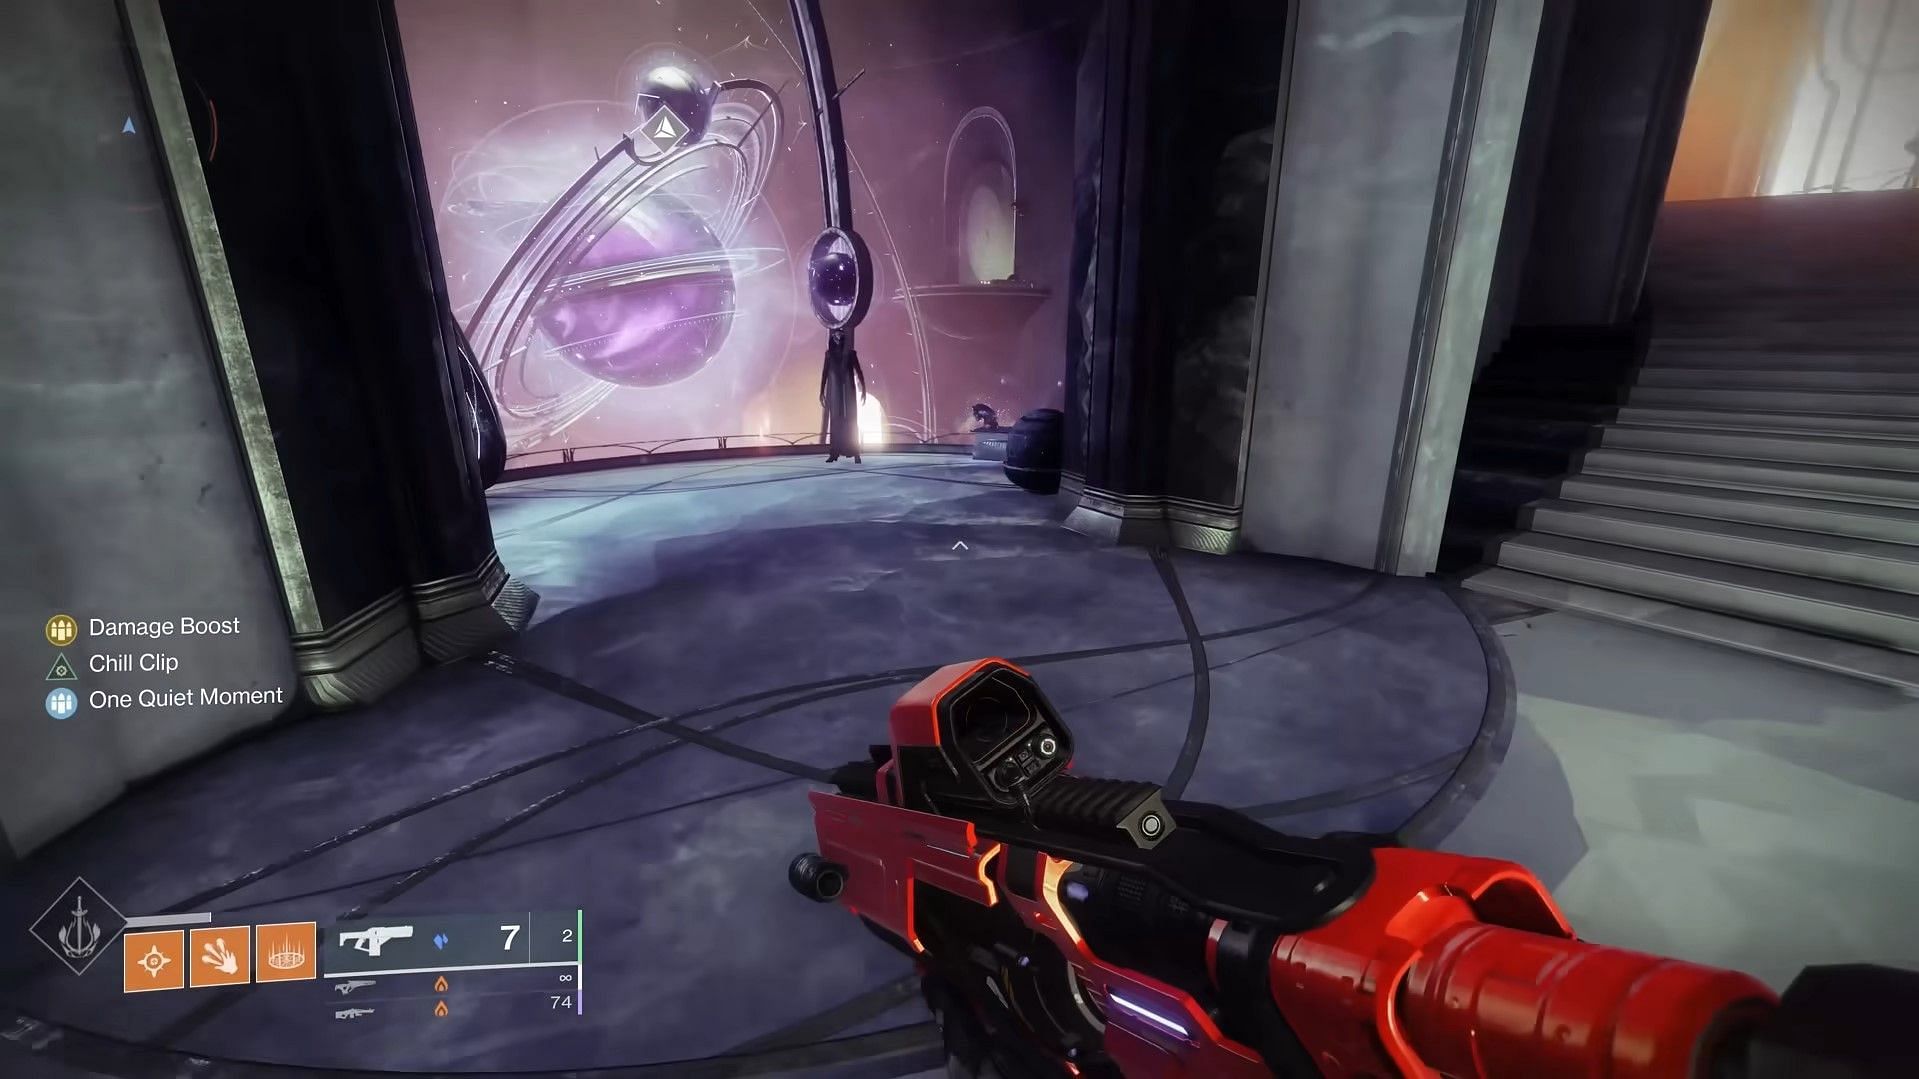
To find this Starcat, launch the Synchysis mission and look for the portal room shown in the image below.
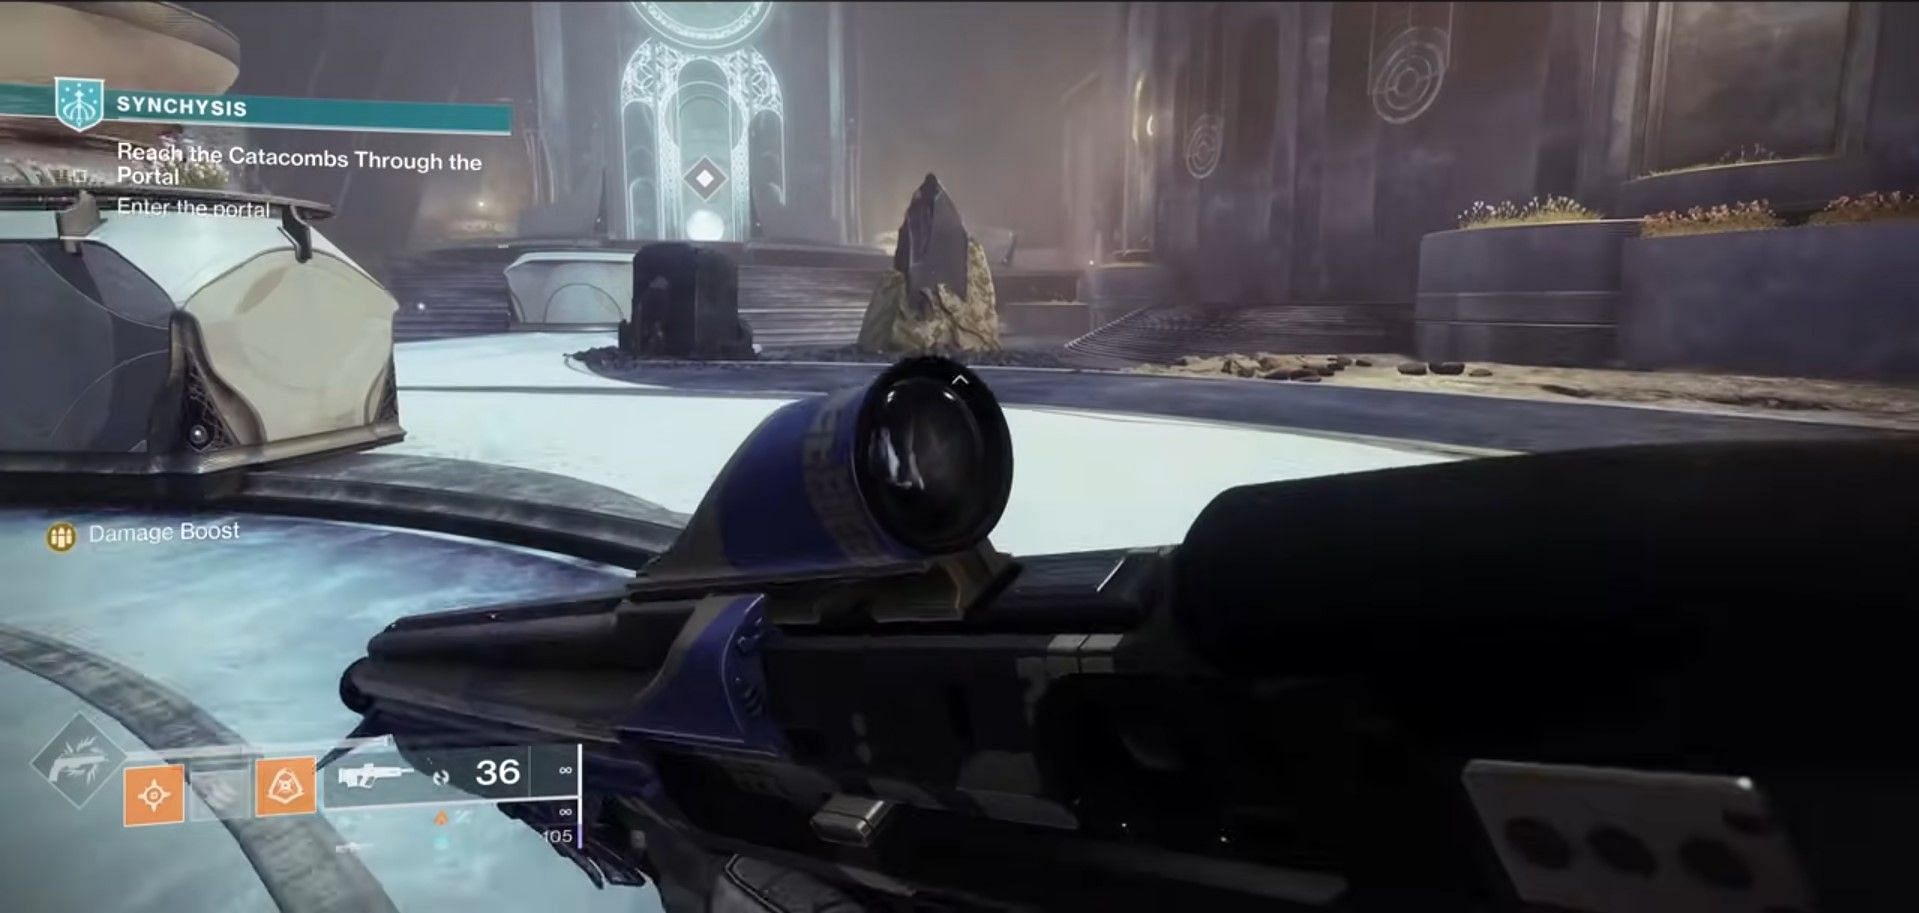
Approach the portal and look to the extreme right of the portal's entrance.
15) Starcat #15
The final Starcat can be found at the end of the Starcrossed mission, through a secret portal. Complete all Exotic quest steps tied to the Starcrossed mission and look for floating platforms as shown in the image below. Please note that you must have all Exotic catalyst quests completed to get these platforms.
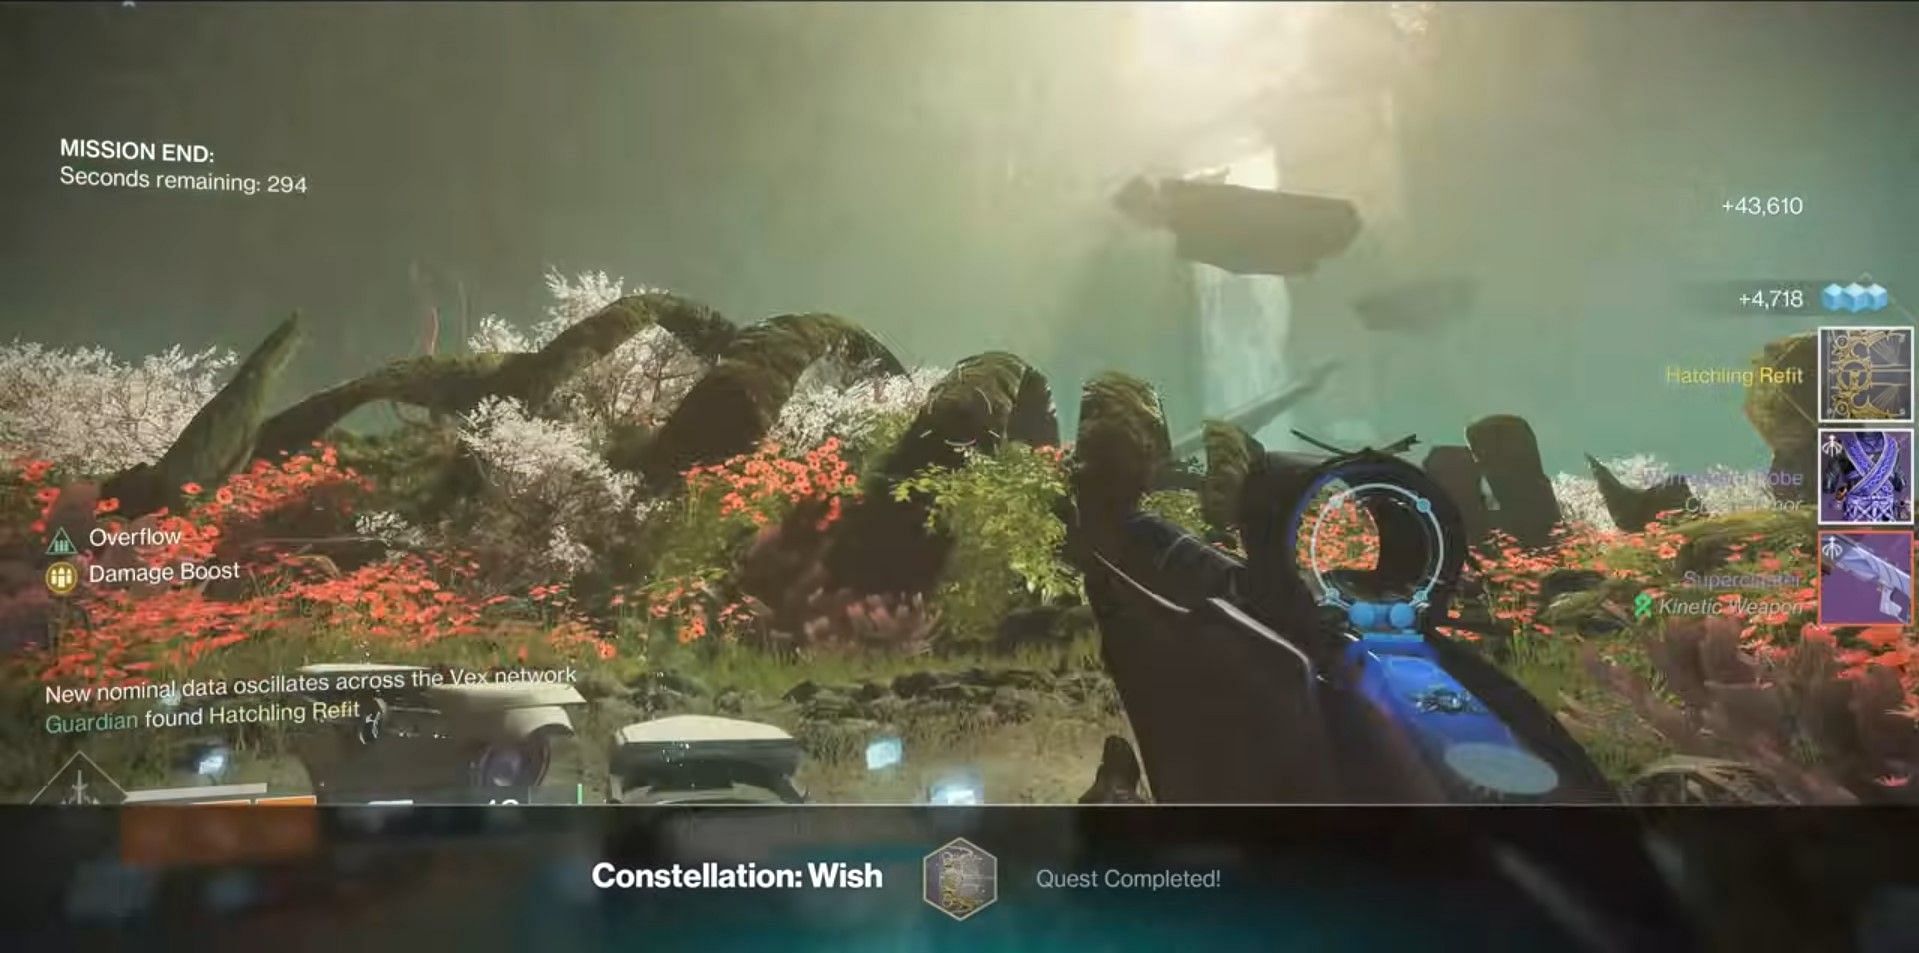
Take to the platforms and enter the portal. Once entered, follow the path until you see a mysterious structure and a round pl;atform. The Starcat can be found on this platform, alongside the Well-tended Garden emblem.
Check out other guides on this game from Sportskeeda:
5 best Rocket Launchers for PvE || Destiny 2 weekly reset || Destiny 2 this week at Xur || Destiny 2 Grandmaster Nightfall calendar || Destiny 2 server status || Destiny 2 PvP build tier list || Destiny 2 PvE build tier list || Everything to expect from Destiny 2 in 2024 || All Destiny 2 Into the Light weapons and perks || All free emblem codes
