
'%20x='0'%20y='0'%20height='100%25'%20width='100%25'%20%0A%20%20%20%20%20%20%20%20%20%20xlink%3Ahref='data:image/jpg;base64,/9j/2wBDAAYEBQYFBAYGBQYHBwYIChAKCgkJChQODwwQFxQYGBcUFhYaHSUfGhsjHBYWICwgIyYnKSopGR8tMC0oMCUoKSj/2wBDAQcHBwoIChMKChMoGhYaKCgoKCgoKCgoKCgoKCgoKCgoKCgoKCgoKCgoKCgoKCgoKCgoKCgoKCgoKCgoKCgoKCj/wgARCAAGAAoDASIAAhEBAxEB/8QAFQABAQAAAAAAAAAAAAAAAAAAAAb/xAAUAQEAAAAAAAAAAAAAAAAAAAAE/9oADAMBAAIQAxAAAACAoBgf/8QAIhAAAAQEBwAAAAAAAAAAAAAAAQIDBAAFBgcRFiEjJGGB/9oACAEBAAE/AKWuaMlt0q2byxsL1JdMSLin3GeqWe8o0jcEMvuiUALpj7H/xAAXEQEAAwAAAAAAAAAAAAAAAAABAAMh/9oACAECAQE/ALHCf//EABYRAQEBAAAAAAAAAAAAAAAAAAEAIf/aAAgBAwEBPwADb//Z'%3E%3C/image%3E%3C/svg%3E)
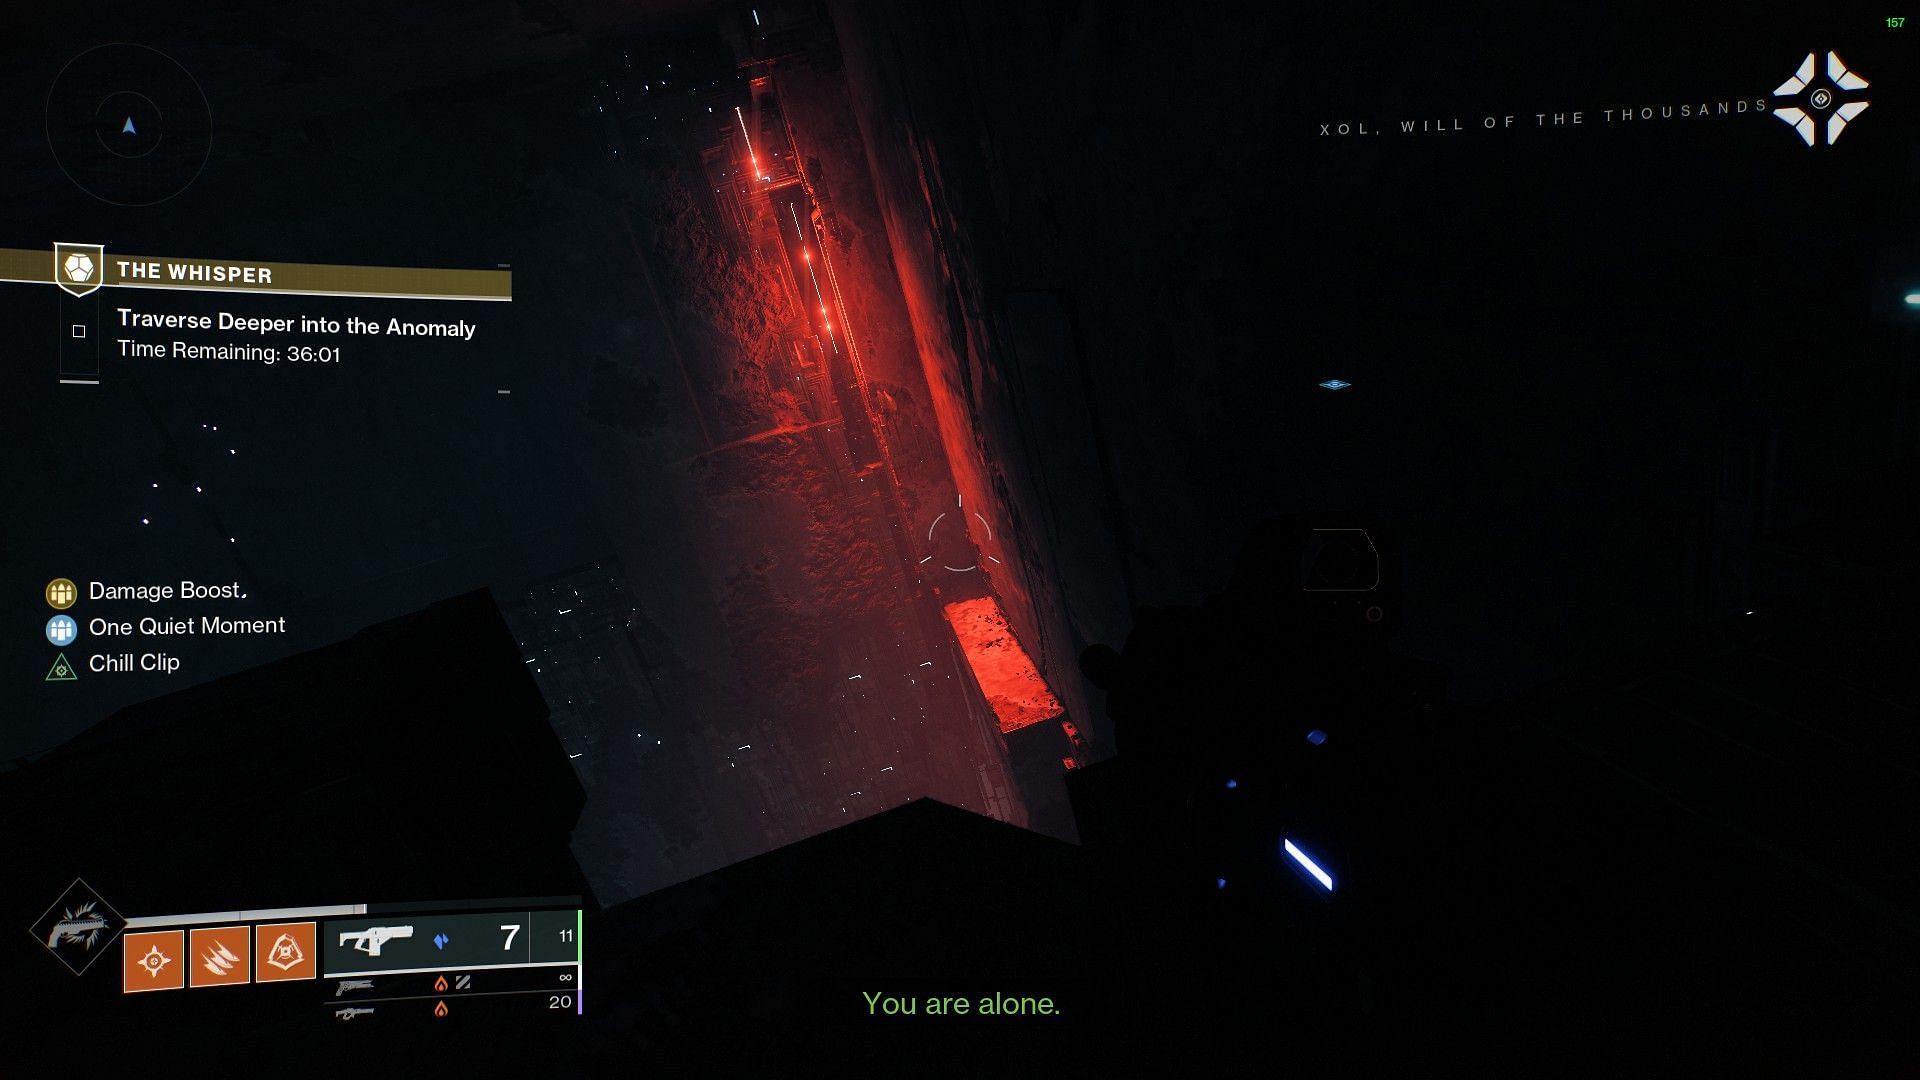
Destiny 2's The Whisper Exotic mission has taken players on a memory trip, as it was once everyone's favorite activity to run. However, since its vaulting, the Exotic weapon tied to The Whisper became somewhat irrelevant until the most recent Into the Light update. Additionally, players will find some new hidden secrets throughout the mission, one of which will be discussed below.
This article focuses on the Oracles hidden in the tileset of The Whisper, required for the "Oracular Seeker" triumph and the Exotic Taken Ship called "Karve of the Worm." It is a newer version of "A Thousand Wings" Exotic Ship from Year 1, also a part of The Whisper mission back then.
Disclaimer: There are seven hidden Oracles in The Whisper mission, two of which are available in Week 1 of Into the Light. Since the rest are time-gated, this article will be updated once the locations become available in the coming weeks.
Where to find all Oracles in Destiny 2 The Whisper Exotic mission
Here is a summarized list of the Oracle locations found within Destiny 2 The Whisper mission:
- At the start of the red-light jumping puzzle, after dropping down the hole in the ground, turn left just before the beginning of the puzzle.
- At the elevator section of the red-light jumping puzzle, run past the small gap that leads to the main objective, and look for another gap in the wall to your left.
- At the red jumping puzzle, before the multiple-portal room. Jump through the platforms until you arrive at the small entrance. Instead of pushing in, look behind to your left.
- At the end of the green room jumping puzzle. Follow the jumping puzzle to the end, and the Oracle will be located just after entering the small gap after the jumping puzzle.
- Under the green room, past the Vex corpses and endless Taken thralls.
- After the green room, look for the Vex Portal in the dark open area
- After the green room, before making the huge leap.
The Oracles can be collected in the normal and Legend modes of The Whisper. If you are running in a group and one member shoots down an Oracle, the mission must be restarted for others to shoot that same Oracle again. Only this time, the Oracle won't be shown to the member who already shot it down.
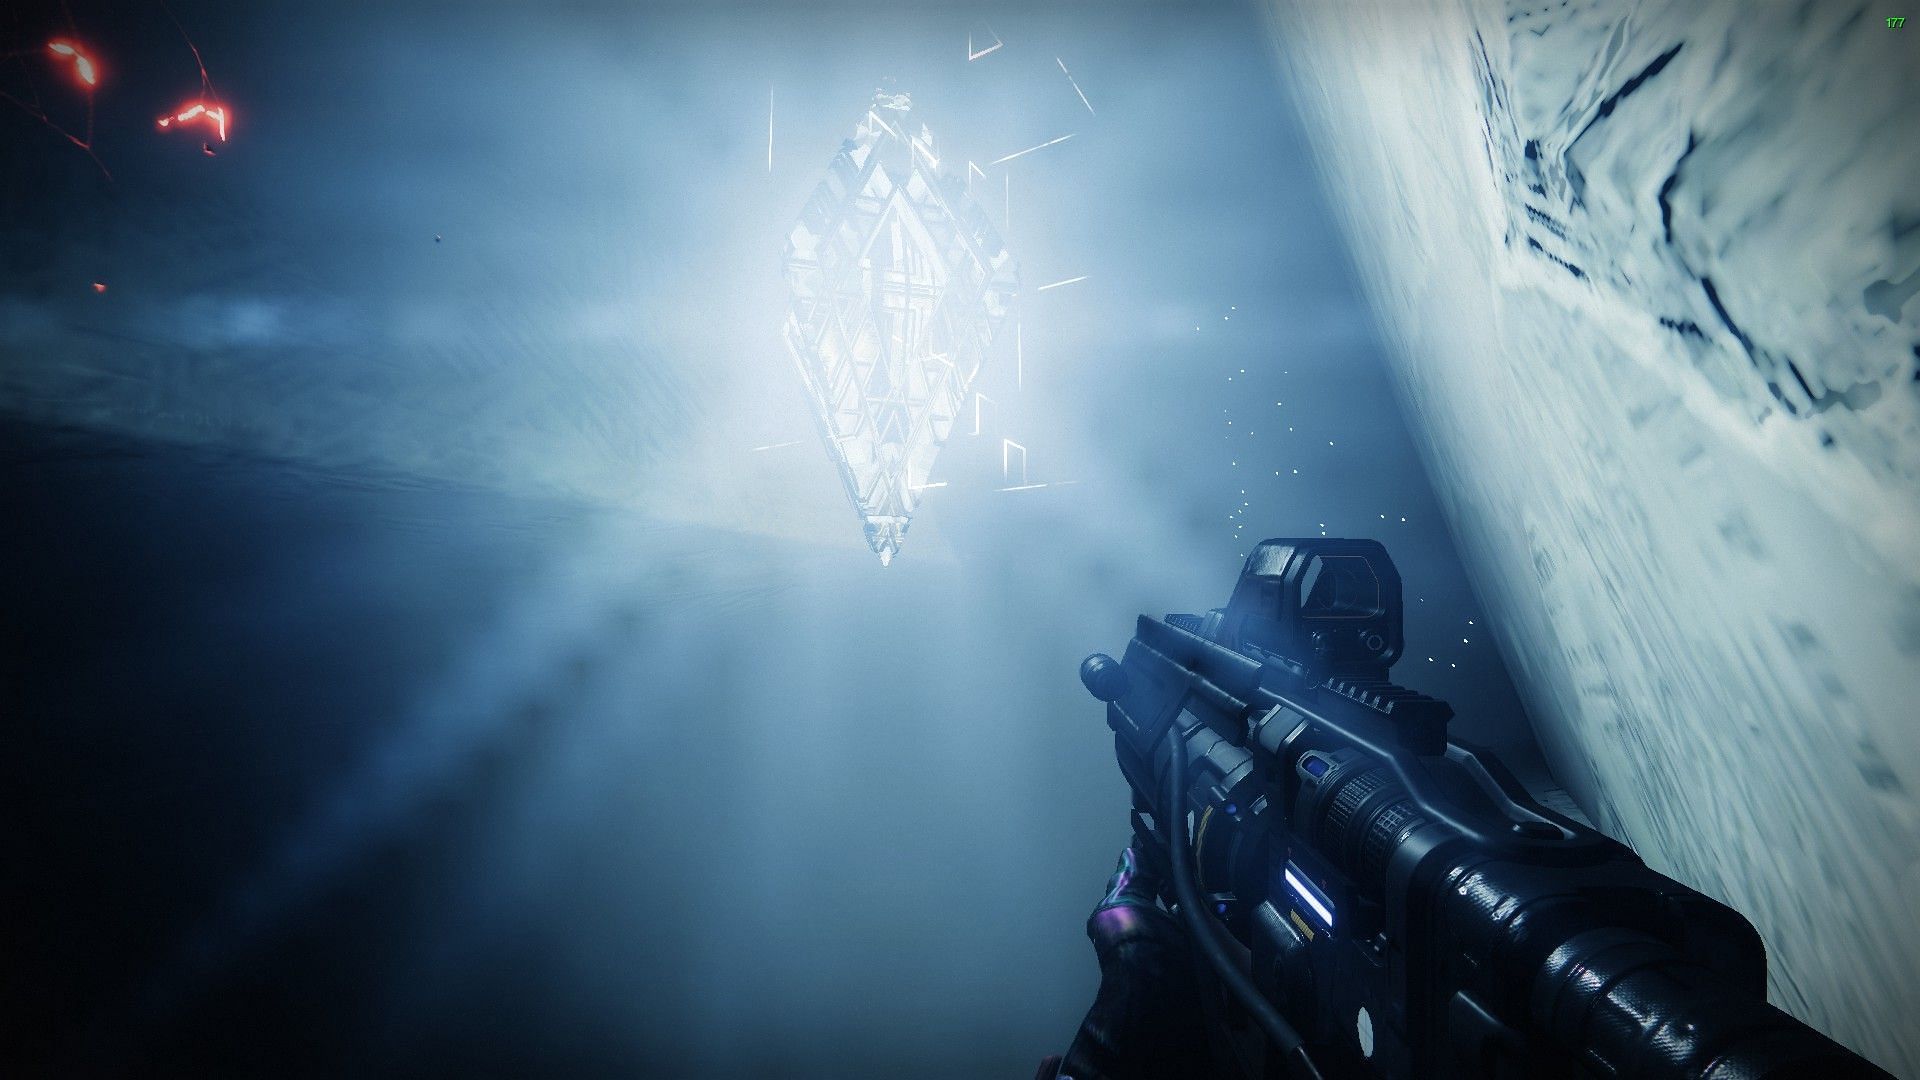
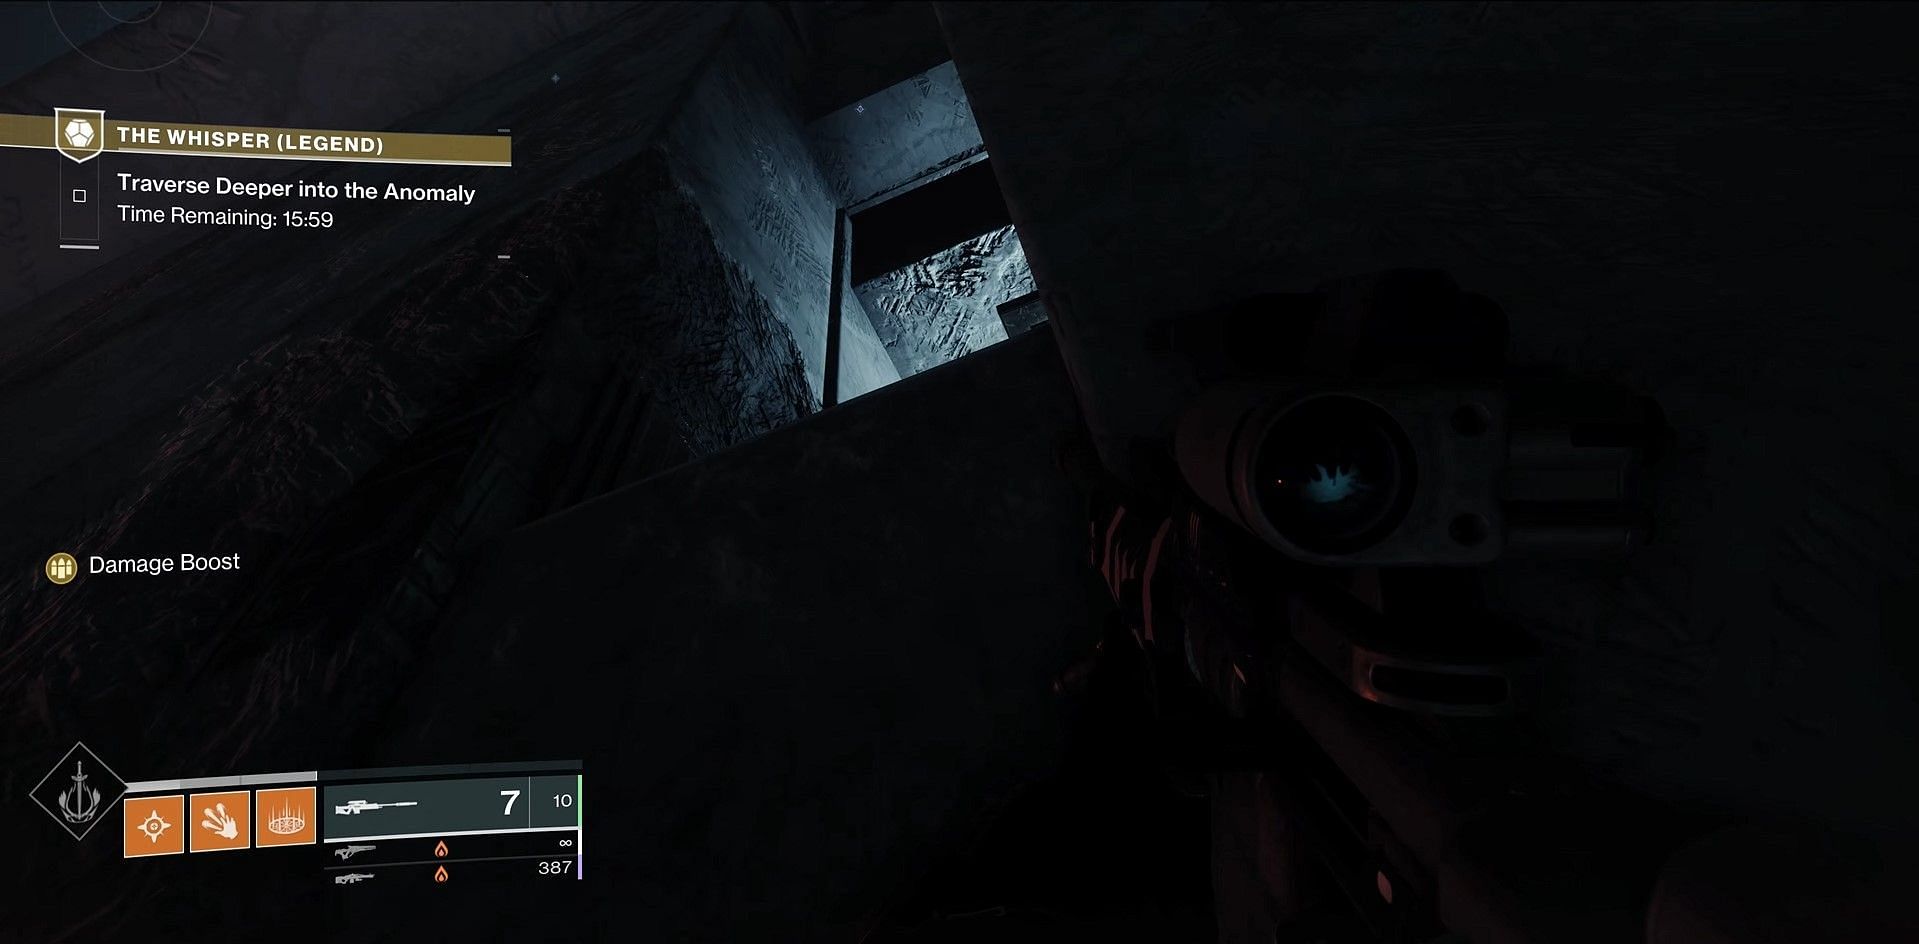
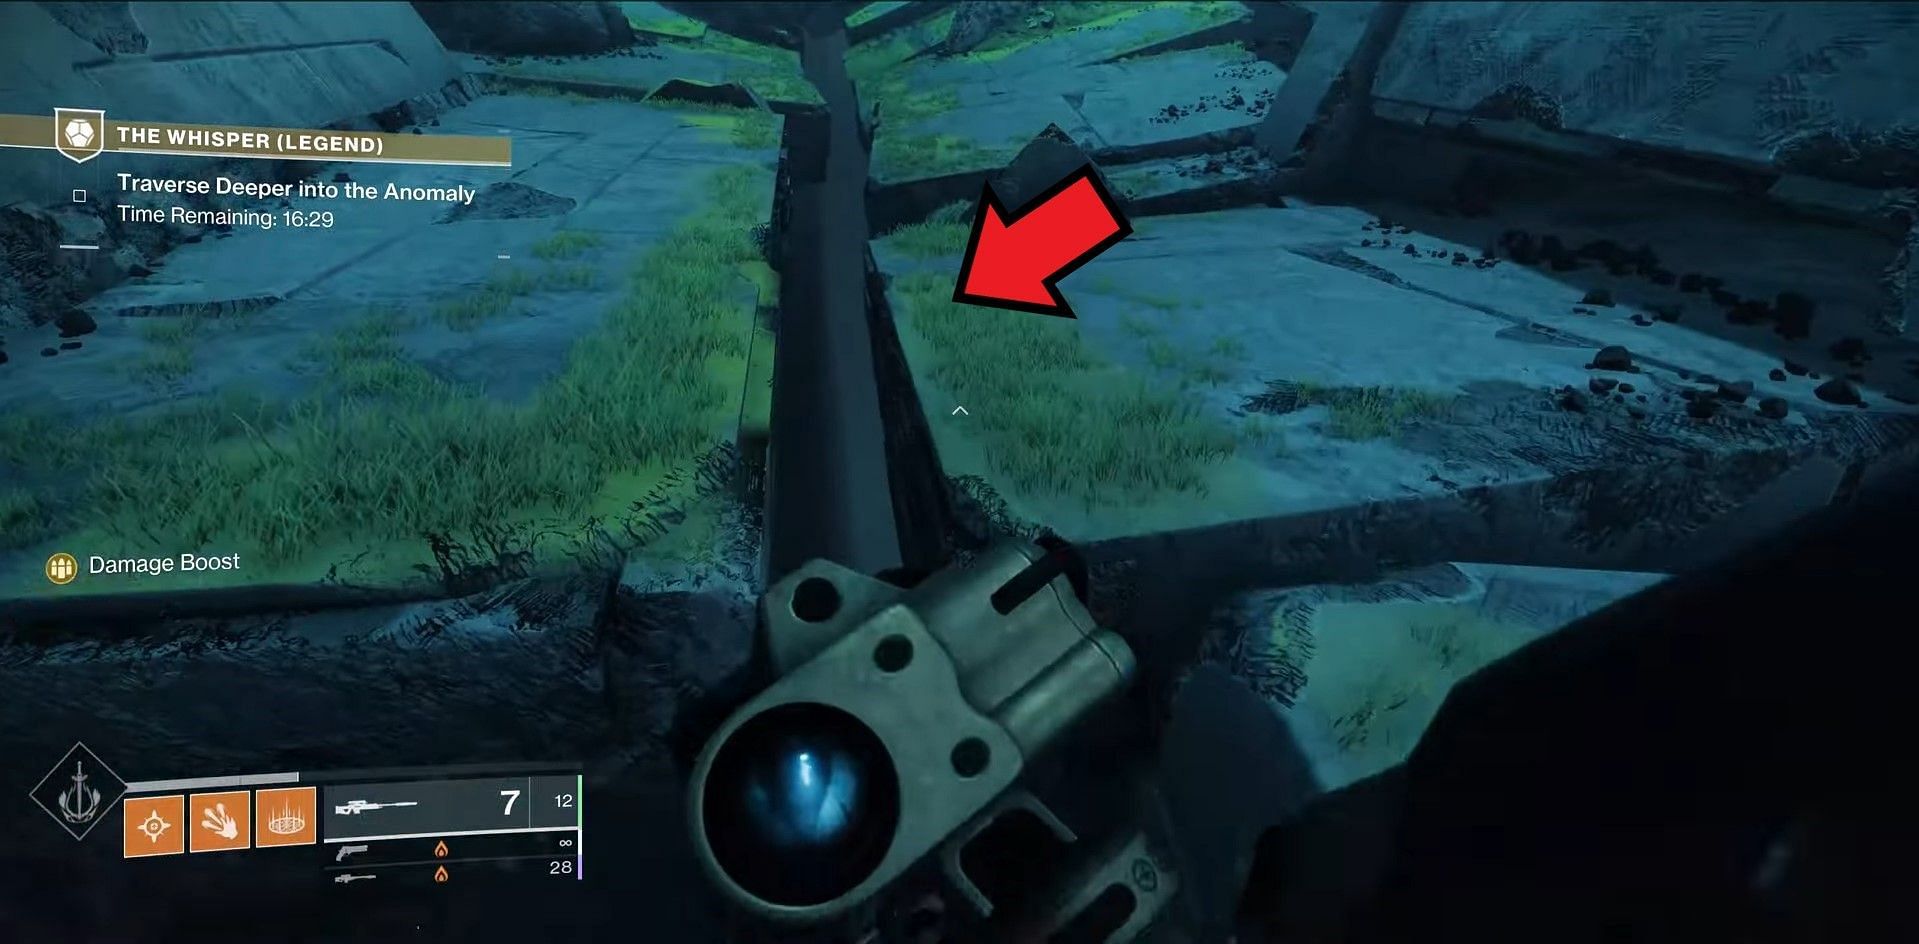
Oracle 1:
After destroying the first Taken blight to clear the path through the small hole in the ground, you face a series of ledges marked with red lights. The first series of lights can be seen after pushing through a couple of small gaps in the wall. The location looks like something in the image below.
Once you are in the location shown in the image above, take an immediate left and follow the ledge. You will see an Oracle at the first turn.
Shoot the Oracle to earn White Nail and complete progress towards the Oracular Seeker triumph.
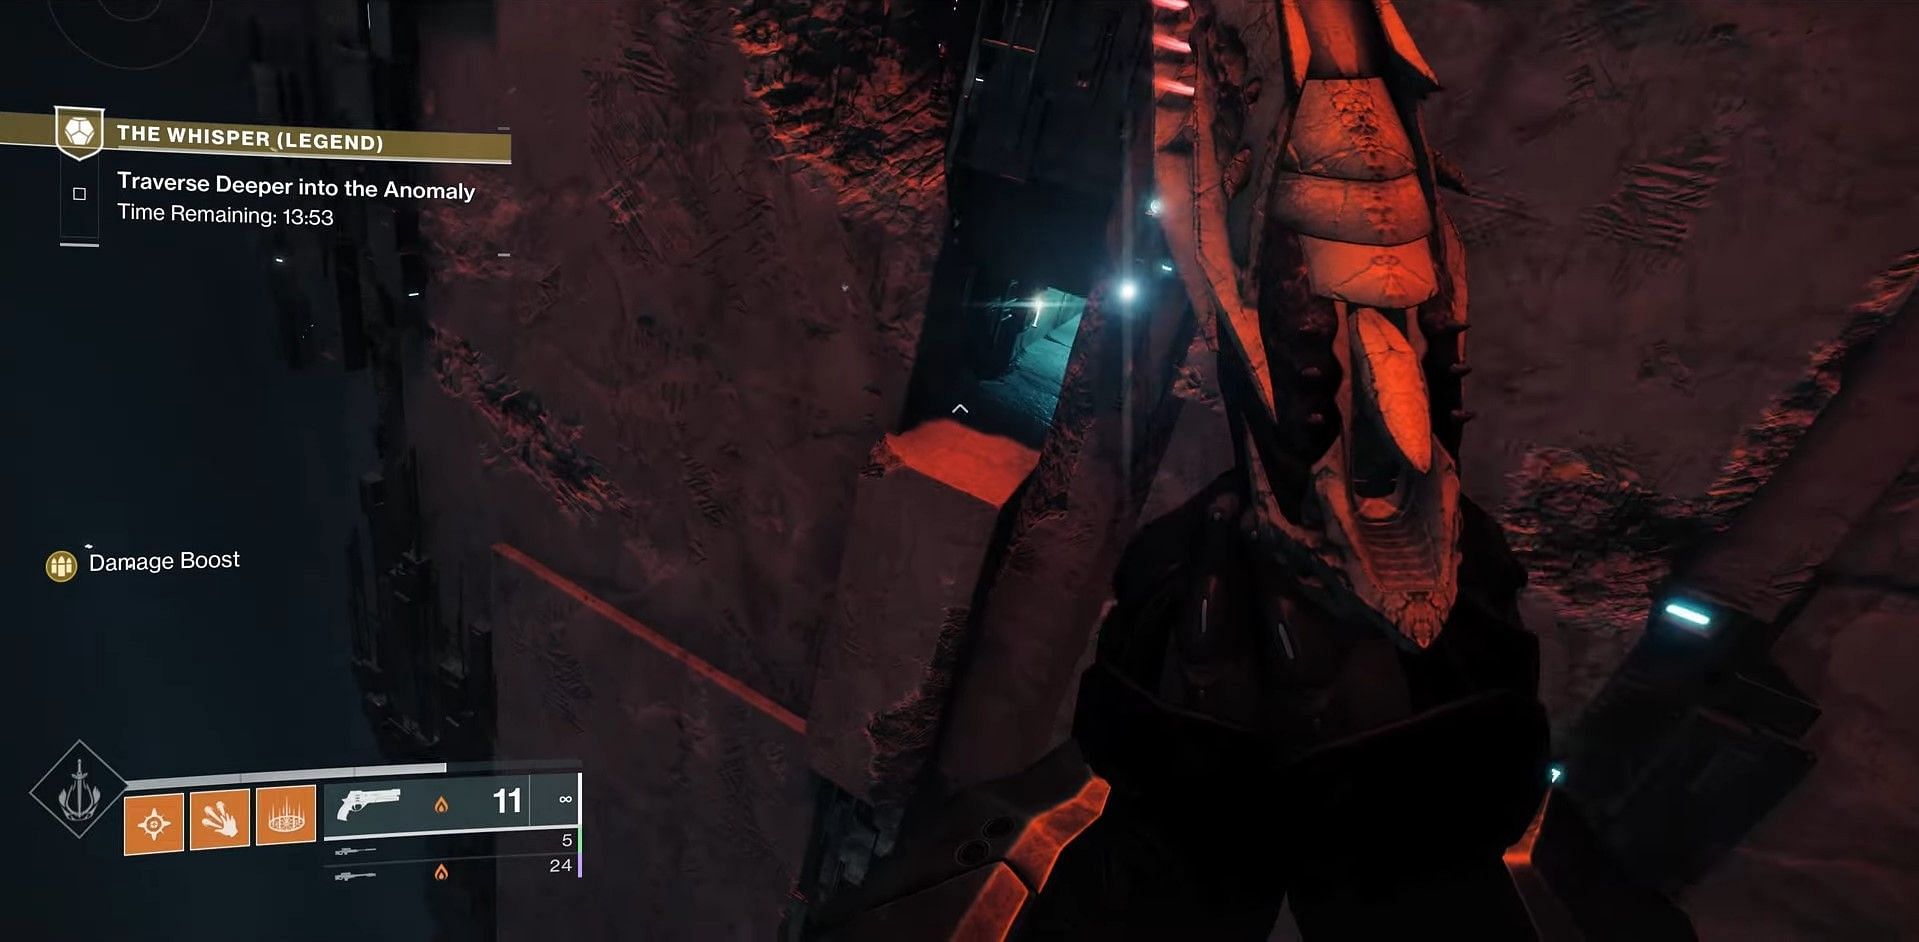
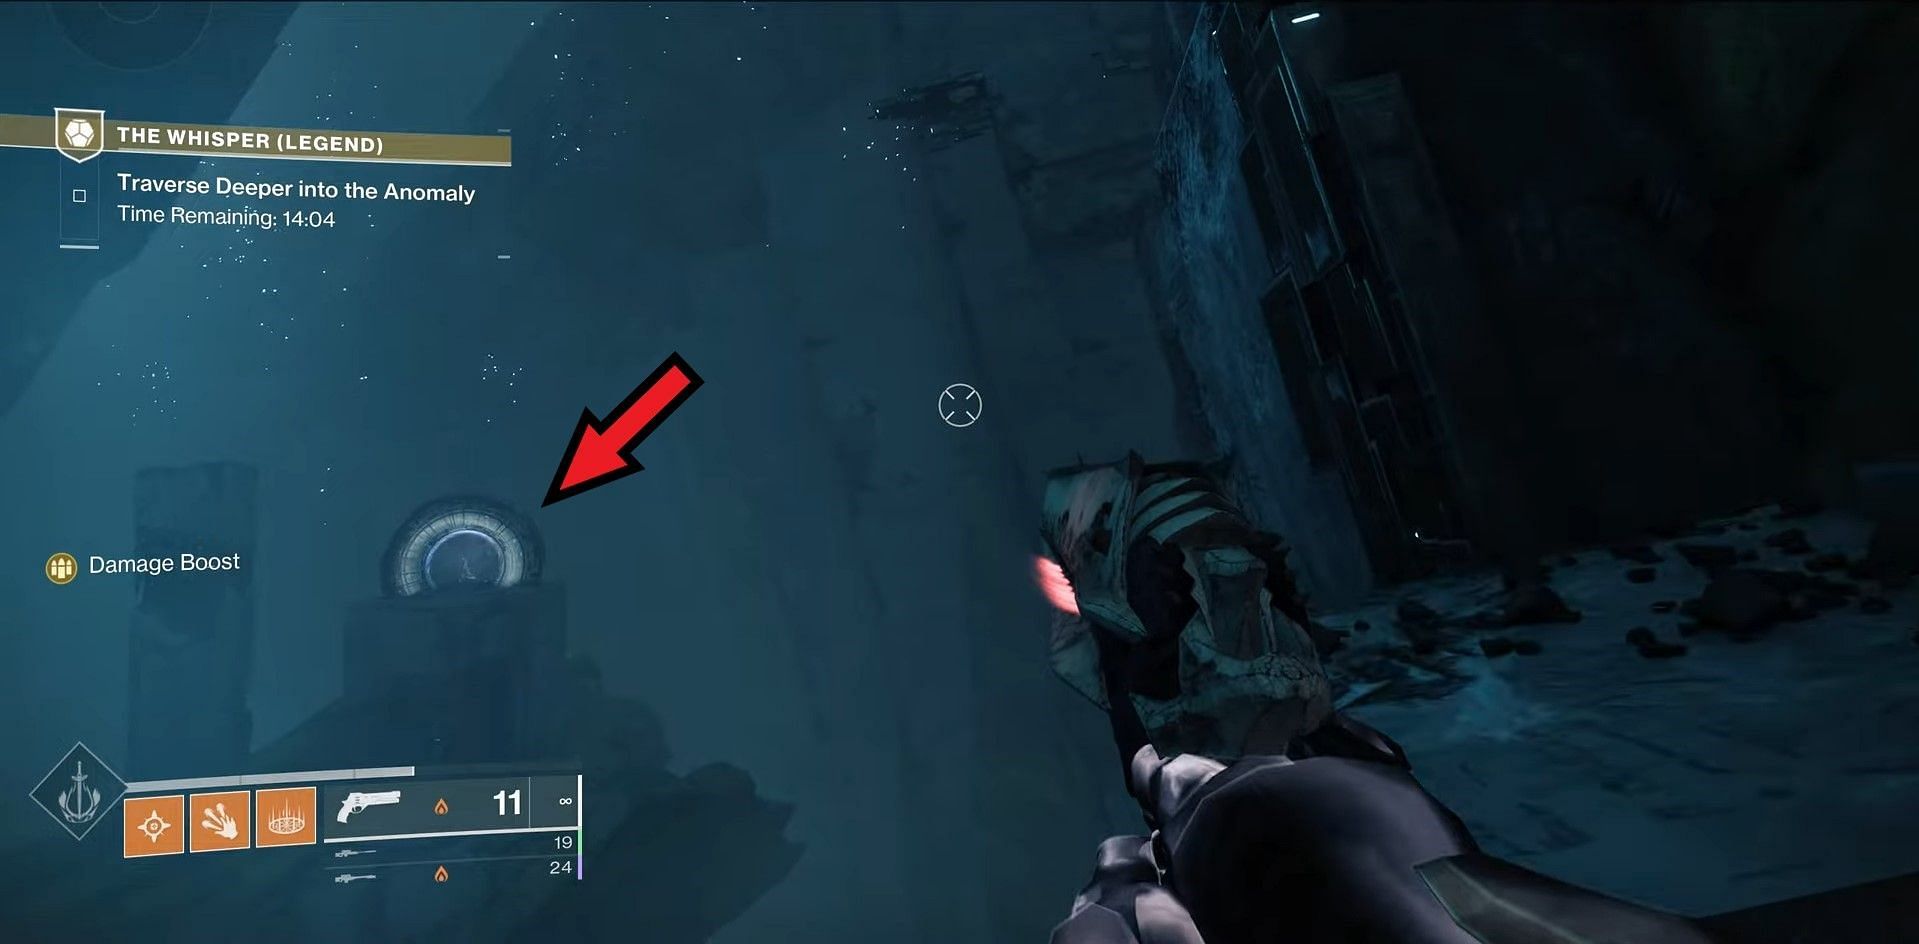
Oracle 2:
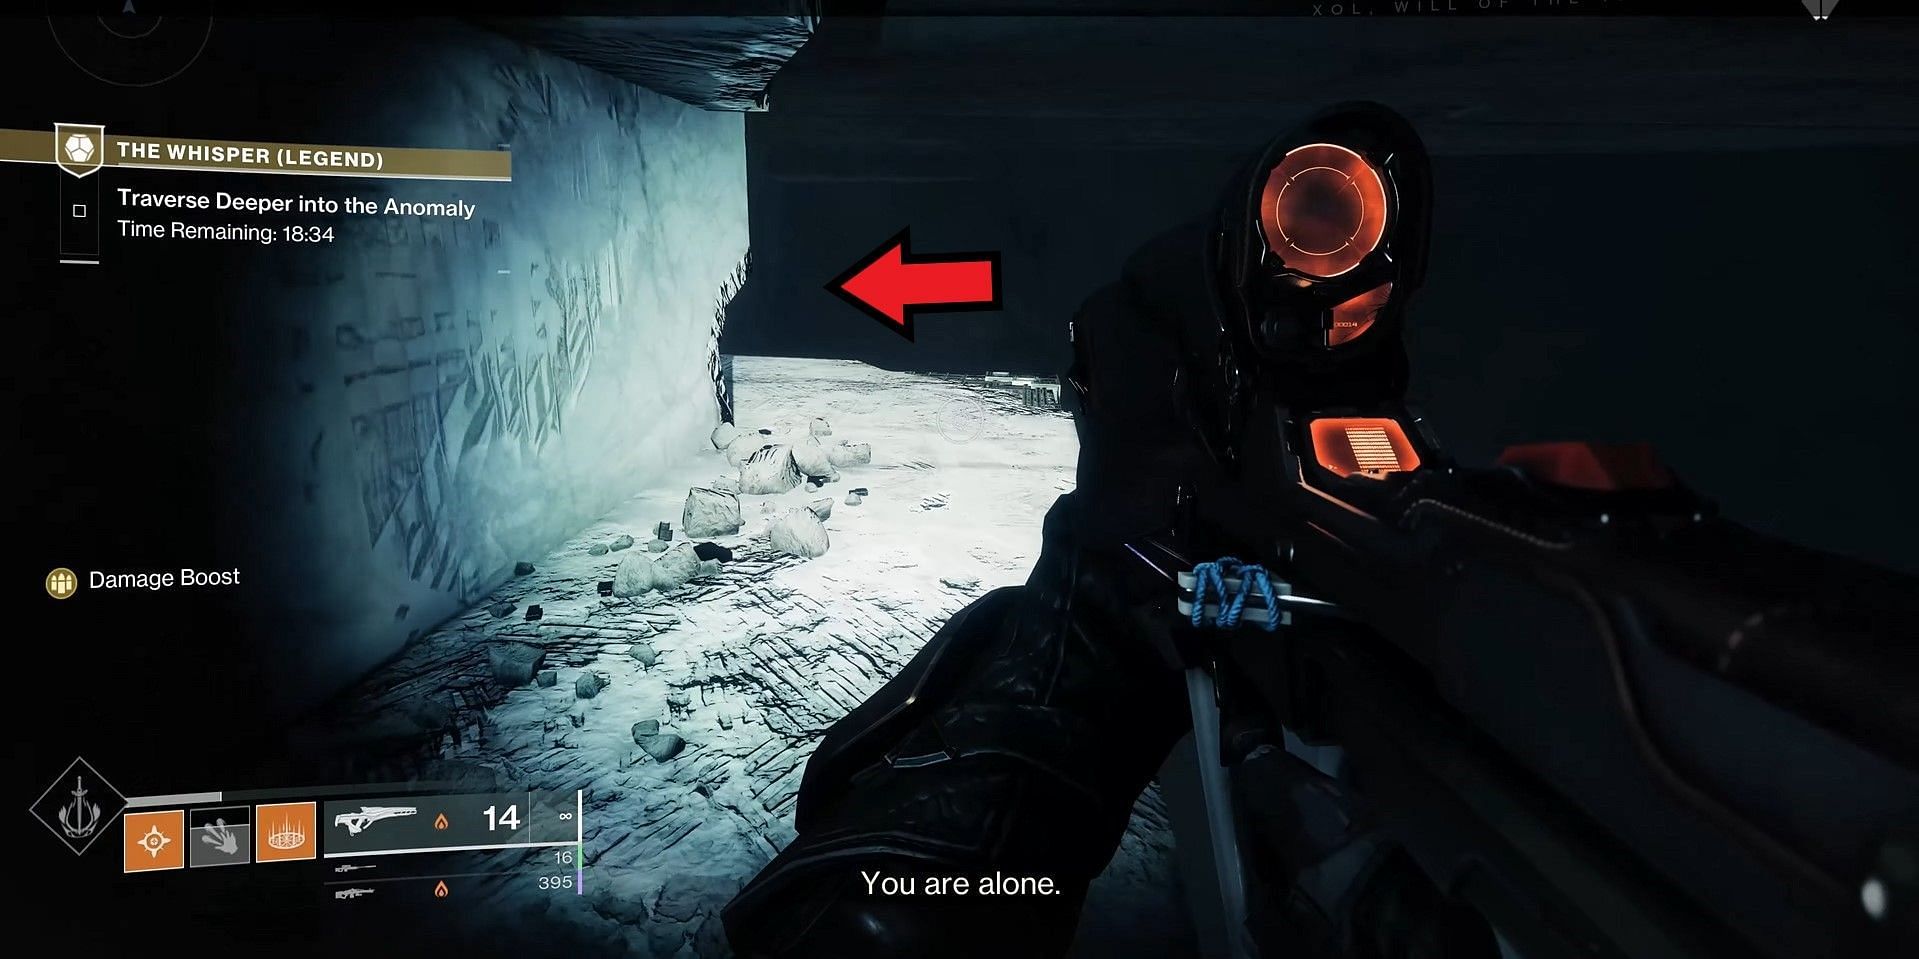
For the second Oracle, jump down through the red-light jumping puzzle until you come across an elevator. The platforms just before the elevator are shown in the image below.
Take the elevator and jump across to the platform. Here, you must run past the main entrance that leads to the normal path for the objective. Stick by the ledges until you arrive at the very last ledge. Look up and to your left for a small gap in the wall, similar to the one in the image below.
Hop inside to shoot the Oracle and earn progress for the triumph.
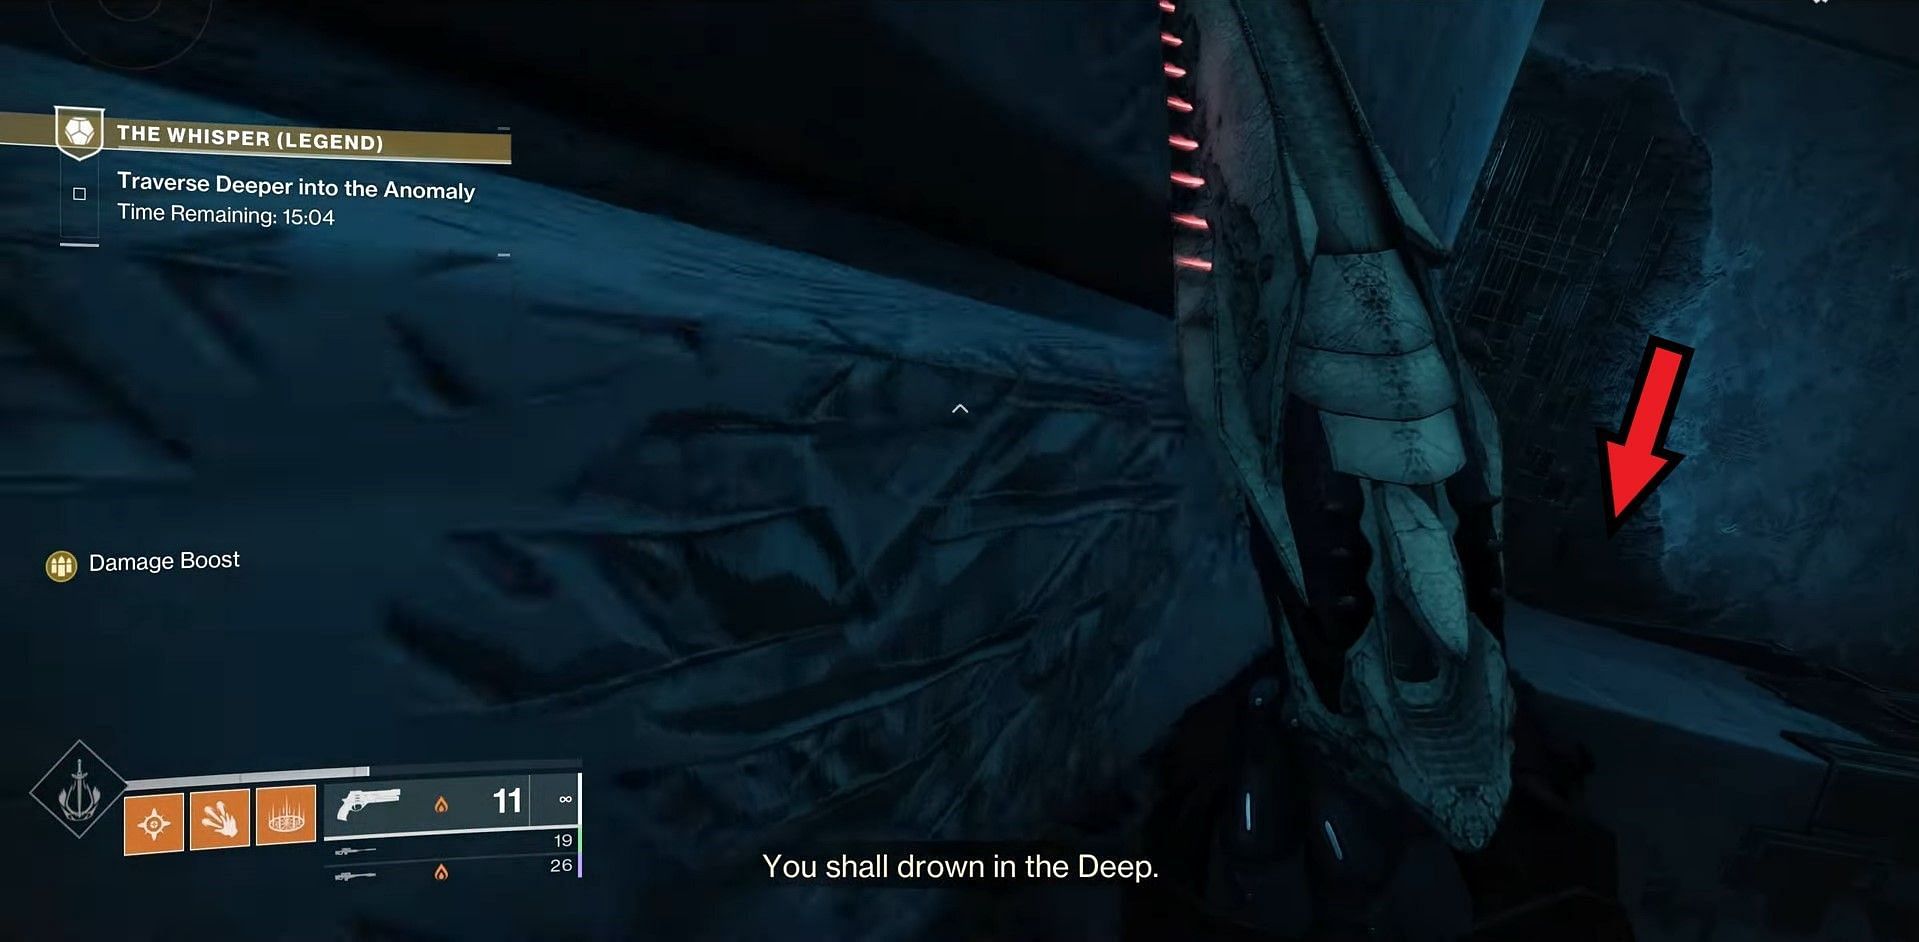
Oracle #3:
For the third Oracle, continue onwards until you come across the red jumping puzzle, followed by a small door on the wall that is in motion. Make your way to the gate, as shown in the image below, and do not enter through the path.
When near the entrance, look behind, and then to your left. You will see an Oracle behind the fourth platform in the jumping puzzle. Simply shoot the Vex conflux to form platforms, and follow them to the Oracle behind the wall.

Oracle #4:
The fourth Oracle can be found at the end of the Green Room jumping puzzle. That means players must make their way through the tiny platforms in the walls with grasses, starting from the left to the right, and ultimately at the center.
Oracle #5:
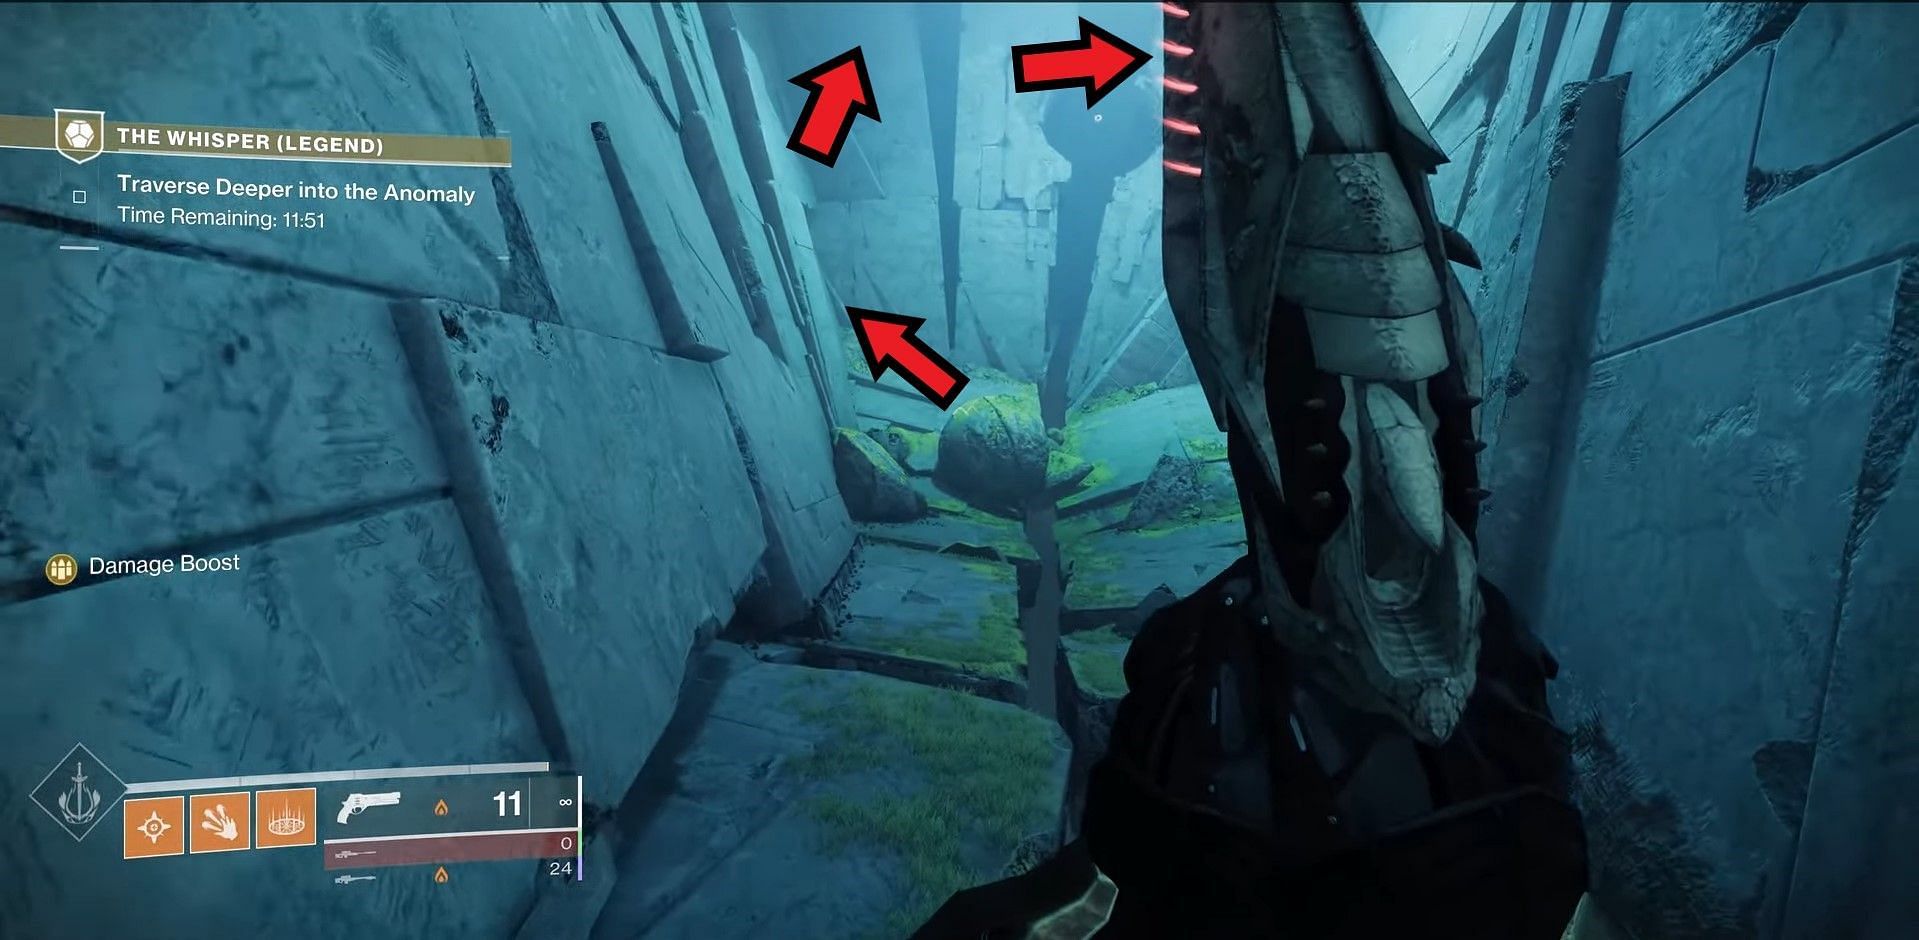
For the fifth Oracle, enter the Green Room and simply push through the middle crack on the floor. This will lead you to the lower area of the room, filled with Taken Thrall enemies and Vex corpses.
After dropping down from the entrance, keep going straight and look for an opening shown in the image below.
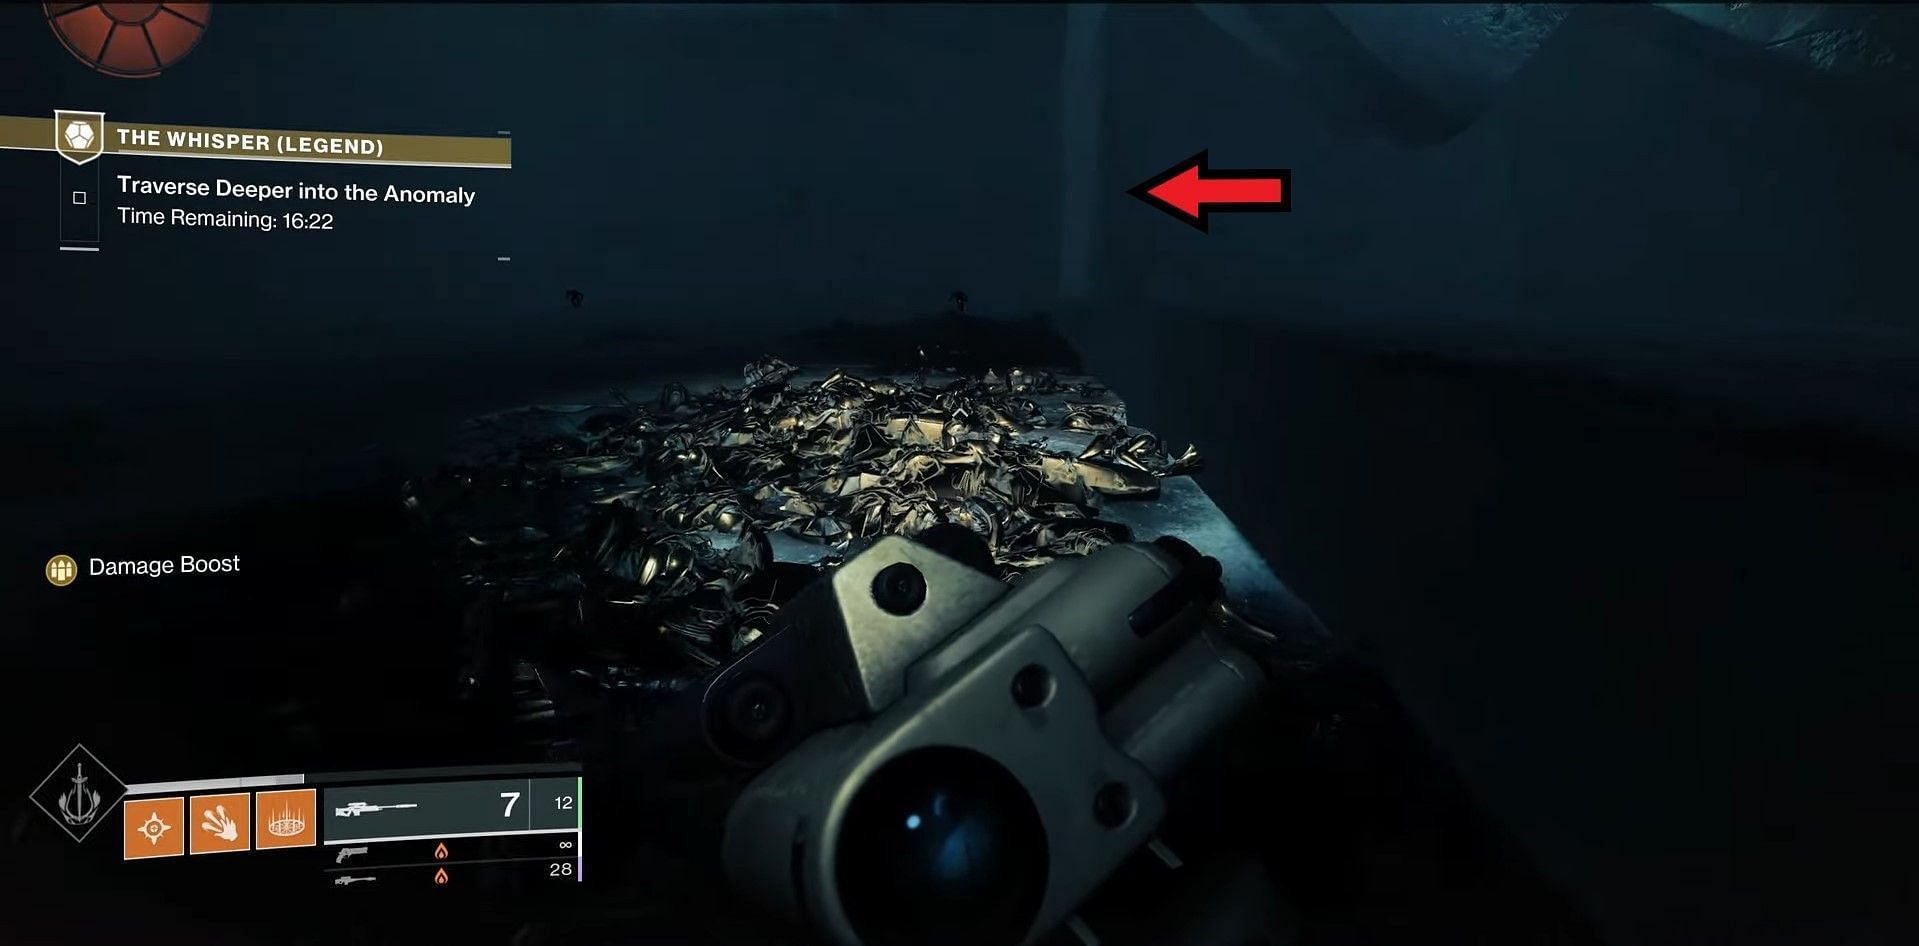
Pass through this opening and then look for another small gap on your right. Crouch through this small gap and you will find the Oracle.
Oracle #6:
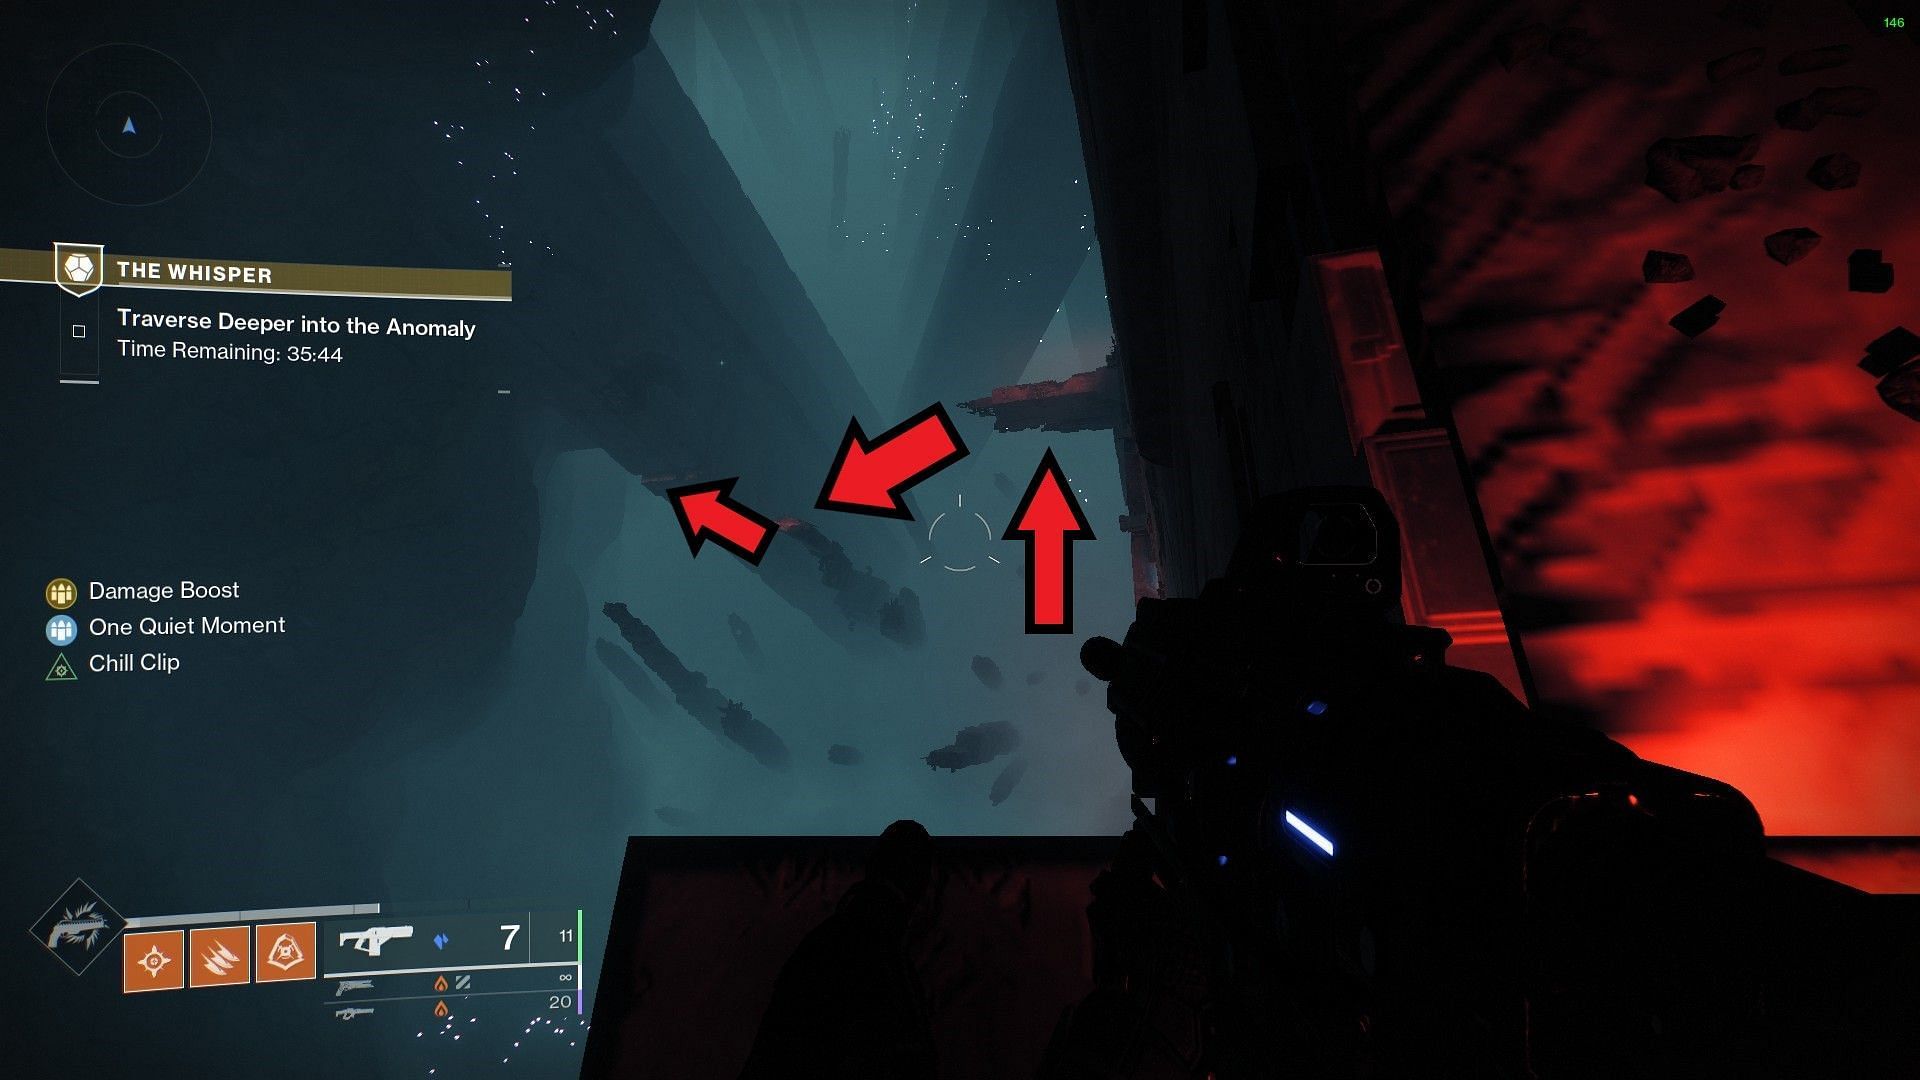
For the sixth Oracle, exit the Green Room and make your way to the dark open area, shown in the image below.
Instead of taking the regular path to the left, look for a few platforms on your right, and follow along. Upon traversing for a bit, you will notice a huge Vex portal in one of the middle platforms.
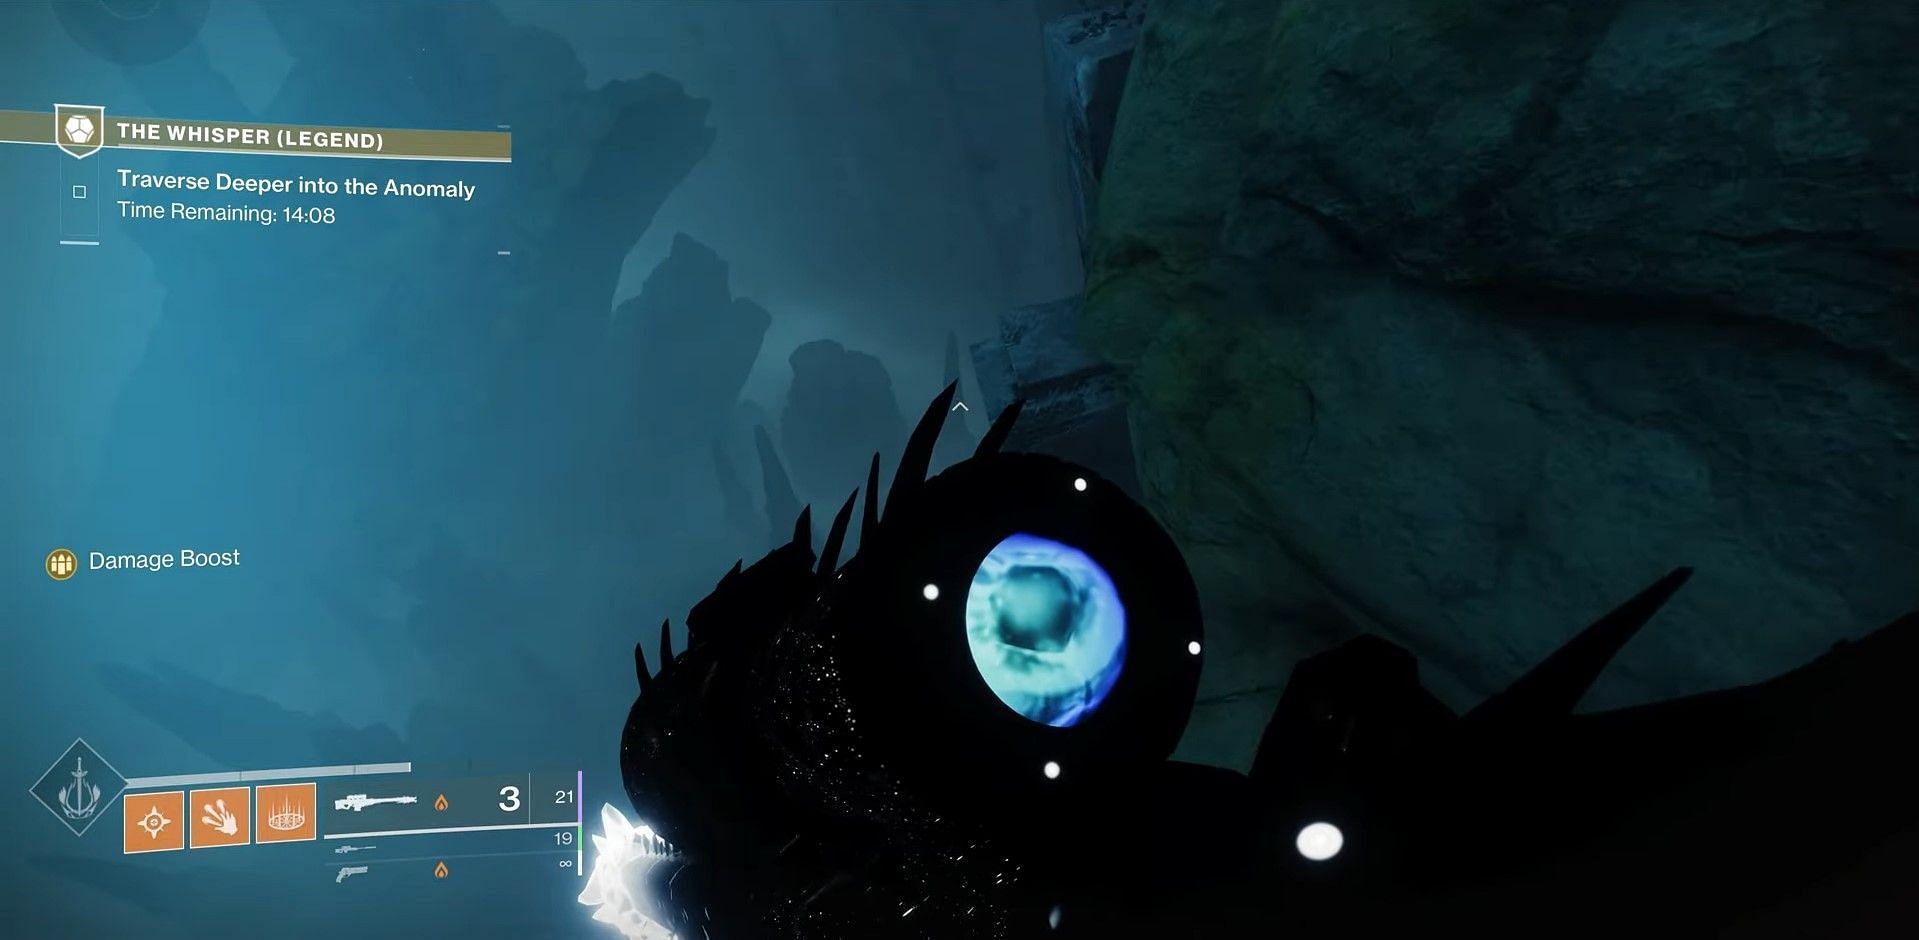
The Oracle can be found behind this portal.
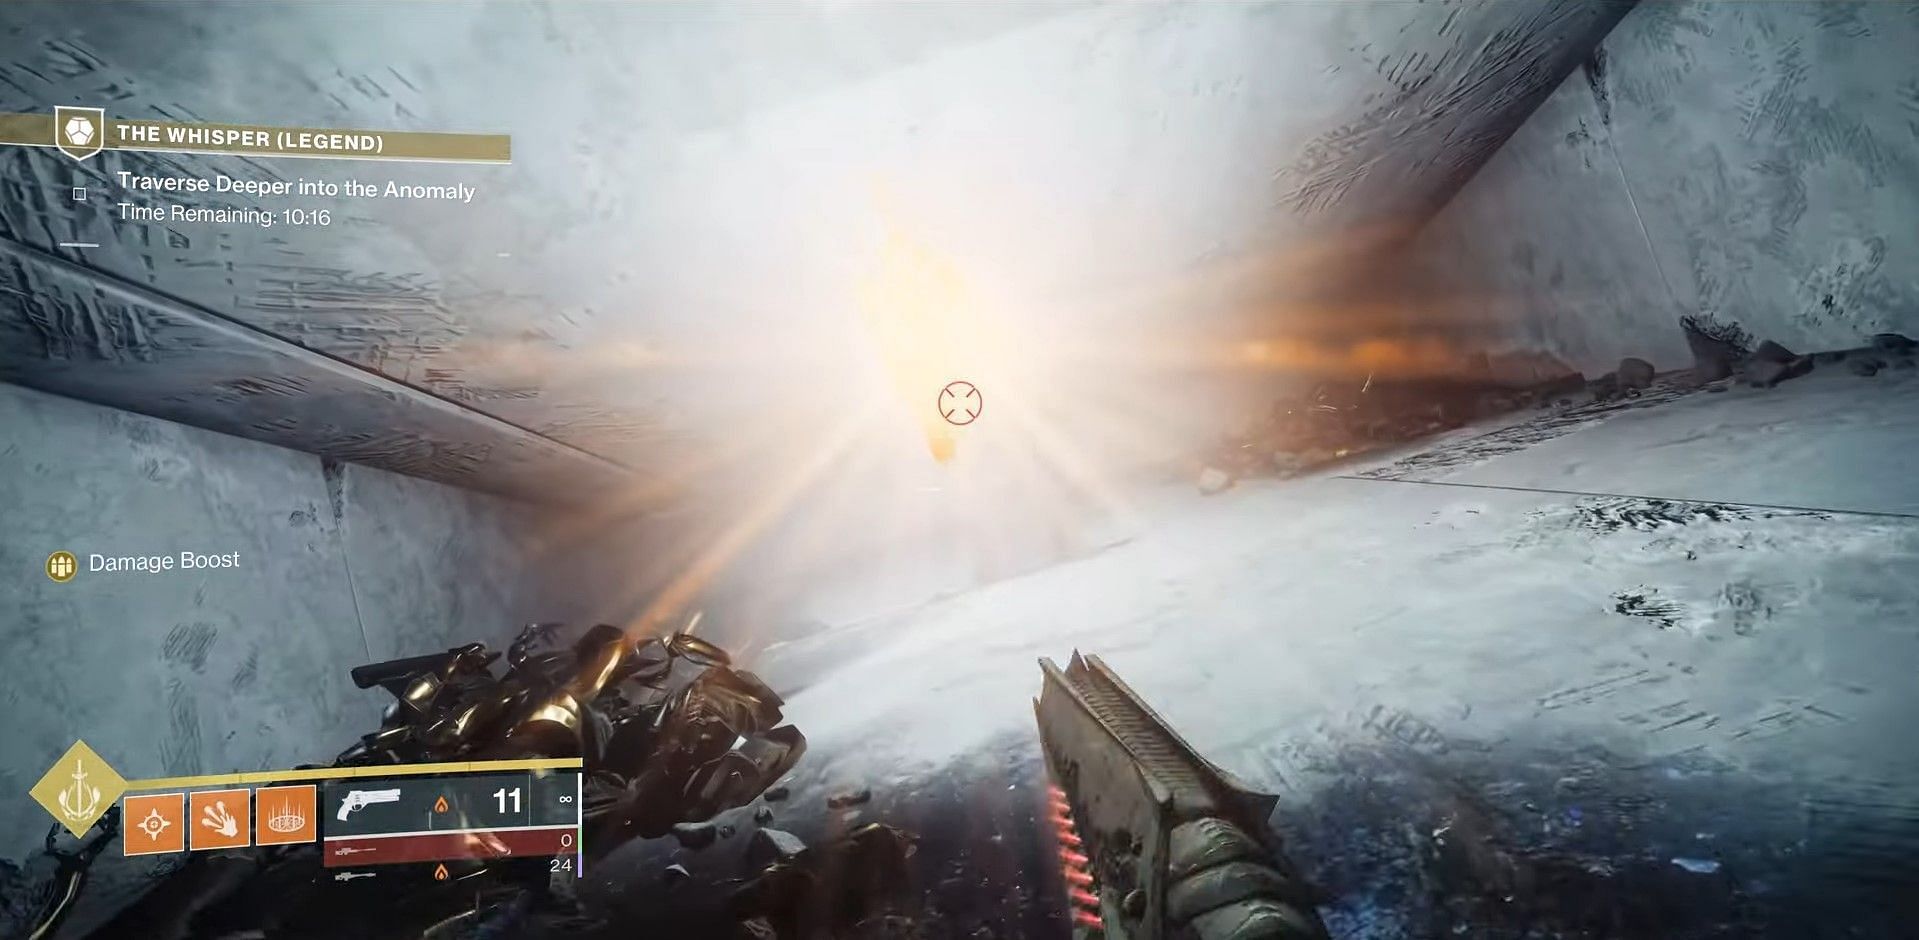
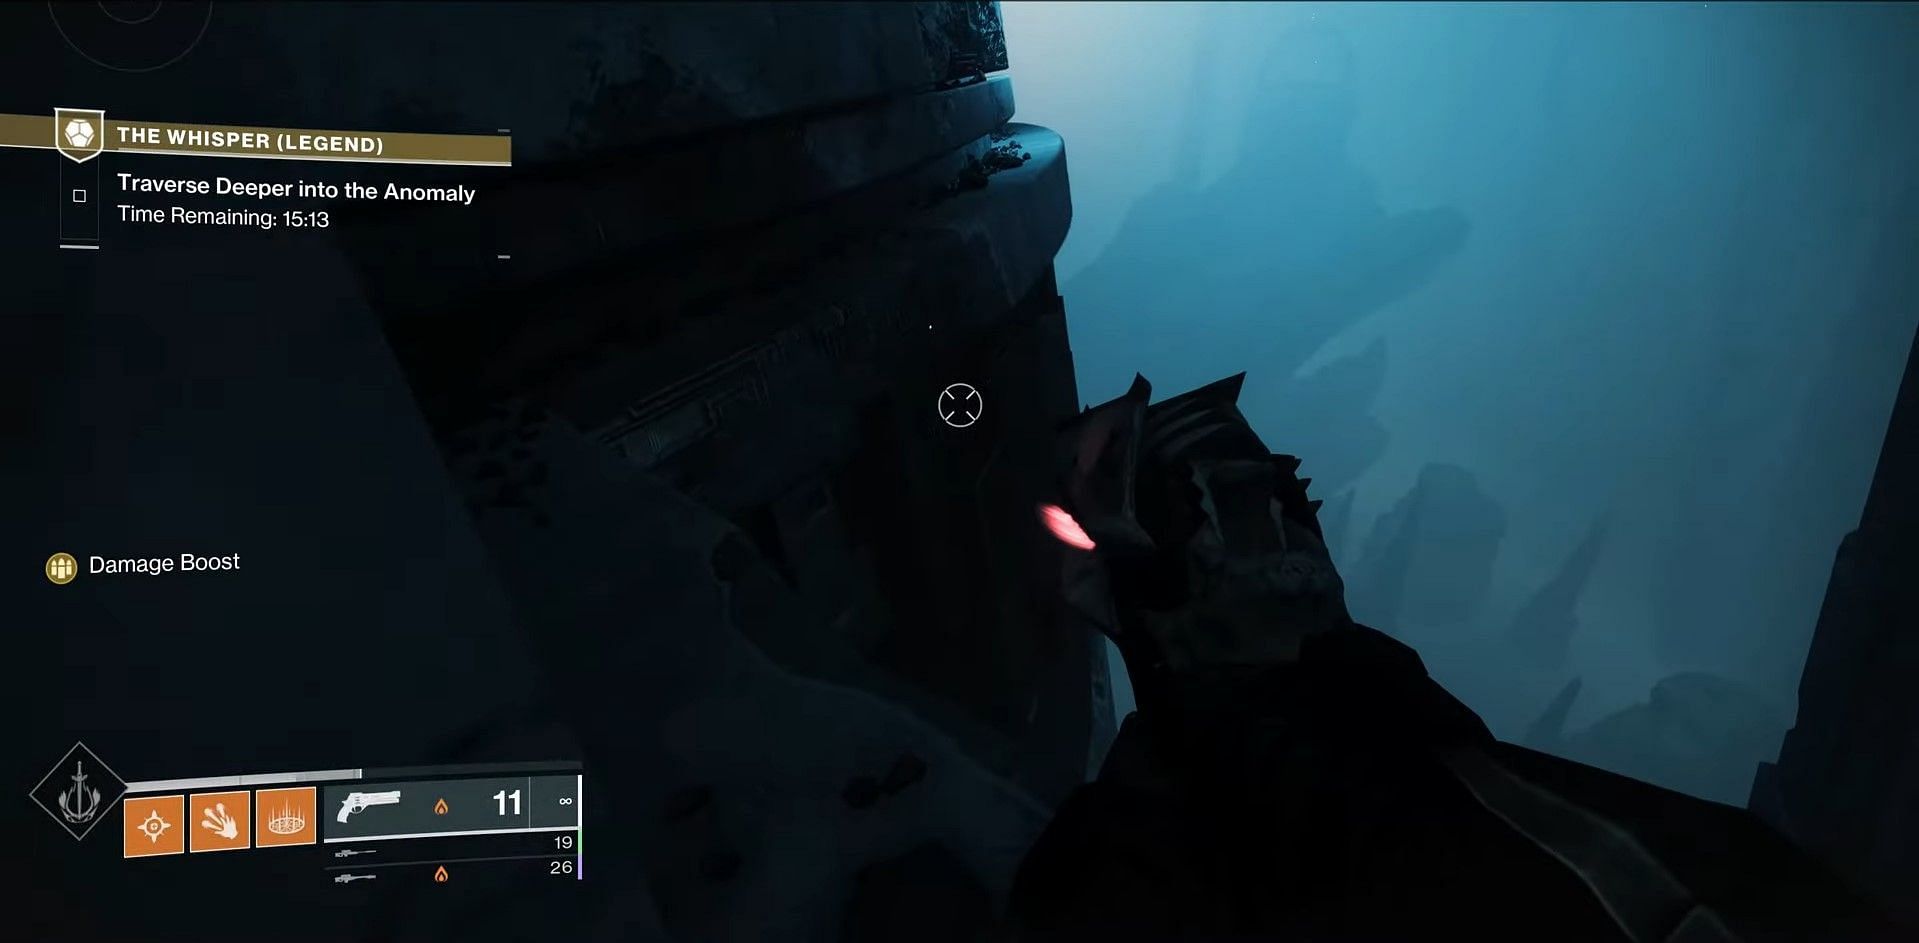
Oracle #7:
The last Oracle, make your way towards the big jump in the open area. However, make sure to not jump. Instead, look down on the left side of the hanging platform, and you will see an opening underneath. The image below provides a clearer idea.
Jump down and the Oracle should be visible to you.
Check out other guides on this game from Sportskeeda:
5 best Rocket Launchers for PvE || Destiny 2 weekly reset || Destiny 2 this week at Xur || Destiny 2 Grandmaster Nightfall calendar || Destiny 2 server status || Destiny 2 PvP build tier list || Destiny 2 PvE build tier list || Everything to expect from Destiny 2 in 2024 || All Destiny 2 Into the Light weapons and perks || All free emblem codes
