
'%20x='0'%20y='0'%20height='100%25'%20width='100%25'%20%0A%20%20%20%20%20%20%20%20%20%20xlink%3Ahref='data:image/jpg;base64,/9j/4AAQSkZJRgABAQEAYABgAAD//gA7Q1JFQVRPUjogZ2QtanBlZyB2MS4wICh1c2luZyBJSkcgSlBFRyB2ODApLCBxdWFsaXR5ID0gODAK/9sAQwAGBAUGBQQGBgUGBwcGCAoQCgoJCQoUDg8MEBcUGBgXFBYWGh0lHxobIxwWFiAsICMmJykqKRkfLTAtKDAlKCko/9sAQwEHBwcKCAoTCgoTKBoWGigoKCgoKCgoKCgoKCgoKCgoKCgoKCgoKCgoKCgoKCgoKCgoKCgoKCgoKCgoKCgoKCgo/8AAEQgEOQeAAwEiAAIRAQMRAf/EAB8AAAEFAQEBAQEBAAAAAAAAAAABAgMEBQYHCAkKC//EALUQAAIBAwMCBAMFBQQEAAABfQECAwAEEQUSITFBBhNRYQcicRQygZGhCCNCscEVUtHwJDNicoIJChYXGBkaJSYnKCkqNDU2Nzg5OkNERUZHSElKU1RVVldYWVpjZGVmZ2hpanN0dXZ3eHl6g4SFhoeIiYqSk5SVlpeYmZqio6Slpqeoqaqys7S1tre4ubrCw8TFxsfIycrS09TV1tfY2drh4uPk5ebn6Onq8fLz9PX29/j5+v/EAB8BAAMBAQEBAQEBAQEAAAAAAAABAgMEBQYHCAkKC//EALURAAIBAgQEAwQHBQQEAAECdwABAgMRBAUhMQYSQVEHYXETIjKBCBRCkaGxwQkjM1LwFWJy0QoWJDThJfEXGBkaJicoKSo1Njc4OTpDREVGR0hJSlNUVVZXWFlaY2RlZmdoaWpzdHV2d3h5eoKDhIWGh4iJipKTlJWWl5iZmqKjpKWmp6ipqrKztLW2t7i5usLDxMXGx8jJytLT1NXW19jZ2uLj5OXm5+jp6vLz9PX29/j5+v/aAAwDAQACEQMRAD8A+YqWrdzZz2zbbmCSJj2dSpqAxjsaoysOgR7q6ghyWLssY/E8V9Y+J9MsdGu9C13WzG8WmWUdrYWj/wDLW4YDt6DAr5MjMkMqSxnDowZSOxB4NdXN471XVte0O98R3Ml7DpsqMEwBlQwJ4HGcDFJq407Htfjnw3B4k+Jl5rXiMiLw7otrH55PAlYru2D/AL6r528ST2F1rt7No9sbbT3kJhiJyVXtXo/xi+Ka+LootO0OOS10o4lmVl2tLJ74PQV5OKAbEoqR4WUFh8yDjcvTmo6YgooxRQAUoIIw34H0pKKAFYEHB/8A10lOUgcMMqf0+lIy4GQcr6/40AJS0UUAIRSDrTqSgAopaKAEPSn2+d/A602nRFtwUHgmmtwexYIxQTnHGKiE3znPTtUgYN901d+xFu4p44ByKqMMMR6GrRz9agmHz59aUhoZTe4p1IRxWZaFb71AoPIFFR0LClTqR6ik70o4INACClobgn60UgCiilAJpASQHDkE4DKQTTBk9BViCzkk/hwPU1owWccZy43/AMqylUjEdjNgtZJThVJ+la1tpQAzK2PYf41ZUhV/dqMeg4pfOA55HtXLOvOWw0iVII41ARQPfvTXTA+VutKJcqDjI9aicnnHArnV29RjHIU5OabyW+VgB6UpBPOAaTYXGG+WtEA8SHpuzipJCHAOSreo5FVvIwcq350/OzquM+hpNLoAxY5PNBL8fpVlUZWwSCDSRjd1FSt+7QtlVUdSTiiUm3YLDhBICDwUP6VYVdvXFZLazFEDt3O/YDp+dUbvV7q44BES/wCz1P41UcLUqPUlySOinuIYFzNKij0J5rNuNdQDFrEX/wBpuBWCyl23uxZvUnJqQD5c4rsp4CC+LUh1OxPPeXVx/rJSFPVV4FQouWxjFSRpmpNu1gOxr0IU4wVooxcmwEQHWlePkMOR0NSclQV61Iijdg9DWliL2IUTDYq1bgEeuKjCfOVJHHr3FWUjCtkZHtTihSYbBjAOajmX5SrHIPT2qnqEkkdyuHO0YIAq7PfWwQFmBfHQcmnddRWa1K6v5ahQen8qYZBknI71Bcahv4jiUY7n/CqbOz/eYn27Vm5pbFqPcsXMo3DDA/SoTKx6ce9MAxS1m5NlWAkt1JNLikpaQwp1NpRSAWiiloABSgUDrViO2mk6IQPU8U7XE5JbkNArQj08DmR8+wqzHFFH9xBkd+tUosydZLYzIraWX7qED1PFW4tOHWV8+y1dLE0A+vNUoowlWk9hIYIYsbEGfU8mp9xI4xTAKOlUZNt7jiD35pwNNzxRmkKw/NLupmaM4p3Cw/PvS5qF5UT7zAfU1WfUEX7gLH8hSuNQb6GhTWYKMsQPrWT9umnmEcWFz6cmmSPG/wDrHIYHGDzVJXVy1Rd9TQkvoU4BLH2qvJfyN/qwFHqeTVBpIlPBLfTik892wI0A98ZNZ6s3VFLUsM8snLsxHvwBURMaH5nB9l5/WjyJ5iDIxPpmpotPJPzAmtI0ZSBzhHdkBuAOIo8n1bml3Oy5k4Pb6VrW+njdyPwpurWvlRRMBgE4or4aUabkwo4iLqKKN74YNnUbyI8h4gcVt+KIPM0eWMjOCp/UVzfw1kCeI1yODG3+f1rvNYiBgnRgA2Dwa+frLkxNOfmjsqP3Jeh5zHZKANqmrsNkABxWwlgwQM2ADVmKFBgcACvvYUUj5eVeTM6CyJ/hwKvQWBb5QpOavwmJfSmyzuCfKJQe1aKKM277jLW2WF13Agg5I71XhN3c75bSxATODNcyCNCe+O5pTOdxLtz1681ny6tZW1tGbmZFYbgB1OM9hXFiXapG0uXR/odOHV4S92+xpNA5YLeamxAODHYx7Rj/AHz/AEqa0lgsHL2NrHHIf+WkxMr/AFyeh+lcbeeMIUIFpA8nqXO0fhWFeeJNRuOjrCPRB1/OuecsPH4ryfn/AFY6o0MRPRWij1eDVJHjvTdXLsBEMuW4QbhmptP1JfDOqLqVpKtzYXYVbqNOcekg9xXkekXjPDqS3M24yWxCmRu4IIA/KruhXchmtbaGU+TIMyxMOExycH0OKxhiYyco2sv+AbfU5QSd7s9u8X6dp+racdTsL62t52TKSsw8uT614vqt5AhaJ5ElmHDGLlSe+D6Vna7qCaheuYIjBaqfkhDZUHuQPes4HA44rkxT9u0n0OvD0VSu+5ut4gmFskMMKqFXG5jWYGmUxl2ykmce/NQQhCzbyDxxnvV2UZsLJx0Duv61iqUYptG/NrYpyOxZxkgjpikgZed/Of51ZaIFixOe2KVY1AGBzWPOrWNLFfY5JbGc08REqAzY57V7D8P/AIZwanpS3uueYnnZ8tF4IHrXF+P9AtPDmvtYWVxJMoUMfMAyuegrnhiozlyRHY5dVw2e+MU/OKACRRitNxliCUFfLl+4eh7qaivY2gdQ2OeQR0IpgyKfMTPEsbNymdv09KqMmtCWupp+BJPL8ZaQ+MgTj+Rr2j4joJvC+pjrtTePoOa8N8JzC28TaZI+QEnXPt2r37x3GreGNVIGP9Fc/pXm5ndeza/mQlufPQbb0NBIcEZqMdKaBtOQa9Zx5tepKdiK6tukkfUdRRbKrK+8ZU9M1YD80wkDoABRFvZlWHKFUYRQo9hV/Q7f7ZqtvE3+rDb39lHJrMLVuaQ32Hw/qupkkOVFvEQOQzd6JPQqK1Of1m5W91q4uU+5LKSuPTt/SsxvvH61aSNiYyqkgf4Uos2LZZgM88VtFqKMnq7m14PBaC9AKg/KefxrsPAHy+MYAOSyOB+Vct4agWOO5CZJOM5/Gup8BpjxpacHO1v5V59VpzlYpLQrfGmFn1TTNgPET5z9RXnyWTH7zY+lekfGbdHqem5PPlv/AOhCuB3+lPL21h4r1/Mc9xiWsS8kFvrTwAv3VUD9aRm45NNxITlVOPfiuxXZOgkxIHUk0rEKAQKDGScO4A9uTTisYGSCx9+BVW7iGuTjg0oV26A1NkKvyqPwpC+ep/WkMaIm/iYClESqO7UnmexNBcnpgUJMV0SKWXjaoHsKRm7E1Edx6saTFVy9wuSbwPugmk8wnpTcUtNRQriEseppDil5o2881YhO1A5p2KWgBuOKTbin4oxQAwZ7U6loxQAh9qa/3akxTSMimhMiIOKcg+XrStkKCKRTwD71bRKZOnzKQahUEEg9uKkThqSZcOG9azSs7FBQRQKCcVQgpMikL03knmiwCl/QUmCaXFIWANMVxcCilApadhXGYxSkY5HWlPNIKdgA9PamkcU8elNYYoAaBSjqKUClHWmAvemkZNO70oFIVxAKdigClxTsJsSkNOxSNTsK4mKKUCjFFguJSNTjwaTFFguNApcUtFMYmKMUtFKwDcUU6imA00gp3ekxUlARxSKOaWlAoARugpNuTTiOaBQK4mKQnFOINAUD3oGMwW9hTgAOlO60UgG16l4btBZeH7RTwzKZWz715vplsb3Ube3UZ8xwD9M8/pXqWpSJHZ3gjP8AqYdh9vlyP5iunDxteRyYh3tE8mu5PMup3zks7H9agwWp4XIyetOwBXO9zqWisbvhuLyrOebjLOFFbWsRlJgAcBQBVDQ4W/sqJWXBebgHjPNaurMPtMmeecAUmiU9TNRwoOxfxNPySp2nLd/ao9vJpyIxztFAyNIwrMxxnPNNl5z25qw4CoN+M1Bn8s0NWQX1GgHtVqzga4dLZPvzSIg9Oarr145FdV4Es0lu57ychbe0Uu7noCRgfjycfSimryJn8J28ECxae0aqVjCYA6YUDAH5Vk6l4R0zWjp9xeXBMjfKsEb4IXjJPftVfU9YGq6lpSWLTC3EziTAxvwvTHcc1r2MdtPqUmoW+nG1S3j8oF0AZmI+Yk9emauq/aTUEaUV7Ok5tHmupW8baveQWKFUM5ijXvwcV0FlZx2vyv8AvdgHA6A+9Z+lJHdXVxdltm+Z3X15NdFp9vC+QpZiOtdEI9Tjci/YYhtpLsqu5ANqdixOFH5msf4haj9i0+DSoid5HmSnOSzHrk10caJFLEZV22tihupWz1fkKOvbn9K8vv7p9X1q4u5ckFi309BRUlpZDgtblaOLyogD948n61Jp0E2oX66baYE1xwzH+FByTSzHnJ7V0/hqxFpoNzfJFm/vB5aSHnyYjwSMc5NZRWtkaSdlqZt/C0lnFp0Dh5dQnW2ifp+5Q4J+hOTVvW7pUsr64t+A23S7P2ReHb8881XtHAu9Rv4AHi06MWFmvUNK3HH6n8aL+1a61ux0iyYvHZosG7+9K3Lv+HNUxIkT/iVeD2K8TXzCOM9xEvB/AnJrnk4Fa/i+7SbU/s9sf9Fs1EEQHTA6kfWsiEgnmltoHmOcn1qNuQSTzT5Bg5PPpTRyfek2UiJzgVCoOc96lk64NI5wnFTYpDNpx81MxubmpEBI5ppGOn50hjHI2kVqeFdNfUtUjAXKqR+dZbLnAA5NeoeC9M/s/SRMy4mk4Hrz1P5VUI3ZMpcqOttQttAkURAVB271LJc/IT+FZ6ZHBPWrKAONrcAdPetzAquCSXxljU9rGZCQw6VLtHQAcUuoXS2GnyTOVVUQse3TtTFuPRQgaV2AC1zfxJ1v+xPDPkxELe6h27rH/n+lYNl8TbY6lBa61YG2tnYbpo33Aj3B7Vwvj/xMPEHiCe6D7oVOyJRyAo6YrCdRcuhtCm76nPOSck1AwOaR58H7rGo2mY/wgfWuS51nU/DvRY9a8SxRzsBBbqZ5M9CBj+pFemyTQ32oy3spC6XYLiMdmIrzb4Yzsuq6gvmMjSWjIpUdyy16HZ2Q1K/g0qIhdPtgJbtuxxyAfrS3NobFm2vF0nSL3xNqBAubpcWynqkft9a8N1a+m1O/muZyWdyTz2Fdn8VfEo1TVPsVq2LO2+UKOnsKq2Ph77J4HvtXvE2ySgLGG6gH0+tLd6DZy1t4m1a2QRvcGaIfwTKHH61bXW9LvZR/aWmiDIx5loduPfb0rG56Nhh6Hmk+zK8UkihgEGT+PTmoEb66Va3uDpGoRTsx4hl+ST8j1rNvbGe0lMd1C8Tjj5hisjBUggkGtqw8SX1soiuSt7a94bgbh+B6j8DTuJootHjpzTDwea6CNNJ1YZtJhYXbH/UTnMZ/3X/xrP1HT7mxkEd3C0ZIypI4YeoPcUXJsUo5Hj+6eO47GnlY5V+T5Zc/d7Go2QjpzTaYiSOCWS4WCONmmdtqoBySTwKl1Kym06+ltLnaJojhgrZAPpmuh0a6t9F0f+0JgkmqTNttM8mFe8n1zwM+9c3dJL5hlmJcyHdvznce5zQhkNIetLRQISlUkHINFFADsK3TCt+hppBB5GKKVWIx0I9D0oEJRTzsbkZQ+nUUmwn7uD9DTC42kp5R842t+VHlv/cP4jFFh3Q2nAbUJ7ngf40oCLyx3H0HT86axLHJoEJikHB4paKQx6TMvXB+tNdy55wKSkxTuxWCijFFIYD7tHehepFLUdS0FFFLikMQnOMcmhVZjgAmrVrbq6byec4xVpQE4UACs3US0QFWKzY43kKP1rQggij6Lk+pqIuPenK/vWE3KQ0XFCgcGnA1WVs0/P1rmcRkwI6il39jg1DuozS5R3J8+jYoPJ571DuqRWB60nGwD9pHSjoaiknjiGZHAHuaozauinbChY+p4FXGlOeyBuxplcc1DNd28I/eSZP90cmsWe7nmJ3yEL/dXgVAAB0rphg/5mQ5mnLqz9LdAg9W5NUZZZJmzK7Mfc8UxVNPC4P1rshRhDZEOVw24FLwRSlSwGOPUUqJkANWtibioOOeamiIHB5BqNVKkYqdAv8AWrRDFAw4xjIqV1JB49xSADGRyaWWVY0w7AHH41XqR6BCQFx0JpyHcvQjHFU5L1ePLTLep4FV5LmaTguQPReKXOkVy3NWaaGJR5jAnH41Wn1PIAhTpxlqzsc5pKh1G9hqKJJppJmBkbJHApgFJTqi9xhRRS4pAFJS0AUALTqQdeOTU8dtK/8ADgep4p2FdLcgxSj061fSyUcuxPsOBVmOONPuIBT5SHUS2M6O2lfouB6nirUVgo/1j59hxVsEmlqlFGcqjY2OKOP7iCpcmm0uRVGL1A0tJmlzQLUKcB702gHFArXHU7d61Xe5jTqwJ9uarveH/lmvHqaG0NU5M0M+lRvPGn3mArNaWV+dxx7cAVGdin5nA+nJqeY0VHuXnvh/yzUn3PFQPczScA4H+zVXzVBwiZ/3qUee+eSB7cUJSexqqcY7kjDB/eMAfc5NN8xAflUsfyFSwWDuCTkgdauRWO0fdPNbQw85EyqwiQ2UZSQSr8rHkEVFNaSSTsWJyTzW0lr/AKMQFGVHap4YPNQPtGSBmuxYZNKLOV4mzujHtrFV3bky2MDPar1vYY7DNakdtk8n8qvQ22TgDArphhoo5Z4tszIrIADgAVaFmOPlIHrWtHboqdM05igXJ6+tbqmkc0qsmU5LTAVlGeME1l+K4QunQsBgq4B/WuhVgRgGsjxQpbSZO+1gaxxcU6Ml5GmEk1Vi/MxvA0xi8TWmOAxKn3zXqd8odmZu+QR7dq8e8OyNDr1i6nBEoweteleLvElvpN59nWJpbnaGK5AUfU18Xi4TfK4K+qPppK+hVZto5JwKqXF7DApaSRVA5OTiuRu9YvLhyRKY0PGxOmPr1qi7NIwLsWYDALHJx9a+klm0VH3YnjwyqTfvyOqn8RW8YYQhpWHTA4P41nXPiO7l3CJViHGCeSP6Vic96X61xVcyrVNE7eh3U8upQ3Vy19tmlnUzysyFgSuePyrd+Kui2Wm32mfYlKLLb7ynYe+a5dvunFd38XkE1v4evVOUe12A+p4NedKpN14OT3udXJGEbRR55Y2qz3cMOdvmMFzjpmugt/DsN9oRuFJW4t3dT6OAaxdIONVtP+ug/nXf+Fh/oOsx55SZ/wD0GvRUbmU21sZ+j/C3xDq9pDcQ2kVrauA3mzyBflPfHWt+DwP4c8MMJdd8SwSXI4MdvzgHrjvmq/xG1O/j0bwzFDeXEcE1ll0RyoYgL1H4150qKoOAB9K8+lVm48xs4X3N7x8/hdprJPCEM8cSq3nNMCC54wefxrlKsXH3RVeuqm246ktW0AYzycCtNRu0OJh0S4I/MCswjNa9kA/h+7H/ADzlVvzrS2jJfQgoyRyOo6Up9qCM49q4Gbn034K1RbnwnY3THKCL5vbHWvAPG2vp4l8TXmoQJsgLeXGD1KrwCfc16l8ILo3Pg66tnOTC7qPoQeK8OVPKuLmMfwTMvHsa8/B0lGpUvugbH4pelFA6V6IXE75pwOKTvSj3oAnsgP7RtJeAVlUnPcZr6E8ZYk8LaiUIIayfH/fJr50Fek+CvEsuo6XdaFfgyk28ggk68Afdb2x3rix8JVIRt0aYktTzMNwKC30qtK7RuUdcEcVHl3Py5NerFaGZZLgHg0m6oVgfIP8AOlLU9BoeTW3rRNv4S0i3zgzu87DPUdq55mwDXSeM4DHDosA5eKyXKj3Oal7q5fRmEshB2joKVm4J706K0OMs4Bx0qQQxqfmyxobVyDV8LSESTgd1BOfrXQeGX8vxhprebsBfB/I8VheHdnnTBQANnYe9bnhWOOXxhpnmYwJeARnJwa43/EYPYt/GaLzNS035sARyD9RXn4ijzySfrXonxnJjv9NwP4X/AJivNmdieOKeXwkqEV6/mEmrljCqOABUTMC3LZqEgn7zE0KoHSu9QtuTckLAfdU0m9iMHFHOaXFUoiuJ170YpkhIbA6Uiv8AvMN0NXy6XJuSD3pelOwKMAVIxtAp2KKoBMetGKXvQcUrAAFFGaTNOwC0UgNLRYA4ozRigU7CCgUE44pCwFOwXFopMjqTRnnNOwhpI2kU0Dgj0p5OD2pBjmqRLHKeKeRvjx37VHjmnBexJGKloaYwk44pvXrTiefSmk/jTsK4vFIWA96byaMU7CuGSTilCHinxKOppzj5jjpTsK40DiloFLRYLiUYpcUYp2FcOMUjDI9xSkUq9cd6YXIx0pwBp23v2pcVNh3EApcUYpccU0hXG04DijFOxVJCbG4pGFSYyaQjmnYQwUfSlPWlxxRYLkVOAyKMUoHpTsK40ikqQrmm4waLBcbRTsUoT1pWBMZSkYFOI54prdaLFXEopQuTTivFKwXGYopc44pO9Fh3ENPA4ppqQDgUmguNPWkpx6mmE0rDQGkJ9KUKTTgoFFgudL8PrXfqkt04GyCM8+5/+tmte6ujJ4Pvrpid1xIxXPXBbAH5CqVkTpXgi5nPEt2dq9jg8f41L4mQ2Xg/T7Y8M23d+WT/ADrqiuWNvI45PmnfzONtoWuJ44Y/vOcf/Xrv9L8O21jYfaZZYIpipKtP8zN6bV9/euZ8HRb9VVxEZmBCqg6sT2/pXd6vps2Lie+ntYpVQFkY7pc9AoUcKB75rlb5epvJtuxhDI/s/djJfJ/E1FehnuZG45NWtm64sOcbVBxVeR181yTnk8UPctaFYxbQGkIwPSlMxC/IgCjualkkUr0H0qpK5Y5J6dKEh77jbmU7QQaitmLg7+gokGUOeDRZLhCaUgROqjHpVmCeVU+zpIwhdgzIDwxHAJ/M1Aoyc1c0tA2p2obkGRR+tJDtc0tV1OXwomi3dvCklyvmPtc8ZbHNVbjx7rEkwtrezjAlJLsFJyWHJ/Cu5uLHRb1NOj1CBri/LlVUxsUA69Rx0FaN4LfTtNmlt4I4uMKqoAcnoPWrpR5pOXYqu+RKPc4HS7WVLURxQPhFLMzDoB1P0rp9EAa5RWZcFMhVHJHvS3twtxpzwRTNLLGiQyrGOFVeSfqTV3wsI44XuL1PLcHcykcgAcD60q1eVOMrb9DGnTUmrmV8Rr5tP0qOyVsS3X7yQDrsHQfjXCW0Ygtxu+8fmarfiHUH13xJPcv/AKpTkL2VRwAKpXL9vWlS5lBc+45Wb0K0xeVxHGMvIQqj613mrTR+G/CMUPW6kX5PUH1/OsTwJpn2/VzcSD93B0z0z6/hTvEE413xXFFki3gbcf8AZjTkn3BrVaakvXQWJU0yy06B8gWcLajc57ytwgP5g/gas+E0aw0zUtauuZEUiM56zScnHuAQKydSna6jDN8zahKbl0HaFOFT8f8A2YVr+Lj/AGbpen6KjfOi+fc47ytyQR6jpVMRyTku5ZjlmOTT40JGBTAOanU9FB+tKw0RlTnHOaGKoCR948CpHYAH1qCRTwe5pDGMOcnk0wntipSNozUfU5pMaEY4pgp59+tNIPAFJlGt4V0x9T1eNQuUQgmvVZCoYRpjZENi4/U1meBtJ/s7RDcuuJ5vlU/Xr+QraFoFA244raCsjCTuyuoIbOc1bjUkA96Rbcg85q7CgAGRimSV/KYcnNcJ8R9WP7vTIWJ6PNg/kv8AWu/1m9j03Sp7qYgLGuQPU9hXht5O93dT3MxzJKxY0pOyHFamJrwDRx5A4JrGGB0rb1lQYF471isADXFLc7YbEbUxhUhFNYVJZ13w1lW3n1OTZvmMASIdyxYYru/E9+ng/wAJ/ZUYHU7355W75Nc18G7W2WbVNVvWHk2UYYKehY9P5Vy/ivV5/EniF5Vy+9/LhX8als1jsP8ABWhS+IteSNwWhVt8rHofY/X/ABrr/iff+dp50+xAFjaEByP4m9K2dPsh4R8LxW1uqNq18MDnqT3/AE/IGsLxbaJaaJaabESbqeYPI3Ukk8k0JdBvRHmezPWrt7Ebaxgg43S/vX9uyj+f50/SbZbu/jjkOIhl3Poo5NRX032q8klAwrH5R6DoB+WKz6iM5k9RRBaGaXaOAASfYDk1ZKgntWhZWhl0+4+z4e5Yhdu4A7epwOp6DpRcDnXXDHjitnStfuLaL7NdKt5ZHgwy84H+yeoP0qlPA0blZEKsOCCMEVWeP0pgdM+mW2owNc6HIZMDL2rn94n0/vCsOSMhiCCGHBBqrbTS2s6TW8jRSocq6nBFdPBqFnr6iLURHaaj0S4Awkvs/ofcUyWjnmz0NPRyBtb5k9PSrmo6fPY3L291GUkX8QfofSqLIydenrTJJJ4DGqyKQ0T9GH8j71DUkchQkdVPVfWiRMYZeUPQ0CI6KWigLiUUuKKAEopaKAuGSO5oJJGCSfxoFJTATpS0GkFIYtFFFABRRRQAUlLRQFxP4gaeVwaaaUtnpUtalIMUuaVInk+6D9asx2yjmQ5PoKhySKHac2fMXHXmpZR83HFClU+4MfSgyBuuDXNJNy5kA0n2/KkVgeafweM1HsweeKa21AmU1YU5WqqZUjuKn3hULEHj0rKWuw0PJxTS2Bk8CqEuoM3EahR6nrVR5Hc/OxatYYeT3E5GlLfRJ0+c+1VJb6ZwQuEB9OtVqTtW8aMETzMUkscsSSfWmdSafTR1rYCReRzSgU1ak9DTAenpTwKYuOtO3Ad6pEMcV+YHuKUnP4VG0y9sk1E0jMeOPpTbSFa+5aZhtJJxUX2jHTJIqDr15oqXJhZEr3Er99o9qj6nJ5NLRSb7gFFFFIApD1p1IwoAQUtAGTgAmpkt5G5xge9MTZFSjngc1cS1UcsSfbpU6IqfdUCixDqLoUo7aR+2B71YSzUffJP0qwDQDVWRm5thGiJwqgVJmmcUuaZA8YpeO9MzRmmA/NLk0zNIZFX7xAoAlzRmoXlKr8sbn8KqtcyscAbfp1oem41G5oMwXqQPrUL3ca9CW+lUGyeXYfif6Uwug6ZY/lU3LVMtveOeEAH6moizvy7HHucCoQ0jfdUKPYVIts7nLEk1ShKWw7RjuIXjXuT9KTzWP3EH86sx2fPIq7DZ56LW0cNKW5nKvCJlCKWQ5YmrENjkjPJ9K14rQZ5H4Vehtv7q4rqhhEtznni30MmLTskALirdvYAtt/KtaOAKQcc1OsYjboOea6oUEuhxzxLfUz7S2AJUjA/masG3VugxVp1XO4DAP6UbvYVuqaRzSrNkMVvtzgc022P2K9Ecy5t5On+FWWlUd+aZDc6VfbrW7vEil/gYHODUTcY9S6SnJ7aGlcQLGA8Q3Qn7rensfeq3n7cYqncandWVkLaUI6o+N/P7wdjXOapq8ogZQwVn4AXrUzxEYRuy44WVSVonXS6lBBGWmkVQOTk4rGvvE9kmRFukb/ZHB/GuHd3kbdIxY+rHNJXnzzCb+FWPRhlsF8bub9z4ouX3CBEjHYnk1lvf3V1Ovnzs4J+7nA/KqlCHEi/UVx1K06iakztp0KdP4UadvIYLuKVc5Rww/A1av7qS9vZ7mZsyStuP9KqqvzFutO9q8+TOpCijmrGnWcl/dx2sBHmyHCA9CfSumt/h34jlsLi9ktVgt4QSTK2C2BzgVlKpGLs2M5HiigHPajpVgFd14/bzPh74UkPJwVz/AMBrh67LXw118JdLnJ/49rop+B4rKelSD8wexw2mHGpWp/6ar/MV6P4ZAGpa7AejPu6+oxXmUDbJo3HZgf1r0zwxIG8WaivZ4EavXhuclQi+IKFvC/heYj7kcsWc56Njr+FcJmvR/G8Yb4eaU+ctDeyRnvgEuf8ACvOOK8qmrJrs2dMXoRXI+QfWoIo5JSBEjuemFGassDIyIql2LDCjkmvRtG8PeKbuBPs1nZ6ZbkD5pWAYj6DnP1rvoR5kZVJ8pwdt4e1OcZ+zGNfWQ4q+bEaZpN5HcXUBklA2opyciu8ufCenWvPiHxQ5fG4xIwT8h1NZzaj4I0uNhYafJez44kdTjPvu/wADW0lGK1ZkpSkcAOVH0o7YFPlYPK7hQgZido7e1MrzWdZsaL4i1DRrS6tbKULBcjEilQe2OPesZFEahV6ClJA5JApI2Mr7II5JX/uxqSaI09W4rcTaW46jirS6ZdsCZ2trQAZPnygNj/dHP6VK9tpMMZL3l1ey4yFiTykz6Fjz+la+ya+J2J5+xnM6qeWAq1bWN5dYMFrIVJxuYbV/M1esJ5pGaLRtKjEvUGKIzSD3yc/yrUk8Ma/eRrNq0sdpC5yH1C4ESg/7p5H4CpcqUN3cPeZiDTooift2oQoQSDHADK2fr0FanhrXbPw5qQvrSyknnRWVWnk45GOQOMU86X4b05D/AGrrslxOnWHToC4P0kbAqBvEOg6e5XStAF0QQUn1GYswPui8Y/GolP2icYx0YW6tlLULtNa1kTyW8MAmkAKwjCjJ5x+dXfE/hW90XWWso43uI2USROi5yp9feqlz4jutbvLY3EFpBFA6lEtoRGoJPJ9e3rXtHxD8O6jrOh2t7o9xILmGEEwK2BIMdj61y1KzoVIxlomVa6ujxGTR7uFGe5EcG3+GRwCfYD1qhHo+pXETTQWM8kIz86rkVJbQzXWqpbvvSRyQwbhgRnOffIrvfBusHTvCcrywyzlLoxqEHIJ6Z9q77uKugiu5x2m+EdYvZF8yzeCAkbpJvlGO9W/GtzHJ4gmWF1eOGNIgynI4GDXReMNI1TUY2vLeeYuBmS0EhwB6r6/SvPCpRirKVYHBBGCKKf7x8zYT93QdvJPJx708gjv1qLGfpT4n/hbp2rVx7GaZreFRi9uAcn91kH8RW/4dJXxnpXB2mbBH4GsPw38t9LnvERn8RW9oDY8W6YSeROByevWuKTaqNofQ0PjWQ13phHo/9K81xXpfxpQrcWDdgXH8q81rTAXdFX7v8xT3EIFH0pcUV3IkVQe9LikGafTsBBIP3nHpUTA7gD3qxIOMjrUcoOwMvI61aZDHxtuG0/eHBp9V2O1ww7ip1IYZFJqxSdxaCaKTNTYYc55pMUpNNyCeTTsA4Cimk+nNBz9KYhw96QuAaFQt6mneX7D8aNAGF/QUuTjpUgT3pwUDtRcCHk96BH7GpSVA5IpDIO2TTVxCBD7UuwY70wyHsKa7t60crFdEgwrdunekLAkAEVGql1wT371IItozmqS6ktjRSF2zgYFO7mkcd6dhXGHJOTSYp2KKAG4pcUuKUdaAuSIuAKUqMdKevIyKa9VYm4wClxQKXFFguJijFOxRinYLjegpxTA3DpSEcVJGcDaehoaC4qqrJx17io8YODUgBR+mafIoOMUWFcgA5pwFOAFBGOapILiUn4Ud+OlOAqkiRFBzRjmnrQRzRYLkeKUjin4pWGBTsFyHbQBUmKMUWAaooZMnilwc0/FFgIwoA6UuOKfijHFKwEe2k2cmpDxQATSGR4Ao2k1KFxRikBXxyTTWGKm2EdOaQjtTAhIp5NOKjPSlWInrxSaGiHBJpwTHWp9gxjFMZdvQ0rDuN6daIUM00cSjJdgv5mkIJ5NbPhK1+0a3CWGUiy5/pVxjdkSlZXN6/hN1q2laSP8AUQ4lcYzgL/k1F8RZB5Onw9xuYj8sVp6BCbjWtX1Bjwp+zxH0z1rA8fsH1uNFOQkQH4kk1vJWizmhrNId4LL21rfXkZxKg2x84ycE4rWvLr7ZZwXCqURwdyk5+cDn396xvCzebY3lkrASN+8T3IrXurfyU4XCMN6/QgHI+ua5pR1TN3uWJ4yNUhT+5Bn8hWcyqGOeua1Dk6hMx7w8H6istkbuDx3qHuaJjWxsICg5qEwnAyKmTOeRmnsHcZ6UWHcozplWBpIAAnA6U66wgKg5J65p0S4i4pS2HEcoJ61qeHbZrjXLSOMEuZBgfjVBFwtWbCSWGdpYJGjlVCVZeoOKgu9nc9Gku2i1CSXVprS3FuggjVeMep+uAKpX+sWGqSeVaXMc8dsPOk2H0+6PxOK8l8UTSyGEyzPJIwyzMeSazNO1S900SiwuGhMuA5UAk46da1hN01ykVI+1lznvWgWi22mIrxhZpj5knqc+tUPG15FpVoirjzZgz7fQnuax/hbNqGsQRrNdSuwuC8rucllwMKPbg/lWX41vTrPiiVIjmFG8pMdAq9TXI054hPsh7U2vMxrRNlv5jcNId30HaoJySeOSTgfWr92wydowoGAPQdqm8K2B1TX4IsZRDvb6Cuy3QzT6nV2cQ8PeDiX+S5uQQT3Gev5CqnheGOLSLmUKj6hqP7iLeQRHFnLn8e1VfHuo/aL77NEf3UQ2D0wOp/l+RrJsJ5LPTLu7GS7r9lgye7dcfhV6XIabRt+EoINS8UT3joBp9p84BAx5UXQH6ttH4ViaxcPqOpXF1ISWkcnnsM8CulWM+H/AUcecXOptwe4hTP6Fi36VyLMBQC30IWUKeKjLgMARjFI7FpCAcConwWwO1K5ZJI4Zvak8znGKRVGCaVEBbnigBjg4Hcn9KX7h4FEj4OB0pEDu2ERmPsM0hiON3JGMVq+FNNbU9YijAyinJ96qpo+p3IzDZzbfVlIH516B4C0p9O0+a5bY8v3WKOG2E+uOlNK7JctDqZmVCkMQHlxDaMd/U1IjgkVVQZHWpE+Xk9K1Mi1JKSecULJjIqAOD3qpqt8un6fPcnBKKdo9T2FAHIfEbVmnnj06Nv3UXzyHPBYjgfgK4dhw3pVm9mMzl3JeRiWZj3J5NPv4/ItI4wBnG5z7noPyrN6lx0MHVlLWwYdmrFYE9RXQ3o/0HIXJ3VjOCemB7VyyR0xehUKnvTGHBqZxjg5qJu9QzRHafDLTZNa0/WNPS6NvHIEaQgZJAz0rtNE8E6Tod4LsySTG3Xe7SdB6AD1rmPgpKYrvVQi7naNQo9TngV2mtM99dQ6JatkE77uQfyzXHFVHWk2/dWy8zpjblRBbsL1r7xFqJCW8eUtl9vUD8P0FV7zS9mk/2tqQC3lwwljjP8Ea9P51q21vHrGqJajCaJpXMrKcB3GMD+v5dea57xb4gXU5L8wsvkx4gQAcL7Cu6CSZz4h2ps83gYWmiyyf8trpvLX/AHB1P4nis0dc1vapZ/bJVXTpYpY7dBGI87WyOpAPXJ54zWHJG8TFJUZGHUMCDXMmaMZnnNKCRyCRinJG8gJjRm28nAzgUw/KcEGndDs1qXE1GUx+XcolynpIMkfQ9RTWtbO4GYJTA5/gl5U/Rv8AGqvbNIckY/lQJDzpzxs/nADaOCDkGsySMqeK6GWMwWccZGHbk/jWfKisDx7Csozu7nTOkkkjQ0fWoZrZdO1vL2w4hnHLwH+q+opur6XLYShHIeKQbo5V5V19QawZY9p4rb0HWI0hOnaoDJYSHhurQn1X29q3TOZx6MzzEQjE9qWDhwr/AHG4NaerafJp9wEdhJE43RSrysinoQazwQhx61VzNqxFNE0TkdR2I7iluLea22efG0Zcbl3cEj1roLJ7HToEdtlxetyueUiJ6E+prGvWnurlpZpPNkbkknpQFynmlxSmM4yQR2pNpB7H6UCDFJT8ZJHQ0hGOtAhtFKcUtAxuKTFLRSHcSig0UDCikpaACjtRRQAnWp4GUHAj3PUHSpITtlU+9KSuhouIJCQWOB/dFSMRjpSsD26iocljg4zXNZMdxSDjI5FV5lOdwz71ZyVFNY5HSrjowuQxswHBIPvU8Tlxg9abFE8jHaVzjOM0sW1WbPBHr2rSpBcvMJPWxYQDuKlIBBHBzVJ7qNDgHcfaoJbuQ/d+UfrXL7GUtS7kEg2uy+hNJQSSSScmiu1EhRSCjvQSLSGkzRnNBQ8HilDgH1qOlFO4D/MY8Dik69aQUtIA7UoooxQSFFFKKBAKWgAnpk1KsLHrwKYmyOlAJ6c1ZSBR1yalAC/dAFFiHNFZIHbqMfWpVt0/iyamp1OxLk2IiqvCgClJNGRRkUyAzSik470tACg0oNNzTHmRerZ+nNArEucfhU0EMs0BmiXKDqM81SjdriVYYwcucVc0y9W11TLEfZc7ORxgdDTVnuNxsiIyqv3mAqJ7ofwKT7mmam1st7N9mk3xE5GBVXeT91aTvexUYK1yw00r98D2pbGPzLtQ5+Uck9agWORz8xOKv2Eexg3YGtqNNuSuTUkox0C7vZIZHihwVPcrzVNvPmBdjgdPStS6tlNxuHRhmnRW/YAkGuh0JTlqZKtGK0MuO0LH5smrUdj7VrQ2wHUVajgxwBjNaww0UYzxLZlQ2XybsdKuw2q4ywzV6OMDKsODTggQ4ycV0xppHNKs2VBbDOQtWYrcnrxUwYY9KRp1j6kVaSRk5SlsPEKLgr1p64FZl3q9rAMmQMT/AAqcn/61ZVz4iJ/1ERPuxxWcsTThuy4YWrU6HWl12gcCqtxeQW4JllVcdeea4m41S8nzulKqeCF4qmWLkliWb1Jya5p5h0ijphlnWbOvuPEltHuEQaU+3Q/jWZc+JLlyRCiRr2JG4/4VhDrR3rlni6s+p2QwdGHQnuLy5uSfOnkYE5xnjP0qDHNLRXO23qzqSS0RaXULwReWLiTZ6E1VYliSxJPqaKKHJvcSilsgooFGKkoKQdRjrRirFnHuk3Hov86TdlcEXl4ApaB0oGK4zYltJWhuoZUYhkcMCOOQa+hvGWsXkXgeSSBhukSMPn+6cbv0Jr506L717x4mUXXw2nPBxZBxg/3Vz/SvOxmlSD8weqPBxnHtS5oH3aXsOK7wE7Yru1UXHwZuo15aG8DH2G7vXCiu78B+KtN0TRNQstVhknWdgVjVchhjBB7VlX5klKKvZpgcpZrolmB5rSahdnokSnaD6e9dF4Ua8/tmfVb60ltLERbDJIhAHpUg8cWumqY9C8P2Fqqn5JHG9x9ff8ayNZ8X61q6NHeXjCBxgxRgBa9RV4JJnN7OT0Om8Q3dpe+AL4Q3MbtHqAaNQ3LAgZIH4mvOVRScvn6ZpR2HA9BU8NncTAtFBKyjqwU7R9T0rhguWTa6u5vaysRRkRnKAKe2O1aDa5qj2/kfb7nycY2CQgEe9QSWPlPtuLu2j43DY3m5/FMgH6mnMbGJx5a3FwpXnzCIiD7Yzx+VaOpLuLlRUOSRkkk8c8mtG30TUp0R1tHWJ/uvIQi/mafZHULiVf7IsG86Mcm2gLtj1Oc/ngVrT+E9YcIdavrKyRgWUX14oJ+iZJ/Ss1JL4hu/Qx30kxZFxf2MRHYOXP5CovI01Isy3l1M/wDdijEY/M5rWjtPC1pGrXeq317IDh4bS22L+Dvjj8Krr4p02xwumeHLQSoxKXF5I0zEe68CrjO/wxJa7soWlmbiUDTtMluGZsIzK0h/Efd/St8+HtcaGX+0JrbSrdceZHPKsQA9Qi1h33jTXroPH9ua3tn6wWyiJB9Mc/rWf5puG82RmklPVnOW/M80SdS2rsCSOhex8NWJkF9rFzfvjK/YIcKT6Fm/wqu3ibSbNj/ZPhy3YMuGbUJDOc+oH3R+VZB5GMVSuoCvzKOP5UU4J/Exs3rnxxr9yiRC+NtEvAW0QQDHp8uKz2ma4JkkkaR2OSWJJJrJwewqWGQxt147irdGKXuoSZoEAjGOKqXEOxMqOM1bVg4ypyKUjII7VEW4spq5TsT/AKz0GCK+obnxRZ+HvBlhqF9FLLG8SKqxjkkjjNfMkUIjkcj7rAV1GseLtR1Xw/a6RcrELW3xhlB3Njpk1x4zD+3nG2y3COiKl7rFn/wld5qdvbzbLgs6xsclWJ559K3PA+tWVhb3kWoL5Qlm85FYZxj+tcb9OtL1NdVrR5UNOx7Vo2vaf4j1IWlsZWuQhIdlwDivG/EaPH4g1FZUKSCdsqRgjmux+EJx4vjHrGw/WvS/iN4Bt/EsBu7IJBqqLw2MCXHZv8a4Vi44evyT2fUc7yR85ilqxqFjcadeS2l7C8NxGcMrDBH/ANaq+K9qLUldHObHhZt1/Irf88jj8xW5pCN/wlmmtgFBMvFYPhnP9ot/1zP9K3rA/wDFQ6f82z9+vPrzXFU0qu3YrodD8bU/c2LnIIlK/pXlIr1/41R/8S6zDZLCfBP/AAE15AcqcGqy+ypteb/MJAKUUgx3oDA9DXoWJuOoBqNmHTNNJY9AcUWES5BNMQ8bfTikUNjk0u07gOeaNBEbjC/Q/pSo236GnlGX72MHimFTGxU9O1VuLYfuJ6ClwSaSIgcED61IZFHfP0qXfYq40RknkfnTgmO4pplHYH8aaZW7YFKzYrolCKD3P1pdwX0qq5Yn7xpwHSqURcxP5i+5ppl9B+dMxRVKKFdjvMY96Tr1JNGKMU7CuAApaKOaLCuFNI5p3ekNFguCjGcUD35pydcetNFOwhx4c+9OxkYpHH3T6inrzzVWJuRUVIyZPFAjpWHcixS1KIxRtFOwXJIh8g+lNkHNSqPlFMlFOwrkYHFOApQOKXFMVxuKXFPxRjmiwEZFLjinEUoFOwXHr84/2hSA84NIDtORT3XI3Dv1osIY4xTCM9am6jBpuCKqwhgFOApQKXFUkFx8Kgk5ocAZp0akDNNbkVVibkdOYUAc0r9aLDuMxQRS0fSjlFcQDmlpwUjmgrxT5AuNoxTwppwXFS4juRbfWlxUmKQip5QuMxSU400KT0zS5RpjG9qFQn6VMsYHPelxTUQ5iMKB2pTxSsfSm01TFzDTk+1N2ipdtJiq5B8xFt5rrvBUAjtri4YcHP1wP/r1y2PQZNei6DaiDT1jABbaFwTjJPJ/rV04a3Ma8/dsWNGtxa6ZaxsP3lxI0px+LZP4ACuF8Utv166wc7SF/IYru7WXzfFbxKQYrS224B6Ekf0FedanJ52pXcg5DyuR9CTTqbWIoL3rsr28r286TRNh0ORXX2k63sMcp37X4Csc7eRwPbriuOxXV6MGFhbIq5JKn65Y1zvY6Wassg+3XLNwFiVRx71VK/uzt5ParMoV7m+2jhcLVa2PJB9ay6jIYIyXJcEAfrSSDsvC1cZjggKeKpSb2zuGPamkDZn3QJfOOKsRL8oqO6ZcBScHNTRE7QRjGKiZpEfgDgU+EiNJmc8lcCmA9exprH5D6ZqYK7FN2ic/4lBEsA6/LnNYp6V6bq/gjzDbm5umSby1LRooO3IzjPrzzV7Q/AWnyXCLPGXUEEljyRWzpSbuTGqkrGv4eKeHPAUZjI+0SwFwT1VnwSfoMj864rSgXjnuT1clFJ9O9dL48uUggNpagDeVhiQdFUdv8+lYjxrb2qRL0RQPqe5rOnBL3u4pvoZt4x55rrfBkQ0vw3d6rIMS3JMcP0HpXGyo91dw2sPMsziNAPUn/wDWa7DxndJaWttpluf3dtGI8erY5P8A9etl3E9rHI3sxnuHkJyM8H2/+vVvSWl1u/0vTbeLYiNtGOckn5nP4ZrKl3kYUDmn6dLeWFys9pOYZVzhl61lJu+hokrHUeOtQF5rRhtATZ2ii3hA6bV/xrnTFM54jb8qaZriRi0kzFuuehJqxZxuw3yOxHoSavVk7CJpt04ztVR1yzCnWmlNcTSIlxFmPliMnFXZpBbWjScZAwPqavaBaFII4T/rZTvkbuM/4UJaiuZ91pcNharNcTO5c4VEGCe1Y8t3AkrLFbbwDjLuT/KtPxJffaLiRo8eTF+6jHv/APWGTWPbRRhgZATSd+g0luy3balIGAjtrZPcx7j+tdDps91M6/vCg/6ZgIP0rIgtVkYMowK3rULZ2clzKAFRcgHvikr3sxtK10Z/jDUpT5dhDI7M3L8nPsKr6Fq9x4dvozZsCFB89G5WQY5BrOhdpHn1GflmJEY9/wD61VXLeVM3UsNv4k0TlZXCC5nY9r068ttW05NR00nyDjzIictCfQ+3oafI+eBXlelazd+H9Qgms2BVFzIn8Mq45U+1enabeWmtaXHqWlHEZAM1ufvQMfbqV96dGspqz3CtR5HdbEqg1yPi24k1C5e0tXHk2i75Rn7zf/WFdDrN+NO0ua6P3gNqY/vHpXKS2VtaaO91cSyO8/I5wWJH/wCs1uYHLXDo8qiNSFAGfc+tW7pRJYsXyfLHJ/2jVOFQWZ+qg/pU1xcNJafZ8YUNuGOrMelZl22Mm5UmwdtxHIH6CscqWGACa1b+4axZ4ZGiIzzxmsx9UGflJ/4CuK55W6nTG/QgNvK3Ow49cVVkwpILAGtvR4J9Ye4Ysy2tvGZJWz+Q/E/1rnG5J+prNlxPT/hVPDpfhzVtRClrppVhjHvjt784ro0E2n2Ahth5utak2M9SoPX8AK5f4a7o/D0804jFnHc7yzddwUd/Tmu40h007T7vxNqOBI6lbVG42IO/1qTeOxl+O9Vh8J+GYtE0983TAmV88s56sfpmuCt1MOhWaN/rJWaVyepz0P5Vi67qc+uavJcSFmMjbY1PUDPFdBqQCTJCOkMap+lVB9TkxktFE44sdxOTk85q9Fqs/lCK5VLmEcBZRkgex6j8DVEjHvU1jCLi5RDnaeW+g61zyaSuzsjFyaSNvMVtbq1tG0Ykw21myRkevpUMjW05/wBIjCsf4hwfzqK9n3TcdE4H1qJ1+XAb8DyK5Er6npuSS5EtEEumEgtbyBx2U8GorK0c3arKhUL8zZHXHagO8RyCV/UVM99M0ZUAHjrmtOadrGPJTvzNWGXsplncjnHyj696ryKMAUqHPvjv2Jprt2700raESlzalSVM5FUpUKmtJhzmq0qbhWqZzyVza8O6nFcW/wDZGqv/AKK5zBK3WBz3/wB09xVbUbOSxunt51Kup4PYjsR7GsN12mus0qYa/pn2KY/8TK2UmByeZUH8H1HatEzJoxAGz1Bp+13UsBhkH5imSKVJBBDDg9jRFM8bAgn6VRmwyGQhunahYkYcEinu0ZbO0AHnjtTQgY/Iw/HigVgVCH5ww96VlQgg5GemKadyjmjdu7EYoGNMD4O3DD261EQVPIIPvU5z607zCRhsN7GgZVz+FLUrojHgFfpUZib+Eg/zoDQbRQcg8giikOwUUUuKAEoFGKKACjuCKMUUBc0lO5FbsR1ppHzVXhuNiBWXIHcVMJEc/Kw/GsHFpjuPKgnjNNAwfalPB3U7AZcip2GRwOsdwodAVJx6VFfFDKRFnaO2c065X5N3XBqqSOwrpjPmjYza1uNoPNLSYoKCiiigoaT6UdaU9aSgAxRRTqACiiigTAUtApwQn2oE2JQMnpzUgRR15qQEDoMU7EtkaxMevFSrEg65JozS5oJdyRSAPlAFKDzUeaUGqIsSg0uaiBpc0CsS5oqPeB1IFSIkjruRCR+WaEm9EJ6bi0E46kCoJTMpwylfwqIgn7zUPQpRuWDOi98/So2nY/dAFQkgDgEmkG9uOgpJN7FcqW5IxY/fb86ZuUdMmnLAT1yanjt/bNaRpSYnOKJ7HdBby3e3GFKIfQniqSQM/wB4mus0O1j1Kwl098JMPmiPqazTatBK0UiFZVOGB7GuiOH2MHXMtLTjOOlWo7XABOAK0Vg4OanWJdm0/nXRGhFGEq7ZTW1B5AHNSRwFW5XirartGO1P4xW6ikYuTYQxxyYikXD/AMJ9aXyfL4K4NLEizSqhkVG7EmrckyrBLFcKPPGNrKcqw/xqk0ZO/QqpgHmp2dCo5wRWe9zGmSxO0cntXNXeoXE7N+9IjzwBxWVXERpG1LDSq9Tqpr2KDJklRQOvNUbjxBCuRGGkx6cD865c/NySSfeiuOeNm9tDshgacd9TWn1y5kJ8sIgzwcZP49qzpriWc5llZ+/J4H4VFRXNKrOe7OqNKEPhQ6iikxUli0DrSClHWgBBxSmg0rUAJRRRUiCiiigApVBZgB3oqW3XksfoKHoNDltx/ExP0q3CiouFHvTI/mb2FTCuepJvQ0SSD606iisirhW1J4p1Z9C/sl7kta8Dn723+7n0rDZgOrAfWpYILi5OLa2nmOcfIhI/Ok6Sna6uK6W5GMUvetBtHnjRnvLiztAuMo8oaT/vheaPL0mLIM93eP2CL5Sn8/m/StfZNfE7E866GcxCjLEAe5qWG3nnG6CCRx/eC4X8zx+tbunwX9yrNovh4hPumUQtKVPruPA/Kr114bv9sja9rmmWJVdxilulZiPTy07+2KT5F1uK7OeSwhC5vb6KDBwY41Msg9eOB+ppGk06FW2xTzMD8rSOFU/UDn9a0hL4Ps8hptV1RtmR5UYt4w3pk/Nj8KltfFkdqEbR9A0y0kUYMsoM7N/31xn8KmV2ttBoq6Zb6rqDrHo2lu2/7phgyQfaQ8j860JfC9+2LjXtTsrDLbX+1XHmSr9VXJ/WsvUfEes3sW241KcRg5WONvLVc+gXFc757Gcu5LMTyxOSffNEYNg2ditv4XsPMFze3+rSq3yi0QQRMP8Aebcf0FRXXiixsi66J4dsLcHpJdZuZFPqC3y/pWArAjIxSSRhxg8GhaPULXLuqeMfEGpLsuNTnWLbsMcOIkK+hVcCsy3mDH5jkn86qyqUYg59qYOOc1vyRa0JvY1uKgli6uo+ai2mD4Vuv86sAVjrFl7mYWYn5l/+tRCzI2Qf/r1buYdwLJnPcCqWMcHtW8WpIl6GlFIJFyDTyAevNZ0TFHDKa0UZXGRWM4cuxSdylcRGPBUnZ/Kq/wBe9axGc56VRubcpyuSv8q0hO+jJaI7eUxNzkqetaSsGUEcisoL9BVi3kCPjJIoqQvqgTsXl+43TP8AOjtzSxsGViCDxRj1rAoEVmztVjjk4GaRemcg19CfCrwxa6T4SjvbyCOa9vV875wCAmPlX8ufxrwXVr37drF44torfbIwKxcLwewrGlWVWUlHoDdjp/hW23xhbe6t/Svo5egNfNnwybb4xsvckV9KIVG0FgN3AyeprxcyX75W7Fo4/wCIXgq08U6ezqBFqMSnyZh/6C3qK+Z3BR2Vuqkg/UV9llcZH8q+ONSRo9RukYYKyuP1Nelk1WUlKnJ6IyqLqaHhdv8AiaEHjMbVtJGG1qxyePPUc9OtYXhfP9rrnoUb+VbzOE1SyLK3M68/iK9Cp/F07EdDs/jTgaTZ/wDXwB/461eQSYYYNex/GtFOhWu3IAuB1/3TXjY+UEjFRgdabt3f5jZCIsnqT9KcsIz0/Out0rw6l1bxTySEo4zgcCujs9CsYcHygSPWumeJUdC40WzzRoCm3eCN3I460m1R1H511fxFtVgtrGeABMM0Zx78j+VcKSx6sTW1N+0jzGU1yuxe8xBxkfhUbSAlSMkiqyD5qkUVqoIi48ylscU1yScHp2qQOAMbaY3QGnZCuN74NLilxSimAmKMU7FLjmgCNhzT1HFIw5pwqiRaKKBSsAUUAGnBTTFcaBS4p233pwXFArkeOaUqSakApcU0FyNUIYGnBADUgFPAHemkTcjC/KKXbwKecY4FGKdgG44pcUoGKKdhXEIpCOKdzSAE0WGSAcVHJU4XiomHNOxKY0DinYpcU7b600gbG4oxTuB0op8orjCOaMU4jmlpqI7jMcU6M7cg9DQKCKaiTcVhtPtSsNy5FKo3jHcU9cBgtVYLkFOQbmFPljKnI6GnRLgZq0ibkij5aiZeKsqvyimSIABRYLkCJ81Ei/NVhF+WmlRnNNIRCEOfSnBQO1SH9aAnrRcdiPBPSnACn7SO3FAWpvcBmKMU9hTMHsKEgGHApuC3SphDnrUgXHanYCusXduaftxUjYFNOSaOULkZ9qbj1NS4oK01ERDjmjFScZpPwpgNOAOOtMIqVuBTMUDJ9Mh8+/hQj5c5P0HNeh6e6pbmQ8rGDIeOvoQfwNcPpJEEdxdED5FIX610WrTvZ+FhEoIlnCxgZ5HqRTirIwqPmlYm8ISl7PWdVl5MjFhn0AJ/wrhTFIYPPKnyyxG71Nem22nm28LfYYQRPLFsJPZm/wD11i2ejRSadDDKpkWMk8HAJNRNCVVQuziCRXaaSpjt7ALyzbePwNX4tJtoV+S3iX680y2iCSrMcHnC/QD/AOvWM9jWlV9o9CvESkd47tud5euaYkqI4wmPepNPRriydiBzKSaLqExjOASeAPSsToZK8yuflxjuazrqdFBA6+lPtsIxWQ8GqV3gykIcjpmmCRTkyXyepNXIM4welV3GyRVPJq3GAoB5HFRM0iP+6pUda0PD2nHU9at7ZxmIMGm5x8g5b8cA1nK/7wADOSP512fguJbWO/vHBLuRCi45OSSSPwUj8aujG7Mqz6G7fWoL+ezfOzEke5q5p6+UksjHAVCSfQVXEhmYHZtAOcZzWd431A6f4f2RkrLcNj32jk1vNXi0Yx3OPu3/ALT8RzzsQ0dsMDHQuf8AJqrqL7Qcmruk25ttKR5B+8mJlb8elYmrTje3OcVlayNd2bHgO2WTVbrU5lJisIyyn1duAPyqhq8/2m9kkc5OT78nqa6CJRong61gOFurr/SZex54UfUdfwNclIcnrRsh7sZx75o4yOKRh6dKRPvckCkUWo41boPxNaNjFuQbhhc8e9UocEqCRxWhJOttatIeABxRpYl3vYgugLnUY7deYYRucep7Ctm4ZrDR5Z+POnPlRjv7n+Q/OqegWMjCMkZmnYM3rz0FN8TXPn6itvbDKQARp6Fj3/mfxFNKwbnNXTBrhYowXWL5cjux+8f8+lTQQOZFLoyjtXUQWdtoVrCzxrJLKwDSPzjPpV1THfWEMjooLqGG0etCjcbbS0MvTYCzAdqh8UzmWS30y3PzOct/TP4VtKI7K3klbAVFyT/SuPiuGb7TqEvMszFI/b1P4Ci1tBEd867lhi/1UQ2j3Pc1DGrMscYA/eSDk+wJ/pUZNWR/qbcoSZImLkAZPt/OsK21jegveuJqkyrbBkKmTy3XHfriq+gaxqmiapBeaY5RoxtKkZWRe6kdCD0q3oVrBd3LPfyR20CHJaRsHnrgV0Gta/4ftPs8ek5YRD5i0OQ59awiranTJXWp2F1eadrWkWt2sZgRpN01rL/yzYDkj/Z9K4PxFfG9uT5fy26fJGo6fWrtz4qg8Raa1vbWQtXhdWZkOQ4PbFQa1Yx2UFtjPnSDcQR09f513RblG5584qM7Iw8bVSMHO45Jp4kWGGW8fG2L5Ywf4mPf8P8ACpJFDsqwjOAI19yev5Vh+JLxUZbSDlIRtz/ebuamT5VccVzOxhXs7TzsznPNQGnU01yPU7ErHfaPJDbeCooYFxLcszzN3YgkAfTAFefScOw9GNdppK7tCsvT58/map23gTxFfsz2+nOI2OQ0jBBg/WtZx0VjGEtXc6f4W2kmr6SliWKWcV009w3qoVcDP+f1qt8V/E/2+9Gl2TbbO3G0henHQVc0/VH8I/Du6sztTUZbt4uPUAd+4HNeeWFnNqd6EG9i5LO5H51i1rZbnSpJRubHgmxWTVIbu4UGKMllB7kDP9Ks3Mhmup5T/G5P4ZrYsrZLLT72YnCxR+Ug9z/+o1hgYFbOPKrHm1Z887nNEZrS05BBaSTkYZuB9P8AOKoIheQKoyWOK0r5lQJAPuqOfw/ya86q9onv4aNrzfQrAEuCTnHzH6mnNSIcLk9TzSNJkVFjW9hN/WomCk5IGaRmphJxVpGUpDtxA7ACmZByaax568GmE7W9KpIybHMCe/WopOM5p24/WkJDHniqIbKsi5plvNJbXEc0LFJEYMpHUEValUY45qpKpHNUiWjqdWVNRso9YtU2iQ7LlR0ST1+h6/nWGwwat+F9Qjtbxre7Yixul8qXvtz0YD1BxS6nZyWV5NbSjlDgH1HYj2NWjNoZaafc3bAQxHb/AHjwKu3+jGzsPPadXfOCo6fnRp893fMsJkMcEY+bbxxVjUYZb1lBIgtY+F3Hk/hTJsYIdh0JoJDDkfiKWZDHKyHnBpmaBC89jn2oOe9JS5NAWG8+tBNLRt9KBC7jjB5HvTCFPbH0pSp9KKAvYbtx0OaOR1pc0ZoHcSkp3B6j8qNvoQaB3EoFByO1AoAKKKSiwWJEldejcVKlzg/MOvpVcUGpcU9wTLrOkkLgMDkcCqVFFEY8oXEoooqhhRRRSARqbTjzQFoKEFLT1iJ7fnUnlHHWnYm5CFNOCj60pUjqKKCbsXOOnFGaSigQ7NLmmZp6KW7gelUAuaUGmN8pIYYIpu/0FSBNmguB1NQZY96UD1oCxIZfQZpN7t3xSAHsMU9Y2PXJqlFsWiCFN0qA85IFaV7cPbsgtyUbHWqUUZUjjFX7mMSxI4HTrXVTg1BpGFSa5l2M9jLNlpHJ+ppUg7mrKR+gqxHCByaI0e4Srdin5AwMA1OlvtI461b2gcYpcZrojRSMJVWyIQLinxxDIAHNP6daDIF5JANaqMYmTlJ7Fi3328qSxsVlQ7hXSanajWLeLU9PjDzEBbiJOoYd8f57Vxk2pRIACwY/7PNMt/EFzZzeZZM0beuev1FRKvTj1KVGpLobMmEO1wUYdmGDVae9hg+/IoovfGM17aCK7sbeWToX6Zrlp3MrlyAM9AO1YzxaXwmtPCt/Ebk2tRgkIpf9P1qjPq88mQm1B7cms4Utc0sRUl1OqOHpx6EklxLL9+Rm9iani1C4jTYJMp6MM1UNHWs1OS1TLcItWsSzXMs3Ejkj0HFRCiipbb1ZSSSsgooopjCiiigAp1No6UAOoHWiigQN1pT0oagfdoAQ0UUVIBRS0UAFWVwqgCq1X4IGZUY5O7kKBnNTN2V2VEdbDeMIC7eigk1fXTb5sYtJEB7yERj/AMexWxYad4kvwqWlrcxwuMbvLESD8T/jTpvD0dupOua9YQFG2vDHKbmUfQLmsHKF77j94yJNOMWfPvrONgM7FZpG/QY/WmxrpcQRriW9uTnlV2wj6Z+Y1rSv4UsQ/wBnh1LVGGCjysLeMnvkD5v0qCbxtNA7f2LpWmaYrLtLRxeY/wBdzf4VUZX+GImu5a07TdTuwTonhsYB3rM0Jc47ZaT5fyq/c6PeSQoPEHiews7eU5MPntMVI7eWg2j8xXLz67q+p7Tf6jdShBhQZCAPbA4qlIVRSwAFTKU3o2NRW50Rn8IacE+TVdVnRsOpK28TD1GNzY/EVEfF2wbNG0XS7ABtyS+T58qj03SZH5AVymcncSDVu0Xjee9NwUVdgtTc1PxFrOqo66lql3PHJ96JpCEP/ARxj8K525YZ2KMCrU77IyTWdnJOetFKPUb7Do4yzgDFaSIEUCobaPC7+/apJnESFj17Cib5nZAlYrXbncFU4xVbv709mLHk9TT0gJTd2rVWirMl6j4H8snLDFXFIYZByDWa2M8DtUlvKY255WolC+qGmXJYlkTBHNUHjZGIYY/rWmDuUEdDTZovMTB69jUQny6MbVzPSTaBjnFXreTco3Ebh+tUnj2HDdaYrFenatZRUloJOxrCqtzAGBZeMdRUltMHG08MKmIrBXgytzKIAGO9SW7lGGO5wc1Pc2/O9PxFVMeldCakiNjTRg65FPIyMEZBrNhkMTZHI71oxsrruByKxnDlZSdyhcwGM5HK1CODWswDAgjiqM8JifcBlTWkJ30ZLQtkx8woD8pB4q9znPpVGyybgAKBkVe7VnWHE+qfDZ83wzpTf3rSP/0EV8qXIxrV8o/56v8A+hGvcJviFZeGPCego1tJczy2a7AhAUFRjBNeGl5J7+e5dSolYt045PavNy6jOHPKS0Y5O7R0/wAPG2eL9NPq+P0Ne1fE+9fTPD9pfxZzb3sLnnqN3Irw/wAFNs8VaYf+mor2j4yRGT4f3JAzteNj+BrmxaX1mFy1sdJ4V1+z8Q2ZltHBaJ9ki91Pb8DXzz4p0wPq18yDEqzOMdm5Nd9+z0T/AMTkZzgxH/0Kuc8SJjxBqSntcP8Azq8P+4xEoxJeqON8Ott1lFYFWAYEHjHFbk7u2o2iuSUWZMD/AIEKWKxia+juAwSVQR0+9kEY+tV38w6jaquMiVACe/zCvTuqk1JGb0R3vxvB/sG3I6faF/8AQTXite2/GtWPhyNiPuzoT+Of8a8Sq8vs4St/MyZHoXgufzNFjjz91iv5Vus5AOfpXHeBpyIbiLP3GBA9j/kV1O7PzHpWdeNps66TvFGV42iNx4auCFy0TJICO3OD+leZY4r128iN3p93bqeZYXUfXHFeRryAR3rswbvCxz4ha3HJ96pAKYg+apO1dZgFKBkEfjR2pyg5/SgBoFLjvTgtAXmmhXEoxSjqaVBTsTcbszS7afilxRYLjNtOA9KWiiwriYp2KO1KATTSAAKAKcFPenBapIm40AUoFO20oFPlFcZg+lOI6U76UuOKpRFcaB1zSgc05Bk4pBVKIXExRinEUU+Um43FLjmlANCglwMd6fIHMTY4qFhhqtY44qGRTup8orjKAKeFp4WmoiuRBaXbUmw0u2q5QuQEUhFT7OaQpzQohchAOafsqQR81KV5qrCKyZUgjtUrpuw60/yjmpkQDj1o5RXGKm+P5uvekCYwPSrCgqT70eWRyRTSFzDQPl6UxkyashcCkxzwKdhXINuB0puzNWNtJto5Q5iEIBS7amxTTRyhzEe2m4qQDcacEAo5UHMQbM04KB0FSNgUw0WC7Y0nFNPNOxRtpWKI8CkqTbRtpDIsUVNtppFAEODjpQFx3qQijBoGRleaTAqQjihV3Oo9TQBdijLxW1qowZnBb6ZrrNTtReavpFow+RCZHz02jH+FYmhwedqxfGUhTA+p4H866+Xy7Wa91GQ4EMAjGfXr/UVaWhzSeuhoXUke0gffYM4X2UH+oFY6RtbDyl52jBz696yPCEryvdTXLNmblmJ6KDkgfU4FbUkwGWY5Y8ms5O7OaqraXIXjeQ5Pb8BVG3JCsWGQm4j64Aq+twSWJQ7QCfc+lULYlzMM42B6xnsdGDVrsk0dSulDaAW8w1VvlmeXABArR0cBdMi3HG4k0l5LGoKq2T6+lZ2Oy5z0nytjqR1qMLgZOOOlaBs1Y5Ukk1XnhaPh+cdKViuYoABrgHrU596YqFZskdql2scYU1EjSI2L/WJnpuGfzr1jTdNMMNpEFU7EMrc5wz9vyA/OvMrK3kW5hkeB3jVwzKB1A5rpdb1zUtTVntDLZoTgQxg5Cjpn3q6UkiKqud2LeOIF5Siep6CvPPGcv9s+JbayibMKgcg5GByT+lYLeHNW1Viqvc+7SMQB9a0vD0eLu6umIYRAQIe3HBrW7loZ2S1LOsSrFGwXgAYA9B2rnNDsW1nxBbW3/LPfvkPYKvXNXdfuCylc8k9K0PCsP9neHbzUX+Wa7P2eJschD95vpjNS9WNaK5X8VX41DUZGj4gz8nsg4Uflk/jWCQSfSrFxIruzAbVJ4X0HYfgKhIBpFJaEZBxjvTFTL8mlkzu2gYqeKPAULyaTRV7F61t1ABqOZTeanDbf8sY/3kn4dq0IYvLtjJJ0UZNLoFq8yeZtJmun/JQeKaj0Iv1NyyIs9PuL+TC4BVPYkdR9Bn9KxtDs/PuJLqckrGSxH+0eo/Dp+FXvFU22WHT7cZEQ5PYtx/XGR6A1MiJpmmG2xudoyTnvxzVOwkYXiu9NyywIMRiPeCPfpW5pa7dLtAf+eS/yrj3eSVpZpCSPLIHsMHFdnYFYtOhkkOEjhVj+VZU5Xk2b1I2ikY3iuZn8jToT88xy+PSsC7ZPNEMHMMQ2Jjv6n8TUst1JLNcagT88pMcWew7n8qqafe2ttqEZuSTGnJA7+1Kc0tSYQcnYjvEkg42kt1Jxwv8A9eks9dn0yORbWFPMfhpZFy34Ve1zxUt3+7tbRIoh046+9cpdXLyuWc8ntXM5OW52qMafwsu32s3l3nzpjj0UYFZxLytxk5pEXdy3Ap5lCjCcCkJtvc6/4dQI15ciQ5+4cdupre8S3C3Oorj/AFcQKk+1cr4HvBazX8zZO2NcD3yau73urwqpJMjd+w7k+1dlN+4kcNRXmxtxOLO1kuOC7ZSIeh7t/T864i4kMszMeea2/FGoCa68qDiGMbEHsO/1NYFYVZXdkb0o2VwpDS0scbyypHEpZ3YKqjqSegrM1O++GtlJrk9rZ7G+yWrGW4c9CpPCD3J5r3MAKAAMADAHoK5/wJ4eXw74egtWA+1P+8nYd2Pb8OldCskZleHJMoTeR2Ue9bXstTkk7vQ868N6dZajquvHUbeK48i8k2ecAwQYB47etRJHbX880tnDHFZwZSMRqAGI6ms26vpItT1+xsT/AMfl5xIv9zaM4+pGK6GxtVstKSHIGeP8aKVBOp7V9rBUqPl5DlPEx2WEMa8eY24j1rmq3PFtwJtUKJ9yMAAVhmlUd5M5U76mTpUXzNMwGEHH1qN282Q+5z+ArQlj+zWKQr99uW/GqargE8egryOe7bPq+XkioEUh44qEsf8A9dTSCoXUVaaMpMjLZzUbN708jrgZqMrg+laJoxbAnocUjc5oIPakUEng9apENipnHNPKAjJoUHHSg9KYivICO/4VG/IwRUsi56U14yBmmIqOCprqp5G1fw9Dek7rqzxBNzyyfwt/SuXlFa/hK7S31ZYZ8fZrpTBJnpg9D+BxTExtpdz27FbfrJxWioeMCSfdcT9QOyms7ULaSyvprd+JInIyPboakt2mkXfLKxHZQaohoivhO0hlnUKT6VWq3Os05JdlVR0XNUd1MVh9FNzS0CsLRmkooEKDQTn3pKKAAge4pNp7c0A0uaAsN6daKf1o2igQ3JpOPT8qcV9KTBHtQAmPQ0EY606kzQO40Glo4PUUY96B3TCig8UmaASFooooASilooGJR0NLR2oAsZyvFAJHWmxnKilJIqiRxIzSFA3UUmASCadnHApWBsjaIgZB496iLCrTsqcSDd9KrOVJyq4ptWFHURcswA71JMNsm0fwcfjT7VeWfH3RmogpYknqetJJjuh88glKnBDYwT60wD0FSKlPVatQbJckiIJnrU8MOe1PSP1qzBhXGelbQpq5lOo7aCC1xg7alWDa2OxrRV4BGDjJqOS4BGAAorqVOKOXnkyqbcY75qaBmi44K9x61E86jJYiq738S8g5PtS54QGoSkactuAnmxDMZ6+q1Xzio7bWYlkVkQxOPxU/UU2a+t8lt4PfA5p+1g9UxezmtGiSa4jiA81gvpmqkupRj/VqWP5CqF7ctcy7jnaowuagrlniZXaidVPDRSvItyX87dCF+gqq7NIcuxY+5pKK53OUt2dCgo7IOlLmkoqR2uPopop1US1YbiilIpKkEwooooGFKODSYoFUA7qKXaKaDinAjFSINopNtOpcUAM2mjBFSUYoHcjoqTFIQKLgIegoXoaXaKAvvTuA2inbaMGi4CAUd6OfSndqYD7eFppURR95gPzrvfDtrPonieyghdTL5b7GZAdp2kg8981xmmOEvLfPTzAa9BDrF4z0Z2YlTIUyfQ8D+dceIk7M0jHqcHreuarrM7jVtQursByQskhKg57L0H4CmW6bIwMUt3bGHV7yI/8ALOZl/WnscKSegptqySCKsQXcm0beMmqkYLOMdTSyNvbPr0qzZx87iOO1ar3Ii3ZYRdqAelVruT5tnUCrUjBEJNZ7qSd3as6au7sbYRrvZVAxmtFRgYFQ2se0FvXpUs0mxMjqeBRN8zsC0Kl0299ueFqOKMvIFpHBAzkHNXbOMhAxHJq2+WIt2TAYAHYVRvH3vtB4WrlxJ5cee/QVnE5NTTj1HJ9B8MRkIHStEAKAFFQ2abU3Hq1WDjvwamcruwIp3MGAXQfWqynaeMHNauOMVTuoMHco4qoT6MTXUbbzFDg8qTV7qOOayhwQatWsuz7x4NOcL6oEyxPCJVweD2NZ0iFGweDWsMHkVFPCJV4xuHSphO2jG1czQSrAjgitG3l8xACfmFUGUqSGGCKdGGGWU4IrWUVJEJ2NPvVO5t8EunTuKsQSeaPepsVgm4svcx8VLDKYiP7p6ip7m353IM+oFRC3lY8Jj68VvzKS1Is0X1IcBlOQaVlDDBGRUEEMkZ5YY9BVkDJwOTXO9Hoy0U1iMVyh6r0q0Oa0rHRdUv2P2PTrqcjrsjJxXT6Z8MvEt6FZrRLaNu8zgEfh1rOdaPVgkcRMDPBHDIxMUbFlXsM9fzp8jPJt8xmbaNoz2HoK9b0/4NOQx1LVgD2FvHk/rWDrkXgrw9fNZpp+q6vdwnbKRJsRT71MK6qPkp6ibS1ZyvhOWKLxPpjTPtTz1BORxnivpPxRpf8AbHhq+07dgzwlVI9ccV5n4X8RWIcGx8NWVogORvUlyPcnvXpuieIrDWDKlvKomiO14ujIfcelceYYOv7tZLYUKsZOxwnwS0DU9G/tR9TtjAJCqKG7lc5/DmuV8YLs8UamB/z3Y174U+YN0rw/x9EI/F1/3BYN+Yriw1V1K0pS3ZpJaHOhCfrUF5E5lhmQnKsM46jkYNWgMk+gpwJ7Djv716kZcruQ1c7H4vKX8Ch3OWDQkn6kf414VmvV/FOrtqngKexkUtcxGMrj+JFYH8xXlIArry5WjK/dmdTQ3fBkmNUlj/56Qtj8Of6V1iTgZB6VwOlTfZtQglHGDg/Q10f2rkDNbYineVzWjPSx0tgwebg/dVm/IGvKlUN82OvNd7Z3ZitNQnzzHbvj6kYFcKBgAelVho8tyK7vYQKB2pcUtFddjnuIRxTgoI64pM+1GD0qkhC980vFAGV9xRtzTsIQjPSgcdqftx0oUcVVhCcnpQQc1IAB0oxk0WC4zbS7fSngUoWmoiuNC8U9RS4xRVKIrigUUUlWoiuLinUijJpSOKpQIchuaegJVx6c0m2pYAN5B7irUBNkcI/erT9nzkVOqoDwOaVl+Y07CuV9uOtGAT0qxsoCU1EVyBVyeRU0SAHOOacFqSNcuKrlFcUpgVCwJOO1Xmj+Wq5HzUKIlLuQhaXbUu2l2mjlDmIsUBalC07b7U0g5iDbRt9ql2/NTivNUoi5yELTsc1IEPpT1Tnmnyi5iNVp4SplTinBaOUm5GqZGMdKkVOMHNOA5qQDNNRBuxEY+MUhTgVNxTGNOwk7keymsAKczZ6UBc8mpY7kJBJpRH6ipwuKRmxwvNIERlcD0qNj6U8gk5NJtosO5FikIqYLSEZpDTIsUbakxxSYzSsO4zHFJjipCOKTFILjCKYalYUwjFJlJjMUhHFPxSEUirjMc0sfDg+nNLjinRpucKOrHFJIG9DrfCkDLAkhHMz7z9BwKk8ZXJi0mG1QkS3T7mzwQPQ/y/CnaV8175CEbIohGRnruPP4gA1m6o/9p+KNseWSDEY47jr+ua0lojlWruaulwLb6Uke3Duev+yP/rmp/JHvT7h1hKxZBEY2jH6/rUYlD8DNZHNK0pakgIhjZlwMDP1zwKqWNu0sNwEwX2seTjv3qxfuhhVEHOMsff8A/VWdDulY26ocyjbx2JOB/jUTWqR14Z6M2dN0m/utPtxZ2ssp254THGfU8frVm18H6vdMQ1utv3JnlVR+mT+ldzph8q1jQnAVQoA44FUvEniCy0Gxa5vX5PEca/ekPoP8az5TruZ1p4FlWANPqVlHJ/dVWlx/6DWjF4E0llU3mqTtJ1PkxpGp/wC+tx/WvOoviBqtxeyssKspH7u2UYCD1Zqx9Q1/U7q6Amuwx6sIzhV9h6n3osg1Pb4/DvgqBkV7IXUowC0tw2T+CkD9K05tI8NwRZs9Hsk92UsfzJNfNsOu3lndM0bhweocn+dd54e8XXF9GkLYDH5fmbgn2NCjFg20djq97DZh1t44o1A+URoBzUWmWsf2cSTrukbk59ep/wAK5vUGuftcYuYHWNmyT2wPf8q6K2m/dRpkljzWmiM9WV/F9+umaDO8WFkZdiY6lj0rjo4fsGlQQn/WFdznuSeTWr4of+0PEOn6f1jhzcS+mB0BrJ8Q3AAkI69BSXcfkcxMr6jqkdvHktK+xQP8/Wup8XSLarBp1uQEtIxEPUsR8x/Liq3gC2X7ZdarMuY7NCw45z2H8qztUmae6YudxyWJHQsTkn+VSXfWxnMP0pqqRyfrUjDJx60OoAxQURqCz4q/Zx4fJFQ2yDdurThVR83QdTRYlvWxBqLvcPBYxn5piM47L3rr9Pij0+2e5YACKPCjsPSud8MW/wBrvri8I4z5Uf071d8ZXvk2kVnGeXOWA64H+RTSsg8ijpUEmqak07M20NvYdyx4UfgDn/gRqxqutLb30FsluGEiFjIzdBzV3RbY2WngucSS8tjsTWH4jaNtSi8qMJHHbqAoqKkuWJpTjzSRl3I/0S5YDAUqv55rY8RXDR6daWEJxLOoB9hisZm36fMvTzLhF/Af/rp76jBNr7T3D4iHyL7KOp/HpWMXyq5tNc8kkalv4bmvtOeSPESqBHEWPAHc/U1yuqaKmnnEtwGPfbXS6344i+zfZtNTagGBj0rg7++mu3LStkmua8pO7O1xp048q1ZWmYbiEJI9aYq9zShecmlamYCM3HtQsLNyx2r79T+FOHyru/iPNKLlSyhRk9yadiG7mx4dQD7aq9owTn61qXUyWGntNjZLMpSM5529z+P+NUPBkBu729iLbFMJZ2PYDmqniKaW+u/3MbGJflQD+6K6Iu0DnavMw5X8yQsaYasraSZ/eFIx/tGtXQvDr61fpZ2VzE8zAn2GBzzXO9FdnQmtjCUFmCjGScCu4+FmmRP4/WC8QO1qjSKCONwGQfwq9H4AbRrm0utRmjmQzKojXp9TWt8O9OdviXrd2EIht9yg9ssMAU6Uo1IqcXdETk02j1hjgEhc4GcevtXFWN7LrS3KeZJaQrI8l9ODj5RwqA13LKRESpG85xnpn/63+Nc1a2UEVjbwJ80O7zZOMeY5J5PsK5sXXjTa5mTSpueiOG8O2Kvr11kExwswXPoOBWzqN1GLyK3DfOeijtTY5E0/7ddPhFZ5OvVjuNcvDeG61C7vGbCxQkj8eBXrJ8sNDkk7psx9Sl87ULh85Bc4qt2zQMkZPU8mg9K5CF2M+6k86UkHkHYKY4wNvHFRrxLu7AYP1pZT3615NuiPqZN7sjYZFRuMEUr8nimMwFUjCTEbOPSoypIpxbBOaQt6VaMmyMjHrQi/MTTw+DyODRvAPIqyRMHGOuaa4OKk3AtxTSBk5NLULkIXHX8qUsCKlKA8g00rnPvTuwKsygiqm0huOCKvyKAelVWGH6VaYHT62BeWOn6nGgHnR+XLjn94vHP1GKxV3k7AxHetzwyVvNC1KxckyRbbmIfThv0P6VmXSeXtkUdDz9Knn1sS0Z8qsp+Yk570zNa8kCSRjHcZFU5LQg8cVaqLqTuVKWnvC69s0w8dRVpp7BYUGjNJRTFYdkUtMpeaAsFFGaMigLC5ozS0UCAGnZptFAh2AR05pu00ClzVBYbgjrR3p+fakwDQKwlJweoFO28daQqR2oDYbtHY0EEdRSij6UrD5hKOtL16ikwOxpjug70UmDS5qRihivQ8VJ5gP3hioqKBFgEN0INKnRv9mq1WoBnHrTW4iO4X5lI6GmKvrVvaB8rj5ex9KjeMxn1HY1q431M1K2gQsYnDDnHUetT3EChFmi/1b9R/dNVwasW1yIQysA8TfeU/0qkkiW23oRKMVIF596l/0SRSY5ih/utVSSXYcKysfUU3JISi2WQaCwHUgVUDluSTTh70e1fQbp9yz9oKj5SaikuJX43YHtTDSVLnJjjCK6EEm4n5iSPemVJL6io+1Ys2QUlKKKBiUUtJSKCiiloJDFFFFAB3oop1AmNNOptOqhDaKXqKWgBBR3oHWhqkBaKHXDfqPpSdqoA5pQTRS9qBjwpxwaQgjrT1+6KG6VIhufUGjIpVzSY+b2p2GLS4o2ik2+lHKIWik2kd6XmlYYYFPWJ26LwaZmtCM5jU9cgVM5co0rkEUDK6tkAqQRWyurSTanZSy4AhlVuPqM1Qpjg4OOMVi7S3NNUa/im3Nv4l1FTzvlMg+jcisK8fChR16muq8fEL4hkfjDQQtn1ygrjZm3sT71FBXSbE2JGm9gBmtJVCqAO1V7JOr9u1WJmCRlq0m7uwIrXTbmCg4A5pifvGCgHrzUJJJzV60j2puPU1T92It2TDAGBVK6kLvgdBVq5k8uM46niqBz19amnHqDH28Zkkx271ogYGBUNpFsTJ6mnXUmyPjqeKUvelYa0RUun3vxyF6U2CPzJAO3emY5rQtY9kYz1NaSfLGxK1ZMBgDHSqNxNukG3oO9Wp3EcfPfgVnke1RTjfVjkzQgkDqOfmFSketZaEhgy9RWjA+9ASCCKmcLaoE7lS5g2Esv3T+lVxWxgEYODmq5tI9xJbA9KqNTowa7EVtKUwr9D0q6CCOKfbaVPcOqW1nPO7cKFQnJ/lXS6f8O/Fl8rMmlm3CnGLhxGT9KibjvewJnIzwCUA9D61ElrJzyAD+Jr1jTPg9q8jA6hqFrAvdUBc/n0rrdP+EmhQL/pkt1dt7vsA/KueeNp01bmuFrnz8tsEOWkbP5Vp2WmX18ubKyubhemYoiw/MV9L6f4T0HT2VrXSrRXXgOUy351tRxxxjESKg9FGK4qmZp7IpI+ddN+HHia+I/0FbZCMh7hwo/IZP6V0+mfBy4cA6nqkUXPKwIXz+Jx/KvZcHPemTTQwAedLHFnpvYCuSWYVZbaDscHpvwo8PWku+5N1ejGNsrgL/wCOgH9a6ew8L6FYY+yaVaIR0YpuP5nJp83iHS4pmhFyJZlGfLiUsT9O1RPrkhg8yDTLkLnBNyywAD1+asJVa892GhuA4GBwPQUvJrjbrxNLBIWn1DSYIScBY900g/LiqA1G5v2wj+INQIPytBELWPn3HWpVKo92O6O+lkjgUvM6RqOSXIAFeW+Khp+nPc6tBd272E0wUvEd53nr0rch0vWprjzYtE022JODJeTmVyPfFTar4KuNctVt9Z1gi1D7/s1pCsaZHv1ruwNSWEqc6a8zOpFVFZnCt4n0iCDe91FMP7gUlq4SHXLyLxQ+qaKZIpy+UVRksvoR3B9K9yt/h/4T0dPMfTnufVp2Lge+DxXRabpulrZq+jQ2qRkfK8SAgV6uIzSM4pvYzp0VB6FPwN4jm1/TA9/Y3FldoAJFkjKqx9VJrzf4nGKLxldCSRE3ojAE8n5fSvQZ7m7tZvs+on5G4WVRhT9RXC+NfD9/Hdtf6SdlsV+dY1ywPc564pRwMH+/i9H2F7V35TlEDMMpDOy9d3lEDH1OBSl44xlpLZAR0knGfyXNVJLRpzm5uJZT0yzE06HTbaI7guTjuaf7pdGyrSfU0tG1jSbS8jlu43u41zmOCLIbjGCWP9K58aHb634nihsY5LC1u5dqqx3Fc5/zitpIkX7iAAVf0L5Nf0t2x8s4P0zxWftfZ3lBW0Hy30Z5xrlg2kazeWDOJGtZTHvAxnHetZLvR7OK3lmt726mkQOUZ1RO47c9Qa3fjDo9la+JprnTZjLLO2bmEc+W+Ox96yde0VotA0i+b92TF5TqRznJINelSnGrTjKXUhcyb5Ruoa1Fe+HLxLTTILKMyIjMrMzHnPJNcr/Su88N+HzqfhHUISwSUzBkb3A4BHpXDzRPDK8UqlZEO1lPYjrWtFwu4x6Cqc1k2R/SnAc0qjNL0GRXSkYtgAKXHcdqYSaWPJJX1FVYRIozn6U0MKSHIkHvxTymGIoSFcAM0YIp6gYpcc1aiK4zBp4FLij6VSgJsAKWkp2OK0USXISgUU4DNNRJuIBRjipFT5TSquapRBsbGOKft4p6rxTwtOwiHbUkS4cGnhaeq4p2JbGhMGpMUEU9RxVKJLkMxSgcU/HNKR+VWkQ5EeKkgH71aNp7VLar+9/CiwmywRlTVMr81aDLhareXl80WEpXRDt9qXZU/l04IBRyjuiuE9qcEqfb7UuKfILmRWCZNO2VNijFNILkQTj2pwQCpOlGKYriAUYpaMUg5hB1pwNJ0pyqW+lKxLYhI7Uxl3HmpwgFNcc07CU+xEFAFGKeBRjmlylcxGVzSbQOlS4pMUWGpEZXijA9KkNGKLDUiEimmpioppTJqWikyLGaMVIV6UbOaVguQ4pcU/bQVIFKwyFhTcVIRzSYosO5ERTSKmxxTcUrDTIyKdHlfmA5BpSPQVZhi/0CaXvuwKVhOWh0Xg0bbK/vJecZOfoKqeGYyPNu5OXyWyepJ4H9TXRaLZLDoa20g4kAV/8AgXX9DWdHiG1VAMFzux/sjgUS7HPOdkxrqSwJOSepqeIBBkYHufz/AMKYp7n6U+RdsQYkfNlQO/HX9f5VCV2c+kVzEJckszfMSD+eKv8Ah5o1lhjaMNMn7wuf4sLgD8C1UGUsGC8nHFaHhuwmgvphcDaykRv/ALw+9/T8qmS1OrC/B8zodT16HRdL+03YyT8qIOrn0H+NeP69q93r+rfaZ8lz8sMQ6IParvjHUn1TWbiRSDbW/wC5iA6ehP1rO0yHOZFR5ZPuqiDP4n2rKWh3RXUdPMNPhNrAVkmcZmfPAPoDSW5YwklYwT02c11Xh/wet7IZdVZYVIyE6sfwrpovBlmil4llkZOVRetRTs2NyseR3MckbnzQUJ6BhikgleF98TFWHcV1WtT3VrI8M1uTGDjEida5mcwuxIi8s/7B4/KraCMrnbeGtWkuLaMX07lFfCqx+XjuBXd2d3A6+YrDaB1ryOb/AEW3iiQ/dUZ+p61Vi1O4hk2pIeevPrxVX7k2vsd/YSG4l1HVD1uJDGh/2F4H51zmvTkybc/n6mulneO20uCCMjEcYB+uOa5OEC71q3RzhWkH86b2sJbnWpGdI8IWsGQs9wTPIM8hR0AP+8R+VclJksSepOTXTeLLyKa7YRn5FxGg7bE4H5nd+lcuzbiP6VNhdRAOenSq8zfPjrVsghTzyagEQ3c5JosVFj7cscYH0q3dF0tViXPmzHYO/WpbOAZBxyKlsk+1635mMxWo492NHWweZ1OjWiWNgicbYlx9T3/WuSAOteJGYnMMZ/lXSeKLz7BowRTiWQfz/wAmsnw1brYWQu5/vynCj1J6U7Ai1rGo4jtYoUG0yqpYnng56fhWBeyCW5XqTsXk/SnapdPdXxcqFEbbEVeg9fxJqpnMbSE42DBrlqyu7HZShyq5SmWX7MoQHh3Y+2K52YOzkuDmuwa7gs9J8vcGlk5PcgZziuSu5/OfK8LWLd9DdwUVcrHgU0DP0pTyaD14osRcQmkRS745x3qWOJScHluuOgqRtoVvmBI4wOgp2IbuVrhsKx/CoLccs3oMVJcHJC/jSRcKygjJ5qQvoPjuJ4GYW8rxFlw2w4yPQ02NpGkG52IGTy2aen7tcMv40GVBgge1UIjYZOAOTXZ/CrMHie1Y4GZAvPuCK49V3HKP8x7V2Pw2zHr1k8udq3CFsegPNLk5049xSly6npvxCDW2irPk5jmVv51peCrK3srC61CWRf8ATZPtEjE9gOBVL4iBrzw9PIEY4cS7FHIUZ/QCsnwtZ3eqabaSX7409f3sUS8bs8AH1AxzXFSqww1FxXRsqpCVWaa6nSWmrXWpSy3PlCGxZWSJT95wTkt+PApxkVPnmYKi9SeAKfO6QozyEJEgyT0AFUnjSXybvUm8pWbNtbtwTgZ3N7+grxoQqY2upvZM7JOFCnZbnm+t3zzyvAR8vnMFUdzk0l9bR6bobxht13M4E5HRP9kfTvVeS6WxtpNVnwZS7raoe785cj0GfzqHUCU07T4mJMjIZpM9SW5r6+T0seJU0SM6g06mmsDNMxPuoM/jUbyg+tPkPXNVnIrzUj6ibGsxB+8RUbMeuTTpPQVG30rVIwkBkb8qTzD3xim9AQeaTA6kU7IzH+ZggClEw75zURwSMfjQV+tOyJJjIoNOWQfnVY/SlGenrRyoCwGGevNHTkGq+Dwcc0YOOppcoIkY81Wl7GnksO5qOQkrihJoZu+C7tbfxDaiQZjnzA30cbf61Y1KIxtcQuuGQlSPoa5m1uHt7iKVOGRgw/Cus8V3AfVpZUGEuFWcfRxu/rUuDumJ7EFoiyW0LKeQhB+op/k7lBGDVewOy3UMcHmpVlXOFasqxCGPbjHK1WktQR0rSjlI9GFSZifqMGslNrZjuc/JaEdKrvC69RXTNbBhlGBqvJa+q1tGtJbhdHPEY60VryWgPaqklmQeK3jWi9wKdLUjwOvbNREEdRitE09gFopKBTJHZpabmkoAdmlpopQaLisOzRTc0oNArC0uaSiqAXg0bfwpM0tK4WGkYop2aODQxWI6X680u30pMGiwCcUd6KDTKTDGeB1q5CQqjPB+lVUYo4YdRT1ZieWJP1oirsTZdVgD1BHoe9K7qhBAJQ/wnoKgWRh0bP15pfNB++o+orXVGbSYm+PPGPxqvPJ5jjHQdKJE28qcrUdZyk3oUopahQKKKRRKhwOakU56VGnWpQKpCkLik708UjCqsQmQyD5TUNWGGRiq9ZtGiY5Tz9KHAyMEHPpTaKCrhQaKKkAFFFFUAUUUUCCnU2igBR1pe5ooFBIUo5+tIaOlAxcetI3SnjBHNNIxwaBAxLBfYYpMUAcUvagYlHQ0EUvWgCWM5FKelRKdp9qm69KAuNHQUDk0gzkil56U0AgJzRn2pQPmFIaBjs0ZpCOmaAKBDqu25zEv5VRNW7U/uj7GsqvwlQ3PSvAnhfS9W8O3VzqkM5meXy4JI3xjA5OMVw+q2Z0/UrqzZt5hcpuxjI7V6suu2XhzwloV1c2bzWjhVcRMFIz3968+8dy2Vz4nurzSpN9jdBZovUAjBB9wQa8uh7V1JOXw9DS6K3jdi0Wjyk5M1kmT/u8Vy0Y3MAO9dNr4L+FtCuH5IeWEn2ByBWJaICS+OO1d9N8sCd2WUUKoAqpdvubbnhaszOEjLd+lZ/XJPJNOnG7uDY+CPzJAPzrRxgewqK0i2R7j1NLcOQm1QSxqZPmlYFoipOxllOOgp0MBMi56ChIJT0XGfU1dhj8tME896uUlFWQkh+MDnoKzrh/Mkz2HStSOB7j5YkklPpGpJ/St/SfAfiLUBG1nolz5b8CR02r+JNZxko6jZx9tFvcEg4HNXwOK9QsPgxr0yE3t3ZWZzwuTIT+VdPpvwX0yIRtqOoXVww+8keEU/Q9f1qKlVdQTSPAZoDK2S34CprTTmnkEcEMtxIeiopYn8BX1Dpvw78L6epEelQzHOd1xmU/m1dHDaQW6qtvBFGqjACIBiueeMsrID5i0v4f+I79N1tpEqLnGZsR/o3NdZpnwc1WZh/aV9a2yEZ/dZkYe2OB+te74J96guLiC3XNxNFEP9twK5Z4ub2Gea2Hwe0eDaby9u7lgckDCKfw5P611Vh4K8N2BzBpNtu7mQF8/nxV1vEGmee0MNyZ5l6xwoWP+H61XuNcnSLzY9LmRPW7lWAfrXPKpVkFzYhgjgjCW8aRIOiouB+VPC1xlz4rdZTu1PS4YzkBYEeeQH6j5f0qo17qF8qxC28Q3wyCJAFs0P4r2rN0pPVsLndyyxwozzSIiKMlmYACsl/Eek9YbsXPOMWymbt/s5rn4NB1aSbzo9N0excnlpy1xJj69M1pp4bvpT/peu3KoeTFaRpAPzAz+tZunBbsdy7Pq0xyLbTpsYyJJ3WJM+/Of0rn7jxdLHI8Nzf6RaSr/AA25e7fp0wAK1oPBWho++4tXvJOu+7kaU59ea27eytbVQtvbQxKOgVAKnmpR21DU4lNSu76VpbOPxDfIRjZ5SWsR+m/DY/GnJo+tXOFbRdHt4x917u4e5dc/7JGO5713ZNGBS9v/ACodjl18NajIgWfxDcwoP+WdjAkKj88mp4/B2jFR9rhmvm7tdTu+fqM4/SugYEEEUKwP1rJ15odkVbPTrDTl/wBCsba3H/TKIKanuLlkiLKjuQM7cgHHtUuDTGjB5HX0qPau6b1CxVsdUt7xT5e9SOcMOcVdDp1yK53WbNoZFuYAV5yxX+E9m/oam0/VYpysM5Edx0weAx9q7q+EUqar0NY9V1TMoVLPknuXPEOnnWdHubGG7Ns8y7fNUbivI7Z9Ky/B3hFfDC4h1O7uUK4MTgCPPqB1z+NalxbCUhlJSVejDtVXR/ENvdNdxznymtX2PI/CnmsFd0vcl6o066mzd20V3C0UyBkYcj+tc1dQz6QQZAZ7EHAcfeQHsR6e9dUD9DnvQ6K6lXAIPBB5BFaYLMKmEl3j1RNSkprzPLPE3hhLqM32jhdzfM8Q6N6ke/tXE7SjFHyCOCpGCCK9mvtNn0stPpymS2PL2/p7r/hXN+INGttbh+2aeQl2Bg9g3sw9fevo7U8XD2tB+qOeM3B8szz0g5yR9Ks2Py6haMeMSqc/iKbPBLbTtDcxtHKvVWFN25AHSuOSezNrm/4kt7OXX712MfMmQFPBOBz9ao+JkOq6LZ20EsQuIJVILnjYAcc/jWeEGeeakC8jjkGlByhZ3Hsavg7TvsVxLHLcrL9pIBRRwD61zXxY8Jz6Pqgv40L2FwAPMA+646g+ma6bw5n+2rYn1r1u9srfULGS1u4kmt5V2ujDIIrL69PDVlJ6p7jceeNj5AwBwTyaAARgdq7P4k+C38K6hG8DmTTrhj5RPVD/AHTXHquK+mo1Y1oqcNmcUlyuzGBacq4YH0qTHFGK6VBkN2F4U/dpWHIPrSkfKD+FKBlMdxWigQ5DQOKKkVfloC81ooIltjAM0hFTbOOKBHTURXIgKfjipVjp/l4FOwEATinolTBKcFppCuR7eKAtTKtOMZFVyickRqtOxUiIcU/y+KaiQ5kKrk1Jt5qVY8Cl2cVSiS5EQjJqVIiODTwpwKlVeKpRJuVxHzTxEKmC04CrUCXIgEdT20f72l2nHSrNmh3kn0p8pPNfQWWP5Kqhea0ph8hqnt5NCiTJ2IttGKkxk0hWhiuMppp+2grxSsO5EKXFSBKds4pWDmIQKXH41KFFAFFhXI9tAXJ4GamCDOTS8D2osO5EsfrUoXikDegowSeaLCuH0pjDJqXbSFadhEW2kIqTbRilYCPbSbeKn2+1BTnpRYLkGKMVNtzSFOKLFJkGKTFSEAetG3NJormIsUtOIoxUtD5yPbSEVJikpNDU7kJWk2dqlNN25bgZqbFpkZUYHFMxk4xzVqO2LqzMQqL95j0Ht9a39N0P7daSXFrbSNBGu4yuxAJ9ABSsO/Y5cxY5chRWknlw6fbk4KmTcR3IFbuo+H9TsAU/su3MhXchVd5K9yc/UVfj8MrLsnlVhMyj5doG38OlS2oq4WcnYlgmWSC3McgDMN7L6Z4AP5ise8lVrlyv3R8o+g4rdm0w2+n3DRIE8sDJbrzx/Wsu202eaMOtvvz/ABE4FJS5lc5q8bPlILZC7Ko5JPT37U66YSTEr9xRtX6Dv+PWtCHT/JWaS5aNRHGWXa38XQZ/Os8xQIm5ryMtj7igk00jCV2kiONfvnPKqCPrkYp99qj2egPMG/0i6Y7CPfJz/wB8iiO9htI5iHmAlQxsVABOa53VpTN9kj/5ZJE8iD0GMDNZz0Z24X4bGcIR/YDynJdpd3PYf/Xr0bwvp1vbaLZu7qpaMMwQYLZ55PXvXLXlosunXVvCv+ptoZMdfrV29u44dL0xYC4doFZtp68Y/wAaxhFTSbN6lTkO5S5tYhiPaPpVfVtVFu0KwNlgCx2nFcb4enJ1TzL2ZjAg3BXPBbtWvcf8TXVY4oSBGARuHoBnP8q15LakxqKSLlxriXsTRajBHcAjGJVz+RGCP1rj9W0nTxPHNZiSMlsmLO5Rj0PX8xV+6SazkVLmMoWGVLDqKsaYBdTqcAhflz+p/pSsaJ9jkb2OUsSUPNVdMtjPqkUbrxu3t9BzXsEVnAI2Z41wBySO1cXp9kzS3+prGdkrlI/TaP8A9VTa5d7Iz9WvJMP8xA6AVgw3EqziVWO8cL6gmr+rl2cJg7icY9zTrzSJtOuIVuVIPl+aeOhPSgcbJEk96JZAGJ+UBRzngD/Jp8W1jwayiMHuTU0crRDPFIGtNDTAyc4yakiXJOOtZyXi5w4x71etryISKocBfemRZo0m/wBHspJW42jj61oeFLdEiiViNzkyyH69Aa5/xJfoLVYomB7nH6VnaTqFxE6KrsGkOOvahaFbo6HXJDrOuLDGcxh9i+nHX+n5mtHXZEs9PW2QYdF3Ke4PTP8AOovDNruuJbp1BMXyJ7nPJ/PNZ/im7EuoGNDnYoVj7nnFTN2RdJczMu2PEeeSZASTWXrVwygQoSP4mI/lWxZxb5EVujNVXxIbRJ28rB28VxSep6EY3VzmJHLnLMSfeoWqSRtxyOKao4JI+lFiG7jcY+tOQclvSkxzTjwgH40WJkytPIQ/BxkUtswKSAnJ4OO9RSfM5NNAwc0iScHGd65Jpkm3+EfWpoX3IyyHJHTNRlBySRj0pANt2OWBzg9PQUFVUksckc4HSmhz24FDfcA7saRQ4PgIQMHOa9F+FUKT6lG7dC5HzV50/XjoOBXc+BZntPsjqSAZQTj61UdEZzPa7yNJN8TqGjI2lT0I6YquFitYQFCRQRL9AoFWL2aOJpZZXCRqcszHAA9awLHd4qufNRmTQ4H6rwbhx7/3RXzWGw9TESdu56EqkacbskjjfV2ju2YJaLKFt4WODMwOSW9gATj2ql468RDTtVs7V4lMf+tmlCguFHUKO2RW/GIU1O1sNNiHl2SM0khGREWHA92615T8RZxdeI9QaDefKVIck9+h/nXu4elGkrRR505Oo7ssXPhG98QSQ6gZIbfTWUGCHcSyRA8A8Yz+NY2uSCTU5An3I8IvsBXps9zHp2g2Nkz4uPsa4A9FUZP5kCvJpmLzOSMFiT9a0oTnUTlLvoc+JtGSiuiG44zTaefSmmtjnRiSKM1XdV79KsPknvUD5wa81H08yFlHamFQe1SHtTHwD1rRGDIyvejaMU8/pSYyKpEsiKY70oU9M4qTAzTSCPemSNMZ+tJsJPA6VICf0x9aM880ARrux0ppyDntU4brQDnqBTAruOMio25FWWAP8IqKRRjvxSApnrXV666zafo1wnG61CE+6kr/AErlmXLGurlgL+DNKm4JE0sf4ZB/rVITMX7TKhI3ZHvUIdlOQxB60+SNgehpmKrlRFyeO8lTrhv0q3HqKfx5H1FZuKXFZyowl0DmN2K4RuVb8jmrKzH1yK5kZBypIPqKmjuZk43ZHvWTw9tmF09zot0b/eGD7U17cNyhBrKi1Hs6kfqKtxXUb9G59jWcoSW6C3YWW2I+8tVpLUEdK0UnbHUMPSn7o2+8uKzTa2Y79zAks8dOKrvA6npmula3RvuMKgktT3WtoV5LcNGc8QR1BFJWxLag9qqyWm05UVvGtFhYo0uKnWIlirdRzUboUbB/CtE0xbEdFOxRinYVxM0u6kxikzRYY8cnrS4pn40AkUxD8UlJupdwoAAaXrTd3oKTJoCw4imtjtSUYoCwo6U5etIopyqc8AmiJLJV6UGlQEnGDTihrZbGbepXk6UzFSyKcc1HWUlqaJiGkp1GBSGPj6CpRUKHGalHSmhMmXGKRhxSL0px96sghNV2GGNWmFV5B81RJFp6DKKdTaQwoop1AxtFOooAbRTqKACm06igBcUDpQOlKB1oJENApaXFADc4p2QRzSYpMUDFIxSdPpTgc0EUANoX71GMfSlXhhQAgqSLoRQqgvg1KseG4PFAmRn71FOkGGFNpoYe9IaWgimAU6mjpSilYBas2Z+VxVarFn99x7VNRe6OL1O213VrS++HNpZLJ/plrIoMZHJGeorj7VSIgG/DPapUBdwi5Zj0VRk/lWxp/hbxDqIB0/Rr2Zf73l7QPzrkprljyot2TuOvkW48B2wHL296wxnoGFYyKEAUdBXd2vwt8QNtOo3Wmaajcnz7gFh/wEd67nw98EbG5tRLfa+bnJ62SqFx+OTQ1yrViUlc8HmiaU9VCilhsgWAXc5zgBR1P0r6t0n4T+EtPwz6ebuQDBa5cuD746fpXV6XoelaShTTNPtLVTyRFEq5/So9t0QXPk7SPBfiLVXCWOjXpHZpIzGp/wCBNgV1tl8FvFE6o1y9hagnlXmLMP8AvkEfrX0qBn1qvc3dtbDNzcwxf78gFQ6gXZ5DpvwM0+MBtS1a6mbHKQxhAPxJP8q6vSfhj4U01U/4li3MqHIkuHLH8uB+ldA/iLTfMaOCWS5lAzsgiZifoen61RuPEciKrjTjAhyN19cJBj8OTUObewrmpaabY2JJsbK1tz0zFEFP5irJyepJribrxbLHcvHJf2YXtHZW0k8nb+L7v6VBHNqmooDDZa9cspyGuJ1s0IPsnUVD5mLQ7WeeCEEzTRRgdd7gVkz+ItMQMYppLvHX7LE03/oINYdr4b1R7s3DWWhWZJyXaNp5c+u4nH6VfHhaZyft/iDVJEP/ACzgZYEH/fAB/Ws3FfaY7libWpQHMdg8YAyJLuZIVP1BO79K59vF0xV/MvtOQjPyaej3rfoBz7Vs/wDCM+GrRlkms7eaVeklyTM/5tk1tWMdr5Y+xLCsY7RqBj8KiShCPNZtAr3OIt7u91KWSSC18Q3UTjbsn2WsXrnBwwp1voOsyoY5dO0S0QfdaWSS7Yfg2B+td6UPcmjaPrXNLFQWyKUTkT4VuplxdeIL9U/55WaJAmPToT+tWLfwfokZUyWTXTr/ABXMry5+oJx+ldNgDtTTz61hLFTexXKU7Wxt7NdtpbQW6+kaBf5CptuTkkmpqTGa5pVJS3ZViHaM0vbingZ6Vn6zqttpFr5t0xy3CRr95z6CotJuyAsXNxFawNNcOqRqMlmNc6t9fa9cKNNL2thGw3TsPmf6D/PvTbewu9emW71kNDaDmG1Bxn3aulijSKNY41CIowqqMACtLKG+4twAKqBkntk96MY565p460AYrJ9xiDrz0oaMHpwaXHpSg4+la05Qekwd+hHkg4YU7v2qTK45HFVJ7mND8mSO9dLwEpLmpu5PtF1JZEWRSHAIIxXEeJrKSwlEqxmW2J5XPb1H+0K7aGRJU3IwIP6UlxDHcRNFMgdD1Bp4LFzwVW0lo90RVpqojldJ1ZoY13ytd25OQ4ILJk9D69+Dg1xGqa1FpFh4haSJnkuZNsKuvByeCR6V31/4YCymbT5HikJGcHBOOx7MOTwc1wHiOa1R3ttXvpeGIaGOFeDnoD1r3aFDCYqftKbs/wCuhzudSCsx3gTxlrmnaY13r6PcaMZAiyFf3iZ/ujuo/wD1Zr2GyvIL61juLOVZYXG5WU5GK8Nu9W06TR2s7Oe7uDKFXEzEhACMdfp2rpPhvJcWUFzJASYshSh+6T/jSx+Txq+/R0l+DHTxDWkj1ZTxWLqmjFpDdac3lXHUr/C/sam0nWrLUpZoIJMXUOBLCx+Zc9/cVqA4r56lVrYGr2aOpqNSJwmoWNrrls0NwphvYuBkYZD7eoPpXA6jp9xp1x5V2hBP3WHKsPUGvadX0uK+XcuY7hfuSL1HsfaubvLdLuNtP1eMCX+FuzejKfWvoqValj1eOk+xzNSpOz2PMipJGBzTgDjJqzrthcaLPtvFJtmOI7lR8vsG9DVdD8obII9RWM6UoaSRqmnsavhvnWrbp1r2OJSyKF6kV454cOdatcDjfXqmq3x06C1mxlTJtb6bT/gK8vFQc6iiupadlc85/aBH/Eo0kf8ATw3/AKDXiYHFe1/HeRbrw/o08XKPOSPoVrxuOL1FfVZLT/2ZX8zhxEvfIVGTgVJ5WOtTiIDmpVXIr21A5m+5VEfFOVOelWNntTxHx92r5GS5orBDjFKkeOtW/KOOlKIjt4pqmT7QrFM0u0VY8r0pwiqlTJdQrqvPSnshxVhY+akMfSqUA52Uwhp8cfNWhFT1TFVykX7lZY+tSBPWpwtLto5Q5kQbOaeEFSbeacq01ETmR7OKBHU4SnhKrlJ5iAJxTguKmKd6XbTsTciCU4KKk2ml2mgRHirFqOWpmz1qe1X71DGhZh8lVQParsw+WqyrxUoGRkZFJt9Km20baLE2INvNDKccVY2ikK8UWHYhVcCj8Kl2E9OlOVAKQrEGwk04IFqbFNK5FAyI+1NxU2ylCjtRYRAE5p4SpVX2p+2iw7EQFG31FTBfagqKdgICoHajaM9KmIpMYNKw7EeyjbUlIRxQIj20xlqQ4pMc0hMhIphHrUzD0phHoKQERFJinkGkIpBcY1NAJPFPIpD0wxOPQUmUmNwoPzZJ9BQQxHTavtS5A6CmtknJOamxaZPKirY2xXBQli2ckBs9/wAAK9O0fX7K18PyWqQwo0OBIpbHvkDqa8pQvG25CVbpkGnyXFw7Fmmck8dah67lptPQ9A1Tx3Nd7HgtjGJW8rJGCFyOfzNW5degjly9zGFCBRyASe/FeaWcXm3kKNzucA/TNX7mETa2ydVQgfTHWplTUkP2rg7nYXl+17ZzSLITHuVW7Z64FZHmHbgOxA6DPFWoPm0MH+Ka4Z/wAwBVbyacIpKxxVp88rsh1N3g0C4ljwDvUBvqRx+Wa5mPUJkB3fMfeui8TEjRbeEdDKGPvgGudsLQ3VykQ6nJ/IZ/pTN6cE46mrZWct9DcXUg2xwpsUdi7f4CopbZJL673EhIVSAe2QR/MitywIT4dLOuVka8IYjg5BFUNTtnSPxGqAl0MU2MdBk8/pXDSm5yk33OvlUIpIteHQl5rUkRUDzrEROucgMpwa55oZrW+eznB3W5MY/3ckit62/4ll3puvxfvNOul2Tgf8syeG/I9RWv470h7iBdUsQHlhGJgvO9OoP+Fa01yk1VzqxyDkYAIyDXeeCdO81p7kbFRW8obmxxwT/IV53FIZgpTnkV614dthb2MSkDJyx+p5/lit5bGFFau47U9Esri2n+3TPKMF8g/dPscVx2hWlzFFvgtZpIjko5AAYZ656eldt4iLjQrpYiQ8gEa/icU62t2gEFon3YkEYH06n8yazOnZnLa7e3FpphgkgMdxc/JENwJOTjPFW7+BNP0mC1XAEUYX8cc/1qtMy6t49UdbewUn1BK8fqeag8T3ZdnGTxnNSkVe5g6TYrq3im0gxmMPvkPoqjJ/pV3xPKmoX0kpUbZGLL/uDhf68U/wAHQtDp+rao33pQLSEgcgk5cj6CqN3IJJnZSMZwD6gcD8+tALcynsM8qBVK6091G4tn2roI4yygk9KiulBZUyB396Vh8zRyUyurYIIqBiynPNdhDbxSyDMeTnqaqa3pKYTyeGdgoA9TQ0Up33Kml6LPqNh9oyTufCA9wKrzxGy1J0bhoFx+NeoaHZx2FtEjAGO1jy3oSOv5mvMdbmae8uJyTmZy/wCGeP8AGgE7s6bw7qbyafNFbrt8qIvJKeg9zWIwMkPnMcs7MxJ71n6TPLHLLDG7LFKuHUHhsHjNdBptqs4t/M4hjzJJn0B6fjWFaXQ6aEDm768micCPcAFwP8ax5HZyS5JJ9a6DxDdRyXD+TGFGc4Fc+3UmsFrqby93Qjxk4oanEbRjueTTTTsRew0mnS8BQO4H8qQjABNIW45AIFJolu4hi44INQsPmHoKnkTGNmeRmmBQGUN3IFSwQ0DA96SQ4WpG+8TUUvSpGiMDinjmUeiCkQc89BzSp9wk9WNIYh9a660uf7O0WK5CBvKAfbnG7npmuSIzXSeIQv8AZMNnb8y7E3gdj1NaQ2ZnPWyNrxH8SY9b8OXdkbKSC5nUDKtuXrk89a9C+F2uaZeeGrPTbCUtcWcI89CpGDn1714AunTE8si/jmux8BeIB4VW8CwJcy3GPmJwFA7Vlh6UaF1FaMurLnWp74ixoXMaBFZzI3qSepNeJ3UJv9RtsnDahflvqA2Ku3vxM1KdJIoYbWJWBXKqSRkY65qh8P5LjVPF9n5x3Q2cTsvGAPQ/nVV5qFNyXRGVODclc7jxjH5dxd3koAh8lYoz35JLY/Ja8znZZJyyj5TwK7v4nXwMNnZI3P3nH+fwrgR1HHAFFDSnFeRy13erJiPjmlto/Nuok7Fhn6UmMikS4+yCSfbkxoSPrjFaERVznoQD34PGPQ06WIDvSRgxuTjIHB/rTnbIyDwa84+keiKjqVb39KPlZfu896kkG4YJ/GoskDAJAq0ZMZnDYxTirDpj86XBYcjnpTlG4YxjbTRAwjAOaiPXk96mYZwcdKjADNx3p7CDA65o/EHFK0fHFRMDz1oAcQQMGjcTjgCnxybowPTignIBOD/WnYCNiD65qJycYPSp+PTH0qFxwfSiwXKzffNdbAxPgS3yMhLyQfmq1yTD5zyK66zjY+A0wMn7a3T/AHVppCOfeZg3QZoWTd1AptyjI/zKRmmJ97HrVElq2I3MGUHI4yO9KEjK5dSCem3pUSnawI7c1Z2gh1Xp1X6U0SyFoR/A2fqKa8Tr95TipBkLkdR0x2oLHaOSRTEQbeaNg645qUEEkueAOPc0SAcFO/agAWWVPut+dWI79gP3g/LmqlLiplSjLcOaxqQ3kb9Dg1bScnowP1rn8U9HdPuuaxeFt8LHzI3y6N99cGo3iRvumsuO9dfvDI9qsJdxt14Nc86M10Gmug1oiL4Af3STTLm3EgBAxU1i5kmmkPRgFFXCqMxHTsK1k+RBuzAlieM9MimAZFbklv14yKpTWvUqMGrp4hP4ga7Gc68U3FTyIyghhUOK6E77E7DcUU7FGKBjaAKXFLigLiYoxTwoPenBVHWgCICnbSacWA6c0Bsn0osIAnvTgxUcHrSAMWwamkxGMYyTTSE2NRyD1qwrb0J9KqLV21j/ANGuHJHC4wevJ7VtBXMpuxXYAsQ2RUDIAxAqRiT1qIVnPc0itA2Gm4p4pc1BVhqVKKbgU5etOInsSp05pzDNNXnvzUgFWQQsMGoZR0NWnTjNV5R8tJocWQ0UuPSjFRYsSilxSjHcUANopxAHrSAUAJijFLS/SmAlGKUA0oHqaAEXpSilGPSnCnYQ3BPajHqRSkUAUABFJindqDRYLjMUtOxSEUhjSMUmMGn0YoAVThwasDmq3pVsDikxMhm7U2pZh8tRVSAbUigA4PQ02jB2g+9MBXXHTpTccVLuBBzzimhSc45oFcApKg1peG7+z07VYp9S09NQtOkkDMVyPUEd6ooCFwRioiMUnFSVmB9I+D/EPhTUQsPhO20+wuwMmC6iCy5/2Wbg/gan8aR61rGnpYHUbqzDyKXK/J8nfGK+a41zyfwrr9D+IXiDRoo7dbpb2xj6Wt2N6fgeo/AivNqYGcZqpSlt0exXNdWZ61B4B8NEJI+o6hHIABull3gn8a4bxVcah4J1yI6JrWXILAQvn5T/AHl6dq0JfF3hLxXpb2usSXujSZ3EKBKvH909fwNYj6l8PNNRlg0zVtZmB/1lxOIlP5f4V0qvUqQ5JwsyI01F81z0nwD8XrjVpP7P1eGzS92Ex3DS+WjkD+L0P0zXSy+NZnQgXcBkB27dNtZLw/mAB1715R4c+J3hrS79CPBdpBbYAMkZDyr75I5+nFexaR4ysvEManwxqFpIeCbVl2TL7YPX8K8+tGVPXldjXR7EBGs6hLIY7HV7iJ1wPtVxHbxHv90fMKW38Mau8W0w6Pp5J5YK92wHp8+BWnp/ii8fVRp93ol7u3BTcRL8i+5BOcfTNdU52oSegGax9rpdD5Tk/wDhE3ds6hr2pTR94Y2WCP6YUZ/WmroPhawYH7JbSPnP71mmbP0JNZl5cvLKxPmOjMT16c/y/OkT5VAGSCcdeB7kf/Wr0qGHhWimp39DCVRxdrHSDVLGBQlrFgdhHGFx+FLFrVu8gSUmNicAnkH8a5l5vLk2FlJPGe/0+v4VKpGAXVST19K6Xl9Nq2pPtWdgdzKGiZT6dwaicqx2TLt+vQ/jXKPLdwR7tPnMUg5Ctyj+xHv61o6H4lhvgbfUIvst6vDofut7j2ry8TltSCvHVGkKybsybU9Dju0/dStC2c5AzWUPDV5E2631FlPrgiuqMJKA202zjgdV/wA/Ss64mv7fO9EPo2Mj868pwlHTp+Bvcy/7M14fd1YH6/8A6qQWfiJel9E/1P8A9apptXvI8DyYm9SAf8a4vXvi/aaZfG1t7H7WycSMkm0KfSt1l1Zq6SaJVVXsdaU8TR/dkt5PYkVG1z4qQH/Q7WT6OOf1rL0T4oaJqEcRu1lst5C7nG5QfcjtXdW8kVzCsttKksTdHQ5B/GuepSlh9KkCk1LZnJHWPFMf+s0NHA7rIv8AjTR4n1ZOJtBnX6ZP9K7Joz6imhDWftqXWA7PucJe654tvRt0TRIowDgyXD4/IHFaOh+H7hZl1DxBOLzUj0X/AJZxeyj1966VZEkLCN1YrwcHOKpXVxdwIxSBZSOgpTrq3LCPKCj3LnXrSAgNjIBrmtC1nWb/AFqeC90oW9ii/LNyCW/E/wBK6G4gWZGRsjcMZFYSjZ2ZRNtGKTHtWYdKI+5cyjHvSixuVGFvHx75rNxXcDSxRis77NeKOLsn86gu9NubtNs1xIV9ElZM/XFNRXUDTlnhQEyyxoB13MBWfDc6dfStFZ3kEkwGSiuDmsc+DNPLl2s0ZzyWMjEmp4fDdtA6vHaAlTkfOeD612Uayo/CyZRuXE0q6tbtZ7OT92T88LHg/T3qbW5dTgtw+mQQSv1ZZDgge3rVq3nnDBZomA6bgc/nVxsP94Z966a1aGIV2veRMYuJwUkniu9QEzJbL1+RQh/M1ha54dtzpd4+qajbfbWBljPmqXZ+4P1ru/FPhuDXbXy5HeKUA7JFP6EdxXkesaFd6JceXexYTOFlUZV/ofX2p4R+9dOzQSV0Q6T4Zv7iOJo44/LbHz7wQB6mvSLIWui6SUGBHEu5mP8AEe5rzOO7urRHNhO0Mh54PBx6iodQ1HVNVhEN3IfL/iVQAD9a+po4iM43ejOKVNpi6dq9xP4wGpWzvDJJNhSp/h6Y+hr1zwl4xh1Yra3oEF8SQuPuyAeh7H2ryDSYktLj7ROu5oxmNB0Lds+w64r0nwLoCTWsd5IDuk5L4+6PQV4ubqjUSfU3oXR6KOmar6hZQahbmKYfRh1U+oqZFCAKOgGBVXUzMkcbQNMCGyVjAO4ehz2r52m5QknF2Z1OzVmcbqbvpoew8QQCawm/dx3QXKMD0Dj+E/5zXD3FnbWEpt7P/UoSc5zwTkD8K9rhf7bbPHf2oQNwVfBDj6V5rdeGb5r+58q1YQea2xpGAG3JxyTnpX0NPMXXp+zmtV17nN7LlldbGZ4cx/bdpgfx16B46kEegR5JDeYMfkRWNoGgfY7+K5ubm0RYzllEm4/pXbanp1pq+nmCdRJBIvysh/Ig1w4i8akajWhrF3Vjyj4qjf4J8PY5/ef+y15asZI6V7H8aLZYNC0aGFQIopyoHoNteVLDx1/KvscjSlhlLzf5nl4ttVLFTy6ckeTxVwRD609Y8V7agcl/MrJDUixYNWAlJt5p8guYjCDGKAgqXFKvAp2JciLyxS7BUvFJgntRYXMxgWnY5pwU04R0WFcYFpQtSCOnLGB2p2ERY9KdsqYJTgvtQBF5ftSiPFThaNopjsRBMd6cEGKfiikAwpxxSbePepBzS445oAao4pwFKOKdSsFxmKntl4NRYNWbQZU/WhgR3AwOKhUcVZuBioAKSQMKTFPxSYp2FcbiginUUWC4zGKQ9akxQRSsK4wCjFPxS7adguRkUoWn7aUDilYLjAKcFpwX1pwHFNILjQKQrxUmKCvFMm5ARQRxUu2jbSsVcixSMKm2UhWlYLkG32oK1KUNIVNKwXIGWoyhzVkrTSvrSaDcrleeKaV9qtbKaVpNAVdlNZKtlab5fpSsGpVCUjJ7Vb8v2pDHTsGpU2U3Z7Vc8ujyuKnlC7DRI92qw9tuWP5VpToGvJpIxjKgfieTWSu+JyUJUngkelbce57IOeGdyfp2FJqwSd0aSR+Xp1knqrPn6n/61RsOKtzqVMUZPEcaqKgKnIA7n+tZo5am5i+KiQ1rGCdoUsR9cc/zqj4fP/E9sgejPtP4g1f8VKzaic4G1Qv9axraVra6hnjBLxOGAHfB6VSWh2U3bRnW29m7/DvUlTObPUizjuFyCf0rU1G2MjJf6fsmEseySM4xMndc/wB4HOPxq1ptzb2Gpv8AaAo0TXowsjHpHLyFJPoSSKxrNhoGs3Xh7WJHjtnINvP02N/C2fpj8q8ymnCpKL9TtlsmiHwS9sNRufDl82dOv8tbFxgpJ/dPoT0NdDpaz6VcjR73/XQgpDv6XEX9wn++tYXiPSWmlVWcW2qqQ8Uy8Jc46EHs1dDomr2vjax/snXQLTxJb9Gb5DMw6Mp7NVzfs3zdPyBe96nM6xpMGh6kbgRhtKvGGWxzA+c5+ldMZ5BaySxznBlVYgAMMvUn6YqOS+exZ9L8Rxbs/KJmGFl7c+jfoaw9f0vUbGwD6JcPNp6ElYerQ56hfb2/KtviSswSXVHUR3qeQj3xRE3F1Gew6ZrOuvE9vDGZ7RkuGbKgoeA3vXnUVzJe6rbiaVpDtwc9jjv70+yBj0p9mS/nMAPUkDFCjbUJSOx8FR7LK/1OX70zlFPqB/8AXzWH4huh857ntXV3SJpei2tkpG6OMbsf3up/WuS0u1/tbxRbW55RXDP6YHJ/DoKfQSN+8i/srw7p9h0lji898HBEknQ/TGa5kqPvHgVu+KLw3eoMB93JIBHIHQAH0wAR9awJt2CHIx2A7UhomjkYghEwo71RzvnYhulL9q8qLy1PJ4zSxKu0eWcknJNCEzQsV7nqafCv2jW0U8pbLvP+92/WnQAwQNK/RRmr3hi2Z7cSsPnuH8wnPbtQ9iluW9bmMGiiHcVku22EjqEAyT/X8K4S6t43diVAz0A7eldN4suRNqckQIMdsBAp9D1Yg/n+DVg5jduWORwKhspXvoZ9pZ+TdF8grjn8xSXeuPHbNbWwAB6t7V0tnYQtbTNL/qQu5ye/oPxrj9WaFZHVBzXNUalKx20VJQ5jMlkaQksck1FjnPUD+dK3t9BSM2AFHQUrBe7GGhF3NjsOtBqZU2rgjnvRYmTILj7/AE4AqFulSzffNRt0FSwQHgd6af8AWoP7oz/n86ceoFIOXlYey1LGFQyfeAqY1CeXPtUDQNxGfU8U4/LgdgMUmMuo7KMmuh8N6Gb6QXFyh8kH5U/vn1PtTjFydkKUlFXZP4Q0dHu4L7UY99urbliP8ePX2qrr90LnVby4RQhlkJVE6KOgAru76NLOxLZAJXGB/KvOJAfMLAcEkk1vUhyLlRjCXM7sjTLDaRyRn3qSOIKu48E+tL8sKkrgt/OmsS5y5Ix0FZGtyUKETJPNdx8G43kvNTucfIqLHn0JOf5V53NKxQqecd69U+FMS2ng26vAcNNMzH22jArnxPvR5V1si4PlvJ9DF8bTifxFOFOVjOwH6ViEEcCp7uTz7uaU87nJpjKOK6UraI8rfUYwwcelZOvzmKxManBlOD9K2HXLDNc14mb/AExI8/dXP50pOyN8PG8yZlCpgj6/WoWUhcKAAae75PJprEkY7V58T35kDc9TUTgDvUsqk9DVfjdzVoxYobAOaX+dBxz8oFNIPY8UySYJlRyQahYFGPNKCQOtSIwP3xxTERLNtNNdlLZqwYkb7uOuaU246jigCtGPm46Gng4b271N5aqMAVCwYHGc0XAYwwx7VEw6+lSMxP3sVE54zincLFY/fNdpaDZ4FtB/z1u5P0UVxmQWPrXXOxj8K6RE3G4yS/mxH9KqJMjIukLxsD1H9Kzh1zWzIAwVwQc9RnpWTMuyVl7Z4q2jOLJOvNWYjlUbP+yf6VUj5X6VPCeGU+mR+FJFPYeeGYdjTMYFSyYIVhkZHOajYHPAqiBncihTj8KU9aQAZIPekVcfkHqKTZk8GjKnrkH86Np/hwfpTT7Ca7iEY6g0baUOQcGlBHbj6VSl3IcRu00hX2qUH8fpSjaTgdaejFqiSK5EabQMY7VLDdgn5+M1W2UFaylQjJaj52jXilH8JyPQ1IUST2NYiF4z8pOPSrkV3nAfg1yTw8obbGikmTT2vHI4rOns+68GtqKbI4OR6U4xJIOOD6VMJOOw79zl2jZDhh+NJtreuLT1FZ81qynK10wrJ6MVuxSCml2+tOYMpwwxSdetbqwgwAKQDjmjFOFFgG4GelGPSnUU+UVwjO0+x4NSSDcqtj602pImwu0/rVJEt9URKuTj1qZgyDb2NIY8nKfl6UFX/uk1a0M3qRHrTNtSuuCMnnv7UlZS1ZrHYixS806ipsVcbmnjrSYpRxTQmTxr7VJio0OMe/6VNWiRkxpHFVpB1FWz1qCUdaGhxZVxS07FIRWZoNI5oxTsUlACHoOelJxTjSYpDE+lLmlxRigBBS0uKAKaC4Y5paKKqwmwop1JiixNxaKB1owaGhJ6jaKdj1owKVihpFFOopWC42p4X3DB6ioqTkGiwyeUZWmeUexp/wAzJ0JBpQzDqKaER+U3tS7G8sjHepN+O1LvHemBCqnecg81Iibec5p25fWgNkZoARskjBFHJXtmgYbpTguKAGZIP0FNPNSkZFN8vHehCYzHFGKeFIpNtOwrgBT4XeGQSQu8ci9HRiCPxpoFKKTVwuemeEPjF4i0Qxw6g66pZjgrNxIB7N7D1r3Dwj8TvDfidVjhuxaXZwDb3WEbJ7A9G/CvkUUEBhhgCK5a2Bp1dVoy1No+3LzRbS6G+L92x5DJyDWFeaTdWhJ2eYh/iXmvnXwf8SfEfhhkS3vGu7JBj7LckugHHQ9RwOxxXt3hD4y6DrJSHVQ2lXhwB5h3RMfZv8QK8ipgq+Hlz0/vRpzRkrMnEbgsXwcdDjtT1IVcEkt6V2cllY6pAJ4GjdZOVmhYEN75HBrEv9CnhO6MCZB3HUfhXVh82lD3a6v5mUqC3iZkOAMkk8cDNMvrO3ulxMMN/C68Mv404HycqyYYcdMEUqqF5ycnmvYo4mnWV4MwlBrSRSOp32hRGRhLdQr3jGSR/tL6/StbSPHGl3xSKYy28jHH72MhfzNU5GYMBnD/ANOaWPoeFJI6Yqa2Fp1dWrPuhRnKJ0Go6bHcx+ZaEI55BU5Bry7XvCOjyyzwX9ibG5nbetxGPlLeoPTnuK6TVvED+H4EW1IluZTiK2B4b1JHoPUYqzovjSw1ppLLV7MQyg7SQPNib6ntz2NcM6dWhq1dd1v9xspxlp1PLrDw1eaddy2l1D5lo6krMoyrY6c9s+lV7jUtZ8IXUdxo92Ut3PzQvyhx1GK9+l0i3eDFoVVCOFzlSK4Txj4Gi1SHad1tKv3COUz9KxeOpT9ytHTv/mV7OS1iauiePba80y2lu7WZbqVNwSFS4b6Ht+NbAubrVogsKNaQH77MQW+gxxVHwl4WTS9KtreY7/KTbuIwz/X2rpkRVUKihVXgAdBXz1f2am/Z7HRG9tSraWkNnCIoFwvUnux9SadNLFBE0k8iRxryWc4AH1rP8S+ILHQbXzLtt0rD93Cv3nP9B71454m8SXviGcfaWEcCnKW6n5V9z6n3p0cNOs7vYbaR6fq3i/R7faF1aMDv5Mfmk/l0rn5fiFpkMxMK6pc8YyzKi/kea82bH8RApjcgbQT+FejDA01uRzM7u5+JOoyKwtLG3hz0ZmLnHuOlUx4+14E5ktvp5X/165JRJ02k/wAqtQafe3QHkQSsPVELfyrT6tRj0Qrs6UfEDXB1Nsf+2WKni+IerKcyQWrj6EVk2fhHWbld0dpNg92AX+da9t8O9SfBuJYIh33Pk/lis5Qw63sPUsf8LLulI3adAfpIf8KsRfEvP+t0w/8AAZKsW3w6t05uL0sP+mceP15rRt/BukWqlmiurv0UnH8sVk44e2kWO7K9n8QtPnnRJbS5gVjgyHBA+uOa7KKWOWJZInVo2GQwPBFZVpomnKAV0q3jH+2NxH+frWrHEkaBUCqo7IuAK46sIfYVvmNDw3oelZviLTf7V0i5tAUV5FwrMMhT2NaWPcn8aY/lqcvsB9WqI+67pjOAs/hzCuDeaizEdVjTH61sWvgfRYyGeK4mx2djg103nIBgPkf7Iz/KmyThBllYL6nAH61tKvVl1YrIpWug6XajEGnQJ9RmtJF2qFQKijoFHAqob+PHDRnnHysX/kKR7xgm4hivqse3H4sah06k9wukXgPVjRgd8Z9zXOzeIbKBiZdQtAvffdKCPwUZ/WsW98faFErN9tjnIHSGBnb82IFb08vr1Phi/uJlVjHdneGSNRyyiuJ8b6Ut5eJdyl3hwIwu8gBhk9Kw5vidYxqTaW+oyjH3TsiGfwyaxrz4l39yf3WlWm3qPtDPIR+o/lXrYLLMXRqKcY/ec9WtTkrNm3bWvlDZbxbPXBJrpfDN1d6ftt3jkltCScbSSh9vb2ry+68ceILhcQzQWQPa3iAx+eazptd1u5TFzq98/qBKQPyFexWy3EYpJTskc8a8KXwnpPxpmgfR9PVJFMhn3bM84x6V5MKUqXk8yRmeQ9WY5J/GpAuOlexl+E+p0VTvc469b2kuYRfpTwM9qTBpwBrvTOe4hGaRhx1p+2lK5FFwITggcU9VBFBXinx4CjNAhAtOC0uR9aUH2osAgWnYpeTS4NOwBtpcDvShTTgnNFh2G8Yop4Wl2j0osAz6UHPan/hRg0AR4NG01Jg0m2lYBu2nYApdtLtosK43ilzShadtpWFcbVyzX90T71V21o2SfuBRJaDi7sq3Q9qrirt6tVdvNCWgSdmN+lLtOacF5p4XsadibkBBzzRipilIFoC4zFGKlxRtosK4zb7UoXtTwtKFzRYCPbQFqXbShc0ARhadt9KkCe1PCc0BYhCZo2VZCDHegpjpzQPlKuzFG2rOzPUUvl8Ug5SsE9aQr7VbCUhi54poOUqBOpppWrfl80xk20BYqlKbs9asMuaTbRYRXK0hWpyvNNxQ0O5Dto21JjvQaVh3IiopMU89abikMTFIwp2KQjNJjK8i5roLaHdDaRd3x+pzWJsLOqgck4rqbCLfqVsnQIS35Csp6ESJLk77mVh0LHFJbqDdRZ6bgTRnuetLBIsdyrNyqgk/lWKRy25pI5vXyJL64Ykks/5dqztNg8++iQjjO5voBmrFxI1xISqMzsxIUdTzV/T7F7SGSSbHmzARqv8AdHf8cVrsjtirs6DQTHqFrc6XegG0cZRj/wAs2PT8Kuy6aPE1o2g60wTXrJT9lujgC5jHTnuR3/Oqvh+IC0eQrzKxx9BxWrLBHqcMcU8hgvLdt9tcg4ZGHTmuHEU+fbRmtKuuZwlscZZ38+nTyeHvFsMhtVOI5SCWiPYg+nvVnVNP/s+SL+1GeSFWBtNUh5eP03kdveuyuLuy14rpPjGBLPVFGLe/UYjlPbk9G9jxQ4TQLYaXrkGy3XIjucZicE9D/dP149+1ZU61/cqKz/M6XC2q2IDrVvfaelr4oiSVGULHqMK7kYdt47fXpWRc2t9ozefpdwt7YkBgA2/K47f3h+v1pj6abUyy+F7qO5thzJZbshR32+n8qx1vbePzWtfNsDu3Txqp2hvV4+o7fMv6VcaTg7xenYXNdFm+0m01tV1TQykV9GcyQHjJ7giqnh+2tp9esraJZV8pzcXEUwwVYdAPUdOajuJZVuUubhhaythob+A5jk9nx61aub6G8miTVFbTtVUfubyH7sn0PcH0rVaktFvxNdbp5TngZJpngO3MdnqWpkKJWHkRM3ADNx/UVh6vPdx5gv4wJZMKky/ck/wNdjJbvp/ha1soly7puYepbgflkn8KH2Hc5p/9JuJJEBEecLk5wo4A/AVDcWvyZLVpSxrYW5D/ADOBk46CsS51GSXcBHtU+tPQNihJEGuNinI9a1bGBVx3xVG2XL7jya17UBTz27UAiPVd0qwWcZIadgpx1x1JrqbV47Cwln6CGPj69q5nTf8ATNYmmIykC7EyP4j1IP0q94uuPs+lw2oIDS/vHzwdo7fjWcmaRRyt1cBiF6Ofnc+pP9cYH4UtnDvfJOBWUhdpd75JJ3E+pq7dPKli/ljBfjPp61DZoodEWtb1eOKyW2gbk/M2PyH9a5CZy7ljyT605wc5bOajwf6CseU6ZS0sNwOvpwKjIqRvTsOBSYosTcYByBU5+8frUaDLqPepW4BoaIbKUn3jTT1FOb71IR8wqCg/iz6c1GgxGPUkmnvwjflQRtAB7AVDKQw8VHEMvz3NSPwpNWdEt47nUbWGckRSSqjkdQCRn9KlK7sDdtTS8OaI1/J506kQA/8AfX/1q7q8/wBAsEW2UedKQif7NaDx2wuZLfTofLt1GFB7KPX69aqQW0s6yzLiSUDEak4VfQ1306agjjnNydzF1kyHTZGdyyJ8ufeuTZsrtXB7V6Z4/wBGk0jwPYS3mI57uUbEIwzqBktjsOeK8zVAMsM5rCq9TWktLjGjIHb/ABqJ5Cp64qdiWOOlRSJ3JHFYs2XmUrlsIxHWvXNO26T8N7WFWxK8RlcehavP9K0KS/dGlUiEngd2/wDrV23ieIWOj29spJklIZ89cAYFL2PNaT2RlWq2i4rqctbqTgdSaeR83tWpewxW2k2hQDzpFLE98Gs5Vx9K0ascKZEw+bPQAVxGpTG4vppM5BbA/Cuy1SXybORh1CmuGUbnHuayqPoduFW7NVxu5qME/wARGRTyTnI6ioTjPXBriWh68mSFh6moyqk5xRnI9xTCWHParM2DKQOOlJyOAPlNKrjPrS5yCadibiHBPvSEYbn9aegGOQM0jYx6/wBKLCGHcDkGn+c2RnJo3Y4H60ikMBuGDQMmV1PJ4pkibhkVHtySFz9aN7px1FFhED/T61C5wOmKmkbcxPIqCY/KaYyEdc12PiFxHFpdsFwIrOMke7Dd/WuZ0u2+06jaQDP72RV/M10/iW5E+tXRjKmJH2INuRtHA/lVoiTMJ8MMg5qrKMOT61pMVYEbIwfVeDVSeF8fdJx6VTREWQxHDY9amQ7XDHkCq44IPpVj3qSifHysozx0phpyfMFPOSMGjGVPqKsnYYaaTyKf1XimsMqDQIXYWGVHekVDvI6GprdwjENjBHcVOqpJg8j3Xn9OtHL1Hz6WKueCHGfSohVx7csTsZW+h/pVPGODTasJMUGnZBplFIdh2TkEMfpUyuG46Go1QGPcWAPYGmHimm0S0mWCVHcVFIykY60zaG5HBoZSPeqUrk8o+O4kiPynI9DWhbXyPgNw3oayhz0oxWc6MZlKVjpI5QRzhloeFJBlDz6ViQzyIMod2Oxq/bXiSEBsq/5GuWdGUSk+wT2mcgjFZ01oyHK9K31k3D5gGHrSPArjKflUxnKD0Hfuc0QQeetJWxcWgOcrg1ny2zIeOldcKyluS0yEDNLgZ60YGeaCora5mxCR703eewFOII60hFJ3KVhySEHnmntMSOBg1BinCi7BpB1pKdRSsJMKbS4paB3G05etNPWlU80IfQsIOmRU3aq6Z4qdemDxVozYGmuMipSKjbgE4qmhJlNhhjSU+XlgajwayZsnoLSEigj1FGKQxM+lLQBRigAopcUAU7CuFFLilAqkiXIQUYJ6U8YxT2wFwO1WRcjCk9KUIPWpFG1B6mjAPUUCuJsHamkEHIof5elN/OlYaQ7ccdKTI7qKBn1o3H2qbFC/KexFG1CepFJv55Apdw/u0WC4BATw3509o1PKnB/SmjafanbR0BFAE0IIjAPUU/FQrkDGacC3pmpsMeVB6gUhjQ9hTd7D+Gl83/ZosGovlL70eX6cUvmD3oDj0NAajPK9KTY49/xqYMuetGRjqKBXIWDEcg0u445FTChulMLkGSOtKGHpT8CjaPSqVxXQ3IpRinBRRtqhXQmM0oXPtRs9KNpFABtIo6nB5pcNmjGe1MWp0HhXxhrfhecSaRfSRp1aB/mjb6rXtPhP45addlIPEdo9jMePPiy8RPuOor51496evUc1y18FRr/EtS4zlE+1raXSPENqJ7Oe3u4m6SQuCevrWbe6BNDl7V/MUfwng18naNq+o6LdG50i9ns7g9XibGceo6H6EGvaPAvxouLm7t9P8Q2aOXwoubfgk+rKePyI+leLXyutQftKTvb7zZVYy0Z2DxvExWYOrejDms7W9RWws2dEa4nJwiLyST/Su5j1XSdYtne2ZLzy+GjQfvF+q9awBDoU939meeezuXywVzjv6mijmtenpUXN+ZMqEXtoePazdXSyuW3NqEo/eSkcRL/dWsbTriexuGeGeSNx12Hn8a+hpvCEEi/LdMwP95Awrndf+G0N+sYivILSTdkusQBb261TzP20ve0/QI0VBaHG2nxF1axhUKkEzAY3HjP1Fdl4b+JOm6nsttWj+x3DHbk/NGT9e341TtfhNpMHzXl/e3LDgiNAoJ/I/wA66Sy8A+HrZAF03zPeVz/Q1niK9GcdVr3KjBp6HQoAyBoXEkZHHOR+Bo4IPVWHrS2dlDZQLDaQpBEvRV6CpSh7n8q8aVrmxwHjfwg+rIbizXzLzIActj5e4Nc5a/DK+kO64uIIvXLbj+levsoUZY/iTioi0Y6FSf8AZ5Nb08TUhHliS4rc88tvhpZoAZL6Rj32IK17XwPo0BUmCWYj+++B+VdU8oC5Icj3GP51Va+jJxG0TY6jeCfyGaHWrT6hZIq22haZakNBYWyOOM7cmr0cSxjCBVHoqgVAbz5SyqxA7eWQfzYgVj6h4ksrQuZr+2gZeTHNcop/IbjRGlWqOyQNpHQkDvk/U0wsi55QCuEuviP4eiRv+JhFIwP3EhkkJ+mSBXPXnxTsUcNYWt+4B5GEiBH5E/rXXTy3Ez2i18rEOrBdT1kzpjK5Yf7IzUTXSLyQAPVmA/SvGLn4q3siD7NpUKN3M9xJID+HArCufHGvyvutriCyOcn7PAg/UgmuynkWIn8WnqzOWJgj35r9D/qyH/3FLEflUE2qJGpYuAAMneyx4/M189T+INcvD/pGsXz+o80qD+AxVJrcSvvmJdz1ZuTXoUuHL/HIwljUtke66h4x0e13eZqdoSvOzzTIfwC1kXXxG0WFCYJbiZ8/djttoP4tXk62yY6D8qmWEZznn6V6VLh+hH4tTCWNl0O8vPiZx/oenTv7Tz4H5LWRcfEPV3/49bOxtsnOQpc/rXPBMd6Cv+1XdDKMNDaBi8XN9S1d+L/EMzl21KaME52wgIPyFY9zd3V2265url2PXdITmrhT/aqNkz3rqhg6cPhiiPayfUrRW0YGcE/UVYWJR0H6VIowKdurZU0tiHJsi2f5xRs96mBJowxp8iFdkYWnheKGyOtCq56An8CaaiSx2AKcCKVLeVuRGf5VKtq/8RVR7mqshWIgacD+dStAqD/WKTTcEelUkgGc0YPrTypNAXmiwhmPU0BR61L5dOSPJxSsFiMKPSnqtOUc81IFp2BIZtpwFOAp2KdhjAKXFOFLiiwrjMUoFOxxS4osJsZtpcU/HFLiixLZHil2in49qAtKxNxu2gLUgU0u32pDIwPanbakC08JQKxCFrTtU2wKPaqgQk46k1pxLsiUEcgVMjSmtblG8TOKqiOtO4Td0qAx01sOUbu5T2dTTgtWjH7UCOgnlK+ymbMGroj4pDHzmgbgVggI6Uuz2qfZShM0AokGwehpAhq1tFASgrlK4TjpQI8npVkqfSnBKLhyldY6eqVOI6cEzSHYhC0u2phGaCnFILEBXmgJUwSnBKAsQbaQirJjphT2pjsVivpUbrk4q4Yj6U0pzxSuDRRZDz603Z3q95eKaYxg5p3J5CjsJPpTWjP41eMfA70gjH90UXFyFER01kNaJQD0FQsBnrSuHLYpCMnoM0eWe4q4yr2bNNwvoaQtiqIfcUGLpmre0dlpGB9BRYLkVhEGv7cN0Dhj9Bz/AEresxtupW5JWNsH68Vn6NFu1FWYAhFZiD9MVqRP5UF02BudQmfQZyaxqLUiTKsriNeT0FVkSW4LLGMAjBY9AKsQWpuMyzkrCOnPLf8A1qm1TCaPP5SbFICjnoP8TU7aCpwUdWY0s9vp48m0AkmAw0nofr/SrEqvsXcctHHvcDjaxH/16y7KDzbuGMActn8q2rmN5rzVDGAVQqCO+Acf0olZOx0x2NzTAE022GAAEFVtfuPs+lTyKSHIAUjrkmrGllZLCIpzVHxNGs1tHCf4iWP4dKxS9447e8Z2k6+b6AadrkH2m3bCrLj5lrpoL/UNIszbXES69oONoQkGaIegP8Q6cGuHtrR4G5wDkkemBW14L8+OW+nSTEUURldCflfkDn86VfDwqLVHoUptFqHRrG4uW1PwXe/vlzvspG2SJ7AH+RqjcXVnrE4ttXifTNXU7UnUbcn39PoeK3brRdP1lVuoSbe/TpPb5DI3Xr1rN1BdRiiWDxDYprNqvC3kXy3KD+TVxxU6bsnzL8TdrTsYc8V/4dldLmCOW1lOGGMwyD1/2G9+lM822kgZLSI3Npgs9hL/AKyL3jPcfTiuksrmae08rTZItZs0GHt5V8u6jX/d6HHqBWJNpNtPcCTQbjy7iMlhZTgoyt6qOoP04+tawqRk9CWmtyhFGPs7GzmOoac33oXGZIvw68e1X4L+e3jhcTveaapB5GZIcdiOuBmqwRJLzM6f2bqwBHzZVZW9Q3TPv+Ypt9I1rc/6dC8NyVx9ohwsjDjOR91/88CtL23J8y/eXcUo82FlkR+hBzWRIN5ORgGqrxO2+502RJkXmVUGG+rJ/Vada3kdwBtGG6FfQ1Q7lyKIIAB1q1Ky29nJIeoGaitwWYAcAU/U4/Na2tFzmVwWx1CjqalsaRoeGrfyrOBWwHl/eMfr/wDWxWB4qvPtuqShM7M7AOo2qf8AGuollFrp1zdYwApVK4aFtxd8AsxwMd/f6ms5G8VZkcKtJNtA+72rS1opaWMcLAF8ZY+/pUNuEtAHk4bOT7Y5rF1O8e7mZiTjNYtNux0QaScjPnO5zjuah6ZP4CpWHPHXoPrTHABwOg6VdiL3dyPFGKcaFGRz0pWJbCEZkHtzTpeENEIwxJ7A02Q/uye54FTIRUYfNSY+el5z0BqcWk5wfLOMdayehpuV2XcBngZzSHLMcDJJ7VeWydiA5CgDt1qyloET5GVPc8k1m2ikmZq2u4fvnEY9OprY8N2kP9r2+zfIVJbGO4HFVPsO/JaRzj24rovAmmmbV2FuzFwmNx/hyetVTackial1Fs7RLWXBHG6YYY9gO4FbtlbWuiWkV/egMG5gtz1mYdGPog/WnyfZ9MhhnuY98SqBbW+fmuD3Zu4j9+/0rGuJX17WpZL66WKKKIszdBx0VR6dq7zhOU+I2u3uuT2Yv5vMaJWYcYHPoK40cIcE881reJG/4mTrkgIoXFYzH5Se9ck37x1U1oKcMc9MV0fhnwtd6zsmjiMkRyR6YHUmuWKknjpjqa+iPBtqmi+DbJ2wCYdzn1POB+tFKPM9QqPlWhzOl6SLaYbz8mMJjv61z3jRy2seSOkagH2rvbF0e8shKSSu4n0ABzXmWq3RudXvZg2RJIePUA8VtV0VjjmybXQqtaxLn5Yx+VZeDjFXLiZru78+bADEDA7KPSq7DLMcYBPAHasHqyEzE8SMU01iM4Yha5W3GZM9gM1t+K7ktPFbqfkQFiPesJGKqwHcVhPVnpUFaCNNh26N/OoXXvjBqy6Z4PBHSom4BBxu/nXKkei2QE5OO9G4jPNKwzyoFNY8Z71SIY0dDyM03ORtzSE9e49PSjBK+9MTHq7DqPrUgYAe9QhWwP0pQCMjNFhXJmUHBHTtTD8nI/GkDEDGM08nkAjiiwXFUAgnpSnIHIBAqREUrmo5MgcE0CuVp8dRVOU84q1cMDVM4LGgo6PwLGP7VkunXcllE8/4gfL+pFQSuzMzHqTmtXQx/Z3haWcsokvpQgU5yY168+5xVNooZMglh9GBrWCuZTdjPlXDZ7GmoxVge1aK28SjDyE+m5f8KY9rGT8rL+ZFU4PdEqorWZl3CbJmA6HkU6LlPpU9/DsVG3KcccMCarQnDY9al6MaZYhPUenNTMMSdMAioEOGBqww+Rc8lTjnvTQMiVQQeenFM7kVJghz6HmmkfOKBBGo3LvyB0NSzQGN/kbPGR2zUXt6HNaFwuTGSeqAiqSJbKReUDDAnHfv+dQZ5Oc5NaIXBBHSm3Ea7zlR+FJpjTRQoqRo8E4IIH4GmsjAcDNIdxxHCAjgDNJ/AT7gCpA6SbcAKwGCD3pxTOMcYOcetO19hJ9yErnJHY4prZHWptu2P3ySab/Cvqxp2H6EXB60qjLYyAKcUyAemc4phUg801oKyZOsWOQaDGfrUSSMvQ5HpVmORX44BrSLT0MmpRFimkiPByP1q9b3iv1yGqkRSEVnPDRlqCqtbm0HDj5gCPUVHJAGHHIrLjuJIiMcj61cS+j2FicEdq450JxZrGSeqKl7AEdAB8xNRXUJjbIGOa0rVTPI08wx2QH+EetLNb7l7le2a1UuRahe+hjlQRURXBxV6a3ZMlRn2qsfmGCMH0rojJSWhDTRARikqQjFNIoaGpdxBS0Uq/NwcA+tIH3QlFKVwcHrSUWFcaetA609Rk4qQIfSkUndDoiDx6VOKgjyGqdeTWsUZyHAU1xxUq0SD5TV2IuUZUycCkRPmGRU7DDA0SYB5JrPlNlLQryJzxjFRlTV0KGPt60nlZ5XBqWkUmioBzS7aneIjqCKYY/SnYGiLgUZHapHixyO9NCZODxT5SRu49qMk04oVpMU7AOhGWyegperAetOUYj+tLGBy1FiGwPWlopG4UmiwiNjlvpxS00DiinYsXFGKWjnFAXE2juKQqPSnUUhiAUuDSA+9Oxkd6TAQce1OyR0JppHpSgUWAd5jj3pRI3cCkH0pTSsA4PkcqKUFf7pplLRYLjvk96UKD0am06nyhccFOOGFKFf60wc0vTuRTUCWx2Gz0oyfSmhm9TS72Heq5RNjt3tShh3GKbvOOgNAYf3RT5RXJMr1zil49aZ8p7Ypdq+pFFgHYxSgUBfelCnsQafKINv0pwQUAN7U4Z7irULibsJjGeavaHPDZ6zY3Nzu8mKVWfaMnaOuKqU3NVKmmrCuz6F0Sw0HUS2qaTq8s2WLMlt8ssZPqOtdJda75UUa2lh9ruR8okuXAIHqT1r5btbma0nWe1lkgnX7skbFWH0I5rutC+Jd/bKkOtQx6lFnmY/JMB7EcH8RXhVsrlGSnD3l2Z0KrdW2PV7zxJ4njjfbHZDj5BHyV/OtHw74uuGt0XW7VfNP/LWFcD8R6/SuCk+JPhlR8lvq0xx0ZUUZ+uf6Vjz/Fh1ZxYaDahOQrXErOcepAwP1qa2ElWSjThyihLl+J3PoU3UZQMvIPIycVC16O2CfRcsf0r5s1H4neIruPbA9pZEfxW8AB/Ns1jT+KPEN781zrV+5brtlKD8lxWMMhqS+JlvEJH1DcarFCpMkgiPXEhVM/8AfVc7eeOdCg3edq9mjj+Hzi/6LXzfcma7kEl1K88g43SuXP5mmiIgcACuynw9BfFIzeKPcb34q6FCp8h553HaO3wD+LVz198YEZf9C0y7En/TW4wv5LXmPlEjtUXlcngV208kw8d02ZSxLO2ufihrk75gtrC3OME+XvJ9+azb3xv4kvSPM1SSEeluoj/lXPqnPQU8Liu+ll1CG0EYyxDfUfc3d7duXur24lY9S8hNUxD8xYnJ9TyatgUvlk9OldUcPCOyMvatlZU+bgVKIyaljgIOcVYWI9hWqpIlzbKqwk1OkHqRVlYTUqxY7itVSRDkQpGB6VKEAp21R3o3KOK1UUiXqIeO1IWNG8dhSFzQKwuTijnvTNxNKASeTS1AU/WlAHrTgmajKYOKLBceNv1pQw7CmY7U5lweKdhXHhgTzwPapRJGBjyi3uTUKin7aLBcf55H3URfwpDcSn+MAewpAv0pdtFhXGmRz1kY0gY+5p+zPalCU7AIvNPA9TQFpwHeqAAKeBQFpyg0AAFPQfNx6UgpV60BcbtpRTqMDbQK4tFJS5oJYYpaKdQJsTFKKXBpQM0E3EA5p4WlC09R6CgY3ZTwnHPWnLxTgM9M1I0hqx5pwQ1IoPcU8KewoLUSER8+1PVM1JsJ5pyx0ilEaoCsCBV0ISgJ5quE96uqMIB7VLHsVJFwaZjmrDDLUzAz0ppjItvHSjb7VPjpRilcViMKaQoanwaNpJ5ouMr7KQJVkx5o8ulcNCDYKUKPSp/LoCCi4XRAFqRV9qmCCnbRQFyIKaApqwq+1P2ccUE3KvlnNL5fpVgIc9KcUNArlUx0oSpvLPcmlEVAXISnHamlRVkxCmGPn1oBMrkcetMIGelWzFzSeVSHcotnPSmnJq40dN8v2ouFypg4phQ1e8sCmlB7U7hcoMhoWGrhXvSfLjrQGhW8kAdKQxD0qycelN+i0C0IRGBSGP2qfn0FNIP0osMm0qIl7hwcBY+ffmrsUKtCxmGIy2764qLSo8wyliQCwH+9jtReyNOqouRHn8//AK1Yy3Isk7sFl+0vlRiFfuj1qLxAQmjxKeC8ufwH/wCurUEPlxYrP8T/AHbSPPI3Mf5f0qYq8jKMuaTZnaGobVIDjJDAgevPNaO5Y9TuixMRkchj+PBI9Ov61j2kxtbyGYZ+Rsnvx3rsNSgi1G3+22SiRMbpYh95M/xL6j1rOt7sk3szqp6ogsz9jdoZMLEx3AjkDPp/smqGqTRz3zLG4by1A47d6ns2d402nKL0TOSAeuw9wfSkv9FjkVruwbBBww6fmOx9+lJNRfvEOld8yFs9Dm1G2nljZUSJQrE+rc/yrNm1KHTbS6trTMgnAV3Ax8oz/jXYafdx2fg2R0CGSSQ7lz8ykcAEfjXDGxmmuUiEEu2Rwu4ocYJ656VSd73NbWtY6zwpdyTaXdKrpaSwsEw2CzgiujSONoPLjZXVFwDkH0H8zXEal4Q1O81q4a3jiS1kj3K7vgcDrit7wzpkvh/SLn7VMksiEklSSAFBYjn3K1zqMW3JM6ZzkkoNbGc9lZapqF8qwm3lsyALqJtpyfTHNQzWl7IgWb7Lq8S9DJ8k469HHOfrVvQ1MPhxrmQETXkryknqVzgfpWJKjTalZxxsVd5M5U4OB/k0pUoz3M03Yq3twgDW14sqRdodQXOP92Uf1rOaOaQeRa3CuvUWl2QwI/2G9OK7rX70RT+R5UU6A7CrjOcDk5+uawL7QtGu4QwWWwkY7sx8rn1x/wDWojFx2eg3qcmYFhuVA8zTbwH5VlyUJ/2W9PY1PJafaJ8XCjT78/dk6wzH2PQE1szWGq2luUK2+uWHTDH51+h/xrJNxbRhobS4kt+xsb5Mxn6H0qwLdkWtp1h1BDFKfun+F/cHpVyxX7Xqc86/diHlJ9T1rMjugE8qUeSh48qQ+Zbk+zDlauaZdf2TMizxstq77iQd4B9Q3Qj2ODRbTQFLXUseNpfIsbayjOC3zN6/56VysCP8oQdO9aeu3Y1TVWmjbMJwFPtT7S2MkiRIMAnk/wA6jlL529EY2roY4EBJy/f2z/Uj9KxiMDitzxHKk14RF/ql+VfoOlYr8D6fzqErnS/d0IMYJPpx+NREVO6449P51HtycdzTsTcixk4FPABwB7ipGQLwKYnBAHrSJGAZ3Y5J4x+NOe1nIyQAp6ZNWbby0m2yAFcEnnGeP5U+8vPPZY027I16gY5rjqVfesjeNPS7KdpCq3CLIRljt3f3a25riCytHt0UMzHAY9c1iKcSK2cYOc0jlpJA0jk89TWE05O5rFJIsxzlpck5/lT23h1YqNp6ehqOwRJpvLcHbgnHqR61tXV1EunJbyqquBlahtJ2HbqUPPcRlXVcZJwK9I+E+lR22g3urTKsoluBBFET99gM4b/ZGcn6V5isiPMxjyPXPevTPBryR+FPIGUSZzhh/ADwSPc4ArowyvMwxDtEk1e6e41OW4lfzQcrvJ4OOgA9PQVk6e3mXjRkAYO5j2+lWdQVZdasrKDPkRLuPvj1qbU7fZCZIVAjhyzducE16LOFHm2szGbUbuTjDSHB9s1mvlsnt/OrMjFyT6kmqr7geTXBJ9TtgiWzjM95bw9A7qn5nFe13tzKLGHT0k7hVUnGMccCvK/BFqbzxNZAgFEbzHz0AA/xxXeJeRXXi2e4uHVIrZdkaFgNzEVvQ0VzGtq7HT3NuLXR55ky04h8uMDqWbGP61kP4Zs3sbQTkoYl+cL1dj6n2q3q2sLY6dZPA8Vx5txjKEMMDjg/UmrmrLIkAWLl3wOf4QetaOzZyS1Z5qY0N1dGMYjTdtB9uKpkdzkYrR1MBLyURt8jN/D7Vm3zFYJG5yFJP5Vg0THexwerSebqEzZyA20fhVIj5frT2yzEnkk5pGGDj0rkbPYirKxr53rg9e1QSDedh4bsaZHIVbPapAyyNu6e9Yo6WR5w2G+9/OoiQD0z61NJg/K33uxqHByR3poTGsg+8pyP5U5clenIpuMNgf8A66FbBPBpkju3bNAbOc8U3JzgUEEnGKVx2FyO5o3A9aaykAZGfxpqklsYwKNQsSK5APWmtLkEGg471E7Y7cGktR6EMrjBx2otIHuZ4oIRukkYKo9zUcrZbjtXSeD4Bbi51iVR5dou2PPeU8D8utUhMveIGRLiCxiAEdnGIeDwW6sfzrLAI68in3OJEWY5LOSWJ9e9VgcN7e1apWMZO5N7YzQxyMNkCpbqAQsNrkqwBU+oNV443llVA+CxwN3Sq1JutyrOvyn2NQKcMD6VflhdGKtjPIPtVJ0ZG2t/+uoasWncn61PGokXG7BI79Miq8Ryg9qmjODjt1oQMd2HtUb+o7VIRjcOPWm4zGaokawG7vzV6O8V440uIgwQbQy8Nj+v41SU/KDgEjjmg8GqTsJq5pxpbSt+7uAmf4ZuMfj0ovbaSOTlflIB3DkVmZ9amt7iSLIjkZM9QOh+o6U+ZW1J5X0GyJyQRxUaROnzKcr6GrrTrKuJkXcf41GD/hUZ2hcKSR9MVErW0Lje5EUDdRzTfnj6fMPQ1MB8uab5nyneM+/elG420NR0buQfRuR+dK0fTHBAxikZU+zoxBBYnAHpTU3qMplk9DWl+5G2wOdqqB2H/wBemuADj0XmpEZDkdD6HpQ6gk54JosNPuQtHzjIBxmoypU81M/Mjntimcr9PSlYLipKw6kkVOrhhkVAYxuGB17UkhKyYHBXg/WrjNx3JlBS2LDcjGKRCFYblBA6etRiXPbFPByGJOMdPeqcotakKMkXPtwBVSDg96uxShgMHPtWMudoJGAelSRu0ZyprCdBSXulqdtzZaJXHHWqNxaAnJGDUtvdh+CcGroKuMNj61zWlBlXOcliZWww49aiIwefzroJ7UMDgZFZs9sVzgZHpXRGrfRisnsZ5Wm4qUAg4II+tBX0rUm4ikMoU9R0NG3nmkAqRTkDNOwhoXnNSMxHQfjRjtSYosuo72HJ0yetTIBkCoVqxCvfNaRJkTbenSkZOKetD9eKuxncpyCoZSWbJ5Jq3MpIqqRk81EkaRelhnbHIpVBX7pIp4FKBTUbg3YcsrjvkUpdG6gqfamAU7YatUxc48RhwMOM01oWXrz70mwilV3Q9SR6Gq9mNTB4umOajMdWfPXHQn2xSEqylgMYpOIc2hXbpS4wAMdKVRlvpSGk4kcwVHIeQKkppQ9alqxcdSOgDPWnbTRjFTYoaRRSt1pOxxSYCY5pcUH8aUHFSUAUUuKUYNOosA3BpeaUUtAriAUYpaKAuGKdSClFNIQmKXFLRVpE3EHWl4zQOacFFUkITHpSgY7U4DHSnCnYQ0D2FKFHpTqXvTsAm2lwfSlGadTsA0j2o2ntThRVKFwbAZ9aUEijB9KXBxWigzNyQu80BvUA00g0oUnsarlFzC7l7rS/KfWnRxk9RU6xKO1NUrhz2IVjB+61OEDdmFWVj9BT1iPpWqoGbrIrLA3cgirUSjaPaneUQfSpIU2n2NWqNiHVvoKiCpAop3A70oIq+QnmG7RUPllnbHHNWhg0hj5ytUoCbIUgx1IqRYV9Kfs9akUDAFUoEOXYjCKKcAo6KKcy85ppNOyQXHBvQCnB6iJ+QfWk3VSaCxOHpC9RbqWquFhxem7jRQOtTcoUUoGaVRUqgVSRLYxVp4WpFXPNPVM1VibkQyORUgAYcjmpliz1FKIh6UWArmIjpyKVk5qyFI4oePJ96AsVQtP2kYyOvNSlKewxt+lMViELTgtPAp2KVgGBaXbTwKdRYCLbTto7U7FKAfSiwCAUtLtNGw0BcbmlTrThGfSnLGdwpCsRCnfw/jUnlHGSCB0zThF8ueMUXHysgpRU4RfenBR6Uri5SDB9KcEY9qnAA7U8HI4FHMHIRJE1SLCSemKkUHHQ1KqMaV2UqcSEQYPUU8RAdeamEZ9BT1iNK7HyxREsYHSpAoHapFjHc0/avrQPREIUdqXHNS/KO9OBT0oC5EFNOCGpQw7ClDe1AXIxGasDgCo8t7U9GIzkZzSYmxpXnNIVBPSrJQEAgUxUIOOoqRXIgBinFcHpUpjp6x/ypiuVsH0pwB9KuCIUeVikIq7CRSiI1b2gUYHancdyoYjSiGrRxikGKQEQi4p3lVKD7UvWgRGqDOKkCDHSlxTsHFAXG7B6Uu0U4A0pWgRFtFJgflTynNLt4poCPAphAz0qfbzSbOaLAQEHtSEEVPsoK0WApuD2qPaferhTmmlKLDuVHXiomWrjLURjNMCvtpdnFWVi9qd5eKAKeyjZ7Vb8uk2UDKhSpLa1a4kx0jX7zVZjt2mlCLxnqfQetSai3lp9lg+WMD5z3J9KTfRDQ7939mzEPkDbQR0IA7VXBVSgPYYFWxGF06JPUEn8TWbOT5pPYfpWKVzGXvXLzyJFFubp0+tYuqSC9uBIBtVV2gfqav3QZolOcgrux6c1Q2U4q2pVOmorUpi1XOSSTVvTLl9OkBjdwmc/KeV9x/hQV9qYyiqlHmVmapJao3VEF6pkgaGCdz3/ANTKx9R/A1RGWe2lfKyQ3UI+eGTkkfX+JaxYneCTdEcZ4ZT0YehFbsV0moW8UU7fJnEc2fntX7Anuh965Z03DzRalciuI49QtVu41EM0TAyCM/Kw7ZHpXXrdRXtgssR2oeCvdCOoP0xXJWtvLaaj5fl4mY7XjHRj3H0I5qtdXraR4jSWDdLbwscxFsBu3Pv0qXByVl8jSElGSbO6tJPNmuJFuXnt1CxpuHA4ycVj+MJ9vh544CxmuSIh2yzHOfyK1X0TxMdUuFsorUxySE4+bIBP9MVZ1si78UaVbxDMUAa6b6D7uf8Ax2ohBw0ZpVqKbbRX1lFtbSC1ThYY1jH4Csfw4FbX5rqXBgsYWkbPqBx+fNWten3Suewyaj8Op5Xh+6mkAY3dwFw3G6NBuYfoatLS5HUr3B33buwO4DDAnOHPLfrmqV1cOZCq42jtVtzgM3ckkmsyZhkt61SQXsRBpYpfMtnaNx3U4rRknjvY1XU7OC4GOWChWP8ASqFupdyKvRIN3rihxQJlGXRNHNxEkEl3bPJ0RSSBWrYeB5goNnqhETjO1wCp+o6ZqGwXzdTmlxlYl2r9TW5dajLpS26wlcBDLLGwyGzwoP41lNS+xuNW6j9N+HVnG7ST3MLSd13AL+CiuX8c2iaBcRrbPG7SKRiIYCiu30vUdH16N9si2N6g3PHIcLjuVb0+teW+ONdsn1B47aQXLR/LvXkHHv3/AArjjOfN70vlY2pxW6OclZn5aqjyxq2WYcc/jUM08sx3MQiH14/Sq+R/yzUsf7zf0q3WtsaWvuWBMrcgMfwpVkAbO0+3NU3xn5mLMewpCG/55Y+tR7aRXKmXGkBPYfjUkMaMd3mAn0FZ+G/uL+dPjMikEbQRU+0YcqLkiMjcYI9SKZlACGjC57rVqI+ZGDxz1HoagljKnB6HoazaGmJHHGx4OTS3CqsYwMY4qBfklBPAPFWG3Puif/WL0PrSsik2JYXL2lwZo1VmVSBu6c1XnkllnZ5TlzyakghMjEHKnrz0xTzGvmFRz2/Hv+QrJxV7mqehBEWHA5zgV7zokCWPhW22x7pTGqxgjJ3MOT+Ga8a0qzee6g8pQ37wA+nXgV7kSVkijC4SNRgDtXVhlq2cuJd7I50WqDVJpFAMiDbu9KoeJ1kttDvZ3IClfLXnrnua6LTrOe7lIjjd2mkJCqOTz/L1NVfi8un6b4Jt7a3lSfUJ7hVkK8qgUEkL68gc10zlZHPBXZ4pMAAMMMgY+lT2mmT3FpPdkFLeFSxdhwcdhW94Y8LSXjLdaipS3JysfQt9fQVu+P4otO8LSq7pB5wCQRAfM474Hp7158p3donpwpWXNM8utNYvLNme2kEbOhUkKM4P/wCqrU88s4SSZsybACRxk1l20KzXMUTyLGjMAXIJArdt7YXOoW1tFyZJQi+/OKqN2jCVkdvp1jLPHoOmQnEhUSn/AGcnNdP4ouLgXQhhk2wwxkyP3Y9BWXZLdT63qD6YmZI4hAhHRAeM/pVnU4pIrkWLuZ5rpQoPQL2H4d66o6I8u922cmQW2Dp71ma/c/ZdLucIWMo8sN6Z610WpWL2dy0TckDAbHX/ACa5bx3qCCwstNhUbgTNM3qewrKeiZrQhzTRxkC5k9hzUROWJ9TViP5beVu5+WoAK5T1CQMacDtHH41GfqaXOB1zWJ0EpdSMN+BpGGfvfe7GoiQTk9PSnghhtOT6HuKaJY7qOeCP1pg/GnAbhhsA07Gc88imIYPvBlHIqUFTz3qMA4OOaAChyBmgB5XPDD8ajI2n1FTdietMkA4yQB702gTImPHNVpW2ipZCAOuearNl29hUFBDG00qxxqWkc7Qo6kntXX6sEsLa30eAhhAN8zD+KQjn8ulQ+ErL7HBLrc6jEWUtlPUyHvj0HX8qrqpmkaXJZyxJz1zVruTLsOs080SW3dxuT/eHT86pmNlbHQ1ccyCUSrGTIDkbeKWaWWeQs1syck/KPWt01JaHO009RFzLY45MkJyPdT1/KoCeAR1FT20ot5g5RiOQykdQetQv5ZPyBgPcUMSJ7pfN8q4H8Y2t7MP8ao30eFVx2O2rttLCIZYZXIVvmUgHhh0qC5ZGjYBsjHHFDtYcbplKE8kVOhw4OcVDBG8sqpEpZieABmtSXSruNWMkL7VGWKjIFZ2NG0V3H3W7HimqMDBP4VpMlm0SLJ58bgc5TIP9aZLbQ53Wlwj8ciT5SD6DPatLEXM1RhiMnJpQvGO9W10+aYMyhQUG4jd1+lV1G2QZBBByc+lFgGbT6U+KISzCMHDYJzUrjDYByD0p0Fu6TCcY8scNzyM07CuVdjdVbNBkIPzL+VSsnGe49Kin+8PoKTSe40w4blHwT60xhJgqRn3FNIBqSNyvB5FLYehJeRSxrEcfIEGCORTrj5VjjUkYUE/U09JgqgIx56g8j8qWTy5+WOxz3HIP1q+hJUJycOMj1705keI4PIPODUy2cnmruUmPP315X86ZK5adsdCelFguIjowwRg+/ShotxGOMflTlh8w4GMmmjfExAbj2NHqHoIh2lpMcJz/AIVW6/WrEzFYRGOjHcf6VCq5NSVsKBgVMR5ceD16n/P5UkS7n54A5NOk+d8tyM5amkJsiYsoUH733v8ACp42ypzjIqFiWkLGlHyRk9C3AqloS1ckY89OaswXhjOGBK1VVAEUsx3MeB6CjA59qpxU1Yhe6b1vMHAKkHPantCso+XhvSsCORozlDWla3qvgSZDetc06LjqUpJ7Ed3ZgnkYIrOeJomww49a6dXWRQJMEdmFV7mzBXIAKmiEnHcd77nOlfSm4q9cWjISV5FVStdC12J23FiAf5WO1v4T2/GkKkMQwwR1FJipC29QG+8OA3+NUoiY0DmrMIOO1Vx1qeORQcE1olYlu5Oue4xTiKarL6ipRtPQg/jWqiZtkDAGqkgw9X2HOcVWuFzgihxGpFcCnqKUIakCU0gvcaMU44NBU4pNuKoENJppqQr6UwigYw1K3yRqvfqaETc4z0HNLIN7getSwbGj5UBPU1H71JKRu47cUyobJYAhSNwzTxsYcHB96hPWkNQ2bRVkSsuBngikK7hTASO5p4c+gNTcojZKbtNThgeuQaGXvUDuiAqaT9KnYDAxzTSlFgGCnjpSbTThQhMSjFOoxTsFxtFOxRiiwXCikxS4qkhNiZNOUGgCpAPlye1aKJFwHFKAMdRTkOD0yKsRzKq4MKMPyq1EGyvgeuaKsl4WPMJH+61AW1PXzV/WnyiuVx7UuKsLFAx4nI+q1P8AYOm2eM/iKpQbE5oo4p6xsegq9HYOOhRvowpxjZOqsPfFbxopmUqpUW3J6mpViA9KnVGbpU8cAPOOnrXRGgjF1m9in5a5zgGlEY9M1pLApHSplhXsK09gifaMyFi9FJ/CpFgc9FrYWJacIxVrDol1GZK2rn0FTpaAdea0NoFMJx0qlSSJ5myEQKB0oMYp7PUbOTQ7IaGOoA69KaUIIPtTjk0/HC/SpsA1QPSpAooGKUmnYAAFLTS1ITSuA4tTS+KaTTTSbAd5hFLuVhzwajoxUhclYfucDnBqMe1PXPln60vB6imhiKMsAadjk0qr8wxzQRyapAAFKBQKcAT2qkhNiqKmUUkcTEdOKsJCx9qpE6sRFqZBT0gNTx2+aq4WZEopcVbS2qZLVccigOVsz9ue1OMZ3VprbqO2af5SDtzQPlZk+WfSkMRPY1rFF7CmNFnoDSuPkMwQnNPWE1eEDHtTxbt7UrhyooCDjNOEIHWrxgOBzigwDu1Fwsij5Sil2ge9XfIT3o8qNe35mgNClgDtQfYVdGz/AGajkKt90jj2pCbsQgupBVQMe1EfzoSZCpByABUolbGNoNN3OegUZ9qViXMijBkyCcH0NSfZz3al8rfjPDDoaPLfvnNFgUmOEKr95qcI4/UfnTPJz1yacIfaiwXYu6JegBpRIn8Kn8qBFinhKVkO7AS88LTt5PQYoEfPSpFQ0WDUaC1OGc9TUgQ+lOCUFEYU+tOCcVIE9qdtoJIgtKBUoUUoWgBoXtTguKcq0/bSAaBxShakC05UpCJYxuQE/SjZg5pFBB44qwU4zilYCvjNOUYqQJ1zSqtMREQaUA+9TbKXZ6UguQFeaTbVnZRsoArhe1Gw5qxspSlICALTgtShMU4LQBGF9qcFqRV4p+3NIEiIJS7KmC0oHFFx2K5TninBBU2KULxRcLFfZzQUFWCtJsp3CxWKU3aasleabt5zRcVisy0xlqyy1Ewp3EVitAjzzU205p6x47UXAg2CjbU5j9qUR0wK22kK1aEfNHlUDFtl8mBpCOSN34dh+dZjKzsxbksa170bEWMDjH+f6/nVOOLdNGPVhUx7jfYsyx7dkajOAB+PWsaePDmul25ujkDjccf5+tZ15AM59aiL1I2MwJmIdeRVcritJlBKr0HSqTAVSNUVmXNRslWiABUbYpjRUKYpIZHgl3oAwPDKejD0NTPjB5qE4xSaA6Kw1y2igeR1aS6UCKEN1I9z7dM0tt4ZGsxi5nunhyzD5Rkn3/U1zUa/vUP+0K9Q06ExWsCFSuxBn6nk/wA65pr2fwmkVzaMoaJ4bsdIuGuIZJnmC4V3IwCeOlUbFxLqOt346BltY/TA5OPxxXR6jP8AZtLnmOMKrNz3wOP1rmbRfs3hq1B/1kwad/qx/wAAKyTb1ZbSTsjnNclIR8dW4FbF7H9j0mytAF/cwqHB6h3O4kfgpH41lxW/23WrS3PILhm+g5NaOuS+bdFlYMrMzj252gf+O/rWjWyJW5lzkbDk8elZ8ignGKv3HUZ4FVdoPSqSGx1uilflzmrnEULMewqGILEpkkZUUDqxwBWBrviu0jjaCyBuJc4LdF/D1/Cs5zUdxxTZ1ejRLHaI87qiuxd2Y4AB9/pXM+K/F1pJcXC2h+0MzYBHCgDpXHapq17qOPttwwiA4iXgD8P8azwSB8ihB/ebrXLOu2/dNo0+5Zvb65uiWnkKIf4e35VTU45RcH+81KPmb5AXb+8elBQdZGz7DgfnXM23qzZJIYcFu8jfoKUozf6xsD0X/GnqWYbYU49uB+dL5S/8tXJP91On50hkasqnbEuWP93k/nQ8Uu3LFUJ/h6mp9+1dsahB/s9fzqFmCnk5P5mgLkXlvnl6cI27vS7znhDS/Mf4P1oHcltX8tyGYsp/nWoIBNHgjgjg+lY43j+EDHvW/Z/6tDjjH1oE+5izR4JU9RViQbrSK5XqnyvUmoR+XdOMe9P0kCRp7Zuki5AqbajvoNGWUMilgemKgEoNwquD5e7DAdT61Lprm2FzBKx+TJWqsIHnRl+m7J/OlPYcNTt/B8SjW44kTEe8EfhXrWn6bPf3bRwDJcgluwHuewrzf4Q2X/CQeK7uRVKW1rCXLOcKoPGSa9R1Txdomn2zWlhdqYh/rJIhuaQj6ZwK1w14w8zPEe9ImvLq30u0ntNNBkcjy5bjux/ur6L6153rNil1q1sJoxIsCbhHjjeSMYH4Gtf/AISvRzGQZpSc5IMZUfma5u88SxLdTtblIfM2jz1lQuFGRgDPB561pVtyNImhpUTkast0LZfIgRJtQzyp5jgHXLep/wBn8684+JnyC2WWR5riZzI8jnJOBj8B7Cumg8RaXamONMCBeWC7izHPPOOp9a5jxXc2viHUEnlnaGGJSkUUMJO0Z7k9SfWuRQdjvqV427s4q1Xdcpnp1rt/h9aibxA87gMtrA8x+uOD+eKp2UemWdpcQJHPK0wAMjIAwxzwc8D8K7DwTp0baLfSWkbpNeTJao7NnjqfyrWnHU4a1T3XY7Pw3aQ6HpAuL6QCe9ky3qMjIX+dZt5FFql5JqMLmKOLCq2OpHb+las02nLZvpkDtcNbo53nklgOTn6msjRpj/YU6vH+4iZsZ75/+vXUcPkc3fzyXk4eZgWIwMccf/rrzHxNP5+s3B27RGfLA+leq2KRyXivKNsMQMj+yqMn9BXkGozG61K4mP8Ay1lLce5rlq7HXhVq2QzDbBGv947qhqe6OZsf3QBUNc52oc2ASQPwqI5I4q2VGOV/CoJIyvQ5BrOxtciGSMdRTx8pGDTXUY4q0kB+zoQMbiTmgYgKsh3cY6UsapngnI96cqeUQGIwaaCFc4wR0oENkGGOMYpOVGf50bvTikBH1NACiQken0qKRg3rmlZiOKryyYGB1NDYJDHOTtFaeg6U+q36W8ZCRj5pHPRFHUmqFtbyXE6QxKXlkYKqjqSa7eWCPQ9OOm27A3UnN1Kvr/cHsKaQMi1e4gnkit7RttnbL5cK+3cn3Jqqqxrx5oz64qNYtwyzGkKbT8rGtVoYtXHlVJ/12KUNs4W5YfQmo2LEYMhx9BTGH+3+lPmYuREpVmP/AB8hvqaQeYq/MyMPwNQN5g5G1gOtLyZGC4ZBn5umaLsOVE21z0SFvwFQPAXmHmRhVPULxShv3RkKsFBwfWnbkDBXLgkAjjk5p3uHLbY0dPlsrIFYVdGPVmGSfbNXLjUIJIvKSTiRgr/7vU/yrB3Ln5XpU3Hpg5p83Qnl6nX6lqFpeacyRrGJjiNB9eM1DrmmWttZr5UMLbFCllPOfr35rmDhT8y7T9KUyHGPMfH1yKNB6kt5bRwuqxk7gBk5702FBcRMDIDMMYVjz+GeKYzO3Vtx/WoX+SQsVOD1yOKatcl7Fia1dBiSNgD3xx+dMiGLa4KnPAz+dPt7vYRsmYD0PI/KrKNG8MkZiQ7+rJwfyrRWZDuYx3Mdyn5qsFA1qZXzuUhfY1L9iUk7JACP4X+U/n0p0sMsemvvjZVLjBxx+dRy9yuYz/LDHC8U0xMBxzUgIwc9aasTgjy2P07VDT6FX7kZBH1pwb1qcqGyCMN3qFlAYgUJ3GTQXMsJJicru4I9R709jFM4ZgIn9VHB/CquDnjrTzkY3girRLRZ8po1duCAOCvIqA46gA06F2VvkcA+h4p0jxlCzIVf/Z6H8KoRTmO6QmlQYXNIBk/WpcZwKgsVfkQnHJpOi59f5VLKMvtxjA6egqN+WwOP6VVib3Gqm5go4yaVgJJsZ+ReAfYd/wCtOwBGT/ExwPp3NH3UwMZb+VUkK4Z3s0rZ2gYUfyFKgU9OtIw+UY5Apoqo6EtXRNsppT86ljYMMU/bWlrmYW108PDEle9a9tcB1zGcg/wnv9KxtgzSxgxtlCR7VlOgpaopT7m68CTLmM4buprMurHJ6EGp7a7yQJMgj+Idau+eJk27N7jo3QVioSix8xzUkDo2CKj2nOMHP0rektwrF5TubsB0qixIc5UCuyCutSW+xSVTt6HIp4DE9AKumMSKMDBqHGCQQMg1SWtgvpcjAccjBNOWQKfmiIP0p4X2FSIueeatQIciEMpORuH1prfN3FTODnnFMxnoBVcguZDQuKdTlRiehqZIwOtaxp23IcuxXIoqy4Aqs3WqcECkxpqMjrUh5ppznFYSVjVCJwhPc01eAzfgKkk4GP0ppTAA74rOQeZAecUhqQqSeaYy4OKzaYIaBxSge9GDSqM0rF3G4ozTyvHvSFeKVh37if0p4diCO2KaF5ORRnaciizDQXnZSgjjOKRiMcZ5puKTQXJNo7UijIIxTBkHipYzyQcHvRyj5hhSgA/Wp8Zo2D0FKw+a5AQcZoGPWp9vGMU0p3xTsIaq+ppwUZ7Gl2YFB+matCsKQPpSheOOKB7U4dKtaiEUelKKX6UqjJrWMSGxKMelOVCRkCpEjbPFbKKIbYiRZPOasJGB2oVMd6lCMeg4raFMylNIbj0FSBnYbS7EDsTUyQA+tTLAOwrdROdtvcgiHvmrcWcc9KckIU1Kic/hWiiK9hBSj2NLsNKR2q1oJyFDY6ik3fnSAUnWm2IXdTCaWkxzUtlIbijbTqSpsUJinMOF+lJ+FKfujHrSsFhlAzmnbTTtnFSwsxhHJoxxTtozyaUKOtK4+VkeB6U0/SpgvtShfalcfKQBc9jShT6VZCnFO8s+lILIrrGdjDvSrGe5qy0ZCgqST3GMUiYJweD707BoRCP3qRY1NWFgyO1SpAB3qkF0QRxKD0qZYgP4anVEHpUihRzmqQnJIYqgDpUqLnpyacuxR8w4NSRyxp9xSTVJE+0HpAx7YqeKFs84xUQuT/cp/wBpbsAKdmLnRaWH3p4jA61UFy/qPypvmMR9407MfOXeF5BI/Gq8p5JDjP1qH5mHUkUoiz2osJybJkm/vrj37VKJV4HrUSRkcHkVKsYo5RpsUyDstJ5h/u1IEpRHRYdyuWkJ7flTTvPfFXBHzR5eaLAZ5R+7H86aYj3rRMNBi7UE2M7yPanrDgelXhFilEVAWRR8rjpT1ixVwxgUbBSsCSKoWnY7GpylJ5dKwyHbRsqwI/anCOiwivspRH7VZEdPCUrBcgWOnrHzUypTgvemBEEpdvFSgClAzjNSK5Ftz1o21NtFOC0hXIAlOCVMFpwWkBCEp4WpQlPVKAIwmacEqZUqUR0gK+ypV4HSpVQelPCUmwIQuR0oCc9Kn2il20rjsRBaXac9akC07b6UrhYhK03BFWGFM280XAjC+tKFqbb7UBaBkQWl2+lS7aNvNFwGBacBTwvFO20AM20u2pAuadtqQINtKFqXbTttAWIcUmKnKUhSgCuV56U0r7Va8umlOadx2KpTj0phTtV0pmk8vmncViosWe1SCKrSxU7Zii4WKflc80eX7Vc201louFir5eKFT5x6ZqcimMKdxWIr9MOoPPFV7Nf9Miz2Oa0byPzYw68lRn8Kq6cq+ezMM4U4pJ+6ElqWISN8zNy2zA/E/wD1qr3Kr5TFvSrkKj7NMxHJYKKo6iD5ajsaxWrJZlOeMn6VSkPzGrsiFsBASTwAOpPNRmxuZJWEVtK2DjAQnFaXtuaRKJJqM5rbh8O6vOcR6dc8+qEVq23w+8RXAyLONB/tzKKh1oR3ZahJ7I4vZk80xl9q9Eh+F+vOR5jWcQ/2pM/yrf074SwxIJdWvjJjkxxDAI+tZSxlKPU1jh6kuh45GD5ilRkqQcAZroBfeIbgLJFIyg87dg/lXe6lpOnaQGSzt0QKPvHlvzqGzjWO2TIG49T71LrKSukL2bTscpq13qt3psFteQQxJIyxZXO5mJ64qfxGFhYQIfkjAQfhx/StG6xceIrRGwUt1ecj3A4/WsDX5t0jYJyO9C1aB6Fbw4n+kX14SR5UZRfZj/8ArqC6Gbl+RhTt474GM/jjNaFk0WneGlmuJEiErmUlyBkDoK4HVfF0MWY9NQzSDjzGGFpymottgk3sb98UiTfI6qo6sxwK5m+8TwQEx2UfnydNx4UVzOoX9zfS7ryZpD2Reg/CqpyByQi+g6mueeIb0iaxprdlnUdRur9v9MmZl6iNeg/DpVTkAniMHr3Jpyo2MqAi+rdfyowiHoXb35P5Vytt6s1WmwxQTyi4/wBpqGVF5c7j78D8qn8p2AaRhGp9eW/KgeXGf3aZb+8/JpFXIgskg4AVB3bgD6CgiJPvAyv78D8qWR8t8xJPp1NKI3xk4jH+11/KkA13ZlwxCr6dBTFyw+RS3v0FSARg8Au3q3+FMkcn7zfgKAEKc4d8+y/40mQv3VA+lCqx+6Me5pwhHVyTSGMMox60NIWPKnFThMLwAKYQ3amAzecYEdbmiqXtwXOBnisUg9cc1seHY/NuPLJODSBj/EEW14ZByGWsy3l+z3cM3ZWGfp3ro/Elp5dih67TiuYdcxn2oaCL0NS8RV1edY/uSRbhWfp9tNc3KxW8TSyYIwo6e5rVSzS4ns572ZoLcxgOyglvwFe0eCNJ8Pf2Yh0SSKfd99s5fP8AtDqKpQ5txc/Lojx+8uNS8J6VLY2128ZvwBPGvAIHSsYPI0a+ZI7nHJJPNbnxPmFx4xlhTGyI7Rj2rFIxUy0dkJu6Iyo9KUADsKU0lIBaQmikpAkKTXo9uv8AZ3hPS7eF2S5lVpvQgueT+QwK88tIPtN3BAM/vZFT8yBXuM2lW39qJJcrm2s7YNuIwCQMKv6E4rWkupjW2sUP7DmtrbT1tInieWMi4fjAGM8+5/pWZLfWy6PJYW+9nSTqRgNzya29S1i5vtC8+NGiRQFMh4EjHggD05rnIYoItMctl7qRsKB0VR1J+tbnPp0M3UrkWXhbW7vhXeIQR/VzggfgDXj9sm64yei816l8UJRaeEtJtMKHuZnuTjrhRtH6k15bCdkcp74wK5Kz96x34dWjchY7nZvU5opMcUtYnTcsqcj5gWPqOp+tDgMp4Ap+Ai5ZgBUMk3GEGB61nc0sMaIDnpTvNYx7RkgVE7/NyTmm7iOaLlWHhtrnJ+tISv3s5Jz3phPGe3vTfoRSuOw/cByvWmNIc59aRyO1QO+OnWlcB0kp7Dmo0R3cBQSxOAB3p0Ubu4CAs7HAAGSTXa6Zp8Xh6Fbm8VJdUkGYojyIR/eb39BQA3T7Q+GrPzXAOsTr8vPNup/9mNZe2R2LFsk8nJ61akd7iZpJXLyMcsxPJNPWPuKtIllNo3x2/M0zy2PUj9a0SgPFN8selOzFoUTC3rzSeXIOh/Wr5j4pvl07MNDP/eL1H60pkcRjgkHgirbx5qMx4U/pUu40iESuDtGcHke/pTjcNtDsMleAe645FOEfyj1H8qUoMnjrz/n9aabE4oYZMs/OC/X3pONgVGA77h1/GpPLHHHPY00xjDY7/wD66pMVhd7ZUA8DrnkmnGQFyAhK54I6n8Ki8sheOoPaj5lYDscdqpMlxJg0ZGA2PZhTw7DG1sgdP/1VAWHRl6enNAVG+62Pof6VSJJW2MCJI1JzknoaRBtOYndPxyKb869ww96N6n7wKmgLE4knC42iVefu/wCFPiukVSgd4t3VegP1HSoRnHytke1OLlhh1DDj73P61SbIaJiIGBDxRvn+JflP6cfpUEUbRsVIIz070eTC/wBwtEx7dRnP50xop0GAdyeoOfxqtybWEIwWOO9QSQSJ85wVPPB5FWcdATin3sZE4ZGDxkDBHaphG92ypO2hTgQs4Azk8VZnkzIyEAqvA/CpLdtk8eIwW3Agn0qS4gSSY+S22TujnGfoa0USHIo+UOqmoZc7tvYVdETIcSKVPXB4qm53uT60OI0xI171LEACWI+lG3CgVI4CIiKPmPWjlG2RZ4LevSmquSAepqTG58HhQMn2pvIQnHzNwPYUWJuIPnf/AGRSqC5LYOT0GM8U/ZgLGv3m6/SpQrKwK5GOBTSBsVcxRcjDMOntUJh3EmPnHOKtPidgWOJPU9DRJGYQUONx5JHPFaWJuUUyOmRVhGyMHrT1jVyd5wAM5qPZjp0pq6JauSUU1Se9SiNjWydzJpoajFTnAP1q5DdhiFcYNVfLalWIsOv4VLgmCkaWAec596hliDVHG0iDBGR65p5nUfe4rJwktjRNDfLIHBqpJzK2fWrTXCDHPX0qCNNzEnqTmtaUHvIUmugBGA45FTqu0U5F9akC/jXTYzbSKxTLdMU9YgOlSkUGrjC5Ep2GY9e1BHtTqYzYFU7ISdyGUcVXPJqSR/mqOspyLirsaTQvXNIetL0X61hc26CdTn0pcUijjmn1IxhAqJsHNSv0ph6UrDsRAetPQDt3p+zPPelVeamwDNopwUYqTHNAAFCiGxGRxSFc1Lijb6VXIxcyK4XDYzS7Oam2jNLtHpR7NhzIgCHPtT41GelSYoxzS5bAmgxikxTulKBRyjuNANLmlxS7SR0p8guYSk2ilx60YpqAcwm0CjAH1pyjnkVKsY4OM1pGmS5tkIB7c1NFHwCRirSqoHQCpo4d+McVvCmZymkV1QDpU0du7DpirsVoAc/1q2sJwO1dUKSOeU2ynHajaMgVKIQBgCr6QkDtS+WNw4rZQRlzFNY8DgcU4IfSrmzFOWMHFUkkK7KiJnqKlRfm5AqcRgU4Lxn0pisQFBk8UxhjOBVgkZxxmoXBNK40iu3XGaQLT2ShVI6jilcqyECc0hSpgOTmhsY6ilcFYgKijb7VKSo703egPc0FJ2G7T7UjAqef0qTeuOFo3gHpmpsPmGKAehp/lnHSozyckUoLc4J/Gk4i5mSeVzSiJR1IqM7u5NNIJxmlyiuycLGP4h+dO3QrwcH9arbaULVKAXLQliA4H6Un2n0T9ag2+lPCZpqKFcebliPugUwks2SB+VPWLNTxw01ECJFYjCkr7ZqUI46sfzqykQ9KlWLiqUQuVUi9qmSMYqdYxUgTHaqsS2VwnSpFWpNuKOlMkQCnYoB5pwoAbipUXikAzU0S0hpXHxR/jVlYgRRGOKmUUFjBGKcEp9KKChoUUYFO6UhoJEJ5ozSd6UCkAoGaXbSqKXBzQA3b60balUUoFAEG00uz2qwFGadgVNxFYR04R+1T8UoIFK4EAjpwjqXNGaVwI9lG2pKKVwYzbS7acBS0riGBeaCMGpAM01gd1FwBBmnheaSMdalUc0mwEVaeEzTlFSAUrgMEdPVOOlSLTwKVwsMVOKlVOKB0p4NK5Q3bRtp/5UUgG4BoxThj3pRx2oAaFp2M08LTgtTcohYcU3bzU7LyKAmTQSRbaULU2z1oKUAR7e9BWpVWnBDRcCAL7U8LUoSnhKVyiELzTwhxUwjp4SlcSRAI6cI6nCU8JRcdiqY6Ty6ueXTSnOBQmOxVCE0GPirezFMYU7hYq+XSCOrJFIBTuKxDtwKQipjTCKAIyKaRUpFNIp3AhYUwrU5FNxTJsEW7YCv8PB/p/hTIYVhef0YcCpIX8qTcfunhh7GrMsQG0DlGGUf+hrOTs7FJXRVjGLbHq5P6VWv1xEpHrirbHYqxuNrDP0NQ3Q3QN36GpW5k9GYi5WYMCUYfMDnpjFek6KWt9NtkyQ3lhmz13Hk5/E1wNiFN0yEA7/3fPYE4Nd1C5GcYKg4H0rLE62R1UNNTSN26n77fnS/2lOq/LK351RZsjpURbHWuPkR08zNFtXuVTO4sV5Az1qePxcWhMU8ZDY7c1w/iPxXpmiSJBdysZ3BIRFyR9fSuXk+Ienhsra3DfTAo9nB7i9pJbHaa7dm4DNH8wPXnnHemQsfLjXHbNcJL8QLOeWNWtJo493zNkHj6VQ8RfEtUL2+hW5dx8vnzDCj3A/xrVOKWhnq3c7Nru3tF1O/vJkijyIVZzgYHJA9a8y8ReMoZpHj0yLze3muMD8B/jXI6hf3eoymS9nknYnOCcKD7CqmNxxyx/ur0pOq/sjUO5Z1HUbzUnjN/cyXHl/cQn5U+g6D8KpnrtzjP8KdTUm0AfOwH+yv+NOTcwxCgVe7dB+JrBu+5otCMIQCDiMeg5JoTGf3KFnHccn86k8tB99jIfQcLQ8pwFyAOyrUlDfKwczSYP91Ov4ml3CMfulEY9R1P40ojkIycRr6t1/KgLEpzgyN6t0/KkBEuXP7tS3v0H50pjAH72T/gKf40sspbjP4DpTNrH2oGO8wR/wCpUJ7jr+fWocsx4BNSiIZ55+tP4UdhSsMgEJP3jj2FSLGq9AM1IqvIcRoW/lU8dhK3+sYKPQUWC5UZlXqeaWOOaU/u0J9z0rVis4YuQuT6tTpJ4oxywJ9FoFzGPcW8kIG9gSfSoNretaNzMs2AFwB+ZqHYPSiw7lTB7n9a6Dwg0YnuFYAtgFT3rJKAfwiup8DeF9X16+P9lwbYlHzzyfKij1JosDZJreZrLykBLswAHc+1dD4c+HttZWC6x41uRp1jgNHCf9bL7Bf8RXSWUOm6FcG08PQDX/EWMNeMP3Fse+O2R61uaR4RMl2NR8R3LapqOdw8wnyov90fnVqPUz5uh5j43aCVo7zStGbTtLkYRRGYndLjq2D0qD4b3FuvjmxS0haJlaSOV93MmFPJ9siuz+Nk0K6VYx7gZPN+VR1PsBXG/D+H7FPresyYC2kDkA9Q75wB+ANGvMLocr4gf7T4q1CXOQJWAP41WYU21zK80zdXYn8zUzisXuW+xAaSnkU09aYDaSlpMVJSOk+Hdn9s8WWjEApb5nYH0AwP1Ir2XWHUrOl1JHEGjCxKfU87j7ivPPgzZhtRuruVDsO23Q9iTkkfoK7mYrf+M9k4zHCQqjsSP/r1001ZHPVd2UNU2QBLW5iLWFltjji+75zlQST7c1jmHfPlVCl24VRwB6Cuv8YQqZ7V2ALc5HbHHP1rJ0yEfb4d65jXLnjnaOtXcytrY8f+MN2JvFX2RBhLGCO3wPXG4/q1cOwxAB3Y5rU8TXv9p6/qF4pJWed5FJ64LEj9MVm3P+sVf7qgVwyd3c9GKsrENIacRSYqSrgznqTnPrUfU5P60ZGOeaUHnPasNTqsN298jFA9aceAccmo9/cdaBise5xTHbA/rUbSYJ9abgt97p6UAK7lj8tS2NpNeXCQ2sbSzOcBVGSa0NE0O51Il/lgtE+/cScKP8T7CuhN5aaZbG20NGDNxJdMPnk9QPQUxD7G1tvDablKXOrMOW6rbH29WrPkLyStLIxbeclie5qMPIxdguMdcnvUuH8pSWG09dvQ1SRLZKABxjmgFVP3gPxquqJuIJJB6c0rRxDBUD8ec1aZNicyRL1cfnSfaIh/EKZFLGvHlr+VP85T0QCncVmH2mL1/Smm4j/2vyqTzFPUKKQyr6rTFqQ+bEf4hQWTHDCpdyH+7SERE8ouKTQJkaKCpAIJ6dfyoIGMjvSlU35KjHb29KCq4bC/M3WpNBCoxx1FNZRu9utKVG5Tkjb0pNrbSEcE54z/AJ+lACBM8fUUwjgHtUx3K4+UEdz6U0sNpyMAHFMCNkG8nHeo2jB7VbwCx5HPNIyj61cdjN7lQBh0JwKXce449qsbaTZVolkShWPyna3tT8OP9ofrQYhSgMvTJ9jVpIltiBgevBqRZJEbcGJJGM9/zpDtbhxj/PrS+Sy/cOR6Gq5X0JuKTHINsi5z36EfTt+lIsbIP3L7x/dPDUqKWJBRgR7ZpfLYDI5H5iqUWToLb3Ma3WblCGxjpg1PPb+YGmhZZkPUdGX8KiJEi7ZBuHo39DSrAVIMLkH+6eD+B71aiyGirczyCIRBiVx0POPpVeFct9K2rSytZ7hRKp81jyjHAP0NdPrml2MOi28lgkCSs20omCxNHIxqS2OIiheRiVViqjLEDOB6mmvyxfj0H0rbnsr7SjFMzBDIP4Tnj0Ipnk2dxbvlPJuhyMfcY+ntVqncTl1McRYjC9WfknPb0poTdKW/hXpWmbGbyJZjEylcZx0APf6VCtv+7UHqeSav2JPOUwmCWzkmrCkMMY7Y2/4VajtQ33MEjt603yQDwDnNUqNiXO5VWNmzjAA605GGNsi5B6eo+hq4wEiFQdp9PWonQBT5gwV6Z9afIg5iOeIJGoiyynlmxUKK20kLkelXYpVIBxgjqvrUpQE/KCCe3pS5QvYzjESu9ASPTuKSN2BxngVpiEg5H4io5rZW+ZBg9x604xQm7kAcMOCM05Ru5oES5zUyxkjgYFbRp3MnJIi2/Wo5I1ParRQgc03HPNU6dgU0yqI1HQc1YRcAZp232qVYxjmkoMHNdBqLkU8AAc9aei4Oc01hg8mrtYzbuRvwaYae3600DcwA71N7FJXI2PNRvgrzU9zGYzwOKpu3BHWo5rouxEfvUhopawnqXB2GEZalYZNOHc+lIOtLlL5gopaKAuMIoxTqAMnihRuNysAHFAFTJCSKkWAY+Y5q1SuZuditj0qSOEtVtLcnBCk56VYW3cdRgVtGizOVVFIQDApTEB2q95OOKYYXJIAq3T7EKr3KTRjOABTfLOPu4NXvIfPQUvkt6UvZsr2iMxo2HY/lTdjelawt2PanfZTip9i2P2qMcIxHSnIjbhkHFaZgYHpTPKO77tL2TGqqKflHJx1p4jzV7yMkYoMBAzg0KkP2iKRhB4pfJU8mrPlMO1BjYDIFUqdhe0K6wgHjpTtgGKm8s4zg1PDEGABFWoEub6FUIxPSr9tCVAz2qWO3XOcGrSQnIJreELGLl3EiHqOlTqfypyxU7y8HmtyHqIW4GKN3NJgDNHFAgDc4p68nIOKaMDk04dBQBLkY70xiOvJoUZ60oTHqadhkL4PamEHHUgVZKD0pu3HGKLBYrEEjqKawI6nip3AzyKY56HrQ0BA2aYRUjYJJpuRUsaGkGjFLuoz+VLQAA9KXFJkdqMmlcBaXHamZ4604ZNMBw+tBWgAk1Io9aaC4xVyeKkWM09Ripl207CIVhqZIalUgU8HNOwxqxAVKiUJzTweaZDY9Fx2qUKMVGrU4NTuK479aduAFQluKYXpXC5OWGKYSD0qINRuouK5IM1Ki+9Qg81MjE0rjViVF96lTioPMwKUOQxB60F3Rox4xUy4qpEcqKmUmlcslOKaWx1ppzRgmi5Iu+gNmmlMmlCkdaLgPFOApFFSY4piEHFOH3ab9KCcIetK4D1NPJqEk8Yp/OKlsB+aM1FhqcFbvSbAfmkpQjGneWam4DRSiniM04RmkAylAqQR8U9Y6BEQXNOCcVMI6eI6QEAWmsv7z8KuBKYY/3hoQFdRgMcUm/Bx3+tWxH8jVatbu5t4vLt5BGp6lVGfzpNvoCSe5QRJSMiKTHrtOKkEcndWH4Vcae5lH72eR/qaQKe5J+tSm+pTiuhXCt6mpFQ+pqYJTttFxWIglOVKlC09VpXGkRBaXZ+NTbaUL7UrlEQWlK1MENLs5FBI2KIu6ogyxOBXRaf4S1C42tJEFQ+9ZFqfKuI5P7pzXdw+LFigUeWGIHrXJiJ1Y6U0dFCNN/GypJ4Khjt9zsd4H4VyF5Zrb3Dxqc4rrL7xhPMhRLdVBHXNcvI7TTNI/U1OHVZa1B1/Z7UyqI+aXy/arIWlCV1XMLFXywMU7y/arQT1o2YNFx2IFipwiqwBSgUrhYiWMCnhBUgFLjFK47Ee0Uu2n96Q0gsRkUgXFPx3pSKdxkLCoytTkUbadxFfbSFKsbaQpTuFittpNntVnbTSuKdxFcrTGWrJWmMtO4rFcrTCtWCtMYU7gV2HFWLdh9mWKUna3Q91PrUTDFWFhaR4YwPT8qmptqCv0MbxVq8vh3TUuJ7VLuJm2geZggeua4aT4i4kXbpiiIHJU3GcjuOld18RLaKbwtJbtkFEaYEc4wa8MYLz++GPZa4vaPobOKT1O11/WJLbxO2qaaNsMqpdQwuSVAK4wQO2Qajm+JevSJiL7NAP+mcRP8zWReiNtI0SWPcSYZInLdyr9vwYVgZjUkMXJBI61lGTsazVnodHN438Tyg/8TadQf7qIP6VnP4j1tyS+rX5P/XwR/KszMf8AcY/iaCV7Q/nRclDri6mnmM08zyynq7yFifxNXEbfGreorPLHHES/lVu2JaBc9RxUyNYb2JfzqrfgEIwXJzg1ZOKiuFD27YyMc1CZo46FI7VxvOf9kcD/ABp+xyOQsUZ9eP0/xoDrHxGACe/U04QyuN7kRr/ec8/lVmQzEadAX/2n7fhSAvLwoL4/IVIPITkAyt6twPypskzSdTx6LwKkYnlgH97J/wABTn9aPMVP9Uqx+/Un8abtPc4oCgdBSKGksxzySe5pNn94k+1PJzwOTUsdvLIeF2j1NIVyEKB0AFAyxwgLH2rQjsFHMmX+vAqfdHCpBKr6AUBzFGOylf75EY/M1Yjsok6jefVqHux/CuT6mq0szvwTx6CiwrsvmaKJcFh9BVeS+/55p+Jqng96XHNACySySZ3sSPTtTMVMsEjc7cD1PFKYkX775PotMdyDFSW8EtxMkNujyyucKiDJJ+ldL4X8G6l4kYvawCCxTmS7nO1FH1NeneEbC10mM23g6zW6v/uzazcp+7T18sHrRYHI5rRPh7Z6Jbw6l46uDFvwYNNh+aaY9gR1Hau2Wy1PxBax23lf2F4fXlLC24eQesh9/T37VvaL4Zitrlr2+ke+1J/v3M5y34dgPYVq3d1FaodpBYd/SmhepS07S7LSLQQ20MdvAvIRBjJ9fr9ap6lq4RCsQwOnHcnoPrWTd6vc6ndNbaNbvfXAyGKnEUf+8/QVgXcy2GrRYum1jXVP7q1tFzb27dNxP8RFUl3Jv2F+LNlax+HoIpJGk15XWYhMEQqf4SfUiua8Q2Unhr4XxW025LvUZvOkU9V44H5Dv6mvSPD/AIUOEvtfHmXRbzfKZt2G/vMe5rgPj1deZqFhZqeFBYj3NS7dClfqea2SbbZfU809wamVdiKPQUxhWJV7lZhgVEwqw4qIigBgFBFOxQFLMFH8RxQFz2T4bxRaZ4OjnkJF1MzzxKR3Pygj8B+tXNCYw6tFNKTJI7fN3JJqQWLW1hEHICWsEVuPdgoziuj8NWQitTcOg3vwhI5A9a6Vojm+JmP4lmEupmJFL+WNp9j3xWHrV5/ZfhnW9QMhV1tzBER2d+B/OtO7ikg1K5WRstuJJ7c1xvxeuPsngyxtlcBr26MjJ3KoOD+dKbtG44K8jxZQGmUDgZqKQ7pGb1NTx/KHb0FQY4riO8bSGnEUmKQyruA6mguAOtQEufYUbPU5rGx1Dml+bA5prBm5PArU0zQtQ1FsWlq5XqXb5VA9ya27fw/plkofVLo3cveC2OFB92/wppXFc5iwsLm/nEVnA8sn+yM4+p7CunttEsNKy+rSLd3ani2hbKD/AHm/oKnudUkNsLayjS0thx5cIxu+p6n8azWB/wCWhpWC5Z1HUZr7YshCwJxHDGMKn0H9aggYRnt6g1AWGNyDK5waTPZicHoR2qloG5ankXd5gIB9u9R+bsOAOCMj0zUR+Q5YDB6+hpcADDHKHkH0p7isPDFlyoAYHke3tTHLAggnaaeuRjAOfUU9lxgYADdj600gbIgueQSfxpQvsKVEyTkgY4NWFVOuSfoKaQnIrbR3AP4U7YvoPyqx9FNLuA6xj86dkLmK/lhs8fpTdg9Kthh/zyU/jTvk7wrRZC5vIpqMEg9Dx16UoyFIyQynP/1qsFIz/wAsyPoamXS7yU2YWB83h227HpJjjijlHzFHHzkZJRv0zTlBAHfjH4inNbzIHJQgI2wnHQ+lNbzEZhIhBBB6dKVh3QK52ZI5zg4p+7JKnnHODTNwyQAcHt6U/I3Kw/HjpVWFdDXVXwcD2xTdjZ4Yj61Js+UrwcHtSqpFXFEsaodeq59wacGUnGcH34p6570FVYcgVookCbfalEeRQsbAkoTU0AfIBU1tCDZDdhggJPTNPS3ZfukgenatK2iDDp+FXVtMnhTXZCiYSqIx41YA5XAYYzg9KSGwfzP3LEZ9en41ui0+bkZUdqPs+zkd62VBGbqGL5IIbehXBxuA4zSi1ZRwAV/MVqtGnIfPPYUrBA5ZQUXHAHIp+ySFzszkhDHEiAj3Jz+Bq7bq9q2+ELIAOFkADj3FIxBAypUnpnoaikLAAZOB0ocYoV2zT8231F4hcHy/J5EZ/iz1yah1S1juQZLS3IKnDGMZX8aps8TJ8wyf73Rgf6ipba6urFN0ZLW7nr2JrNpdATtuVop5bdGTcfLYYKEnFVpEh4IkYg9QR0P+FWdQlW8lEiIUUD5uOM1RkBB+bg0Jg0OZGjO4dPUUrzGRcEDJ79zSRMwU55XsKRk3DcnX0pcw1EYQCR60k8Uivtlzkcipi4ZdrDHqKRlLEckn3ppNg5JFYJg1at5ADtk6dm9Kels7dBj61KLPpySx7DvVchDmRyBozyMrnrVm3SPzAZQxQjB29R71HAM5SQcjgVO8ZaMqvDdRWiitiL9SpPCgYlGB57UR8VKIwg+ckkdhUTDBJXgVotNCH3HOoPNQnGeRTy+OtMbB5FDdg3FyP7tG7IGOMVGT6U0msZ1C4wuSFsU0uTweRUZbI5qGQkHrWLmaqCJnYAZqSzIEgZiMD1qiz7R1yfSpIJ0H3uGPtUSk2tC0jQuMSKdowv8AePFZ1wmFJAwB0J6mryybvf61HcR71INZqVgt0MyjH407YQSO9PRBvGa1MyNuFA/GgjAAxg05sF+OcnNO27iSc07DIsHvSHg1aVai25JpqI0RAVIi81KEFPAqkgHxjC1ZtynAOM1VBx704GtYTsZThc2YgvYCpjGD0rKguCpwTxWpbuz4wCa6oyTOdpifZz6UpgIxgVpRRgjlTnFRygAZxirUULUoGMdMUhi9hU7YJyKG4HNHKguyERetO8k+mafvFNWTrjiiyGN8jPWg230qTzfl5o8ypshjPIAGKa0YAxUu/NKOemDSsh3K3lj0ppQYIwKsnPamsvrUtBcrFBnI7U6MDinEYzRGMHFQlqU3oWIRzVkDHaoYeMZqxkYzW6MxM8Z54pCc88mnDmgjHrTAj78UFSaccdutJnGeadwAKe/UVIg5yabvGOKTzMdaBky4+mKXeOgzUHmY696aX4680XEWC4xzUbt8vU1Dv9TzTTISD60XAc7DnmoGYY6mhue5pp9BUtgJ7+tNNL6ik6VDYxCRSZ9KQjNKBipuUKDmlz60KOaeFz3q0Q2Cj6GpFGecdaIkLHAxUvllSB61aEM2jFOC+tPVD0xmpkjJOcVVgIlX1NSKvHen+VmrHl/Jxn0pjIUHFSAU4L2xTtuBTE2ItLznIFKq9aljTJpE7jAMjIp4X1p8alW2ngHpUwj5pNjUSoUJpDCa0Fi9qlWDJ6Urj5DLWA4qQW5Nagt6kFtSDkRmLBT/ACtoye1aQgFMki/hA5oKsjPii3OWI4H86eI/nbjvWnHbbVAxTfI/etxTCyRDCnyA9qnVB6inCE+lWY7QDBPWkwK20eoo+X3q+LZccjrR9lUdjSugsUcex/KlA54Ga0BCMDipRAP7tK4NGcqn+6KftPQL+laItsjgVIlrx0o5gsZaxP8AT8KR4m6HmtkW3FNktvmHHahSuDRkiHpU3k5rQ+zdKl8j2pNiMwQinCH2rQ8n2oEPFK4FERe1OEXtV5YPapBBU3CxnCH2p3k1oiCl8n1pXCxn+TTli46Vf8mnCGi4WKSxe1OEftV0RU4R0rjsUvK9qjMfzmtLy6BEPSlcLGeIztNPWI9xzVxoxjpSiP2p3BIrCP2pRHVnbShKm5ViuI6cEqyE9qULSuKxAI6cI6nVfanhQOalsdiIRDbknB+lIE9qslenBo20kxtEASneXz05qdUp23kUXFYiEdOCVNtoxSuUkRbOeacEFPxzSgUrhYaFpcU/HFGKVxjMUYp+KXFFwGAdqcBS7acBRcBuKXFOApcUrgNxSFc0/FLii4yLFJipCKaRxRcGRkUAVJijFO4iMigipMUmKLgRbRSbamxQVp3ArlaaVqwVppWmmFisye1RFOauEUxlppisUmTJA9TWlaxgzu+SNq4H1PFVQmZUHTmr2nsryzoo5AA5781lXlaJVNXkc140KG2urVQWmWwdh1znGMH614MQrElYCM9lU4Fe0eMbtRqOvrGrO0NqYlOOQSMnn6ZryWa+unmkcw7GY5KhMAVypaFSfvFmTzjoOk+bjy/MuBGO4H7vNZCRysX2QkjcefWteVp5NI07zyNm+cxjuPuZzWXEbk7hGSF3H+LHepRpJ3E+z3R6QgfU0G2uscrGP+BUrJPn5pF/76phRv4pUFBIht5h1eIf8CqSyU4dSQTnORTNgHWUfgtWNJH72XJzUvY0huKUxnimSr+6fH901fdFyarXSBYnwf4TUGtzLjm8pAIlCt/e6mmOXkbLEk+pNAwAKekckn3FJ9+gqzMYAO/NGce1XYrAn/Wvj2FWkhggGcKPc9akVzMjglk+6hx6txVuPTxkGVyfYcCppLyNfuAsf0qrJdSueDtHtSHdlsRwwDnan86ie8RBiNc+54qkSSeTk0oid+imiwD5LqWT+LA9BxUPJPNW1tCFzIwUUu2FOmWNAXKyqW4AJqVbZz97Cj3qXziPuAD6U3LN1JoATyYk+8xal8wKMRoB70BK6rwp4KvtdBuZCtjpicyXc/yqB7eposFzmLa3ur+5S3to5J5nOFRBkn8K9C0zwFBo0sEniXdc37/NFpVr87t/10P8A/zxXc+GtCjtYxB4Sge2jZdsmrTp++l9fLB+6Peuy0rQ7HRY3dF33D8ySudzu3cknmhuw0mzAt9BvNXjtxrXl22nRD93pNtxCvoWPVj/AJ5rpYIYLWJIoUVEQbVRBjA9hUNxqAVgihnkb7scYyzfQVnaxPDp9uX1y7e0Mg+SztmzO/TgkdOfSgei2H6prAjmFnaRyXV63At4BuYH1Y9FHua5rU2tomH/AAk12Z7s/c0fTWLlye0jDk/QVo6dpGt6tbtDaxDw5o7kkqgzcyg92P8AjXU6D4X0nw/Gxs4AJW+9NId8jfVjzQ5KOiFyuWrOQg0PW9btTDdlPD2igfJY2WN7D/aPr+dbNjY6ZoURh0q1jhJGGYDLN9T1P41r6pdMw2R8Cs+3s2lfcRSvdalWS2HhnlIz3r58+KFz9t8d3CA5SD5B+FfR8sIt7aWVhgRoW/IV8tX0xvtev7snIeRiD7UN6aCehWcVGwqw4qJhWZKZWkWoWHNWXGaiZaCyEitjwbYnUPFGnQbQyiUSMD02ryf0BrLIrvPg9prXWu3VwEyYoSqN/dZjgn/vkmqitSZPQ9BkYXIWNgVUytJn2PHSty51KO3hWK1Us6/KAeAvHWpLmC0gWE7PMkUBU7AjsTWVcxBbiUKCTu710bmOxn+S0kxaZsvJz715P8dbrPia309SDHY2yIMf3m5bPvmvcbGA3V/brx5aH5uOgHJr5j8c6idV8UaneH/ltcOwHsDgfyrKs9LGtGOtzCbi3HqzfyqLFTz9UX0UVEa5TqRGRSYp5FIRQM249B0a1wdR1SSUgcpbRZBPpubH8jUtpcWNqki6fpcRB4E9yfMf6gdP0NRQae0p3zHJ9Owq20KRJgYqVTe7NHU6IiuL+7u0Czzu6jonRR9AOKqudi/OwVaS4uVVikQDP+g+tUmyWy5LP6+n0pN20RSV9R8szHiIFF/vHqaiCMDnPPqTSkU9FZvlAJzRuVawiLuOUIDdwehpQODgfVfSrP2VIgGnf/gK0rDqwTy19TyafKTzFLdg8Z/EU5VZwflwfXoKtIhcbokwf7zd6Y0ak8uXb26VSj1ZDlfYjRSBgyH6KM1NCpDhvL37ezng0kfy9Mfh/jS7yxwgLH2GaegWZMdpY7UVU6gddv40cE4ByfbmmpDM5GQF925IovVSCbZHK8q4+9t2An2FFn2DRbsmUYH3cf7xxUTuoJGU/MmqbStxwB+GaDLIe7fhxSsw5l0LgYEcM34IeKuwaZqNxEHgsNRmRhw0dsxBHsQKxCXYck/nW5oviPVbKJbSDU7yGAfcRJWAGevFUlfcTn2Q4aLq/wD0CdVP/bo3+FOkTVrMQvNFqcAtiTG0kTKIieuM9KvHxDrWCRq9+D7TtWLqWuateRGK81K7njY8rJKWB/Cm0kHPfoPW6k8vZ5suwyeaQVBBb1PrU8+oyzXlxczeU8k/3y0WBxjoAeOgrDXI/iIp6yP/AHjSSDmNWa8immDva2gG3btQMo+vfmoY0jYxhlKjneUcHI9hVVHZupzR5oJ+6DVJC5kXvIhJkCOy7OY1dOWHpkcU1QrcFQD/ALJp+mRRXMhSS7S0b+Ey5Ct+PatObRL+NS6RxXUXd4GDj/H9K2jFk3TMoQhiNjZ/3uKTyGGSQQP0qwBhyrxMp744x+FWIEG3O4/j/hW8IJkttFSKFumOtaVrb8jjNSwxDJJGcDr0q/EqgAA8+9d1KmkYTqX0CK2jGMgZqxgQqSDkdPeoWfaPSoJJOAdx47VvzJGNtblrzVwF5DH14zUMsg64yBxxUBYOcsT14PpQQUBUZbvk8VDkFiGVsk9ieeRUGXByvAH41aC+YWIIB6bT/SmtCd23GD61DbZSstyuuJioYMSOxz+lMO+LO4bk+vIq99nwMHkdfpUZQg/dJB9aLCZUZAygpgj9RSRytG3Yoeqno31FWDDxuj4pm0N8rDDetZuLBNDVg812ktCsT4JMLNw3+6eh+hqEqswIVCJB1jPGPp/hU5gKtyPwqy6JckCZiTgASn7yfX1FCixPTVGcEG3IycdRjkH0NKsRZs5xjqR29qvSQtDLi4ILEfJPHyrfX1pRC5xuXA7Y6H6VSp3F7TSxVEAlGSuGHcUscfluNwziroiHTv3NSeQXXDZDdj61tGFkZttu5AQRyuCpoC55GR71LEpjJR+lWooYzlWO3cOG9D2q1C25D1KN0BMRIQqy4w2ON3v9fWo0Jfj+MfrU0kLrIyuMMOKiZQMYOWHWqcQQ2aNpAXVSWH3gP51XEZPLEAe9aER3AOnEg6+9QXUe471GFPUehqLWHczJ12NjII7Go93GKtSxZ4FVWUqSG4IrKbZUVqIT271Ys7RrssUYAL1zVdT2rU0I4uHU4AIzXPNO10XOTitDLuoTBO0Z5K1BOp8pWB6nmtfXEX7WGUg5XnFZ5UGFlPXOalRurlRndGe67aspEmQcE4p6xbmGRV2K3wOamehpEgSPn5anI45p7R7eRSsu5CR2HSo5b6hczJY8O2BTSuE6VMcs1DKOldCjoQ2QJGdpJHsKeEqUjoPSjAp8ouZDBGzD5RSrAT0qWMkOvpml+7cH2NOzC5GsQB5YClCICOTj6USD52+tAqoomUrInihheTCkmpEhUSHEeQPU0y1KiZfc81ovtVzjkVtGCvqZObGIFA4jQfhVmKfYQBgDIzxVYsO1NHOeOK1do7E7l+a7ZJm2NgY4qUXH+jO3DMBnn1rOuAMIeeRU9ploCuBkgjNRKeg0Na7Q/eiUnvgkUrSQvzudc9sZqiFPSpUHFVzMLImMbl0CMGD/AHT60jQzK2ChP+7zU8QxHbt3D4qKcGO5cKSAD60lKTY9Bg3DIIIPvxTsFulSRzy5wWyPcZqUTKR88QJ9RxVK/UWhAqkdc07IHtUrGFgPvp+tJ5Kt/q5FP14NPmAiySetHOakaB1xkZB6Y5pDGyn5gQfene5LIwAacEFSBDilEZ70WFcavTmnAnPHelCHOKcsZ7UAPQ4z6U/qPamqMCnKtUMYw546U3bzx1NSlR9aCuc9qAISDnmkY88AHtUrKevTFIUyOKBEPT6U0j2NSlT0pNpzzQBC3THNJzkd6mKdwaVVz06UARbcnHSk2n8qsBM9ulO8vjpSsBSKfN0pu3j0q40Z6U0xZY/pUtCKmw5OKURnNXPJ+XmnxxY6imohdlRIj7/lUyxYOcVbCAcU8R+1WoibKywkPlfrU3lbmBqzDDuNWorU55FWkJNvYpJCR2qxHbkkDBq/Fa88jNXYrf2plWfUyhan0pDblRxzW8Lf2pwtAR0ouFkc55DddppBC5/hNdMLIY6U4WXtRcOVHOJbOc8Gp4rV/SugSyA7VKlpjtUtjSSMBrQsvIPFPhgJGDnNb/2X2qN7Uq24AVNwuZqwe1TLF7Vorb5AIpwt/alcLlARe1L5Z9KviD2qQW2aLgZhjwCcUQQHJYitI225sYqwlsAAMUOQGcsPtTPI/eHitgW49KQW2JDxSUhmWIDxjrVxYDnBq0ttkDtVtYAD+FTKQJGcLf608W/tWl5QpDHip5h2M8Qe1SLCKt7KAtK4yBYh6VII6kxQKVwGiMU1o/m5qYGmufmoTExpiGBxQY6lPalIouMrGOlCVPjmgLRcmxGFp4UYp4WngVLY7EW2k2+1T7aNtK4yDbRjFT7KTZz0ouFiMClxUgSjZRcViLFLUm2jbRcZC44FOUcCnSDinqnyik3oCVxm2jbUoSnBKjmL5SLFKBUoSgLRcOUYBT1wOwpdtOxhaVx2F3cdDTWOaenOM0OvNJbjew1akUUiinqOadyRCKTFSEUmKVwGYpQKUCnAcUmwExRinAU7FTcdhmKAKeBS7aLgNAoxTwKXHFK4WGgUYp+2lC0XAYEJOAK0LXRru4AZEGPc1XiG1wT2rpLHWI4IQpPSsKs5xXumtOMW/eMtvDd71Kpj61XutLNuh8w4at6XxJ1CJmsPU757xsniopyqyfvF1FTS90yymCQKTbUoXFBFdVzCxCVoxUmKMU7gMK03FS4ppFO4rERpDUhFNNO4WIiKaRxU1Rt+FUhEIHzgnGACTV3T721hiu7uaRFgRgpLYHQc1nyXEcMbvLIiDaRyfWuB8X3LS2kVujAK+6QhPU9M/hUTh7T3RxnyamnrMzXEesahbpsjuLWeRDk52gHDY9zXj0t08ztJNLI8j8s2Opr2vTYFm8PacZXjEUlqlmxcgcNJ83PtmvLNXjtodW1COJ4/JSd1TGMbQe3tXPtoEtdSjDFKLKF5A4ife0W7OMArkj8azVYgsAjH5jXYa4y/2H4bVcY+ySn85f8A61c3BNEqfNycms0ayVtCqBJ/DEaXZOekAq8buHH3ScVG96u7KKR+NAiv5V1/zzUfWpdN3I0xkwDTWvWzjHNJbOWWRjwSamRcNWWmfk4NRTt/o8v0ppbmmSt+5k+lSjbl0C1giSNXcAkjv2qR7uNBheSOwHFZyCSQAKC2KnSzkPLECqMBZLyRvu4X6VXLM55yx/OrqwQR8yNk/Wla6iTiJBQMrR20r9Fx9anFqi8yyAe1RNcyMeDgH0qM5Y80AWt8Ef8Aq03H3prXDt0wPpUSxk+tSrHjripGR/Mx5JNPVKkCingGiwnIYI6t6dp9zqN3Ha2MElxcOcKka5P4+1dP4X8D3mrIl3fuNP00kfvZB80nsi9Sa9f8L+GTZWfkaZbvplowAeU4+1T/AFb+AH0HNDshJORxfh3wFZ6TKDqyLqmshd62MLZhiPbzZO306+lei22gNclJ9ZkSSNADFaqu2GH2Ve59z+lX41sdGhEVvEi4546ZPUk+tJczTPbtcXMsdlagf6+fgf8AAV6mle5qopF5riG3hJBWNeg9WPsOpNct4h1K4hlU3cqaXprDmaT5rhz6JF7+p/Knac19eX0k3hy2diy7Dquo5wB38tOwyB0xXQaT4Vs7a7+3XzSalqh5Nzcc7T/sjov4VN1HcqznojA0r+1r23WLw9aHSrB+H1G8GbmQc8hPx7ke1bmheFrLS5jcZku75iS13cndIc9h2A+groyuDzyaZM6QxGSZ1RF6sxwBUObexoqaWrI5D5a/LyTVG6fbE8krhEHJZjgAfWlj1D7aD/ZsDTp/z2cbIxz6nrXOeIIdGskN14q1Q6k4y0dkrhYQR/sjjv1NEV3FJ9ijqOvoVnbSbO41N4QSzQoTEMdfn6H6DNc/4Y+KIOrfZtctIre2c7Y5YwflP+1mteHxF4h1yFrHwrpC2tkTs85U2Igx3J/pXE/EDwjd+GrS2v8AUTHdtcyFZtgIVCQSPqeOtaaPRmOq1R6745v4rbwTe3dvIjLJHhHU5DZHY18tWKZhZz1c5r17xfcNY/BrRbckhrhQcZ5APSvLIY9kKD2qbWVgnK7K8i81A4xVuUVXcUEFcio2Wp2FMIqS0yHbXtnwNslg0O6vNhLyykA+yjA/ma8XIwCa+l/Bll/ZXgrT4Ny70h3OQOrNz/UVcQbuW/syS3oVz8xBznt9Kiu2iMAjjVQd3L4wTirEUJto3uJSXuJF2hj2+lU7ZA8438gHmtSClr95HpHhfWdTgJ8y3szz/tsQox+dfJNxl7ltxy2ck+/evoj44X5sPBNraREq1/dlj7pGMnP4lTXzsclix9zWFR3ZtTWhFJzIxHrTCKkI4pprNmozFIRTzTcVJR1DyeXHk4C1i3V21yxVCVhHVu5+lJdXEl5t5Ah7he9RFQBx90dAKmU+bY1hTtuKAAMKNq0oXNKnOAOSa0o7aO2i3zctjOD0FJRuXKSRSitiRubATux/pVqBPl/cgBT/ABHqanWJpRulXAPRT2Hv/hUsrR26b5GCj9TWiiYylchjgXO48t6moZ5o0Yog81/QcgfU1BLcSXR6GKDso6t9aYMFSq4CjsOg+pocraIahfVjmLPzK4OP4c4Uf40xiu3PUe4wPwHeln+Rd/Eno3YfQVUZmclj+dLlfUOZLYkkm9Bn68D8qvWtysiBVAR8crWZtAoAIbIOCOlUtCG7m0OKjnTzU2kcjofQ1DbXeTsnxnoG9frV0qMZHQ1drkXsZEiHBDDGOD7GmqdwOfvL1/xq/coH+ZVywHzD1HrVKRShDLyQPzFKwxmeOaMdxwRUhXIDL0NNxiiwGlazebGCfvLwaS5tRKMrwfSqUEhhk3DkHrWojBlDKeDyKaQXMtomTCyLg44PrSKuOTwK0LvOEbJxnBqnjjGORwaLBcSM8kdqVEw204GeQT0NNAIFSIx27WAZeuDVIlgFIODkVc0+OQSh7eR4nHIaMlT+YqOFBKdqcEeta9moiQBR8xrpprXUiWxLDYXl7IXeZ5GbkkjJNaKaPdRKMoT/AMBpLK7ltJFZDlD69jXbaJrFpOoFyBmvRp04WOdybOIa3aMkNlG/z2ppZsZOOBj04r0y407TdSGIwoauS8QeHZ7MlovmU+laci6ENs5xW3DGRnpycU9kLD5zgdOAKj2sj7ZPl5wcjoPWtO50y6sYkmdA1tJ9yeM7o2/Ht9DU2tuJO5QCrsVVJyeoI/lSc5xjr2zUxVGAxmM/mpP+fSgq3HmKD6MDx+dFuxV+4BEY5OCR0zwaVAUJ3IWB7+lKVBxg59jUqblXn6Ux+g3aDwudveozDnnp6VYEec7eD796kCbjgAhsZwapIlvuZ5iK7ivftjg0NCr9sNV4pSFAfbvRykvTVFNI9vyuMr/Kni3wcr26GrOznHXNPSMjkDiqUSbkMag7laNGVusZ4B9x6GmmDyF/dlntm4KtwyN/nvV7yQQCMfT0qSMFGyTyeCTyCPQj0qlAT1M4R4OQN2ehxSmPuc59a03t1G54VAxy8JOePUe1RNErrviyRjn1FOwX6MzZIvMGQMNTI2O3Y+eOlXwNzbUxnt6mq7xEuQRtPQ7qLdxN9iOZWljUZyy9D6j0qkIzzkYx68VpOpWIE9j1qC4LT/M33/X1oQMpNhGDI3IqUPuUsADn7y1GY2POMUgQo2QeKl6giOdRn5funpVV4QQSc8etXQcbsqCD0HofWmeWW6ip5LjTM14zjpgVNaBVmUzIxTvjIq75Q9M0GIZ96l0wbT3I7wQSBFtoigByc1DDb/M6uO1WGjI68U6IYcMfxpezsrCvZaFG3hw/NaMUO87QKgZcOSPWrtpIQQR2rGpT6pFxmUbpSgPHSqhmAQhep4rZu0DsSBye1Zc1mVBY8e1RGHRlcxRHBzSjk1L5JJ4FSLAQorZQZLncgxk05UyKsLDjrUioV6Cq5SLlSOI7gcHFSXCHzgQOvNTMXxwaSdW2IwPOME1Li7lpohmhLOCuMECm/ZmJHzL+JqaZS0aNznvTYlOeacYhJkiWYUhhLj6CrTxgEM7Hkdh1pqDgVdaMPEmOw5rVQM7leJYT97cSKkRY8n5P1p6257VMsHPStVAm9xkhCwhvLXjgA021Jd87VGDjj3q2YN0OBnIPpSWiFZCoHoah01YpMznih3spDowPTGRT0tlbPlyZPowxV+4gzcMTTltwOgqlT0E2VBbstq+SCA27g5xRewN5wcKSrAHIFXFjIWVexXOKWffshdSVJXHFTytMd9DKCfNjpT9mRitAM/G7B/CnqseOYh+BNVZi0M5YzjpUiwZ6j8a0RHCe7j8KlW1yhZWBX1o2D0KsEeI1Jydrj8qfKHWZweee4q2sTJCw4PfI6U+6QCUnaeQDmkkrj1sZ5CnlolP0OKWaFVKFRgMu7HpVnYpjySeuOlWBbrMseXwduKp2QldmUUpNvarslu6HDL+PrUezGM099hXtuVgoFAXFTlR2FJs5osLmIsc9KQKc9qm280u2mHMQhaXbxU2ykK+3FArsgZP1ppXmrGylEXelYdyoUJ+hpwQgVaEWe1KIvanYd0VlXA6U4KatCHnGKkSDinYTfYomM+lPEXtWgLfNSpbZPQUWQWkZnkH0py2zE4rbitMjgVZjsunFMXKYKWbdqsLaEda3ks+enFP+x+1O4cqMaC2xzir8VvkZxWhFZ+1XYbXHak5D22MyO36cVYS3PpWqtqB2qRbcelS5gZqwe1Tx22eoq+sGDUyQ4qXMopJbe1P+zD0q8seKdtFRzhYorbgdqeIRnpVsLzSgCk5DsUzD7Uxoc9qvECmnFCYWKCw7TgjipRB7VM/SmLKOh6073ENEApWQKKUy1FvLv7UICSOMDk1KAKjGaeoNJjQ8KKCBvoUGkZTu/CkMXjb+NTA1Dt+UfWpccUmCFJppNKRTCKQCE0m6grzSbaYC5oBoC0oWkACmuTuqVVpHA3ChAxueRUuOKTaMip8Ck2FiELTsVKMYoyKVwsMC4FKBS5FIWoAXFFJmjNIYtL2pKTFIBaBSYNLQITFLQBSigLDHHAqdMbVyO1RsOlTKPlH0qXsXDcULxRinr1AxTttZNmyRHil2inYBFIRg8UXE0IV4oAGMU5lAFCimnoSwCgEYpCMmn4OaADmhMTGqKeq80AU9BQ2ITbRipdtJspXCxFinBadtpwWk2AzFLipFSnBKm4yILTgtTBacEpXAhVadtqYLjtS7KLgQhSaULUwWjbRcZFtoK1NikIzSuBARzSEVMUoC07gQ7aQrU+2k207gVytNxVkrTClFxFcikIqZlpjLVJgRkU0ink+1NJ9qpCI2FZHiK/Gm6ZJcMCTwo+p71sMfauQ8f3Ef9nG1JG8kNjvxzVxJlsea3VxNK5aWV23EtyxPc1FJcSY+8T+NTeWXijOOcH+ZqJ4wv3qxlUaZKidjb2/9rfDT7NFkz7yB7tvGB9MGvK3DKWXgYJFenQancaH8P7W6toVkle8fbnnA245/E/pXmUjDDMeSck1kWzotafGk+G09LBm/OV/8K5UFiMiuo8SK0UGiROMMmmpn8Xcj9CK5kEBegqI7G1TdDOTSHPrT93sKTce1MlDOfU1atf8AUfU1XLN71Yg4hGfUmolsaU9ySmyf6p/pS02XiF/pUHQ9hqXQjQKiDNRvcSv1bAqMAY5P5U9Vz91Cao5hgyx7mniM98D61KkMrEDpUy2mOXbP0oHcrAIO5NSr/srVlYokHzYz71J50S/dUn9KAuQRwySHgGrMdix+8wFNN0/8IC0wySP95iaViXIvW1kktxFDHh5ZGCKM9z0r1nwP4Hs4Lt2mRNRvoeGGP9HhJ9W/iI9BXjaKc56Y5zX0H8Il+xeDYcBnlmZpmJ4Az0LMe1KWiHTs2dbbaZa2cwur1xcXYAAcrgJjsi9FHXpTzetOJJIvLjtk+9NK4RB+Pf8ADNYN3qJvLprfSrZtXujw2DttYj/tH+L6c1q23hafUCkviW5+2suClso2wR+wXv8AjWb01bOhXekTOTUGvJXXw5ZjUbpet7cgx28Z/wBn+9jHbNaNp4YE12t5rtzJql2OVWQYijP+ynT866ZIoraIKgAVRgADAFZt/q8Nr/rHCZOAOpP0HWo5m9Il8iWsi+QFX5jgDoBQ08cMZeZ0ijHdiBWBcXd9JEZHMem2uP8AXXXLn/dT8O+ayv8AhIYXkEOiWFxq96v3Z5RlQe5A6D6Ucgc51bXU1yp+xRbE/wCe8/yKOnQHk+tcdqmuaRpl4zTTz65qGdoj6RKf7qqOD+Oaup4S1zXZBN4i1JoojyIIDkj2z0x9BXVaF4Y0vRubGzjjkIwZCMu31Y80uaMR8spnDfZvFvi7aXUaRpbHAR+GA9l6/nit7RPh5ounMJrqNtQugc+ZccgHHZemPrmu228VRu9StLUlWfzJf+ecY3N+VRzyekS1SjHWRKiBFVI0CIowFUYA+grzr40SteadY6BaqGudRnVPu5KqOS34V0ut+LYNKt3ku1WJiP3ULNmR/qOwrM8J2tx4g1xvEWpW3kokflWkZ7AnJb6ngVUIuPvSJnJS92J5l8bkFp/YWkI5KwQgEfSvOnTHHYV2vxZvBqPjycL9y2QIOfxrkJVrZ7HLLdlCRarSrir7rVV0yaRJUIpuw1ZKUwiiwrkuk2rXeqWluoBMkqjHtnmvpVLaZ9PihTCRhVzngnHH8q8S+FmlnUfFkTkfurVDKzdh2A/Hmve4Zd8iwnAJXKe49T+Yq1ohx1GyQmaFEUdDg5qrLbiKZ1Tpnaa1pYikWIyC4weRmkWFBl3HAOef1NJSNOU+fP2jNSEmv2OlofksrUMR6O5yf0C144y4jz6nFdT8RdU/tnxlq96HDpJcuEYdCinav/joFczIMAD2zWbNEQEU01IRTSKllIjxSYp5FNIqRlsbWXONpHAK9DTWA/iH4r/hTsEH5SKapUtluEHJ96zSOpuxNYKkUgklB/2Rjqa1ooGkl82cc9VXsPf61StZ0hC3MudpP7uP29anm1SWGMPcNvZslEIAP1NaxS6mMnfYmvrhLOPcwy5+6vrWLIzyuZJzukPIHZRSs0kr+fNl5X+6PT/61OICRkv3OW9SfSplLmZUY8qux0EMly392Ppu7mtAW6pHsCgL/P61kQ3k0b5Rvl/u44xWpa38U4Cv8j+54/OrgkZzk3sVZYGhyEBeM8lT2+lVntm2GW35Q9V7iugWMbwWOBVe6sm85nhwjHkY6N7Gr5TLmMAAMuV7dR3FJitCW3WXJX91cL1B7/8A1veqm3JKsAsg7ev0pOJSlcjxVy0ujGNkpJQdD3H/ANaq6qM4PFP2AgY60LQGauzd8y4OehqpPBsOMfK3Kn0PpUdtNJAcYyndT/StMLHdW52nIPT2NVuTexjqPLbBzsJ59jUjKORx+FOmRlYhh8w4NR89c0hjdnHNWbKXY2xj8p6fWoaAM8UJA2aM6B4XA6jkVQx82R/EM1eglDxYk4I4571W8okfKp4OBiqsK5Aww2cY704DuKkMUnUq2PpQBg88VUUJsfbt5coOM9q6OzgMmMrwa5+MfMMcnNel+HtMEttEzYORXbQp8zuZSfQxEtD1KnFTyRPtyvGPbFdkNHO4AJ8tQ3OjnBG2vRikjnaOOivrm2bKSFT7Guj0/wARbogt0vmA8H1FZ2oaY0RJK9Kx5EMZyvFNk3aNvUrW1vpDNCwVvQf4VSsJb/Snb7PIRG33o2G6Nx7qeKhRmGGHDetXYJzIpEmCKhtS0LUepVvpLSWIyxxm0uSeY1+aJuOo7qc9unvVJH/u8eo7VoXcCuu5OB6VmuhXJpctieZpk4dCoG3FSq+QOCQOx4NU0YgEDp0INWIiQDsOPb/Cpu0XF32JFPOafuzw1NXnAbJx19aNuRkciqTE13AHA5zjt/8AXp4GfSmqpHPapo4mAyuG9v8ACqRmx0ceTVoDGM4K4x9KZEoKhh0qcjIrRMSRCybDuQ5FKQHXcv4ijcEO1vu+vpTHBRg69Rz7GqEL5hXAJxj7rdx/9aopY9wZo+HHLKOhHqKkYib5kGD3FMQEEAkjHRvT/wCtQBVQZbg4PWkkyzEnOT1JqxJCTlkHzDkgfzFBXeAdvI6mgnYrr0IbkelRFADx+Zqy3HTrULKWNDQ0yCXa3ODn07VCULdsCrnlgc9aYy0hlTYB7mkK84J/AVOy568e1KEPYYosBCE454HpS7eOMCptmKNmegpk2KxQUzGKt+WT9aXyTn0pWFYoyqSckU+HYOp596tNDx1qAw4PSk4XFezL1vGpAxjBqO9tM5GPpUtgCxCgEmtn7G8kQ3KRj1rmlHlZvHVaHIrbsDjFSG2OOldYLK3tlzMASaz70wHiEYrpg09jOceXVs59oDSeSfwrTZMmozF6VTijLmM4xH0pxgLQ5x0NaCoQOaeFODUNFpszHt8xABeajWBv7p/KtUAZ5701hg5Geah6FlBI2z0xWhAvyYNRlTnJFTxjijnYKJZhhBHJA+lXobFW6sfyqjCTxzWxZtnHOK1UmJRT3EisFXjG5W60Lpapkxrlie/ataFM9quRxA4zTbHojBk06NiGB2t39zTDYgcblro5I1IwcCqcsCk5IFClbQVkzBjtSk3KkgjHSopIAbNQOSrflWtLGEbIyMVWAKKwQ8k5zipcle4+TQyhBx3qTycDkVoLvYfOFb9KdtHQx/kavmJ9mZnlY7Vbt8rbPgd849am8lP9ofhUsMS7XUng/mKmTuhxjZlSOEEMUOEYdPSpiG+Q56r6VJHCVcE8g1KVDQhkGAp5BpddS0ivs3Idyhse1LHGDs2rjkj9KmjI5FT2+3B46HNNrQEZpTG6KTJQHAbuKrywyJkAgr2OM5rcmiSVyBgMOnvUQhx8jDK+npQhNXMMIf4lzSvEAwBUgdcjmtd7Tb7jsaY1vnGaZHKZXkgkBCfxGKUwFRnIP0rTW2yelSrZ+1OzDlRjGFgM7TilELHtW6tl7VOLJSV+WgLI54W7n+GnraSHotdPHZL2QVbjsl7Ci4rI5OOwckkqfyqePTWx0NdWtmvoKlS0H92jmQHKLprHsalXTG9D+VdWtqvpUy2q+lJzQ9TlotLPofyq5FpR/un8q6FYVHapAoFS6gamLHpuMcVOliB1rVwKaaXOwsURaKKd9lWrZoxS5mFiqtuBUqxYqXFITRdhYAopygVGSc1t+HtDfVSW83YoOPrWdSaprmkVCLk7IyxtFOBFdlqXhyGy09iGDMBnJrjNnNZUa8aqvEudNwdmOyKCQKcsZNP8nitbkWK5PIpBUzRUBKLhYhxTStWClIVouOxVZahkjwQwFXytMZBjpVJiaKDDIGM81LFEQPrUgQb/AGqwFHpTbEkRKlSKlShaUVDYxgShl+b8KlyKYxG6lcBm3j8aeBxSE/L+NOU/KKGCEK00pUmKKQyEpRsqajFO4EOyjbUuKCKVwIwKjkOGFWNtRSJlqaYmMz8wqbJpgT5hU+2hiQznFIc1KBRtqRkRzSYOam20bKLjIqUVIUzQEpCG0VJspQnNA7EeKNvFTbaXbSuBCFzTgtSYpQKVwIiOlTHA5NNK5o20nqUnYchBbJ4p7sOgIqPZ7UBB6VLitylNpWHqRnqKCQTkU3bTlXFFluHMKTn1xS49jTlFOC0hXuNAGe9OCcdaXFOFK4DNtPRKcBUkYwaLjFVadsqUDPNGOaVwEEAK00RgNjFWI2waeVGc1DY7FVk7UoWpivNKFqWwsRBfanBalC04LUthYhC0u2pwlLspcxViDbQVqxso2UcwWK2yjbVjZ7UhSjmCxXK0gFTlKQpVJisQlaQrUpWlC+tO4iDbSbanIpMUXEVzHxTGhZlcrj5VLH6CrRAprEJBO56FCv4kUOWg0rs861Dxk1vM0aWasVJ5LkVQbx5cDpYxf99n/CsvxBZNb6nKpHDfMPoaxpY66U1Yw1Onfx5dnhbSEf8AAiawdR1OXUZZJrnBcjHA6Cs9ofSmyEpG3XOKOZBr1LOnRh7PcexIqnfcFhjpV2xmCWSKRjjNZ95LvDH61zPVmqeh0es3N7ZfDzSRDFEY33K24ZODv+YD29favNjExXAQknge5Neqa1qmnaf4agtr1HM8mllLVFAK73xlj6Ec/ma84t54/Ot1wT86g8e4pdCXuWvE7S/2rNHOMPDFFFjPogP9ayFjcgYQVr+KrkXXiDU51BCtMQAeuAAv9KzRdbcYXP41MdjWo/e0IzDKP4QPrSeTJ/sipGvGJ+4Kj+1N2VaCbsQ27kckUqDbGoNNa6kIIBA/CpBnaueuKiRtS3EpJRmPHqQKdTLjiMe5qFubSdkPjjij5bB+tPNzGv3R+VUOvU0oxV2OctNdEnKqBTTK79SaiVSamSJ26AmkMRc96kAqaO0kPUY+tWo7DoWb8qAb7FJRU8cZJ6GtKGxjGOM/WrscCL0QUyeV9SbwhpMN5ftcX4xYWgEswzgv/dQfU/yNe6aBoL+IrKC81eUxaef9RYW48tNo6biOTXisFq0/2WEhhDPOI2Ye5A/xr6YjkttPtre1izIY4wixRDJ4H5D8cVnVbSsjejFN6lyztreyt1htIUiiUYCqMCor28itxmVyT2jQFmP0A5rF1PW1icRT3HlOcYt7QeZMfYnoB9KjS01nUTixjXR7dvvyN887/U/1zXPy9ZHTzdIhq+qNGP8AS54tOtiO53Tt9F7fWs20ub68Zl8N6Uy+t9e8E57jP9K6bSvCOnWUouJ1a8vAd3n3B3Nn1HYfhXRBVUHOAKHUS0QlSk9WcTZ+CBdSC48RXst/L1MecRj29T9eK66zsre0jEdrDHFGOyLgUyTUIFfy4szP6RjOPqelYur+JLeyGLq6SJv+ecHzv/hU+/MtckDoLm5gtYy9xKkajuxArMuNei2t9nXKj/lpKdifmev4VyUkus65MDo+mGBO13ecsPoD0/AVoW/gF7tkk8QancXpB3eUGITP8/yxT5IR+Ji55y+FGbq3jC3kmaFJZ709PJtFIUnP97qfwqKLT/FeswEWkMGj2jdN2RIee5+9n64r0TStHsNKiKWFrHAD12jk/U9TV/FS6yXwoFRb1kzhtE+Hun2VwLrUJZdRu+u+b7oPsK6y8ZbLTp5VAAijLAD2FXcVzfxCv107wnfyk4Zoyi/UjipUpTkkzRxjTi2j5kvpPteq31zz+8lJGeeKqSLVqJcQgnq3JqGUV2s84oSrVZ1q7LVWSoBorsOKjYc1OwzTSKLCPT/gjYHZqd0c7ZAI/wAuc/rXrIC2txbyMqlGTyx65PT+Vcx8H9M+yeE4ZHALTZfPsxyK67ULZpZrNVDGMPuJHbAob1sawj7tyCSWT+1ktkUKhUsWxySawfiNrI0bwdqdzHJtlSNkQnj5yMDH4muwkt0/1hQB1U4b0FeM/tIXwj0DT7KIgC6lDMO5C85/MChNMqSaR86sp4HU9KjfljU5HzZ7DmoiKlgiJhTCKlIppFBRFikxTyKTFSMfIxX5QQR7jmi3hE8hDHEKDc5/p+NJMGZidpJPAqeVCiJZxcuxBkI7n/61ZLc6JMFkE0zTy4ESfdHb2FQAm6naaU4QdPpS3o2yrbp91evuasRooKoVyi8sPU9h/Wm30FFdQjLbmZjglf8Avlf8TVSRmnk2qOOmPQVsXVlPbQg3Nu/lyfMXHPXtVKO2ZT5loyyDurVoqbM5VEMWFUTaQCT1qF4MH5at+ZG7bZFMMn909D9DQ0RXGRjPQ9jWnKnsZKTW5FbXs9uQCSy/3WrbstQjnXZuCsf4W/pWO0WRyMioWhI+709DQrxB2kdFcWa3A/uuOjDrWZcw8+VcLscdHHQ/SorXUJ7cgOS6js3b6GtqG4ttQiMb4z6N1H0qlZkSvHc59kYZWVckdGHf60AdulaVxaNbNtkG6M/dcdvrVZ4tvX9KOUfMV/pT4JJIpAYwST1X1rd0jw3c3yNPLi3s05knchVT6k8fhyfQGntLYQRn+zCZJAuGdlwAe+M8ke5x9BUSfKrlRXM7FC6gmdUnkiMC4wS/f8Kr+XZq2Hkduf4RkYqxcSzXUseZC8zsE3yHOB+NazaYbX92xdnH8Wf8ipU2y5RS0M6wm01bg/6EZ0XkCV9ufyq9LryRpm10rToAnQ+VuY/Uk1VuNPYybrWN5Jh1VFyST2wK9Q8FaXpb6aV8S+B7yRggHnQyZMnrlSwwab5nqhJxWj3OEfVdXkjTzWghUjhI4gMD8qy7uS7J8wybnySQVGPwr1bUPBWnTRNJplzfW0ecpDfQqNi9l3A5wPesp/h1ezW5e2u4Jd2RuByBVKM2S3E4G1lvNqS2sTO+Odq5GfpVw32oTTPDPDErIPmEkIB59q9A8I6DrnhHUfNgaOeJuHidQVYV6Rq0GheJIIZda0Mx30Qwk9q2GXPoeOPY5qvZVFqhqUJI+ebdrZAwudPhlyMBlJQrXXeHru1hmSO1ad4mUH5hyp7ir/jXQbOEodNjuW7ESAfzrG8NWU8d7mSIoufujnFduGjUi9djCfL0PWLKK3by/KkMkZQHLDBB7irslnCw4ANTaH4XW+07zbG/IkKg7GAOD7/41A9nfWD7L6Iow4B6g/Q1oqsZOyepXI0rtGBr+kRtCzAdq8w1KzaKd17Zr2LVrvNsVkIZQOOOR+NcDfWkF9Oot5m8w5Lh1yFA78c4/CumEny6mMoq+hyByBjvUJkYPgdMVqX1o0bMGIJB27l5U/jWbJGQeaEupMn0HQznByeKSUbgSMUyMYXBx/jUiAAcCmncgrKvzYIyKsxrkgDj+lSiIEe/tU8MBXBINPYSXYuXej3FvYrertnsyQPOiOdh9GHaqSZGMADPGexrU0y9uNPdzbMAkgxLEwykq+jDuKm1KCwmj+06Yfs7H/W2Uh4Xjqh7j61KuWzLEJ7jFKoKnPTFSxD5QVJKj8xUkkefmHIPp2rREtDY1wdy4IPVf609sD7pyP1pqgrTmXccgHcOtUK1iB1JPrSLnbt7HkH0qcpnrQEpoTiNIZduCCB7VMEV13KAcdRTAMdc4FKiukgK4Ht6+1WGw+NV+63Ho3pTxFhSyAbh99PUeopzRjaGUgqeeOx9KfCGyNpwy/d/woAqQ2sZnQtjy887ugFOubePzH8qMCMHggVpwRlQ+YgYm+8P7p9akeLMWxFATOc+tT1C6MeS2F1CQPkljUYVV4cdyfesswN6YroxG0MgeNiGXkEdqjmtUZN6t+8Jyy44/CqRLXVHOmAjtR5LDt71tC3xzjmka3z1HWnYmzMXy6BGR1rVa2ww4p09sG+dFIHf0FMVmZix5HApjJzitFYCDStbg8gUxWZmCMntSiAseBWrFbAnkVfhtY4l3yAfShtIag2Z2l232aQTSLnHatufUhNEEWMCs66l3cJwKjtyOhrGdPm1Zqp8vuoL2NpOvesswEMQa6PaJI/cVnXibeR2p03bQxqx5tTMaICo2UYqaRjmoSCTxW9zmtqNJHpTakMbdxQYmHXFZuzOiKIiB6UmR3FTCMkHim+WfSpcUy1Kw35SOlSIFI96Ztp8ancDil7NFcxZiXoCQDWraRnis8IS4OMcVo27lKpQGma8MZKjmrSKQO9Zcd0QoHNWUuMgdaLCZbkSq0ie9KZc96YZPbmizFcrSxnHtVMqwbnGK0JGDcFaqum5uBUuJSkQ5A9KepU9aQqR0FINwP3RS5B8xYREbin+SPUUxGbHQCp0DMRzinyi5hi25UEDvSm2JGAcc5q1HEx6k1KkTL15FKwrlEwNkHGB9KfFb8EAY960BCc8EEe9Txw4AwBRewXM+W2zgr97HI703yfMHIw46e9bHkBue/ag26k5xhv50JgzGSNhlWUkdxSm3I+lbSwo/wB7g+vrSiEKdjCnzAZEdt7VZjtR9Pwq6Idp9R609Vp8xBUFqOKlWADHFWwmaeI+PpU3HYqpDg9KnVB6VKYsUu0ilcLCBB6U9UFA+lGeakocABS8U0GlzQAp6005zinUcbqAI8mjjuTT8jNNLCmAmB70o4zmjr2pRyelIBDj0pCMjpTtvfFOAouBEEOeKu2d5dWgP2eUp9KiA+lKoqZJSVmUrrYuz6nfXK7Z7hnX0qsEpuacH4qVFR+FDcr7ki8U4mod2TS5osK45jzSAc01jxSq3NUFxStNK04mmk1IrjdtNcZ4p7HApq8nJpoQhTjFKvoetOJpjZzkUXuBJRTVO7kUopALUbD5hUgprH5qaATb8v409cYxg0sf3TTxSbAb+BpD14U1JzRzSuFiPJx92jBI6Cn4PpS7TRcZGQ3tSbX9qnCU4JRcLFYI+eTSlMKT1zVnbSOvy0uYLFbbyKm280u3kVIVobBIj20YqTbQVqbjsR4padto2UXAbSZp+yl2UXCwylHpTtlKEouMaKKeFpdtK4rEeKMVJspQuaVwsRgU4CpAtLtpXHYjxSYqXBoC+tFwI8U4Cnhc1p6TpRv2Pz7AOKiU1FXZUYuTsjLAp4BxzXa2Xh6C3O5z5h/2hUes2VvHbkqigj0rl+txcrI3+rSUbs4/FKB71KyDJxRtrpuc41RT1FKFp4Wk2NCo3anHnpSBalQc0mwBF6VZK5UUiKD0qwqZFZtlxRW2c04J7VY8unqg71m5FKJWCH0p4j9qsBKdtqXIrlK4jp3l+1T7aULSuFiDZSbKtCM0vlE0uYLFMpSFKumGmtFTUgcSiyUm2rZjphSqUiWioy03bVwx1GY6akS0V/LyKayYq15ZIwDVCZiGwO1UndikklccRUVwcWsqkdQTT451Pyuv5VNKqmKbkHEL4B9xQ5cu44R5tjz/AMQ6X9utS0QHnxgkerD0rgpEGTngjivUjJsYZxkdK868SrHBq9wsPCMdwHoT1rdO70MWrbmTKMHjtVG8YGIgd6sytnNU7gZUY7VTRDYSv5YVR2UCqUspbjj0p91IWmlP+0f51FZxNcX9vCo3M8irj1yamwuY3vidGIZtDjUHcbBJH7jJ4H6KDXH2iF7yBVzneDx7c/0r1/4saeItPiuzGuyW8FvDgdI40Ix/31n8q4DSIol1ESvhFiikkyB6L/8AXrPm925ryPnsYN6/myzSdd8jN+ZNVdpPY1ZtlDGIP0xzWiEUDgAUtim7sxDG3900nlP/AHTWy5ABAxURkxyWWlcVzJaNgOQast1FT3MisoG4Ek1CetRI6KQ2mzKX2KBkmnUvmCKVGIzgVK3NJvQEsQPvsBVhbSNU3dcVE14hOQlNa8dhgAAewqjnL0MKhchRz61YACjlgBWR58hGN7Y+tIOTzSsPY2fOhXq4J9uaUXkY+6GP6VkorE8AmtXS9KuL24SNVKhu5ppCu3oiRbxj91QKlWeRv4sfSt//AIRIWrqs1wCSM9aiuND+zksJAy9etOxbjLqdZ8NFg1uNNKubR7m4tJGuYdpChgcAhj7EA/jXrUHh3ULtNl5ciytj/wAsLTgn6v1rhfgJZCO/1W9lwqRosYY8Ackn+leuTarAqu0OZAv8WdqD/gR4/LNctaclLlR00YR5byG6XotjpsYW0t0U92xlj+PWrc08MA+eRQfTv+VcndeJRO/lWsklxMG/1Nipb8Gc8Y+gFLBpuv37l1EGjxOCCynzZj9Sf8axcXvJm6mtoI3bvVVhgMjFII/70x2n8utc7JrT38nl6Za3OpS9NxBjiU+9bFj4R0+E773fqE/UyXJ3fp0/SuhjjWNFRFCoowABgClzxjsg5JS3OKg8O61qJ3arqAtIW629qMfgT/UVvaX4Y0rTSGgtVeXvJL87H8TWyWA70xpQKlylIuNOMR4AHtTqzrzVrOyXdd3MMI6/O4FYsvjC3l3Lpltc3zjoY48If+BHjFChJg6kY7s6rNIXA6kCvOdR8U6qzhZZdP0uMnkmTzpPyHFYF4upavbvc6fr094YSTIhPlFMfxADtWkaDe7MniEtkeyBgTXl3x31AxaPa2SkEzPyM/kf0NUvhn4i1GbxENPv9QN3DLGzJuIJUjtmsX42Xf2jxZb2wziGIE+nNVTpclSzJqVeendHn7jCAegqnLVyWqUp5roOMqy1UcVckHFVWBzUFMiNLFE00qRIMu7BQPUninba3/Amni/8VWEbLlEfzG/DkfrimiWfQnh/TntNAjtoQE2xqq5rdSMKig4wAATWbp11cTi7W4i8iOJPkHcjrmrkSefpcPmSOGbBBPBY54rKV+p1wtbQkuog8JTJw3GfavnX9puVP+Ei0e2TrFauWHoSwx/KvpSWHeYUB4Byf8K+OPi3qz6x481acvvijlMUXoFXjj8c0U9RVtDiGHyE+vFQEc1Zk6AYqBhVszTIiKaakPSmmkWiMimkVIRSYoA02s5I9S8gr5vkLkhentTrT93DcXc8QUxjahIxkmug0RBPeXlyRndJsB9h1qp45ZI7OGJFCmRskDihQSi5jc25KByVv88rSN1JJrc0Sz+16jFFyUT95Iff0/l+tY9qmWQH+I/y5rd0XWF0l2D24kEvJbOGAz2rOmk5am1RtR0O0wJFKyICvTBrG1Hw/ayP5lszW8p5yvQ/hVm38S6XOcO7wsx6SJj9RxWiskUw3W80cy/7LA16NozR5vvRZwmo6VcxAmZBKg/jTn8xWaomgGYWDR91PIr0aSLJPUH6VmXmi29z8yfuZP7ydD9RWTpvoaKotmcitzG64KmN/Q9D+NMyQeRWlqOjzQHMsYaMdHjGR+I7VRe3eFPkYlD+I/Os2pdS010IpCGwoApgGD6e4qVU9aVYzI4VASxOAB3pW6sq/RFu2uLuZPssYEpfpuGSK3LS2s9HCPfOLq5xuEMbev8Aeb+HnqOv4VlzPHpixwxnfO2DMynGB3UH096bGpuJdtqhcyH5UUZP0ArOcpGtKMSxfXl1rkohaRmhhzthhG2KLPbHTOaqy6dLBh49xHfNdRoWiXFnZPDfWF/AzvujlMB2H2PfNW7DR7y/vkhSBkt1b95K/Ax7ChXYnoaHgZLS8tgmp+EYZ4th/wBIaQoW/D/CmQ2trqGuXGnNbSWkcZLIvnFio7D/APVXoEcWyJIxyqgAVVbS7Z75bwwD7QBgSc5x6V0KnFHNKrJmfpulW+nxhLVAv+13P41t21xNHgeY2B705Iu3FSrDkDitYpENt6s4vUr++vdda3E8xTfjbnt3rp9Is47It5Uk4RuShbilj0eNdUN6HbeRgr2rRER3dM1rdbC1LsbROFAkdCPfOammvYLfarkNu/OqSxlTnGBWHdO93qbxwAnZwT2q4RTBysbl7ZRX6iSJ8MegIrIW3NsWACMQeSO1bUE3lwxo6g7QBVofZ7pNlzGsq9iRyPx60+dxFuZWn681mw2ybGB6g4rZl8YyzRhZpcgdSMH9KyrrwxazyF4Zpoc/wj5h+vNZGoaBdWnzxEyR98Ufuqj1Wo+ecUWdWN1qIP8AZ7x3O4ElE4YfUf4VT8MeE316WVBdNa3UR+aMrhiO5qhEHVweQ6n6EGtvTtavrZlPmmUocoXPzIfZuv55rWpGfLaDFTqpSvIxfFHhu90PVDBeOXSTHlS7cCT1HpmueuNPQ5B4PqP617bca7/b+npbtYW16wXMkE7bXBx1Q9G/SvPNTs1E8i/ZJbZweY3Ocfp0qKE5v3ZrU0qcm62ODmsnibkf/XpFgYZABya7CGyjzmcEqfxB+o/wp76LEPmhmicddgbkfTiupW2ZzOxzFpbODkrxWh9mLDOK2hZrGACoFIYQBnFVZMXPbQ5+WArnANQ+Rzkg5remiUjmqUiAVSihOdynGhU8dakCHJwOD1FP6GnZ6Y607IalYhEZwAenY04R4HvUwPzHK/VTQykcqSUPQ/0NCKI0UA8gYPal8tc/L07etIchj2FSqpzkcVQthBHj2pRCD8pA+tTLG2elTxxH60EtlRITHkdVPapUhx2q/HCx+YA5XqfSnLHknd1JpXIuMgyAzDk4ww9RSshjKkgFTyDUnl4+tTRwxsQrOQpBwfQ/4UmFxt4tu9vGyL++PUDpVVVKElQBkYP0qZVAyCOaRhimlbQbkU2iwelRNGAauScioiue3NVcm5WeIFai+6COxq2wxULoc00xoqkfNwMVaitty7m4FW7SwLoZG4AqK8mCx7EHNTz3dkaKNtWQyGKH7uCaqSTGQ8sAKa8ZKbjz/Sqzqe1MlsdKUB++DUQkCnIYVG0ZBpmw+lMyuzXt5sgHNJcqD+NUrbKgZ5FX1+dNuCSKxkrM3WqMeVMORiprSJTkmp54C5yBg06zjG4qRWt7oy5LSGeUuelSJGnU4IqWaHDAdqYIj0BpWK0FeKMjgYpn2aNuoAzTmR8cHNJtYYJoSAQWMfsM0o09Qcg04bvU1LGGboTmnYLDRbDd1qVLc9qVFJNW0yBinqhNkKwkdqkWNvQ1OrgdRS+ao7Ursi5FsbvmkK/Wp/OWk81DRcWpCEpQoHWpgVPSl2KTRcNSuUBOMUvlA9qseTzxTvLx9KLjTbIFiHpUyRc1NGlTqvFIaREqGpkT1p23gVIgqWUkCIAcipVTggd6VUJ6dKs2aBZBvGRWbdtSkr6ECjj3qQAN7GtMacJcupA9qp+UVYhuo71CmpbFOLW5AY8/WhUycHn+lWljz9aURcjPWquKxUWIqSD0qZYcDjkVOE5IP4UoUqaOYOUjEf404KMVLtOMjp/KkINK47DdopNopxFNNAhCoppApx6U080wGEikJpxBpAKYhhJzQ2c59ad36UGi4WGknNMIJqU4z3pdo96LgRBT71Ki/MKUKPenqMGi4CgU8LmgfSpYxntUtjGBKcIqsIvtUgSocikin5fHSk8sg1eEdL5Y9KOYLFEIfSjYaveUOwpPK9qOYVigymmhTnpWj5II6UohFHOFigENOCGr3lD0pDGKXMFiiUJOBTxFx0q0sYp2wUOQ0ioIqBDVzZRtpcwWRR8nafapPKqyVBHSkA7GjmCxX8qmtDyKuYFBWjmCxVSLrxT/AC+anUDNOwKTYWINlKIxU3FFK4EQjo2CnlqMilcY0IKNtOzRmi4hNooZeKXNKTxQMZs5pSKcOtKRQ2BGRQBT8UoWgBmKXbT8UYpXAZijbTzSUrgMxShadRRcBuKUClo4oAQjigDAp1IR+VFwAdaU0g+lHakAtFJg0uKAFFT21zLbnMLlTUAHNPVaTSejC9tjRGrXpGPPao5bqef/AFshb61WVakUVnyRWqRTnJ7sNueacFFOUVIq5obJIwtPC1IqU/ZUuQ0iNVz2qRE5p6pUyp0qHItIEQACrCjikVealVazcjVIjC808LUipTwtZuRSREE4p4SpQtPCVLkUkQhKeI6nWOpVjqHMpRK4ipwiq0I6eEqXMtQKnlU0w1e2UhSlzj9mZzQ+1RtD7VpmOmGKqVQh0zLMXtUbx+1ahi9qgkj9q0UzNwsZrLt+b0rMlXLse2a3JIsgis6a3KMRit4SRhUi7Ga6ntWF43uzDpkr27MjrtBIPWup+zksB05rj/HkQXw5cSE/N5wUf5/Ctk1KSRlZxi2edHUrhWJErZPvVC/uDcSGRzlsc0yQ1VmbgiuvlSOXmIpJRmog4LrnkZwaikPNMB+U+1TJCUrkErFiT6nNaXg2My+K9JjAyz3SKBWY9a/gcSf8JfpBgUvKLhSoFRLYcdZItfE/X7++8SXWnSXJay0+VooFAx2AJPuTn865W0klb7QxdsCFgefXivQfivpNtpvieK1CI0/2VZbmTH35WZiT+WK4eREit7tVAG7ywPz5rJNOOhu0+d8xnTHGMVCWb1NX4IVlkO7kLVn7NEP4BS2K3Zikt6mmnNbZt4v7lMNvH2UVNx2ZkRDMq5+tWD1NTTxhJQAO1RgFjhQST6VEjopbDTUU6s7/ACqTj2rqtB8PtMRNdjZH6NXVWEGlG4ECQqz9CcUKPU0kro8sgsriY4jic/hUpsJkbayEEV7Te2lhZWzbUQORXnMsLXeq+VG2N7YzTZlKFjDh06aQgADNdFpPhyApvv5AvtXQXMNhodkschElwwznvXM3N887cthOwzRsFkty9NDY2cgW3UMAewxVgamduIowp9awBKgOSy/nU8dxGOrD8KV2F+xqG6nlbc8rE1dshNcTxRgs7MwUD6msZLmPtk1t6TdiGK4nQHzFTYnsW7/hVCuepeC4WeW4sfDdtGzxH/SLy4YlCx67V78iu0h8HRzyLJrN7PfMCD5edkY/4CKp/By2Fv4KgcrtaaR3J9ecD9AK6261G1teJp0Df3QcsfoOtefVnJyaid9KnHlTkSWlnbWcQjtYI4kUYARQKnZgo5Nc7f8AiTy0P2a2f2eciJT+fP6VyuoeLJJWKS3yQ+i2iGRvzOP5GpjRlLVlSrRjoj0Se7jjHzOo+pxWLd+JbCFmUTGVx/DEpc/pXDRy3+oSD7NpF3eZ/jvCcflwKv2vhnxNdqUllg0+3Y4KRkA4+gH9a19lCPxMz9rOXwotXfjScz+Xb2awjGd104X9OtYF14le4Rvt+ozkn/llarsX8T1rpYfhtZdbm/upD1IXaB/Ktux8G6HaBNtjHKy/xS5bP4Hij2lOOyJ9lVlueUm++0XKHTtMLyDgbwZST+NaKaR4t1YbfJnijHQOwiUfQV7DbWsFqmy3hjiT0RQBUxcCpeIfRFLDLqzy2w+GMskatqV9tc9ViGcfjV6bwDBo1hdXOl3FzJdbDlWbhl7jFegmZfWuN8ceNoNDt3htVE98ynapOFX3J/pSjUqSehUqVKEdTzf4TWobxnvdTtto3Y5/hPIrnvGWoHVPF+pXO8PGrlEI6bR0r0fwZZtpPg7V/EF2MXd1G8uSAMDBxj6145CSyu56sxNdEXeTZyyVopCS1Tk61alNVmqiEQMKjZc9qnIpuKmw7lfZXpHwR05Z9euLlxxGgT256/yrz/bXr3wr0xx4deSNistzLgY64/yKLaBHdHonic3EdjLLa7fLC7XPf8KzfBrz6hNm5nZlg5Cnue1buvxi38NXCg8rHjJ79KzvA1kYLY3EgIMoG0e1ZKS9mzpcX7RGt4nvP7N8PalehtrQW7upPqFOP1xXwvfStPcvI5y7ksx9STk/zr6u/aC1x9L8Ei1gYLLqEohPqEAy2P0H418nP9806K925FeXv2K0g5NQsKncVEwq2QQmmEVKw5phqSkMIpMU/FJQUejeGrMLpUJPDSZkP1PNcf44kL6wsJPEa/qTXd2Kq2l2ToQP3Y79OK878TsX8Q3GTnaQM1pV0pJImlrVbKtsuZ1GM7VP5mobvL3W30wKsW4/eyEdlUfrVdCGvSWIA3HrxXNFHTJ2JWtWX7jH8aaPOjIIXkc5U4NaG04yoBB7jkU1o+M8108nY5efuOtdevrY4M7OueVmG79a17XxQh/4+LYdfvRt/Q1gMue2aieJc9MU1KUROEZHc2usafM3yXARjxtkGM0y+063uWLwBY3PVkPB+orilUr3yPQ1fiZocGFmjP8AskirU+Zambp8uzJbyyNow+0Lsz91x91q0NGjNpbTajtQ7SEQsMj3wO+ay5nutQkigkleXLAKDjqa1tZ2wi2tIpVeOBfmVT91j1yPXsaxqytojelC+5k3kYubtpZGAmnfIjjXP0AHoOlSDS7mMBl3Lz1PGPqe1WtCES64kkrBFdDGrt0Q9ifaug1GI2y7FKXDyjagibdnPc47Vmm3qXJJPRHc+GPD0Vtpdu105vLkgSGR2LAHqNvsOK6JYeOlO8L2jWmi2kFwfnWMZyOntWn5O5vlGa7InK1qZ8cY6YqZIAeoNacGnSOeENXo9Gmz90AfWhyS3BRZzjQ89KnWL5RxzW+2jsOuPzpo0vHGQD9aFOIcrRiCHJyBU8cGa1P7PYHAxn3NI1lKh+7mq5kFmZkkRHSqwtwGyFGa2JIipIZSM1D5WBVKRLRmmPDZIHpTwioN2cYGaueUCDTGi7EZFWpE2MOW/upZtlqzIO2O9XIY9XGGS4SX1RquxwJHnYoGetPVCpBUkMK0cl0RKT6mbfaeblDJcW3ksOrL29/cVmNYSW7DeMoejDoa7OC4BG2Qc/oails4wj+SAVPJjJ4/CiFVx0YSgnqjnbeIZBBII7jitxLiC4jEWrRm5jAwso4kT8e4qi9tty8Jyo6g9RUaS5FatKZKbidN4b0yxhkdH8ue0kOYZiOh/ut6GqPi7wmYbh7+xQG3ZRvVRyp9fpVTTrt7WbzISCDw8bfdcehFdC0s91aNLo926sPv2r4OPXb3rilGpSqcyeh1RlCcOVrU87a2O4AjPb6VWuraSFirqVYdjW7cytLO5kQCTo2Fx+YqveSNOqrKvyqMD1A/wr0ozehySguhzMqc+1V5Is1r3VuY25wR1yKpMnPpWydzLbQoeRz0pywcehq4FApCKZRoPCmuWhdEVNUt05CjAnQd8f3hWLGoHI+6eoqxHJJDMkkTFJEOVYdqknmNzcNM0aI7ff2cBj3OOxNSo29ActCqbf5uR15FTQwBasxDIC9u3salZdvBBB71SZPMyOOAfQVYSAEVGjjODVuFwfw4oYkxEtyAeSKZJBjpzWlHginMgIxxU8xVjHZSVJx061GGIBHY1ozRYNU5osHjvVJ3JehFKxkG8kFlAB/xpqLvyMgHGR71JG3ltnaDwQfcGoWG18dR2poVxjCmEVKTjrTSPamISKEzOFQZJrUTToY1Hmn56g091hfceCKbe3bSykqeKzlduyNYuMVdkl9KsUflxEY9qxXj3HJq0xLHmm4rSEeVEym2VWgGKheAZ6VoFaYyVVybma8A9KiaAelaZTPamGKmFzOVCvSr1uuSM07yRU0EeKmauilIimg6gCqtvEVm561tFAUB71X8sCUH1qIPoDlchuIs7T6U0w55P6VomNSnSm+WCOKdyLma0WCcdKjaPA96uyoytgd6ieOQehqhplRY6mjjoZWGTjFSR5IHWmO5Ii4qQAmkUHHSnoeaCWxRHkUph9BU8QzVuOMGpvYm5lmA54FILds9K21gX0FOMCjsKfMFzGW3b0pxiIrVMYFQyIBSuFykoIqRc08qKnjUHGaTYJkcYPpVhF9qlVBingAVPMWmxqx57VMkQpUxU6CpbKTGrEBUyRelPjAqdQMcVm2UhItyn7xxVgwJKM8bqYiipFBByKyfdGifciMIXg04IvfFSn5utPSEsdopc1txpa6FdowemKaIx0NWWjKNg0oX1pqQNFURke4pTDxkCrQSlK4FHMFkUzFx0qF4sVoEVGyg1SkS0ZrIR2rZtfDl3LAJmA2EZHrVUxg1rxa5dx2whXbtAxnvUVZVLL2ZUFH7Rzk9u0UzRkcqcUwxnFacn72RnfljTPLFaKWmpDRm+Wfen+ST2rREYpwQU+cVjOEBPani3PpWiFFG0VPOOxR8jinCGrhUUm2jmCxWEOKesYFTFaApzSuFhFUU8CgCnKDUtjALTttKFp6rSbHYZspQlTAU4LU3HYr7KTaatbRTdtFwsVtppNlWiopNtHMFisENLtNTlaTFFx2INvtSFamIppp3ERFaaV7ipWphNO4hBihqbnB9jTXJ4oC44HmgtUYzmlxTFcUmkJpMUYoAM0ZoCml20gEFLmgClxRcAzSseKMUEcUDFU804nNNA5p4FJgJSjNLijFK4xDSilxRii4DaSn4oxSuAyjFPxRtoENxRin4o20ANxRin7aNppANC0uBTwtLtJouBFjmlAqTYaAlK4hgFSIKURnNSKhpNgIo5qRRQENSKh9KlsaEA9akUYFKENSKlZtjSEUcVIopQhqVUqGy0gRc1YSOkjTnpVlVrOUjWMRgj5qRUqRVqZUrJyNVEgCetSKtTiPNOEdRzFqJEqVIqe1SBKkC1DkWoEapUgWnhacBUNmiiNC0oFOopXKsNxRinUUBYZtpNtSUUXCxEVqCSOrZFMI9apMlxuUGiyelQT2+4jI5rUKj0qORBitFMxlTujGng2RM2OgzXmXxHdk0yBORuZmI+n/669buDsichc4FeOfFSUrLaxn7zKzEema7sK3KZw4pcsNDzaQ4qnMauSg1UdPU16TPM3KcnXNR5whHY1ZkjFQSDj2qHqC0K7jNdt8GLUT+PbF2A2wB5SewwK4xq7jwFYXp0vxBNpyM149p5MO3ghmPUH6VhU+Fo3pfEmVPibqMWo+PdYmjlDxK6xowPGAoz+pNcZcyo8bopyfMB9uBRNp99Nczb42kmDt5hBz82eeeldFpPgy5NulxenykbkK3BI+nXHvU2UY2NIc9STdjmrJlLsuRuJrYt9Mubj/VJmtiS+0PT4XhWMPcLxkDPP4Vb8Ppc3u+SFxFGozzipZ0Qgr2ucrfWs1kpM6EAd8Vnm7i969C17WdJt9GmtrgrLdkYGOTXl1o0azKZhlAeRU2FNcr0Or0DR4dRPn3Q2Q+prevtN8P6XAJ4JI3lHOODXJ3+t77ZYLIlIuh7ViMSxyxJPuc0m0nobwslobmseIJr2QLDmKNeBjvVPStfk08uQN7N3PUVnMdqMfaqvHfNJMmbsbF54hvLpyWkIB7VTW/nEgdZCG9RVMEehp6kegoZBanu57l908rufc00E+9RK3tTwx9KQmiVTVmEnNVVY1PEzetMjqaMOa6bwikM+qRQXUvlRyHA+XcWbsAPUmuViLetdz8J7NNQ8c6ZDMgkjVjKVPT5QSP1FJuybNIq7SPadOs9ThsYLGzsblreNcbp5PLX6YHJq7beG9UkGZ76KzU9UtU5/76Nde0saD5nUfU1XmvoYs53H6KSPz6Vwe0k9kekqcV8TOfh8D6YX8y+kubx85zNISPy6VuWOj6dYDFpZwRZ67UFUtR8Q21nC7O8SMvQSSqAfyJP6Vzx8cKYWMhQPnA+zRvPx+S0uWpLcOanHY7wFV4GAKa8yIMswA9zXA/2vqN7lobbV5EOCAIkhB/76ycU2Sy1icEtp1pAnrdXzMfrgcU/Y92L2/ZHX3euafbHE13CpPbdk1Tk8RwnP2eC5nx3jiOD+NcvHpz2JZp9c02xzzi3gUn885qtPfaDFIxvvEWo3eRgqp2j9AKpU4oh1Zeh0cviG+IYrp6QoBnfPOo/TrWJfeJpMKs+tWdvnqLeMyN+vFYkur+CrflNOnun9ZWJB/WpF+IumWaBLDQ4EUcAbgv9KtQXSJm5t7yKt1q1zd3gOntrOo7PuggpGT6kDqParOj+CNQ1y9W81tXhTPzeYMMwH8IXsKq3fxXvChW1sreD0O4tisK8+JOuTZxdeX7ItaWnayViLwvdu56J8X7tNJ8DG1t1VRKVhUDjArwpBtiUe1X9W8R3mqhV1GWS6RTkK5wAfWsdro/7Z/EVUKbirE1J87uSuM1EVqJrg9w/wD31UTXH+wx/wCB0+UknK0mz2qqbg5/1R/77NAuD3hH/fZo5QLXlkkADknA+pr6V+H2lJZ6LZZUBli6e56186+GITqOvWVqIcB5ASQxPAr6ss4UsrJCTjagBzWVZ8qsb4eN5XGSXEU1xcW7BXWJAXz2J7Umlx+XpsQQEZbOD9a5XT5LtvEDBhsiuW8x93cDpXSy6gRrENikLFApdnxwKwlC2iN4TUtWeC/tNaq83iLTtMGBHbWxn99zkgj8lFeGuOGP4V6B8Z9Y/tjx7qUqhRHbt9mUhs7tnU/nmuBnG1UHqM10xVo2OOcuaTZVaom61MxqJ6GUiIimEVI3FMNSNDTRilPT60YoGej+HlLaPankgoK871vd/b92HGMSdK9O8ETW58OWizSxIxJVQzAZINed+MI/K8T3Y45YGqq60osKT/eyQ3T1aSURxj948gCntnFaOo6BqauXuLAP6mMYrN0+Qw3McoOAkqE/n/8AWr12bxPooA8y9jDEdOtFCKaaY8RJxaaR481i0T5Zbi3YdyuQPxqVDeDlJYrkHru6/wCNepLq+jXxKxXdszejkLn6ZqWTw3pN9GDLax7j/EnB/OtlS/lZzOr/ADI8ne5Ck/abV4z229P1p4e1kXCyr9HGDXeX/gRMf6Deyp/sSDI/PrWFf+DNUt03G3t519Y2wfy60nGSKU4s5uVAroAOpq0qFucdaY9hPZSZmtp0UH+JDj8KsIckbSMHtnkfhSghzZreC7IX3i/TLZgChlUvzjjPP6VganI0uqXlwqsiyTOw9gSa6Lwvcvp1/e36EK8FuyoT2ZgQKxLiRwqBMb5WC5I6Z71lUlaVjalG8bl7wvNeXGrWljCVxcSqjEoCduRnBNfQVhpNja7fIto0ZRgEKM/nXi1nYjT5ke2mkS7i5WZSCd306Yr2PwJqj6xowuLsAXMbmOTb0YjvTg1sTO50FvaR7d0nA7VchADYijH1xT7eJXIaRgFHqcVYkvII1PkjLep4ptvYSStqWLaGZwdzlfpxUU0kcTESSkn2OSaoSahI3Vjj0Wow4PIjJJ9qXK+o3JdCeW6B/wBUuB6t1qAsxfduOaeBnkxsPwpREGbjI9q0ikQ2ye1uQ5CzD8e9aAjdRuiIde1UYrUketWEjli5XIqXHsVGXcm81GOJ4v0qvc2kMg3QHGe1W0k8wYkUZ9aBaZOVNSnyspq5kpakOQRwe9QTwbHI7VtMjIcMCaimiDj7vNaxnrczcdDE8rFNZcHpmr0kfzdKiaP2rdMysZ1zHKxwhCrUItD/AHzu/StJ0/OoivtWqk0iHFCQW0oDEupYjg/4+1Z93ZswaSNdjj7yf1FasDhWAbgU64khYFHcDHRu4pKckxuKaOZikKthuMVowXDxSLJA5WRTkMDTL6yfBlQA46leQR61Xtj0ro0miFeLOljgh1p0v4ogt5CR9oiXpKPUe9bGuaLDfaLI1gqeZt3LgdfY1yVpcS2dyk9ucOvbsfY10F7fzvai/wBHk2FeZoGHB9fxrz6tOcJJxeh106kXFqR57cIUJBUgjgq3UH0NUJVwc4ODXQavqR1FvMltoUkPV0JBNZgjSaIRAETgkr6MPT616cJO15I452voZjD0puMGp2Xk8c9DTSnpWyZiyFlPtjrQFxUoWlCU7iGqKl5dcMfmUYFOjTI6VIE6HHNJsaKpQg89RViJtuGIBwMEetSmLJHfNAiKt0ouDQ+OfbUyXPTnHvVbySDjnjke4pwhNGgrlmSQOM5yTUO3cCKI1I4Jpd+w5oFcjWHa2eQDwaJLbdEyfMXTlRxjb3p8kuOnemrLld2PunB55INDfUVyi0RxREDG4YdRVqRdrkcYPI+lMYAjpVXJuVJMlyfU5poBNTstMIp3DmIyAKQipCtIEp3C43bnoKeg2tk05RxQwGaVx3IGQbj6UmwVK1JincVxgQdqciYNKBSjihsLk6LkY9ajdOaliPSpHTPNY3syr3RBtASnxoCg9aYwOCKnthlDnsatvQm5UuEw4NIVU9DVu5T5c1HGuVxii+gXKkkastEUXy9KtMox05qJM5Ipp6C5hAntTgmO1SAGnBcii4cwxDtqVZ8UwpTGXmi4rk4usUpu6qBCWA6U0qc0XC5dFxmkaTNVAD6VKVNFwbJNwPSnxvTEB29OlPVOKlvoNdydHyBWhpthNfSbYhzVGFAFFa2l30ljIHjrKo5W93c0ha/vBeaZPZHEoqGM4rQvtQkvjmSqioKmDly+/uW7X90fGeRVmM1HHFVlI6Gxq4qAVNikVcdqlxWbZaItvNWLeUxNnGaQAU4KKl67lJ21Q+UiU5xg1DsIqdVFTIFx8wqL2Kvcp7eKCvFWigJ4FMZccGmpAVStMK8cVZK0wrVpklYqaTaasEU0incmxBzSipCtJtp3AQHFKDRijFIBc0oNNApQKYXHUopoBpQDSGO4pwpApNPCGk2MFFOC0oU1IqGpbAYFp4WpFjPpUgiNTzFJEO2nAVOIT6U8QGp5kNIq4pCKu/Zz6UfZj6UudDsyltzRtq79mPpR9mPpRzoOVlLbSFavfZW9KX7IfSjnQcrM4pTClan2Q+lKLQ+lHtEHIzHaM0wxmtv7GfSkNkfSj2qFyMxPKNN8qt37CfSkNgT2p+1QcjMMRc0vlH3rbGnn0pwsD6Ue1QezZheUc07yq3fsB9KBp59KXtUHs2YQjo8o1vDTj6Uv9n+1HtkP2bMDyj6Uvkn0roBp/tS/2f7VPtkHsmc/5J9DQYDjpXQjT/anf2f7Ue3Q/ZM50QHI4p/kH0NdD/Z/tThYe1J10NUWc75DelHkNmuj+wD0pRYD0pe3Q/Ys5wQN6Uv2c+ldILAelKLEegpe3QexZzf2c+lH2c+ldL9hHoKUWI9KXt0P2LObFufSl+zn0rpPsI9KX7EPSl7dB7BnNi2PoaUWx9K6QWQ9BS/Yx6Cl9YQ/YM5wWp9DSi1b0NdILNfSl+yL6Cl9YQewZzn2VvSlFq3pXR/ZV9KX7KvoKXtx/VznfsjelL9kb0rovsy+lH2dfSl7cf1c55bRvSnran0re8hR2FN8kZ6Ue2F7Ax1tDUgtfatYQinCEVLqlKiZa21O8jFaZjFMMJJ6VPtB+yKAhqRYvar6Qe1SCAjtSdQpUSnHFxU6RVZSLA6VII/asnO5qqZWWPFShKnCUoSoci1AiC04LUoSlCVPMWokYFOAp+2gilcrlG4pKx9av5rVwI+Kw5vEF2vRhWsKEpK6OWeJhB8rO1pMV5+3iO/7S4/CoH8Qagf+W5/StFhJvqZvGw7Ho/FHFeaHxBf/APPdvyFCeJdQjYN5u4ehFV9Tn3F9eh2PTKK88g8VX8syRjb8xAroLuW+iRJGuMK3GBWUsPKDs2awxUaivFHRZpMisAXN0IS5lJUDOeKw11G9kS5Iun+Xp7U40HLqOVdR6Hcmo5fu15hF4j1CGY5unYA4w2K1U8SS3NrKjMUk2khhW31Ka1MFjIS0OsuOIXPc8V438VI86tb/APXM1dOvagkxJuZHGfutjFc/4p1CTUL0PN1UYA6V3YfDulK7OHE11VjZHJypjNUpFrUmXNUpAO4rqZxopOtVJuCK0ZDgHiqt2I3c+WDt45NQxtFB+hr1jwHrVt4W8Havq10jPudYYwo6sRxXlUigBvYV6V4lsfsvwRgk7yXaSHjk5bisKlno+pvRuryXRHH6f4xWyRzJbB3kJZj7mqut+I7q7BC74Qy5x3ANc0kTXEqQxDLyMEUe54FXtbdmv7rcwYiQqCDkccce1OUVcdOtNxdyjbzGGcSkB29+9aM/iC6aLy4CYR3K96yDSGoYQbWwSMzsWdizHueTTCKUmmnpUmqJ48CJcfWlquxOcZ4pvPr+tQ43NlOxNKf3RHc1DxTTnvSZx2oSsJy5tR4x7U4EVGDS7vagRMGpwb3qAN7U9WPYUhk6tUqPiq6k+lPU0XJcS7HLivRfAHivT9JmtY4rOzs7sKVfUJozIzE9uOnpXmKsRU8chFDVxRdnc+hpfHMHAm1i5kHdbeNYx+fWs+48W6TKxeSK+uj6T3h2/kK8RSTPXFSrJ9KnkRr7Rs9gXxnaWz77DSdNhfOd7Dcc/Wi4+ImqSLhLm3hH/TNAK8jEv0pwl+lHLEOdnot14t1K4yZdVkI9BJgVnT6zJL/rL3d9XJrjPN9xR5p9apJdhXbOoe9jb71yh/Go2uoe9wn51zXmn1pDJ70XFc6QTwMcfaI8+5qRoePvJg1ypk96tWF5LE2A26Mfwn+lFxm40X+0tRPEf71LDcRzrlDz3B6inmquFiqYv9qmGL3NWmFRsDmgdiqYh700xr71ZNMIoaAh8tR/CKUKB0A/KpNtKFpWA7j4PaeLrxM87rlbdMj0yT/9avoG/j86wkXHVeleXfAyzVNMubmTADyE5PoOMfpXpWsyymy22oLFupHp3riru87HZQVoNmVcWn2hrZPMEMu0EAdeDwKva/eJpejXt4/zfZbZ5GPc4XP9KZb+XNqEbldzRxgBsd8c1z3xO1KK0+HWtyzuFM8LwrnjLMCoFTq2kVpGLZ8k30hnund8FncsT6knJqhdHMjY6dKtfxEnnAzVGQ811HCiFqjapWqJzUs1Qw96YacetNNSMQ0oFJTu9AGnouoSWFliO4+zJISryFfM3Y7Y7fUVneITnUw4bcpUFW9RTIB59jdRDOYyJVHt0NF6PN022lByyHY39Kz1cbG+07j4OYpfXCsPwPP86rQwm51LyCwXcxHNS2cm0oeoB2keoPH+FMvIWWdZI2KyjqR6ilHdFT2NldHt+F2OSOCVbn61p2F9qXhho5LadrnT92Ghk7Z/kfpWJb65Mvli5jBZD99Tgt7GrWq+IBeWogit1jUkFjnJOK7OaHLeO556hU5rS1R6Vb+L9EniR2vBEWGdrg5X2NTN4j0aZMLqMH1yRXklrAwgUlssckinMg7gflVqbtqQ6cb6HsMWraY8I/062k7YLDmsXXofD1zazM0ltFOFJVkIyT2rzTyx3UflSYVeoH5UOd1aw1Ss7pmtoGyfS9USdn3KgkBTqdvX9DVFZIpFC7x1BB6EEdK0fC0irqTREZjniZGHtjk1kfZJV7DqeM81yyiup2wbtoj0LwnFceIYXt7S1S5u41+aYNjHYbh/hXqHg7w9ceGtL+y3EolnkYySY6AnsK8y+COrRaT4kuYr6RIYLiHAZzgbwRjJ7cZr264uVdDNlSuOCDkY+tXGKM5PoV5rkqQoy8h6CpoVLYaQ5Pp2pNPgV1Mr8M3P4VcYKgyORV36EWJURAOgFCsA33qgjLzn+6vatK1tUGMrz71L03Gl2H25Zj0OK04bRXGWWpbS3TaOBWikaqOlZynbY2jC+5TSxUDgVJ9kGOlWwQOlSKQazc2aKCMeayHOBVZVeB+c4roWjBFUrmDIPFVGpfRkyp21RRDRynDdaqzQFG3JkCpZYSrdwaekh24YZrS1tURe+jKrW4ueBgOP1qjLAU3A8MO1azRMrb0GKdcQrcxZIxIO/rVKbRDhc5t48896gkUjJBrYltSDg1Uktq6IyRg00Y0sMjE7n/DtSLZJj5mOTWqbY8imtbnAI7VrzvoRYxZoXtiXiYpng1TP3wQME9a6g2om++MgjFZtzp3ky8cr29q0hUT0ZMovcrQgkdK0tHufsV6rEZik+Rx7HvUUNuwHSpGtyeMUTtJWY4trVFybwxbvryqM/Y5lLgA8Bh2H1rK8a+H4dMt7VrRCu9yC305FdVpTSXenGEttnhOY39COlVdR1OO+spLTUoHV+h284YdxXFGpVVRa3SOmSpuD6NnmLRluW+9/OlEX1rohpiGXAfC+rCk/s4c8CvUU0ec4MwkgyeBUv2UkDjmtyOwA7VYWzAHSh1ENQOeW2x2qw1k0cccjA7X6VuCzHoKtwWiS2kkD43L8yE/qKmVWxUaZzAgyuAORyKaYD6VvizAPTpSGzHoKftEHKYQh4zjBHf1p3lDFbX2NfSmNaCn7QnkMNouc1DNCTzzzW61oKT7ICMcYqvaIlwObMLFcY6UkcTB+eB0rpBYgfwimmxGelP2iJ9mzDeJniU45Xj6imeScdK6VLMYPHUYqNrIDtSVRbDdM5h4m9KhMT56V1DWI9KZ9iHYVSqIzdNnOCFyOlJ5D+ldKLE/3ad9gY/wGj2qGqTZzYt39KU2zkdK6QWDD+ClWwc/8szS9rHuV7KXY5j7K5HQ0C0f0rpzZEdUoFkx6ITR7VB7KXY5oWbelOFk3pXTLp8jHiI07+z5V6xGj20e4vYy7HORWbKeRVgWzFcY6Vs/Z9p5Qj604Rj+7UuaZSg1oc+1kSehqW3tNuR0zW2YSTwhqa30y6kO5IHx64pOqktWCpNvRGDLZEoRioUsiBxXcweG7mZcspWoE8OXZkIWFyB3rJYqntc0+qzetjjWs2x0NQrYsGJx1r0eDwrK3+tG2rieEY+7EVLx1NdSlgqj6HmIsz/dNO+yH0NepL4ShHVjTX8Ixj7rGp+v0yvqFQ8v+y+xqNrX2r0O48ITBsxsCPeqVx4VvFb5Yi3uDWixlJ9SHg6i6HDNan0pptTXdL4SumTJQg+maqy+F79fuwMR9atYum+pLwtRdDkBbe1SC346V0o8Nahnm2fFSnwxehc+U2abxNPuT9Xn2OXWEAUvl4NdKnhm+J5iYVPF4Su3blGA+oqXiaa3ZSw9R6WOZiT2qUKfSuxtPB0ob5yQM1t2nhK3TBkYt7VhPHU47M2hgqj3PNlVvQ/lU6bvQ16efDNoR0xSJ4YtF9TWP9ow7GywE+551FuHY1ZTOOhr0AeHLQNnbUi6DaKOEqHmEH0LWBl3PPwDnpTx0run8PWreo+lM/wCEbtcY3PR9egL6lM4takXNdd/wjNt/fk/Onx+HbZDncx+tDxtMFg6hyQB9D+VOAfH3T+Vd1HptvGMBBUy2sK/wL+VZPGx6I0WCl1ZwUayg5CMR9KklidxuKMPwrvBDEP4V/KjyY/7q1H13W9i1g+lzziSKRf4Gx9KgIf8Aut+VemmCL+6v5Un2WH+4v5Vax/dCeC7M8xKt/db8jTWDA/dP5V6ebWE/wL+VRyWFu4IMa/lVLHrqiXgn0Z5iSc9KMnuK7+fw7aytnJX6VAfC1sf+WklarHU+pm8HM4elrtf+EUtv+esn6Uh8J2x/5ay/pR9epC+p1DiwakQFjXYf8IlbZ/1stTReGbeM/fc03jqXQFg6hyUds7dAasJYSN/Cfyrs4NKhi6ZP1q4ltGo4UflWEscuhrHBvqcTHpkn90/lU6aWx/hP5V2XloP4RS7F9BWTxsmarBxXU5JNJY9jVmLRWPoK6TCj0pNyioeKm9ilhYLcxF0YjuKeNII7itjeKPMFR7eoX7CmZI0nHcU9dMA61omT0pPMNL2s31H7KCKY01B2oOnL2xVwSetOEgpe0mP2cDPOnD2o/s76Vo+YPWlDA0e1mHsoGabHFN+yD0rV4NJge1HtZB7KJl/ZR6Uv2YelaeB7UYHtR7Vh7JGYLYelO+yD0rRwKXAo9qw9kjOFp7U77GKv8UmRS9pIfs4lL7H9KPsdXcilyPWj2kg9nEpfY6Psn0q7ketGRS9pIfs4lP7J9KPsn0q5ketGR60c8g9nEp/ZfpS/ZT7Va3D1o3ijnkHJEq/ZqX7N7irHmL60nmL60c0g5IkH2c+1H2c+1T+avrR5q+tHNIOWJB9nPtR9nPtU3nL60ecvrRzSDliQ+QfajyD7VN5y+tL5y+tHNIOWJB5De1HkN7VN5yetHnJ60c0hWiQ+Q3tSeQ3tU/nJ60ecnrT5pD5YkHkN6j8qXyG9RU3np60eenrReQuWJB5D+oo8h/UVP5yetHnJ60uaQ+WJB9nf1FJ5D+oqz5q0u8Uc0g5YlXyH9aT7O/tVvcPalDCjnYciKRtn9aBat3Iq6WHtRuHtR7SQeziV1t/WniBfSpN4FJ5q+tK8mFoob5CelKIlHagzL60wzDtRaQ7xJQgFLgelVjOaTzmp8rFzotYFFVhKc1IshNLlY1JMmFGaj3UbqVh3JMijIqLNGaLC5iXIoJqPNLRYLnOeJCzPjHy1y1yhzXeX1i10fvACs9/D+7+PFdtKrGKszzK9Cc5to4VlINRstdu/hgk/6wVH/wAIr85zMAPpXQsTDuYPC1OxxBU+lROK7pfCuUYmX5h0GOtI3hNSit5pLdxiqWJh3JeFqdEcZpn/ACEIMjI3iuy8R3LCzt1QHceatweGIYLmN1JKjknHNaj6bHK48wZVfu1z1a8JSTR00KFSEHFmSiytpyqEOWAFYjabOkEwCsSwyOK7pIAq4oNumBxWUa6jsbyoOR4td2k8UjeZGw59KdZBmk25xkEc16zdaRBO43qCKpSeG9O3lvJAz6HFdixsbWZx/Upp3PIQjGYKB827ArF1VmkvJnYguWOSPyr2TUNA0+28x402Mqls5rxe9YC6mXOQHPNdlKqqiujjrUnTdmZswbvVR0J7Vpvsx6moQgrRGaRniBpHVB1Y4qpdQmIOGwDmteZMDcDgisa/kI2gnPepkmVpYoY3vtHeu7+KurXFn4f0nw0o/wBHFvHNIwB5bqBXH6JD9q1i2gAz5rhPzIFesfH1beC20C0REE2GZuBkqFwM+2a5pySnFGtODdOTR4ZpbtFqlpIvBjlV/pg5/pUd02c55JJP61vW0ER+1yOAPJtZHHGcscIP1aseGIS3ADjIUZxVN3ZMY8sbFDIpDW2YYx0jX8qRoYj1RfyqGy4xZhke1Mx8wFbpijA+4tU71FyqooBqbmiTM4j3ppH1qbyD3f8ASk8lc8ljU8yNFCTIG9qT5qu20SF2wMgetXliQ9Y1pXFs7GJ83vSgmtgxxAnKLimiCLkleO1K47mXk0oJ961Ft4yo+QZpPs6FiFUAUrjuZ4Jp6sa0Et48coPzpwtoT/CR+NK4ygDTwxq99lhA53D8aUWkJ7t+dFxNXKQc1IJDVv7FF/eb86PsUfZmp3J5WVxKaeJqn+xJ/fak+xD+/j8KLodmRCajzal+xAjhz+VL9hOP9YPyougsyLzeKPNqCQhHZc5xTQwoC7LPmVZtT+7LeprP3CtGEbYkHtSY4kpcqylSQwOQRXQ+Fo5Nb1i1077rzPt3L6dz9a5on5q9I+BWn/avFk12yqVsodw3HGGY4B/IGk5WTZpFXdj0RfhFpvy51G9Prwv+FSj4R6QB815eMfXI/wAK9AS5XgSAo3TnofxqwSNpJI2jvXG60+53KjT7Hy/8UNPsfCniKPT7JpZo/KDys5yVJ6Y/CsOO3nljSSOGRkcAqQOuab8QdTOs+JtRu2ORJKwTvhQcAfpWAuo38KKkd7MqKMAA9BXdFuyuefNrmdjovstx/wA8Jf8Avk0v2ecDmGQfVTXPDWNUHS/m/OtDQ9S1K+1mytXupZFllVWBPbPJ/LNVcm59NfD7TIbLwtarOAuQpbsN3/667CNAqkDG3sPQVnaXZpHplrE4zsUHB9a0SeCBXm1JXlc9SlHliiG2WJVk8kA4JBxXhH7SertGNO0SJz5WDcSqDwTn5c/qfwr3W0UQRBMcsSa+UvjfrMGr+Pbx7STzIrdVtycEDcuc4/Oroq8rmOIdoWPPJHwjj14qm5qxOdoAJ681VY11M5UhjGo2PNOY1GxqDQaaQ0E03vSAXNOFNpRQA3T5RDfR7/utmJ8dwf8AIqbbsN1ZSD5hn8x3qvNATkRjnqKtyuZHs7tVJlwElUDncvt7jH61nHsdE11M+2OcqeM8Vpyyq0O9gGLDn/ZI4I/karava/Yr8NHzFKBIh9jSxfPuA5DDd+XX9Mn8KFeLHpNDVuUUYeJHHpUq3luwAaAJjoVpmhxQHVPKuyOM43HAJrp7e3t1kfzo42jY4CkdD9a6aUZTV7nHWnGDs0ZNswcZjYOP1plwzK2ChNS67psdkVmtwyRyZ+XPQj+lVI7O7eJZEglZW5BCtiqbafKTFJrmTHF8DJUjNJwwDCmG3uh96CUfUGkVJlYYRhzRd9irLoy3YXDWd7b3K5AjcE49O9aOq5Gp3JClN7GRB6K3IrNkKkEEYBH0xVu6m83T7e4Iy0X7lyP0J+vrWVaN9jWjPe5p+Ho4X0ncY0eTeVmDDPPbNdv4E1R7O7k0tpCbWVPMijY8K2eQPYjmvNLDUxay+ZGCGOMgdGx6ivWfAuk2+u2UevCZTLGWjEKjBRge/wBRUwvcJWPT7ZMxoE54pk2S6oOhPNLpMxCRuPvIcEUupPmfzVXGTk4rXrYzexbtQNw9BW3ZqJW5wKxrLGQexrasyBKPeokVHc14Y1UcCnM1Ef3aay81gdHoAapYzSJCD3qZIQO9JtFRTJEpJFBFPWPHenFM96zvY0toZc8Iz0qsYwD0raMCnqaBCg9K0VWxm6VzKBUR4IOfpUSYL4UH8q2iIh1AozEBnAo9p5B7PzMSaHcMhTn6VTeE/wBxvyrpjLCPSmG4gHXFVGtJdCZUYvqcytq7HhD+VPXSZm6HFdEby3HcU06hbD+IVft59ET7CHVmF/Yc7fxilPh+dlwZVI+lbMmqW69GqB9WXH7vmhVaz2E6VFGcvh6Yf8tE/Kl/4R6bP+sX8qnm1idQSqqapPr17n5Vjq068tiGqK3NPT9HNrLvLA5GDxU8ujWkspeSJSx5PHWsL/hIL7PKRY/GtifUZIoY5iAYzjf7A96ynGqndmkJUmrJEn9iaeOsEf5Uf2Ppv/PCL8qo6xdyS2W60dd4OevauZa+vieZK0pUqlRX5rCqVKdN25bnaf2Tpo/5YRflR/Zmmj/llF+lcK93eN1lP61C0t0T/rT+ZrZYWp/OYvEw/lPQf7K09vuwx/lVW50GJx+4VUP0rkbTUr63PySBvY1v6X4jOdt7hfcVnKjWhrF3LjVpT0asI/h2fJ2vH+VMPhq6P/LSP8jW0NfsO8w/Kg6/p/8Az2H5VCrYjsX7KgZEPhifd+9lQr7CtKLw9aADfGGNVr3xNEgxbfOfcVmP4qvP4Y4v1q+XEVCb0IHRDQdP726GlGhacOltH+Vcs3ijUPSIfhTk8UXufmEf5Uvq+I7/AIjVaj2OoOi2XaFB+FQvoFmxz5Sj8KxR4olA5VSaa/iif+FVqVRxC6le0om5/YNrj/Vimnw7aE/6sVkR+KZcfMozRJ4olH3FFP2eI7i56BrN4csyMeWKavhqyB/1YrGXxVcZ+ZVx9KnHivpkD8qbp4hCUqDNuPRLNAB5S8e1TDS7Uf8ALJfyrnX8WADgVBL4sfHyAZqFQry3K9rRidT/AGZZ94k/KlGn2a9I0H4VxT+Kbs9Cg/Cqs/iO8kXG8CtFg6z3ZLxVJbI7x9O09vvxxH60Lp+nJwsUQrzR9VumOTJ/OgapdA8SfrWn1Gp/MR9ah2PTlsrIHKxxinm0tW6ohrzNNavF/wCWlSLr96DnzBUvA1O5X1un2PQZNJsJPvQRn8KjGiafn/j3T8q4uPxPeIMZU1YTxZc/xbal4WutmH1ii90dmmmWaY2xIPwqyEhRcAAV59N4pum+6VAqufEF2WB8yj6lVe7H9aprZHpDyxRKSWAFZ95rttaKpfnPTBFcJc6pc3CfO/FZk8hlOHOfxq6eAv8AEzOeN/lR6A/iy125VGNR/wDCWWvdSK4AIvGDxTZI1Knmt1gaZi8ZUPSIfFFm/U4PvT/+EmtQcY/WvM0RcU7YB0P61LwEL7lLGzseox6/aOOWA+pqaPWLRzgSp+deU8jv+tKHYHgmk8vj0Y1jpdj2BLmFxkOpH1p5li7uuPrXkiahcRLhJCB9aVtVunXBfI+tYvLpdGarGxtqj1rzIj0ZfzozH6ivJ01a7ThZOPrVhdcvsY8yk8vqLqP67DseoZj9RShkHcV5kuu3w/5a0ra7e9pKPqE+4/rsOx6aZEH8QqKW6ijGWcD8a8ybW70nmWopdQuJfvyE/jQsvl1YPGx6I9CudetIOrgn2qt/wk9rnoa8+L56kmlyK3WAh1MnjJHfv4otV7GmDxVbk8IfzrhAMmnqBT+o00L63M7v/hJoP7ppr+JoQOFJ/GuJApwWj6lTF9amdY3igZ+WI/nUUviRyPkUiuaApwxVLC010E8RUfU3D4iuMnGahPiC83fe4rKpQBVfV6fYn21Tuap1+6I+8wobX7ojAYj8aywtBWj2FPsHtp9y3JrV83Sd1+hpItXvgebmQj61TK00DnpT9jDsT7Sfc2E1W7yG+0OfbNaEHiF0UCVGY/WucQkVMzAr05qJUIPdFKtNbM6UeJk7wv8AnT/+Emi/54v+dcpmjNR9Up9i/rNTudX/AMJPF/zxf86P+Emi/wCeLfnXKUUvqdLsP6zUOsHiWL/nk3509fEcB/gauPOaSn9Tph9aqHarr8B/hNSf23CegNcOGI708SsO5pPBQ6B9amdp/aqN0OKUaip/iFcZ9oYdzR9pb1NL6nEPrMjs/wC0E9RSi+Q9xXGrdP6mn/amHQ0vqiH9YZ2H2xPUUfbE/vCuQF2/qaeLtvWj6qH1hnWfbE9RR9sX1rlPtbetL9rb1NL6qH1hnVfa19RR9rT1FcsLtvU0v2pvWj6qH1g6f7UvrS/ax/ermPtTetOFy3rS+rDWIZ032wf3qPtn+1XOC5alFw1L6sh/WGdF9s/2qPtg/vVz32hqPPb1o+roPrDOg+1/7VH2v/arAE7UeeaX1dB7dm/9r/2qT7WP71YPnmk+0NT+roPbs3/tY/vUfa/9qsD7Q1H2hqPq6D27N/7X/tUfbP8AarA+0NR57UfV0Ht2b32v/ao+2f7VYPntR57UewQvbs3ftn+1R9rHrWF9oakNw1HsEHt2bpuh60fah61g/aGo+0NT9gHtje+1LSfah61hfaDS+efWj2Ae2Zu/al9qT7UPWsTzz60eefWj2Ae2Nv7UPWkN0vrWJ559aQzH1o9ghe2Zt/a19aT7WPWsMzH1pPOPrT9ghe2Zu/ax60n2setYXnN603zj60/YIPbM3/tgpPti+tYPnN60nnN60ewQe2Zv/bB60fbB61z/AJzetHnN60ewQvbM6D7aPWl+3e9c6Zm9aPOb1o9gg9uzo/t3+1R9u/2q53zm9aPOb1pewQ/bs6L7d/tGj7af71c95zetOEzetHsEHt2b/wBr96X7UPWsETN60omb1pexQe2Zu/aR60v2getYgmPrUgmNT7IftWa/2getKs49ayRKfWnrKfWl7MPamusoNTI9ZMctWo5Pes5QNYzNEPS7qqo9SBqycTVTJi1G7moc0A0WDmLAanA1ApqRTUtFJktGaaDTqktMM0UUUhhRRRQAUUUmcUxXFpM0hamM1CQmxxNQTt8uKGeqk8mXAzjmtIxMpz0MLxFcJ5F0WYj5Co+teK39uRM+OhJ5r1DxfOsVhO4PDSbR7815+6CdSB1r28JD3DxsVK8jFSMKcsaZIOeKnu7V4SSQcVS80njmutK25y3JRKsIZnRZMjGD0+tczfktLW5cOBEcgljWBcnMpqKlim9DZ+H8e7xfppYAhZQeTgZHI/lXR/GvW4NT8UWhikVkgttvByAScmqnwwsZZ7y7uLeMvPBbu0S+rkFV/nXnt/aXiXkyXaP56MVcMckEHkVxuKlO/Y2c3CnZdTTSSP8As2/l6sTHAv4ksf8A0AVkwTpFM5fv3q3tMPh6IMhDT3TNk+iKB/7OayCjuzFVY89hR1BtpI0Tew/3qY19F2zWeYZf+eb/AJU0wyf883/I1LRSkXWvk9DVdpvOkLAYAFQGJzn5T+VOhBWM54JNRLY1grscxpMig5pj/LG30rM69kMhuQmcjIJqwt9GP7+KoeW/9000qw7GrOa1zTF9D3BpwvoPQ1k4IpKljSNj7fF2bFKt5D1L1jUZpFWNxbyDPDgCnC7h5w4rCzS5pWHY3jdw8DcDSLdR5zuFYWacGpWCxvi6Q/xgU8XMY/5aCueDUu80BY6IXKf3waeLhP761zgf3pd59aLDsdJ56f3waR7hFQncOBXPCQ+tOEhoAnLFmJ9TmgGog9KGqhWLEQ3yKvqa0geazrP/AFhY9hV0PxUsEiUHJr6I+AmjxQeEpb90BkvJW5I52r8oH0yCfxr52t1aRlVQSzEAD1Jr7F8KacNH8N6bYfLuggRGI7sByfzrGtK0bG+HjeVy4bQqf3LlVH8B5U1zPxC1R9H8F6rM2I2MJijCnqzcDH0yT+FdiTXjn7Q+qBbLTdMRvmZjcOB14GF/PLflWFPWR01fdi2jwadmZjuOWHU1UfPtT5cHJqFiK7jzGw5rtfg5p/8AaPji33A7YEMme2cgf1NcOTgda9v/AGctLcJeajIpCyybVyOyjqD6Zb9KUnaLKhHmkke8oNvHoMCqtpJI89yHfo42r6L/AJzUs0myMlevbFVbAOJ53kGDkKD647/rXClpc9NvVIXxBfJpuj3t67AC3hd+emQOP6V8O3ty1zPLO3DTO0h/4Ec/1r6o+POrJp/w8v4ycPdlbdOeTk5P8q+TCxL5AOBz9K6KKtG5y13eVhsx+cj04qBjTnbOTULNVtmaQjGoyaVjTCakoCaTNJmkoKsOzTgajzTgaEJlzcyMHWMcHOMcGtZdOu2tVuY7SP7FfusKSF+IpM45Pb8az4TuRgfSun8BalAklxoWqkNpmo/Lk/8ALOT+Fh6U4wVzSpN2uiTWfAGqweGg1w8ctxb/ADKqHJ29cVwNpIyFf76HIB9uxr6D8PXtykp03UwHvLU+U/8A00j/AIX/ABH65ryv4peG20DXzcW6EWV0S6Y6K3daqtTSXMjGhVfNySMC30WXVrjZY4ecLuC5x8vb8R0NbFv4Z8WxqqrYyyIvK7ipA/Os3QLye1vory0f97b/ALwR4++v8Q/L+tez2fjXRmtkkluwm5Q209V9qKEU+tgxDae10cFY+Bde1i5RtdkFtbDORkFwPQAcDPrXrlnFHa2kVvCgEcShVHoBXIah8SdEgO23M1w3oi8Vg3nxLvJcix01UB6NK1dMXGJyyjOfQ9MmZSpyC3tjis65mtIRmYWsYHUtjNeOal4s1i7J8/UBED/BFWHLd+cf3ks87e5NJ1kNUH1Z7BqWo+GTE4u3tnBGMKoJP5V5np7W0epT253nTZyU3MOQOx+orPtCvmDzIygPTI71obCUKnoal+/qXG1MXUNGm066kt7iT5lPytjh1PRh7Ef1rrfhn4pTw1dXdndiWa0uQG2xjLI4/iA9xwaxGml1XT9lw5a9sk+XJ/1kPcfVf6mqmmzi31ETsu6ORPLcjqnoa5uZxlqdfLGUU0e9aL4j0+6unNrMcPgtG67WU9M49K6kgTJkcivAIZriF/tNmw8+Eb0fPpzz7GvXvCeqy32jW16sRWKZclc5KnPOParTuZNWN+1c27bX5TsfSt6xcFge3asRQswyCDV2yLQMMHK+lDEtDrbY7kFLKD2qpZzjYKvK6sK52rM6ou6IVLe9TR7vU1IoHtTgAKlu5SQ9CR1NI74HWms4AqtPMNp5pKNynKw2a6KtgMaryXjf3iKozSMGLE9ag3lm9q6Y00c7qM0PtLHq1SGUhMk1mA5fAq0+RGoz1ocUCbJxLkdaryy89adFDIyFgDis+dykhDcEU4JN6EybtqTvMAOtQNNmqskuTUJl966IwMHItNIexpVuJFXIXIqp5gqeBwQatqyEiwtzvT5hiqcswViKmuGAVfrWbMf3hpwSFIseeK3lkEugsx7LXK5rorZlXw+N5wrcE+xNTXjZJ+ZdHdoxg7EZVGIPoDTTMNrDA/rXU6oqQ6TIbUBSqYGB2riipz1qqM/apu1hVafJpcmMwphmFQlSKY4NdKRgTGce1Ma5Aqs+agcGqUQuaRkb7L545QHB9qgN6FIyByKEydAnXJysmfwNY5VgwPpShG97jehqPfjuRUR1BfUVlOrE0zY3qa05ETc1zqC+opBqAz1FYzKw60gBpqCEbpvAFB4waT7cMdRWRtbZmm80ciDU1xfAEdKc18uw88isJ2INOMhWOUHnIFHIgNUX6luSMU2S+QHhs1hhycc01n5quRAbT34PeozfD1FYjSkdKb5xp8pJtG+9xTTfe9Y6yZpDLRyga5v/AHpv9oe9ZG/Pems+O9PlCxsjUPelF+T3rDMvvQJiD1o5Qsbn273oF8PWsUy5NJ5ho5RWZu/bR2NPF5kcGsEOfWp45cA5o5QN77blABTJrpsg+tULNgw56VLPgrkdqi1nYC0LggA9qd9o3Kfaq0OGi5NKy7T14NFgLMNxkYNSGeqkK8kVYEWe9JrUBTLQJDTlgqQQ8UgIS5xSCQ1I0YAOKjVOapAhwk5qVJM00IMVKiCmOwoelLZFLtFIcYqBpCE9Kdmm5GKXcKTQ7DhTgaj3AUb6LDJg1OD1BvFSpjANJoaJDIQKFlNI2GHFMC80kOxKJc0vm5qPbmkPAosBYEnHWpFeqi+9O34pNFFzzBS+YKpqxNPBJpcoE5kFN8wVEQaaQc0WJLIkFPEgqmM0ZNHKBbMg9aTzKqljSGTHFHKBdEg9acJBVDzCaN7etHIBobwaNwrP8xqXzG9aOUC6WFIWqqJKeJKOUCajBzUYkFOEoosUOwRRk03zBSGQUrEkgNOFRBxTwwpWAkGaeoNRBqeHpMCUKc9acBUO+gyfWlYosAfSlBqt5lHmc5pWAuBhS7hVPzqPOo5R3LvmUeaPaqPm8UebS5BXL/mD2pN49qpeaaXzDS5QuXN49aN4qmJDS789aOULlvcPWnAjHWqYelEnHJo5SkWtwpdwqn5nvS+b70coi3kUuRVQTe9L51HKBZ4oqsJqXzuKXKFywaaag86jzKOURPmgVB5lKHo5Rk1FReZR5lFgJsD1pMD1qLfSb6LDJSB60mB61HvpC1FhDzjsaaaTdSFqdhWFJpKaXFJvFOwWHZpdx9ajLj1pN4osBJuPrQTUe8Uu7jPaiwajuaATQGGKUEUgFBNLmk60opMBcmnBqbRSCxKGpyvUOaN2KloVyyHpwfmqwbinZqeUdy4kmKtQyVmKaswtjrUSiXFmtG9WFas+N+BVqNq5pI6IssZpM00NxSFqixZKpqVTVZWAp3mAd6TQ1Kxa3Ypwaqnm46UokqeUvnRc3UbqqiSnCSlyjUyzkU3NQ+ZQXosHMS7qaX4qEvUbSU1ElzJmk4phkBqtJJUJk5rRQM3MtO/esyeb58noKknuAqnnmsy6lHkSH/ZP8q2hAwnO+hx3jubfbwAZwWY+1cak7RNkV0fiybzZYoR0jX9TzXMyJnNetQ92KR5tbWdyzLdLcx7GAzWS1uIZD3FW1jweOtTNFuTLda6U7ozsY1+qqmR+PtXNzr8xPrXW6nBst9x/i6Vzk8PzVlURVtD0L4TXP9jWk2pSsqRfaFhdmOMLhif6flXm2o3i3F7eXLMCZZnk6+p4rofFM4sPAGm2kTsJbu8knbt8qrt/LmvPMGRggPLEKP5VyKOrkXOpa0Do/FGYLXR7bcCEs/OIHZnZif0C1m280Swqu9QQOeaZrTsb2dXYkx7Yef8AYUKfw4NZhqUtC5y97Q2WmiI/1i/nURkjBz5oH41kk0xjUsabNWSeJFOHBz6VSJ+Ue/NVCdxA9eKsyHBxUSN6S1uIWpjsAU3HAJ5ozUFyfnA9BUJam03ZGsXVgPLZcYoJXyzuxmsTJoEjjoxFUYcpsKkZX50BJ9qDBbn+AD8KyhcSjgOaeL2YdWB+oqSuVmgbOA9AR+NMawjPRmFVVvnB5UGnjUPVP1oHZkp04fwyH8qYdPfs4NPXUUz8wYU9b6H1I/CgNSqbGYf3T+NMNrKD93NaAuIGH3xTg6Mchx+dTcd2ZZhkHVTTdjD+E/lWzkY4YUvygdqLhcxeRRk1rlUIy2M/SmeTE38IFFxmZmlDVom1ixzj8KzpGUSMFHAPFADg1SK9Qhx6U9X6ADk0DNOzGIsnvU7EYAHeoY+FA9BSq26XPYcUiWztfhZpa6v460m2fPlpJ57Y/wBgbhn2JAr6xHWvBP2cdL83UtV1Z84hRbZOODu5JB9sAfjXvErlIyQMntXNWd5WO3DK0bjywzivmD4y6v8A2l4zvcNmO3xAn0Xgj/vrdX0XrN8NL0K9vrg/6mFpDj2GeK+ONSupbm4klnbdM7Fnb1Pc1VCOtyMVPRIqTNg1AzUrn1NQsa6WzjSuOO5iEQZZjgD3PSvrr4d6YNF8OWNmU2SQwIrg9Q5yzD8zXzB4A08ar4x0+B08yGN/OkX1VeTX1havsiBdtzMxJPr2zWdTY3pK0jSublYYjI/QEVIsowSCKz7uRGj2nnP4mpBIqof1rDl0Onm1PB/2nNY83UdJ0tSf3SNcN6c/KP5GvFtxj0+Rs4MjBfwrsvjfqa6j8RNRMbho7dUgXHYqo3D/AL6zXDXb4igj9Bk/WttlY5ZayuV2aombmhmqMmi5SQpNNJpCaaTUlJDiaTNNzSE80DHg0uajzSg0XA0NJulI8qYYkTgj1FOucI5KElScgjr/APrq34y0WbRdUZ17HI9CPWrGmW1vqloJIQQ4+8vp7VSi78j3K54250dz4d16fUtKhvoQJNa0pMSKet1b/wB0+46iuz1m1sfHng4G3cFZV3xPj5kYdj7g8V4tp9zc6BqkVxDlWRs47MO4Nd1pOtp4Z1BNTtPn8Mao4M8a/wDLpMe/sK2T0tL5nLOFnePyPKp7e50jUpLW5BiuIXxn09x7GpnMUm4pCrORlQ38J6lf6ivYfip4Tj1zTBq2mBXuok35T/lqnWvEoHDNhwdynkdD/wDrrnnF05HVTmqsddwgknnk8uEoh6+laMWlrJg3V630Rc/qaoXkWxlngbPfcB1Pr/iKvWV0s0e4/eH3hWlNp/EY1lKPwl6PT9PtgT5Lz56eY3A/LFSQzpCcwwxRY7qoB/PrVN7tQMMQB9arS3cZ6ZP0rfmjHY51CcviLF7cpOGVlYknO406zn3LtY/MP1rNaXeflBz+dSRMQwJYJg/jWfO3K5r7NKNjWy6uksLlJkOVaqnnywyMycDPTrj2q/aQT3h221vPKf8AZQ4qxc6PqmnQvd3Nlut+ki9flPr/AI1U4c2pNGpy+6UYNXniz8kLAjBDL972Ne//AA48R6fr2iIlrEltdW64mtV5A9GX1BrwKK3gSJpolEsTH5C3JQ/3TVrT7250+9tprGdreVn2+YhwR7fSsFJJ2OlwbXNc+mlAB3REqf51ahuiDiVB9RXkmneOdUtpFW9ZL1BwwZdrfga9B0bV7bWLEXenyb4wcOp4ZD3BFVozPVHXWd6i9GBHua1YbtGGcj865FWQr8wqZGVfusR9DScEylNo7Fbpf7wqT7SpHBFcesoHWVvzqxHdKo++T+NS6SKVVm/c3W3iqQMksmScL6VRN0X4HJqV5JYwCVKg1SjYTlct3agx+9UV3KpxTmkMg5JGKQOgOGbimtEG+o6NWPPGTViYHKg9hUcUkSkMoJNR3N0ATg81OrY9EjQGpLbRBMAkCsO9uPOmZ+majeTcck5qCR17VtTpqLuZzm5aCM1RPyCPWlZqi3jdgnFdCMhNrj7hOKnhnePh0NLENxArQjjG3HBolJLcaXYh8wSIvBHeqEx+YmtO4QIvGBx2rMmXHSnT7oJIrFuTW1rTvaaDaQudpkI3fQVn6Xam61CKP+HO5voK6eC0sdVuZLmT96kRMSKfugjqcVnXqKMlfoVSpuSdjkIdVuVjEYmJTpg+lSFsW5lOOX2jn2yai8RyRjVJYbZEjiiO0BRjJ6kmqKyu0YUt8oJP4+tdUIqSUkrXM5Np2bL4kBoJBqmCRTw5q+UyJioNMMSmmmSm+bTsxEgUiNowx2NjI9aheAU7zqXzuR7UaoLlc23PSk+yZPSrPnDNPWUU7skotZZ7U37CfStPzVxTldDRzMGZf2NsYxSLZE9Qa2QyelPUp7Uc7C5z8untjOOtNFgz79wP3TXSHYfShUQk4A6UvaMZyDWJHY1A9m3oa7E28ZPQVG1pGewq1VQjipLVh2NQNbsOxrt3sEPYVXk05ewFWqiEcZ5TAHg1EUb3rrZdNHYVRk07B6VSkguc+FbNBRiehrZNltP3aQ2o9Kq4cxilCKQqc1rtajPSojbc9qaDnM7Bpeav/Zxio2hwaA5isAaeM1MI/aneXntQFwtZSpI5qzJIxjP0zUMEX70cVcMWQR6ispLUEyGxkLbveriqWUfKSBxUNpblWATknivQfDvh5JNLla4JDnkVhXrKlqzSFNzdkcEpMb45GKuRS5FGtWv2a9ZVORkiqw3KQa2VppNEOy0NFZKkD1nq5qUOexNLlAnc81DuANNZ2HWq7Oc1SRJd8wYpUlHrWeXOOtNSRs9afKO5qmTio2kql5rY70hc+tJRHcuebxR5vFVUanbqOUpMmMhpPMNQM1MLe9HKFy4JDVmKUEcnkVQgIJwatgDovfqaiSGiYS55Wl83B4qPIVeKrzSEZxxSSKuXTcYpPOz1rOLnqeaa1wR35p8vYLmkZsUCTJzWUJznJNTx3HrT5LCvc1FeplbistJx61Ok/vUuIXNDNJmqnne9HnVPKO5ayBRkVU86jzjT5RXLJqJhzTRJnvTg2aLAPVakCUxDUoNSyhNlGypBS4pXAhKUhU1MRTSKdwIuaMkU8imkUwELH3o3U0g005osSShsU4OagBNPUGk0O5OHNTRtn3qsoqaLgGpaGicH0FKDntTc8Uo61mUOB5xil28dKVRk8ipRnGNvFS3YCnIDvNG00+XAlNKMcVd9BDADTgCKkG2njZSbHYiyfWnKSSAaeQvoaEC7hSHYhPU0pz0pxAyaUjmmKxHSU8ik25H0phYaTQc8UpU048gcYwMUrjsrDKCTTtvFGKLiGZpCTUgWkZeKdxWI93NG+nFaaVoCwokpRJTNtGKLICTzKUPzUXNAosBPupQ1Q5pQ1Kw7EoalzUO6jdRYCbNNYmmb6QtRYLAxNN3GnIu9sZA96sLZyyAHB29B9KlzUd2bU6E6msUVNxoya1odOQplzzUUthg/KeKyWIg3Y6HgKiVzN3GnLKy5weD1B6GpJbdlJ4qHGOtbJqSOSVOVN6jzL1xgUokx3zUeKMU7GbJxJTw9VhTs1LQ0iwJKXfVYGnK1KwMshs07NVw1O3UrEsnBpwPNV9/vUitSsSThqkR8Gq26lDUnEpOxrQSDFWY3rJhkxVyN8iuecLG0ZF8SUF6qq9PZsVnymlyUv70m6oN9G+jlJuWQ9KJKqGT0NJ5lHKHMXRJ708S1QEnvTlk96TgHMX/NpDLVPzaY0tLkHzlppqjaX3qqZPeml6pQJciw0majaSoS9Q3Mm1OvWrUehDZDcTFnPPSqlzITCwz14oZ+aZLhrdixAAYZPoM81vy2RitWcXrsiz6hIyjCrhPy4z+lY8g9K0b0iS5lZeFLEj8agWLPJrugtFY55aspqnfFXoYt6Y9KeIhjtUsACn61tFWEkYesRnAGOlc/JESa7nULIyDIGayE00fao1kB2mRR9aJRvqGwePrGxXwvbtPu+1wmKOJc4xuUljj/AIDXndnZwNfQZBKq25sNjAHJNb3xPaca9I8lwDCZGWKJTyirxkj3ycVzGnswS8n3EhIvL5P984FcVrIG052sQys13MHlb55GLsfc8n+dPFjGT99x+IqrOfn9MCot3+0anoPdltrOIcB3J+ophtIu7P8AmKrF/wDbNMZ/9s1DNETvbxxyKUckjnBprHmm2+TvYkntzSms5bnVRWg3ktUYhMzM2cc4FSMdqsfQVWQyJyjfkaUR1H0JGs5AflINRNbyr1U/hUv2uYfewfqKUXp3ZZOPamzJXKrKw6qR+FJV83kbDkEfhmk3279duffipLTZn0ma0TBA/wB04+hpjWIP3H/OgdyjmjNWXsZV6YP41E0Ei9VNBSaZHmgGkKsOoIpOakZIHIPBIp4nkHRz+dQZozQBZF1KP4zUi3kg64NUs0uaQWL/ANtYqRtAqqOtRg04GgLEgqxaLulB7DmqgNX7BfkLep/lQJouE4UmhGCISe3NMkbov41c0axbVNXsbBFLNczLHgdSCef0zQZtH1N8GtH/ALH8AaeHQrPcg3EgPXLdP0xXbMc46dax7cvpcUFvF+9gjRUVP4lAAAx+VX0uI7pN8DjcOqng5+lck027nowaUbHA/HXVvsPhMWyPtkupQvB5wvJ/A4xXzHcSZYgHgV6v+0Hq4n8SQ2Ck4tIAD7ljn9MV45NIM8muikrROOs+eY53qB5KY0npUDyYUk9BzWpOx6r8FLRknn1AEhpJRbpwMYA3E89j04r32CT94UDfdHJrzD4daWNP0/T4GTDwx7mJ/vt8zfkTiu+WfMgA+6uB9felNCg7amr50ZK4J3knnsMVS1fUU0/S7u7lfEcKFyT7DmmTXKrs6rn+GuG+MmsGz8C3yxkB5gIQPUMcH9CahRNHI+cNRvJL29uLqY7pJ5GlY+pYkn+dVriXfJnGOAMVGTkgUwtzmk2NIUmmFqQtTCam5SHE03NNJppNAxxakzTc0ZqbjsP3UoPNRZq7o9jLqeqWtjACZJ5Agx7nk/lTWonoetRm18YaOiS7RdIuA3f6GvOrmG88JaxvUExE4ZexFd34i0u40e+OqaQrKM7p4VHB9WA/nWnDBp3jbSSkm1bwLgetdMlzepywnya7xZzLG21vTllhALgZBH8vrWfo+pNpcs9tdRefps42XEDdCP7w9xWN/p/hHV5Le4V1hLYIPT6itTU7iG5tlkiwSedy0ubmWu6NuW2i2Z3/AII18aFdxaHezefpdx82n3bHIIP/ACzb0xXO/FLwZ9kuJNY0dP3DHdLGv8B9RXK6dfosTWF+GewkOVYfegfs6/1rsI/F+oR6a2lTCCe+UARTSEbJ4/U++KLxlG0iXGcJc0Tzy0uFdCrgFT94eh9RUL2/lzMUYgdCByefpVnWrf7PqErQ+USrfvFhO5VJ54PpUmmzRvKknmeTMpykmMgH0Yf3TXMtHY6n7yLWmeGdU1FS9pYXDqOrSARL+uDW/p/w+1CSX/Tp7S1THWMmVgfTHA/Wuo0TX01O1MLkQ3kQxJDu4PuvqKffa5badHm6mVfRRya7Ywha5586lS/KUbXwJpdsytdXN1c4HIJCKfwHP610GnaPotsAsGnWwPZnXcfzNcw3jzTGwjJMB/ex1/CrUXjDRzE0guPu/wAO3BrSModDOUaj3OvlWOJD0AHpwBXG6/4qt7NJbexYXFwwKkYyo+p71i6t4jv9bjMUGLSxPGf4nrDeFLfhAWJ6nuaTk2tAjBJ+9uNtQ8TPImwb/vR/wkehp7zxK5AB8s8lW5wf896ieLAOzjPau4+Hvg2011ZpLy42mLoucVzzgmjpjWcdzn7TU4DGBLP06FlOfxrt/hvrljZ61LEtwifaUA8s8KzD36c1zfirQ9NtGltrZtl4JAFO75GB4xjsfeucismtZ3S6wJUONucj6g+lRZQ1NIv2miPqe0ms2QKw2fTmrqx2zL+7kBP5V4BpHji5shDaiHeWG1WlkZlH+FdRY+Ptjbb2DCjkvEc4/DrVXT1Bpx0PT3t3LfKoI+oqWK0k2/6rpXMaVr8WoQLLaTh0PQg10tnqUpjGWHHHWm720JVupZgSSFtwh5FXJrm4uECmLaB3qi2pOMYIqKbU5ipAIAqOVt3KuloX1Q4O9h+JpjCGMZ3bjWSbh26nNCTkcEZrRQYucvy3JC8YC1RknyTk1FJIxbmqrMcnJrWMSHK5YaU54phmNQF6bvX2rRIi5YMmRSMFfr19apSXPkt+92iM9GzV232yYIIK+oqrcuoLUdFLJC/qPcVp2l2JDhlxgdR0pgdFTJ6Cs3UL9IQQvBPYf1pfHpYpPlL17eKz4B4FUZLge5PtWI96WPDNz+takJOlSwXGoMDPIR5MGcnn+JvQCtXFU0RzczNaW4XSNPbdxf3I+VRyUXuTWVbapc2e8WzssRPAcfr9TXYajLY6fpNxdhI5bnyy29gCzHH8s15ddanPK5aeZnbqcnj8BWOHtVvdGtZeztZnQOHu2e4ugEG3cWUdT2/OqmeBwKgjuJJLaMDdtPzNz1P0+lS7lHOScfpXXFW0Odu5IHOelTMkyKC0bAEZ5BpljqK204lWNHI4wy5FbA8SxyqVnRGHTlaipKafuxKiotasxjJxyCB7g0wHe2F61o6tqVncW8UcEaovAYqOTRawWRkV4pj1zhhQqrUbtByK9indQG3IBYEkZqtv6n0rZvrJJ3Mn2gAH1qidPQKV85G9804VU1qKUNdCpFKm75zilecZ+U1I+lg9JR+NRtp6qDm4TP1q+eLJaYxpvegTkd6zLuQwSkbgR6iljZ5ACpyK1SVrmT3NY3BC9aWO5PrVHypCoy2KYoZWxvzSsgszVNycdaeLlgCfSsoMxPBqba7qfmQH3YClZC1NJLw7c0fbRnrWUUlUYEkWP+ugppRwMtNCCe2+jliGpsC8FPF0p9Kw87eDcQ/99U9ZB/z3i/76o5EK7NvzVakKq1ZCXC7v9atW1uQDgMCPWlyNbBzFhrdDUElqMcVOkwPcVMACRngHvSu0G5kyWvtVSS1bPAromiXPBzTDApqlUE0zmzbMM8VA8DeldM9ulVpoF7VaqCaaMFYT3FSrBWgYgD0oCgVXMJFaO3AI4qc2/wA1TLipAwqGykyOBDE4YDJBrpf7fmFr5aJt4xWCJFFSrMnesKlJVNZI1hUcditdBp23OOcmmeUSvTirbSo3ambhjFaLRWJbuUWjKngVIi+xqfAoVeeKq9wInjyKqyxHdxWkQCKgkXmhMGU0hyRmrf2eARcE7qQCg9aHqCK5ipoiJOB1q3VrSYke9UPjFEp8qbGldlZdNnEe8KcfSqjoUJDDBFep3F1ZW+nDcEwBivNNVnjlunMYwpPFc2GxEqjd0bVIKHUpMaZ3wKUtk0n8Wa7TG5IoKjOOasRzEKdw5qrKCSMHFMZiOF6VFrlXsXTKQemT/Khk+Xc74z071SUsOp5qedybZGH0qJXvZFJ9WDmFRzIQfpULG3I/15z/ALtVpiSoPrUBq1DzIc/IvE2+eJj/AN8mnoYT0lP/AHzWcBnvUicYBp8nmHOagiAZhvOAu7OKckkY6MxoUZiTnkpVVOtZwvLcuVlsXxImASWp3mJ0BNU8HFHNVyk8xeR0JxzQWCuR2FVEyGp85IlJHelbUL6XJ/MGaBMPWqhYnmmkmqsK5opcAd6nW6HrWLuNG9gOpocEw5jfW5U96lW4X1rnVlYd6mW4PrUumNTN7zQaN2ayI7g+tWUuOKlwHzF4c0oUmqyzj1qZJhUNNDTHlKaUpxmBFMMgPehXGwCgU8AVHv8Ael3CgEybinLjmq+8etOWQDPNTYaZZzTlNVxIKesoBqGhplpTjFSB+KqiYDrSic44xWbRRBdSfvjTfMO0GifEshO7HFRSMEABNbRtaxJMJTThKaqiVfWneYuetNoaZcWXipY5RuHrWd5i9jSiUBhzUuIXLxkG40/zAVPNZTXGJG571J5wKEk8AU3EEy8rjBp0bA5rNhnBB5qWGbINJxsaw1sX9wwKKrCTgc04SVNjNlikNRiQU7zBSsIeBSNTQ4oZxigBaTimFqaWqrBckOKTAqIsaN9OwXJcChVGai305H5pNDJCtMxSluKTdSGGKMUZozTATtQBnJPQUE8U+BPM3ADJHJ+lJuyuy6cXOXKi1YwAkO3A61anvV+4nSkdlitgOmRWVnk81yRj7VuUj1qk/q0FCG/U0Ulyepq3E6jkkVjK2KlLkx9cZonRTIhWb1Nb9zcMcEE+lYt/H5UuMVNA3lyAZ5qTVuUBI59ammnTnZPQuq1Wottaoyy1JvpCKTFdx4rHhqlgcBvmqv3pwbHqDUtXGmXsxhgQDjvkVFIwJyBg1GLjjBGajLdycn1qFHuOTJ0IOcnGB+dG6q+71pd1VYzbJ91Tx8iqQarED84osBbC0nQ0xpMcdKN+RSsBMh5q5C/rWar1PC9ZyQ4uxob8GpN2RVRW7GpkyDg1i1Y2Q4viml6jlbDVFv560JEtlkvSbqg3UoaiwifdQHqHfSbqLATl+KYXqPdxTWahIGSF6TzKg3U1mxVJE3J9+ATWdcXBdj6VZbDxYzzWZIkm48VcEr6ky2HNJxUV9dCHR7t2GcgKPxppVwelV9QtZLuxe2DBFdgxJ9q1smQtDkjOC3OKnSTI4rQj8OKD802aux6RGgwSD+FdUakUY8kmYO8k8VLbpI0q8cZrbOlIuWGPyp1vbru4A4rRTVroFBrcWCIOmHHSnHTYpGZ8f6tGf6ECr0Vv8lU9Vnaw0m/uApYiFlUDuTWUpO1kaJLqeC+MrUWmv3EbymaQ4dmPYsN2PwBFUoYzHpfmdPOlx16qvqPrUOp3E95ey3FwWMjnJJ/SrF2DDaWsLADZFv8ArvO6sJvoY0knJszHIMjE+tMO2imsD61DKQh29zTGC+v6UpB9ajYE8Z61Joi1Cu2Af7XNBqRhgBR2GKjb0rF6nbBWRDPkxhRySarsjL95SKnklMc64AO0VaW/iK4dCPwyKpbGM3eRmbmAxuNG89wp+taX+iTH+EfpTX0+NhmOSgSfcztyk8qR+NB2fwt+YxVh7KQH5SDVeSJ0OGUj6ikUmg2HGQR+BpQ8q9GYfjUJHtSh2A4YikUWBdTL/Fn6il+2SA9BVbzG7gGjevdSPpUjReW+B4lTI/OnGazk6pj8MVn5Q/xY+tGw44IP40BYv+Rayfdlx+NNewBH7uQGqBB7igMy9CR+NILFprGYDIAP0NQtDIp5U/lSrczL0kNPF7L6j8qLjRDhh2pRmmZOSc0oY+tIokGSeBzWxbKoCr6DFZdoC8wJPC/Ma0DJsjZu4FAmgLBpWI6ZwPpXoXwO03+0PG4uWj3x2MRlLf3WPCn+debxHC5r6A+AmnrYeD9S1lo182eUqrdyqcYPtuzQxWu0ekyX/nEsQysDt6cjFakdktwRcMxRwPldTg/jWRZStcWBnbAklPJ7CtPT3eSUQiX5EwABWclbY2g7vU+Zfi/4d8RWHia9v9XhLwXUheO5jyyFewJ/hPsfwrzllI6196XcMN5DJBdQpLbsNrK4yD+FeAfGD4X6dpFhJrWiSi3twQGtG6ZP93/CnCrfRkVKTjqtjwYg1NYNBFfW0l4he2SRWlUDJZQRkfiKmktTnAkGPpUYsZJpEhiO6SQhEAHJJPFaGa2PpTw5NBc6bb3lsojjmj8zGSQCxycE81sRhjuf/lmq7s/Ssu0SOyt4LWNNscMaxhRwAQMVoQSuIH2qdr/KWPQYqzNdiNZCz7mfk+teV/H3UIhp+l2OSZpJGm46bVGP/Zh+Velbz0xya8E+NGow3njJ4bZiyWcKQnPQNyTj8xSnoioK7OIKkQGU9M7R9ahJ4qa6OyCCPuQWP41UJrC5uhxNNJppNITU3GKTSZpCabmlcY7NJmkzSE0XHYdmvU/gbpAl1C41aZMrEPKhJ/vHqR+HFeWRRvNKkUKl5JGCqo6kk4xX0z4N06PRNHs7SNBsSMeY4GMv3/WtaSu7mVWVlYmmaKZcO0Y7ckV5zr2mXPh2/Oo6PMDbk7nQEZT6e1c9/wAI5Yggy6s5Pr5gpT4f0ZVPm6u/v8/WumV5dPxOaCUev4HX6nf6P4s0IrqUsFveIuVkLAZOK8rgWazklRZEe2U4yT/KumGj+H12g6kxUHj56ebHw3GCw1SQscZ+bP8ASsp05Ss9janUjTutznIyJcEMCrevAptxGuSpy3HH+z7gU3UZhHeSxWzxvbq2Y2CDpVV55id28kkYPHOKxcDoVRvoX1v5Rp5tYxHEd/mM+3iUY6E1Q4yHiJD/AMS/4Ve0C40+K7Cavb+dbN/ECQUP+FdSLjwWuD9ldiPY/wCNaKlzLczlW5HschaSyRSxzRyNGwPBB6f/AFqXUJprmVpJH3yd+a68Xng5TkWDnPbacfzpDqnhZP8AVaVn6riqVHS1yHX1vynF2kaqd1wAfQE8fjViV4HOQir/ALoPFdWdc8PDgaIrfkKRfEGjKQV0KM46Zx/hVKmkrXIdVt3szmbafY6iRyYx6HpVz7bAzYBbP0roF8WWUfMOjQof+A/4U4eNAn3NLgHfoK0SsrXM5O7vynNm5XJZFdj0zirNpqN9auxtXmjDDnYCM10kfxBkTG3TLQH1xS/8LFvt2RYWZ9ODRZdxXf8AKctJLeXJYzQ3LtnkhGNLGl2xA+yXbgcZ8piQPaukl+IepMMLa2iA9lBFRr4/1UKQIrcZ+v8AjScIvRsuM5LVIjsbCWaIE6dfuRySI8YPtW8ultJEpXSdX8xuhLRgflnNYrePta24jaKP/dBpo8e6/uyLpF+iChU4IUqlR6s6TSoPEGjXBktNDk8qQZKS3CgA+v1rpl1zxUg/d+HkOOo+0Jj8DmvOD4/8RFcfbVx/1zWmf8J34hPH9oY+kS/4VaUUQ5TZ6jHrPiyZN6eHoNo7Pdop/nRNq/i4MAmjWY3Z63KHH1+avKm8aa+c51FvwRRULeKdZcc38v4YprlFeZ6xHqvjPkHSrA8dTcIB1+tVjrvjITMg0+wBBxkyjH55ryw+JNYY86lPgf7WKiOu6m/3tRuf+/hp3Qe+eqSa54z/AIrTTx/21H+NKmteKGIEq2CgdSrqSfzIryc6xfuPmvrg/WQ1E+oXJzm6mP8AwM0JpA+ZnpHiLxnqGm3KJNKSzLnCRrtH4hjXNyeP9RVnKyMd3TIArkpp2lGXdnx6nNQk5HfH0qXUd7I0jG61PTbDxHf6vpagajErg/MrxjINTPrmsQpEE1aBAvVVTANeUZKNkVZgUzA+WpYjqACTVqrpYmUGtT01/FWq7wz6pHjP3eAMf41BL4ludzldSyXyCWC5H0rz0W85/wCWEn/fJpRaXJPFvJ/3zTVR9ETZ9zu/+EikWECTUZC6kFWUqMGoX8Tyu4eW+ldu5MuSa437DdYJMEgHqRUYt5s8Rn8SKftZBbzO1fxVhwzXUrAfwmQn/IqeLxusSFViiP8Avc1wwsbpjxFn8RQbG5HBjAP1pe0kFl1Z6D/wsWVbbyhBAc9+f5VT/wCFg3A6JED6hCK437FPjov/AH1TDaSY6rn60c8kFl3O8h+IN0FwqRjnPCmrCePrpjyE/wC+a8+jtpB/HH+dWo4vWZAa2hU7ky02Z6HF40nfqBz/ALNX4fE9xIBtIH0rz23QDrMtaVrKsfWQfhXXHlaI5md1/bd1IMFyaWPULgnOea5i2v0UgM2a1ba8iYjmq5I9EDbNyC+mkkCyMdpqLUVkikBViY271DDLGe3NW/8AWrgnIpclndBe61KIcsMHJpwMiD92SKvrZjqBViK1HcVV0CTMhp524Ymm73I6mt/7Arj7oph0znpS5ohZmCQ5OcmlEbHqTW+mmg9QKc2mnHAo54hys5t4yKibeK6OTT2HaqslmQelNSQuUwvMcdc04StWhLaEfwiqU0ZU9KtNMXKPjmYd6tR3jDvWcCaGLCixPKdFa3hbGTXQW18jQbJFB4wD3Fefw3DIetaVtqRGASaznSUgTcTsVlHrT99YVtfqwGTVyO6Dd6xdNoOYuSNVaQmn+YD3pDg0loF7lZ81Gc1bKA0nlCrTJKnNLzVkxCmlBRcCuc+tN3MKsFRUbAU7hciEhHWnCbFNdaiYAU7JjuWBPUiTZqjj3qWM0OKKUi8HyKY5J6UxXFDNUWLuJuI7UhY0xnx3polweTVaiuiQuQOlME7o2V4pDIpJ6YqNpB7VNx2RPPeTygKXO361UIJySaRpQO9VJroDhec0RXRA7bssAqDTmdc4rMadj603zm75q+Vk8xrlwV5NR/KOQeaqxy5iGetRySlDwSaSXQd+podB1FTovmWRywAVutY63R71oWcu+wnHpg1M1ZFQd2PaKLYC8gH0GajEVuf+WpP/AAAiowwMeCwyDTTKqnqKajfqS5eRP5Vv/wA9G/75pyx2/dnP0FU/tC56il+0qB1FVyPuLn8jZiVBFFsJKjI561GvlBuQfzqC2uA0CYI4fmqtzc+XcOF7HmsYLVq5rKWiZrBoh/Cfzo3R54QfnUFlPaG3LSyEuR93HSrts0MsZKINo6setKVRR3Gk2RBl7IBROo3A+oqLUHSNEMZBJ649Kqz3JEcZ9qqLTs0J3WjLYVc5OKbheeRWd9rB4YnFNa6YkknJ/hHpWtjO5okConxVH7WcfMfmppus1SQXLm4Ck8wDvVJp/emNMT3p2EaHngd6U3eB1rKMhpjSHBo5SjYXUMHrUq6j71z3mEGpFl96TigudAdS461F/avuKxS/B5pIIJrhWaFS4HX2pcqW4XNwatk4qxHqIbuK5Ysytg9QcGpIpiC3PShwQXZ1f20EdaZ9uxuPBwM1z4uWA606KfzHKE43AiocUh3NhtbI6Kv51owXfmRq3AyM1ywtFZsmQ7SPSta1YKqKpIA4GayqcttC4t9TaE5yM9PrT45ty5BOKzlcgDnNPjlLLzjr2rlZpcnuLxYQ7vkKo5rPvL8NFHIDhW6UXREgkR8lSuOOuKydVIitIQmQo4APWuikloTJs0Ev84yan+1ZAw3WuYScirSXPAHIraUewovubZvdpIz0pUvcyKM96wmmyx606Kb96n1o5dBX1NiW7H2mQZ6GrkM+5H78VzVxMReSf71X7S5Ox8H+E0Sj7oJ6l6KZscE81dtJs7qwNPu87hnPFT2F3uaQA1Mlozpox1i+9zoll+Uc0eb71lLcfIvPag3PHWsuUyk7M1fOHrQJ/esj7T70hu8dDT5SeY21n96HuAAMmsZLknvTLy6KqvPehQuwubX2ketH2hfWueW5YjOTzTxcn1NX7MXMb/nr60ecPWsNbg+pqVbj3o5B8xr+aPWnJJzWSLj3qeGcFiM9qlxGmaQkyKPMqmJQB1oEwqOUq5c30u+qYl96USijlHctF81JbT+WeOrcH6VQaYAc0PLg9cZpOHMrMunUcJKSNu9uFeFdpzjiqJYADvT7GET2THI3dR6io9oU4c4Irmg4xvHserVpVKtqrW6LXDjPqKkht2ddwYdemagVhjg8VKsjBWCHFTKT6FOitGPEbJcqG5GRyKtaqP8ARx9KrWxbhn6dTVW9vGmcgE7egqIqU5ryCbjQou/UhHNOxUYang12M8UMUYpQRTqQiPbSEVLTSBQJkZFAp9JjmgVhucGnxPhwaawpAMUCLMj7myKcrcVApzxVpEG2kwBDUsbYNRMMChWqGikX4juYDPWrZOW+lZtq26VfbmrcTgyFawmtTeOwkrHJquG+Y1ZcdaosT5lOKuZzJw9ODVX3GnBqdhXJ91JuqINRupWC5KWpham7qQmhIGxS1NZuDTSajdsCrSJELkd6azn1pjNn60zdVpAOZqYxpGODTSaqxId6aTzSg80YpjSGTti3kIOMKeaxrbUxFjJ710aQLLZziRcgrXLnRwIhLI5ADcqByfatKVRapinF6M0pNbCwnbjpUHiLW49L0q2luGXe6SFkJ6tt4FYdirT63HZucAyYI9AKwPicJL2WEhx5aFht9Cen6Crmk2kjLmaTZxUe24eK3EiGSVhHnI6kgZ/WotbkSTUJip/dF9q/7o4p2lWZj1BZ2IC26mbPuPu/+PFapXavNLgLknLEVzSXvBF+5qWd1ueMp+lITAe0f51Qa1kHWI1Gbdv+eZqWCZoMsHby/wA6rSrH5qhQvHPFVGgP9w1JaxbPMbGMjFQ9jSKux7GmU8io5DtRjWZ2bIdb2izozt1Y/lTZdNcfcYH2NV4pJoD+6cgeh5FWo9UcYEsWfdf8Ko5inLbSx/eQ4/OogWQ8Fh+NbcV/bSYAcK3o3FSPDBMMlVOe4pXHcw0uZk/jz9RUy6g+MOgIq1NpqEZjYj61UlsJU+6Nw9qQ9BTcWsnDx7T9MUzyLeX/AFcuPrVZ42X7wI+oqI9eRQUkWnsXHKlWHsarvFIvVT+VIrsPuuR+NSpdTIfvBh71JSK5B7im4H0q59qjY/vYR9VpD9mkPDFD70gKoLAcMadvbuFP6VMbQsMxOrj2NRPBKn3lNBQ3eP4kI+nNISp6E/iKbkj1pNxpXAfx/eFOGPUVDk0+IF3VfU4pDNG2Hl24Pdzn8BUjkkKvXuaa5BYKv3V+UUiN8xPYUCJlGCB/dGT9e1fWXhTTho3gK208ookSAGQL0LnG4/iSa+cPh1pQ1rxnpFlJt2POJZQw4KJ8xB+oB/Ovqu7Vrd5VZdqAbuemO1JvoOK6lC8mj06xghc/fA3ewq/4WRGnmljOU6g/WsDxVbHULeJIHICYJK9+9dHooXT7SCHOXdBxRP4CofH5G3NKkaEE+9eF/tEa6pisdJjYFz+/fB5XqF49Dhq9cuWeQuHbCg8/Svlr4rax/avjO/kR90UR8mPIxgLwR+eazpwtqVVndWOPlk9DWx8P7Y3vjTTFcOY4pDcMR22AsM+2QKwHavRvhFZiKx1rV5FOdq2kLZ4yTub9Av51vFanPJ2R6Kboyyud3fg1oy3DC0ghjILOcA5456n9KxdGKzSyoHVZPLyGYE8d6vTCOK+McbEx20JcgdSe/wDStTFPQW9njhtTJGXOFLnIwQAOv6V8tahdHUNTuLhiWM8pfJ6kE8fpivoTxdqbW3hjUryNlV/IYDPYscAflmvnW0ws/wDsoM/lWNV9DelrqJfPuuW9FAUfhVfNIzbiWPUnNNJrG5vYXNJmkzSZqbjsOzSE00mkzQUOzSZpuaOScDkmgR2vws0gahr/ANqm/wCPe0G7ty56D+f5CverUHY3lfMhHBY/0rz74c6YNM0eITAB2/eybvU//WArtZZYvLRVbYo6ba7KceWJw1J80rnzaAo4wKcOfSt46vp2fl0eAfgP8KZ/bcaH9xZRR/QLx+lTZdzVt9EYuPY/lThHIT8sTH6KTW2viKZekYB/CpT4ouscAg+zkVVl3JvLsYP2K6cZW1uG+kTGo57W4twDPbzRKehkjKg/nXRt4r1I/dldf+BsaztT1e61C3Md05cZBySTjFS4paplxnJ6NGMVxyOlOiPzAHvwKACvB/A+tMYY+hqE+po10NyDRNRddy2kmMAgnjOakfQNUT71sB9ZF/xqhZ6ncxIsXmnYOFzzirJv7o/8tnraLi0YNTTJU0LUWOPLiH1lUf1qePw7qDHgW4+sy/41SN3cHrO/5037ROf+Wr/99U/dJ980x4euv4pbUH/rpmlXQLnPNzagf7x/wrK8188u+P8AeNIHOcbm/OnePYLS7m3H4ZlkP/H9aqPqf8KsL4URBmfV7RB7HJrns++aPlyc4p3j2Fyy7nQL4dscjdrMX5D/ABq4nh3R0Xc+vxE/3Qg/xrkwV9eKcvX5AT9BTuuwnF9zqRo2hA/NrLfhGP8AGnf2d4Vj/wBZql2+P7qVzHlSt0ilb6ITUiW1yelvN/37anzLsRyvudObTwWBxfaiTjup/wAKh8rworf6y9cfiP6VhJZXch4tbg/9s2qxFo2qS/6qwuW/4BRfsg5e7NQSeFkOPIu3Ge5P+FSm98MKp8rTJi3qWNZv/CPawPvafMM+oAqxH4Y1YgE2oQf7TgU032E1HuTR6hoCSBjpLuvoWP8AjVz+3NDRcRaFGf8AePT9aqjwfqr9Et1+stQP4W1CMkNLaL9ZaevYLR7l1/ElkqgQ6JZrj+8M1H/wkwI/5Bdlj2Qf4U2DwjcOMy6hp8f1mBqyPCUSL+812wH0Of60XkL3SsfEu3OzTbRT7KOP0qlqOtS3dnLC0ECq4/hUAg/lV46Fp8bENrcJx12x/wD16U6RoijEmt8+yUnzDTijj87uvSn2t1PYziW3cq3T6j0NdFJpHh2M4GrXT/7qgf0rnrqOFLmWKNzJGD8rHuKzs47nSpKeiNA63eSjPnEew7Uw6jdnkzv+dZYzDIGxkZ6evtW4l3o5iBFnKz9wW71ak31MpQUehUe+uXUq07lfTPFQ+c+fvn9KutdWAOUsiOe7GkF7aKf+QfGfqaPmL5FTzpMcOaTzHP8AGSfrUz3MZYsluiA84HakW7Cn5YU/EZpBr2ICzE9T+dJl/wDaq09+7Y/dxDHoopPt03bYPwo07jV+xWG70Y/nT1VwfuN+VOa8mJyWH5UgvJhnEhGfShOw7MtxBxjcjflWla7yPunHvxWELu4J/wBa+amS7m4zI9dNOtYzlBnTRbsjjH41o2xcAdPzrloZ5uDmQj8a0rW4kxn5xXbCpcxtZnVQXJUDJ5rTtb7BGTXK20jsASBgn1q9FJ9BWt7j3O3tr5GQAnmrsU6nuK4iC7KnGRx71fi1Agfe/WpcExps7e2lT1q6jKRXDwaoyn72a1rXVOmTWUqTGpHTLGpOanWIelY8GppgcircepRnvWDhI0UkXWt1YdKrSaerdqkju1boanWUMKm8kVozLk0xSOlUZ9HDfw10wZTTWVTVKq0JwTOMm0Yr2qjPp7KOld5JCG7VRuLLd0FbRrdyHTOAlt3Q9KYFcGuovbEgn5azZLcqeVrdTuZONjNV5F6Zq5bXUoz7etKUGelMeP0p7kcpZXUypwTVhNTB71itCSaQIVFLlQuU6FdRX1qQagn94Vy7sw7mofOcH7xo5EPlZ15v0/vCmNfL6iuU+0MP4jUb3bDufzo5ELlZ1TXq+tM+2rnqK5hbtj3NL9qPc0+VC5WdKb1fUVC94vrXOte47mmfay3QE/hRyofIzoheL0zUi3Y7Gucjnc9EarcbSn/lm1DSGom8lyCOtI9zgdazIvOP8BFJMZFwGGCegqbIqxckvPcVXe8561D9iuZOcAD60jaXOerKPxp+6hcrY43oHcUx79cdaX+x2Ay0gqN9MVQcyilzRDkCO83naenrUvmKR7/Wolsosf63H408WkSjPmj/AL6qJWexolYkQr3/AJ0owSQME1Wc2y87mz7k1DFdQLyWw1Ryt6pjuuxoKDu5qREDdSfyqi19EuNpLk1e025E0iqeM8AHvWU+aKuXGzdh7RAjCg/lVmziIWRDnDLj2rQRFCjjmo2lRDuZgo+tcTxMpaI6FRUdWUvsYAwSfwBNAskYclv++ana6tVbmYce5pn2+0z8rE/hVe0q9Li5IdRo0+L3P5Cg6fBnlc/8CpW1S2UcAn8KhfWolPyRE/jimnWl3E1TRbjto44yqAgZB9ajmtIpJGbywWNVH1vPSID8aj/tlwMBUFONOte4c1O1i6lsR0jRatxZQbeB644rDOsS+qj8Kvafe/aEcuRvzROFRK8hRlFvQs3bbIWIIBxWbqBZLWNi+Wz+dQXU0/7/AMwsFGQMjjrWQblicOxYD1PSuqhTejuZ1JF0XGevBpJLja5GaplgR60khLEE9cYrssYWLZuQccmlWfd06iqA9qlgPzYz2p2sFi4Jx608Sg9DVNQWH3Tn1xUkccmfuNj6UaBYs7s0HmmCKTOMYP1qQRsOpUD60roLEJGRSetWVhU5zJ0GeBTCkan7zE/TFF0ND7II88QlPyFhn869auz4estHP2d7dHK9iM5968hUpjhScepqJAjSHKDmuSvQ9q072sXCXLoPvpUa9maM5QuSPpVZH+ZqllKowAVRxnpUfmYYnIAx6V0K9tBWXUnDZAwKltiRMpIOOe1UTJkj5mx9animC3AyCcVLT2CyWptJIMbccdsDNTW86naMFcttyRWeuoFQAkeQOxNN+1SDaQgHzbhn1rncH1NE49jaklKeX3ywU1FNcOkjAHAB4xWaZ7iUgyFeDkZ7GhmkckvOOfSpUEtxNmlE5kUFzkjIzmqGsHMQUBjgjk96SN3RgRMWA7EUy7Z5kC4Owc8VcdHcW5RQHincipI1y+0EDHc1Z2KeoWtXMmxT3HFKkhDqeeDVsxr/AHVNN2L3QCk6gcpVu3JvJCuTz2qzZSNiT3BFKEXH3TSiJQc7SM1LmrWLsrla0k8uUhiBketSadKfMk57VJ9ljP8AyzFCwIhyqFc8cGk5pp6m1OryuOmxeEh2j6UhkIFVgGHQvj60vJ7tUpruZSd22TGQgUhlqEgg8saYwYMRuP0xVJkl2GTOajv5MJHz3qqZHjVsH9Khu5jLHGFySOT2prcOhehl/djNPLAjINZKPIFxj9ak81/8mrJNESnFKJ8VmidtuKeZWfAHFFwuaaz7uc4Aqa0nzIee1Y3nlRtx0qaymxKSxwMd6T2BG6ZuKFmrPExYcDj60odvT9azKuaImo87tVEO3p+tLubuP1oHcu+dwc9KaLg8569qq7mGMU0iTPGSKEUmb2lXjQybW49jW8yx3CblwGriQ77wQu0AY65q9b308ZG1+P7prhxGGlJ88Nz3sDmFOEPZ1dUdGsJGemKtwQIq7pSAD71zo1N2IDNlf1FMmvp5OQwx25rm9hVlo2dksXhoLmjqbt/cxRRFUIxWJ525sk1TlmdhmQ5I6CohIfeu7D0VSieHjsZ7eWmiNRJATUof3rKjlOe9TiU+tatHBzGgHpd1UFl96eJM9DSaHcuhqQt71WD8daXfSsK5ZDDb70Bqrh+KcG5osO5PnNFQh6XdSsK5LUscmD1qtupQ1IC8zgjimioFbinb6lopGjp+DIxPYU9XBkbHHNQWHMcpB54FMgfhzWDV5M2TskXS+RVdsE80+NxjmkbHWmlYl6kByDRk09qbiqIsLupc03HHFJ2osA/NITTM0hNFgHZpjnikLcVFI3FNIQN061GaQnNGatIAoxx9KTdSM+BxTsA5BTjio1fihnoC5oQ/LYOfY1j3Kl4AFbDF1A9ia0jIU05s9+PzqlAjPMgHJUh/yrKGiky5dEZes2Sadq5vQczS4WNR/eHU15h4ktmuNQM32ncz5JUn7nPT616d4uuhBHHK+AbaJpg/u3A/nXjMxEkjszkliTn1zXXh05xucldqLsSRQG3srmRn3GRhEvHGBy3P4rWX9hknZpEdVHQfNite4ikgskjkyNuWC56Z/rWMyKo4lYfjQ6etxSlaKiNfTrntKp/4HUbWN0P+Wn5OKRuvEz/majkQnrIx/E1lKn2FGaCS2uUQkucD/aFP2lIURjk4yfqagii82ZF3sRnJ+bsOtWJcs5J7mueatodNJX1ImqvdBmACg4HJIqyRjr2qvA9xFIZYpMM3O1hxjtUJam03ZWK3mMOGANKrRnrlTV17mCXi8tDG3/PSL19cUgsYZ1JtLhJR/cY4NUZFNogw4wwpgDRn927ofrUk9rJEfmVkxUXmSDhgHFIZOl9cx8NtkH5Gpl1RCcOGQ+44/OqIkjJ5yhpSuRxgipsOxrJPFMOqt+RqOa1t36DafbiscxLuyAVb1HFSJcXMX3Zd6/3XGaB8vYsyaeR9xs1WltZE6qfw5qymp4GJ4CAO681Ziu7eX7kgz6HipuPVGIVIPSkI45Ga6BoY5OXRT+FV5dPibJUlf1FIfMYuMHjj6GpVmmT7spx6HmrMunyKTsww9qqyRSRnDIR+FKxSYPOzKdyIT6jiodxzyFpHNMzSZSRJu9h+dW7JfvSEAAcD6mqSjcwAGSelag/dosSj7vX3NILCcgE06IbmC9u/0qNjuOOwp6sEiLZwW4H0FCBnqHwRsXl1bUNWziOCMQLx1ZjnIPsFwfrXvdjrKTwNBqIaSBuN4HIry34V6c2meDLUux33bGcgjGM4GPyGfxrqL/z2ltI4WKxCTc4HcelauCa1IUmndHU699l0TR7jUnkDWUEZfcvJY9hWfoviqw154rvTZVKKoyufmHsRXnvxi1l7XwyNNjkAS6lBdM/wrzwPrivFtI1i90W+F1p0zRScbsdHx2NQlbRlOd/hPqrxLrQ0/Q7+8Yn5I2YDpk44xXyddzNNM8jsWZzkk9TXeeJviKNf8KfYpYvIu2ceYQeCBXnTOhx84pNJbCu3uNdute1aParo/gfR7XAWWdDdS47s/IJ/4CBXmXhLw9d6/qtpHbRMbZp1R5ccDnmvXvGMqya7JFFjyYT5a46YAwMVUNWZ1XZFnwrNDFcO8rKpKiNc9SSa09R8m2uTNI8fkkCEhT8xJOWz+GK4y1aWa9hghYq7naCKtTrHEscDTMDH5jkMeQoOAAPU4rWxipaWML4vXcVt4SSCMkG7usoAc4ROn4c14tG221mfuflH413nxpvA2uWVinAtLRFb0LMNx/nXnrv/AKPGmMck1y1HeR2Uo2iMJ4pCaQmkJrM1AmkzSE0hNIoXNJmkzSE0ALmtfwrY/b9YhVhmKP53/DpWNmvQPA1h9ns/tEvytLyeOcdhWlNXkZVZcsTvYHWKKNpWBJH3f8atR3hZVcA4HTNYjsHwWBCZ4XpTdT1RbaykmkO1Il4A6V2HCeax6fdyfdgc/hip00e/bpAfxYCmDWb/ABgXLAfQU06vfn/l6kH0OKy906feLH9i34GWjRfq4pRo1z3aEfVxVRtSvXHzXcx/4FURup8586TJ/wBo0XiJqRrR6FO//LeEY9CTTo9CBz5l2q/8AasY3Ep6yuf+BU0yk9XJ+pqrx7CtLubp0CzC4fUwP+2dYMsISaSItu2kjPr70FgT1BqKbcMFQc/SolZLRGkLt6scYwpxk47VqaObFi0eoPKg/hZTx9DWarbl+dSp9CMUHj6Uou2qHJXVjpdugqpzJcMf97/61RF9HU/Ksx9s/wD1qxIN0sixpy5OAPU1proupH/l2YD1LAVspX2Ri423ZbW50cD/AI9ZW/GpDfaOMeXpx/E1SGiXw+8sa/WQVINDuN2Gnth/wPNUubsR7vcs/wBpacv3NNQ/U1Kmu26EbdNgwPUVVGhSD/WXdsv4k08aPbgAtqUWfQIapcwvc7mknizyx8ul2X4r/wDWqGXxXcM2Y7W0jP8AsxiqX9mWhIB1EH6R/wD16sx6NpoGZdVI9cIP8aPeHaBPF4y1SLPk/ZlP/XIGmv4y1pjkzxg+0eKjew0VD/yEJ3/ACnRxeH0OZJrpwOwPX9KPe7i9zohT4v1ojAu8fRcVH/wlOtE/8hGYfQ4qx5/hpf8Al1uH9y5FPW/8OIONMZz/ALTE/wBaNe4vd/lM2XXtUmOZNQnb6tUD6hdPgtdTH/gZrdXXNCiHyaBA/u+eKQ+ItPBBh0O1jxyAAP8ACn8xfIwDdTsOZ5j/AMDNAaWT/nq35mujPjCZWDQ2Vsh9Qoyf0pP+E01DHyxwD6Liiy7hd9jnDDIf+Wcn12mpItPupRmK0nk/3Yya1pfFepP0dV/3aafFWsbcLeOo9BS0C8uxUGh6mQMafcAHjmMip4fDerv0s3H+8Qv86ZJr+qSg77tz+VVHvrpjl53J+tP3R+8aT+GdVUfNDGP+2y/41DJ4U1B5MmW0jz/fnWqf2652/wDHxKB/vGoHumY5edifdqlqLGnJD9S02awmSCaSGZnBIMLbhxVHyJkf5UJqV5gLiCQyAgNtPzdjWi8isRtIPbjk0lFMbqNWQtrY2Ulurz6h5UnRo/LJINI9ppyn/j9kceyAf1qvNazySAxW07k/3YmP9KtQeHNauFBh0q8YH/pmR/OnfyEk3rcaItMBO6Wcjt0qFzYq3yJIw/2mrQ/4Q/xD/wBAm5H12j+tKvg/XM/vLNYfeWZFA+vNFyuXzM7zbIDBgJ/4Ec05rizwNlrj6tmtE+EdRA+a40xfrdj/AAo/4Rkxj/SdW06Md9rl/wCQouLlXczPtcIIIt149aYbtM/LAgrWbQtPB516A/7sDGmPo+nKDjWC3+7an/4qlcfKjNF6QSVjQE0G+kJHyrxVqTTrEAbL25Y/9cAP601bW1VgWWeUe7Bf6UcwcsRiahOf4gKnS+lPV6mj/s5QN2nsx952FSefYKBt0uLI/vSsf61tGrYlwGxXjg8tV2O7LcFzVJruE/6uwtE/An+dOW/Yfdht1+kYrojiooj2MuiNSKVs8E1o27uRyDXPxanNuwu3Poqiry3WplQRHKAemTitVioMPYyjudHA5H3s1fim964yXULuAgTB1z75p8WqyHnJwPWqWJg9LjdKVr2O4jmPY/rVuGVx/F+tcnaSzSqGWaPafQ5rStTKWw03A9qr2kWZuNjqoLtlxkj860re/wCmSK5KMBsYmJyPTBqUS+URl3P4gUnysE2jtkvVwOanS8T1FcM2oFcBWyT79Knj1BcDMmD6ZqPZpl853KXcfqKk8+Nh1FcUl+naUVajvxjiQn8Kn2Q1M6aVI5B2NZ9zYKwOKqw6gTjkmriXJfFJKUQbTMibTiCcCqb2bA4wa6oFWHNVp4QemKpVX1JcDmGtpB2/Womt271uz27dv5VnXFtMQe30rVTbIasZrW4LbScGmnTtx+9+lSSQTq3JY/iaj/eqeWcfiavXoCD+z0BwSaPsEHc/qKtRQbwCSWPvU62ox0rNyZSRn/ZLWPrg/jTglkByB/OrMlgTyKg+wsWxjFUteotUMBsAfuA/8BqZBDj91D1/2cU7+z9q56mlhikU9Dipa7AmKEH9wD8qmEuwYK04AgcilwD1oS7laELXJGcKKoSyO04kOCRV2WME8YFVWjy2K0ikQx/2mVxjzMfQYqOaSTHMjH8aZJEQcrk0bSQM5qXHsNPuV3lmHRmP41XeR2PJOa0DCO+ahaNVzwOfaqQXRSORyalVkxxxQ2F9/wAKheTaeFFDVxoklKMMHP5V0/h/wO2paf8Aa/OXae2Rx9a4952Y8Zz9a6G18UPaaVDFHKY5EfDIvAZRjBPvWFWNRK1NlXXUyPEWkSaTqLwHDDGc+lR6TK8V5C0hGFIqDX9Zk1W+e4Y/e9KjsnJUEnmtOWThae4oyV9Dv0dXHH1rH8RSpDCg53E8CoIdc+zWwjMYJUdc1kavqv24rlQoWvPo4Wcal3sdNSqnG3UiN2ewppu29BVNmGKQNmvTsjkuWTeP7U+OZm4Lc1VCinY2/MDUvyGnqPnkkU8E4qEzMe5qQzKwI6n0prRhhkcGnF9xtdia0n52yfga0rKc21yXAyMdKxMEHHpWpCMxgn0olFSVmJNovy6i97J9mChRIcZ61RaK1jchnkYg8gLii1bZqEJzzuFJe/Ldyr0wxqIU1F8sdinK6uyeCK1kjn2LIGRCw3HripZlgiYIISxKg5LetV9Mw1w6E/fjZakvAztA6gkmMZwM9KPt8t9A6Dt+0fJDCPwzRHPIzgYRfotLFFKR/q3H4GrEds4IJCD6titPdI1IrOSR7xVdyVORip51bdFy2PLFSW9uEuVbzEBz0BzVmVF2xCR2BAI4HvUO3NoPXl1KiR8dcml8sYqQNGpGFdvqcU/zE7RD8STWlyLEcCgs49VNVihPQZq/ExMnAA+gqMlscHH0pK9w6FIwyf3SBSRQOJVLAcH1FXG3EYJJFRqmJVz6ih3aBPUrXUAd1JwBtqAQRr1Zif8Adq/ejDL9MVTZXJ+VWP4Gpinbc0ctdhAFHRc/hipCQp4jH1qs6yDPBH1OKdvIAIlUDH96k4lq9tiwJB/zzJ+hprOpxiNgQepJqv8Aa2VtqTMT6AUz+0nPyl2I68ipcCdepc84D+AUpul9KpjVXzh2OP8AdBp7anb/AMTOf+AAUnBklgXXpxT0uQzAZ61QfUbY9EP402G8hklRVJUk44NJx0GlqaMbDz8eo/pUysMCqiP/AKaBnPT+VTiYAcohqObsNon3e+KCR61B56/3B+ZpDMh/g/U0nJ9hWJ1bHUimtIA+M9eagaYdkI/GmlkdN+1gQcdahz8ikicyjPUUed6GqpMf+2Pyo+Tsz/lS5/IViyZT26fWnpKccn9aqgRkcuw/4DSkR4++fxWlzodmXDJyuT1FMmn2ysCcc1UkILKFORgUSorSyZmAO7oR0pRna1xtEz3BKna3NVFvmDBWxxxniiSMbG2zJ068isoWrMBtuIDnn75rVTixxWjubguSfT8qd9rb+6n/AHzWVFFcgcTQEf8AXSp0WYnBeHP/AF0ocoiUfM0JLl1f5UToD93NJ9rc/wAEf/fNV5I7gsMBTx/fFNKzA8pn6GlFxsNxLYum/wCeaf8AfNOFyCeYl/75NVAJscRv+Apw88H/AFcn/fNN2BRsacco2g7cVL5vK4GAaqx7ygLIc+4qXPCnGDU3XQgtrIOBjnGakB46mqW/DL/u1Mr0LULlkHHenjOOtV1cVIHxyMk+maYXJRn1FPH1qIOPpTgwzSGmTKAfapAg9agVxUgkFFguSbB7U8IPaog49ackgPeiwrjyvpSMpxnFKHFIzDaee1AaAoOM8UZK55/Ko2ceWPrSB8IPQk5o1AnWTINPRsqarbhSq/DY6YoAth+fwpVl5qk0pBHpilWQ807CvqaAenBveqAlp4m9TSaHcuhqUN71S86nrLU2Hcuh6duqqsnFSq+aTKTNbTjttpCfX+lQRPiJvXNPtmC6exPdsCmhABlq5VKzZtbRCKzg+2akMp6E4ppGU+XNNKgnlufTFVzoXKSFzjOaN9Qk8dTTTnjJFPmQrFsNmlx7mqodh2BFSGTOMjHalzBYlINMYGl80Ad6aWJwWBGKakFhrK1RODVkMMZwaifkdMCmpC5Sucio2JFWTsx8x5qN1B6A/lVKYOJBk01iamwnqc0xlHYk1SmieUYhwMUO3FOKAdTTljBdR3JFJzS1BRbJ79ttii+pxVa2Yp5zqeQAOTU+pgERL2BJ/OqInMe4LgAsuT6AHms6avAc3aZyfxKv1iMdqDvLgErnB2jpn2zmuIsVjubyCA27bXYbivJC9zWj4qml1LWZ7pbeTy/upw2do7/jUemrJpttNLLEyzXMexFPJCHqcdcnpzXoU17OFupyP3567FHV5VeUAKShJOB6dqznWAj/AFL5+tS3LvNKW2FR0A5FVicHDFv++q2VrGc5c0rleRIM8q2f9004wwFM4I/4CamVdx4J/On+WXIQM2T19BS5VZtiWrsUbSBUWSVQcN8q57j1pTFWjIgGFUAAcVGUVQS3Cjk15k43kejC0Y2Mm7QBBGTgvx1xUJ8+ABWVZY+wcYP4GrM2ZSz7Vkj7DuKrhmX5YJSq94pBlT+FLksjKUrvQYJbdztLNA5/hkHH50yW0B+ZlH+8h/qKdK8bnbcRmHPdfmQ/h1pi2rKPMs5So9YzkfiKzaKQge6hGI5t6/3ZBn9aRriBgRdW7xN/ej5FKbh1XFxbhh/z0i4P5VIginH+jSq57qflYe2KllEP2RJxm3ljlHpnB/Kqkls8bYIdDVia2QPl4zHIO44NOWa7jXAlWdP7kozSZSZRLSrwcOP1pBMnRsqferbzWznE8D2x/vL8y0hsxKubeRJk64U849xQUmQjBHykEUx4lbqoqOS3KNjBQ/l+lJvlU4yHHvU37lj0MsRzFK6+x5FWI9RuI/8AWoJB6jg1WFwuf3ilDTtytyhBpaBY0YtTt3OG3If9oVJc3UawMwZXGPrWQ6DuPzqvIqqeBikwUUBkJJJI5pA5z0FNwBSqMkAdTUll7T0yWmYfKnC+5/8Arf4VMSeT3NOCiONIlxx192NRlvmJHQcCgkVUO4KPvGp4ITeX0FtGpPmOsagDJwTjP9ah3bVLk/MeB/U/lXTfDN7CLxnYS6nJshiy6nsXx8oPtzQmD2Pd4EW1hgtUyVgRYwfXAAz+lWpSFnjb+I4UCqBL/aRISDHKSwx2FWdQkWECdj8kSmQ/gM10GR438X9TF34iFqjBktV2e4PVv6VwBNXtcvWv9Vurl2LmRydx6n0/Ss8rleuCa52zSKGuATVa4IRCemKnUbFwW3VZ0KyGq+I9NsCAVmmAYN0Kjk/oDUt2V2Uldnu3w50z+yfCenwlWSVl8+TnkM3J5rIvLw3V3NIcYZyfpk10+pXUdrZyxxsF2Qn5R6dBXAq7iMk8Z5/GnhdYuRli37yj2NOx1D7Bcm5QAsFITPrjiktkmvdUtnuTu+1SA7z9cHFUtSmjWytrWIjdGWeR/Vj/AICruqyW9hpkl1bTEG000t97IWRuFx77jn8q6WzmSu7HjfjS9+3+KNSnWQvG077GP93PH6VjTkeZtH8IApytvudzY6knNQM25mb1JNcLetz0UrKwuaaTSE0maQxc0maQmkzQULmkzSZpM0AWtOg+1XkUR+6T830716hprhYcEbcYA+lcJ4ah2bp2UEt8oz6V2VpkYLHjO76Gt6WiucVeV5WNwMuAWGSOBzXFfEDUsrDYxnGfncD07V0FxdpBFJI5wFBLGvMNRu3vb2a4kPLtkew7Cqqz0sFGF5XOmGn6cv3rxj+AqeO00NRma6mJ9FFYmKCMelVddi7Pub4Tw4o/5eGP+8aaZdCjH7u2dz/tsSKwdy/3l/OnKQRwQfpzRzIOU2kv9ORvk0+L8QTU41y3Qfu7G3H/AGzFYGG7I5/4CafHFI4yI2x7jH86rnFydzaGvspylvD/AN+xSP4iuCMCONfogrJ8iTA+X/x4f40gjf0X8Wo5w9mh2r3z3ckEkqj5WwT7Gp/IiZCNo5qu9m88bJvgXPQlz/hWnbWR8pFlu7YMByQSaUWm9QkrJWKSxptBAAPtSveXQJUynitFbG0UnzNSQDr8sTHFIbLS2Yl766Y9PkgA/maq6WxNr7mYbqZushpPOlP8Zq/LY2H/ACwmv2/3lUVF9ijx8pnP+9gf0pOVilDyKpkkOMux/Gk3HuTVxLDJB2v+LHmrVvaLFy0ETf7/AD/M0ucfLYyQw9RSgjPUZrpYbqOFcf2fpjf78KtU8GqyQSB7Wz06KQchktUyPpxVcyCzOYRHY4WNyT6Kat2+lajcjNtp93KPVIia6k+K/ERG1dSmRf7scSj+QqI634gmP/IU1Fieyswo5hWMQeHNcJwNH1A/S3atCy8C+JrwAxaPcqCcZlHl/wA60IZvE0nCXerEdf8AWuB/OnzW3iKYFZ7i8fPUPOxppslkcfwz8Ts2HtbSId2e8iAH15q23ww1GIZutY0SAerXQP8AKs1/D963zTpEM85kfJqxa+FLidlVXtgWBIAOc460e8LQa3giOMkSeKNAUjr++Y4/IUyTwrp1uc3PinTmX0t43c/yrQXwjKBl5415xwDip4/CUfe9Yf7q07MTsYEmk6BGR/xOLyYZ5EVpjj/gRrTs4PBCRj7TFr0zd8MiZrQg8MwmbY11KRnrtFaEXhiw80I005I6ntmmoyYrpGHIfAi/c0jX2P8A19IBTUufCMRzD4bvpj2Fxd5H44rqIfDmnGMlYzKQcNz3qObStNgTP2WDjg73/Wk4tDujnhq2mK2628I6YhzkGSRmxVk+KNQ27bXStFt1xjC2yk/ma0ZE0+E48iwHHQuD/WqNmUSNpbmW1GH4RV6r+FJ26sPkZ8mra1MdxNsntHAg/pTRfa2ePPHP/TFc/wAq2jr2lwNsZ0ODkjZSt4q0zythefOcgpEP8aNO49exz5XVpm5u5yx9OKc9lq+QGurwE9MsRmtMeJdLzyb0n/dA/rVS88S2/wDy720rHPWSSi67hr2IxoGqSY3zXJHvIf8AGnL4cmYEySMf96Wo/wDhLzGo8nT4xIO7Sk06DxbPK+J4bWLPQ7WP9alyitRpSGpoFuzMu9dyjLck4FaA8JRRk75Y8DHQE1DFe30qSNHcQqrYwI0BH61Kkl7MxEt9KM9gqgfhWMsZSiWqU2TDw1bY+V3I9kot/D1qdzTGTAHQDBNKyyohBu5we3zms67WWSNg1xOSe4kNZxzCm38I/YStuX7nRdLh2FvMGeMM1QTWWmQZDqi/WUHNc7cadMw3ZM3+8eaolAhKmPBHUNwa6VXjP4RKk1odJPHpW5SJrdRg5w4Oaq502G3Qi6UyAHdhc5rFAUEYwPalwWOBjH9Klzv0OqMHBK7Nl7m3ktMEAnPXbiqFqkAmcISU/DiqmcP1wB0+tWNPnWK6aSSIDjB29D71jJzep2Jxhpfc1bCOHLmONHcDseRWl++MG5YRvHdmOK5S9uPseqJPbONj9ccD6V08N6vlBmcfMOmawlVrQXuswr0Yu073uY2q319FG3nW8QUHIZeayRrV2ysqrEFPXKVsa2BNaybHLA8gAZrH0yzSSxd5xJGwbAO08100qs3rIznThGldEtrqt3AMxSLHnrtWrK6veM2WuXb8cVWj025lx5UbMp6HgZqaLRboMNxRecctXfCbPOkkbun63C4VLsOD/ezXSWhtXUSIwcHvuzXFJpEocK0qAjrtOcVoW9kbc/u7x1PcKuc1o4uWzsQpW0Z1qtApyAM04NFICABXPLIwwPPcn/cxmi1u5DKQ4ZR2O6tacJdxuS7HQqrL91sj9aswynuayYrgAYOSfXdVuG5XpgfWuuMnbUxa7G7ay81qwMcDFc5BeKMdB+FatrdbsYpS1BM3InJqUAmqdtL0q/G2a55Kxqncb5ee1I1uG6irSjNP21PNYq1zMlslI6VRn09Tzit9lqvIo71cZsTijDW0CngGpVg9c1dYAGmEir5iSJYRjpR9n9qnBFSKwxS5mFin9mPoRSG19jV7zFHUChmUr2pczCxnG2WoJIVHSrk7gdKz5pTzzVxbJdkMZFFQBFZSehpDcYfrVNrkCRgDxWiJuaKRLtGaa8aelVoLsFNp7UslwM0agSOqAVTuNlJJOD/EB+NU7i4VTgmmgGyMvIqrNjBqOS6QE8mq73O5SQMiqY0KGxnNVNQfAXHU0rXR6BAPxqrO7S4DHgdgKaTE5KxH5hq9YS4QjPOazSMVZsTh29xRLYmGjNG4bIyDyRWd5hJ69auTk+VkdRWWr/pUIue5ZLHb1oWSoPNGMZpBIPWrINFX4BzTGnPmFNyrxnJOM+1VFnUYHP5USsJHyAOnepSHctRxOJOVDA85Vs1JEs7khFVB/tVRVmQ/KcfjUhuZiMGQgewqgUkXnglRQXKHjsat2chaJM+lYyyOeCzH61pWLfuh7Gk9ik7k8rbLhGz0IP61o6ldJFfuvkIWOCWb3rEvmOMqTkVa1lJpb2OSNZG3RKflGe1ZytzK5V3Z2NSwu3kvIkKxBWOPlXB6Ut1M8dvbiNioG5T+BrM063uVu4HZHVVYEluOKt30ZktiFkRTHMwy7YGDUSlFTVikm4i+e5+87H8acsgHWs3CJxJdqCP7ilqUT2y9JZ5PwCituddEZ2NaKQCRCCBgitC6kGFzwQxFc9BeRlwqW+SSMFnNad7etCjkYDBh1we1RJ+8tClHRllDu6An6CpVjc/wke54rEXU5ifvt9AcVZivHfG7cR7mtLMiyNiOMqwYlfzpNkfd/wAhVWGXI6CrKsPalYAIQdi36U07NwwmOe5qVQtDBR1oGhlxwuF2nk9eaz5lf+83HpV13UdqrySg+lJKxTkZVzGzZJLE/WqDoUGStdBCscsuHOBUpsLd8guP0puSRUZXRyfntDIHQkMOlQ+dnPYmt680dhkw/OKx57B4mO9CCfWhST2M5JkDSgjrUTOf71OeJh2qBhg8g0ENvqPLNnqOa7bwp4Ju9Vt0vlnVEVs7cda4U11ei+MrzTLL7LASM8CsK/O42gVBq+pY1y2bSNfihnYEysNuB6CoJHAZsyRDn++KyNTv7691CO9vNrmM5HzViSJ5krMEGWOcCsYwlpr0NHLudihDDKOjD2YGgbjkgVyQt5lXhGH0NMIcNyzBh9arkb2Yrpbo7BdzdFJ/CnZYJjaevpXIrJOPuSy/gzUGW4U8zTD6sal02+oc6OrJPofyoGfeuYW9vUAC3coHpuzTv7Rvv+fuT8SKfJIXMjpg3rTgc1zSanqAGPtO76qv+FSjVb5cZdD9UFHs5ApI6F+DH/u/1ps/+ul/3v6VkXV/dmC2mAA3Lhjs4zmrF/qc0Nz5f2WAjarZZWBOR9azjF3RbaLMo/dP9K54A7RsIGTWmNYO0h7KIj2ZhUC3VqOunj/gMrVtG63RN1a1yt5bt1YU5QyjaVJ561cF1aN/y5lf+2ppfNsiMbJ1PpuFVzd0PlXRhqO5bn5D0UVAryKerfnVxpbJ5d5e4B9MKaXNiTn7RcKP9wf41KkkrNFct3uVlnlX7ruP+BGp4LyRX+aSQfRqftsT/wAvcv8A37/+vSGK2Y/LegfWMik5xe6/AOV9zWhlkKKd7YI9auBsxoT71mJPbqir9oUkDrtNWJbmKOGLMqkHOCOlZPdWJs1e5fZsbP8Adp4lOMDH5VU8xXWNvNjUFRjc+DT1ZSOJIz9HFKLXUNS2JW9vyp4lb0H5VXAI7g/Qg09QxGcE1S5Q1J1kJ6gVKrgnBAqqA4/hagswUkKaHawJvqWldcYxTxIvoaphjx1p2/60CuXBIvofzpfMX0P51UV6dvyOtOwrlsSKfWml/kfn0qsHpTJhH59KLBcnDL5Y3MRyaRpAFG3kZ61VMn7tPxNErYSM+ooGi0jFlO0E4oEnyk9jVQTbAdpwemc0iyZGB0qrCbRbL+vahX5OarBj7Uu4+1VYkt7/AHo31VDH2pdxqbFcxaDmpEciqYc+9So/1pWC5dRz61ZhbfIiepxWeslXNOYG+iB6ZzUT0TZcXd2N20hE0G3cQqMcCp54goGASTVSzB25XI5q5JuG35jyK8ycmp7nbFJoiKlASQaacnHyHPf2q3sfbksT9aY4cNnPNLnHylR8E9CKSJgjAlCc9jVuTcMdPyqElgccflRz3Vhco7zkPWMCoGGSPmP5VYyzLnavp0prA7gMDmpjOw3G40mMpsPUdTSOyHkE4qYRAgHaBk0kiBG5XIp+01FykBYH+IimcY71L8gBPljP1ppZMYC4/GrVRi5SMsQeBn8KaC3H+NSZHPB+tDRgLwCT70/ai5BCFyMmgrCeC9BTHJyKaY1CnJP5VPP5lcoGNAcKwP4VA7NHICOmeuOlTxhFO4nkUrOgDMegGaaqO9hcoy+2uwyeABjis9tqeYBySR1FQT6oTKSAdv8ASkM4kh8z+J2/lXXSjKK1OarKL2HkLuzgflVeWwtvN84RDzT95zz17U4P2pHl33IReUUjP161uYRV9CNbSLYybIwf7xQGmTadbSOn7uAAdf3Yya2VAxng0vynjaPyqfaFexRxVxpNsmsvcogEZXaYtvy59RVmLw3pJtQ8sTtMxydrYrso44yMFV/Kq/l2xkbzQ/XooqpYi6sVGjyu5yLeFdMc7lt5FX08yqmqeCLG5hZbWaSCQf3juU12l00SxOIUfb2LHFUYSScknk1mpc2pbR4trHh+/wBKkYvGzIpx5icj8/8AGsZ3yNs0e4j2wa97+U2N1J3NwV59ABXG6r4bstVvYoY1FtJIclkUYJ9x/hV2uZNWPMME/wCpcMP7j1CWRJMnfby/3l4FdNr3hK902SRgPPjXoyZP/wBcfrXNO0iDY43+qycfken51jKJcWS/aJV5mjWdf7ycNUbJbXZ/duBJ6N8rVCFQt+5doX/uN0NNlJBxdw5H94c1kzRIsk3duNu4Sp/zzlHP4GoxPAzYlD2zn1GV/P0psckoUfZ5/NjH/LOTnH9acbmJgUuI2hJ7Ebl/OpKsSvBIU3LiVP7yHIqk8KbsgFW9VODUwtdn7y1lMR/vRtkfjSNcSqf9KhWdf+ei8NSuCEFxcqu0slwn92Qc/nTGktnOJUkt2+m5SfrUgW3n/wBRPh/7knyn86bJG8fEgOPfpS9CkRtbMy7oWWZPVTmqjRAHkFW9qsmCMncmY3/vKcGhmuFPz7Lgf7YwfzpNFJlUPKgwGDD0NMLknlR+dOmkDHHlsvtnNRjHo1QykLuH939at2SgkyFeF4HuarRx+Y4VQSTWpHHkrGowoHX0Hc0IbDGI938T8L/U01E3OFBwB1NPdstlQcfdQeg9aJcoqwx8zSc8dh6mkxDCGklLqpMcY2qMdT71sabok09v5rfIo+dznG1R3qC2sfLhVA7++D1NaDT3IsTbCTEJ+8Mct9TSlFvYcZJbnSeDvG7W9yLLUyXss7Y5j1T2Pt712vjy9+zeCrq9ikBinYQo6tzk8/lgV4t5ZXjIIxjFdB4Ys7nxDcW+i3FzMNMjJldVb7oHpVRlK1mTJR3RxZ67j1prHvXRz6HDN4p03SdNadxdyNuMmAyRhsZA+gJrf8b+B9J8N6Lc3o1O8eaMARxuEwzHoOmaOVhdHnTGu4+DenmfWr3UXXKW8floSvG5jk4PqAP1rzRrlz1Ne3+CtLvLD4bM9nG32mZGu5OeQp5yP+AgVzVryjyLdm1Ncr5mXtZvfOg1B1ZGjaYW8ZHX5R84/PFc8rknnj0p1wJLXT9PtJwqTKnmygHPztyc/pTtOuP3V4HjBQxEbj2PUfjXZSiqcVA8+rPnm5ET7BKplyy9wDVHxrP9j8DyeW4/026WMg9SqruP4ZxXT2+jxP4ZknmYLdt+9XPVV7ce9eb/ABNu8nTLRTgQ2/mMM9GcknPvgL+dOo7RHRV5HFKcJI2ecYH41FninyYEKDuxyahJrkO4cTSZpM0lBQpNJmkNFAWCnRRmWRUXqxxTa0tGhy7TH+Hge9C1FJ2VzesQIwka4Cjj64rYhmwAQoGc8DpWNCCAPXrV1JAq7jwo55reLscE1cpeLL/ZaJbJw0vLfSuWs4GuruG3XrI4T6ZNSapdNeXskpOVzhfoK6L4Y2QuPFNvPIP3NorXL8ZGFGcfjWTfPI64R9nApfZkxyc09beIj7ua7iPRtLH/ACynf6nFXU0TTzFmO1Gf9tq39kyfao8+WJF6IPyp6jB+XP4CvRU0q0iYf6BFnr1JrLv/ADILl0hggRARtOB/U0/Z26i9r5HIrG79Ec/nUqWs7/dhlP4Gu9025jju0NwbQQhc4JTOT61Zk1axjlkAuE74KDP06U3GKV3IOdvZHAR6Xdt922kP/AasroWpcH7E4B9Riu0TVoCV/wBIfj/Zb/CnNqlmy4Z7gn/c6/rWTq0FvNfeO8+xyMHh7Upidlsgx6kVdh8I6ixAYQKT0G4ZrYk1uGzQPBbXUuM5woH9TWU3jR0lZl09w/8Aty4P8q1hOhJaSuS/adiWPwdenJaWJMHFTx+ETj95egH0C5qinjm9WdnFnEd3ZpCR/KoZvGmoO+6O3to/oCf61T9n0F+8NePwzbqSJLmTjg/Lio5tN063LKzTl9pZc9Gx2rnZ/FWsSOzLMkYPZUB/nVJ9X1iU7mvT+CL/AIUk49gtPuddpVpZ3u12spRFjJbdx1rVj0jTVbLW4x7sa86/tXU1jZBqE4VuCFOBS2upX0DBjcySj+7IxIoc7L3UHI3uz06307S0KZtY2BGGLevrTrmzs4zwtogzxkgGuNsNbsZgEv7bym7MvzCt7TrGzuXEtrLEyZ+7wTXn1MfOnfmhY0VBPaRqQ/Z4mBS4tFz6c0ya7gjk3pMWf1RDxVpIIIRgIuPcU5miOV8pMrxzwK4XnFR/DFGn1aPUjF9EVDCe4c+nlkVmaj4nt7Vj5thdtxjeBgfnW3EBkgqu0VXvYck4A2HqMZpU83q83vJWB4aPQ5W58W2syAR2EpK5wXcVEnjOaBojDYRAx527nPFXdT8PQzvlIjGfWMY/SsO68OXcOTF+9QevBr1KWPhU+1YydC3QvSeNNQmUhYYEGc+tQJ4v1dW4eEA+kYrFNu0LlJEcN6EU1lI5H41087fUjlS6GxL4k1aZsm7dT6JxU8Gt3jcXF3csp64esBFcHKj9auQxSOowvNDu1uDsjoImtbhh5d1OS2Ays5FaNnplqrMxLu/XDMTXKxWdxIx2QvkdwprVs49Ytz8kTuo7OCP1rkrUKkl7ki41IrdG1JaWcr7mjAOM5xQRAi4CLj6VXiW8aM7rUq/oZFx/Oq121xAg85beIHgb5up/AVyLDVno7mvtILqWJra2ukIaIE9SQORWNdaI4Ba1kJA/hb/Grmn3jSzFIZofMUbuA2CPxrRjO8nzplQf7KZ/rXRToV4fCQ6lN7nGzQywSYmjZPqKjd8cZzmuxvIY5/k82Z0B7IOap/2fp+4BIJXkHXc2DXdCM7e8Yua6HLlcn3pQMHJ7V2CWNivJsoc/7c3/ANenr9iXIEFgoHJ/iIFaKFtyXPscnDLLCQ0DlT6dvyre07WGdlS7gc+jxjPPuKu/aLU5WNlQY6xx9PccVV8mRbqK5jvLxgnLJ2as54enU3BVJI3XKyxqyKzDHXaahaNPLB2kMx4zxms2fV2XJWOVmPHJxxVSO+lZlxbhsdMvXKsBSi/iZp7afY2SrqwDIvP+1Ve+soblAH8oAnHvWf8A2ldpK8iwR57jk0wXd9OBiRY+cgBBW0cLSjqridWbIZ9FjRGKXGcdF2/1pkFpkYCyswXJUKAB261LcvdsMyXDhR1AUc0gikHJnlPYc10WXYIzaW5HbWSSxj7TE6ksflJ/WrZgs1GxITu77nqBNN807974HPPNaK2w2jy0JyOoq4x8jOU23e5Va3gOE+zQt3yBnFWWkEMagMgUcfLHmpYrcqp7DvxzTjaSMMJ90+tVydbEubelyql0rb1/eMRyMJgfnVGKGOaBlkhkA3E4Zq2/skgUDapx36VDPblWG5tp9MZFPlDm0sUrZfKiWKLhUHAJNSBXBDOBjOema0rW1RV38ncOhHSpCiiTbjI7CrUWQ2ZsPm+YzByC3XipxG78lzj61cSOLcflwT704xpwFGB9atK24myqIssPmJ96lESr0FTBUB6/jRlB3rRMkIuuO1XoBz0qiZF7GporgLnmtFMTuzUVBwcDNaNpIEAFY0VyCOmanW4GMg1qncVmdTbTggVp20ucc1yVldgkAsB+Nb9oWIBGamUSos34yCKl7VQhkIAB61YEtc7RqmSuagfmmyTegqo9y+TgDj3qoxYNkrqDUDrUZmcnk4zUbSnHJNaKLJtcnHFNZwB1quXJ7mmNuPrTsFiR5QO9J9pAHU1XZW9KmggRxlmodkNQZDNKWHGaoTlueK0p0VWwDmq0qAqeKaY/ZrqYdxI4JqlITu3cmtS7j68VRkjJVgOvSqUrMv2asQpIQxGTStMTnnimQIzMc9uKe8OG4PFatpMwVNvVCBsjNVrkZYVZ2gCqs5BfqOKSd2XKPLHUqtCWakjjO0/1qwCQaegDHBOBWljJGc0RzxmmGIjvWq0cfRST+FN8pT25+lArIymgzT7aDbMp5rSMY/uj8qVYxuXAAOaGgUVciliJjPFZEtqysdvIrpzECpqhLb8nNQkU9TCaFhzik8pvQ1rvCMc0xYwOimi5PKzMEMmM7Wx9K1NC0S71edo7ZHJUZJAzQFfsoxXefCvxFY6BfXA1EMBPgKVXOMf/AK6yrVJQg3FXZUYKTs2cNf6DqVi5W4tZVUfxFCAaprbyd8AV9UXsmm65pxG9DGwzk4rwzxhpFtpuqBbRg0b5JHXFc2GxjrPlkrMurQUNU7o44R7Ry4qeBgPlU5HerrxKwPKY7gKDUEkAVgUBGfbg127kJdiC73YAXqeKv60bu3jskE5X93tYIcAkVEIQzLvXIqz5anBYbj6tzUSjdpvoO2jMyzJa7hNzI5jDZZsk4xWpqckFxAyW6uXMm/JBxSrDhQAOKeID1xScE5KQLRWMhbdznpxx1p4tsdWH4CtEw9fameV6ZP0Ga1uxWRTSJR1zkdOamCBjk5J9TzU628jdI2z27U4WsoGSEH45pXHoJGgAHFWEUAVGkJH8ZP4VJtCnkE/jTuhE8bqB1qQykYwCagVgBwoFO8z3ouTYmE7+nFNNwx4JAqFpBjk1CzAc0JhYndyw5OajIz3qDzwDyRQ1ygGc0XFYnBPtTXfbyTVGW9VR1x+NUn1BWYqWprUNjoINQeLgEEVdlVLyAscbsVyBu0P8RqW31QwOCHJX0rOUeqLjJbMs3MexyCp/KqbgegrRbV4LhgCgBqpfxAJ5kRBBpKfcfL1RScL2ANQn/WKQoHNNMue44pNxyOaoha6nSPBE6gMgIqFbC2VtyxAGp85RfpSKeeua5dTXcY1vEwwQcfWqjaTAWJ3OPxrQoxUptbA9dyktgkeArEr+tMuNOEox5zL+ANaJ+tNbHSld3uG6sZ1tpCRybjKW9sVO9iD0Zfyq0CR0pcnuKTbbBaaGNNpExYlZIzn2xViHTiiYO1ieua0s5pysB25puTasCVncyrqzneMJGg2j/a6VDHZXUsgM5f05OT9K2iwAPanRkD5wc56U1KysJ6u5nf2eqj7p/Oq8tpOrApG20+2a28569PSpIiFOO1VF2B6mElnNjLqfypskJj6g5/3a6JX5zjj1p2/ce2B1p8zDQ5YAswAQEmrP2bI6gH0rfwvdR+VGEP8ACPyocmwSXU5qRFjPJBPtSLhmwFJromt4GPzRIfwpFtoAfliUH2pc4rGKLYnt+tSzeV9ljiJfzEJOMcYNazQxH+EVC1jAT90/99Gp5m3qN26FC4aKZLdYi5dE2sCp9aQQkfwt+VaaWkSfdBH405rZWBAdh70c1tELfcz0A6bsfjUqEjpIfzqVdPUn/XN+VSrZiPo5Yd+OatyQiFZHHSQ/nUnmSY++351K1r8vyv19RVQIdzjIytJNMLFlbmUD/WN+dOS8nU8SZ+vNQQRmQZGPTmpVt5CPlCk+5padQa7Ey31x/eX/AL5p4v7j+8n/AHyKrfZZx/CMfWpY7ZwPmFFoolczJhfTdW2H8KdLdO1sGwoO7HA9qgePaPuMTUBEmMbHA64xQknqgd1ozSeRooozJGD8vJzRcTfLEBxkZx6A1TeSaWI+aTgcgYxUKuSMsSeKIR6scn2Le/mno/BJqnvqRWwvPetWZFxXGetPVx/e5qkrjuakRlJ6mpKLe+lD56Gq4YetOUr2JpFFpT71KpNVkIx1p6n3pAi0GNaGljdck/3VJrJVvetDSz/pB5/hqKivFlwdnc6CwlRFcO2CelXmniYr846VjKaaJ0xk5x9K4ZYdTfMdUarirHQedER99fzp2+Mjh1P41zwlj67xinedHj76fnUfVfMr25uMUJHzD86RkXIIIrCM0f8Az0X8xSmZf+eg/wC+qTwj7h7ddjaJx17U1TuYGsjzCRw5/OgO46O350vqr7j9sux0GOOajZcmsXz5v+ej/nSfaZx0lao+qT7j9uuxrTplQFqBkqh9sn/56H8qa13KTy+ce1NYaouovbRNHaDgDuanlIVOntWN9tlXBypx7UHUZiOVQ1DwtRspVomi4LSLzTnX5VFZg1B1csUUn607+0mbrGPzoeHq9g9rAvLGN5OOlQ3xEdnORgOykL7kioBqRH/LP9aoavdGeBcAqM4q4Yeo5rm2FKpG2hiSsVJ3HmriKfKgRRliM/iazLhszFR7Cuj0vZFAl2fmWGQeYAMkAd69Oo+VI4Yx5mRT2ZtULTTxq6jcUzz9Ko6dI0swQn5eW/Eina80YnLxTpKk3zjaeQPejw+UkucIGyqkuT0JzxilryXY0kpWRupGUApWFTxpuQZ60PCSOK5uY3sVlYg0pxISVDY9cVN5JX5ipIHJ4qaaDULyLzIbMpF2DsEFJyGkYupSCK1k2Lk4xkn14qpBwq89BU2rCWK1dZUjGTj5WJ/Wq6HEefatIvQh7lSOQf2ZJz1uHP8AKs/TW3eIrcZ6c/pUsDf8Spck/M7n9apaQx/4SEnOQqMf0rVPRmb6F26cid+e5/rXOa1oOn6ipcqIpz/Gnf6ite5kJdmA3ZqpI3HU5prXRiZ51q/hu6swWjAmhHpzj8OorBJkjGAxA/uvyPwNetyBZAA4JAqlqGkWN7C/mQBZADh04P8AgfxqJ0uqKjPueWnymb5swyevb86kJniXDqJ4/Uda6C88JXyw+dYr9ogIJKgc/wDfP+BrnHjltnIw8TA42kEj8R1Fc0k1uap3Gp5RbNtI0Mn93p+lTfaZEGLiIOP78fB/KoXlR1xcxD2deR+dCxyqN0EgkX+6x/rUFkvlwXYzGVY+nRh+FMUXEBxFLlR/BJzULtC7YnjMUvr7/WpPMnjAG5bhOwfrj2NIaJBdQ5xdRPA395OV/Km3Ekca5SVJAehBpDdQFCHDo/dWGR+Bqk/ksxKhQDSb7DSEJyc5BpPxFGE7AflVy0t1bDsOOwx1qSya1iMa9Mu3bvVuXbDEUJzI338dh6fWmlhCDg/vfX+79Peool6yPz6ChuwrEilUXzJOW6KoqIMUfzBne3BIpRHNJKo27pW+6Oy1rXWlNZ6f9okZfnGxBnknuazlKxaiYsepSK/VvzqwdV3/AOsDke2Khjto8ASEA+np/wDqFDxBmwFI9B/n2qedlcsSzHqVuHUtHIecYx1r03UtLbw3pFjq1mHjdYvI1AKMjy5Orf8AAST+leY6DHFDrdi9zF5kInTcvqM19C3UcVzbzQTrugmQxuP9k1hVxLpNN7FwoqaaRzPgnwdqB8bza9eKi6dFahLOQODlSuAcfQsa4L4yax9ruIrVHyrSNKR7Dhf0r0zwvrKaR4U1LQ5rp31GxZo0EgwTG33GU9wAetfP/jC8+2eILlwcpGRGv0H/ANfNdineLl3OZRtKxR0u0e/1O0tI8b55VjGenJxX1HZTjSlgsLNVELR+WVP8MSDr+gFeH/BnTBe+KGu5VzHZxlxlcgueB+IzmvTba6F/4z1ZNx8jTtPEbYOMPIwP8lFcalzV4wXQ6JrlpORyupyPealNJncWcitjQba3n0ozS3AhWOYks3CnjAFRT6Bm3eWC6ChTkK45JPv/APWrPvbS8s9IRHizCpaSXacgnoM16Sunc8i51GrtHqen2n2KUlZJUhc4xuXPSvCfHF39r8Tai44XzigHYBflH6CvYNU1EQaZayhwPstm1w+08biMDPvmvBJ5DJcFmJZs8k96yrvodWHW7EnPzgegAqPNDHLE+ppK5zssBooooHYKQmlptK47CgEkAdTwK6G1QQxpGvOOvuax9Oj3z7j0Tn8a3LYDdk1cUY1X0LcZ2Njvnn2qprd4Y7cqpwX4A9qn3ZOa53U7j7RdMQcqvyiqlKyMacOaWpVHJA6Cu58LudL8CeINUDMslztsoSOuSc8H9K4UnC+54r0y9sCun+DPDKlg9y4vJgRx8xzgj25pU11OmfRGRL4n1eRdputq/wCyoFU31LUJeHvpyPTccVSx605RxxVXbJslsX7e9wdtyZZO2d5zWhZ/YJHBDEN6OTWGoIweakC5HTn3rKdHm6jUrHXx2cEjho1GD+NX7eCKMhZY0x9K4m2ubm3b9zKR7ZyK3LLxBJkLd2/mL/eTOfyrgq4Sr9l3NI1F1OtjijAyqjb6YpsmxmJ2AY46VDZ6paTRHY0oz2aMjH41N5sYXOHK/TrXlvD1r25WaKcd7jcArgDGOuaiksobgFZ4gwP51a+1W/lBsZySMZFRfaSQXQRlRx97mtoYfEr4YtEurDqzJuvC0EgLW0rRMex5FYN9oWoWpLND5if3k5/Su2hvySPkTbx7083wlU/MUx2C5r0qEcdHdXXmYSnT7nmhyOGBBHYigOwBwK7m7itbmPfLEZBnGQMGqI0zTRjdA7Z9XNerDna99WZi5LocoFyc96cFzkAiujvrVLYxmxs4SCfm8zJx+tTCF4rxDKdOEOCDgKPcd/ersLmOYWN93Az+Gau29tdoweCOYEd0BBrpRd20bZEsC4/u8/yph15SCqzOQeeFIFJqNtWLmbF03U9ah+VraSdB2defzrfXVJmi/eWLRk9Q3Sud/tKN1zvuGY+ijH55povZFAZ4S4zgDfg/yrjqZfQqO7X3FqtNHU/aZNn340z71Xa5YNj7SuD3GetZsUgaHe0Cq3UfOTUTSztGxgWASDoGU4/nVRy6hHoHtps3I5CSGFyxOPTOap3U0oYBI5ZQ3XacbfeskS6vcRgRNHGQcNtAqXyLhw2+8nJA2nHANbQwtFbRJdSfcht0NzqJgv7KZEC7lcyZBrUWx02FgzWsRUHB3nNZLWrlWDO5YerE5pYLWR32OA69gV5raKUdEiXrrc01msoXfyltUweOBUx1SGK2IM0W7PAQZ4qlDpcZUkwhT7f4U99PfaOVwv8ADtxVe90ROhbg1S1kQKskpfvtQ4p0uoqJFAiuHA69gajgVI0KkAAjsKlhV5MsM7RxyKuze5OhE07vHlIHXP8Afaq8ySyhGMMRKHcN3PPrWgbd8Egkj2FPtrfcfnJC9uO9HKF7GOxui7MqwIW/uoOOahaS6OI5ZCB6qOK6dbEckLn1z2pZLAKoIUHPtSdN9w50c2ttdFcpI+D6GnxaY+4tM2S3vXUW9qu1iFI7Uq2cbYLMwwaFSQe0ucydLjT5ojh+9R2+nsucgEng8YzXXrBAn3mBpSsHVdop+zQudnN29gAwMaEEdattatztGD1OK2C6DOMAe1RtcKOFXOPWrUUhczZivpzuCSBSLpgU/L1rX+0N/dFM84jOFHNFoheRmNpsiglcc1XTS5VlJbpW0ZXPU5qMMwB5zmlZBdmXPphd+TwPSmNZRxIS5Y47CtIR46mopxGwAklVQDnBYCnZD1KMayFVEaERtwT3NW4ITGuScE9gaguL2yiIMl1EAOytn+VVZPEOnIceazfRTRzJAoNmsAoHPJp/mjGAtYT+IbMDKh2/Cqcnidf4IM/VqfOhqm+x0zSknGBVe6TzhtJK+461y8niaYn5IkX6gmq82v3jD5XA+gFLnRXsmdlkouASeMc0wyEHJwK4KTVryT707/gcVWe7nbhpnb6nNHtB+xZ38l1FHy8qL+NQPqVooy1yp+hzXBNI5Gd5JpQxIy7c9hS9oxqijtX12yAwHZv+A1Vl8QQg4SNm+prk93zdhTndYxnqaTqMaoo6CXxG44SFc+5NV11+8duCij/drnw7M3uasocCq57B7NdDpIdaunG15OPYYq+L9hDkufzrmLTJO49KtyyjyiM8it6dfWxm6XU6fStT2zDe5K+5r0HSdWRo1G6vFbW4PmZFdNpV7KGUgkCu1TjJWZioS6HsttcLJgg1dBzXD6JqZAUOwP411NvehwKynHsaJNbmikDSthVJNSvpFywBEL/lVnQtRjtpw0q7hXb2ur2lwg2ED2IxXn18RUpPRaG9OlGW7PMbmzlhOHUj6iqxhJ6Cu88SNBMuV25FctsHpW1Gu5xuxOnZmclvjrUoiGOlWylN24rVzbBRKjwAjpUTW+BxxWhimOOKFIdjKkhINV5FwDWpKtUZlq0wsZk6AjmqTRDOa05VqlMQn/1qer2KVkrsrNGFHAxVKeVUHJ59qdd3Mh4RcVnMCSc5zWsaT3ZlOulpEWW6JGFGKrliecClZcVEwIHB5rVK2xzSm5ase0nTimpKS3GeKi3OBg4pY22nnHPvVEXJjKw7HP0pyzE44IwaaMPyGApSBjO4Z+tIsnEwznpUqSA5IYA5qouR0wamUnn5RmgDSQgj8KjCK55XP40yJunakVsSEcnmkFiwtnE2MgD8aQ6fD2YnJ7GlWXAHA4Pc9KnS4A6lRz2Gc1Ooir/ZynoZPTpUb6cY23McDOM5/WtVJlcEAOxz9KUwtIpCxEZOcs1K76juVkjvbaI+Tezlf7qtRHZ3M+JJdzN23tzV8QzsMNIiL7Us0HlRM/nMxHrxUpJAUWsnjOcRg/7wqNrck4ODj06VsWsULQK7AEnnk1XvpYYnXGBn0qlLWwrFH7LlgApJ9BT1spT/AABf941LHeR+dHgjO6tKR0J6gVM5co0rmbHYMBzKB345qUWiA4LFv0qVpUDcfzqCS5UHORU85Vh/kwRsMoCffmnsyAcAD8KovdDPaq8lwSfvHFLm7sLF9jhic/hVVmG7HeoDde9V5roA5oUkLlZcZlFRvKBWe93VaW796fMhqJovcAd6ha696ypbk44Jqq87eppOoVY2mvcd6hkvxjk1itMx6moml96l1Qsakl6CeDVWS9YAnIxVJpOapXEp3FAfl6k1PtGyWi1LfO5JGT6UwXL496og85zx6U7PuaPaMlxLn2txSfbG71TyT3pNxFJ1GHKXlvGBziuh8P6xaKpjv+nvXIbj7Uu44+6KlzuVG8Wdpq9rb3B8/TsbOuKwHlMb7ZAQRUOnai9swXnZ6VtXvkajbho1AdR2pqbRbipq6NS3nzAmf7tPEwrHS7SFQk0y78D2xUgvYG6TIP8AgWKhSbVwdloa3nD1pRKM+1Zi3EbdJEP/AAIVIJVI4YH6Gi7DQ0hIOOc0GQGqIY5wO9KHOec0uYLF8PwTxTd+KrmUNjjbSbxkYz70rhYs7vU0m7moGehZF2lT96i4WLDtyKGY5yCMGq564OfwpVfoMUXFYnDehxUu89ARiq4YYA75pGfbgA8mncViz52Bxg9vxpyS5YA8N61Uc7fmXA9f8aWKTdyCWx6UcwrGiZFC4HNRl8fjVQSHftxx1J9KkZxt5IzngUXCxP5nrR5lVg4I60bx0zRcRcDijcM1XDUA88ZouBbXcQSBkUqkYyfWofMK4Az07U8EHbuyG6YouA+SUgEAAH1FKJwcAqSapyNtc4JBpElPJPUd6oRoeYoPcCqePmkZT94f1oWXOTziovM+ViPQUJgWbUhYkA7mp4Gz3qlbnCr6gVNA/B+tJsC8rU7OKrK9OD+lICcGjNRF6XdTAS7bFu/OOKzA3Aq3fP8A6M/4Vmh+K0gSyfdzUoftVONstUoc9hVtk2LKv64qdGUdqqxyHHIH5VIZcjoKVwLIde4/WnhlJ4qoHHp+tTRuvpQBZBAHU05SB3qEMvXFKGXtmkO5ZDD1rQ0ls3Dc9FrIDDA5rT0YjdK2eeBUy2Kjubm75Sao284cEHn1p88hWCQjsprLglIAIPes4I1ctTQnGzp909KgZuKmjlWRMHoeo9KrzKUbB6HoatdmSxhamk0GkJqiRN59T+dL5rA8MfzpmRSGgRZh3tz5jfnVgLK6ErK4x6HpUMLgxZH0q7ZkFDyOhrGcmi4mU93coxUysCPWozf3I/5afpRfOHmJAAAGOvWqbVqkmrkNtFr+0rkfxqfqtH9qXH+x+VUm+tM/GnyoXMzTTVJSeUT8KkTUnZwojBJOODWVEGdtqY9yauW2yOVUU5YkZNJxSGpM3d3HNVL1iQq+9TA+9Ur18SL7A1kjW5kSuTegj+9V2DUJ4BIYWykg2uvUH/69UNOPm6mhxkAljVmVmhjia3OxnkYMcA8VpJJ6Myi2iOeQMxbaFyAMCpoNSNhgwRDcVw2TnPfNUySW5xycVDK2XNOyejC73Oit/GEkOA9jE4H+0RWhD8QIo/v6TEfo5rh3qB8Vm6EHui1Vmtj0uL4k2JwJdIYY/uuK1JPiDot5beWRLAem1lyPzrx5MDnnmkYj3rKWEp9DRYia0O313ULe6TNvOjLnJwe3+TUIljeB9jqSF6A1xbLNI6xWqF5n4CjrUcNrfrcl5I5oY4wWdugPtmn7NJWI5+p09mFOlwg4xtY/mTWdoxB1q9YfwQt+eKt27sNLTHUIOPxrP8NZ+16o7dfJaktmN9B9yy+X85xhQevfFZU9x/dbNaV1HCVDMPmwO9Z03lL9zJJ9aqLsSwjYnljzVhXIhk3AcA1nwyYPPJ9atSSf6PIcj7pqpMEjV8Pvi1j9DGTWJ/Y9rqtzOL6MEFQyspwRk9jWnoBJtIfeGotLY+dKV+b5Bx+dZvW5SPOdY0E2cpa2k3RsSFzwTisGSFo2JGY29V6fiK9A8XJiTzVDJF5hRVK4xxXKSJGUIx+PesZQXQ2i2ZfntsxcIJEP8S8/pUQROWtZtv8As9RWg1qpXcGIPqKrNaLnJYZ/3ay5WXcqv5jD5gmfY03y3z0Wr62SGNSDkmp0tkjG5QPbNLkYc6KMFsc5cD2FXBhTgHLe1L9oGOYxjOMg81K/2WOBDHcBpnPKFcbR9al6FLUrhdpzJx6CpQwwGfgDj2FSWqQC5R53DrnkZ6/Wruv3FlO0UNqAsScuxGN59vas3KxaiVIbhUdWVuR6GrF9ctfuhmkwqDCoowBVAR22CUClj6np9P5VE9uGAMeM+x61PNfoVy+Z6R8OfBUXiPTtZnZQQkfk27twBMeQf0A/GuBvI3tp3ilDCSNirZ6g55r2Hwqs+jeHLfToZDGGAmn2/wAUh5/QYH4VyfxX01F1CLWIUxFfD94AeBMPvce/X8a2UVYx5nc4JLlopUmjOJEO5c8816x8N/E769YTQXhX7bbHDY43IehryAup7irnhvV20HxDbXyn9yx8uYdip6/l1rkxlH2lJpbm9GfJJNnqHxAtXtjBrdqpZrf93coB9+Enn8R6/WoL/wCGHhd9HbVY769EEsX2hJAwIKkZ5rrbkQ3lm6NiS3nQg+jKw/wNY3w7u/7PbVPCmpbZktcy23mHPmQtzj8M/rXLgq96bhN7GlanaXNHqQfD7RIfDfhl52YtJcj7RIW4woztH5Vk/D+4F7o+vaqdwmv77Zz/AHFAIH/j2K0finqxsfD4srXAub1hBGi9lPBwOtaNrpK6FoWmaSuBLDHumI5BkPLc/U4/AVvgYOVSVRmWNly01AjAba2V+UCs7xLOYtGWMMf3soUj2Az/AEFaMs24FF+7kYz7Vx/im9a4v1toxlYRtAH8THk/0FepJ6HjrQreIytl8O5pi5E99ciFQe6LyfwryhU3RSSk9Dge+a9K+Llx9kstE0hWBEEBmfAwdzdM/hXm8vyWsa92Jb8K5Kr1seph42giGkNBNJWZ0WHU2ikpDFo+lOijeaVIo1LO7BVA7k1p2+lT22rvb38ZieAb3VvbkU0rilJRH2kJgjCn73VvrVuP71QBi53NySSTUyD3qkc0vMTUZxBasQfmb5RXP9TjvVvVJ/NuNo+6nH41WQfI7noBgfWpk7s2px5YlzQNPbVtdsrJAxWaVYzt7KTyfyzXr3hrbq3xW1O9XJg02IQIG5GR8vH4g1xPwuRbS9vNYlVjHp1rJcDsC2MAE++TXoXwcsynhyfUZs+deztJkjnAOOtb0VsRVZ58umWR63Mp9cKBUqWOnJ/z3k+rAUqkt8qCJH9CORT2WcjlwB7KKd10Rnq+oot7HjFox/3nJp6raB8C0hHtio0juW+VJGbJ+lWRp4lQ787veqT7Il+bM7UFuRIv2Foo09gMimWtxqEV5E8t6DF0ZOOR7VqnTFhO6IDP51DHbEyEtGuQeCKVncaatYuHUEkJRpX47YzUTTM4IUylT+AqZbZZHLSLjPFXbSDY+ANy+npVq7IdijHG+3Jjdsf3WpjXsscZSOEAZzhzzW0YSF+T5SOoFMNq8pGFHHtVOMugk0Y0Gq3EQAWCNSfXJqQXl/IpZDGv0QVpJpgZ/myMHNTLp5GQvPt2pctR6XHzR7GEtzqLIdsjnH93iq4S6uCTNJLn/eORXTGyeJTgYz1xVR7RhNnJwelJ031Hzoyl06QA8ls8HJqJbBVnClSwPXnpXTpaOIOASwqutp0OGyOfSh0rC5zKFltULgcdCO1Tw6Us5w4b6DpWi0cKruYuSOMKO9Miu5ApaCIlh1JpqCW4ud9CW0tI7fdAi/MOzdB+NTHT5DlvLGfTNMt0lmMZkBG7lmJ5yfatQRPswHOc8cVrGKZDbKUdr8pYDkdVNSCyMgDqgGeOa044QFXpuPWpt6x55FXZCuZkelMg3RybW74p8lhJn5pcg98Vf85Mt1waXzAVyxGKLIV2YFxF5cpUKc5wMdDWlY2xZEdhtlHbPNR3dsLiRVyRGOeDVqMRxH5QSQMZoS1GyaRQR8y4b+dKq5Tgg9uaYzhhyDSeaqjAI/E07omzLMUceCdihj3xRIY+FBC47YrOn1O1iOJbuCM+hkAqhP4i0qE/Pexk/wCz838qTkkUoNm2ssYOAG474p/nKv3E5/SuafxZpSMVEzPjk7V4qvJ4wtthMNrcuT93KEZ96l1I9yvZS7HWee3PAo+0SHPIri/+Evd2IS02jH8R71BN4j1B1wslnA3uwOKn2sR+xkd0ZZCOG5pGd3+/+lecSeIrwKVbUkLf9M4z/Oq8usSyNu8+6m/EqP0pe2RSoM9LZ0T7zqPqRTPPi/56KfpzXnMerSbgRCgA/wCerFj+tMm1SeYkG4Kj+7GMD9OKXtkUqDPQ59QtYATLMo/WqDeIbEHClyfpiuENw3+031OBTTLnpgfSl7V9ClQR28niKID5I+PVmqpL4oABCRqTXJo5LYwWNPY7f4cGp9pItUYm83iG8c/JsUfQVHLq1+8RbzWAHocVhxysW5GBU7yZTBPFL2jvZlezildFk3skibjK7N3y3Sq0lw7Hlj+dU2chgVqQuAOcZqrgkuxHdYYZJ+aqW4+tW2BfNVpk2mmCHxy84NSk+lUc4NSxydiam9ityctQG59qZmm5zVJisOfrntUe4k4FO3ceooVtowBTuS0OTag55b+VRtnrSnnmo2kxwKLhYe0gA55NRFix5phOaeoHU8UuYLEkQwc96sxgswFRwQyS/wCrQ+2eK1baxYJ85Cjvnr+XWspVox3LhSlLZELMduyMEn2qe2s5XAL8LVuOJI/uJkju3+FSliTyTWSxLXwm6wy6jra2hiHTJNXI3C/d4qrCkszBYY3c9PlBIH1NbVlokrDfdMEUdgf5n/Cl9d5X7zNY4e/wol0y7ZXABJNdrpM7sqljgGsG1tba3UGNAT69qvJOwPHFaQziK0G8vvqztbaZQo5yavxXGB8rEVxEF6y45NaVvqB7mu2GKhVOeeDlDY6rzi/ViaM1iQX4OOauR3ikdRWyaexi6TReoOKrC6U9xQbgetUTyEzVG2Kga4HrVSfUY4vvNk+gqoxb0RLtHcustUboqpwTVV9UDjg7RVGe9XcTuFbwpPqc8qy6Es8mQQOBVKQAgkmq13ej+F1/Os6bUdowc5rojGxzuTluWrgqCfWqDsu45qnc6hx1yfas5r1i/pVE7GvIQSfSoHUEEdqoG/x3H50q3wzzgii4XJ3jIB2n86r7W3H5s1J9sU9hR9pRuMAY60XJaXQaH2/xA+1PEoK+9QNMjrnAAHtVbzRnAzmk5FGipJGA3HrUy7jg5wKyhKox94dqlW5AZf3hA6Ck5DRt28pEahutJNNtk69TWTFeYB3NvOeCKbdXJY56Ywf1qVLUdzooghwSSadOyRtGRgAnBFYcN5K6HbwVHHvTrueRUyzBuRtpKWo7X1OvgmAHGBU/2gHvXN293uhjIJ5Aqdbk+tZORXKzbaf3qC6nzbSjPO01ni4JpskhaN19QRU8wWYWF3LPbsBMVQA4AP41Q1a5EQBRyxOKz9Em/eMjKzdRwfXr/Kn6yzCzjPlhBgZ9c56VrzWkTbQRL0iRDk8MD+tdW05IBHcVwIf92TntXZwtutomz1UfyrGs9hwFllYk81UkkbPWppCADVaTpWN2aJEbTN60ssrGFcMQD1wahcUoA8gZbGWx0qZPZstD1upQAAwwPanuVdWcqGPlg/j3qERc8SRf99VZVMKFODmMjg1FRpWaHBPqZrTL3hQ/iRUMkkP/ADxI+jGp3tpu0Tn6DNV5IZRnMUg/4Aa1Si+pDbGE257Sj8RSFbTvJMP+Ag1BI2zO/K/UYqpJfRLkZJPtT5OzJ5u5py2tmpXN1IoYbgSlQyWlsT+7v4s/7SkVSvbqRrS1kXGCCufTFZzSyP8AeYmoUG1e43JbWNmTTmZT5d9Zk+74qmdGuW+69tIP9mYVmshPXBpBGAeAPyp8kl1DQ1Do1+qgi2Lj/YYGqot5yXAgkOw7WwucH3qO3d45oyHcAMOAxHeuhvnlhs9Y8qRkdbiNgVODyKiUpwdmCinqc+0br96Nx9VNMx+FWl1K+A/4+5fxwaeNUuzw0iP/AL0amr98Vinj1YUc9iKuHUpiPnitn+sVKuoptxJYWzn1GVo97sKxTAarum3bW0o3j5D1qeO5sXtJZDpcYaMqMCZuQc/4UwXWlOmH0+ZG/wCmc2f5ip5n/KwSa1ub9/orX8Md1ahQCuQM8tXOz2VzA5V4H474rZsta023jEayXqp2yAdv0Nbfn6ffWqOl3NkDlvJzn6470QrOOjRU6UZ6rc4bY6jmNx+FIODwCPwrqN9iXIW/Tg4O5SCKd5SSBjDc28u0E4zyRV+3XUx9g+jOa8+QY/eMMdOaet3LniZ/++q2VMEgziM/UCmtHa5wyR8+1ae0XYn2b7mat/cDpM3481J/aNx3cfkKvGztWH+qU/Qmozp9v2Qj8aOePYfJPuQJqM/GWU/hUn9qS55RCKVtNh6hpB+NB09AOJnH1FF4haZYTUJfLaQxjAHXNOh1AMrMYzgDPWoHhLQeWJwEPbb6Ui2UigFJFI96XuheaLsF8sk4RVbd1+lPnulhBaVgPT2qG1tWhXLspJ9KxNXt5vMZ1cNGBkJu6AVDt0LTdtS5qWqneuxjsHRemT7+1WYtVi8pMOyuR0PFciztI25iSf6U7cSMFiRjGDzxSTFqdTdX91HO6x7WjfGOc496S0u/szgOTJJIQu49Oa5v7RLtC+Y2AMCnRyv5iDcTkgcmmhuTtZHufw3k0jzVfU1iHJGX6V6TeTeE2t2ANkTjooGa+ctOvIAsal8BBjk1da+RZQsPTucVzzoc8ua5tGbgrWOh16CBtVmNgFEBPygdKoCIqpOcUy3vQzBGULn+LNW8Lzk/Ka1WmhkysThEZDkGlQFsHBJ9aXyxjlgMdBSmTAVUPXqcUySKUFuWGDmiNWxx0p8oYNt3/TNAbyzwwY07iHKoCsDg+1U2OUwBjmr0s8SxGQ8FRWKl6m3vktTSbC6NCNgKkt2+XmqAu4ufvD8KmS6iH8R/KnysLov7iOlKr5qqs8Z/jX86es0f99PzFKzC5aL+1KzYHWq4kX+8PzoLj1FIBmoPi2Iz1IrN34HNWb9z5B3LwSMHtWdvzWsNhMtRtwcHk1KiyZyBVaNC+ACo+pxVgK6/xD86psRYUv6GnCRqhBkHc/nSgvnoaQFhJGHYflUqyc5IxVUOwqQSsD0/SmBa8wY6U4SLnpVXzcnJUU4Se1Iktbx9K1tEOY5m7bsVheYMDjFbWitm1fHALmlPYqG5fvn2Wcp9sVkQv8q896t6o+LJxnqQKzIW+UYqYLQqT1L3nFCCpwauxTLPHzjH9ax5H5HeiGZon3DJB6j1q2hKVjRkO1ip6/0ppNKHW4iGD9D3FQhirFX6ihMbHMcUq5YgU080gJVhigksgn7qdKI3ZH+RufT1pY/9WT61VmYhsiptfQd7DLrAfKrgHt6VUZvapZ5Nz56nvUOcnpVLYQm4k1LHDnBc4XuaAqRpukOB6etQzT+YcdF7CmBO0oyViACjv61JYY+1x59zVRGG2rmmKTclh0C1L2BbmqzEVnX84V3BPIU1eb61zN9LuuJmz3OP5VMVcuTsT6K37+d/7sZH50XjsZbeNWIGSaj0htsNy3rtFNuJR9sjXqwU/rVP4jJPWxKcKrNn6VVLc1JO4CKn4mqzN700UPZqrSHmn7/eoycmqAC+0Y4qMyc9qST25NdboEFrJpbW00UckiK8rEjnrgc1lOXKUldmN4PcS+IomwDtzj6YNdHrZ26JeHP8IH61naxbyaZJBcaNakTfNuKJkdMc/nWHNq+qXFvNDfKUic4AaPaSR/SsX72qLWmjNaMhdLH+6Kz/AAq++LVXP9wr+tWLp9lio/2R/KqPhFv9C1M/T9TULYfVFS+v1bIRhkcciqPns4xxipNQWIN+75bJzWa7umccVoiWyzG+SRnODV1m/wBEfH92smCQMuNuGPetH5haSk/3TQ2CN3w3/wAesAI48k1hQ3P2acMrEZH9TW14dcfY4PXyT/KuUmfMhA6gf1NZX1LtoWvFdyLvSFc8vHIOfrXEl66O+LHTbhNp+7url2PNRJ6msNh+791+NQsacp+Rh7g1GxqblW0J4PmTb7064bC7V78VXgm8uTB6Nx9KWRiWP5Ci5LWpG3Q/TArPZiGJP3s1oN90fWqd2gMpIOOOfrWcjRFgSB4N3HTmmQymRPLmBdO3qtVhlUIBOCamt3VCFOctwKzZSQ5rW2BIM5B9xXQ+BNDXVvEtnbCbzIUzNIoPVV5xXMSN8xGeSa9J+C2rWen67qMMsYNxcW4WNsjjB5oirvUJNpHd3yyRMxc8tk+1Yvxd1C2svCGk6fEwkup3MzjvGoHB/Guq1CPzLZXfhYyCx9u9eF+OdXOseIbmfJMafu0Gc4A449q1n7qMoasxWnJHIH5VGZI3Qo6jH0qPJxUUhIGFBZzwoHUk9KwZvY9o+FmpTaj4YaKVWP2N/JWQ9GXqB9RXVR2Fo+pRX7xILyJDGsnQlSc4P07fU1z3h94vDGl6ZpCrksgluGIwS7dePbp+FdNrOkxan4fuLPzlS5lbNuyth1kAyBxzgjj8q86rg5Sq2honudMcQowu+hxGmKnij4rGeX5tP0dCwz0Ljpj/AIFg1195MJr2Znx+PvXj3g+xvU8c29q006Rq7SSqrkZCcnd+XevU55hkDDFnBO7HAwfX8a9XDU1ThynmYupzyKuoTJaQyTsQI1Utz+lcPoxe61i13DdI8oZj75ya2fGs5e1t1z958lfoP5Vh6PcmyN5e8AW9u789N38I/E1cn71jkSu9DkfiFqw1fxTfTIwaJXEUZHTYvArnZ2DMADwoxTZHLyM3djmrVrEo0+8uXVWC7YUz2djnP5K1cj1Z7MVypFPNIacT7Ck+gBNSWaPh20ivNTjS5QvAoLOoOCR9a6668MaFIhMM91ayN90SAOv5j8asaT4cstNGnwSX6R6tfRhjC65C57Ej7pHoaiik+2ajJY2+GlSYQbs/KzE44PpXRGCSszgrVJ8147Een+HrfQdIuvEMt3DPcW0ipaQqcqzHqW+gPSneL3l1j7JcxRrHe+QGcD+LPVa6W3NpY65deHLmGK6az/fNPjcpbAJ49un4VhidrvVZpeFy5IAGMAdPwq+VWshc8t5bnHQtuXOCCDgg9QfSpLiXybdn79B7mt3xPojxZ1KzXKgZnQen94CuQ1C4ErKqHKAZrCScNGdEffs0VVDSOFUFnY4AHJJNWtShNo32Ykb0OGx696teGpIrbUfts+CLVTKin+Jx90fnisuSSS5udzZaSR8/iT/9eotobX1t2O9t1OnfCy5IRvP1a7SCMeqJzkD65Fe1+HdPGnaFY2y8+TCifjjmvMriw8zxZ4N8PYJTT7dZ5sHOGJLkEe2P1r2MYGFB49K7KSsctRniUmnfxSDPoauWdk4xg4Vux5FacojdSMjA9DUEDwI4O5hjjHUGtfZxTMeZ2GtZ7WGxQpx2NMW1l3tlB+B5q9FJDNIVD8jsKlYoku5ELNju1VyLoK7KcNluwCpB9asjSkxkkcdqc8hbkDb+NKksi/xAj3FPlQXYiWcRB3LwKsRogXCKMd6iMrHsKUSnaeMGqtYNSwYogSRtBPU03fCjY5wPQVWGTy3Wn0gsTyeQwyHIPsKjSWJeDuY/SoyyjGWC/U1E15bIcNPED6bhQ2Fi2ZVc4KkDHWq4LedlVzHn8apXmuafZw+bNMdmQMqpNWDqEYUMqOwPTjrS5lsOwt4zGVVTee4GcD8aEikDLuBOfvD0qvcao0TgC2JJHBJqlca7PFA8rpDGiAliTnipc0txqN9jQvYpXURQpgE5LCgQSxgeXGd3TIrM0bUdRvoHnuHWJHOYkVOQvqfc1phpW+9IxrzsXmdLDNJ3bZ2YfA1K92tkWII54xtO1hnJOeatb/LXLvt981RKkLk5zjPWmIX6Fie/PNefLP0tofidkcpb3l+BYk1azgPz3SKapTeJdORiA8kp/wBhc/1qdufvLG31QGo1jQj5oICM/wDPMVazpyV7D/suK6lCXxfbLny7WdvrgVUvfGkke0W+nlixA+c8DNbQsrZx+8toSfZSMU3+zNPbhrFcdyshFJZ5FuzG8rtqjA1Lxddq5WBYowDjcFJrPm8SauIhJ9tXaTjCoAa6xtJ04kj7NOo/2XB/mKYdC05lOxbhf94KRTlnFNrVijlso9Dg5dc1a4zvvJyp7BsCqbzzkZkcnJ7sea9Abw3ZspAnKn/rj/8AXqu3ha28wFZYmI/vIwFP+0qLWsg+pTXQ4hLh16ED/toaf5xcc/8Aow12jeFwxwpssfUio5fCMxzgWuD/AHGyapY+j/MJ4WouhxuQD91c/wC+akM4IwwyP+uhrqF8HXG7P2d3H0qKfwjeoTts5SPaNquOKpP7RDoVF0OYaSPIXylGeM5JpzMq87Bj1AzW4fDN6n3rKQ46fu2GP0qjc6FqET7li2g9s4qniKfSSBUZdUVhdxhDhGLepIH8qiNyW6D8Mk0SaZfKx/c5+hFOj0+cKN8EhPftVKvF9SfZNdCPzjjqBUsExJ+9+dNktnVseQ4HqQTTHV14CEfhWiku5Li+xoso2Bt27NPh27SCOT0qlaFjkNxn1qQOVb6VqppkOLWhYEhRuO1SzSb8N+dU3k3NkDH1p/mgLjrTuFiZc9eMUFhjDVArk9M0pwB8zc+lK12F0h+c8IKAAOW5xUTScfLwKaWOc9VNaKyFZssFwPoaicAjBP4+9M3daaHAHrVXCyRFIhBPaot2KsndKQAMn+VRzQhQcMCR1AoaFcEfsadnniqwJBqRGzwai5W5JnvSZ5pCatafpt5qMuyytpZTnBKj5V+p6D8aTklqwSb0RVcnHy9KiGScAEn0HNdTD4XMRzfXCZ6mOI5x9W6Z+matC0trZcRRqAP7o/meprmnjYLSOpvDCzlvoc3aaZcTkHaVH0ya17fSIosGRtzD8T/hWnE25doGB6DgU4r6VxVcZOWmx1U8LGOpXWNY/uDB9R1pNoGT0rStdLubgj5dinu3X8utbdjotrCwM7b3Hryc/ToPxrinjYQ3dzqjQbObs7G5umxDGdv95uBW/Z+G40w105f/AGeg/LrW2rLGNsSBAO/U0hc+uTXnzzGc3aGx0ww0VqyOKKOBFSKNVUcAY/pT3VZG3ScketAPNBqY15PqaciFKjHAoHpSKfWhiPWtozE0KXx3p63BXvVZyN2ajkcAcdK6qVaUXoZygnuakd9tbBNWo9RA71zZcbc5ANY+p+KLSxJjR/PmH8MZyB9T0r2MPiqsnZK5w1o04K8meiJqI9aq3ev29vkNKGf+6vNePXvie/vCR5hhjP8ABGcfmaqx6nIABuP5172HtvUPIr176U0euf8ACQtcA/MEX0Hf601tSViBxk15hbaw8ZO4mrY1wE8k/nXepwS0POnzSd2d5eakEX7w/Cs06puzkmuUm1hWTGc/jUUepE9mNN1opEcrvsdFPekk/Niqk9yWB+bOPesZrpmOcNSGaRhgKx+grJ4ldyvZsvG5PZqha5bP3uKqIl0zfLbTEf7hxUv2W+bpaTH/AIAaiWKiuo1SbHm4YnqOKabkggFhTl03UWHFnJ07jFI+iai7Z8lUH+1IBWTxlNbyRXsX0Q37URQbxh1YkelTLoV0F+ea2T6yikOkOD897aj6NmsnmFL+YpUJdhi3h24LkU4XO7A82pF0yEIRJfwhv9lScU2PTrVGO+9aTHQLEazeZ0VvIf1efYFuG4xIpIqaO4fGRsJz0zSC308N9+cnHZcUnkWIJP8ApBHucVDzWj3H9VmTJMd7KQPUEGn3L/us+opmtaa2kX6Rhi0csaupPPUZqs8m6Jcn2/nXbTrKcVJdTGUXF2ZpWbFkJ3kArjipLtl+zA8ltg5+hFZ2nTYVc4x6mnvIfKkQyDLEnH1HAH6VXPqCWhuafJvtIjnGBire/aMmuesXnePy4pVjCj0yc1ZjtWcn7RcSS4OeuKltXLT0NV7qNRlplQHpzVaXWETHlhpQe+MAj61EtpF52/AP15qh4ivDbwCGDaHfktt6D2FRUrRpx5mNRlJ2Qmn3y29y7jeQTnC9+v8AjUt1dPc2+3ynKKC29j2rloXmUBpJXOD0HFaCahMqbQRjGMH0rhlmqT0ibfVHbcvxSq0XXtXXabPv0+3Oc/KBXAreNnDJHtHbGK0rPX3iiEaoAi9M0SzSElqmJYWSOwkbjGagkbjrXPp4hDffQD8acdetc/vH2/rTjj6T6j9hJGtI9JvzbyE/wnNZZ1W1lX93MuT60i3kYgnRpbd3YDarNgHnvWjxdNrRi9nK+xLLewo3zyKOPWrlrexTRQtGxZSzL06GueMRYk/2bbSe6TGr9ojCCER2rwbJwzLu3cYwSKdSvCUdGTCMk9TNm1SYSP5eRgkdfeojq18Ol1MPo2Ks3UFkJpA4vUO48+XuBqutvYsTtv3Q/wDTSEitlUi0RyskXXNSAwLyUj/awacNYvWOWkR/Zo15qH7BGx/dajaN9WIqQaXORmOe0f8A3ZRRz0wtJl64vg2nWzy2drJvZsgpgcemKrLeWmMNpcGf9h2WpJLK8OlQxrEGdJGOFOTg96oyWl7FjfazfgpNKDg1a4pKW5ZE2nt9+wlUf7ExpzLpL4wb6L2+Vqz385B88Mij3UimeeO4P5Grsuj/ABJs+qNJbfTGddt7crgg/PEMfpWxcxLN/a0bSrGjCJw7dOK5U3CY5OK6O4mRre95AL2kb4+lY1bprX+tDSGz0KH9kEpmO+sn9t+KYNEvm/1X2Zz/ALMoNUleNsfdNTq6r92MA+xrW0ujM1K3QkbR9UXrZs3+6Qaa+mXyDL2cwH0p6SSfwiUfRmqVXuv4LidB6biaPf8AId4voV4beRLS8Dxup2oRkY7mqm36j6iugtL2/SzvCZi5jVSpYA45qo2ramfvC2Ye8YNSpTu9BtR0szI2rnkgfjVzTb5rOT5XBjPVc8VY/tKc58+wtJQfSLbUbXtsf9Zo0OfUSMKblLrES01uaM1tbap+8g2q564NVLfSrqC7yhAIBww57U2C+05XATTbmNiefLkrd0LUrG5nEEglWQEhCenTuamU3Z6GiSk7HHr5gJK5Bzzz3qQNcj+M4+pq5q1h9nkMkLbojzwazPMI6Ma0uZcrWhaF1dqOJGqRNRvFGDJn6qKqB5CMkkD3o8zsWB98UXFqaH9qXQ4KofqKcNVuASGiBz9aobxvI3B+27oKlaYgLGgGR/d5zRcWpYGonO5oWx3weK0rO9imT5cq3T5jWHuyDuYgA8pzmkRN8wRMoGOPmOPzobsCbOmkvFVSTsOPRq56eVpXldcszjAAHQeldEun6DpKK1/dm+uMbvKtj8g9i1Nk8UC1ULYaZaWykZUsm9sdjk1j7Rv4UbKKXxM5ePTbxlBW2mP0Q05tMvEUs9vKoH95SK25PF2sk5W7ZR/dVQBU6+KtYjiIe6MuFBbeoIyT0+tF6nYP3fcx00SRraOZrq3jDjIVyQaE0W6kP7iW2lx3WTpXV3fiGGWysBqGmWtx5seSVXY36UR22jT2Mj6Xcmzl/wBYYbjABHoG/pWcak/tDlCL+FmLbadex2p3QL5wOcqwO6r0UUp8tpIWXnkDqDWPc3HmFDFK6SIcgg4pou7uM5FxISfU1ulIydRbM6pSQNzc45xSSXkxJIIA6BcVzSaneAAeaDjnlcmrEes3i4yUfHsBT94XNE662IngRpPvEYP1pLrEC5Q4JrEGuzpZRStCjOzlcA4HGP8AGmnxDK3W1jI9DzUKU+w3y9zRaWZjnzAfqtRRNPEzfOrhuxqp/bsZPzWQ/A1Ius2bfftGH0NXzy/lJtHuOu2neMjKBe/NZkQkZSFGcHnmrsuo2EoYNDcAH+6aSKbTQnyvOgz0IBNUqrXQXIn1I4xIVJ2EipYxIR/q2qe1+x3AWGC5cM3QMmM9antAGhdhIoVW2/Mcc0/boXsuxUAYdVP5UEitIAE8SRH/AIEKUxluiqfpiq9uuovZMzN1G/jAP61elR8bTEfyqLyx0aM/lTVVMXI0V7lytgMSZUtyp6g1Whfc6iptSUeWqxxOHB7DIIqC1G0EsCD057U4yQNO5fC5bIZfpUqox6EH8apIFH/LQGpkx2cfnTuBZ2uOxpV3jpmoQGH8X605d/YmgCxufHOacHaoVdx60vmN3oAnEhHanCTnoKriVvT9KeJD3Ap2AnMgx0re0g/6CpxjJJrmjIPSuj044sYf92onsOG4azIFtUB/if8ApWfE3yLip9ccBIAfUmqSPhRRHYJbk7Pz1ppkqEszE7VYj1ApMsOqsPwq7iLUMxik3DlT95fWtMMk0YI69jWCJCGwwwKt2twI2wSdh/T3qWCZobtpwwwaXIPamSYcZB5xxUSyEOB0NAy8XCxhQMVSmfJqe5IBJziqLEueKEJsRvvYAyaWR1hHZn9PSopZ9gKx9e7f4VVLZFCAlkkLHLHJqEvg8UxmpEPNO4rE+/Aq/o0n+vxz0FYzPWnoxH2eQjqXx+X/AOuob0GjUkkwCT25rl7piEZv7zV0E7AQuxPQGua1CTCIv404bjkaWnHbpnTl5CfyFVEYNqEpPYCrNsSmn2y9M5b86xvPMd7KwBKnIqlq2ZRd5GhJJuYmoWbrTghZQc4yM4qtcyLBIFcnOM8c0JrZGm245mxQW4FVvtEbNjd+fFOL8d6ewJroSxq7yBlViisNxA4GT3rattUGlq8rKWWVNg7YGak8PJt0XU3xnKqPx5P+Fag8Oabd6RYy3CO8rw72Ic1zzmuppGLexd0i+mu4rS7SFRbuxb73JAB7fWqvi6GK4077XICZUUheenOKk0uMrLahEiSGONwoDkuRgjkdMUeKTjQH7cEf+PGueMru50Tgo6HL3z4tV/3Af0qj4SfMGrL/ALCn9asagcW44/5Zj+VZ3hZ8PqwH/PBD/wCPGrWxi9yldTfMwx3qg05fqpFWLl/mbPTNVC2TzincVizanFaEr5sps8DbWbBtXkHmrE/NjNzztNK41odB4dI+x25HP7nr+FcXfzf6XtBxjg/ma6/w1JjTLQdzFiuG1EE38w6YY1lJ2ZcVzI04t0ltKpOQUIrknGOD1ro9OlbOCeOlc7dgpcSL3DGouaxGKRkj1FRk5NIW+YUxjg0XLFY8j1qQuDzmq+6liG6UenWi5LXUstgfhWe7Ekk9+auXDbYz6niqR5IqGxxEbqB6D9aN2J177V/U0g5P1ojwWdvVsD6Cs2WSSLg5UV3fgLRkbRbnVfKJ1FJBNbsQc+Wh+YD61ieB7VbnxDBNcQia2tf30sZ6PyAF/EkfrXZ29zN4bs7jU4Ue50e6uHihj3gGIqeD9D07VpCP2mZzlf3TpfF2rtB4GOoQnaLjCIeh5HpXhLtlieua6LxP4in1HTrewRHSxgkeSOPOdue2fxNcq0o6Hj8DSqSuyqcdLjpWwK3/AIb6Sus+K4POXNrZj7RLkZBx90H6n+Vcu7g8Bh/KvW/hlYx6f4Hu9QVle4u3ILL/AAqvAGfzNRFXZbdkW8Sar4nLZ+Xfkt6KOp/KtPUL51vXmQkHIKf7OOn5VN4S0yS40PU9RhGWiwMd9pPzEfhx+NYlzN5kzkHgHAraMdLmEnqdBcWlmstz4oiwHng8qSNeok/iOPcVlR6nGNVksJBllUFT3J75/DFWb6d7PwnmNcyHc/p071m6asDWa3bKBcSxrvkbqcdTWnkjjqyvIx/F0qSXcCqACiEn8TxXNeIJntfC8vQC7mWP32rk5/Ot6eOK70+9v5mIlaYRxfQcAVy3xGX7K2nWOcmKIyMexLHH9DWE+si8OuaaRx+3Ks3YVcuCYtJtITx5rNOfcfdX+TVWZT9njQcs7cD+VTaox+1mLkLAqxAemBkj/votXMtj1d2VKt6RBJc6tZww8O8qgH056/hVTiun+Hdg2oa5Om7ZCttJ5j5xtUjHXt160QV5Dm7RbO1vdM0aDVdQ1ePUfMuLBGkkhHOJOmSfrXPeFbcwaeNY1Aslik4d5AOS5PAqzr+jJouiXZguVuZtUmWGNU5AUHPHqela0WipL4dTR5r8q0UgkuLeMg7DxgEdc102bkcUmuXUuXsVlY2t7fWka+Zcx7mlJJZt3Tk/U1j+GViS+ga9JNvuHmYz93PPNXPEjJFYwW0YwhPGPRRwP1qlqEsOmeFrSeIiXUrm4wEBztQd8e9aPRmSvIZc6xIl7r+o7WTTdxW1iccEngAe2K81dtzE9yc/nXWeP9UNxcQ2KEBYRukA6bz2/CuZ0+LzrgZ+4nJrlqu7sdtJcseZlmZFt9PSNlHmyHP0q34E07+1fF2nWxXMQkEknbCryTWVf3BmmZs8dB9K6/wCg03R9d15toa3tjDCSf434xj6Uo6yLekfU7/4cL/a3jbxPr23CmU28eOQR0yD9FH516Vt6YOMVx/wm0waZ4KsiQVluSZ3z154H6AV2LHn1xXbTVonJN3Z5kqAdBSHYnJ2r7nivKJtbv5yM30x9s8GoriaWWPdvk46gsT+NZLFReyNPqzW7PUpZNPyS8sAPqHGahOrabb53XgY+nJrzOwzHJuc/K341elAD5HQ8iuSpj5QdlE6KeDjJXbO3fxRpynjzm+iVWm8W26/6m2kf/eIFcgDjmkJLdB0rF4+q9jZYOmjfufG00coRLOMBuhZiar2XinVdU1KG1gEMIdsEqueO/WuevYTIi7fvKc1f8HgJrKkYDbGwfwqnjJ8l2wjhYc1rHdXc0sivGs8ijpuQ4P51mST39tEEnL3sHeRTiRfqOhqzvbeelSCRs/dFePHM6sJN3ud8sFTlG1rEVpNDcx5hKyBf++lPoRU0kdvbQSXFwFSNBlm9qo3dpHLIJowYrkcrIhwQff1rL0/U31aOey1KNS0Z+bnG7HfFe1g8dDELTc8rE4OVF36FpDHrrNatGlrbyqGUsPmcZ4x6GtaW6+yzR2G2WTYoXK8tx3rHBWPWraRyI4greW38IkxhQa6Pwndw2+nhnGbtiTMz8tu9PpXfTd9DlqKyG3UgiiR5/M2MdvzKePrWXJYyatqB8xQmnwEYU/8tW9cegrrb7UoZ7d4pY1KEc8ZrL0p0+zhlXbyRz6U6uiJpFm3g2KAoGKk27m+8RTTKVJBYcU9SMg8cc18DXqylUcpvU+uo04xgoxWhNtKxtnBPuajiKMoBPz4zjvTikbgsSQ+fXg1GVczZCAAYIOa2UKMo2k9Rc0k7pFgRjv+VM8t9+E2kevekjf5nEgcY5HFL5m6JJI8Bj0wc1NLDuk7xlcqU1LdC20LplZTnPOQentUzKERmPAXv60xbhjEMod2ec9KcI55UIcExk9cdKj2MqlTnqWX6j51GPLAciLIpZNxx2HWhlC/M7bV25OatWLI5MS9uAe7U+W1EqOjAgE/jWVacKVT2clZdyoJyjdbmfEqyhmjII6AmmtE6oTjLegq/DZ/Z0Kq2c9eKVYOFIzuznHakpU3JqDVk+o7StqVUhJALcZHIHQVPHbnrtzVuOIjIOORkg04DMnyjHGMetc+JqrTm37IuEexDFEuORVmKJsDaSPbNL91gMAGpvMVNvI3HtnrXjSqTvobWQsbyRjCyuD3GTiplebGGkY/XmmFiwbBBxxTFd1X95zk/lU+1qPVS/ELLsOlgVwQVTJ7lAaoRafDK7NPY2bAHAzEMketaYbJ57GjI8wHkg9q0pY6tSi4pkypxluUjo+nOxH9nQAf7OR/I1BJ4f0yT/l3Ix6SMf61tAg8HoetLtVpMoMD0rqo5hXlC/O7oh0oX2OXufCenPk4lUeg2n+YqnJ4PsgMq0p/4Atds8YIxnmmGPII6Z4yK6MHnFd1OSpLqRUw0LaI4J/CFoWOHHHB3R//AF6ry+EIFOA8J/Eiu5mtiOM575NRPAOuK9CeeSpVeS90ZLBwlG9jhG8LhTtCx/VZP/rVXk8LFSch89trAiu6lt/lwFx6VE1uTyVrSWfSXwu5H1GD3RwT+GGBI/ern/ZB/rVdvDUwJwzgH/pnXoLQYGRSKhHcgfWiPENZdBPAUzzmTw3cgZDj8QR/SoG8PXS9GRvoa9P5VstKAPcinebFjDyREe+K6o8RTt8LZi8vp9zy06Rd7dqocd+RVWTTbpDzE5+gzXrck9iVAdrc/gKrzXGlY+fyv+Ag1vDiGb/5dsyeApL7aPI5LC43geU4J/2a6HRvAes6mglWIQQd5JzsHvx1rubbUdMs33wIm/sxTJH506/8Q292MT3E5UdlYAflXTHOHUXwNMz+qU4vWSM218MeH9GB/tCQ6pdD+HG2NcH07/jmpL3VXeEW8Cpb2q8LDGMKB9KqS3OmEHZLNn3INUZZbUt8szY+lctSvVqv3nobxlRpr3RzDzXyeR/OkeIsNkYyT2pI7m0T+ORv+A4qxFqdtH0ic+2OKzc5J6D9vT6k1npjv1+Ud8c/r0rUhtra0Afblx3HJ/P/AArJfxBngRPgdBwBUR1tz92Efia55xqzer0LjiqUdkdMsjFDhREp/u9T9TVW0EjSg543fhisFtcucYCKB9aiGsXQXCFVHtShRai02tQljYX0TO06nFN4zzxiuJbVLz/nrimf2hdN/wAtjVU8NGG7JePvsjty4B+ZlA+tIJoweXX864aS5mbrMxqstxI8uPOfHp2rWNCBDx8uiPQGuYV/jGfaojdQgAeYBXEsW7u3500nH95j9atU4Ih42fRI7KW8t8581PxNU57xfKbZJAzD7oL4H4mudwCORUYdc4CEYPXFawtHZGc8VUloT39pdX+4XWrwRQt1iiU4/H1/GqI8P2K/e1Nj/uRVM1xGuRzwccDNQyXbrPEiQsUfq/TFdsMZUStHQ45QUneQp0PTR1vLwj2jWpItK0lCCz30gHY4FMlWYeZJDIGcjAU9BTrYzhP9I2Fv9mn9erW+In2USyltpEZyLGV8f3pTTmbTRyulxge8hNQqSVG7r7UjDPbNQ8bWejkP2UexOJLVlymn2pX3yacLhQPktLVPogNUoBKrN5hTZ/CAMGpj1znipliav8w+SPYtG/uB93yl+iCmnU7sHDXYUegwKqmQeoFVntrR5C77Cx9TUqpN7tj5Uan2y6Zf+PqUg/7VM+0zHrPKf+BGqizwxqFEi4HHWmm7gU/6wGp/ePuLQuNI7D5nc/VjURUE8rn61Ua/hAxuJP0pr6lAq5Jb8qapVX0Y7oulVH8IpRt+lZg1aFuFVjSNqi8bUHPI5q1hqz+yxcy7mkcjGAMU5SfWsxdSZ22qi5xnk1BLqsqylAi8d6uOCrS6Cc4o28gjINMmJ8tselVLWWY5D7SSu4DtmrKktENwwxHI9KwnTdOXLIad1c2fFMxutI0K87vbBWPuDisBm/dZPark8sk3hCxXnMFzIn/AQM4rO+8jAelfS4OVqSRw1Y+82SWZVnCMcDcRVpPKEyDJbjHTPNZcD7bgcZ+YH86uh3EuRhQGxn8v/r10uZHKWNJlIl2+xya24blkGAR+QNcxYylLpxkcEitcP8pbIAHFJyGkbUEolEu8AkISCAAQa5/xEjMUnBGxRtI75robfTsR7hMSWXpj1rG8SQC3tPLVmYEB8Htg1libulJFUtJo4+7fywH3Hyz6c1Yhnjkj3RsCBST7WjRhjBOa7K106zns4XNvFlkBJA714Dmklc9A5NSDjORTjUM8SJezpyArsAM9OTV/RbOO8MyyyOpXG3Brq+qTsmjL20dipntjIqOSEOQSenGPWt2TRAv3bpvxQf41XfSZl+7NGR/tDFT9WqLZFe0iZVtb+SSASVPNSCJd2evtVm4t7iDAYRkH0NQ4k7xn8CKh0qq3Q1KL6h5syOojbEffBwasC6mA4lbiqoYE42vke1O3qB82R9RiolGS3QaE7XlxkHeWI6c4qb+17oLkqpQdQ3Wqauh5BB/GnHBFJTnHYbimW01JJV3SW0RHuopRd6fIvzWSE+3FUGGFI6A0yBcKCeatV6i1UmT7KL6F37RaLJiO0dD6q5FPi1S337En1CFgcHa5I5rPllMQzgsOpotblbgZRSp75rdYypa71J9hA6KO+kZtkes3Sf8AXQAini5uSwX+1LSU/wB2WMc/pXOyyRoQH4J6UxItkpZCDn1oWMl1S+4l0F3Z0y213MxYWmlT5+gq+1lM10ZHtFaL7IUaFG4J7KD1rkV3L/EasR3Myj5ZZB9GNDx0n0BUEuppmytus2jXcI9Ufd/OoGt9NU9dTiPoIwaghvryOQOt3OMEHG7INdDNfTtDkyEqRnGBXRDHxbSs/vMZ4dpGNsscYj1a5Q/9NYjxTkgLn91rNs3+9xV9bggcqDn1ANBMZGZII2Hulepyv+Y5rrsRWkV0kF2v2qzkaRAEHmDk5qvLp2q4z9nifH/PNgasC3sXOTbRZ+mKU2dmRhY5FP8AsSkGjlkndMV01ZozmstRXl7GXHsM1C3nxH5redP+AmthLURj91c3kYPX580v+kQqzrqlxhRnDqMGj955CaiY5nIhJJcMex7Dual0u7X+0IBvBBbH3RnpVi6FwLdpmmj/AHjqxQpyD25/pT7i5uLSMtMLNjtyHRPmX3onzNWsEbJ3NWxvLS4s3tm2+aM/ermb2MwTuFhUehplvKkcqzANkkN1roxqNjqJjjmjCcYJxTRfMpHKMXbqBQAf7tauqWFtBLmF8oao+QOCkoHtmkS3bQiyfSlVipBHBFTCGT+GQH8QaQxTEc4P/AaCbkZkJ7HNL5pJ65NDRyD7yj+VKAQOU5+tDdhxipAGJ5wKblR2FPJIPKn8KTKE8q4oTY5Rih8O0sWI+VBuPv6Cnjc8bliSWIP60xxEiomSFb5mP8qeBGIm2yZyRn2Gaq5k0bE0FpNZ2CXNxLEyRcbVBHWmizslUeRfpG2CCWQgsPf/AOtVK5bMdoFkGBFjJPXk1D84PLK341lGLtuU2r7GkulDrHeWjA/3jinLpU+Aomt3A6DzhWeCG6xn8Dmo/s8LNkiYflV2l3Fddi++l6gG4tFdfVXBpn2O9U82Ug+lVREE+7cSqPxqZGnH+qv2H1JFHv8AkLQsXKyx6fbB4ZFbe+Rt57VT88D7yyD6rWpNdX0en2rR3Y3ktliQd3TFRLqOpjlmhk/4ADUwcrbDla5TWZTjDfmKXep/iq8dSugP31jA4/3AKY1/Efv6VET6gmr5pdhadyrkH+IU4KT3FWVu7J22vpbqfVHx/OpR/ZYbJjukP+8DijnfVMLX2YaMpXUoz0wCf0oQgaLIQ5w04/lVnTxZ/bd0MsxcIxCsnB4PeorWGOXQlEkyw5nJBYcHArNy96/oUk7FNWA6M1SrKwHDv+Zp62CH7t9an6tiphpc38EsDj/ZkFaqcSOVkK3Uw+7M4qZL65GP3zEfhR/Z12D/AKrd9CDR9juQObeX/vmq5oPsLlkh51C6xxKR74oGoXXeQFh3KioWjkQfNE4+qkUzdjsc/Si0Og7yNeS+lW3gcqhZwcgqOaRL9CP3lnbt/wABqrduBHbj0T9aiWT1NRCMWti23c0xd2xPNkgHsSKkW4sifmt3T3VzWWHFO3VfIhczNQvZEfK9wn05pVNqf+XmYfVRWWHFO3iny+YrmsqQkfLdj8VpkyGOEyCRJFBx8tZgfNWlP/EtbrzJik7x6j0fQsiJjEr5UbhkCuktAEtolznCiuVvN26BFJGIl/M11MQ2xqvoBSu2rsLJaGfrOXnhRRkhSfzqkW5A9Kk1p2F8gUkfIM/maqqx259a0WxLL0TYjXFSLIfWooxiNc8mnZHSobGicPlgCOPWpmK7DwM9qrqwFSdsntUXGOadY4gW4HSmS4kw6nkD86q3sokTyUGWJycdqImFuqxvICx4C9cVrHYh7kolLoDIxI6UyV/mCn5UHantGC6t3HakVAZ138k8/SquTYrODk4JxUZPvV2RkLHgVA4jP8IpXHcqsT6ikSKRgZBjC9eamaOM9qTChSoJANJsaZWLVsaYClmme5JrKMcYBJY1sWnFtED2UVLY0F8+LZ9oyTxXNam581VwRxXRXTqqjecAmsO+tWub0SJImzKgDPPWnB2lqKW2hryof3EKdUiUc/TNVYvDd2fNuTLF5ZBAGTkZrU+zs127syAcKBnJ/wA8VrjK6YyMjg5ODjg1LqW2CnS6s5ORfIADuOMDr3p9pYxXdxK0oJAUAEdqLu2MssZ3oAJBuVjg46k/SrkDBZp/JwEzgY6VLlZ6CrXUbmbdaArMfKbA9DVeOxVEa3Zz5ydT9egroBKehANQmyjmmMoZw7cttbAFTKq0tTLD3lIn0sGHwvfsc7i+32zgf4108CtHoNn8pbFohwOp+XtXMW7hfCd2zHjz2/HG2usjdotOtyxPyW0YAx6LUzZ2w3PO4PCl/fyvfvfR29xMpbYOZIhnhT74xXQ65bmz8GxwvJvZMjd3Pznr71c06cPdgvPalvKYbF4cEkH5veqPi1y2iyAHKDp/30aiMnJamtWMYy0Od1AgxAZz8g/lWf4QGb3VF9bYf+hGrl6AEHPOwfyFU/BwzqWo8f8ALt/7MapbGL3RlXS/M3IPNZ8qvnpWndkF2xjr2rPlJHvQwEt3fDZOfStOH57WUEfwn+VZUK5cAEg5z9a0U3LbyYznaf5VjOVnY1pxurmv4dYCys8nnZiuRvtv9pXQPY/1rpfDxLW9n/uGuW1gFdYuAOMmlN3LgrJXJrBOBn1rI1yPytRlHrg/nWnbs6srMe4FReK4cm3uR0Zdp+o71CTWpaknojnmaiQ859RmmtQcGIHupx+BouOw0mp7YDDN+FViakt3w5Unhv50riaFumy4X0GarnocfSnsS7Mf84qLzI1+8dxHYUmxpDhxz6Amrek6VeajFM1lA0q28fnSkdEX1NT6Nol5q7/u0MNqeGnkBC49vU/SvZfh3plvpMx02PLW+oRmCZ2AJckYH0ANCVwbscR4YhfT/C87KEF5eOPLfqwz8qD8yW/CvQ9ZsLKbwnaaNH5eXt/lI5w4GRk/XNcZawlNR+xzqQ2lM8TNjG98kL+S5/OtQzNC8bx5JBBH4V0RWmhg3qeWyIUJVwQy8EHrmqFwnJyK7Lx9Y+RqovEUCC/Xz0x03fxD88/pXJOjHgiueS1sbxfUzpIh9a734Vai7fbtCkOUnXzoB6OOCPx4/WuLdME8VueA7QyeIVulZ0FmplJU4yegH45/SpinzFSeh7hoOo22iT2cURLwhWiukPRg33vr1/SuW8U6UdG1+WxVt8RYPC/Z425U/wBKEmJlUnggbj7kmuniSLxDo9q4ZDeaUwbLf8tLc9Bn1UgiutxsctzA8UyuqwWMSjyygic+i4yayoIjJo0UQfbmHaGYe3+FVdY1yR9YnaOEvDEWDr/e7Zq5JdwDTobiUEROoBRexI6VKaOKWruYISR9RsLOMYiTa4UDuerGuH8d3jXniS7BJIiYQqD228Efnmu80S7Q6vc3cg27I3cZ/hAFeVvM93qBml+aSRi7E9yTk/rXNVeh3YOOrkWLRFk1a3STiOMbmI7ADNUZZWnlklf78jF2+pOTVq0lVIdQmP3mTy1/4EeapVg9jvW4EV3Xg7TLy68K30tq6wb5vL8wvs35Ugqx7gZzgVwZJ5r0/wDsPUdS0PR7aC4SG22IXiyF24JO4DuTn9K0pLW5nVlZWG6Vp09t4r0DSNyzf2erXUufuhmyf04rb0/SJbPWdTurq4Wa5unJOBgdc1n3V62taSbLR7ZRew35e5vA21wifKvPUjArohl1Yuc4AZnPt1rpglc5KknZI564tn1jxPHZQtsVVAZm6DGSWI/Sse31S3SC+uGiTNoxRWPO484x9cVJey3FlJDfTs8K6gXETA8sue/oK5jxFLFbRpY267VB8yT/AGj2zWc5W1HThzaMxLmZ5pnlkOXclmPqT1rQtYnEEcEX+vuGCj8az7aPzZgD90cmuk0qwWbTtS1iZisVooSDH8Uh4H4Vzx1OyWisc7cxbLowhg21im4dDg9RXfXFo0HgnQ9KjRTPq92JmUfeKA/Ka4TTLaS9v44YRmR2CL/vHgfzr17SrZNS+J9tbIA1polqqADja4HT/vrNXSV2KbseqWdvHaWkFtEMRwosaj2AwKkY8HaORQBg/SkY8getd6OI+TVcjrUqS9jiqqyqepxTsZ5BryWkz1FoW3bf07dqnhnIXbLyo6MOSKzw7DrzThL7EVnKnzblxlymsGU4KnrS1mLOyj5CT7VNHeSEYdV46etc8qElqjVVEy2eeajtpDZXscy9A2fw7ihbiJh8wKn25zSedCwwWyPpSUG9LFcyWp3UUiTRpLGco4yDUhyRjtXI6LqwsWMUmZbY9u6+4rq7eaK5j3wOHT1HUfWvFxNCpQlzLY76VSNRWF255xgVlRaUsWt/bkb5XGGiI4P41rPnIA496Ye2eaWHxM6T54hVpRmuWRFcQCZWVoVKd1NTx2m1VEchwAMM4BIHpnrUoBABwTmpg23jBreOcYiD7mDwFGSGrbCRzvkZl/uhcZH86sMpRS2cIOg6CokZg2c7RTyzuMMF/OsK+PxNf4np2NKWGo0fhJY8Nx6VICBkN0NV1YKedv51Ks6AkAjHqa4VSnd2R0+1h1ZciA24zz2qXIUAtz9BVEXkSj5m59qT+04F+8c1g6FSTehf1imvtGgXXbncQParERHygAbcVinVrb+IEn2IoGvW69E6erVcqEtop/eR9ap9WdHhTggfMOlWQ2yMKAc965MeJ0Q8Ih+ppP8AhKG/hRR+Ga554TES0b09SvrlFbfkdOPKj3zGIAqCcjqTU9veqyqXULu6A9+K4yTxLMQQFGD221GfEtycYUDAwPlroWDlOP73V+uxk8bTT909AZNyhgF2kcYpFQhQCv455rgD4mvm4EjDHHBxUMniC+brIx/4EawjgKy05kDx9Psz0Ty2Em/b3pJMAliAv0Neavq92+MufzqNr+5P/LT+daywNSfxz/Aj6/FbR/E9LaSMqMyIPq1Zs1wiXeWeMr/CQQcfjXAtdzkHMpxUMl25GPPwx963w2CVJt3vfyM549y2R6iNSsVRQ1wmR1qOTVdPAB88EjkYBry8NIWyZnYU7czDBdh+NZvK6V73Yf2hU6JHpSa5Yxl900hyc4200+JtOH8UpP0H+Nebu2yIkBnI7DqaEOVDEEZ7HrVPLKL1dyPr9XpY9DbxbZrnEbH8RUJ8aRL0tx/38/8ArVwSvGWK71LDtnpQzKoJJAArSOAox05SXjKr6ndN42DHK26D8SajfxtL/DbxY+h/xriUkRsYNNFwxmCCPKHjdVfUKF78pP1ur/MdhL4yunOQir9F/wAarN4ovmPDn/vlf8K5p0ZXZg2T0AqGNbsPl5I/Lz3HNbLDUd+VEOvUe8mdM/iW/P8AET+VRPr96/Bb/wAeNZDHDcgbfWl47UKlTW0V9xPtZvqy9Lq113kxn6momv7lxzKfyqqeRx1qOJZVB3sHOfTGK0jFLYlzb3LTXE56yt+lM8+YH/WvTc5600sF+8y/nTQtSQzN/HK34mo96u3DAn61DdRwzoqyOMA54bFIv2aPGx9pHpzWitYLMs7R6UFRnoKYJ0IwCT9FJqVI55BlLW4f6RmpTd9QUW9kIuM9qeckYGM09bO9IyNPuj/2zxT10/UWPFhKv+8QKbT3GoSeiRXJwcU4dOatjRtSbrbxr9ZBWPLNLHJKGCAxsVPPcVdKnKs7Q1JnF09ZaF3IzTRkHk8fSqcMsssXnF0VME9MnA4pbr7Vb+W78wsRllHIz7V1LAVuxl7SO1y4fbNVp7iYHZbQ727luBWzo+jLqNsZXvJQysVZVAA9R+lag8MWmMvLct/wPFcLr06dR05bo7IYWc4qa2Zy8cm3aswxI34j86k4HXAA966ZPDWnbhuSVz23SE1Mug6YOPsqNj+8c1bqQtcpYKexyRuIehkQH600zW4XBkjx9a7eDR9NhYtHZQA/7taEVvbKMLbwj/gAqPbwvZF/UZdWeZh4SQA5fHICgmrIJIyIbg/SJq9HZYV+ZY41x6KKQyDAHGOtFTEKD1Q44G/U8+ihuGH7u0uCB6pj+dOa0vD/AMuUx+pA/rXeSAMOtRGMHtXNLHJPRGyy+PVnCiw1FnDfZQpHTdJinmx1Af8ALOA/8DJ/pXYtF82MVXkhGeO1dlPExkryREsFFbHKfY7/ADjZEM9wc4qtPaaqoHlojZ79M12Ihx1FSLGOK3jiIX+El4NWOBlt9bTpCh+mf8Kryf2yn34SPpXpaKM9M1G1sDclwfvDGO1bRxlNOziiHgb7M8ukk1H+JZQPpVZ5LvJ3Gb/vmvWmtoyQkkY54BxVO7sIwrBUX5RkfLk1vDMaKdnAyll8t1I8vMkmPmL9O+RTS5/vfrXfiCFl+WIZ91xiq01lCwIeJevYV2RxtN/ZMXg5rqcQ/U+lSRlQoPIINdFNpVsDkoD7Gqculx7sREoPTrXVDFU2rGEsLNamcrAYG7o2PrTXyYsFs9a0/wCyGyR5vfPSnPokpX5JEPfnNV9ap9yPq9TsZFsTuGMVYUkhdyDuKedJu4WBZQwH901AwKMVclWDZIPatVVjP4WZunKPxIljKh4ztIzwKrT7RN8gIUADn24qYEgjkHDfpUV4TuUkAckcVSlqS0a9g4KwlWLcEH2rSWsTTZwRGm3BVuvrW2Tg4xXg5grVTop/CakQz4Sv0CglLmMjpxu61zVs+QAfQV1WjgTaNrsJzxbiZf8AeU1yCsBI205GSB9K9DLanNSt2ZhVXvDc4m644HP0q1Ky5YEls4aqDH96M98irMcnmLwCAOv9K9FszSJFIEzYODn8s1eWYm3kHfg5/wA/WswFTL1ySAc1YRgEdSw+ZcY/GlcVkbMOv3MYCERtgY5HNUr+9luo285txAOPxqgXVO4oMvBBAyRxzwaU7uLQ0ldNGdudo0GOh5r0DQn3aPbnuFxXCIyhnTGCpB/Ouy8NnfpYAP3XIr52o9DusctrZ2a3eKP7wP5gVa8NSY1CRf7yVU8Tjy9bl/2lB/p/Sm6DJt1WPnqCK92jK9KL8jkktTsXNRSMccUTP8vHrVRpVGSxAA9TirTJZDf/AMOecfpVRFO40XN7CGwG389uapzagxOIkCj361aTJuOhb/SiPc1cmkjk5ZvkUc+grPaNy5J4DDkg1HKRIwtohlF5b3PpVe6JrqQ3k4aQyKMZGEX29T71XUSlNysRUk9uwkPmtyewqTz0ThsChxh2KTYllKyybLgMVPAbPStCaF1jJhc7h0B6GqP2iI/xCr9ncLKvl7gWHT3FZujTlvFA5zWqZlteyFlWRRnOD7VfnhkgkQRlfmXPTANSTwoW3FRnvTrtsvbnseKh4Sk+hSrSKI1CJhiSLOPXmrNvMssbSpG2xerdAKhXT4pHwuffHarTlSgghX9xH2/vH/Cs5YGk9rj9vJETXcAPzNg9QDxU1vcLOpKjAHBzWbJZeaSx6k8+9XLCNoonDdM8VyYnBxpQckzWFXmdi2p6nPatVpWfSrh0blUO0+mBWM5YIQMEFTzV/QiZtCuFYc7WA9+K46a+16GkzJ0fULma7WOSUlSpNWJtTuYFnIIYowAyKy9EDJqMO5SM5HP0qXUjiS8HuD+or6NSOBxuy2niOcHLRIT7E1atNc+0zrHLCBuOM54rEsNMvL3m3gcr2YjA/Ouh0vw6lrIst7cK8vZFHA/GsqmLhT3Y1SctkaJm3KTHu3HHT0qGZpHKo6tsPzHI/KtlLb7PGGzHDEe5ppv4o1LQIZyDtzJwv4CudY9t6LQp0FbVmLfzq9vKA5ZgeaoXMkd1M0crOAACdp7dhVjWcRTGaVQFmXcQBgZPHH6VRgjhjd2Jcs3Umu+FXnimjncbMsbYAAFdwAMcilCRj7sg/Hio9sR/jI/Cgxx9pBTuRYvxRGaIL5qkDjrzUE1myHKNuqBYm6xvmpxFPjlv1p3DcjMMoHKmmbZAfun8qkYTjOMn6ULLcJyAR+FFybETySYxuPHvTvtEmclifrzSNcSkEE5z7ULNz80an8KVy9Uh4mbuqn6qKmilQnLQptUZOM9KiE0RHMIB9jinu0QVBtKq3zEA5OB0/WqIGmVWdGZc5zkZPWi/dIY0RFG98E57ClUQvcptyIwCTu9qz7ibz7l3JyM4X6UNjirmzZLbSwW4urGWdwpG6N+gz6U+W30oZzFqMX/AAcVT0m6ZJVTjHYg1vrKxHU/zrOMOtypPoZYtdK/h1C5jPo8fT8qFtbdjiHV4z/vKwrVE+B82AP8AaWmssDk744GPfIquR/zE28jOOlzv9y9tJPYyYNI2jahjIWNx/suDV/7LaOR/o0ef9k4pGsbVj92VP92QinafRisn0K1zYX5tLVBbO2wNnHYk1Ra3uYz+8tZF/wCA1rrZouPLuLhPo2alC3CY8vUZhj+/zUpTW1gaTMaBlWUfaBNEncovIq+LjSx1u79v+AgVd8y/K4F5A3+/HmmBr0feispfwAquafYVkZslzEXIimdk9XUZppkTOdwzWkwct+80mBvXYeaikjhJ+bSZlHfaaOZ9UFvMNJkAuJG3D5YXP6GiViNFtQO8rn+VOhS1SG6aCGeOYQtw/I+lNggt5dItRdTm3w7lcAkHp1rNy1uyltYp7z6Unyn7wH5VZaxs/wDlnqcB/wB7Ip66YWH7m9tn+j1pzxJ5XsQI4X7px9KsR3MyfcmkX6NR/ZV8Oio49VYGkNhfKMm2kP0FPmg+ocrRONRvMY+1SY9+anjur5MMZS6/QEfjWa0Vwn34JF+qmlinkjYY3qM8+lFotaIE2nqblzelNm6GGTI/iXpUYvIj1soPwyKzb25DSgtkECmpOmBzRCCsVKeprie1YYazA91kNP3WJH3J0+hBrKE6/wB4U8Sg9GH51fIuguc0lSyP/La4X6oDTxBaMcLdkf7yVmh/cGpA2ec0+V9wuuxeNog4W5hP4kVLcIIbKKMlSS5OVOQay2OcdKtSvi2s0Gctk1Mk01dlJrU0pYGa4QjBACj+VbhY5/SuXMh/tgICf9YB1ro92WNKN7K4pPXQxdUkLX7jOeAKrxyBsdgDj60y/k/4mFwc85IH4CmRHMagdT+tbrYg9F8LeFDq0ZkafYAOgxVfxZoq6QyYYHJxxWJY6zf2C7bS5aMHjFQ3+pXV6267mMhHQVy8k+a7ehpeNrWEDhRliAo7mo5JXuDtiykfdu5qHAfaZiAM8L6mrSMuAOMCtdI6sjV6EkSLFwigcdT1zVuwRDKzbVJxnpVMtxxTrdzvOD2qOZsdrIlvCqybhxmqcrlTuXnjFMv5W9TUFrIZIsk8g4+orZbGe4hkYHoTUbTNnGDUkvHIqu56nvTbHYGnI6g1GbjnmjcQemamuWykYIAPXipcrBylYzbuPXiuij+VAvoAKwY9pmjBHVgK23k+Y46UmxpWM/WpgphXPPJqnaN5t3CqkA7s59MVoXtqbmNpmiYoinDduOawNAlMt+SxAVUZv04ojJNMmWh2dq4JQZFb92R9gQZPNc5ZAsyegxW7qRKWKg1nLc3icjqhxnpT/DwBsGLcktVXV3ABxxgVPoR/4lyjBznrTl8Jy4naxokZJxXO3Gq3UN9JFHJhQ+0DHauhyO1cjeWN4l+88kDiEy7t/bGetRGz0ZlRTT0Ozvmjt/AyF8ANKWY+vOP6Vx1j4q1ifUYYVunljZtoiCrkjHAr0jR0jl0GxjlVJB5ZYqRkcsap3Gn2kErTpBAksRVlITnknpRdK53crbVmc7H4Ptr1DJd3lyl7dL500aqAF56A45AzWrrFqtp4UeGMlkjyoJ9N5p8GrWMV8RPNdI0cRVjKjeWMkH5TU2vusnhaaRQSjhmUkYyC3FZwk2tTarGKl7pyeothR6lAf0FQ+C8m81Pnn7Mf50agcxoRg5jH8qZ4KY/btQXuYSP0NPoZ9TIlb52HvVRjjvU825ZHDDvVKVhniluJ6Fq12lwwya0YTkN6YrJsmCv1wa3ltQfDV5qKuRLbzxxsn+w+Ru/DFJpblRYvhtwsNurZBDMMH61geIUCazKQOSeK2/GkLi00i4QFBcWyv8vHIHJ/OuSy+DvYsfesXPU2ULovWQV3+ckGrGuos2mFQDwMqPeskSupyCR9Ket5OCoZtyjpntSlK+xUI8u5zzZFEZBcqejDFbLRQM53QIec9KYYbLcM2x49HIqbF3MVuKYa22hsSSWgf8JDRBZafcTrGqTJyP485HeiwNlKztZ78rb2sJkkYcheg9yegrqNI8Hrbqkt4VuJ8f6of6tT/wCzV1FlbQ2dtHDZxKkQA6dT7k1cAC4I6+lPlvuQnYh0+DYVEwG1RhVAwBj0FdLpuFKyLw0bBlx2IrCLbcHHNathJgMRk/KScdqtLoRJlXxhNb3fiG4ubJQqTkO4Hd9oBJH4YrKuQ1uqF1yT0HetC70prH96JBKrnJJ6gmorCNr26llc5ih+bOOuK2Wi0IMvx9pdvY+FLOW6lY3byeYgxwu4cr+gP515ixDZIcEdvWun+JXiCTVtQgtycRWyYCZ7nuffGK4ljtB29a5qkrs3px0LRBJ5PFdz4QhSw0+LfHie6Pmu3+wPuj+Z/GuH0Oyn1jVbSwt8mSdwv0Hc/gMmvQGf95JsUIIvlRR/Cq8AfhinSWtxVHbQ6BZ4PI2TxsSD1UdR6Uvh+VoFvxuZUji3Lg/3j0P5VTsHNzajzSAwByamZcaNDhgPtVyEc9yijp+YNdL2OWbsjBeSS11K+kYKC4AUEdc9KiuZ0j0KzEhPnrkovQ5GQSfpmtSdLeXUfNkO7cywqvQgg5JrltUcSancmM7kDkLzkYz2/GueT5TnSuU9Vn+yeHbqUHbJMfIB7tn736Vw8LYWVz1xgfWui8YTFbaxts5UhpiPqeK5kkiDH941zVHrY9TDRtC5ZkbZplvF/wA9HaUn9KrU+5uPOMfy4CIEA+gqAtUM6EXtGjM+r2cQjEu+UDYeh9q9E1Cy1Ow1W41a6m/c2tu4U5AycEKoXsBkVw/hO6S01TztypcKv7h2GQreuPXHSt3Vrm/Tw9eJfyOZL+6UxqxyQoySfp0ram0o3Mat3JIh8N3UunJHOpJLks4z94Gu2urrzNHnnttzB0ONoyRnjn6VwxAjgCrwFAAq1pGtXGn2l1bRhWjuI2T5j93PpVQny6M5XHmdyO7k+0ww3FzcF7ezXEaY+WuRvZXmmaaQ/M5LVq6gHtbWGw3AsSZJMdAOwrKvceYAOwxWM3c7KSsSWIeRfJhXdNK4RfxrtPFyJovhDT9IjcmSSQzSj+9j/wCvWZ8OrD7RqZu5FJitxkH/AGj0/rVHxzf/AG7XpgpPlwgRj8Op/OqS5afM+oN81TlXQu/Da3D+I4LqbH2e0DXMpPZVHX8yK9L+D8LXK6xrs65lvLghW9QDz+tecaFKNP8ABmrXRO2a522kR788t+n8q9l8D2i6V4Y0+1I2uIgzAf3jya1oRIrS3OpjbEYLcE04nAJqs2GUEkgZ6UNLhcZ6V1nKfK0Wl30v3bSb8VxVhND1T+G1cD3IFdd9omb/AJaH86DK56uT+NfIPMJ9EezyHNRaBqbj5oo1/wB58VL/AMI3f9zbj/tof8K3csT94mjnPc1H1+p5D5UYieG7nPzzwKPZiasJ4cVfvX6D6L/9etJh7UgHcik8dVfUORFNNAtcfPfOf91cU7+wLAc/arg/gKuKc9KeOnOKzeNq9w5EVItI06M533DH64q/aJaWknmQpKHznO6ojxyKglbygZFVm55AqXXqVNGxpW1RstqIJz5WfxxUf9o+kC1mxTJIqtyueORipDXPazK55dy9/aMp4VEFNa+nPQqPwqpwKOCKQm2Tm8uD1fHpgVG80zD/AFr5NUmgmZ8tKQAcgCrQJwAetW9NmIBJIAAZGJHel8xzwXb86F9aQg56Cp5mxjgc9STSYyaOBxxQZEHBcCizENUsXI24Ud/WnlfTFN86MdZFH41G1zCDzIuKrkk9kBLgDmnqRjOaqfbbcHlxTW1K1Vc7uPWmqVR7JgWmMu44VWXtzilVm6MoH61T/tSA9CeelMbVY8cLnHvWiw1V/ZDQ0x7mgkA+1ZTamDyExUQ1CQ5EaqT1xmtFgar6C5kbO5QcZ5peoIFc3JrErrgoBj0NRf2pMD8vH41awFULo323hlUsTng4HFUJ9MlN55isDETnBasx7+aRsM3B9Ku2t4AWUJ5oQ87pCM1vDB1YK8Rcy6m9EAsYHA/GmFF3hmcDHvVJNZgA50y1P1djU8PiC0jI/wCJRZE+pZjWDwVVXdi04PqWfPjHV1496aZ4W/i3H2GanfxjbRxKU0e34ODg0qePLdBltJQf7rVlLCV1tD8TVRpPeX4Fb93kmOKTcecrEakUSMOLa4P/AGyIq1F47tXY/wCgyLjngip18bWeebacD2IrP2OJ/wCff4mip0esytHa3chwllOT7gCpv7M1I4xZgD1ZwKlXxpp5ODHcKD7Crlt4osbgnas4QcZMfFKNGvq5wsX7KjspXKkeg6rKuRFbD/elP+FPXw3qbkCQ2iD2Yn+la0WuWm3IlcD1KECl/ty0J4n491NRKFVWskaLD0jJn8F3FwwMmohNvOEjz/WrkfhWOKJTPqUuMfwxgGtJNbs92ROB+FD6taSJzdRfTNRN1eVps1VCl2KQ8LWhBJvbvH/AR/Sp4fC2ngfNJcyf7z4/lU8d1buNyXERHs1XY9xi8wEFM8EnANcyjXl9o09lRj9krL4a0eOMk25fHUtI3+NPj0bRUXP9nxg9fmy38zU3msAQFUn0zVVpZV3AIPfB5rgtXbacn95soU10X3EpsdN3FUsLUAY6xipkS1jGI4YUH+ygFZkjyyHHlsBjAIYCqdnDNDdFn3kHIxivTw2Gk4NuevbcynKKlZROnDKFyCMUwy7R96s1rlhkAEVAbll55/GumcEpKViVLoafn4YnNNMwYnk5IrJa8AJJzSLeAt1rZT9zkaI+1c1HcYyK4vxDpMy3EstvGZLeY7iE5ZG78ehrpRcggAsOaFmXdjcN1Kg5YSXPDW/QitCNePLI4OwidYmguYpmGCqhUPIOPyINa6W1xOFhWOV8DIDrtH4mum84e2c05px611zzyaj7kPvONZXFv3pE+kxCzs1jO3zGO59vQmrnmAg81lif3oM/XccA+lfNcs6tZ1J7s9iPLTgox2RqqxxnPtSFxnGef51Q+0KFKk9qI51ZeDmvVpt04qLVzGVm7l9JBtAPWkEp7d+lUzIOOelMacADGfwqaKcrxaHJrcttMe/ShZtygVmm8TcVJPHc1GbxS2AcZ71awrT5uhPtU9DXEwNOE4FZBuQoGOc0NeDHXA7k1yVMK3LQ1jVVjZ81SAfWmsFPSsqK9ib5UcEjqAelWBOvXdWLoThoWpqRYYYOM0wH5sVF54Y9acsgNXFzjqxOz2JMkfWl38g+hqFn7CopJcd63jNt3Jasi4Xw27PtRv657+lZr3GO9N+08darkk9SedIuybWViBVSS2BTc3DY4FRrcHnLfSgznby2a2hzR2IbTMu9UxEbQTk5OelVbhEcgEsnOM+tbZdXHzgN9agMFu5Py16FOvZanNOBmK+Z0iQhhyGPoaeXYSMhU7Vxgg9auvBCiqVQDYcjHeopmUjoAa1509kRytFSRl2kbssT0z0rJ1NFeFmwCy8j6VEYZzcjchB3Z3duvWpb8hYJWz0Wu6EVTkrO9zkc3Ug+ZWsZZKHfkHJANR3BGeM9jUazYAyM8YpHlLrg4HHWu+5wWLmnvtcHPTtXSBxt3Z4xmuTt5AjgnFdFCrS2yh+MjBHtXlZiveUma09jovA1wl3qF1CwJjmtpUI9cLXEWzHy13deP5V2Pg7ZZ65YqPuM/ln6MMVy2qRi11W9gUYEUzoB6AMQP0FXls1eSRFVFaQ4kH1qe3OzGcnJ7VUnbn8qsQuSg6DB6163MZWCVyrRtjHUflQ10mT97J+lR3P3RyTh/wAs0x4fNO5CF9RRzAkupPNfq0LIqEEjHWqJct1JNWktEGC7Z/lUhiQLjaPwFK76j06EgUPGpHUiuo8KP/os6ejA/pXMJgKAMfKMVveFHPm3Ceqg18/V3aOtapGb4yQrqkLkcNHjP0J/xrJtZvIu4pMZ2npXQeOVI+xPjjLDP5VzI5dPc4r18HO9KNzmmtWbk+qTuCExGvtyaz5ZGkbMjlj7mtaHSFwGnlJz2X/GlMUMbbIIv+BHkmu9zitjmSl1MuO3lkGUQ49TwKnTT2O0uwGfTmtFtoADMc+lOjWRlwi4H95uKnnbKtYp7lA29SvHvVdLJo9uxwQOenf3q4wwzKQDjjpS7v8AZFCQnIqz2zSABgAcdjVM6Zzw5/EZrXyCehH404bezMDTFzGE+mSgfKyH68VH9iuY23KF3LyCDXSbVY8upPqRilEeRhRGx65ziqDnKlmHnRPNBViOSKdPAsgjIkxsPGRU5SRAQI2YY6DvTVUqAWBUn1FK4eZTuJPKQxx5DtyxHYetZQvXVsAAKOAB2rZlto5XLbip6ccZxSfYIn4KIfc0XBNIyVviOAuRV2ynE28YIwQalfS4QceX/wB8mlhs0tQzJu+Ygc1y4zWizWlJc6SJDzkZrX0NkGmtjgAkHNY4NXduzRmVeMt/WvETsdkkMstPZ51kZ0ROvBBP5VoJZWsUrOtu08jdWcZ/TpWCAB0J/CtjS55ZLGaPzSwjb7uexrpliak93oZKlGJrLdmKVY7p1RT0WMbiP6U26uipxboI2z/rG+Zv8KzhsQbzyBUF5qtvApLndjHC8n6VMFd+6gb7l+KV5LjbOzOWPJJzTr6e3tYVWSRFYn5Vzyfwrl5tVuJyrRN5KOOAvXr61Qk3MpfJZs53E5OauUXGVpBFXV0dPq8CXdtCZpGURtzt7g1TaKInCyAfUn/CpI5GuLZRj/WJ/wDXH8qreTkcMD9K9PBy9yxx1l7xL5HAw4OfQikMLjoQf1qLyHXuRTdsi9C3511XMvmTeU4PSupMKaZ4PV3jVru+Y7dw5VB3H1rmLTznnjTJOSBiuk8d3TRapHaQ/wCrtoUi29gcc/rWcneSRpFWi2c8kkqcDcM0STy9WYn8BUaXJU5KKfrU32tWXmMfhW1zFRY0XJxgoppwuFI5iX8Cf/r1H5kbE5U08G2I5LA/QUkwasOiMUj7SpB65z2pQ0MhLOzc9Bt6D86btj2/K4HmZGT6DrTktkZgBIG9dpqrkkGoYghQxk5bis5vlTjrU9/N590xB+RPlFV3+4als0irISOeWNgUcgirS6reL/y1z9QKo5p0aNLIEjUsxOAKLlNI2tP1WeaYRS7duCcgc1qGQMhyB65rJ8iPTbUvIQZmH4k+gqpHqs6/wxkemKdyGr7G6j85UjjjPekkvoLUqs4Yl+eBmsf+1SfvW6f8BJqSQrqEO5AFkTtRcm1tzuL64srzw7ZalAoQxH7PMFGOnRj9axBf20hwkoH1NO8Fgz6ZrWnyjhrcyKD2ZT/hXISDDEe9Z05NNxNakbpSO0jmjbpKre2RT1f5gVI49RXGWh/0mIZPLCr+rsUlj2kjC9j71tzGVjpnc7s8ZNKsrj1A9jXGpd3C/dlcfjUyaldL0lJ+tHMKx2cNxtVvN3lSPXpSy3MT28ag5YZPzKMGuWtdTmeVFdlOTg8VqrMGxkAjpUuKb5h8ztYubYW+9FCfwxR9ntT963Q/8CP+NZ275iMg/WlaYIpeT7qcnFXckttY2pbKI6f7rVJHbog+W5ul/wCBVSTVLRh97H+8MVIl/aH/AJbKPxp6MNi7m6HEepTAejKDQsl+pz9rjk/31H+FVxcxN9yUEfWpFfPIYGlyRfQLvuSF7sn5rexl+q804vJj5tKt2/3WI/rQpBH3hmjcw/xBpqEQuRs1v/y10t0/65uTUZ/s4tzHex/8BGKthm7E/nSiVgfmY4p8vYW5B5emAf8AH3Oh/wBpM04QWxXdFqCkdcEEGpnkU9NhB9QKYUhY/NBET9KEmuofIj+yu/8Aq7y3Y+hbFSXJeG706FiCwABxyDk0029uSP3Cj6HFaH2SFr6OUsT5ajaQeOO1ROXLuVGN1oRwQz/2wsjphDITn25roQ3OawLCARanu8xySpYgngE1uIpkDeXjKjJ5pp6ITWpyt05e6mfIJJbA9eamt32SwjAYE4wex9aRtKvRJu2Kwbk/MPWpFsboTKxiYBemOa25k9CUmXXmAOBgt6UiHGTwWNRmORBzE4/CqV5O8ahRkA+1Te2iH6moZgPvMBSC6iH8YrAMxpkkrnlTx6A0uW+7E5WOlN7Dj/WCp7GeOV5PLbOB6VyAnzxuNaVlq5t4hGYgQP4lPJ+tDp22J9pc0tQcDNV7Z8Q8dd1Vp9QinHKODUBn+XEaY9yeatLSwJo1/MDjB61XlyOR0rPFzOp4GSKtw3AnUhhtcfeWiw00xQcnnr2qS4fBVc9BUDMsbqWYAeppLlwZTtORj1rN7l9CexJN3GMAjkmtVm9KydMJNySDwFOfxrSB5oERahIYtMuX85gNhBTnBzXP+G8KLqU9EQLx35p2sXsj286FyV3Yxn3p+ihRos0oGC0ir+WSamGhlUlqdFaagcKY4icetXL3WZ5YgkluuB6GqGjgERjHWtrWIx5KlQOVz0ola50R1VzitYv1KtvUgngYFdFp6CO1RR2UfniuR1WZYb2Fym/DjC9ia6y1cGBTkEnk80qj0scta9ydjwcVPeSW39mzDM4kKfxLwTVY4PGRzWK/iO0uoprYfKwBHJx0rnlFyasPDySbueiWTKLCxRChX7OvGB8pPNZ+uTC1SRgAS4VcEDA5zmvN9K8Sas+s2sSXLrbPMqbCOAua0db1Z5tRlYuZmT5EX+EeprWUeh1RqK2h3lpeJHb27XUscZkUH5yBk+2ah8SvFP4ZlWCaORtrHCMGP3jXnMt7cXdxbtfSeYEIRFPRR6AV1FkI/IkVVAJUjj6UmUnc56fLWsJ5/wBWP60nglv+JzdJ3aIj9DRct/o0AGQAm38iaj8GEL4lCk/eU0mLqZ1+CtzKvo1ZkoIPTrWvqoxfz57sf51mybcnNIUhtv8AdZzwqjmu/t9MaLTNb0tWEiXejR6hG45zhh+o3GuDgBcskaklgQPyrt/BOomSDw1LKcvc2lzpDgnpgbl/kKTZUEV79f7R8MWMhbLW7NEgH93qK5V7MbjkAiui8LEPoF1aMT5sUoQA+xKGqc1owc81k0bIwprPg7apm3dWyw4rfkiK5yKrMvtUjTZiyfKeTgdqaSOMr81aNwgbOF5qgIGDEv26UrFJ3Ksuc9KS3fy7mN+wOKssoY/P1qtOoU8dqBno1hKHs4WBzxg/hU7Od+QOayPDMomsCu7kYI/GtZUbuapEj95Y4PB61oadNsuYifu52sPUHrVJEyQKsQqFlxxVIll/U5EnglhjcGVG24PqKr3Dpo2hXFxKApVCzd/pTdYtlZLeeBvLmkcEn1IGD/KuU+K+rGKzt9Ojb5pPnk+grSTsrkRV3Y8yvrl7m4kuH+/IxZvbNV2fIPShnzn3qPnooyTwAO5rjbuzrSsekfBW0kg1S51sICtomxAR1LHBx+HH41veOtPXTNblFo2be6UXELeqsM4/pXPaSx02wgs4mKsqhpMHq55J/l+VdZrLrq3hiCdATLYPubjpE/b6Bs/mK6oRtE5Jyuzm7S9aCzdd37xjjp0HpW/qdwlhpFpvH+rhD7fVm5x+tc59nVrm2iQFg7gHHueaXxLdz6rfzeTEfKichcdOgpylZGFTsUIZHknM9wzl3DMnPGf8KzhnB2dTwK3dUQxaXZ26p+9b5d3fFZDxtbzzOo3pb/MxXpwM/wBKwkrMiJyPii4NxrE2OBHiID6Vlz8FVHYUruZblnJyWYtTSGln2oCWZtqgdz0Fczd2evBWVhtNrQutG1G0k2XFnNG3oVqs1pcKfmgkH/AaLNFJrudF4d06Kzltb+5K3EpKulqg3ZQ8bmPQYrtp9H0bV3mSymEN3bH/AFY5Teef8eRx0rE+HWlpc6ZfTX28R4MSDJG3I5q5qWiXEFsq2g32cSB3ReC7rnBJ68g44rqhH3djkqtSna5i6rY3VmCs0ZKBiN6cqce/+NYl4+IsDqTXTf21LamQuGlllIaO2AzsQ9ifWsC/WKR5y/7qSPLFB0HtWU0ug6aa3M8kvK0jks5HJNZ8rbnY1bL5gLDjPSq0SebOiL/EwFY7nTHQ9K8KKmmeEvOkBBYNMf6foBXmczmWd5CSS7E/nXonjOVdP8PR2sR4cLECD2H/AOqvPbWMyTKo61tVdrR7GWHV+ab6nU6Nrelrp8enapZkRxtlZ4+Tn1I6cV6Lo2uXZgU6dc22rQKM7GcRzKP5fmK8abT58nlD/wACFOhtbyCQPASjqcgo+DThWcdGgnTjLVM+gLLxLZXMot5pHtZv+edwNn5Hp+taPmFHLb8p168Yrw+38R6qLZoL+1S9jxgGRcsPfPeoYPE+sWULxwFkhYEFGyQM+lb/AFiJj7FmoBzwKcKwn1O47ACozqN1/eFfIfVJs9e50QI9qWuWa8lY5LkGl+0SkY8w/nVLBS6sXMjpmYdyPzphdB1YfnXKSCdvu3D/AI1VkW5H3mdh6g5rWOAv9oXOdp50I6yL+dLHNHIdsbBmHoa4Ms3ct+NX9DuDBfpkna/ymqngOWLadxKZ2DSqHCnOT6Cjf8jFQTjt0o3KGAJAJ6U4dDXm6IsLKG4vM/ZYd7Dqu4A1bXSNVY5Nqq/70gqDQbr7JqajOAxwa9BQhl4PB5FOTUXsJux5Rf6lJZXUttLFiaM4IzkfhVWPW3JIZQvvitX4oWJttTt7yNSEmTaxxwGHT8SD+lcWJPUV69DDUqlNSsQ5NHQjVpWjZlKlgcbe+KiOp3Dt2FY3mD1p6yAdDiuhYWitoiuzVk1C434WQAZx9Khe/uHlKrKQpPB9vWqizsE2hjt54oilCFsqrZUrz2q1QpLaKC7J/tUrlj5jBe1NVpnmT5mxyx5/SoS67Nqg59TSCRh3q1TgugXZYJkHXdSSK5iUgEnJNQiZvWl89vU4q0khaksnB6HCpiklysSAZ4AB/maYJjThOQaLIdx5O0ID/CmfxNNk+WFB6gZ/E0GcHqBS+cpHKgiiwN6DtxAQEn5V3H604MVUdc7cn8ajMitnI9qGZTGeSXOB7YphfQjpRSUVIC5xUkP3pgM84NQ85p6yFWyvBIxRcLEwbHBFMUct160zzG74zS+Y2etD1Baako5iZT9agbkVb07Tr3VLryNNtZrqZuiRKWNeiaL8JLlIRd+LNSg0i0HJQMGlPp7D0oHueY2+fOUAEseAAMk+1d14c+HHiDWYlupIE06w/iuL4+VgA84U85+oFdtaa14R8JFh4X0Zbq9Vdv2255J9evNc14h8UavrsmdQu3aPqIlOFX6Cuepi6cOt2aww85b6DL/S/D2gHyLBjq14PvXU6kIh5+4g4/76JrJaUs2TyexP9B0AqJqRQXcKilmPYDJrz6uIlU1eiO2nSjBWW5KXLHLEmlDVq6b4dvbt13qYlPYjLflXVad4atrPBkw0vfu3+ArgqYmK+HU6I0n1OPs9PurrBSMqvq3H6Vv2nh1UCvcuOTj5uv5f411KwpGuIkCZ/E/nUIjy2B17VyV6sopOXXojaEEZ0dvDb/LFCpPQOw/kOn86c0ZcfOSfr2q+0WSSBimGI1wVcUneMTaNNdSgYM9ulRmAAE4zitRYsnBoaD5x1wK41VNHEzPJ+XOOfemY575xWo0OGHucVWNsqTOQOT1J7GvRwlS/vSZjUj0RQx0ILMM9u1QygqG3u4HbnNabIu3I5qrKMMMnjuK7XiZSV7bGPskjOyxOCGwOhJ6/SmyQ9GDY9alv720slzcTKnoO5PsK5i+8SNK5Wyi8tf8Ano/JP0FejQjUrxTtY5qk4U3a5sXTpaR77iYKB09fwHWsa61ttx+xoFH99hyfwrGmleaQyTOzuepY5Jpu6u+lhVDWTucdTEOWi0NQa5fAcyKfqoo/4SG+A/5ZH3K1jyHKnBxUaZrf6vSe8UZe1mupuHxHdpyyw4+h5qFfFl2WwbeE/iax5kJdSSAoqaRIFt93yl6uGBovXlREsTUWlzVPiu5IwbaIH1DEVPB4qctte2Az0Pmf/WrlN2Wp2aqWFpfygq9Tudl/wkTkjMBGPST/AOtTv+EgBXBgcf8AAq5a2mJUqecdDUhc+tYrC007pFfWKnVnRNrULfeSUfkaj/teDjmUEf7IP9awCaaWAPWqWHghe3mdDLrsCqAXlH/ABUf9uW7jmaTHvH1rnpR5gA6YpiRspPIOapYWmDxFQ6K21azt5y/mkBvVT/KryeIrLvcAfVT/AIVx06HyyxHSm29rJPggbV9T/SlUwlKXvSHDE1FojuV8Q2X/AD8p+R/wq7b6pFIAVkB/MVxttawW/JG+T1ParLTHb2A9q454Ole0TshWna8jsV1BHb7ygDodw5qOS6Qg/vE/76FckspC9acCz9KzWDgnoW6z6nRPcDPDr+YpguPesNVC8scn0pd+4ew7Vp9WikZ+2dzdFwMfeFH2kdM1gGgHFNYeInWZ0AuPXNOFwMGue3n+8Rj3pvmPnh2/OtI0EmS6rOhab5aqSz8c1jS3LxrlpSB6k1mz6nM3EbkD1PWtIYdt6ETrpG3dTHjBxzWRqV2JB5SHI/iP9KpSXEsgw8jEVGMV106Ki7s5KlZyVkOzRmk/E0fiK6LmFh1dbYuHtIz7VyGTXT6K26xT24rzcyXuJmlM1rGYwX9tMOqSq361m+OVWLxxrSRjCeaGAznqqk/qatjghu4OaZ8RI1XxLDcr/wAvlnFOfrgg/wDoNc2WytVa8h1Foc3N0/ChHxnIyODSSHIFNjwww3HGK91mBNLMGBHHUGneYAhBJBHpUJC7TgEkr1pq5cEYOeOaLhYspcLjDZ9KTfhscgHpzVcRHueak8pj2wBRcLIuW5yuc5rb8Mvt1Bh03IR+VYVsAqEA9+lamiNt1OHPfK/mK8TE6Tkjpj8Jf8cAnTbdv7s38wa43f0I6g5ruvFkRbQpcc7Cp/XH9a4VIZGPCmu7ASvSsZTWp19vcNNbxsijoMljgUSCNVzJOB6gfKP8TWHZ/ao4hH/D2x1qw1pKV3OCM92713powaLEmpQRf8e8RZh3xgfmeapTalcynAIQei/41NFaKFJlDseyrwD+NRvbOSdqbB+dHM9g0Iollb5jNge7VN56pwZ3J/3eKjNrIOtIbaT0z9KWvcehN9rUDhw3ttoF8f8AnmPrmq3kOOiGlER9qpNolpMux3iucCN8+g5qczog/eK65/vLWcsJPtTxGTxyfrT5mS4IvrcRHGHX88VKknXbJ+TVUhidTmMc/TNLNC82Nygf7q4p87J5F3NBJCWAfke4pCVPBRCPpis6KDyyd+8/RiKlYuMCNpAvoxzT59Q5PMu4i/554+hNV7sKIhjd16E5FNjkYk75Qv1XNNuXbyyMowxncv1rDEyTpyXkXSi1NEIGDVmWTbpyqASC2PpVNWLAGr8YDadLnqM14Cep3sy3fbGWBwQM4PWr3g+QsbwsMkkHH4VRkBZSMeo5q14NBD3WeORW0WuVkyLd/D5lxIpdxGSCExhR+NQJbxuQoEflrwoIGD6mrmqzETmLJ2yEL/jTVmYAL8pUcAFRXu4eMVTTS6Hm1JPmdzLubdBJIqhcqmVx9cnFZ6N8pBH/ANetO+83eWgRSSNuF4x0/wDr1nOhR2UjBBwa48bG0lI6sM7qxt6G4lhiVRyrFT9Ov9ar3EDxzSJ6MQPpT/DRHnSoPvYDD/P41PrAlivcoCVZQfxpYKpao4irx0ujP2SDGD+tKHmXuaU3MnRlJ+opwuVP3kH5V6hy6mn4XZ5tfsI3AwZlHQetSeKbzzPEV+zIp/fMP1NJ4YuIl1+wYqBiZDz9RTvFKRR+IL9JQ27zmPb1rP7Zf2DKM0Z5KEfQ05Htz94uv0GaTbCej/mtH2dCMiRPzxWploKBETw5/EVIluJMbJE59+nvUQtWP3cN9DmpVheONiyHcRtHt6n+lNCfqQspkueMBQuF57CpmzaWckp4kb5VqARO1wsa5BIqLVpt9wsKklYwBz3NF7ajSux2i6Ve6veLa6fA89w3IRRk0zUbK40+6ktbyNop4zhlYYIq34a16+8O6nHf6bJ5dwnAaq+t6nc6zqNxfXrb7idtzt71knLm8jVqPL5kR8v161ftTDZReYcea3T1rGDbDnOaa8zs+5jz/KtLmfLc0LlhdSl5Wye3oKi+zp6kVUWZvanic+lO6CzJzbjs1OhSWCUOjA46j1FQC49jThce5FF0KzO28FASeI7R4+Fm3RyL6gqa5XVLd4r+dFGQHbBH1rd+HUx/4Se1OcxqS7ewCnmqOrY+2zOpzE7kg+hJ/lWa+Nly0pmVZowu4dynG6rmskGQY7KBTITidB0OafekfaSD12itDG5nBqVcuwVQSx4AFWwNxwoyT0q5DHHaKXfHmH9PaqC42GGKxh824OZDxx29h/jUC6nMDwiYznnrTZz9ofdIcnt7VH9nHYmlZk8y6lpdUJ+/Apz3ViKsQXUVzmEqV3DHJ6//AF6zfI9CaBE4IIOCOQRTswuiS5gaCUqee4PqKjBrTRvtdvtcgTJ3rPkiZWJC9OCPQ/4UCuN4rR0kkiUZPbvWdhu4rT0gYjkPq2KaBkD3MyStskYDPrT11C5H/LU/lVWbiZ/rTc1dzLU0F1W5HUqfwqxb6rI8qo6Lg9/SslFLuEQEse1acVtHZxGac5YDr6fSmNNmskobsCKaz4PWsVdSI6xZ545qZNRhc/NE6n2INCZTkjVDHAHal+0wI20uARVKK6jZgquwJ6Z4qtdwNneOW7+//wBemDl2On0aSN7hyrBiF9c10cA2QHHWT+VcT4NUvcXOO+1R+Oa7pwFfA+6gxWc3bQun72pRudqefMRu8pOB2JNZ8F5cPjfDCfpkVb1FgttGO8rl/wABwP51SRRgfNj1oitBt6l4XLFMrEffa5/rTkvF/wCWglB9Dg1UYquASOakRVIJyPpTsguSy3Fk/EiAg/3ohUf2fTX6RRfkwoNsrjlcilS3RBhDj2NFkFxh0rT5f+Wcf4SEfzqB/Dto/KGZf91watFexOKhlG3ByeT1pq66iaT6FWTw3Cv3Z7kf8ABqtJoJX7t2f+BRkVshmwAGP503zZgCFlcU7yJ5ImOulXEf+rlhf/gRH9KX7BeK4fywzDuHFavn3I/jDfUCk+1XI4SONvquKTuUkkUXtppIvngbBHI61SEDw/KEk29RkdK12upcfNbL9VJFRm+K/ehlA9mzSd2FkQ6TnfKSCOAKvu20E+1UxrESsQwnQ/7oNSwajDeSNHbyLLLtLeWyYPFK7QKxzuvsqWsYXhpG59qv2CGDQ7VD1dmf/CtS/wBPguIcT28RIPHHQ1U1KEWssVun3I0AUDpSi+hjVg1dmzo4HmRgegrR16TYmwHmqGgqWmTHbFWfFEmJCMAcc0Pc6Y7HKQQLdajJvQPsTgHoCT1/Q1p6SYhEyuAWUkVRt96WsrRZEk8mwEdcDr/I1qaLaj7OQ45JNKQoliWFAufK4PpVePR7GVstbx+vK1rRxEDAHFL5XpxWbdiuVMy77Qbb7ATbJFAQw3SZxgd6oi10Wyi3Sm5u5R/Cg8tc/U5P6V0rqPsjrIjuueidaxXnEcqizsEMqnhpMyMD6+lOLuDSWxjahP8AaY4TFp8dpbJICCgY5Pux6/St/Tsbjx1Xms/WYr9oY5dRmPXKRswB/Ba1LAfKCPQUpDijlpjthAPVWdf1qDw2/l+KrXHRmI/On35IlnUnG2Zh+dUNLk8vxFZN0+cUmxMt+I0EerXC/wC0f61iSd+c4re8aHy9euFI4J3fniufBDEDGKBSOh8EWzT6/pwltmkhlk2jjAJ+vtVzSIPskSLgNJYeIFDHpgOQD+hrP8JX/k6XJcMMyWGoQy7gcHbuwR9Oa0b52t7/AMdxqAWhmW9X6q/UflmpuaRVixpcIsvFes2C/MyTTYzxjPzii/AFw+OxOKguJWh8bmcEMbyOGYMOmHGCat6jJHE5SQjcg2k+44NTsy0ZM33uT+FQFk54FNmnWaTCDA9arOfm4rNvUaGzbc8YzWfOcMauPGzHdkDFVpkVR8zHNK5RUbk++Kqyg9+lXd684GaillUDAAoKL3hy6aGaNVOAx2mu3gbeOR82e/evNrKQpPxwAQ35V6BYTmSJT1Pb8aE7OwmjRVdxPGcVE5Kt3qYEqAxPHSoWbcSAKsguWknmWxMpP7h/MA7HPb868Z8XamdU1q4nZsqTtQD+6K9amt2ubG5t45fKMyGMvjO0Hrj3qp4e8EaXDp+rQqHnvZbfCSykduuBRK7VhxtF3PFM+q1qeGLQXWqq7x74bcea4yRnHQZ9c/yqpcwGOVkYYZSQfqK7z4cWKxeU8kfz3DFySP4B0H55NZU43ka1JWiV2dpJxNIMMx3Pj9TXVaBcRW12YHbzLeQFJAejK3BH8j+FM8T6fbxOlxbqUJOxgvTB9azfDoNzqD5B3BsqPXsK61ocZoafanStfvYrv5vsiOVJHBGPlb8iKw9MvWaK6DgBOXJ75Y1u+ML9zDcfKqyxhbRpAQS46kH3HArj7N5dpRB8jyIG4rKUrSsY1Nzf1QRxQ+dIQSqgID1HHauT1C7+xeH71+jT4hT69T+ma0Nfld7xhJkKDtX0wK5nxfcAWNjbKf70jD36D+tZ1JbsuhHmmkc3FxubsoqLJHIJyO4qTOIP941HXKesj3XSNR0DxF4etbW7P2PUY41RHdjJDMwGMsfvRsfUcVg6t4aubJ8IrhwuWSRhg+6OPlce4P515faXc9o+6CQr6jsfrXoPhn4kz2MSQ3UayxrxsflSK6YVYy0kcVShOLvEqQ309jKfKeSJv4kI4P1Brag8UQy28kVyhgkYbQwBKfU9x+v4VsXTeGfFkGLSQaTqTD5RKN0RPoD1X+VcV4h0DVtDkC6gkflt9yVeUcezdKpycdUZxUZaPcveIXi8gyAbpNmxZEbgg/SuOvbf7Lalt+WlIQAdhUrm4XIBG09Rk4NQ3xmuWhyiokfYHNYzmpHTTi46XKVz8saoKk0i0kvb1Y4SobrljgD3qC53eYflIA4qfTrmS03PHHuLcc9qyVr6mzT5dDa8bM0QsbOSUytFHln9c9P5Vg2EscL75c46DHrU95di75ngO4DAYHmoII7eRdkjFWzwT0pzd3dBTjyw5WaIvrU/8tHH/AaeLu1bpNj6g1UOlofuuaYdK9JKV2Llj3NFZYWPyzxfiSKfwekkZ+j1kHS5AeHFLDpVxJPHGvJZgKLhyx7hFK0fBGVqyCrgMvQ1UGD1pAzRtlP/AKxrGpSvqjoUujLe0g5wPwoKgjOOaWKVZBgcN6U4pk5BOa5m2nZmlrjFRiDhvzoIkA5AP0NOVSD1zTzyKXMHKVmKtxIn5imfZ03BoyVIORVwdOlN8pSeBg+1Wpk8puiQTWEczDLIATj9amiuFaDzDnHrWdpLHY8THI649quW8ZjPlnHlnoK8qrFJtFjEcpdEkcA5U16VpEwuLKNh1xzXAMgUoew4rqfClwBuhJ+lc1R3s0JrQf48sP7Q8M3O0Ay2/wC+XPt1/TNeMivoZwGO1hlSCD75rw/WtLaw1S6tiCPLkIXPUr1B/KvTy6sknBmckZNOqU27jtTDE47V6qkibDOaUE+tLsIPINAFPQoXe3rSh2puKUA+tGgDt/tS7/amge9OAHeldBqG8Z6GnbgexoBX604H0WpcgG/gaX8DUqIzdFNTLA/cAfWk5jKoH+yacAewNWxDjqwFSLEnfJqXVQ7FHaf7ppQjHoprQ2oOiinoCzBEUsx6KoyfyqfbBYoLBKeiY+pxTxayfxFR+NdvoPgTWdVCyyxrY2p582fg4xngV1dtpnhDw1jz1Os3yc5k5QH6dOKHVsrt2KVOUtEjzfw74O1jxBOI9NtXde8rDag/4EePwFd7bfDvw74fCS+LdWNzOOTaWh4+hPX+VWNZ8balfKYrUrZW5GNkIxx7muXdmdyzEsx6knJriq5jGGkNWdVPBt6zOuufHQsLf7H4T0y20q0A2hwgMj46En169c1x1/e3d/OZr64lmkJzl2zjPp6UNtz71JDZT3J/dRnb/ebgVwTxk56yZ2QoRj8KKXqOOKIoZZ5AkEbOx4+Uf1rrNH8KPMwe4jcx/wB5/kX8O5rq7XSrS0QeXEp29MjCj6CsKmLTdor7zSNLqzitK8IXNywNySF/up/U9BXXafodjp6hVRfM7hf6sefwFaaPM6jOAo6KOMCq1y4M8an5W7+hrk+sRqpK93+BoocpOQRHti2xp0wgx+Z61GsRA+tSRoyxHd1zT3JVVzwQaxhWhU5rlcrjaxW2sGB5pQg6ng1KXwWXHHaoyxA6VwVedW5Xe35mysxxXqRj1+tM2AntTd2R15pm/wCb0rOa57ytqC0HNFkg7iOcjFRy5LOCwCEcY4/WhzuOSTj+72ppKhcAcelZq5QhPrjAqtOcMSTkHmqOs69YaSp+2TqH6iNOXP4VwOt+N7y7ymnJ9ji6b85c/j2/CvbwWWYistrJ9WclfGU6fXU7PUtXtNOjL3cqxjsoOWP0HWuPvvFkt3MyWKGGPs78sfw6D9a5B3aSRnkYu7HJZjkmlt32zLz7V9Lhssp0I66s8mtjZ1HpojRnd5JS8jM7nqzHJpAcU1jTc8/Su1bWObckLUhbrmmk+9NzTQAT83PSojKzfLkKOvFPLKOpFVHGSdoOM1rFXIky1CEL/O5P1NLceWXA3fKBVZYTjJJzSiBz1Iq1JJWJa1uPXy97DnGOMU1CNveniAqRto2bCSTk0uZWC2o6JwpJ59KlEu7+ICqoNAPNAy4qluQc/jTgnqahtj8xBq5ZQz31x5NnA8r99o4H1NZylbVjSbdkRbQOv605Rn7o/KukTSrDS1EmsTCWbGRAnT8fWszUNRFw223gS3hHQKOT9TXOsRzP3Vp3N1Qt8TKflLwZOcdqeZCOF4HtUWc0DLHCjJp3b3LSS2JAaegZ+lOig7uRj9Km3BR8o/GpuUCRhPvHH86du7LwKZ3z3NOFMT1F9qUdMUhOKM1LkNIQmjNNJ5xUVzcJCMu2D2Hc1cNXoTJpLUlZgATVO6vVjGIxvb9BVSa9klJGNqf3f8ai8wY6AV1Qp9ZHLOr0iJK0spDSZPoOwqPnuCPqKc0ozxmnhyB8z49q10RjqyIGlqYjeOFB9yMUxUVR86k/jTugGUVJtiPR2WnCAH7sqH6igRFmug8PPm2dc9DWA6NG20gHPpzWx4fLI8isCAeRmuXHK9JlQ3N0HcDUnjza+meGbn+NoJIif91hj+dVIpczyJ/dq14nZZ/BVg+395a3rRA/7LLu/pXlYJ8tZFy2OUblaiwxbCdcmgSEjGKfakicFcZ69cV9Fe5jsTJEQgMhxnI5/lTbZcjlsAdfepdmScknknA9ajjtpmzgdTTFccZVQ8AH6mozcuThQKt2+kTSnLcVfg0NmOBGzY/u0m7asLpmdZlyzGTHTtV7TpCupQ5HCuMH1p93ax20OURlYHBzVWOQh0dR0cZ/OvIxS/eM6IO8TudRRLjT5oT/ABD+VYSaakSffUt2AGf1rVCzO90X2iMjEePcd6zktLjOZMH6Gt8uvytXMaq6jY4JIm3KV3fTNPaB5WDSt+ZzVqJJF4MYHvUvlc84/CvTstzmfYqeS38GzH0pY4ieoBNXfLXHQ0u3HRaoRQlQqOY8/hmmi3Mo5QKPfitHGOoFPWgDL+wRjlgcUv2G3PRRn61pNGHyGPHpUaWkSHIUk0WAp/YYwMBTTY7FQfm59q09oxxSeWaLAVkgRR8qgU8qAOMVNsf04puw+1MCBlXuAfwpBEmfuCrQipfJ56ijUVioYI+6D9Ko6vbKthMycNj+tbOwCq+oopspx/sk1nW/hy9CofEjmIuIkB6gCtC3ObKYex/lWeQdvGK0bJd1tMM9v6Gvnb9T0WZbn5TjPSr3hZfKNwpOSeaoD5sYPGOlXNKkFvM27oQB+taJ6WFLYt6wo+0wuRnLjgHFF0qRruQMhz0LZqTVhmO3f/poo/WszxDdlZhHDkMTgY647mvew+tOL8jzanxWKsYnuLmWRVIiA2ru4zzTLhWR1LjBIq0budcglsVXuZjKg3gArz9anFx5qdzSi2p2JNGl8rVISSQrHaffP/163NeYxxJIBna2D+NcqsjLJuUYIwQa6+dkubPLcqyBhXl058lSMjpqxvExBdjHKjNP+0RMOVA/KmqLdxkbfyoNvEehA+hr3zz9CxaSQJcxSAYZWBBxXQePLaGTWFukICXUSSqfXI5/rXMLZ5+4WP5V1lxENV8Gplx9r09sHPUxnpWctJJlxs00csLRD91x+YpptXHQt+INQGKUdx+dLiZR0JrUz17kqwybgAQc06Qy78Lkqnyj6jr+tRi4n+6xbB60ltO5SNAoJPyjii4rPcmjuDBI8kvXyyBWVuLEs3LMcmrutMFmSFcEgAtj+VUc+lJvoXFaXHZpSeKZnJwOaXHOeppJlMAA5wTitO001HUNuz7Gs5SNwrfspVES5iQ+/SqRnN2IH0yMH7in86hbTY8/dYfQmtXdETkxkZ/ut0py+SerSj64NMi5j/2UhH35F/AGoH04qflkB+oroQAR8s4+jLSGLoQ0RJ96LD5mWvA1i1tBq19Iy/ubVgjejMcD8etc9F5/7xJgChOQc5613d+v9meF7e0jXdcXbedIEP8AB/CD/OuUnUxEMY3Un2rOCu3I0qOyUSOCFViDMWH+8ORUVzAJGD+aBu4wRTpJQzBfmVh17CnIMDGQ2e1aGNyFytpGz7QWUYHv9KzHupHYsxBzWq9t9oXCvtVeNvWof7MwemaBq1rsorcN3ANSC59iKuHTBjO1h9DUbaan8Mjg+hApptC917kQuh7j8KetyuPvD8qY9g69H/MUhsZV6Mhp3ZPLEsx3AVgykZq25E8fmx/eHDL6j0rINtMOqfrT7WSa2kyEbafvCi4cqRZfGc87T0NXNPOIHx/e/oKTyUZwQ4w3JQ881OsYjQqhUZ54qrkqNncpcE89SxJojh819oH4+lL9mk3kPwPUGppLiKyjCr80h5x/jVcxCiywgiskyAC5/M1RuHkuX3SNnHRR0FV2uWkbc/JNKJqaaG0xwhPtT1iYEdKasw71MlwvrTRHqIyOO35VetZTJFslzvHf1qusqn+IUvmAEEEcUxrQ6rwXbYa5lA6MOnHb/wCvmunu2Koe7OcD8az/AAhbhNFWdwN00hccYIHQfhwa05SDNvb/AFcKl2PbjpWEndnRBWRj6gwN3IpA2xARrznp1/UmqowMEiqjXe9ix4Yksw9zzVi3ZZcMzcjoG61psSW4zuYblBxU4UY4U02BdwODU5iIUAsKTY0iNQCQOFPpmnMjdQQR6U+OMbuMcU4pySCQaVwsRgZXoAfeo5UBkiU8ZPpVmVAUBAG6mFX+1ITyAKLjsL5QGeBimeTjODmrI6k9vanKExnJzS5gsU/KII4FNkIjbO0n2Aq/IM4ximYAz0NHMFiiNjqflIJ9RVeaPA4xVm4kUZDcGqFzMnAPJqkKxTulVgQelUfDz419YwV5VgPrj/61SX822JhhsD0rM8OSFvEVmWPVmX8waHsRJ6naTAtDIpOTWPq0gEtmHbDPGQPwNa1sd8C9c4x+NYPilDu0h1GMTeWfxOazjvYqquaJ1OhZSVFByDTfFB/fNj0p/h9StwuQMiovEP7y629dzAH86p7mi2MspcJZiK1/1gjyxzjAbrzWppV1bRFIZLiFWTg7229ves2ZVLsoPEkgUfQdf5Vi3MReeSQHkk0pK4k7HpNvLaS4C3dmc/8ATdM/zq/Hpjy4MXlv7owYH8q8cYEEkgjFRtjrz+dQ4lcx7XLol8LWQxQ7ifUHHvVeXRLiGBcZjY8naMV5z4c1jVkkdYNRu0hjXAQSkCtmfVtTkXDX1yx95CamzKTTHa9p/kQsdpZvUjJ6VNpzI0a7WGcetYmoT3VzGYo3mmlJHQkkEnGfwzUZ8LX7zf6LqzCQdN4NNpkp2ZmeIh5Wp3Q6AuG/Ssa3kK6lbSZ+64/nWrrkcy3Tx3UnmToAruP4iKxJPkkU5+6wP61NxdTpvHyg6rHIP4ox/KubhiklL+UATGpkPOOB1rqfGaeZY6fc9QYwP1/+vWDoQ3amqA48yN1/8dP+FK42tTsNfgtbSfVYYIxGlxp0VyqqMAMuDxVS7kSbxdcTSJiHVdLRwp6MSgPP4k0/UgZU0K6ZtwuNOeEnrlgCMU4vA+ueBptuY5NPFq3GMsAV/PKmmUipqjiGDwxe/wAVxYFCe+UPFWfFUYkuGlj5RmLZ9c8/yIrKvwy+GLDzWLSafqktrk9VQk4H0res1WXRYTICzhFLE+oGw/8AoFRItaHLLEyHnIz0pfLIyccVs3ESqPlGRVKTgH0NRy2K3KDjIqlOc5XFaEuM+lULhSGzSsMzrjKkY4zVJm7kVoXA3AnHSqJQnIpMtDI5T5oxkZ4zXbeHbgm2jGQSPlrinAABFdB4enxO6DocMKnZ3GdypLxgHrSbcHNQWzkgAkbashj3I+tamVhoY4wc4rZ0thHcQvg7D8rAdSD2rLU5kVODmtu1ULGFPWqRLPHvG2iTDxxPYRRlZLmUFFUZC7uoHsDn8q9Km02Kzu7efT0xam2CqOwdRgr+lN8d+XbXumanAQl4EMceOo9W/Pd+dS6Ncy32gXNu5zPATMnqfX8xiqhG2opSvoZE0qahaOkgMcjNsOemRVGaT+x9MmlZgXC/KwGDkdK09agSWwiwdkmQ25fU1xvjO58x7ewVidxUE/Xirk7K4krsZMktxY2EMe55HU3EuTk5dv8A61XNPxBa3bgAbCdoPU44zVK4lnGrEW5wyAR+2AMf/Xo1a43WEDqu15htY+w/xNYJrc5JaszZ5nnaFJD0/PJrl/Fzg6sYlx+5RY+PUDJ/UmuktXRLqF5eY1YFvfFcVqVz9sv7i427fNkZ8emTmsJvQ7MJH3myBzwo7AUzNBpayPRSCnwIZZ44x/EwFR1o6DF5l+p7IC3+fzpJXZM3yxbOlRREAQAAK39K8QzxafJaSbLu0f5Xtrgb0Ye3ofcEGueuD8n14olZIdLlK8SEhT9a6Yux5a1N270HSNTVTo876VeN0tbs74GP+zJ1X6N+dcxqmm3ulTeVqNs0TdnHzI3uGHGPerVnqjQoqtmRDwc9RW5b3072TR2226siQz2zjcoPrjqD7ik4xlsae0nT+LVHGlFYdiD3qGSAn7pIrpZtItLyVjYSfY7hjnyJj8pP+y39Dmsi8s7qwnMN5CyOPbr/AEP1rJxaN4VYy2Mp4pF9xUZJH31rT4b0NIUQjBUVNjVTaKkUzoODlfQ1YW5QgbsqaaYF7ED61G0RFFmgumWhKh/iFSwzGOVZI2AZTkHPSswoR1GKTp0pXsPlTK4JpwNNZMDcpyv6j600GkpG1iQjuOtWIbjPyycH17VWU04ilOmprUabRfBpCcCqccrR8Nyv8qshldcqc1xypuDNU7ijkmlAIpMcinipbGT2chjnRvfBrVvxJJADAcSKQR71iCtyyl8y3U9xwa48QrNTQx6s7xAsQGNaOi3JgvELH2NZwI8w56mpYztfPf8AlXJJXQHpcTiVQR3FcB8S7Bkvba9QDEq+W2PUdCa67RbjzbRSDkgYNReLbQ6joU8YGZIx5i/Uf/WzUUKjp1UyLdDyLDDqKM+oqb7wpCvpxXtqY+UjIUnkD8qQxxnsPwqVl7DFQPHtIPUVUZXE4gbdD0yKabb0aplGUOCQaSFiyAnr0NPma1Fyka2pPcfWpFtUH3jUo60tS6kmNIZ5cSdRTg6j7qD6gUhG7qBTS4X5aE2wJPMPfjNKr7jgHpUeFHJNa+jeH9S1VgLG0Yxk8yP8qj8aTsNK+xmnJ6VZsbO5vp1hsoJJ5W42opP5+g9672w8G6VpgEuu3n2iQDPkxnCj+p5rQbxHFp9v9m0GzitI8/eVeaznUhTV5M1hRlIx9P8Ah9NHGLjX72Gyg6mNTuc+oz0/LNblrqei6ChTQdOV5f8An4mGSff1/lXPXNzPdymW5leRz3Y5pmCRxmvOq45t2p6I7qeFjHVl/U9av9Tcm5uHCdkXgD2xWYwDDgEn1NWYLWa4fbGrMfRRn861INGkYhHOH/uJyR9ewrklOcvekzoUUtjntpDYzmtC00u4uCDtKA/3uv5V01no0FsQ0h/ef7PJ/PtWtHIsIxBGsZH8Q5Y/jXFVxSi7G0adzFsPDIiCyXWF935P/fP+Nb9rBaWwBt4tzj+OTk/gOg/WkVwW4yT6mkK4GcYOegrhqYyUtI6Gkaa6l0NvDFyScZBJpN2ExjPNQwnIz1A61KSAMds8VzyrS5U76lcquSITsx0b1qN9rDHXvnuKYzkMBmmu3zgjvRCpJxt1CyJQcAg8jsaHIbk9AP1pgJIphfHJ79a0wtW0+Wewpx0uhkshLjH400y8YbPTFMGAT35prDdwOa0nWk6jsHLoIXIkx0yKUnmsPXPEel6SStxOJZ+0UXzH8ewrgNa8aajfkrbE2cHTbGfmI9z1/LFehh8qxOJadrLzOatjaVHTdne694js9JcLLOrP/wA8o/mf8R2/GuI1rxpqF/uitALOA8fLy5H17fhXJFiWyetKTuPygmvp8JlGHw6Ta5n3Z49fHVaui0Q6U7izOxZzyWY5JNRHipBE57Y+tOFtz8zn8K9NyicaTIM+9IudwIzkVbFugHK5+tSqgHoBWbmuhaiwLZApp/E08hVGSCRRk9VWs7jGYY9Bijyjn5mp43N3xTto7ijmC1yPEa+9SRshHEeSKTAz0qNX8tjTvcViSScISPLFPLNs3AL0zVSWaNjlhSi5G3ABxT5WxcyJoZWkk2nAHtTbhMNx35qET7T8q4qOadmG3v8ArVKDuHMhSRuIBFMhR3nWOJWd2OAqjJqS2sZJT8wKj9TWtaxraD92TuPXH9TSlVUdEVCm5b7Gxpfhu3tYRd67dLGmMiBGyx9if6Cpr7xAI4fs2jQLaW443AfMf8++axZJGkbLkkjp7U3iuFpzd5u/5Hckoq0SJy7uXdiznkljkmkwa0IbKRk3yAxoemRyfoKCkcbdBn9fxNXzohxsVordmOW4FWECRnCrn+VDMW46D0HSgUufuFhSSx5OaOPwpM4NGavmEkKBThTM0jPtFCdw2JC3FRtIFGSQAOpPaqd1fJECv33/ALo/rVFpTKMzZJ7L0ArWNJvcylVS2LNxqBY7bcf8CI/lVPY7tlycnuac0p6KAPpUbOScscmumMeVWRzSk5bjTkMQOaQKT1NG4dhSFj2NaEDsAdaNw9aaRxSY5oAkznv+tLtz3P41H3pwHoaaAeqL/ET+FTxpBnnf9arZIpd5XsKTQi+IrfrvIHpVvTDGt0oRmP1rIjcucKrHPpV2xzFdoXOD6VlXjenJeQ1uboAS9Y5++K1ztn8Ga5A6BjE0UyexLbc/kayJ0MgUjqpzXQaBEl3Z61asMmSzMij1KEMK8OlK1SLNJbHCR6ddy4MULMPUVNFptxFKvmjy2PY9TXRR29xIqh53SM9VTjAq/DZ2dsNyxNNJj70hx/8AXr6FOafvL7jncl0MGO0C/eUk1s21ikcQed44wegzuY/gKtRQg5ZyAD0HaplSPOAVJ+lbNN7OxjfuVFYZKquV7cYJqyruyBWV9voDgVYjjVRwo/CpgY8csAavlT3Jv2MTW0Q6dJtGCMH9a5tRt49a7TVQklhOq4PyE+/HNcXnj8K8nHq1Reh2YfWNjtbJB9nEuSfMRTj3xShlxyD+VQaFc+fpaf7A25+lXLdWkgRpFAcjkUZbfnkicRshgwQDyPrRjj5akMSlvQ+1Sqh6dq9hI5blcKaXYTVnZg8c07aAOeadgKmyjYT2qzgZ6UMCfu4p2Fcr7CO1LtNS+W5Hem7CDzQAgj9QKTGOKeB9RTlT2zRoIj2ZHNNdAOlWCmPWmNgdFBp6AQKrE04ISec1IR+FJjPU0WC40KB1NQXgBtJhx9xv5VYKqKimTdE4A6qR+lRVjeDQ4vVHI5GOlX9MwRL/ALtZxYDIPYZp3hu8+0zXSHsPlHtXzCi2m+x6b2KsQIXk5q7pyrJcMrZOUOKrEbSR7mrOlnbfL7qau/UT2LupxsLIKjA7TvO49AMc1ipfGctKVXJJGcdq09anCvBE6B43ByD7dqqrdRBQgj2KP4VNe9hHelE8+ppJjFuh3QfhxSTSxSRsu0gkYHepA9q3VQPqKDHbMeCB+JFbzjzRaIUrO5lA5AroNNnaTTV7lDt/CuevQUncKcbTkehFa3h19xniJ+V1DAe9eDJcrPRequJLa4lcKeh/+vTDbSDof51b1i1ZblHjwQ6fyqkv2hPuqw+hr3KM+eCkefNWdg2TDvmnJPcxAqrOAeoBPNBup8fOWP8AvDNC3mM7kQ/hitRCreTLwT+YpwvD/Ein8KT7VG3Bjx9CaUNbt13DP40XE0h/2pGBBjAJ9DxVjTpIxbtKwIES9SO/NVjHblcow3D1GDUWozLFpVvbxEb5Ms/+f89Kd+ouW+iKEkxllkmY8saRcn1A/WmADgelKGJ+7+dZ3NbEu4KMfpTMsx5JA9BUsEMkrBY1JJrb0/Syx2mEyyDk+gobtqxNmRbW0kp4zit2GzlijXcy/jVgL9nY7ECsPQVHJJ5jbpGLf7OKV5N6bENp7jfKnGNqBh65pFEu75oyPxFSGaMAfKM+1NaZCP8AVk49apOXUhqPQGcpjcpH603z07sOtAdHOSgH1oXy1fhY2z2K5FVzMVh7T78Zk3YwB82akWRh/Ew/GmOsboVW3gye6ggiqb2jj/VsQfZqFLyCxqJJuzvwccgkZphKN96OM/hiqUUBI+a8uEPuuRSkSxsAs6Sr6lcUKom7A46XLiLCoI8kc9cEinYj9HH45xVSN5mcIqIW+uKlIuV+/bPj1UginzxW7CzJsDJ2ysB7rSbcnh0J+mKqi6ToVcH6U4XEXd8fUU7oRZAYfwK3/AhTSjEAtGR+tRLIjdGB/GnKw42n8jTuA7ykP3lP5U3yoz0OKkEsi8B2H40pcvkPhgfUU7isiLci524LHvUS5EhZipyeOasBIcYMEePYYpHjiYcoR24NAmmI7JuB6H2rOuLKdpGYrkEkg5q8LeMA4eQH3wasqeADJn6ihAYqWchPOQPzp5snB++PyNa+DnjafpTjkD/Vg/Q1SCzMX7LKOm1vxpPImH8B/DmtrAJ5BFAjTuKaZLVzCIZfvKw/CpbaKS5uYoIsl5HCAfU4rY8tTwpxW54OsFm1bzZAGSBS2GGQWPA59ad7E8lzsYoktreC2jz5cCBBnrxx/Ss3V7po9FlVMb7iTYPcd/0rVlAWJ2Hpgf0rD1pN91BaqcLbx734/ibnj8Kyjq7m70VjLtQRJ86jA9RWinlSYJQAjuBUEQUL1NXIkVlAGK0bJsWoY04yPxqVoFJ3bM1DEnPynGPSpYw4PBIqGOwgjQMSBipPKOMgE0q5UZY81YjJyMrkUAVgpbA5Ue4zUZRluXyQVwBV91VyDnBqG2iOZiTuGcCgdiDAC4AOabtc4UbvWrawhVbIzmmSr8oGSPpQIgbIO1jj3xVZwVORKW/CrQzngk1DNIy7ulCYFKUoUPrWbdAAAnFW53Un7oOPWs68ORwWXvjPFaIRk6rJ8hTzNpPqaoaG4TXLAjBzKoz9eK0L23EyEyFoyO6HIP1rOsrcx39lMrbkE6c9P4hSZk1rc7zTjmGXttmkX8mIrN1iLz7O2PH7q7Uk+x4/rWlZIVa7TPS4kPHuSf61BIubS7XHKyI361mtze146mzoIUTDPXGag1F1+3twBtBbNP8AD5OSx7LWddl3nmYYxnbk+neq6j6FXPzbj/yziLc+rHH+NZzDj/GrU8oW1d26yPtA9lH/ANeqDSFhxRcloiuBnIJFVHwKnkIAJ6mqssq/dAGTUthsbWgxBLRnI5difwrUznheWqraRlbaNMcKoFTcRQs4/gBNBRuaTb/2FeS3F9IgjbCblBbhvYc9cdqzU1uK31GRW83y1cgnyye/51bubq7+wRzxGJolUGZZRk4wMEe+ax7pZI72feMhm3g8d+f600hXKHiRo5dRlniyYpVDruUqfyPPauXuRnOOhrvfEmnmTRrfUhIMJiExkdcngiuFnHWsOZNuxTTVrnT6lL9s8E2Mp5ZCVP4A/wD1qwPD7Aa5Y55zJt/MEf1rV0B/tPhfUbU/ehkEyj1HesPTG8nVbRj1SZc/mKL7DsdYoY6T4flZSYYb2a3YZ46nFUnlaHTfD87nMljqrxnPGBvzj/x+rt4WXw5eRIyg2+sFgePlyQaqeIVx4R1WZWzLb60sp4x8rIpz+a1TGkGsiP7N4ztE/wBZDex3cY+uK1PD8v2vT5o052l2z7HDD/0M1QuIftHirUcAlNQ0kTDHdlXP86TwVK8cIVjy0cbP7kKyH9QKiRaHzJLHljnHpWfcSEEkc1c1XUVDyIVxg4rn/PZpc7uM/pUyY0izIxbGFqtco2ORxWsNjQg8Bqzb0yAfKBz3qWhme6nJ4qpIvl5Yirzb9gz1qjcsW4NJlJlOYhlOMjNW9EuGhuUYkf3areWQTUcPySH2IIqJbFo9FtZN8eCfpUvnOrAAnaKxNOui6qQeuOO1b8KiWP522j2pwbaE9CaO5VWSQnPNdFaXAlRStci8YLkZyO1dFohBh2g846+hrSDd9TKSVjn/ABJcvqGt+UM+Xbfukz0yeSfz/lWzoY/s2aKVnB5yw9R3/TNYM8ey/ljZiXViST1JznmrdvKy25lYlljGcV0pGJd17ZDcXAO5IoiHT0ZTyK8yt5jqHiXzn5SPdK2ewA4/Uiu18c3yDwxatu23Eh8tR38vr+h/nXB6Euy2v7llPKiJG9yeR+WKxqy1sXtByNTSTunuLp2+4pJ+pqpdXJmjt1bkIvT27VLpMqxs0bDcZflx2qnduXmclQuPlwOnHFZN6HGtyvehk0e8uQPlVdgPu3H9a4ocHPpXa+JJhB4Vghzh7icv9VUY/mRXE54PvWFR62PTwsbQuIKKKKzOsK3fDceIZpP7zYH4f/rrBNdZpcQisYVwMkbj75q4LU5sTK0Ldy9LGqNBvOWbBx6c1DrzBSkSgAHLHHr0q7GqXBSQ9VGB+Hesu8P2i9k5G1Ttz6AVu1ZHFSV5ehWRSuB+NX7WYxRZiZkl3ZDKcEVTHOMfhV+eJYViA+8VyazjpqjWo09GbNnOt8PLv4QW27vNQYbHTle/4Y/Gm3i3NnGY5Ql5Yk4UsNyj0Geqn24/GqFq0kErOSwITIB/ShdQnikMsUmJJFw4HQj0I6GteZW1Oe2ugSaXbXzA6a/lSnpBK3BPoG/Lrisi6tprWYxXMTxSL1Vxg1qecm8h1VM8ho+i/wD1q6Sy18rax2viXTotW08DCebw8Y9Uccg/Q1HKmbQquOktjgTR2wRmu4vvB1nqVs134QvzdH7zafdELMnsrdHxwOxrirqGa0uHguYXhnU4aORcEGs3Fx3OhSUtiIgH1pjRinhsE8U9cHgMQT2NK1x3aMx4mjbcnIqMqHOUwG/u9j9KuxsrjKnIqKWANynB9O1cUKutpHc49UVM9uQR604GhueHB3Dv3/GkUY7mupMzHg54oG5T8pxRjikGabV9GCH5eR8DcT9auxhtg343e1UehyDgjvVmGcMdr8H17VzV4O2hpBljFX9Kk/eNGTweRVCpIX2SqwOMGuGouaLRobjIN3TmnYyaWMZQZOeOtOX3615rYG/4ZudrtET16V1A2svIyDwRXBafKYbuN+2cV28Um4KR0YVjLQl9zyjXLRrDVrm3wdquSpxjg9KpZ4rsfiJZETW16oG1h5bnPOe39a43FevRqc8EykGaY/3Tmn4oIrZMCEHH402I7ZmXs3IqQgDJNQy/KysvY1qtdBNFmmNNGvVhUsMbzsFhRnY9lGa2dJ8GXN5JvuT5MXU89B9ayU6cX77HGnOXwo54XAdgsaM7HgADk10ej+D9X1ICWSJLK2PJkm649h6/Wuw0vTtL0Uf6FbpNcDrK3NPurye7P7+Q7B0UdB+FctXMadPSC1Oung29ZMisdJ0HQkDkfb7sfxuMgH2HTH50l9rt9PH5duUt4zwAgxgVCbcsckZFPW24ORxXBLHzb0OuOHjHQoRRSN80sjSMe5OamW2JOcHNbFlpc0xHlRnHq3ArdtdLtbf5rphIw7HgflWfJUqu/cu8Y6HLWOm3F1IEghZz69h9T0rpLDwpGmJL+Xd38qM4/Nqsz6qIkKW0aFV4GRgflWaks80xee4ds/w9APoK6IxoUH+9d2Zt1J/CtDYuPs1unlwKqxj/AJZw8D8W7/hVUzOYxsVYo+m1Bj9etRlfMwCCQfWliRgGUj8K5cViISi0mbUqbT1FVjsGMj/GpY45HIwcCl8jeg2EfWrUC+XGoPJHWvCr1VJ3R1xVh0MYTIPSnbCshYEEY4HcUufU0buOK5G2PYcpAzjjNIG3pwce9NyKXcBwOBQMdgdT9ajk6/KaRmHrVeaUICQMgdSTgCrhFt6C2LCvhfmNRvIvfpXMa34wsLENHERdTj+BDlR9T0rhNa8RajqzFXlMNuePJh4B+p6mvXwmT1a75pe6vM462Mp09Fqzvtd8X6XpZZN/nzjjy4jk/iegrgda8Y6rqjNHCfsts3GyLqR7t/8AqrFWAL91QPc1KEAHzP8AlX0+Ey/D4VXSu+7PKrYqrV0bsip5LliT35JJyaeLcfxMT9KsfKP4SfrSqzY+UbR+Veg6r6HJyojWBR0T8TT9oHUgfSmknPrSkY6jrUtt7jsI7IvQ5p8QEi5XGKpzjElT2T8lfXmhqyuiixtHc5qFriNTgAk1KzFelZ83EjY780QjfcTLsUglVhjBpwqnbvtlHoeDVtsq3PehqzsIXNJmkJ5phPWhIB2ahmOM4pC208mo5ZR25NaKOuhLYx0LIcdaaqv3U1PbJPJykZKnvjitCKA9XIX+f5U5VeQFT5yhFbySHptHqavwWscPJGW/WpgQowgx79zSZrnnXlPQ6YUYx1HbjyAMD0FJmnwRSTybIULsfTt9a14tMt7NRLqEgY/88x0/+vWLZskZ1pZT3bfukOzu54ArTWOz0wAyHzrgfiAfpVe81WSRfLtx5MQ4GOuKzsZOSef50cre4nJdC3dXs1yxJO1fQVXptOHSk2IUUZpO9GQKBilqAc1GzgHk4HeqVxqCrlYfnb17CtYQctEZymo6svTTJChZyAP51m3N403yplE/U1SeSSRtzfMemTTGDH+LNdlOio6s5Z1nLREu5Vppkz0GfrTNnFOA4rYyFySMk8e1H8qOv0pcYPFAgxRS9RQBTAByv4Uh6VIoJwBzz2qRbZwBv+XIzQBABTwpPAGTVpLdVGSCfrU8UEkoxEvH5CqSJbIrHS7q9YiFMgdTnpW5H4bhtwJL64UKOop2nLPaW7x+esRc5O1Sxz9amEMb4DSuCOd8g5z7Z/wrmnGpKVk7L8SlJJElutpA4Sxtnnz1YDAH4mmtoE8hmu5SqAZcKPar0IlhQJGfPzyCzAf0p/n3KAiWONVIx1JJz9Kr2XLF238yOe71MwAssbBiBjketbnga4B8U29q2B5qPGR6gqaw4TmIflUmjXBtfFWkXa5UrOEb6E4/rXgQjedjoZuuAGZduMEj9aECKMlXJ9xWzewxJq1ysgQhZThN209aWWC3Ybo0ljPoWBFfTRm9Fa9zz7GYMOPmQkU5EAcbUwK0EWMMEIQsfXgfnV0WcgQsog2Dn5HBrWU4QaUnYSTeqMfy1cEE4NMisZJH/wBYSo7AYq/LEgUvj9KihmkLAAfL/tHArR26iuNlsgLeVSnJQjOa88YbQ2f4ePyr1RYonUBgMnrzXmGoR+Tc3MZ6I7CvMzGNuVnVhne6Nvwdn+yXdwVBkYgGt7RX+1WPmZBw7Ln1ANcx4UuBdWE8SEhUJGcccj/61dZ4Xtmg0sQuQzI557c81jgGlVae46/wlhYQCcd6eIsdqueQaaYGz6d69s47lUrjjbUZQ44q55Xvk08Q8dqAvczRGQcmnhccEZrRFuD0OTSNCo7jNAXKHlnOeaCnH3RV3aMc80whDRcCkB6rQRxwMVb8taaY1zwKYFYZx0ppB61ZKDsKhnIjUEgmhCIjGW5oEQ7mpFAYcqVFSHYqegp3Ag8r6U14uDnpVnKKNzFeelOjQyrvLxxxf3mPJ+g61FWpGMbscVd6Hmzq25yDxtIpnhOB4pmZicuDn0xUzRqlxIASQGI5+tS2BEd7Ai7gDnp0/GvmedpOKPUtoV7lMzOPRzVnT+L1Po38qhvMi4mwRkMev1pNMkDXiNnK5IqdQex0kFlb3RBuIxIyD5c9s099BsXP+qdP91qdpLbnl4JHH4VqqB/er38BrRVzzq3xnOy+G4D/AKqeRfqM1VfwzcgZimQj3BFdeQexH+NROCeciuyyM7s881ixmsJYRcbTuBAKnIOP/wBdJoswh1KIZABO0/Q10fjO2LaYs3VoXBPsD1riXJWSOVOqnP1FeLiadqjR30Zc0DtNcLR2yyJ1VgD9D/kVjC+I6op+oretbnzI4XwDvAOD79addQpICRYwye4HNdOX1LwcH0OavFKVzCW9Qn5k/I04z2z9QR+ANaR0+CRMtamJj/dY0n9gQsMiWVfbgiu+7ZhZGcI7VxwyD8CKDZxtna6n/gYq6/h1wP3dwD/vLiqr6LfJ90I4/wBlqYW7MW307Mv7wtsAJPT+dYcu155ZI8mJThe+a05oLy2R43WWPeuOOQfyrQ0rQD5QN0NqDkL3P1pPUqLtqznI4mdgME/7IrcsNFeTDTkIvXHet+O0tbRcxxAN69TVuCJPs7Sz3AQ9kQZP/wCus5zjBaju5bFew04NExiRI4lH3mOM0+HeqssTFV9u/vTcg/fANPB2j5cChRbb5tUK/YaqZUfKQc85pGiU5wFqQgt1yKZLE+QEIHrnrWhJX8kBsiME+uaY0MhJ4XHpVtYsDpk04o2OOPrQFjP+z5PzKPwqOWyZDnkd6uySiIfvBx7ZpFnik6E596BWKsIxwGBqz9nQjPQ08RKTuAHNBTn5SBQOxH5KDhsVEYVLZRvwIq2I8cjOfao3j6kE596AsVXtieSAfpxUf2UjkM6/8Cq35T4wzZo8r5eaQrFIQFPusTn2p0bSxAqiIQezLmrXlNj7xFO8okfeyaN9GFrbFKT51+aGJG/vKMGmLbFuSCD7VaaB92SoIpCJVPCkLQlbRCt1YiW0IA/eTqe/GRSSr5Z/dvI+fUdKVWmY/Kv5mhxKBzihJp7g7diEvcbwFTOenapvLvAPntjj1Ug0zPHzjP0pIiingY/HFU3LoTZLca9wEbEkbqfpQLyHu+PqMVOU8zJLMfrzUHkKr7hz7MART5mFiVbmJhgSIfxqQMDyCKh8uM/ftoD9FK1EbWLdwhHsDmmpvqga7F0MR0Jpd7YxnNVEjRSQ8kyDHBHNRNIyNhJmYfhVKfQk0VfOeBXfeC7bydFaVgQ1w24Z5BUcA15xZie6uEgXG6QhRt5OSa9eghFrDHAgAVFC/L04HUfWiUtCoK7uJIA00MXTLbm+g5rlQ7XN7dTliFlkOCR0Hat6eYCG9mJwNohXnHJ6n61RdILZECSAHjnrmiBUtWVY4Rnbyw9xir0MIB+UUqTxkZbGFGSx4A9ya4Hxd4we4kax0ckR52mQcFz7e1Ep8q1FFN7HY3uvaTpxIu71EwcbUG9j9AKzJfGlsVIs9NvZ+uGkKoD6d81wlraJahZ73Mty/wB1fT6f41q21nqOoxB7KGUr0ygCr/303X8BXM60pP3UacsVudDH42kCkS6PITn+GUEUS+OThSulXakejKR/OsJ9D1tc5hn/AOAyIf6Uz+ydWX71rdk/8ANHPV7C9zudFH4+jX/W6TeZ9Rt/xqza+P8ATlBWS1vU3HJJjziuTk07VYlLPZXG33hB/kagdboqCbaYn/r0f/Gj2lTqg93ud8njXRJDgyzx9/mhbn9KG8W6JIpIvlQjjaykH+VcBuuFbDRSjH/TvIKjeV+S0Wf95XH9KPbS7D5U+p6B/wAJNordNRhGffFPju7W+VjaXMUoz/yzfJrzV7lc7WjgB9C5H8xTPKQyI6s0E/VHUgc+zDj8DQsQ1ug9n2PR541CnJ5rKlILEEEn3NZuma9MkyWmq4y2Ak/Td9fete52uSkeSfU11wmpK6MpRtoUZ1yRlRj2PSse/m+z3kW3hVYMe44IraMTQBizbw1YWpQhZmLgkHmmyHseiQAm8vfTerfmgNNEOVvs5HyZ/KpoWBujg/fhik/8dx/SnyLumkHTfEy/pWTepqthdEYCGQ8ABetZ1zyFY8Akk+/+RmmeEbwXGiO7HLqMHP5VHPkF1wRvIRc+/wD+utAKl4QEgQrg7N59iTms+RhjAqxqszSXkwT7inaPoOKqs4MXykggdai4NFaUkg46moLZFkvoExklsn8KndcjAbIqXRbc/bWkAzsGBSA6FCAxHSor0nyGA9Rx7Umdr5cYUiovNMqTFmUKi5HqcVQEbavc3N9LZll+zmIKFA5AB9fzrmdSu5GuppFkbGexp0NxOL8vEpkkcMoVevIxxSadYNe3scTb4kLrlpMYx35/ColKyFFXZs3i3EVrYW8jSmNLbLEk7WdzkfkAKwpj87DNei3dst/otzuyJUJuIVznCjjH0wP1rzu+XbNnsRWUI8sUXN3ZpeC5lTXfs8mdl1E0P0JGR/Ksq/RrW/lXo0b/AKg/41FbyGC+tpwSPKkV+PQGtrxzbhdWkmUYSZQ4/EZ/xp9CjUvsra+JIjzJmC6xjjOAM0y7tWl0rxDZudvmWMFyg9WAIJ/UVatj9qvdRSQ5FzpKScc8rUOkSm4vrFp2U/bNNePPqQ6kD64BqtxIggvPL1HwlfJyk9s9rJ9cYqr4duDb6j5ErY2NNGxPqGEg/QmqDZi8L6XMDh7LUhG2eqjNWrqMQ+Kb85+Q3qSe211K/wBBUPYtFjX4MXkqgjnkVlJB8u5uDWzrrb5o5Cv31BrHucgcAgHtWa11NGAnK4UnNSl/lPQ/Ss1255prS4Hyk5ouFi2JVOVdcVE8cbHIAquZx/EMmnRyJnAPWncViSS3TbkYNZzxhJzx1q/IXUccisq6aQTKRkDPNJlRNbSJvkAY4PTmumtbkYHOR0rj4DiYjtwRjtW7p5IIz+Fc6k1KxbSaub6jzDwa1tJfY+0msOGUqKsW915UoY10RkjNq5B4nU2ut+YoO2ZQ/sT0P9KrNLILVEjbl2+b6GrmvzC+t0cAlojgHHPP+RWPqK/2fYi7D5DqQB6NXQpaXMHF3sc/4y1Y313FEqgRW6+UuP1NRQfu9Et0AI82RpCP0H6CsKSUSMzZyWNdFqCCOSKBSMRRqnHc45P51zOV3cqv7sVES02pcwvg7QfzNV5zunkI5BY4/Oh2I2qD93oan0yJZ9Qto3+4XBb6Dk/oKXkciWpiePZdt5a2in5beFVI9GPJrlzWj4iuje61dzkj5pDj6Dp+grNb736VhJ3Z7FOPLFIKKfHDLLny42bHPA7U1o5F4aNh+FIvQdboZZ40HVmArslwi4A4A6VzmgWzzXpfYxWJSx46V0Ry4ABAz3NaU0cWKd5JF1SsMDbeAi559awQxOeo3cn6mtPUT5ViUBBLkA+9Z23G3nnFaTfQzpK2o+IYINW2kZ5AznJ/pVaLrUy85HWs0xS1Zo3n7ol2+aOVdqsOtUpUCldmdrLkZ605ZSQiSEtGvQelT27qflVeAcA4559a00kZaxKijIK4HrmrVjfzWilBtlt2PzQyDKt/gfpUgt9xkXGWj6c9R2qkj4Yh1BBPI9KVrDTuaUzRAx3ViZYGJ5hJwR/ut3/HFXZNVg1S2Frr0LT7eEnAAkT0ye4HpkVSN9brGkSIzKOMtxgGs+K5KSkkM8YyAM4wPrVXSFFM0dS8Hz20JubKU3dkRu3IMtGP9odR9cY9K5ua3eLkjK+o5Fdbo2u3NrcK1s74QcAHDD6f/Wq895oWrkC8jbT7wk5njQbSfRl/wx75olCMtUaQrSWkjzEoyNuUncfyNSxzBuDww7UpGRiopE7cADuOory7xqaS3PYs47D5Ilkfdk+4qCRWRhvGVqRJCvD9OzetPaRduDzTTnB2ewWUtUVtoGSmSv6ijeO1OxtO6M4x/nFK8Ycb4gQT1HatVOxNhmaU81Fkg9wfSnhq1TJJ4ZzHw3K/qKuKwYZByKzs5pyO0Zyp47jsawqUFLWJpGdtzrNMl8y2A7pwatg8VgaJdr9qMXI3jv610C14WIpunNpl3vsAPII611mkym5slCth1rlDwa2vDc+2Yxk8HmuSe1wNbxHZG/0S4iAJkC71A65HNeUV7aoBUenevJtf057LXLi1jRmy26NUXOVPIwK6sFU3ixx7GWTSE8V0um+DtRuQHugtpDjq+Cx/D/E10FloWj6cV8wm4mJ+8w3fp0ronioQ0WrOmGHnLV6HC2OmXl8R9nhbYf42GBXQ6f4PVVEl+xfvgcLXUvcFZAkKrEnZmxk/QVKwNyP3jMw9c159XMZW7en+Z1wwkVvqZ9ullYoY7O382UDjjCipI5Lq4DfaBjHRF4FW0hBkBAPHFWAm3BJriqYqUvdSOmFJLUoRRFfvDHtUiwEvuwAKvpbhjkjJ7nHP5UNPZWijzHYv2CjJ/wABVU8POprLQJTjHzI47Mk84A96uRW0FrzM+XPI3dfwFZ76ncvIqRRCBCcbhyx/H/ChVcyliG56knrWrdKhotX3JXNM0Jb9gQkQCKe/eoC7NJvyWz1pAhbAAGasxwlhlcVxSxk+ZSb2NlTVrELRfvOOhqaKAZPB3ZqZYMSA7jwPu9jU2MNuHUVzYjEurLmLhDlQ6KMDr1BxShPmJPOeMUnmHHUUnmcda5febLsSLhRhQABRuquZ0DbWZQ3pnmn+YGGRScGtx3RMGzRmq3mnGQppsl0iIWchVHUscAU1Tb0Qrlpm4zVS5u0hHzOAx6ZNcvq/ja1tQ0dkjXcwOOBhB+Pf8Pzrh9V1vUtVdvtDsIz0jQYX8up/GvXwmT1KnvVNEcdbGwp6R1Z6Bq/jCysQUgH2qfHIQ4UH3P8AhXD6z4gv9ULLPcGO3PSGLgfieprF2SdOQPpUUkEzEbFJr6LDYGhQ+Fa9zzKmIq1d9ETb4kGFGf1pDO2MAYH5UqWk7kAAL9TgVo22gvMCXvbKIf7TnP8AKu1uEd2ZKncymkY9/wAqY7HaSOuO9dAPD0C/6zWLQf7qsaX+wbDb82txZx2gY1P1imv+GLVGXRGJYSl0IY5NWm6Vo22habCxJ1sEH0tz/jU0unaYg41V2+lv/wDXrKVeDloHsZnPbm3nHSlLHtWhPZQAnybksP8AaTFQizAH+tyfpWyrQepl7KRRnG6PPcGo4yUYEdq0TaDaR5mc+1MWyQf8tG/Kn7aI1SkOfDKD2PNUbpQHBXoa01hUIF3vj6Ux7SJgASxFTGrGLD2MjJ57Ve377cMDyKn+xQDsx/GpoY4ohgRBh6NzTlXi9gVCRlecex/OmmRj/EB9K6S2ZZpVig062kkbgAR5Ndfp+g2ljbi7177FAi8+TGinPsT1/KmsQukQ+rvueb6Xpd5qtx5NhbvNJ3IHC/U9BXa2/hjR/D8Qm8QXCXNzjK26dAfp3qXVvF6xxNa6DAlpbj/loFAY/QdBXHzTPPKXldndjksxyTROvKei0HGjGOu5q6trIu2K2VultAOAAOTWQhJbJpTjHWtPTdHuLoB3Hkwf3mHP4CsubQ1s7mcMswVQSx4AHU1sWWikp5t+4ijHO3PP4ntVp7uw0lNlmgmuAMFzyfxP9Kxbq8uLxiZmyOyjoKlagac2qwWymDTo1C9N/rWVLI8zl5WLMe5qJEJJODj6VLg+h/KqlZaISu9WNpRRtbPQ/lS7TjoalyuhpWAc06m4PpRhuwpWYXQE1BPMIxjPPp3pJ1nJIjAA/vEjNVzayEksyZ92raEFuzOUuiILh5JuGYBf7oqAJjuKvC1bu6Cj7LzzIv5V0qpZWRg6d3dlEoT/ABYFAQDvV37Mv/PUflQbZP8AnofyqlUZPs0imRQFHvVv7PGP4mP4Uot1/wBqqUpPRCcYrcq7RSquemTVsQIOTk1ahtt7KEBweyjrVqMurIc4rYrWWl3F22IYic9zXR2PhFFj8y/m8vuQOgrVsotWeFYrOFLWBflDMvzfU/8A6q0YPDHmYa/vXmY8kMwx9Mf/AKqwdOvU2fKvxIdWMfMxWGh21v5cEP2h1/ujkn3NYl4rXF20rgRDgCNR0FelQaVp1suFRfTPJNJNpmmSrhrcH6LzW1KlSoaynd+bMnVlLaJ5zFFGrbsLuHduatoru2FEpX/YTFdVc+HtNIJXfF77gKzzo9pCedTdR6BgampiqMftDipPoZrwMygQSSW7dCZNp/Wsy9090bc19BMx7bua6SK10OBiZpjO3+0uf6VZOpaRCAIbZ2x6JisHj4R21LVNnFQxXpBMCysB1281LFqN9bvje4I4wwrrG12P/llZ8D+82Khk1iZx8sEKj3yayeZpdCvZXMOzdpIyWBDZJP1NSPHmWCXvE4b8jU7N5k8krYBfkhRxmmsNyEeoryZ1LzcomtjofGN2sHiKUfafKLRxvgLycrnrVCyvX8wPHNPK3o8qgH8Kt+LtIfU302/jmiQzWiBhIwHIGODXK3ekXlmR5nlNnp5bZJ/CvoMLyypRaetjlle52EmpTIoO60jJ/vvk/kKSPU8581w/p5CHFcakd/GBIsVwMdDsJxUh1i9K7JJmIHqSDXRyyWzJtF9DrY7tppQfMnCg/wAS4FbltqrKFSW4tyvQB1Ga87g1KMY+0Wwl92Y1ai1K1LgCCCJfXysn+dElz/Erislsz0GErIxdHjcn+7jFeb+I/wB3rN9uGMPnH4Vrx3tps+TULgf7McapWJq21r9mVpGV1BzIQSa5MbNyglayRpQioyeo7w9OiRzqsixLKAQW4Gea6/Sbs2kARJI584yd1cCq7eO1OJC8k49685TlGXNB2Z0uCkrM9TTU0x88LD3BzUq39s5+ZiP94GvL4b64jGI53X23cVai1m7U/NIH/wB4CuiOOrx3aZk8PBnpIlhk/wBU6H8aegJPArz6LXnH+tt0b/dJFX7bxBbj7wmhP+wcit45pNfFEzeF7M7TaT6/nTtgUZYHFc3b+IIsjZen6OK0Y9XMg4kgkz6NzW0c0pP4k0ZvDSWxelijnI+8R6A4FPFsqrhSB9aonUv70RB9VaiLUUJw/A77hmuiGOoz2l95m6M10J7jZGPmdNx6DNZU13LE21FJA7k5zW8slpJjBi/E4qKeJWf90FA9RzXRGrGS91kWa3RmJeSEDzEAb6VOvzryoYGpRppeXcHYtUj2ssQw3zewqvaRvy31C3UqyWqt6qPQGoo7YuxWKRUUdWf+grUaNUjRYkndz1Z8AD6CkFs2cuoyf0qOZ1Ivl09Q2epmz2isQIpWZe7MMZ+gqBdPUNuXIPc5zWz5Kjjv9KWOEhecU1HljZu4Xuzy68TZe3C91kYfrS2UgW7QYyTn8Kk1tTHq94pHSVjxUNq22QH05r5qfxNHqL4blLVCReXeM4PNRaRJ/pcKnOGIK+lS3AaaaU5wGUcfWmWqiK+twMDBHfmtE0lYOh1+hqZJbhAenNbXkMeXkZcdhWR4Uw2oT54yG/QiuoaNSCdpOASQBnivawD/AHR59b4jPWHjGSffNIsATO0ZPuavbB2AppXPQZ+grsMTF1WE3VjcQsp+ZCB6Z7V5j9wlC2GB/KvYZPlcYUN61zd34Osr2ctG08UjEsdpGOfr2rysZVp86Sep2Ye6Wpj6DcGSzVX+8hKj6da623jLQxuEHzKDwa5n+yo9JujHBdfaY8fMcfdb6966i1lxYwbSgOwdaMA17SVuxOI2Ff5eMEf7wpUUsOAD9KkFwjACRV3Ux2iLDtj+6MV6xy2GudvBjYfhxSb06YqUugUAE/jTcKTw4/GgQ35e4zSM2GXC7uRnPQfWgRB5grymOLuwGT+FTXv2cMq2cbnA5ck8/hWM6tp+zs9evQpR0ubH2XQb5R5czWV1j+LJQ/j2qCTwxebN8CxXSdQ0Tg5H061lBfUYqRGZCDHIykd1OKI0nDrct1Iy3RPLomoo2Hsph/wA0sOiai/C2M599mKVdS1BBiO8uAP+uhqN9R1B8h7ydh7yGq98XuF5PDlxHhr6SC0j7tK4z+XWkuG0eyheOFXvp2GPMPyov0HeseRmY5clj6k5puaORvdhzpfChnNG/nFObPpULeaD8qKV9c1ZA5olJycnPUU1beJSSqin9qPrSAijjZXOGBX+VSkDqOtLkdKDxQhjdpNIQ1SDtzRnHWmIi2nqaUKD2qRue9JswOppDGCPNKI/SkJYUoY9qVwFx68UhUUAE07HBHQ0wI9h7EVGYDnO41OFIGM5NG360CsVfJYdcGmPbBueM1bKMKhedUbDA5+lC0E0VivlnByKnj2FcMRT8pIvY/WlEQx6Ci4WGFVHQ5pkiqeqHHqKkMPvkemKDCcYA4+tMCDywT8rfgajaBc/NtFTyW7EYVitNEDL1bNO5Njb8CacLjXhKowLZDJkdmPC59utd/cuEidzgYBrF8CWq22lPOVAluGPPfaOAD7da2L2FpTFCvG88/TvQy4KyMnUIw1laQMAWcmdx6E8D+tUoIBI7K27A9e9aN5iW/mIGUU+WmB0C8fzzUWp3EemaRPeSlf3anYD3bsKtOyJe5xHxA1ryIv7LtnwcZnK9cdlrmtLtVtIPtdwuZX+4v8AKorZJNT1Vpbglst5kpPc+ldBolgdc1kQ8i1i5cj+76fjXJUbnLlRqrRjcseFvD8ms3P2u+Dm0z0H/LTHYf7P869EMaRoscSqsSDAUcAD0qWFFgiWO3URxINqqBwAKlhGT98E+ldMIKCsjklJyZSXYxyckdsc1ctCu35MH8OamWyjc7ixBI9OKI7NFxvjwwOQVFWTYWYgW7nB9KcibYVXBJxUlzalrX5WZiSOM0skNwFDQvyP4WFK5dihMjZPGR3qhNEN3QfQitaSSYthkTOOTyKo3e8kZjHvhqZLRmXunWd/E0NzbRsCCA20Aj3BrzPW9KuNDvGjZDLbPk47SL6j0YelerLgE5Vhj2zVfVLWK+sXhcKGxlGIztbsazqU1JFQm4M8qj23CCB23owzDJ3OO31FbOh6kS62tw5WdOAT0cdj9axbuE2148EihI5GK8H/AFco7j60s254BMB/pVu2JB6nv+dclObpyOqSU1dHZXIdl4I+uM1k6naGUB2OAAen0qWwWGSFJrb5wwGVY4xU19C5gZRkZ9Gr0L3VznavudBp7n7TaknIawi/ma1SR9qiB/iyPzFZukAfZ9IYk5a1MZHH8P8A+utK4YRywH/bA/OsnuaR2OK8ITeReapYZJWORgM+x/8ArVvmVTIBkER5kP4D/E1y0EbWfj++iUnazs5+jc/1rcvzss7hs88Rg+5OTV30EkZcoZxlTkk1VfcjYPFNJIPDGonyz5ZuKzuOxOxG35uDWxoEHlWW/u7ZzXPSHeygA5zgfjXW2y+VbxoOy4q0JCXuEgdvbj60650eO8RBaXDWxIyysNwbPvUN44eJkxk5xW3a3BMcQ8mM4jUZwQelMGc1BoJ0qYXE8kUrKQYvLUjvg5q0bFYpJI96EhiAN3QZrT11wwto1XBJLH6CqL2kssiXCq7I6gE9RuHB/lQtANvRosC23qMHdbsc/wALDj9QK881q2aGSSM8GNyPy4/liu30ppUaZDEcpiRB6lTkfyrF8YWxTVZ3/wCWUvz+3I/wIqKiGji8cV12sRf2l4UtLxfmkiUK2PUf5NcpIvluyntXWeCJ0urO70yU53fMoPv/APXrNdilqrkGlM0OoaO+ci6sZIuvaoIi8dx4fj4AW5ntQ30QgfqakObGfQVmwBBePEWPoe1N1EG20mzPIe01oMe+AxNV0GjGvzIthr9oxyUmMo+obP8AKpb27S4U3S58ya1VsehiZef1NXRbCTVdegP35bYyovvtORWdDCraF4dlwD56yWzH3KtnP6VBdjoNVIkgjkA47Vj3GGjOeOKvzTF9Dtpf9gD8hg/rWEbsFSCazTLtfUhkySMjmoGyp5BqdrmNe+aUyxMDyKVrhdopMeaFf5xweKSbG8lcYpbdwsvzgEUFGiu4rzwtVbyNSvvWgGjaD5eCKybicmQqR0quhK3FiO14W7EbTWzZSc4rEiYPayAfeRgwq9bS8g1y1NJXNY6o6aF84qV8YrMt5SQMGrDsxjPNUpaEtEhnALIp6/5Fcx48v1XyrKJ/lA3sPc1q2zNJOQOcGp4fDljcXrXV4HuHZs4c8D8PatITbXKJxSd2cHoFs1xrFtEyEAMJDuGMqOT+grYmYTXMznvkiuq1mARSyakiKii3aDgjhs7QP++ea48MRkevWm48uhyV5c0hM8D1qxayi2t7667xQNj6tx/U1X6k0zXnFt4XBB+a6nx+Cj/E0r2VyKUeaaRxLnLk0ylzwfU1auiIzFGqKCkY3cDknn+v6Viete2h1/he70u6t7a2vAytEMF4+JF9x6j2rU13w5PabZYWS6s5OYrmIfK4wDyOqnnkGuO0K9sEPk38ATLArcRjLIfceldzp2vX3h1o3Krc2E3PTcki+4reFpLU4qylGWhz9pcz6ZLuEYZOjLjqPer3+h6i4ktMQykHMbHAz7V197aaN4mtTcaGwgvTlntHPH1Q9/of1rzy/s7iyumVlaKRT0xiqkuT0M4tT0e4msMUuIomA+UZNVVOST1qXzTPIWu2LPgAMf8A9VTSWMka7k+eP+8Kybcnc15eVWGRj5akXvTEqQDApGTHLU1vcNAQVH8WT71DSdKadtiWk9CUTSM0zp8pk6gUjRSC3SUp8hON3qfem5YQAcFC3TvkCrjtKsVvCrbYim5sjiqWpL02IGt82++PLdz9K6vwd4ZivbVLrVS6WshIVY+Gb3z6VjaFby6hqFvp8akBjlmHZPU16pKsMNrDFbhRHENgA7cVyYmv7NqMdzehTc7uWxzGseDbW2i+0afEtzbj+KI/Mv171g3NjaXGDOJA6/xdD+Nd/p0ktvAZICVkzj2P1pt/YWGsAtMps7voJYx8jn3HauNuT+CTTOtRj1R897wegJo3sewFIAWPAJqRYnJ6AfWnodV2RbeuQD7dqSOJtxIAb/Z9KsiE55bFO8kA5UsG9a0jU6SJa6orHBBGNpHUdKbC4U+Wx5zxVmTlf9IHI6OOoHrVC7UxyjkMOoYdDWvInGyYr6lmWJZBzwfWqboyNhvzq9GwZQRjmhlVxhulYwqODsyuW5TU5p+RjmpBbKf42xUTRmJuRketdEaqeiJcWiWCQxTJIONpBrsYX3orDkEZrkLWB7mQJEM+pPQD3rp7RDDCsW/cyjr6152YqLs+pcIu17aFuXDoy5IJGAfSnaSZbSSMyybyDjdVfzgFJbPyjPFPRxNDuRjgjivLafLboUehwXC+QHcgLjJPpRcSJAwmWJGlYbQ+OR+NYmlhtQ0R7d3KuVK7h1rWt41fTI1STzdqAbu5IrknFKLNKE+SomU5ZZJnJkcnvSogJzx9TUZfOQRjFSQ8DGDtHvXG7nt6Ei28bMGdAWHc1YXAHy9PamomAGfge/FPc7iBGCy/T+lChK95F37DY0VdzABFPJJPFElxHGoaEeax6ben4mn/AGZ5BteKRwe204p7WLOnlvDIF9AprZ1m3fl17kKNtE9CETTyRhXYAHsnApn2RQCp+Yk5yRWhDZiBcCJ1+qmpRx0Qn8K5ataq3rc0jCKRWjt8gcdKsC3DH58bcUoaQ/cjY/QE05fO6eU+fpXM1N6mi5RBGiNk8Z4Ap0arEzEZJY5NNKXG7PlsBjuCKaIp2P8AAB7tR7OTC6JZJcKSoyR0HrVZLgtGS2FYnnB6U/8As+4Jy0seT0+YdKT+yZgSzTwqT1+cdfzreOGdtNWZuokMaVcLuOfc1DLdIvByc8cVPJo4IG+/iABqGTSoQ4DXox1yBxWioezakxOd1YjZk4baNwGFx1ApoudkbMWCbeSzHAFOlsIAQpvGOPQdf0rJv9Atrlv9IvrqReoTICj8K3jThUk5VWRdpWiitqXi+GDcLXNxN0z0Qfj3rkb/AFa+1CQtczsV7IvCj8K68eGtKAGBK3bn/wDXUyaBoqjmCVm78n/GvQoTw1LWCOeaqT0bPPw7AfeNKGPrzXoDaVo8YOyyYn/aamNaaci5NihPbkY/lWrx8Cfq7OCz70H2rudlmF+WxgGfUVBNJHEmY7S347baqGL5nohSo23Zxoz6GnhCf4T+VdhDcDy8vBAregXpSyXePl2xjPAwtbyquKuQoHJJE+fuE/hUohk7RP8AlXR+axGMjB9hUbSu2RuxWHtrsvksYIt5z0if8qcLS4bpE1afnMGxvc4PNOad2UZkf8zW0e7ZDMz7Ddd4iPrTvsFwOCgH1NW2dt2SxP1JpjknmplK17DS7kH9nyD7zoKVdPH8VxGPwNKx4pmaj2rHYebCIfevIh+BpfsVsP8Al8BPstREYNC8GqVTXUlolNtaL/y8St9FpphtP70zD8BSMMHmkHpWikr2JLVpcw2Zzb+ahPfNMuporuTfcefKf9p+lV8cGgDGKftNbMTjpcXbaZ/49ie3LUE24Py2iZ9zTSOaQ4zmqdRJ2Fyuw9J1QhkgjVgeDjpUsmpXDrtdgwPrVQkUwtjk4AFLmu9A9Sc3DdkjH0Wk8+Q9wPoKzZb4BsRpuA7k4p0F55p2mNgf9nmtnSna9jFVoXtcumaQ/wAVNMj/AN40+O3uJD+7t5j/AMANWk0XUXGRbMB/tECs07bluSKBkf8AvGoyzf3jWynhzUG5IhT/AHnqVfDUo/191Cn05q1Uit2ZuaOfJPqaQmukGg2SDM2oZ/3cCiPT9FjPzyzS+3P+FL20EQ6iOZ3UmRXYJ/YkHMdizn/a5/makGoWiH9zpcIx3IA/pSeJgiXM45Udj8qMfoDViPTL+UAx2c7A99hrrBrk2cRwQoB9TUcusXrHAkRB/spUfXEtkS5tmFF4d1SQD/RtoP8AebGK0rXwfOzA3NxGq9wtOkvrp87rqQ/QgVC8kr/fkkYe7E0njn0RLuX5vCtoox9rSIevU1AND0aLibUWl9lOP5VSKKeoFKMDoKX1+payZHJ1ZfjtdBgOVjlmI6bskVYi1CytyTb2TKfUYFZQP+c0hyT7Vi8VVlux8qNeTXJOqW4GO7Nmozrl2w+XykH+7msiRkTDO+AOnPWkMqYyrqc+9LnqPqFkaj6pfvn/AEgqD/dGKgkubmQ/PcSt/wACrKS62TjzHdl5+6vFaWn2VzqDbrONZM8YMqg5+hOatUa09k2DaQjHdyxY/U1EWA25Q5JxWnc+H9aSMsbLCAZLbsjA69Ofyp1noizPi7u47Zh3aJsZ+pxWsMvxEvskSrQXUzGOFzjn0pRnA4rr7XwlZSoC+pvID3jVQP61oWvg3S0ILy3M3s74H6CuiOU4h72Rm8TA8/Jwc9BQJF7sK9Tg8L6TDytlG3+8S386uQ6XYQsDFZW6H1WMCuiOSzfxSM3i4rZHjskqRqW9OelTAZAP412HxOtz9kspI1UEOUxj1FcZDvCpv4O3kDnBrzsZhvq0+S9zopz548x18rzSeE9Jlhs0ujE8kRyM7cdKyG1S4SQC4jlgI7JGMCut8ASiTw7PHIOYbjIHXg1vSxh0OIA49MCvbyylGpQV+hyV5uM7Hmv9owTSgSXN2V922rUxihlBMUVo6dN0kmc12Nz4Ysro7nhWMnqFUD+VZ9x4Hs3OYnkT6Hj9a7JYW+zIVbujlxpWnSv+++zp/wBe5INCeFrK4Y/Z751Poy5rXl8I3lrlrO9II6A8f5/Kq8+l+IET5ws6/wCy+MfliodCpHZj9rF7mHc+FL2N8RNFIP72dtZV9p9zYSLHdLtZslSGyDXQDzbZ8XmmTyEdy74rM166F0IdtusGzIABJOPxrlxkans3dG1GcXKyKFjbi4u44pHKh+Mj6Va1PSJLW2aUOJI84wRg1R0+Ypqdru5JkwP1rtZAs8fkyQmVSc7QcE/Q15CfLOPNsdUm7aHBZIYHbzjFOL8HGQe2a7CfQUnZSlr9mUn5ibgZ/I5qCbw5biTbFqFuPQOQT+lel9XpS1TsYe1kuhzCMcDnP609jxyQDWrd+HbuLlfKmH/TNsn8sf1qpcaTdwpue3mVf90n+WaiWBfSSGq66orqQV96UMR0yKiCOpxkZHZuP0605jIufkz+dYywdVdLmirQ7luK8uIh8kzr+NW4davIzy6uP9oVkrLx8ykUeYp4ya55UZR+KJalF7M6FPEDH/XQK3upxVmLXoc/dlj9wc1yyurEhWBI7UuWAB2g+vPSo5Gh2R3lp4hULhL/AG+z8Vfg1SVvmVopge+a84B470gcocqSPpxThOcHeMrMmUIy0Z6smqjgSQEe6mphqNsw5Lr9RXlkV9dRj5J5B/wLNW49cvU4MiuP9pRXTHH147tMyeGgz0tJ7WQZWWMt/vU4rnkHP0rzldedv9bbo3+6SKsQ61AD/wAtov8AdreOaT+3EzeF7Mp+LY9uuXWMg5B/MVlDdj5cZ7k9hVzVrgXV68qyFwwHLdTgYqpGuWx61585qU3JdzqirRsyEkblwc5QZpgEZuUYgl1I6dualvwIblQuMbRSFsAsO3NU3rdAtjrfCIJ1cqAfmVj/ACrtfsxJJwxA5O3rjvXCeFLgR6hbseSQ3612NzfRLCyoCzMMFckD6H/CvWwdaNOk3N21OCrBylZFe9uVjfEMLiJjhSzZOevWle+uJYFiZtsQ7CsiQtJODIC2PwVRTbnVIrZNtttnm6bj9xf8TXNiMbOqrQ0RrCioavc1meK3iElw4jQ9P7zfQVhalqr3AaGEGKD+6Dy31NUZ53mlaSeRnkPc/wAgKxdY1B7aR4IkZZB95mHI+grijFvY1tcttKgcxkgN1x3wK6nTLbzLCBiQSVzj0rzbTZCdQcMxLMvOep6V6do+06bAeSeR3FepgUoz17GGI0RFLp+TuIJf1zSG1kHTH51eu4iIxIuBj3z+lC7SikLljxnHFereNrnKZ7W77vnBIq5p9talzJfOTj7sQBH4mrcsdlBbgvI0k7cjY3Gfp2FQwDEeS5YmuZSWJi1FteexbXI9SGeFXkLQKYo+gUnNQfZ5UJKsMmrzEY+fB+nFRSsjnaCy4710wiopIh66lEpKjHbuJPoaVYpMZeU/jTm+98r/AI0NE0mA77vxxVCsNdCw6kj2NAyq4Ck49akNqwHBOPTNOEbYwwwBQgK6uCx3ZH4VJsHUkYpXUIN3UUisr9MinsINoNBX3qUKMd800jDYpgQlMDpTtnGQKkYegqM5zzSsAhAHpxTCw+tPYBqbsGcCkO4gcE9KCwPWl2c00g9qWoaAOewp2TiminCgYh5GKQRkdhUnPbikYH3zQA3Az3H0pcgDgGgDB6UfWhCGlie1Jk08EUh6d6GMTOetBjB4bBHvQBTsUCZGsMa52qOaRUKsccipe9Ax3osA3bTdpqTg0CmmBEQR0p8MLzSpEgy7sFUepJp+D7Vt+ELYXGtIzKGWFTIQR1x0/WhAdlb28dtFFDGOI0CDPXAHf8c0yWby5ppzkrBEWwPXtU6ty7MeBxmqN0pksgFyGuJc5HZV5/Whasp6IoW4YkBuuOT6muN+KN6Y0tLAHg5lfB9Old3Db7XAHJ9T/n3ryD4g3RufE12MnCERjPtTm7IiKuytZj7PpLzk4eU5z7dq9O8A6WLHQ0lkGJrj943sOwrz1rcTyafZrwHZRgd+gP6Zr2OCIxIiJ0RQAPpWOHV25CrO2hNsQjjtRHaxli6Aq3fB609AwHzLj9amUKvPINdRjYkiXbjgGrABCkg9e1RxA4BzmpDnpmpKRWuT+8gHQ76tM+MlsVXmObyJMdATUxjLHnoKAK80YY5GKzLhDnOBgVrPtyeoqrOqkZDGmmJoymjDcoSDiqdwcLgkgk4zjvWu0eVzkZA7UzyVZDkjP61ZB5r4108vIJtoAmXaT6MOhrndOnTzoHlGUmHkzD/bHQ/lXpvimzSXR7ghRvQeYv1FeUTfL9vVO224T2NcOIjaVzqw7urG5pBkiF9Z20ih4/3ke4ZBHcUv9sS+SyCPL45PYVWsJANYspwcCVNp/Gtu5FtCZWELh+Qdo61tQk5QJmrM3PCzeZpOiyk5w80RPuT/APWrc1BAI0YjO1gf1rnfDEitoGnlQoC6gy/gc101zgxDdyoIz+dU9xw2OFvlCfEq4zxvhUj3+Uf4Va1VyLSJCfmZi5/pUviWKOHx8rLzusht9zkioNbG2YKOiKFp9A6mO55OKiYZxyDT5Kn023W5uQjhsAFjjoAByT7VAyCxDS3sScYzmupPHesiyWKG5ljeMebGxG5fStJSXUmNzj0IqosLWHTcxgDHByfcVtabGklvCwlTeVwVJ5GDjNc8fOPy/L+I7VfsJpoSgKoQARnPqc1VxNXLPiCJ454jj5ShAx65qm2rR2lsIZCXIbIjXrgj/GjWJ726Xy0WK1tozgzyPgn6Dr+QqlZWltuDWcEt/J1aWf8Acwj8ep59xUyn0QJEdprM8N+rCQokmQAeQp9K2J401SBEmfc8aBU49BWHq4W5t2V7hGuUOY4bWL90mPU/15qzol0ZI42zhxwR7ioTb3KsctqcDw3Dq4+ZDtP9KZpF82nalDcLwAcN9O9dN4qsgxF2gO1xtcD+dchIhVirdRUsqPZnXeNzGEs54z8slxHKuPfgn9aoa9vGk+JFIJ8uZJ156bQo/may7u5efQJFkJZrTBQ99u4Gtq4dbt9UhcEC605CAf73JP8A6DTvcexlXzSJrsU6NtEluHI9QCM/nVewIj0aVXbBsL5XVT2zIAf0NK+6ZdBkIIEsXkE/Uf41HLbul94mtQgZ0DyKOuTtGP1qfNDsa0Ch9JuIh1jldB9M5/rXNvGQDk9K6GwYNLdL/fjjkHuWXB/lWFdgiVx0ANZNas0iyt5RPPBFNP8Au1Jk4600E5pFEbpnkUkYOeMmp14z0NIW5+X5aoLllZNiruOD3qC5KMNwxupGk3JjAJqB1bIPamnoJIktcGbYf41K/jVi1OFAPVTtrPVtkyMM8Nmr33bmVc9fmFYVldXNIbmxaNwDmtONgVGBkGsK1kw361rW75UVlBhJE8SKjEhQPpVpXbaQDgVBHkjJqUKSc1qvIgy/EbeXZqgckTPvZT2IHP58VzLZH41s+I5N94qA5Ea4/E1jzEHYMYIGDWrdzzpu8hnYDuaz/HEhjezs8n9zACw/2m+b+orZsofPvII8ZDOAfpnmuT8VXn2/XbqVTlTIQv0HArOb0OjCxvK5lwpvniQ8ZYUs8nmzSSdmYkf0p8B2vNJ2RCPxPA/nUPSs+h6C3Ert/C8l3JosdvtSSBpiBG/G8HHQ9sf1riDXbf2TdyW+mM8oiRFV/LzjYOpIHqfWtKW9zKva1mXvs/2SeWbTnLRxMQ4U/NG2efwrWe7tfEKRQ6rcm1uQNsd6BlSe3mDuPeua0fUJHZ7iN/Kl88ncBw6+hrOu7u6hu5p5HRY2disRGMj0GOOmK05la5yqm29NzT8RaHqGhXPlalDsVuY50O6KUHkFW9x2qpaag9t8kgDRnr710vhrxUUsvsV7CL7SZP8AWWs3Jj/2kPY/pTvEXhSBbJtU8OTC70pmwR0aEkdHHVfryPftS5esRqpZ8s0ZRtYrqIzWL5xy0Z6iqZBBwwINUkaazlDxMyMO3Q1s2t5aakuy6IhueivjAb2P+NLSQpQ6opZpwR3+6CTU15ZT2rYdCVPRhyCKmazdI08tyS/3+2BQosylJRKLMSiZ4UdPrU9vM+4RsdyHjaegqaK2QQswOVOVz3XBq/4X00X+pozIRbwfvJGPt0H40pP2a5mEbTfKjsvAWk/2datPcf8AH3cLu/3U7D8ev5Vrag8FowMsyx+YwGGOBmnQ3GxnllxvYBgq9AOwrz3xZqZ1PU/JVv3EJ5PYtXhVZtydRnq04WXKeloNkQXjDfrUc8wto87d3PArzzSfEV3prKhP2m1H/LNzyv8AumupOrWuq2fmWkmWU/NG3DL9RWMJ8zLcLHjyxnPOBTxHzzzUhWnKtdPMaEWwDtUgAI6U8LTgnpS5wK00AljKng44rAZ3jDQuMgHoe1dUIyegqjqumNNEZol/eqOR/eH+Na0ayi7MTVzIsuWb27VbIyKzrd9kwPTPBrSrSqveuCHJginhd5C4zniolHvVuxAMrHPIFYSfLqaxXM7E0JjtE2qMA8n3q/ZpK8IunG2LOAO7e9ZMg+0XsNuDw7bT9O9dIzAgwjG0DaPQYrCv7sLvdnRGPPePYgIxKCOlOiONwYYAPBpY+VBPJHFOxke1cLfQ5TZ8O3Xlz7M/K3IrpLGBIIWWNjhnLY+tcRav5M0bLxg119rdRebHCpJkZd2MVzzT2QmY2pz3Kao9rbQNI5+ZcDtV62W4gRXvpdpXny4+SP6VozO321YgoVHjJDg85Has57CQStmV3U+pxirWJjBKKSTPToxdSHM2b0GslYgFjQE/xSck1Idaul4iCFvTaBXI3EttA6Rz3BIBydrZP6VZOs6eGXc8uMjsaUqWLrWlFNr0sV7ehT92UkjpjrGoCNmZkPHCoOc0+31S/MIaZwGPYAcVgQ6xZ3LeXbyKWJ6Pla0HmXeqLkMwyO9cNWWIpO07pnTTlSqK8WmjS/tK6IyZm/DrQbu5PW4cfjWdE5HOSSeOKSeRipVWCMeAa5nVqSesmapRS2NGO8eMsVYgEdjyarLdOzMS7ZPcms15ntYirTAnHcVSg1Q/Kkww/wDewQK0jh6k43V2hOcYvU1555gpBZ3BGfeqf2lYE3TYC9fUj601r+LYcE4I6jms+R7USlJS+WP8XSumlhpxV5p2M5VE9jeS5WSHdGRtbuBSCRQuzljjr6mstriC1iwpOxuq55qn9tErAIWS3Qc84I967qOB55uWyZjOvZWNkyhQylcOOcZ5pZbxMKGZQ4H3Qck1WedPs6d+wOOT9TWVNZ/6cZvMIX39a2nhaVNNkKrKRtPcuZQGKqoGfeqEbSPkykfeJHPaqcxZpWLkscdjjPtTRJtRFYnIPY84rnklOK2uaXaNMTKRgNjJxnvTjOBjJwcYrLml+YFR8p5AqGSUZDA1l7JJWsUpdTVMwx8xGOn1qpcThctluKyp79hMEzgL1GM5qYyEqPm68mpeGcNZAqnMWDchsdmPaozIDzVWQknO7nGKRGIUAnJxzWkY2Wgm7lhXGTnJGaWV8gZHPSoA+DjPWkD+9dlOSjG8jJ6vQnPy46Y9qjLAk+tRFu2abvGaUmua6QLbUfnqaQjJOKjLEj5VJPsM1IkU7kbYX/75IraVpJXM+ZJkbcUmeMntxVsafdsOIcZ9SKVdIu2OWMaj3NSoqHUl1Ymcx4porXGi4/1t0i/hSnTbGMfvbzJ9iKyk0L20DIIyaMAVroujxnBaR/zp4n01P9XbsfqP8ai9iXiImMSD0oEbscKjE+wra/tJEGIbOMe/Aph1Sc/dSNf1p+0IeIXRGelncv8Adgfn2qRdJvG/5ZgfVqne/umP+sA+i1E11O33pX/A4pupcj6xLoSroU7DLzRJ+tSDQoVGZr0D/dFU2YuRvkc/VjUYaPLAYJHB74pe0ZDrSNJdM0qPPm3TP+OKDBoajDRvL7EEg1nLIoXIyfwp5NL2skS5t7suq2kwtmDS0yO+0Cpv7X2cQ2kKD3rKJ+YZYY9KccdqbrTe7M7LoaEms3rD5DGv0FQtqN6x+a4Yf7vFUywHcCmmRP76n6HNTzSYyy9xNJ/rJpGHu1RMB1PP1NNQSEErBMVHVvLbFQG9iLbRuJHFXGlUqfCrg3bcs8elNYnOADTEeaQ/u4SR6k4/+vViPTr6dwSyxL7DP61vDAV57RM3Uit2RqxzjBNEm8MCGVU7561px6Lx+8unOf7gApf7DseRJvlP+3If6V1Qyiu97Ih4iCMpZoydokXP1pzSJjBYfzrXj06wt+IrWPPr1FWolt4m+WKPd/sqBit45I76yM3il0RzqPuIEauxPQKpqVba9Zz/AKM4XtkYrpVd3J2gKo9OaC656En866YZLSXxSZDxT6I51bS6JwY0X6tTxp07H/WRj6A1vFdxGAKR0VQWkYKo7k4AreOV0I9CHiZsx10ojBad/wAAKtJpNuVG5pWPuxwaiu9ZtIQVizK4/ujj86xrvWbmUHDLCh9Ov51ssHQhtFC56kups3VpptquZ44f+BDJrLuNWjU7bO1RR/eYf0rGV5Llz5SvK3d2OF/FjxU0elX9yQF2qnQnOP8A65/Cr5Yr4UOz+0x00zOQ88ige5wPypiHJzG4PurV1OkaVa2NqVuoUmz955OD7471FLpeiXZz9nmgPTchBH+NVZi5kZllrGp2CYtr+5jXOcBzitS28Z6rHtFx5F0o/wCeqDJ/HrVdvDMMn/HjqpB7LNwP1qrceHNYgGUSC5X+8p5P5U7yQrRZv23ifSpJRJfaNsk/vwPyPzrXi1vRZMC11e9tCT0mTeB+fFedSx3UH/HzZTR/Qbs/hUJuYejEox7OpB/liqVRkumj2C0mu58nT9SsLtF9Thj9e1Xt2oCPdd2MzDOP9Hk3598CvFUALZjIJHdGz/KtSw1jVLE5tdQuY8fwl9w/I8VaqdyHTOy8cXsUmjiFY5o5BIrbJFweDzmuQyMZq5eeLNWvNOks714p45BgsyAMPoRVBSCBjuK+dzhJ1Yy8jtw11Gx3Pw0nAOpRP93Ysn5HFdwzKFU7wuf1rzLwFNs1yWJpPLSaB1LemK6qya8kXdaanpt8oHCltjfjyT+ldmSy/dyj5mGLXvJnT7c80bcVj215qMZxdadIgAyXR1K/hkgn8qbJ4ns4kJlSePHXzImQfmRivaOY2HjZx2H86Fj2jB5PrUFnqUN1ErgqFbkYcHNWRLGTgNzRqBG8Mbj5kU/hXGfE3T4U0NLmNFV0lUZA9eK7oDA9a5r4kQNL4SutgJKMj/k2TXPilejJeRpRdppniMd0INUhVhwXBHtzXoflecFRW2mQhQfTPevNdQgZpoZkB3BsNXpdq37mB1/2TmvmKlk4SR6j1uNuPCWpRyExvHOV7sf8aiaDVrMYbTozj+NYwa9WBDgMOhGfzpGjRhyoP4V9R7KEo6o8nmktmeQHUrnzCJ5biKP/AGUAqQ3liRmS5vpSeoLECvVJtPtphiWFHHuAazbrwxplw2XtUB/2cj+VQ8JB7aFKrM4O3W2lObfTIH/25JQaZPpkTkmRNPt16nyxz+Yrpr/wXpyAuk0kTdhkH8h1rH/4RO/iYPZTZz0LLj9Kz+qyi7xkV7ZP4kYh0rTmJU38jv2Cx7v51F/wj8k24W6M4Hd4ymfp2roJLDxHaKQFR1HO4KuazJL3Ukc/bvtYjB52jYP5f1qeStHz/r0Hz02ZUnhfUOW+yPgejAn8utZ1zp8sJ2yiSNumGBU11cWpWMR37LsvjrJIcfpU8OqyXDj7Nb2KHsZpufyNZtNr34XLUv5ZHELBPEOpcH15pWLqfmQiu7uoHuIyb6fTUJ6MqBiBVCOy0aFcyXV3O3/TKNiB/SsXRoT3Vi1UqLqcikvzENwvapAyHowrpJdJt7lv9FivCD3lgXj8iKjfwxOV3BYRjsZdhP4HP86yngaP2ZWLWIn1iYQI7Uhz64NX5dBuUVisch29dmHA/wC+ST+lUPskwON+CP7+U/8AQgKyll1TeLTLWJh1EDHvT4j84pqwyR5805J6cgjFPQYauCpB05OMt0bxkpK6Gauha4jI67f61RvGYR9doIII9TWpqYzJG2OorOmj3DAOOc5q4S1VxLY39BJWe3I4LD8uK6eUi2j825cIh6DufoK5bSpDbPDImCVwRnoas3MzTSu8zlmPJJ7UN3ZmmP1TUnu1EEQ8mAnBUdT9TUFvFJLIIbZC+0ZJ7KPc0ltb+awkd1jhLcsxAJHsK6Gy1yxsolhhjXb0OxSSfcnvXZQw/tLc2iMpz5di5pWjRWqrNMfNuc5BI+VfoK4PxgoXxJdjjkg/pXplrqEV0m6JH2/Qj9DXm/jj/kYrk4OCFPPXpXZiqcIUkodyKDbndmLYYGqJgDlTXqOgOn9kRghyASMgcda8w0pB/a0Z5xg5r1XwesH9lRNK/wA+5iARwPmNc9CpySuuxpWjfRlgWs0w3xqVH+2MUqYiUqzhj3x/KtWdTMNqSBR396qixKg7sN9DXZh8TzfxHY55wt8KKQS3JJKDJpSFUgAgL6VZW2Xd8vHrxUv2cA/IFHua77mBRa3WVc849qq3NjMWAhKbR1J61r+UqjJYZqJwuMKTgdeOtAXKENmQv7wZx6CpDEuAAmPwq4CAMAYpd3HAGaYXMyUuj8hNv15qIXUOcMcH2rRmieQg/Jt9NuaqSaWDkoQufah3BWG4R1yvINMFsF5TC+1Pmt1gQbWJPvU0WHTkj8sUAVGifdkEflTtmPmIy3tVpkxTCDjApgVmAJ4BBqEqxJz09KuN7ryKjYZ7Y+lAWKoBz0pwqx5eRTfKoAhIB6E0mAOMZqfyjmjZtPIoEQED0pBjPIxVgIewyKa0fHSgZCcfjQD60/Zg88U1lOelKwCE5NIRnrQMngD86jcNng4I/Kk2NIcRUE9wtuMuCR3xR5koYhgpHqKzdUv0gJWTY/sDzipbsXGDky/DfQScqeKsh1bkMK5MXCvNthQ9cDKnGa04re4Q/vEVf1pKQOCRskr/AHh+dKSoHJzVWFCRjKf981NggYLCqTIsO8xB6/lTHnjXrkfhTXj3cjcfoaiMBPWM/iaLsLIf9ui9CPrXd+A4tumy3LDDTtlc/wB0dCPxrgBYiaREEeGY4GK9f06zSzs4beNQBEgT2B6nH1NNX6ladBl6QlsUH3n+UfjVW4H+mbFHFugQEH15P5VPNh9TiDECOEGVyemBWSlyZHd2GGdi3HfPenEmbNKIMWBINeC+J3Z/El4Wzkz17tA7vtznnmvCvGEfk+J75QTxLmprbDpbmx4fk83xbpSnkK39DXs3JI4Arw/wpKB4s05mbHz4/Q17izKyqMYI70sPpEyrbkkSH+J8VbSFSOSfrVeJVLDBOatgEDqK3bISFChRgHJ96cFB5AzTTwOea1dIQTBkCL0z81Zzlyq5UY3djD3I2oMvIZUqfBzndUGF/tK6IA4IX6VIWIPA7VS1QMRgCT3PeqU6kHqQKvqC2OBmi4QbOVzTuS0YjHHc8eneqUly6yFI0bb34rQmwSxXoPbmom25+Un8RVkNGTqcvmWcsbKcshHT1ryvUbOaz1PyLhQrPbHIB7Yr1nVFxZXEm7aUQnNeVX1+11e2wlSPMVs2ZAPmbPOSa5cT0N8PuypbSMLKwkB+ZJAP1rt9RIMTMSqgjlvTNecWsx+zQp/D5g/nXoWxt0vmBfLIXr06elGG6o0q7knh1WHh5wrBhDqCtkd8/wD666+5XNu4HvXK6Hsbw/q8cGMpPG4xz3XmuxaMHcPWtJEwOE8f3X2K70DUthZlLBgONwGOM/jWS3iGzvpT5nmxl24yM4rY+KMIHhmwkxzHcFfwI/8ArV5xZBnuVCYyOefaocrFqNzsJZrQqxS5T5cA7uOvSi1njjnTfMEhcYd4zkle4/GuReRpkCgLmWUE49BmtW1UQ6fEFxuwX9OaaZDXQ6WS7QaiJMpH5yBsO20889D+Na0DrIFOOT6EV5l4ikee4gErM7rEpYscnJFZqsy8oWX6HFR7Rpmqp3R7SFB4yc+mKcIwD1x+leQ2urajasGgvrlCOhEhrVTxv4hTGdQ8zH/PSJG/mKftU9w9m0em3Qi+x+c8du7pwGm6L+HTNY00xujhnnvSvAC5WMD09ax7Dx7rt3bNFJYaZcwjgtJBtyfwIFQ33ijxG25IV+xxkbdtrbgD88E/rRzJi5WdD9mvPK+ZFt4W/h4RT9awf7XtdMvGUyo3Y7DkZB6g/TFc4keoajcqk73E8xPAlJJ/WqGr2V5az7JLSdQvBPlnH59KmU2ldIqMFfVnpFr4n0rUYjayyeUzAgFumaxr20wQUGVPQ/0rmvBml2ms+JLex1CQxQOrZYcYYD5c/jivRdW02bSbgwTqGhb7rdQR7GqheSuxTST0OUZSLa4jIOGRifwFbMUyNJpE7klZrQoccZOAo/8AQqV7YeVOVbKtGQPXkVQ0d3u9I0iOZ8MJhbofVfvfn8tFrCWpXeUx6JYhQT9kvQu7uMNjFXbYk+PLqFgP9Jt1b64Tn9RWdcoy6brdvj5obouR9Dmrt/MIvFuhXKEfvYthPr8xz+hoTKItGLK9vkhna3eJv95DVHUwUu3/ALp/WtFENtfYc4aK/f8ABXyRVLWkKS4xyOD+HWspaMqJnNxj0NN70gOBj19abnmpuXYeDg0hPPNN3UqgkUANIO7Ip+cHDUFDjngU2bOz7wNNOwEc7AjA61J5ihoZM/eXaapMCTknmn28fmKqICZN42gckk9qifvItKxsxNnBrYtm2gbj16VzmvW8trZ3EbM8F1C2SmcHjrXLprmpQn5Lp/xANYRg46sd1LY9ZRuOvNTRPlvpXl0HjDVIsBvJkA/vJ1rpvDPiW41X7Wk9tGiwwly6nv2GK1jqzOd4xbI9RlMt5M+erGq8xBOR16UZzIu7ucmmMR26VoeaXdMkW3+1XbHAt4HZT/tEYX9SK87di8zMfrXZatcC38OzoMbriRV/Ac/4VxJPyt71nUfQ9DCRtC5YU7LDnrK+fqB/9fFQVLcjaIox/AnI9Cev9KirM6UXdGt3udUtYol3M0g4xkY9TXT6mLm2a9vZr0TosZiRg2TkngH6Z/lWN4Uid7i6cOYolhIeTOMA8da3rfw9Pd6cyJcx7JJfMZjkqwHpge9bQT5dDCrJKWpQsY/JsY1PXbk/jUbsrFTKiSBDuAfp7j6VtXWlSRExLNExA9GH9Kxr+F7eKRXZMquTg5xQ00jng+aVyu0iwQi63ySXBGFA4VQPX61teHvEc+nXaSWkpgneP5kblJFPVWHoawLWTG1gAynnaw4NCozXkszgANwoHYUlNrVG04qSsz0W40rTvFMLPpMYtdVUbnsGbh/eI/8Asv5Vwt3Zy20jq6tuQkEEYYEdiPWorPWHgmCys2xWykinDJ9DXdHUbHxLbLHqsoh1ELiLUY0z5g7CVf4vqOfrVaT23MLSpvXY5vStce2VYZ8yW542nt9K6CNILpTLZ/Mp65Pc+1c5rel3mlTJFqMKAOMxzx/NFIP9lv6dagsbt7KUNH8h9R0/EVUZtOzCpTU0dE0e1hFFGQ2cBR1JJ/xrvtN06PTbCCyAHny/vJmx/n6VleCLePVANSuIwBCdq8cM3qPpXT3xCM0hwD1LegrzcfiU5ckdka4TDuF5MwfF9yLDS/3OBNISqeo9T+FeerGFjIblm5JrY8QamdQvnkBPkr8sY9vX8axyRySa8SdRzdj1Yx5UMYiNeOg7CnxbgyvGWjcchlOCKhc+YcIucHqamGSpUHHHU04QlOSjHdinJQi5MoLCzdqnjtT1NWHuLePjeCf9kZqB79AP3cZP1OK155S2QWHtbArxwRSpAAOaptezHoQo9hULyOxyzsfxpqMtmBqM8MX3mFRPexD7is36Vm7vakzn2qlS6sLmVrMSrc+bGuxZOSB0BpYX3xg/nV68gNzEUX73UVQjtri33LLGQvXI5FdkZKULPcnYkye1TWkhWXBwM1VMqL1YU6333L7bdC5HJPQCk43jqVGVmWHPl6rC5baN4+b0zWyCQzKWywPasy5spXtxvwW9VOas2F0s+I5sLdLwe2/Hce9Y1EqkNN0dNOVpepqRkAlR3GalHTrVQPsZT6HmrQI7V5slYzrRtIUda0tEvJv7VhSUqVK4GOtZhznik8PxCTXvPeVsJwF5HNVFKzcuxkzv7mUQwPKVLbRnA61xXiHXGe6ltbJisSj95Ip5Y+ma6nU7gjTro25VpIxgg84rzLUY1tpmWJtyzKJVP16j881rluGpznzzWwSrThTcI9S3by+axWFckcnJ4A961I3i8tS+Du6ZAy30Fc/psipYnnDmUB8/3f8ACr7LLFqrTyfPEeFx0HpX1MNjzpQRPd3tqoIljliA6EoMVsaJrTwSQQz7ZEYbYZueAexrF1OT7XbmJF3Fu/pSaZZktb2+4lo38xsDIUfWuTMKFOpSl7RaJbnRhJzhNOG56CLxx1ChfQVVkcM+7JA7rniqRuARzVd7gjIKkr0618PGjrofUcxYmCTSuzgtwAGB4PtULq7MNzAKANvHpUaSBUwMAHoPSmSTHbgEEiu+lOcfdWxjKKerJ41lSN0DIS3T60lxbmdUEjj5QM9+aqm6cbQoGc9etK077idpIPpXoyqSVO2lznUVzXZOIF8wZYkdBk9R70k4hAKqNnutRL5jjciMfqMUG2uXOVjAPuRXP9Ynzp9in7NK1xy3ot1WEMzbuee1SfbBMMZHTrmoBpszOWdkGRjrmpk08IBmVR+GKKtWM9yFVjHqMeQZyh7Y+pqEuc+lWTBAv3rhAB/tCmk2C5y5c/iamTg1oSsTFFZ5Dt6n61DvbOBk1akuLcACJD+K5pkuoyqpFvCoPqcCs7X6ieKXRFZrdnlV/LZvw61Oba6YDETYPrxTUvrpTkkH6mn/ANoXRXJcfgtEtSPrLWyAabes4ICIMY5NTJpkq4Es6ZqpNduo3SzOAfwqPeHAYOWB77qLsh4iZoPZxhsvcAD2xQI7FPvSlj9ayhcwGYw7v3g7GpMr261TclozN1ZvqaQfTlH+rL/UZpRfWyH93aD8gKzQxqQc1Dk+pPM31NA6s4HyQqv40z+07huQUX8M1QPHXpQjq4BU5HtSd2Ittf3bf8tyPoMVC88z/fmkb/gVRMy92A/Go2niT70iD8aaTYEjD1yfrRgdwKhF5E7bY2Lt6KCakLSAEmIhR3ZgKtUpvZBZjuAOBSbvXGapSagAcLGD+NV3vZWbKhR+FUsPN7jUGbGahkMqMuxVK55JrLN5Pj72PoKja4lPV2P41ccNLqPkZsy7ty4kVV7570x54kPLL+dYpcnqSfqaax/CtY4S+jYchsC9gIYOSB2GKhW9hjBG53JOc9KzeO1N2Emto4NPQTSW5pnUUZgwjJI6ZpsuqlBkgL+pNUgpxxikCIpyQCx7mumngIt+8jOVSK2JBqNxK2Y4yCeAeldBYaDql7EryyCFW55znFUdG8uFluDD9okB+RDwo9ya2nvNRvQUaYop6iLrj6062DbfLSil5shVUviLtroFhYqXvZklfqd5Bx9BT4dbsbdWWxsyV7Nt2g1nw6Ym4hpF3dTk72+taMNjFGNwTOO7mlTyVVHetJv8EZyxdvhRUu7jUdVDIztHbt/AgwCPrTLXRreA5bGe9abtwFB79BTOFbrk17FHCUqEeWCsjknWlJ3YqpFEBsQYHcinmTOeSaiLGnhgQOM10Ky2MyVMscbtw9OlSiMnqqqPQVArMBwAB7U7zGb7obFUhD2gjOeQfSkwo4ABqKV1jXdcSJEv+0cZrLudetohi2RpW/vH5VpN2GlfY3Oo6ACql5qVragiWYBv7qcmuVvdXuJwfOmCJ6L8o/xqjEJJ+beEsCceY52rn6mpdTsWqfc3rnxDIQRaxCMf325P5ViXWoSXEg86R5pOy9T+AqzBpMkz4uGdwP4Uyi9fXqfwFasNglum0IoAz8qDH5nrn8RWbbZXurYw0tbuY42iEHsfmbGeuK07XQkHz3HzsO8h3fp0xWgs8MKkqo3En7o7+5/xqrPPK54bAz0GfzHf8gRSsHM2XVisoCHlcO68j2Ht7fSmSalIci1hCD1NUdoXB+8c5z/nv+I+lI2WbBBA9P8AHj+Yp7bE27jZ2kuFcTzMynqB0P8An3qhPJ9nCtDIUIXGFzkitJ+nLAe3r/n2zUaaLcXMeX2QJnIaQc/go5/lSd+hSt1MxdavEVSHDKT/ABjOfYn/APVWtpeqXtywaOzYjoZEJUD6k1etdFsrcoxiM0g/inPy5/3R1/Emn6hq9nZxhZJPMf8AhjUfyAoV1uxNp6JGvDeToF3StcA9VIBUfiarXc+ng+XeWdqxfPCna1cjfeIb64/d26C2jP4ufw7fjisVoyZDLIzO/XcxJJ+n59s0Op2GqbO8m0PQrldyxTWjf7PzD86rHwySMWGqhj2jc4x+dcvZG+dgLSdxg53F/lH9M10+nG8UYuZFnYj5Rtxj39T+Qppp9BNNdStcaBrFupdoIp0HJKcfyqFX2xLvyOg6d62p9SWxTddXWxlHCIen4D/69Y8U6SoZVb5HYkE8Zya8fNoq0Wb4dt3RteFzt8Q2PHDPs/MVg38Rh1G5jQ4KSuoweeGNaekz+RqVpMeNkqmtnxPoGkT63eOHntpWfcWVSQcjPb61llE3zyiPEJWTZztlrerWC7LTULmFOu1XOPyrYt/HGsxkG5a3ugP+ekQyfx61Rl8LzBS1jqsUijnbIRnHvnmqH9k6qAz/AGNJ0XgmEkfryK+g5mjksnsdT/wl+k3jb9U0FPO7SQNyPzrZsNe0F4wlrq15YyE5JuMuB7AnI/SvMphJA2Li1uYj3+XcB+IpI5oJDhZUJ/2jt/nVKoJ0z2azvLmWMmy1azv0A43EKxP4YH6VW8RT6ncaBfwTac4VoGxJG28DivJGUj5lBHow/wAauW+salbxNHFf3IjYFShckY+hpTleLQlGzTMoOSoZsYI5+tdxp0hbTID/ALFcHOqiPfkqR78V2egy+bo8R7gEV8jW2ueqer6TIJdOtG3EkxLn64FXgAO4rgtJ1bQoraKCfVbqzvEGHByUyfw6fiK2I3nmJ+xa3p96DysZYI2PqCT+lfXUHzU4vyR5M9JNHRs6jjIzULO7MBEhIPVj0Fc20Wp282+a0kZif9YkgZVH0OD+lTWeuTK7rKxRU4zNCyD8CeK2sRc31tV373AaQcbjUpSs6w1eO5J3PCR2KODmr63AZjwNvYg5osNAUB4IzTGt4m6oD+FTb1P3agJuxLxHE8fqGII/CgChdaJZ3LHz7W3cf7Scisy58GaXLkpG0bH+6x/lXUEN6UmD6CgLHA3HgLac2t0QeuXGf5VWfw/r9mSLe4Dr6kgn8M16KwPY80m3I5qJQjJe8gTa2PKJxrVsSb2O4ePPqR+WKrCewzuvLO6Ldg8pINeuNAp4Iz71Vk02CYnekbMOPmQH9azlhqbVkrFe0kjzey1e2tmxZ2UFtngs7mteyvLiTJk/s54T1A7j6Vv3PhWwnLMYERj3Q4NZFz4HiwTBK6H1zms3hUvhf6j9q+qOU8YG2a5ge1jiRip37Fxk1z4ODW/4l0qfTY7czyNIHZgu7qMVzzOFYAgkHj2FfO42DhXknqenQfNTTRZvzu2ce1UWxmr97gwwkDFUJeenWudbmi2NK3kCQxscnGBgdTTH+2ef5sewqpyFz0+ue9S2JcLb+Rt8wFSC3ABBHWusdNQnw9+dM8rPJKBs/jXp4JU1eU0clXm2ickmoTRyF5rON2J+YlM5NaUHiaJcK1okfuo5Fb0ttoki79pQ92ty2B/SoP7C0+8U/ZNQ3H+7Kgb+WDXrXpzVzm96JFbeINPlXZLPcx57hgK5LxQ8MmsSPbSvLEyrh3OSeO9dJN4RlH+qNtL/ALrmP/GuW12xk06+8iVdrBd2N2evvXHjIwVP3bbm9ByctStp7hL+HPfI/SvQfD81/Hp48k2y2odgS5wx55rze3YjULfHrW9596FZIFMkO7OAu4g/SsMHH95p2Lr7ancy6tbW7km6iB79M0+LxLZZCoyyH2BxXCR6m9qxE9jFv7+ZGQfyrUh8TwmMo1rFGezIvT8K9Jxktlc5bI7WHU4rgBlUgVMssLtkPlvT0rgYtRW6fbLqhhX1WLFX4LOwJ3pqc8rjn/WbP8KXtZxfvL7h8kXsdeQC4Gcjvg81OyWpGN0sZ9xkVzsUkq24+zwtOw4AaVST+NRtNrjf6q0jjA/vPmoqxdbW7jbsCXLpozfmWNWxE+8dScYxVKRXDE7jt+tUzN5cGb6eNJD1weKzJ7+yWQML4tg5wuTW1KSUbKV2TKLvex1CiVUG6KUDHUrSbx3z+WKowatcoFMcswQjOG5H+NWpdRa7jCyypgc52bSayhLEc9pRVu6b/IGoW0HFcngUjKRQr5X5WVj7GpYVhMP7+V0kz2XIFb1aqpR5mm/TUmK5tCAjJ5pAoycn9KtG3jwWW6jbHJBGDiqynepIUilRxEayuvysEouO4zy1PWmlAo6ipGYAherHoB1pjuo4Y4Poa050na4rEOBnml+X6VKAMdBWVqerWenahFBes6RuMtIo3bPwpuSWo0r6GiTnpikcrtGBzU1nbRahA0uj31rfRgbiqSBZAPdTz+VVGA5yCGB5prXYHoBPPFNYkck4FSbQACDTJEWVNrgEUxEYYMuQQfpQT7GlVFX5UXaB6UpHoRQBWkxg8Ek1Rk+1tPtiQLH/AHjzWqUxzUErsinahYj3qWhpmVe6deXDAJcBAeoUcmo4NDVTtuXeUejCn6zqE1vZebEDHKrDac10ekXumNoUVxq8LSX0i5LISAR781hOai9TRNtGD/ZFsGQxiSJl6FCQTV9YNqAFHJAxuYHJ+ppR4ltLJmGnWyljwWYGQig6/wCILveyWiyRN91fMWMc+zc5qo1FITTAAdsUjYBweDWZqE2uRRmRdFucHljBOrkj6AGs5PFZsZUj1HTr6GPBGJCA315UZ5rTmS3J5WzoS2KQN71iW3iKwnkDkXRTGCuUH4itOGWOdRJEGCHoG60uZPYVn1Oj8HWv2rW42IO2AGQ+mewP1r0NjtznjFcv4DtxBpst2wG6ZiF9Sq8fz5rfupdluSThm4/GqZUUZ925XT72fO1rhhDHkdR3/rWXAsyMQYiynAGG6Ve8USl5bKyhBCxJ5rjHrwP5GodPzkKzAseefSrSsjN7mhbxSwoG55OTkcV498UrJrfxM8xUhbhA/tnvivaUmBO329c1x3xa0o3vh+O9hG57Vstgc7T1/KoqK8S4OzPJLW6azurW6U8xOH/I19D2l3HcWsEyfdkUMD25r5sPOVPQ8iva/hLrK6h4fFpKQZ7Q7CD129jWdCWtgrx6nbW8iglQVOO/pVzGec5qFEUnlBj0xVhVUDhfyrcwQ0dOn4U6OR0bKEjjHFHlqQdrspolgkCMVcEY6EUPXcFfoVrdcCZzyXfJzUhGRyMVHaK6wKCoOSTnNTM6DIw3HtQhiBmUnkVHIxO7J4FKzJgYbBbsRioZTjlW/I0xFWdgR171Uk4Y56E1PdQecQW3DHocVURAjk7jt9M5qkQzE8WzNb6HcYJzLiNfqa8pncI2pSj7scYhX6mu2+IOqr9rECMPItF3OB3kPQfhXnupv5OnQwE5llJmk9s9BXHWfNKx0UI9SHTl3yWkQ6tIK9H1iLaV8m4VZFGfLPRq4TwpB9p121XHyp85/Cu81aMbWuGWN/KHHFaUFo2XW3F8GymaPXoWC4EKOR1GQf8A61dzakyW0bk53op/MV538PJhPPrO1AvmWrDaPYGvQdJOdLsyO8KfyqnsTBanN/EK3E3gu93A5t5RIPbnH9a8dilMW4qcEqV/MYr23xcjz+E9ciQFmCBsfiD/AErxm0svtCHe2xSPlOKzkaRNjw9pXnRWk7jCmVs+6gY/xqe9w9xIEwE6DA9TwK2tKeJdMjWPdi3iP3hjkDrWIke+8iQEE+YGPsBzTg7xM2veMXXWDatcBeittH4VnnmprpzJcyueSzE1FWTOlDW4Fdba+HEsLa3m1fynN7F5kMeT8oxnNc3YQ/ab2KI/xHH6V0DyGVokLs3kwkIXJOFAPSrpxvqZ1JW0MTxFIZLPTiAqKY2+VBgDDHFZUF3cwD91cSp/usRWp4g4h05PSAH8+ax9v4VjN+8aw2NOHxDqsOPLvZOP73NaFv4z1mLGbgSKOzKK5vocUdKSnJdRuKZ2LeN2uYzHf6bbzA9SOG/A1sx/EOyms2tb+yuHhI+XLglG7kHrk15rSen1q/ayJ9lFnqVvr2lTiK2sbS6eaUj99M4G31AUfzrK0KVksY1LgPaX27aOoB3KM/nWFpUpjvbRhgFWGK2bAMt9riEEKsoI28cCQE/zNacz3M+WxYnXOteIYmzmRS+Pcis3U53fT9DnUnfCF/8AHlx/NTWpJtfxOZeQlxag89yKyruMHw2r7hvgYrt6ZCyH/EUdx9jU1fAv76RWyGjiuF/DAqPXMuxdeVPzZ+oz/WnSiNhYkEZuLV4W+qjNdF4b0WLXoLITyNFAIlMjKOSRxgfl1pSTclYE0lqcCFeRtqIzt6KMn8qvJoeqyQiVNPuTGejFMD9a+kPDukaRoVkE02yiRj96RhudvqTz+Vcv471WGE7GlUE/w55/Kn7NLdg6j6I8MmtLmH/WwOmPUVEGZeoI/Cuh1MXd8WaC2uGQHqI2P61h3CXES/vUkQdt6kVD5ejKUn1RHvI70xjkUnmMVy2KazkHopFIoikx6Vv+A7IXGsG4cZS3AYem/t+XWsFmBBJU/ga3PDXiNNNRLVrYbXk+aUHB5PUj2qoW5tRTb5dDU+JkEY1mK5O7bdwq7k9zyrfyrye5iMczoRypIxXs/j+3F1oEM6klrafB/wB1x/io/OvJNZQLcq4/jUE/UdaVeNmFF6GbXZeEohBoF5cch7iUQj02ryT+ZrjT1rvLKNrfw9p0B/umb/vo5/lWMN7ixMrQsMbksfwpD0+tIeuKfGpZ1VeWPAqzzzm/EtyXnjhHCxqf1rHjAeWNWOFJGTU+pMXv5yf75H5VVPU1jJ63PXpx5YpE07b5nb1JqM0lNJqTSx1ei6aZ9Bka4l8mN5P3e7jccYziujhW6ntdMsLKYpbadIfOO7G4nk8fTiuS0kNfRQtczYWAgKMZ4HQV039piX+z49MgdI3Ej3cjIfmYk459hgV0RascVS/MzQeYSTSO2D3ANcXqTSyvqFxKNqP90ZrrI/KjYtO2IQOexx35rj9TnWSC78kEW/mbY89cds0T2Iw61ZHajESD2FTynbE7egqOLCxgsQABUNzcCRdkYOO5rK5va7KZHNOsryeKdlh3MpP3FGc/So538rhgd2OlWNC1i50WaWazKLLJG0W5kDFQeuM9D71K3NrXR2Hh/wARk2slpdRi6spOZbSYZB9x6H3FX5fDceoFJvDUolt2IV7aX/WQ59+4FecNeyC6+0RMUfORjpj0r2j4UWLNYHVriMxyzjbGOg292x70q2JVODb3Mfq7Uvd2Ox0zTodM0q3sYVAiiQA44y3c/iawPG+oLBarbRnEsoy3stdNfTx2lpLcTH5EGceteS6xfSX15LPIfmc/kOwr56pUcvVndCJSdgSaaehzTRxRkmsrGoAkdelOKSBRxkMRkDriopJPLKMUJTODU1tJvdgrfu+MZ617mW4dRXtJbvY8rH1m3yLYyAaCRirC2bfxP+AFTpaxrg7ckdzzXnuSPTKGM9Mn8KeLeRhnbj6nFaQTHYCg4HXA+tLnEUfsZPV8fQVKttGB82W+tPeeJerDNQtcA52rk+9V7zAsLtUYUD8BQfoB9aqNNKyjkJ9Kb97ksSfrTURDLuxspAzSqFbuy8ViiVbC7P2WXzUIwc9q3XCurIwGCMH6Vys0ZhmaMg5U4rroWknGTJZuJfMwyHxn2pjukxzINx9e9VLS0mmQMiMR7KTWhDpF6/Ihkx7jFZSUIPRlJtk1tKycb/MXHR+SPoa1bd90Snv0NZ8WkXYPzR4+rirtvE8B8t8Zb0rkrWlqi7t6MmD/ADdapzan9jut6JIzD8qtMuGqKd0RlD4we5rGFr6q4jtdAne40xJblFDyckDvVLW9L066so/KiQJGxUMvUZPPP1qrp9/HBYDa2G3DA9qjF5EiyKpco7lyuOMmsdVJyi7BGyd2rmJ/YRjlLQTn0O4ZBq9Fp90FAWVNnTbt4H0q3/aCIAFix9TQdRl6KqiuuGOxEdmE40pfZI/7Lmc/PKQvdUGM/jV+1tjbwmOKNUB688n3NUGvrlv+WgH0FQmaduWmY1lXr1a/xyKpSVL4ErmoLMg5LqDR5cat882D+FZO5iPmdifc0ADvXPyI0eIqPqabtaJ1kZj9ajM1mOilvwqg3yjIHNIHAHTn+VNRIdSb3Ze+2RL/AKuDFH9oOfuxqPqao5PXikAPanYi7e5ea+nI42g/So/tdyc5lI+nFQLmnnkUhCtNM3WR2/GkPI5yT7mo2kROrAfjUbXcCfelUfjVKDeyAnwoPSjrwBVGTVLRT/rcn2po1KMjKRu314q/Yz7AaJFIOKx7nWPJHMeD2Gcmqv8AbF1IC0UQA9a1hgqs9kJtI6I59OKYxIBJyB61zrX965+aVVHoBk0jXMrDl2P1NdEctqdWiedG+jRPFtZw6nruNQAW0LHEoC/3QelYDyf3m/WoHuFHTJrdZfbeQufyNq5vUWQNAFLY+8aRNYcACVFPuDWVBBc3A3qoji/vt0/CrUMSQHcPmb++/wDQVbw1KKs9S4qUjdt5ZJofOkVLeLHBfkt9BVObUpFb5CMduOtUprqSTgsT7nrVcmsfq9O+iNlFLctyX9w/V8VCbmbGPMbH1qAmpIonkPHA9TVqnCPQLIaZHY8sxP1q9aaa8uHuCUTrgdTUsMcVqoYjMh9eTSTXEkmRkqvoOtO6WxSRc+029ohjt0Gfbv8AU1RmmkmOZGJA6DtUYFFQ5tjsFJzS5oGWbCgknsKSuwbSA9KYDkVv2PhbUruMPsWJT03nmt3TPB0Vt8+oSJKfToBWMsXSgvi17bslu+xwkcbSuFiUux4AFazeHb6ODz7jy4oxySzdBXWxXmiWlw0duhkdTgtHHkZ+tZWuy3OqyKkamG1X+E8kn1PataLr1ppRhaPVsxnVjFas5GTajHYuR2J70+OKdx8kZJPtwK6GDRgpBKg+7VpR2UUagyMGb0HAFe7Gk1ojilWRzVvpFxKoLnFa1posUZDvjI/OtYnA4AHpUeWOc4rZUl1MJVW9iMJEr7VhwoH3ietOAdQRE21fQHinKFX7wJPtTs5PGPStFFIzbbCOSVRkqpPr61Ibj5cPuH6imhHPAWnbM9etVYkfHJESPmGffipcKcYGO9VTCrH5sflUE0sFtzJP5f8As5yT+FFwsaIRW+8Rmn7VVecYHc8cVzsuulQRAu70Zxj9KyrvUJJubiY4PbOB+VS5pFqDZ1N3q1nbZGfNf0UZrIuteuZBiACBR3HJrESR5m2woAv9+Q7VxWpZaG1xseeRpEIzx8g/L7x/IVDm3sVyqO5mTXDTzHLSTzH0+Y1Yt9Ou52wxEQxnCje+P5CunstISGII4UD2G0H04HOfxp01/Z2eUXEj9dq/4D+tLl6sOfojNsfDyAb5VDOD/rGO8jB9en6VfZbW2k35UsowDnJA+vXHsKytR1q4lhIVtg/2ec/TsD+JrOtpi6kljk8jJyf8/gKNEFm9Wb8mpKY2WKNVDdSe/wDjWe8pkYlmZieDn09Pp9c1nXF20MgUqMEdc9f8fwzUkV7ERyCD2P8Aj6fjii6DlaLygnYccr09vp6fhilX5t+QMHkk/wCf6Uy1hur1h9liJXvLIdqD8Tx+Wa1rTSI413XErXM3+z8iD+ppi2KUKPJL+6DNJj+EZP4n0+pqwli4C+a24g5Eadvx6D8BV+S4ihjKyuir/cjG1f8AP51l3mqb4yIFIUdzwv8A9eiyEm2XIkFtJ5nAlPP7vr/311qOS+H3ISqepHX8/wD9VY6zyPnzJC3f0A/Dr+eKXzAVGRkex6/5/GlexXKXpGaUMPMLZ6he49zVWW0iVyxQbmGMjqfx6/nSIjE7cFO/Q8/h1/lVu3ibYMckHlic/r0/nSvcNjOexiKqFyiqc/T6f/Wqa30uMlhIDJu55HH4j/HNTz3KREiMCRvUdB+P/wCqk89XBXcy54AAx/kfnSsguyRmtrFFDgbl6JGMkfj2/Csi81udlK2YFuhPXHLH61oR28UjE+YGGfX/AD+tPls1UElVA9f/AK/+FNp9ATS3OVa1ubiQtK27vuY5P5dPzra0naLQITu29+v61O9hFKq7efTYeP8AP1psNobSTy8nDDcATzXmZlT/AHV+x0UZ3diyrYw2ehzW74qivZdetp4LxooZrWOTZnIzg54/CsELwa6fXri2TStEvJhndbFOB/dP/wBevNyyVq6RdZe6V4/LYrv3TuOoHC59z/hiln14aVGPNu/IUH5YYjgfl3P1rlNR167n/d2CiKI9JGHJ+g6n8KxzbYcyXEhllz8xJzgfyH4n8K+lc7bHIqd9z0e28WWt+R5sttMD0SaPBP41akXRdQX/AEjTYmHrE4IH4V5k6ogIPyq3Q8j/AOufwAqJbh4mzbu6lO6nH6dB+Jp+07j9n2Z6FN4W0OQlrS7mtXPQspA/Sq8vg7UAd1tfxXK443kEn+tchba5qkOxI5y+T8qsu7P07muv0i7viN+qxJbjHyqv+tY/7vYfU004slqUTkLxJEaa2kQCRGKN7EV0ng2bzNKZDwyPg1iagcardAIw3OWOTkjPPNang1gpvEPQMDXzGJSSlHsz0Y6pMbrUaDUH+ZAzAHaTg1RERByFIx3WuzNjpl6uNRt3duiumOB6EVSm8KaU7f6HqEsBPQMGVR9T0r38DJyoxfkcFWym0ZVlrOq2CbbLUrmFf7qyED8q2rTx/rUDD7R5F0B/z0jAP5jmqU3hLVkUta3MF1GPXBH6c1k3WmanaZ+0aex/2kbA/I118zRnyp7HXN4y029kWXVdAieVejxkEj/vqtS31vw9MCtpqt/p8jYOZclV9gDkfpXmQmRDiZJof+ukZx+lPV45P9VJG30YZ/LrVKoyXA9mspZ2VGs9YsbuEj7zkbj+WB+lTTX2tQxOzadu2n5fKk3Fh6gY/rXiTxshyVKn1xitCy1vVbFw9rqFwhHGC5YY+h4pqfcXIeu2mvhAq6iJIJSM+W8RyB744rRh1a0nI8mWOQ+isMj8K8st/H+uRKFmNtcr38yPk/iK0IfHOmzApe6GI0f77W7cn+R/Wq5kxOMkeoIyuMgYoIHqK4G21/w5OFMWo3tgw4CNuA/E4ata0nupS32DV7G9PVY+FIHvgk/pT0Yr23Oox3FNKAnI4NY/2jVoSnm2Hmg9WikAA/76waUa7FEzCeOeIL1MkRC/99dKLBc1tvvQwGKoQazaXAyk0Tf7rVI96owIo3lc8ALj+dFgucZ8VVP2PTmA4EjD9BXnPTHrXpfxN8yTQYJJIvLKTAAZB6ivMWyMEdRXzGZq1d/I9TCu9MuXnNtCfp/KsuVlJI4DDqKvuzNYgt2bH4VRlwXAZQc1xR3NlsaWmJvjiQHhjj8ziu0k8FXEahra5IyAeRXF6WSIoWHRT/I17rD80ER9UH8hXuZZZ8yfkefilqmefWFtrGnXaG4Vru0B+eMNyw9BUGpapcxTTLb6fJFCejMvzj8uK9JZFbgjNVp7RXHGAe3Ga9SVKEtJK5zKUlszyeTUGmmHn3d7CgH3QQf8KwvEfk/bYzbzyzoU+9L1znpXtDaZZ3RZXhRyOCSgGK8t+JGnQ6brUEdsoVGi3Y981wY2jGNO8Tpw8252Zy1r/wAha0/3q6/Rop3jZ4bS0cJLkTTfeUj0NcfbjGoWrf8ATQCuy0nSr6/tZpLM/uxIQVzjmuPCqTmlDc3rtKN2ampSSXkol1S/jR8Yby5D0+nSsebTreQNJbO1wg5J+zZAH1XFW5rfU7UBbiwilUesQY/mKsL4lvbayNokJhTpsBIX8sV6DjWjre/3HKpQfkYc2kgorxIHVu8LkEfUMDVd9Jmj+Yrcx/70Wf1H+FbcWrzM6lrqOAD+EQk8/X0q9Nd3mq3HmPqVvv24KwRhCR6kZ60OpOKvNJIaSeiZykUd75oWCbfJ2UMd35Gri6trdl8shuABxhgSKn1rV0so2trNvNu8YaduSg9B71xlv4h1aBSEu3K+jDNZ/W03otC40G1qdZH4icSFri2jdz1JGD/jV6PxNbGPaLOKOQ9WxkVxkfiu7zi7t7acf7mCR9asxa9pE3FzpssZP8UUmcfnV+2g9x+ykjpf7XuLl8R3kEC88hOlXLe1uJwDJrZf/ZQgVyyPoVyR5OoyW7f3Zoyf16U+SzCLvt7+CdPWMk4+vp+NClB6RdiXF7tHUSXcGnyssk808gHQJu/Kol1u+d82trdMvo3Arm0lvUP7uQPjsjhv5Vaj17Ubfhy4HowwKfs5LVO/qK6Z2mn39zIP9Ktmi99wNWm1GGJCZJI1x23CuFXxAJJUe5hDlTnAJAqymo6NMxM9o2TySGzVx5/tNEtR6I6m116yNxm2uVE/TgZzWoNQldMypFKp/vLiuSivNIQA2YRZe2R0/Gj7TqE5At7u2XPAwc1jVowqSvUjfzHFtLRnTyOjOX2LGgGdq9K8r8QyT6jqU1wqExg4U47Cun1iPUbbSriW41IMxXaEUY612PhHU/CV1oNpp97Esc6KAznue5qpuMIKENgje92eLWrTwXaSxEpNGcqw4Nd3YePbRlSLWdHQkYBuLOQo59yp4z+FXfEGiabd+LRY6JIssQTLMvTJ7Vma/wDD3U7NvMjiLxnkFRxURqOOxWktzp7C60PVWA0rV4xIeRBejyX+meh/Sp76yurNd09rIqYzvA3L9cjivI7vSrm2JEsTDHtVrSPEWt6M3/Evv5417xsdyH6qeK3jXfUl0l0PQd+SSAOfSkLmsix+IaTHb4h0O3uSTzPaHyH+uOQf0rRvNc8NyWi3FjfTo4+/bTxESD/dI+U/nVKur2sQ6bRIZh0J2n61XnZFMRRQ80zbIwTwT6n2FXbOy0rWokbRtatJZ2xm2uG8iUeoAbg/ga57XrW+tb2Y30UsKwjEERGAe2Qe+fatOa60M5Pl3NzxXp/h/TtHSC5vReapJIGkl6Kg/ugelcxLaXl8cWkiGxT/AJay/Kij0A71asoLe5tYp9Re3eSMFhF/dPqxPJ+lOW7kkIeSVH/hWMLhQPpXPZy0ivmKLd7y+4z5reWaAW1o91eyE/chXZH+lEPw18Q6ltaGwt4g3OJJ8H8a6awv2ji2RkIo7AYzXT6Fq6iZVnZ1XB5UZwe2fatY0U93c1U3HY8o1P4c+ItGv7W3uraKI3JxFMs/7sn0LdAfrVvXPC3jjRoE/tOx1CSzj4ViPtERB54HPH4V6/MNd1SCa1Gt6atpKcCJ7EycduSevvikil8Y+DtD26P4o0rUoIjl7W8jw6Dvty3IHoaTp22NFNPc+c7lklORbrC4wG8vIGe+V7fhXd+HyZ9KtvK+fJCAj1zjFeoQ6J4c+JWntc3UekW+p4x5+nT+VKG/242AHX3/ABrznxf4B8T+ArkXlvvudPRg63UI3IfZ17fXpSXuvUUotr3T1yzgW1s4LdB/q0C/XApl0DPeW1uO7bj9BzWX4M8U2XiS0UxOqXqKPNhPBB9R7VqO/lte3mMmGMog9WPatdyE9DJuJftGpXUoyQXKLnsF+Xj8QTVm3jw/IypHJqvbxC0s4x9+UDHPWrELg4JGD3HpitTMtRR4BBA4P/1qsmJLi3lglAaKRSjA+h4qOIgnIz6kGrCKA2FIxSGj548VaNJoes3Fo4JRGzG3ZkPSmeFNek8O65Fex5aE/LMgONyn+or1H4wafHJoEN4V/fQSBQ3qpHSvFpBlSV/KuSa5JaHQvfjZn1HpV5b6hYw3dq++3lUMp+vrWpGegFfOngTxxdeG1a1lj+02LHcqFsMh74Pp7V6Rb/E3Twis9hfIfZMj866FVi0c0qcoux6M6cZFQXEu2Bt3AxzXHQ/FDRGH76O6jPvHTpviJ4anjMbXUi59Ymp88e5PK10OvjUCGPGDxS7AecYrnLfxx4dkQLFfKSB02n/CpX8YaCgw+pwrn+9kYoUkDTNqZgi7sFj6VReVJBygH4YNV11/SJow8ep2rL/10FQyapYO2Fvbcn08wVSaJ1RJJGpwSxGOwPWsbxHqMej6eZlO+5kO2GM929foKl1TW7GxhLNMs0mPkijIJb/Pqa8p8QaxdatqEgEg34IZv4YE9B7+tRUqqC03HCm5so3twt1dOZnJtoG8yZyf9Y57Vzt1cG6u3lbjcc49B2qXUrpGVba2yLeM9e7t3JqtaxSXE6RRKWkc4AHc1x3O6MVFHbeALRliub8qxx8i4HPvWvq9wjWrbWIz2P1rZ0OxbStPgjgBJVRuGQMnvVLW/Lkk+aPYCcYxXdCPLGxyzfMzP+G3yeKXj/5628n413+hy79KtiewZfyYj+lcR4PRbbxxaLjG5XWu20YL9kaNf+WUsi/+PZ/rUvYcXqRz/ONThIzvtm/Hg15NpdiJ51iztRByfQV6/Fj+1wh6PGVrxK0eX7dfIxbyw7IecfxVnU0RpHVnTLc26C4t4JjIRGAQOQoyOM1mRN5dwz4+7FI5P1GBTbI7DJtAC7eg6dz/AEqO4JFpfyjG1UWMc9yc1MNIA17xzecnPrTWNHNFSbWL2iqxv42UZKfMPzA/rWk0wE0xbgCFlP51n6KSs8zjqsTMP0qxIN0cxIy3Td9SOK1h8JjPWRQ19s3UC4+7Cg/Ss2tPxGf+JxcL124UfgKzf51zS3N4rQbimmn4pp96kpCdvekHBH1paB94fWhDNWCUrNE2cYINdFZ7zquqMqhgbVpGGeDleP1FcyRuIPSuw0hAmtlGIIuLHA963SuYyI4mL6vpryEICsiAjt6VTnAlsNTgABKTyKp9mG6pZZs2+nyBQNk6DPsRzS+UEvtXiJ6mNx75G0012I6D7V0XRNMuX48u4wx9A9bmga+lm0FnZp5gAO6U8IMsce5riLxrmLTYbOQhIX+fBPXHA/StbSLFEeCS8vIYYyQq5JYZ7cCs5VmtImippq7PYYEub2yDXGqyIGH+qtztB/Hr+tcJ4x0aNLqKUbi68kk5Jq3HqsNtcwgsqlTkvcS7VAHcKOf0rT1nV9OlieU3EY+XGNhHbsTXFVu9WbU9NET+C55TE0KkbSuME1zXxCikn0aaN1GIXyCG5pvhnxJptreL5t2sS5IJcE8VZ8R6tpF2t3HHfWzCRDg5xk1nBO5bWp4z9pnjb5ZWI9Cc1ahvncBZMD0PaqlyFEjBSDzTU4roU2iuRM1w7jsDn0NMd24O0gg5zV/wpaQaje/ZLlnQspKMp6Edq6d/B0aSxsLxmjzkqU5x9a66cXNXRyzkoOzNhJ0n8LTC8bas1rks3Zhgg/mP1ryzWY1ks98ZD+WwJI9DxXa+Nr3ZHFYW+FAAZx6DsKxLfTw+j3AdRulUkfh0q62rsYxkoLmfU4q3ia4njhQZeRgoHqSa9D1AhXKKAFQBAB0AFct4Mg8zxDAzplIA0re20HB/PFdHO29mLdTk1zwVlcWKldpFYdau6cFV7i4f7lvC0h+uMD+dUx1NLqNwLXw9dsGAedxEB6gDJ/mKrY56ceaSRxRYSXTu/IGSaq9cn8amBxDI3djioa5z2EOptFBouBPZXUtrLujPXgjsa7+K+SOSCwiIk3wrMzD+FjyV/DNecqpZgoGSTgV6HYW9vaRR2eY/t8UY80jkjPOM/lWtM5sSla5Nep56QxK4VnPLN0AFcprM6SWirEQVWTaTjGSK6C+3yXAji3HYvO3t61zesRxw2sYhOUZic5zmqm9DOgkUPtG8jfk9h6CtTRoRcXEoKj92MisRBmRB7ium8NoI11S7f7sUZA+p4H64rOGr1N6itHQ5i6kMtw7E5yaWKISMByAByaFQSTMBwBzVyFNiepNRua7Kxo+E/Dp1rXILUEmEHfMfRB1/PpX0PbJHDFHDAoWONQqgdABXJ/DzQxpGjpJKmL26AklPdV/hX8K39U1BNM02W4bBc/Ki+/avGxlbnlZbI0imc5461UNItjE3yx/NJjuew/CuIZtxJqW8uGmld3Ys7Esx9zVOGR2Y7kKqOhriUW9TZK2hN2qOaQRRM5PQVKMdc1P/AGXFqGlmaO4RplYgwA4dQOhA/iz7V04Wg607IzrVVTjdlXT9St7uFLa8AiC9GHQn3p9zp01upngJaLsy1gSwtEeTu5+8P6itHTNYmtUMMuJLc9VJ/ka+ji1FcrPNlHm1RZe7iXgEVCbuQ/6uNm/CtRJrYD93Av8A3zT2v1iH3Qo+lfMe1XRHqGOEvZT8scn4DFSLpd855jI/3jitA6m23cM4PtSm7mccPik6s1sgsU49FuM/O0S/jmpho2Pv3Kj6LSStcuQBPgfSnDIXBYsfXNJ1Z9wHjSbYffnc/iBUi2mmxHBO4+m41WJOD0z702FCuS5BJ9BS9pJrVhYvZsEHyW6k/wC7mq4vgrsIrJFA/iOBTCRSAhs0lN9QsTvqLpHuwB9Kpz6lcbMx7iT0wKlCqBtGMelG3immkOxWjv5XKpKWDkenFTGVMZYkkc04IOmBSNGPXH1obTYDhhhkfWoJrSOY7mGSPWp48bcAggelO3ADJ4x61N3F6ANgUiEKQAV4o3MFOcfWlMgyMDdn06VZh0+9nXdHEmzsxak31YFIRCUbpQpYdCOKlwFXAzxUGv6dfaZZNetMHUEAonbNc8NZvHGFwB6muqnhp1lzRehLaW50jTBXAIIX1PSlDHJJZSvbFctJezyKQ8uR34qFZHH3XfHsa3WXytqxc6OtkdRz5ij2zTGvYEHzSpmuTbce7H8abs9atZcushc50s+p2+9SJTx6VA2p25kL4dx6GsRY/apMKv3iK2jgYLcXOzYbWuyRAfWom1Wdh8oVayWmVfujNMaZz0AFaLCUl9kOZmjJqN12lx9KrtezvwZXP0qsibjmUk/7I61cSQqMJGqAepqvZxj8EQ9WNWOeUZLEfXJp4t0iO6Zg3t/9alVwf9cXc+gO0UjuCeFVQPSn7GT3dg5kth6zLj5IeOxPFI8ruR85Uei/41XeVQeufpTVdnOEX8TVxoQi72E5tku1d2doJ9TyaV5FA+ZhxUDhmyA2T+QpPKjX7xya2IuOa5H8Ck1FJLKf9n6Uu/A2ooq3Z2fmndM2EHWplJIqKbKtrazXcoWJC5PfsPxrdt9LtbAeZesssn909AfpTPty26eXZgDtv/wqi7NIxZ2LE9zXNOrfRG8aaWrLt7fmf5UUKg6VTLEnJOSfWmGgZJwOTWW5pewpahVZz8ozUkMJc88+1Wl2R8YDn0HQUm7DI4bbI3NjA7npVjeE4i6/3iOfwFQly/LHP8hSFvWp1btYNtR+eSSck0ZqMt2FOUZBz+lXHDTkS60ULu7UhJJ9KVULnanJ/ujmporG5kb7uwerc/pXTDCwjvqYSrtlnRtLm1S6EcfEY5eTso/xrs0udH0Xbbwxh5FHJRdxz6k1z1jpsypsEjqo64OATWjb2ESfe5asq2WyxErSlaPZaGP1lR9S/fa/NcIY7FHjz/y0bqPoKzlivpkKSzSyg9d7cH61dVI4xkAAUrMMZLHGa68PldCgrRiYVMTOZBDZiHAdhgDAQDgVOOCcDmoy7FyuAF9e9SRygMfLyD6kV3qKWxztt7jgjlOeB1pfJQYJOD6CnBXmzuf5cfTNAO0bVUg/nViGGPjIU59WNM2ueMLVkgsMHj296cIiq885osBUVNxGec9hT/LwR8v61Hd6hZ2nytKGcfwpyaxrzX5ZOIIljHq3JpNpDUWzfDrECzvgfXA/OqN1rdsi7YFMreo4H51y11dtI265lJJ9Tn8hTUW4kUGOPYh4DycA/QdTUOp2LVPuad1qlzMeJPKX/Z4/WszzA8hESvPIT/CM/mav22kNJg3G6U9QGyq/989fzrUg02ONFMzqir/CMAfkP6mobbL0RgxWdxcNh3EQ/ux/MfxPStW00WJERwhMnBLk7j19Tx+QFW3vLaH5IIy7AdCO/pj+tVZL6eYYyEXp2/8A1Z/Giwm2aV75HyCS3hkBGOARj8arRwQq+6F7izY/88zuFR297cW4CBw6gZCOuRn6daemqwlds9sC4HWJgMn1Pb8M1VkRqOubS+uF2xais6n+EnYT9ax7iwvLYESW7hR3AyK30ewn+5dhDxhZkI5+vSrSW10qeZbuzRscBkfcM0ONwUji5GJ4bIyP8ioLVyEZFViyk4HXP+fpXdFYZDtvI4ZyP4Y1GfxbpVI2VilxvjM9o6nhuGH+NTYpTVjHs9Eu7oGS4xaxtxmTliP93rj2JrdsdFtLaNTHAJHTpLPzt91XoKWKO+XcbS8t7oDqJOGP581lawusSZF0skUXpGMA00khas19R1myshmefzpVGAqnP6dBXO33iG7uyRCot4j3PLflWa0CqfulSeMnrmnWmnXV2x+zxFgvJY8KPqalyb0KUUtyzYyM8knnO0rsM75Dk59u386u3DMVAjRnY/LkZJ/Pr/KpbHSGhcNK3mnBA28L+f8AgK1JI47WPM8iRR46dB+VNJ2JbVzFgsZHQo/yjOcDB5/kP1rTgtNg3r8o7uSQT9T1/LFUr3XI4zts03t0DsMj8q5+4vr68bcZC/PRWwB/hSbSGk2dRNdxQApGBL69lH4f/rrKu7/zmxvZuMbV6D6//XNZa+bNtEhZs8bQcDP16n8KnEOwESEfKc7RwB9R/iaTkNRSLgQIgIOSOgB6fj/gKexcMeeG6j+p/wDrmorVjM4WBGfIwGGcfn1P4Ctmx0WSVA8rAIp+Y5wq/U9P504ocpGbGpYqEXJB6jt+P+ArQh0+WVcysfL6fMfl/wA/nWnHbw2277OnnsO54Uf1P6VDdXEajM77yOoHCg/T+tVYzv2FUpGgWFS20YPZR+PWsy+k/wBKgdsZOV4GB09KdNeGZcxkJGRgMeB+H/1qpP8A65Q75IbPPX8v8a5MbHmoSRpR0ki3muhZFvPB1mcAvbXTRZ9AwzXPZGfetazlL+E9WRMh7e4jlUj3+WvnMDLlrRfmdVVXgzMurYAHKAtjb+Huf8KpHT02naCp/h4+77gdB9TUq3Ui/OHyBx83TP1/wrRtIZ5YhLdhYLc9HfPzfRepr62xxXaOfuNOckuH3Z4+bv8AU9T9OlWLXw1Myq19ItrCDlfly5H+ynQfU10URjj+eGPy2XrNNgt+A6LUT3Skkxnc56u5yT+HU0cq3DnfQWytbaw+ayi8lu87nMrfU9vwrN1HXILUMLYCSQZyx6Z+vrU8sc82fNPQfdzz9T2Aqm+m27hWMakLkKw6Z9h3NN7aCVupjJcS3MxuJAS0jc5GPxrd8KttvrlOzKD+tZt1ai1kRF3cnJ3HJq94fIXVR23KR+lfNY1WnJM9Gm7xVi14pF6J7M2DSq+5gQhPseR/jTtJuL225vbj7W+DmHAwP95q0NaeNLNXZmCqfm29T7Vyl7qUkiiO0Ihjxxkcn6D+pr1Msn+5Ry1leRu6lrQgBN1Pub+GGP7o+gq1beNIVjVRd3ET4wBJyv8AUV57OXBLnkH7zsc/r/QVHHE8mBhgT0yPmb6Cu72j6EeyXU9Yh1m1vmAZbG5JHzEgKfwxTLjTNFuzmeyeHP8AFGQ9eWsscP3T8wPKg9Pq3+FTx6lfQsGhuZF7Lg9fYCq9ouqJ9l2Z37eFrFv+QdqcluzdFYlT+Paqd14Z1a2iaRJoLmNepwp49yOazNI1fWLpkVlikUkL8y8/n611SxJH8965DdrWM/M3+92X8atNPVEO6epyr2t8ib3099n96Jjj9arNNEn+s86I9w8ZAH413n/CSyW8qC6nt4YsYWNlG1QP89atDUbDUUJa0tLjHBaNsfpTS7MV/I88jaOUfu3Rx7NQ6FDnDL79P1ruZ9D8O3mS8E1s/wDeK7v5VRl8FW8gzpmrAHsrOc/kaNQujCsdb1SxGLPUbmFfRZDj8q3bLx9rUEga5a3vFAxtljAz+Iwazbrwlrtvlgkdwo77ck/lWXPbXtsdtxp8q47xkH9Kak0Dimdu/jqwvSh1TQ43Yd1YMB9AwP8AOtWy8QeFp8rBdXmnyN3JYKvsBkj9K8pM0IJDu0Z/uyIR/wDWpVAf/Vsj/wC4wNPnYvZo9J8ZiOfw6ZLfWo76FZAdp27/ANMdPpXnjNjNNjjKOcqQcd6GGQa+ezR/vr+R6GFVoWLGP9AJ6ZOazbksjbhyCKvwsWsZATnaeKo3J4VfXiuGOkjZGjpLkWKsV55xXutlcK1rBu4Oxc/kK8M0sBLIAdAxFem6WJprWEafrNtOSo/cyYyp9Dzn9K9nKnec/kcOL6HX5B6EGmlAWy2SPSsHztYtCBNYrMP70UgUY/4FinN4gEQf7RbXMRTqXiOM+x6V7ZxXNvaFGF4FeT/F4Y1qzP8A0wP867jSvEsOoTOiCMBTg5bB/KuH+LjLJqNg6dPKIP51xY/+CdGG+M4WH/j6tz6OK9d+HOV0q9OCT55OO5+UV49G+LyBe+4GvY/h0+7TLrCkkSf0FedgXarE6cT8J0bZkg8wQDzSPuOcfrUE1lFOgEqJk/w9RVorLOgIZoMggrgE/UGmXk8VpEXfGQMgZxnH9K9uc4wXNLY89Rb0Rg6loenpEXe2iQA4yvBP0rgNV1KC3ea20pdmfvzA5J/2QfT3qx4t8TS6hK0Ns/7vO0uvGR6D2965qFRuyeleNiMS6z00R3UqKjq9yxa2+ULvycE1yrsBIV+tdvZ28l04giIBccljgKPUn0rltasILfVhaae8l1kACTbjc3OSB6VjTd9zdGf1NIwxjHFOnWOKVo1mRyvBI6Z70wqXbgjH1rYsPcd66rwO12puRYojOQM7jjiuXIAUDnius8B6fJqEtzHCzAqobIpwjzyUTOo+WNzpJNHvbghr1rZB1wVFV2061tgQ+o7R6I/Aq/c+G9R2gE+aB0G4j+dVWs7q1BE2nxlT1/d5z+NdioVF9r7jjdWL6Gbcw2AJMV00x9GiB/Uc1WFk05/dWb49UyP510EV/DAu0WCo49P/ANVRTajesoEFxCme2wjH49KX71aJfeNOD6mM2j3KLkwzqP8AdDVA0EiNhZVyOxJU10Edld3vMurIB3VGqSbQ7G0TzL2aWQepJpKq4/GvuTK5U9mc1deeLcpI+9WPOCDWeJHjYbSRjpmuv+26TCNlvatIfYVSuIFvH3Qacyd+TxWUpym7tW9S4pRVjP03VZ9Odpbd9spOS3euy0j4m6rBhLnE8Q7P6Vzsfh+eTmVFQHvmql5oc9sCY5UdR2Dc1DavYfLdXPVrPxZ4c1v5dQskikbqwFVNT8KaNfq0mmyI3faK8iZZYTna6mr1jrd1bMpSRgw75p2I5X0N7UfCEsTN5Y4Fc5eaZLFciAqd2MkYrqNP8XT5AmIYHqTUlhqEF7e395KAXchIx0wop3aEro4qWxZfvL+Yrq/A/iabwvdre3SC9sW/dy2kp3Bl9RnvUmprC8ckoUDjgCsO8txcWUEMKM0iZaQgcDPSrhLqD13Ot8Y6p4U1a4jvPCkUlo8g/f2rRBVU+xrnUBzwDgevFQ6JpGdMnu0uoVljfbJbk/vAOxA9KsrCxxuUrkdXOSfoK7IaxuclR8stCaOVgQFP/fK5/WtG0uUH+tuJkb3GBmsoy7OAzn06L+lRCR3I3E59zVX5QjeSudxouui181WfeJF2YOcY9j1BrW0PQPD2pTuX0O1nc5kcvuY4xz1Nee288cBw2c+uP5Vs6XrkkEy+SxQDptODT5k9GWl1Ro+KD8PLqxe2stDvY9RjJ2T2Vswww9c8EfhV3wV4/wBM0ixEXiKw1+wCrs82HzJIGHYmNjtFbmh60txPGplRHbjLAAfnU9/451CJ7jT7fwleapEPl3SIAjfT2qZRstClLXUzZdI8KalcrrHgXWIdP1EKMw3UXkxTnHvgAn24o8UTala+GoYbiEW13PcqJCrApj1Vu4461m+Grzxlpl3cSW3gprrRWO8WFyFdoz/sE849q6KD4naZrqtoup+CNUTHDRxIHKc9l+9+QpRlysfImrooJI8sMYG4sOCexx6VfhjUwqCeSecf0/wq1aaRF5Zh0W4keAjeLS4jKTxg+zckdqb5RR9rjDDgk9vqK3unsZWa3JYVC4B+g9B3/wAirqDavBz+HQVHCitwRg4+ua8/+KviAWsEWm6fdbLgtulKNyuOgzUykkrstK+iG/GbUsWVnpkZBaRvNcA9AOBXkbBSjEHpU2pXd3dIXvJ2mfHDM2TVWD/j1Oe4Nc0pczNoxsisDxzzW5oPifUdF+S3aOaD/njMm5fw71hDpSEgDk1kpNbGjSe56EvxIR0xceHNPd+7IduacPiFppP73wpaP2/1mP6V5wZlBHIpd4p87J9mjvpfGmivJuXwwsQ/2Lj/AOtTW8UeGZhm48OyhvUXGa4FnHao2YmjnD2aO5uNX8JynKabcwN7EMKrG98Nnp9qB91/+vXFsc1ctNI1K8gM9pZXM0Q/jjjJFPmv0DkS6nUJdaB5wYT3GzHIIIzVfWrzT5Lby9PnKJniNRgH61zk+m6jCMzWdyg/2oyKriOdT/q5PxU0nfsCiu5aZ8+9dN8OI45fEqiUgFUJXNcj5jDhlIPvxVnTNRfT9Qgu487omBPuO4pRdpXZUldWR7ncqFVlf96hJwCaxL2MhpG3sEHIUjOK0oLiC8tYp0bMcq5BHvWfqBW1hnbe4JB2sGHXHpXodDiZkeG72Q+PLATdTKV/SvRtGJFzqq9lvXA/FVNeVaIXj8XaVJIFwbgMCPQ5/wAa9csYxDqurxnvcCT8GXH9KzZaGS/Lq9o3qxFeTapALbXdWjUYAuWx/n8a9fu49l1bSk8LIM/Q15h41jW28W6lHkZZhL+DD/61ZVPhNIfEZ1suLdxgZc7R+n+JqnqB8vSJuf8AWT/ooxVyJh5KYIOTke2Mn/CqGuErp1kn9/dIfxNC0iC1kYtNNLnJwKQ+/WoNjR0VgPtORksm0cetSsSINgH3nj7+4qPSQBBOxGfmUfrUtuhYwA5w86r19GrSPwmMviM/xA27Wrs/9NCKz6uaycard/8AXVqo54Nc0nqbrYUmk7UfWgkAdKRQmDSYKkGnbjjmmMcrQMuwzh1rrLKUwajos5B2PEUOOhBOOfzrhrUkdq6tJt1pobrwY5yrenY/0rWMtDKS1L2qPt024iX/AJYzhhnthsU69bdrk4/57WhYEdyDkfzpL2HMGpxtndvZh/6FSD5r7QJuB50ZQn/gI/wqluZ20IfE8ONPspBjIj21T0rRL6ZY2kkaAHlW6vj27LXT2VuLmwtVuoz5kJPDDjg9a1ooEHcZ9aj2Lk7miqJKxm6fYQWDM4Qbv4nblj9T1rE150nkbywBXbNY2sqHzbsRkjHPSsy507Q7RWNxfCdz2SiWHeyHGskzzGcFHPOaJX3Ro3pxV6+uNNh1ORTuaAHOO5FZV7fQSyMLdCkeflBrHk5Tfn5ihcHbI31piylTwfzpLp97bh3qAGoaKTOi8OXy2+q2spbaFcbvoeD+hr12/uY4bTz2OI1Xd+FeCRtg13dzr76h4etYCCJAdsjdjjpXVhp8l0c+IhzWZU3PquqNJJnMjFm9l9PyroQAqhQOAMfhVHQ7XyrcysPmk6fSr/Wq33POrzvKy6GTotiLKbWLnGC22JPoxyf5U1+WP5Vsamog060UYzNumPr6AfoaxlOahq2gnNy1ZH0yK5/xPO3mRwZ+VRux7mui6/zrjtWlM+oTN/tbRj0HFRN2R0YWN53KBJxjtRStwSD2pKxZ6IUUUUACEhgR97IxXounWgjBupSxuZUHmEnpxzxXAWEwt76CYqHCOG2nocGu5Uy79QvLhkBuG3KinIGa1pnNib2sQiaX/SGjYK0wK5Poa5zWIfssNtDu3YDEmukSWGHTrp5EZ7jYBCAMgH3rm9daRmtjMAHMeT26n/61OexNG9zPthm5jHvWrb3EkGh3i9I5pQPrjr/MVm2X/HyD6An9KZNcO1ukWfkUkge561knY6WrsfYruLNXaeANEGqaobi5TNna4Zsjhm7LXJ6TDLcvHDAheWRgiKOpJr3/AEDQk0bQoLRQDIo3St/ec9f8K5MVWVKFluy0rsvWQbEjN1x37elcB4s1b7XdeRET5MOVB/vHua6jxnqZ0jSVii5urj5Rjt6mvNJZMDc56dTXjP3jaK6hyTk0vWoYZ1mz5eSB37U6RmCls4Ao5XexRBqF19niOMFzwAaZa3kVwAwxDMv8GeD7g/0rIupmnlLE8dqh7V7uEpeyh5nJWiqm52cSwavOI7yRYLl+lyRwx7B/8ev1rO1jQ7vTZilxHtJ5BHKsPUHvWPbai0LBLgkp0Enp9a7LS9eBsTYaohurB+VIPzxH+8p/pXanGWjOJxlSfkUCpyDkin8EY4qs1yM42MT+VMa6OMCPH418rySZ65eO3HOOKQnHQcVjpqTNKylQmO55qObVtmQZBj2rZYOr2EpI3RnHJ4oLKB1A/GuVn1difkLkfXFVZdSuH+6wUe1axwE3uxOSOwaeNR8zqPxqGTULVPvTJ+dcU7yOcu5J9zTcetarLl1YnI6+XWrNON5P0FVn1+Afdjc1zWKUCtVgaa3Fzs3JPEDf8s4B+JqGTXrpuFVFrL2+tOVcngVrHC0l9kXMy2+qXr/8tSM+lRGW6k+9LIfxxQikegqQbf4iTWsaUFsiXJmp4ckZJJIpGyW5GTW8URsggHPWuRguIoJ0cHkGus5dAVOM85FeTjqXJPmXU0g7oeAqjGABW34dudx8onKdjXOOv7xVZye/1qTTriSK/gKAiItiuKVPmiWdtqFnHe2NxbPykiFfoa8ie38l2jlGHQlWHuODXs6HIz6+lea+MtPaDXZGjH7ucCQccA9CPzGfxroyrEKMpQkZzTexz5CelNI9qmNtN2AA9ahnZUyoAZu5r21Vi3aOpPI+oxmA6kfhTPNA+6KaEkkJIGB+Qp4hG0bmyfQVpqxaIY0rHvge1IFZugJqVY1Xtk+9PyAOSBRYL9iOOL++QP1qXZGDwpP1NRGZf4ct9KiadjwBinoMuAgegFNMyDqc/SqbMW6kmlUZFFySx9pHZafEQ/3qrKnoealQlT6fWqXmJi4XBwBQGI4HSmlyCeBzTRknGKTaQJNk5kAXH6UwIZD8oOaVYwDlz+HepN3GBwKxnVvsaxpdx8axwH5vmYdh0/OnPK0h+YgL2A6VEKBWDbZulYeKXNIKmjiPBPyqe/r9KSVwbsRqpY4557DqasKgjHz4B9B1/E1ftdKvrlR9ltmAP8R4J/Gt7SPCu2QNqK5HXaD/ADrCtXp0l70l+ok7nJly3AwB6DpWrp2g3t7GJFURxH+JjyfoK61/+EfsnKlYA6n06GoNR8RAReXpsQZugYjCqK5VWrVrKlB+r2G5KOrZzr6G9ojTag4hhU9uS/sBWa+2eT92uxR0UcnHv71sSrc6nKGvZZJWHRFGAKuWumqnOEjX0HJNe5hqFRK9Tfy2OKpWXQwEtnO0RRgH1NaVno/nfNMSR+VbSW8MS52bj6n1pxYsRjhRXaqXc5nWfQrW+nRRjAwq/wCz3q2iRqAqop+vWgYBH8zQgDtk544zWihFGTk3uSZ96eA+eCD/ALtRhRjqAM/Wp4dgAC8t61aJFVcrhY+e5anm3J2kkHPWlM2DwBgcUwvkgc5oATyFRt23gcetSJgnO0H3HFNAYKzu6hR13HFZ11rlpbqRDmaQf3On50XtuO19jVKn+4cH3plzcw2ybp5ljA7d/wAq5S7129uAQjCFD/d6/nWPNcKGJkcu/wBcmpdRLYtU2dVc+IkQ4tIg+P434H5VjXmq3Nxnz7ghP7oOBWMZZJGCxKck4A6k1ftdEu7lv3o8v/e6/lWbm2aKCW5EtwHcJCpdz07frVqKxlmJ8yXb/sw8/mx4/LNaNposFoC8o3MO7f4dB+NWGmgDBIwT7Ac/5+lLXqDfYrWumpGAyKsb9Wb7zf8AfR5/ICrxENqA3BJHJ7n8ep/MVWEpED7Dt557/melVgX3qwUneMc8H8+p/AUEltr0sCIlIJPTGP8A9f4ioiW3ESOSuPwHt16fU/hQo6jHTk8dPfH+NMkRSgJY7T054z7f/WzT2DcYCVUKgAAOc+v0H+ApxkG/PLEjBbnP+P6ilRC0nlpl29ADn8e/8qtw2TyZEpWIL/AOW/LoPxpAzOwCGVySMk4HT/D9DVyDT7iVVdYwkY/ilOB+Hf8ALFascdtZRqyoqSHjfKdzH6DoDUU99EuSSXI6ljzn6etUTqEGnW0ZDMDctjnd8qA/zP4mpLiaKFdssqrGORGvAH4Cs25v7iUKI/3SHoe5+gqmqKzsSC79y3P6en1ouFu5fn1bdxaR4HTe3AFSR6lasirdWzLL3ljYk/kf6VkyvsAY8sxwBn+Xb8qjS1lnfE5ZFPO0Dk/h1NF7Ba50QutNncJDeqHPVJVxj6kZGatSxzWgCvOIkK5+WTII9hWLbWyRHbDEFYd8Zb/AVNJJBbnfPIN57A5Jo5hcpoSXEEykSWkc5z/rHXaT9AOn41B9jsinD3NpjkCM7xn1xWX/AGsyy5jiTYP4WGau22p2chX7TbSwgggvE+c/nTWom7EslnftEws9RilBGBuwrg/j3rntR0fVVfddebKvdmGR+ddTG1lKY1t7qLJ6LL8hH1Jq2sF7Af3fm7Tk5Q7hQ4XGp2POjaGNgRkEduRUgWTGH+YA5AwP/wBQ/Wu5nnQn/S7eCY56bdrfmKqppNrdyCYx/Y7QdXdsj8PWp5bFc/c5aJZ5mAtYcseGK5A/Fuv8q2NN8OvMnmXLgovPJ2xj8e/4A1uWmnTRtmwmtrlACVjkwD7HFF1LexHOo2cpI6FeVH0HSjl7icnsia2S3tlAtYhPnuy7UH4dW/E/hUiJNcsAqSTsvyqirhV+g6CuV1TV7+TMcCGCMHtyTXoema3BJbIIisasozt4Nc2KxDor3VcqFPm3OE1e61RZHi+xzW6p95ipOPyrFWY7mBYux/iYc/l/jXtUd1DIu35CvXkZB/Cql3o2lXxYz2cTs3JwME/j2rkhmX86NfZW2PIPPYAfMcjjr1/H+gp6HkE8Z7dP0/xr0C68DWD7mtZ5oXJxk/MMei5rC1Pwbe2UUkiTQvEDzltpAx1Pv7V0fWqdeLgnqyeVxabKA6A/jW74WhW5tddtZXCJLa7wxGcbTnOK5+MkxKT3Fb3gqQDXliYZE8TxEeuR/wDWr5mnLkqJ9mdUtVYhtILa3+a3j86QDi4mHT/dXoPxzUV7fRQHdLIZp8Y5OSf/AK1ZerXmoRuI3gkgRyQoxy1ZMhzE7OQx7gNwPqa+yUrrQ4FDubcDz6nG8ruEjDYARssfYD+tAsJQSUZNw5POFX6nuan0mJk0+MABQQDuUYBz61qxw7LcSyFVjycSMMqP91e5rRR01IctdDnjFdR43FypOVX+9747CnpeTtxwDkhn6Y9gf8MVeurmOTetojBAcSTOeWHufT2FFvpskkPm/cT+CSQYBPoq+tRbX3Sr9WY91GyRR7txGSdzcE59vSk05xFqEDMcAtj8609bgEVmimErKhBkJO5gTxg9h9KxVVWmjDdAwP618/mELVmmd1B3gdXqCZtmyQOnJGcfhWJNYLISkqjBx97G5vr2ArfuA81oy24Yyn5UA4Oa55jOjbriLPltgkg4J7iunKHelJPuY19JXIpdIiO4oMFRjcDlV+nbNVptLfaRFIcEcg8Fj7nrj2rXGphiA8OCOmOdo9h0zVm2QXe3YjksTtjUElvcmvWsmYczRyB0uct/qwR2K8gfQf41r6V4eI2zXhCRk85OSeOnqfoMCug2wWh+YrJN/cHKKfc9/oKZNMWcea+XPAGcH/AChQQObY6A+SgW2xCi8bhgMR7nsPp+tY+qa5Faho7QBnIzu7D61ZvlkmjZc7YOhI4GfQep96xpNIR8YDD0Q9B7mh36BFLdmJNPNeSF5HLf7TZ/Qd6lhiMTDaXR+oCn5j9T/CK0pLCWPlGBOMGQjB+ijtVZraRU+eFsMc+WpyT7u3pWdmjW6J4dY1GBiY7x8KMElsqPz61fj8X3SBfNgimXOO6s3vj/AOtXOyBmJbcuE4JIwiH0A7mmqrNIqors78BRy7n+gpqckLkizurDxrAuFdZ7Y9T5b5ArprDxALuy+1tOstkCAfOj5PsO5P0rg9O8PpblJNWAedcFbND933c/0q1q2qxWm3ziJJQMRwJwFHsO1aqbtqZOKvZHXC+07UpXSXSoxEehVsMR646VXvPD3hy4yR5ts3bKcD8RzXmVzqN1Ncec8xRh0VDgIPepoPEWqQkOLktGp/5aDIJ9hS9pHqP2Uuh2moeF/sVtJdWuoiaBFyYzJz+R5rnz/OnQeK5btWt7m2TfKNoKnBHuRTM8V4WaWdRNdjtwyajZktvF5Vi4PJz+VZ14QYQwJ61qoc2sntWbKvmR7SARXBTlrdmqNHRm3WWDyd39KgmUpM/VTk+1T6HGWjcDHyt0rUPhm6u1+0WF4D5nzeXuBIPoRXq5a/3kkjlxGxnW2tanaJttdQuo0/urKcflWzZeO9Yt2H2jyLtQMYljGfzGDWTdaHrFrzLapKPUDafzrMlEsR/f2k8Y9V+YV7XM0c3Kmd3H450+6dTqmhxFhx5kZzj6Bs/zrA8cX+lX5tZdIWdeokWQY2n25xWB58BHEyhvRgVNaltoF3fWnml0iBOU3c7hjrxXLjalqbTZpRglO6OdhJFyr4zhhg/jXqfgS4vYrW5NpbrLHvHmHdhhx24x+tcFc+HNTso2meMPArDc6t0/Ct7Rvt0OJ7e9eytFJMsgOAcdB9a83DVY06ilLY3rx5o2R6JLrXko6z28sbhd2JCAoHuQa848VeI5tVujBC7CAj5m6F/b6egqt4l12fWD5cTyC23clj80nuayFcCfAHIGKvEYl1pXe3YmlSUF5kxRUiA6sDS2Vu93OYo9qgcs7cKg9SfSi3hku7nykKooGXkc4VB/eJ9Km1m/iijbRtJBmtpcbp1GHmbpk/7PoKxiurNfJEWtaiqxto+nL5sDsC1wi4aU9s+w/CsiW4W1ha3t7rfNnEkjcjGMbV68etJtitIHht7ki4Jw8hBIx/dH+NVzHK5CqIJ88AZGau6GkRiPKZaCCT3U4P8ASmLaJIyokNwrtwNvIz/n3qRoG8xUa0kRicDbnk1fkZNMjeCK4YXjYDs3Owf3Rjv61fN2KK1ykVnbPb2s6vMTiWRh2/ur7VHpuoanpchlsLkxMw5MbYyPcU7ZNIuAIJ+/bNQyQogHm20kXupNOM7aktX0Or034i+IIHWOaOO7JIUB48H9MVvv8SraK4WK/wBOVnUfO0TnCn0GetcGEj06Fh5xF5IoK7xnygfp/FVFo5nbH7iZmORkjJreOJmtmZOhB9D1638beFb4gTtJFn/nrECB+RNXQvhzUF3W0tq4PTbIEP5GvFPssYTM1vLH7qav29rDp9sLgylbmVf3KyLkKO7ED9K0WOa3Rm8LHoewN4SgmXfbysAeRyGFU7jwpcrjy2STbyM8Yryaxu9XtpN9lfuHHTbLz+VbNv448U6fzLO8o6fvk3Ctli4PdEPDSWzO5/svULZjiIN6kKCP8arXIu25IMRHdUx/Oqln8TryKyin1CwhZWbGVO0sO+BWpZfEvQLzIvIJ7b03LvB/KnejUd2Ty1Ymf9mjmX9/dXqk9dpBFOh0jTlyzXEsh9H4Nb0WveFtRGUvbZT0Al+Q/ka0DolpKu6GQMDyNrZFU6UJq0Xb0J55RfvI5RDp/wA0cFnNORwRt4rN1PSFlkxHpssJPdTwa7WTQXAzFJgj+8CKi+wX0JwrP+DZH5UvqiWqd35j9szzu70G9tbdpwhMY6+oqhbXJiGASDXpdws7qyXBI7dNpNc9r2n2iWc1wYVDIMgrxmuadOVPSR00l7VNroY0FzJeSRwKSQeW/Cuj0G8sLfSLjzVXzy7HnnI7DNc61q2mWf2lHxJKgIAGTg9qzbVzI3ls21T1P9KEtLIzktLmuljbai7SecsczEkc4pQs1gWt5338fK4PU/WrjaJb6joUt7oQlXULXm4tXbqv95fb2rgLq/mnfmVlIPQnBBrRc1J6kcqqx0Ov3M23zEAI75yfypd2E5xwfWsnSdQM6CGYBZAOGPAP41eeVRnaCzd2PT8BXQmmrmPK1KxL5hLcmrEM+w8YrND1Ir1nexvbodBaam6EfNXX6FrhGMMQfSvLZdQig4Zst6CoZPEdzGmLUiMeuOfzq1VtuS6Tex9M6L4gWPaXmCe5OKta7D4a8TiOSe/isNXj/wBTf20oSWMjpz3Hsa+RpdS1G9uVj+0TSSMcYDHArUZf7NhzPJI8xx3Oc+1J1E+hSg1pc+rdK8Uax4f1CPTfGdk99ayAC21izgLB/aRR90+4roNV0fTdWT7RYXEJkPIZHBz9a+a/BfxA1zSGigvdYvlsDgBEw5iX6Gu9lTwzr10t+vj+KO62bVQKIGB9Gx/hRG26YnJ2s0dJrSSaFY3VzdKEWBC+4dDjpXzcNU3X13dTwpcPO5Yl+2a63xzr2s2tgdGudTju4GJDSRzCQSAHg+uD71wCjgCoryu+UdKN1cuarILi13raLbhe6j71UBnyQo9K6PWJFOgomPm4Fc2G4FZ0y7XPTPAXg+x8QaDHJHHHLKuVlzwVb/Pen6p8IkN0RHfi1BOFR1ByfY15/pGrX+k3Pn6ZdSW8vcoeG9iK1vF/jTUvEps/thET267Q0RI3H1+tdHNG2qMuWV9C5f8Awh1oMUs3DgHkyLtB+hGahk+EHiS1aMsbWRCcMEkOR7YxTfD/AMQNb0/EU1w88ScDeeRXpPhP4oQzstvqsSMrcbjwcn3pqMJA5TjocJJ8MZlwC0m7HOBnFU5Ph1MoOHlb6L0r6Ee8nn08y6ELG9kOcCV9pA9M1gvd+L2kw/h7TpEHXbdqMircIdiOeXc+d9Y0KLS3CySuz5+7trY8F+KpvDV6CS0ti5+ePPK+4969a1LRbzV2Lal4MPmEEGSC6T+Wa8/l8E6Tql5JBY6oNOu0YhrW5GcHnow4NZuNtYFqSekjsD8T/DhOc3QLdjCOP1pB8RfDMvDSuv8AvQVx83wl1hBmG+spR/vEVRk+GPiNGwgtX+koFHNPsHLDudzceKPBt6uy4a1kU8Ye3/8ArV5Z4x0bTI7trnw/eRTWshyYc4ZD6AelarfDbxSoz9jhYe0y1A3w88UjkaaPqsi8VMnKSs4jilF3TDwBqUyt/ZkrmMZ3RseCPaul10CSAqMExnJJrS8K+Gw8McPiXTJ7S8T7lxHgq31I6GunuPCdn5TGXUiE/vFRn866KaajZmM9XdHjumyvFqlnJJkFJU2HqDz0zXtO4r4j1H+60cLj/wAeBrjp/BlnIxFj4itThg6q+DhgeK6yOK4+2pdSmKUmERSNCwIJByGx+dFgvqW9T/49wR2wf1ryX4tbrfxjHOM7ZrdPxxwf5165OoltXxn7tedfFnTnurvRbhMEGIxt78g/0rOWxotzn5VWGwXA6Rlh7cAf41m+JyEuLeBf+WUSr/X+tbFwolZEyAjOkeB3BPNYfiSQSaxcFex2/lxSnsFPe5lcqaD2zQetIDWJuaFlkWMu08Fj+OBmtCBVW809B/z3JI7dzVWzCiyj3D5TISfbIq/ahZdTstuCAryH1+7Wy2MepzGot5l9M395yarY9qkkOXOe9A6dK5HudK2I+tLTjTDQCGE8U1jlTTuuabJ9w0h2Fszg1v2zsNLRzgLHMp3dwTmuetjzW9Z/Not2uf41b24//XWsHoRJHTX6D7be7s7ZFG3HuuKoSSj+w9DmAAMU4XPtlh/hVyImS6tHmyA9sjnjuDWM99BFo89lcDmOUmPHXeCCPw61aZkkdtboqxsyk/M2cehPJqK6vo7cckM/YUpkaLSVnA5IB/MVz8gLkvJyxrovZEJalfXdTuZgxjJVRWDpTyXFy3nOxBHftW6tsZ5PnyEq3cR2kcBWFPmx1ArNxbd7l8yWhxOr2wS4ZgevNZw4NdBqiqwyFNc/KME4rlqKzOiDuhshBGKhxTieaQ1BoCnBrpPDAF35lqT3Dj8Otc1Whol01nqMUgJAzg/Q04OzIqJuLselsoVQq8ADA+lR7SQR3OAPxqRiGAYHIIBH0p9gnmXsKsMqG3N9B1rqR4rKniJ8XrRdoFWL8QOf1zWOTgcVZ1KUz3UkjHl2LH86qkcewrN6u5QrHEUjj+BC35VxKDdcMT0XLGut1T91os82SCziMfjkn+Vcgh2wSv3Pyisqh6GEXutkGckn1ooxRWR1hRRmkoAO1aujMRHckscBQAM1lVoaZ/qpPcimtyamxpRXM8YwsrY9+aoazLJPPHJKcttx+VXFFZ+pn96g9qpt2MoL3hunLulk9kNU3POB0HSrVo2yK4YZztCj8aseHNKm1rV4LOAZLsMnsq9yfoKiTUVdmy3Z6D8INALy/wBrTqDHFlYc927t+HT869YuGCxl3ICKNxJ6DFVtNs4dPsIbW3ULHGoVR9K57x7q621qtjG+HkG6Q56D0/Gvn69V1Z3NYo5LxPqh1PUpJj9wfLGPRR0rnZ8zSCPaSg5JqRZUnnJVycdu1WDgLnpSXuGpDFsj+SNcKKoazdEKIV4Y8t9KtSyiCNpD90cj3PpWBK7SSM7nLMcmu7CUOeXO+hnUlbQb2ooo716piIQCCGGRSQXUti4HLwnt6U760qna6tgEA5welAmk1ZnaeKPDOuaArPLZG4txwJrf5xj3HUflXFSarOw2qAtdv4b+IuuaQnlXLDULRflKTfeA9jXSj/hBvHP3lGl6o/cfISf5NXk+0qUX++hfzX+RstVoeRQSNMhDn5h3+tVjCASGbkV3/iD4Z61o8jTWKjUbQch4fvAe6/4cVxF1GySEMpVxwVYYIr0aVenVjeDuQ00yt5Y7GlEf41IoHcinjb2BP6VoFyPylA5zTQijruNWAM075QOlFhXKuB2BpV2k4Y4qdk3dWx9KhdFB4NFguPPlgcHNR7z24FM4FOCs3OMD1NAAWJ6k03JJ45+lS7EUfO2fajcB90YoKGrGzdeK6zSZ/OsUyfmT5T+Fc/bWk1x8xOyP+8a19LaC2uPIjbJIyfevPxrjONluioJo0phlMsSMdxWXLqUlpPsZSwXBUjrWuxIBxgn0NYerWTIXuN/ynoB2rhw6jJ8sy2enaHdre6dDMOpHIrJ8fW7tpSXUQG+Bssf9k8H9cVk/D67ZopIZCRtOVrs7yBb2ynt24EqFT+IrhaWHxHkn+At9jx2SeSThnOPQcZqMYH3QBTbhXt7iSF1w8bFSD7VEzHPJz7Cvq4KKXumTbe5MzAdTUZlGcKCTTQ2eAAKaynOQeapiHb2LANwPakIBfGM59aAvfNOYfMGFBRGBzgnA9qCvcCpGxu6UnUUWJGqvfvTgADmmk4HNKh9aLpDJcfgRQxz9aArOfb1NPUKh+Xk+pqJVexUafcYsZI3N8op4OOEGPfvRgk5Y5NPWMk4AJrByuaqNhtABqcW54JOBUyxKMYUk+9UqUpCdSKKyqSMAVKsJH3zj9atIgY5wox3NTxwM4ykZbsCRgVtHDpbmcqzILGzkuphFBGWc9z0A9Sa6+003R9PiRryeOWbuS/APsKo22n3ElsIog0Mb8kjgv7Z/pUkujrbJkABz3YZJqKmDqVlZNxXluZvERi9dS9N4hSM+XpdmCg4MkhKj8B1qlc6zeXKlGnVFPBWMY/WqEljdnBdJGX1UZApixgDAxgcVNLLKNJ3cbvu9ROvKezJIYUVsYVQerYya0Y4owo8vZKe5c4A/Cssbl+6SKkWUjGR+I4r0IqKMZRbOhQAAAgAYzhRileRchUUNx3NY8V0w4EmfZqtxXIDZZSPp0rdNGDg0Whl+uRjnHrS4YkZwAaI5kYAIwOO1SDBxmqsQRFcMc8g06NWCjjip1CkY5PtUU9zBar++mWMZzjPNFgHrGcjK5z708xNkcbV9T2rFuvEPVbKEn/bbj9Kxrq9u7rieVtv90cCpckti1Bvc6u4u7K15muAT/dX5iayrrxG4JWziVF7O/J/KsOKFSpZmz6KvLGkvba5j8sRwlGboudzH6+lS5voWoIkub2WY7rmZn74Y8fgKpvdjP7tSfc8Cr1p4euZiGuG8vPb7zf8A1vxrfsNEtbddzIu4YO+Tk/h2FZ6sq8Ucvb2d7ff6uNtp/ib5Vx9e/wCGa2NP8Mbgr3LFu5VeF/Pqf0rXkvbe0coBuk/2uT+XpWdcancTFlBwP7uMnH06fnTUV1Fzt7F6KGyskKwqoPQ7eP16/gSKgkvSE/dYAHYDA/DufyNZhmLjecnB5Y8n8+n5Ub2yQM5YduCf60yS3JOXAJYn26Y/Dr+ZFQ7twPAx07Af4fzqJc/MBgheSBjA/pSiQKQxIAPA/wD19T+FMBLouLdSrFTnJABLfhxn8gKhjuXSQiY/LjnHf6nOPzYmr1vpV7dMXdBBbMc+ZL8ufoOp/GteDS7O3A2Rm5kByJJvug+y/wCNTZsq6Whk23m3CZt4SwB5ZvlUfiRj8hV5NNQgPK7Suf4UyqgfXr+FXrm6REzcSAgcBegHsP8ACsO71oTq0VojSeuOFx7/AP16b03JV2aaRxxNhnwAOI4/lUfX/wCuaga+8tNi4RgcbU5OPr1/IVhiaa4IZ5SRnHyHCj2z/hVobI1CsmPULxn8OppJjehLPOHYlnIyOMcsR7+n4mmIABu4XsCTn8j/AICmoyscRqSfQDJ/wFSpEWO9j8o4JB/m3+FK4yMyHftjUtnr1z+Pf8yKcUZhs3Mv+6AT+X3R9TmrSRCOIg4VCemMA/h1NQm5JJWNAQvrj+XQUaisiS3tVTDoAG7tuyT/AMCP9BTpZoYCcHzHP8K8AfU/4ms+e4Lry7ENwAD+g7mmJDuIDMRxnaOT/n60wfcsTahLKCq4jHTC9PzqsItxBc4z/wB9H8OtSgqmSB+IOT+f+FJjgHAGeB/nqadu5NwWNVJUD+v/ANYfrQTkdOfXPJ/Hr+VSxwvKcDgL69vw6VMIQqseWf27/jT0RKTZXSJmPC8H2/p/jV2xLQPlLp4h0bYx/kP/AK1NWHK/O2FH4Af402a8tLKP5mBIHSlzMrlRoLKQS0UYZicmSXB59QvT881T1HU4IZQ93cNLLjHqR9BWHd6nd3hxB+5hPAZuCfoKp/ZERwJWZ5Tz6n8v8alyLUO53mn3unXscSx6hGWIxskUxn8+n61pA3MC5t3faDt/dtvTP8v0rzVFjyQByOpB/m39BVi1lu7eRWsGmBQ5DISFB/qapT7ol0z0CW5jm/4+7WCfjkFNjfXj/Cqr6bpsr5AuLMnnMZ3jPvXO23iHVIpFjuRBcKDlt8eWPtkc1u6XrNvqMywmwuYHLEGSP50X8DzRKUGvef3k8slsSRWN9GxNhqEU4zwrnaf1p7ajq1iQLuzfH95eQferlxbeUxEKG5b+HPyqPqf6Cksk1NJAZrtUUDAjj+6OfSuCs8J9pr5GsXUHjxVEsaiIsbh+D5oKKv8Aj+lUd0moT77i4WY5zy2FH0Fa06W0in7ctvJn+IqFIrJaHw/A+5ZI9wPZif0rm+uYekmqS19C1SnJ3kc5jYzoOdjEfka1PDMvleIdOk6YmUfgTiqFyIzeXDQnMTMSpxjimWM3lTJIDzG4bP0NeFPVto6z0XX/AAvaalI8JaSLB6qcsST/AHfT3zXJah8P72Jf9Gu4JQnLGQbQg/lmuq1fxDa2GoTJPI24hWEarguSAeT6c1zmpapd6w6rK4EGcrBEePxNe/hFXklJu0Tkm4rQhd7a2xCn+mXKcYP+qj/xqBYLi/fJYyhccZ2xIPr/AIVvaRodsQJL5wVxxbocA/U10rQxPCkSKkMK4ARVBz9B3Pua6KuY04y5dzKNF7nKrp0FkIwyi5uXOFJHyD/dXvj1PFW3gZyqyGWW4II8qI5YDtufog9l5rdOkRSAebmJS2Qitudj7n0x2FLPYuI1RdkMUYy0MfAIH95q6KOY0J6Xt6mc6M1qclr1kBoN2QS5iwxjhBEUXIzz1c89f5VwR2+cj87geMV6X4hMk+izbNqW/ln5z8qvjnCDqfrXmnQZxXnZm4yqKUX0OvCX5Wmd5axNcKGKbYjg9etM1eza5svIi+ebogzsSNf9kep9TXHW9/cwYEM7p7ZrQtvEV9G375llXsCMfrXm4etVw9+R6G06UZ7mhp/h4xZkvJPKRB/AN5J/2V7n3NTSzERmGCMW0XRsk7mH+03U/QUWvieBsedC6H1U5FaMep6deDa8kRzxtcYruhm0lpUj9xjLDdmcxdX0SOUtyWfoX9B9e386rx3JxuDgjPBYcD6Dqa6yXw7ptwFKIEA5Hltx+VZ134WaPLW92M+sg6D0FddPMqM93Yh0WiiNQk3EyKkjgfKD1H4dBTo7uFgRKjKMZZuuT6ZqvNoOpRxsyw+Ymf8AlmwJb61QmFxExSVSmOzjCrXZCvCfwu5k4W3NYCCdlKSKD2DcKo/mTUX7jzxAjSMzDcfk5as8SqBuJ4PAbufoK1bOz8hEuLxpIEYZSFT+8kH9BWorWI20w3Lldibl5YsfljHuelWbSO1sQ/8AZi5kf714y4Y+yDsPem3EzOo+0bYrYfct06fU+pqFdQAQgxFCeA3Ugewo0FqR30kqxtFaMFlbkuwyfc1zr2MqeYQhlLdZN3zN6gegrpVktZCyszIvVv70n1PYUkbrNO0ccJLKBjBwq/U0mrlRdjkntVR1Do6sfux4+UfU0wwn74kRscFyOB7KK6+W2TYTkeWOsh4B9hUQ0qFwst2PKiB+QY+Y/wC6PX3qeQv2nc53TLC5uLtRBEQF+diTjgd2PYe1bBFXlkVYjbWiCOAHLDOefVj3NU2+8frXjZpGzi0dWHle5LCR5bpjqCR9ao44q3GcHrVPJwR9a82Gxt1L+hOP34B6Ypz+Jks5nt5rTfsOFYNyfwqn4eyLu4TnG0E/nWVr+I9TmCArkDc55P0FengXyVXbsc9WKludta+LbPzAq3lxAy9Q2SP8K14tZS7A/e2V1noGUZ/TFeQIpkZEjUksQFQfeY16J4R8MixZLvUcG66onaP/AOvXpVsYqUbyOdUL7G/JY2lzteTTIxzk/Nuz+FaDTWtpame4xHCnr1J9AKbeXcFjame5chT91c8ufauN1G7a9zfak5jtF/1cY7+wFeHUqzxEuaR0RioqyLd7fNrExmun+zaZEchQeW/xJrF1fUZL5hDGDFZxj5Ix0+p96oT3ct9MjEbYVbCRjoo/xqzMAQAKq3KXYrpnOB6VLZxm4k4KoAfmduFQepNTafZPeXPlowUDlnbhVHvUOp36BH0izjZomb/WIMNKfU1cdREmo6mFik0mwjke1kI3SqMNKfc+g7Csvbb2cEkFtckTk4eTGQB6A/1qNpI7WMw20/77OHc9vYH+dQOJnUfLFKM9RgmttRpWFTzepaCVffGf8aGC4ObN1z0KE4/rUDCFTiWKRGz/AAmtSJo9NQv5pFyy5jR/4Ae596H5DFjmTTEZVkZbuReM8iIH1x/FUK+dN85NvP67sA/rg1BNLcXHaOfnJPBOaD5aAie2kRsdVJpNAOnj25Etm6+hRjj+oq5Zxw2MSzyTOkkinyo3HAP94+34UWMcUcIvJZnWIHaiP/GfT6VDcTT3Mm92gnc9uDgegHpSu9gGOJpQzF7ef+8WwCfxPNRtCmwebauD2eNj/wDXFLIijDXFo6A9NpIqbT7aKd2dbqWKOIb3LDgAe/rTvoBLp0MMMZupZ5o4FO0IR99vTPoO/FRyy3VxM0jSW8/s2Acfj/jU1xdTXTEReQ8C8JG2CR749T3qv5YHM9k4UdShI4/lU8wWIjHtX57J8H+KNj/9cVZ0yKOaRnM09vDEN0hx0Hpn1P0qONI5Zljtpp45GOFVhkfpVy9nfalraTxTIP8AWF/43z1x6DtVXuBXvJ5bydvLa3eLOEjbHyj0yf8AGqklsvO+wP1hYn/EVOYQOZ7EnHUoSKjU2yyNsluIfTcM81SlYCGzsIbu4SKKSWJz13KCFHck8cCrV5PMt4P7LuBFGgCqyOVZvUk+/wBauTvLZWnlLMj3E4BfdxhCOFx6n/Cs9omx+9tAf9pDiqU3uK1zb07XfFdpaPNHqMptlIDMxWXn8cmtWy+IOrxhfNWyusd2Uq355xWBZXEbWhhWFkAGSpPJ96z2ji3/AOrYL712QrO2jMJQTeqPQJPiHNcQMsmkQZII3LcdPwxWHfeIXv7Oe3e18o7Qd2/Peqdpb6I8I855Uk+nFNltrRPMNlIXyADn60p1HN+8Om+RNR6m9qJAmsEILL5QyMe1CJ5MxeCCAqerH+H8KbqDMl7bbSRtjAJqzJNCxCvFtkHZeje9aUtr2Oarfa9hItQk0m9g1Gz++CRIp6SL3U0eJ/D2kT2667bQSGwujlhH1ic9QR9ap3NwkLNG0RdW5Uehq3oGrGxmltbwCTTbvC3EfaPPRx7iurSSscyTas7rzRN4ah0i6tG09It+wbh5i4YZ9DWTrlhNpk4SU5tz/q5AOo9/eqninTdU8M64r2MjyW7YkgkAzuU9q6SXWrfVfC7vcx4nPyNERyH9RWVObd4S0ZNSjOhJVKd5Re9zlM56dKz769PKQnA7mptRY20Qj6MeT7CqFnbPdy4XhRyzdhUTdnY9CFrXGQRSTyBY1Lua1rbTIYlD3j7iD9xThfxPU/hTpZotPi8qIZc8n1J96z/PeSTdI2T/ACqNi9Wb39qRWaBLC2ij4xuCYP59fzNVI7q2uHJu483ZPyy7vlUey/1qiFaXnG0HvSC0Uuu47u9HM2LlRduYp5GCxK6wnlpipGR7Vf0XU7jRbpJtOKAqckOgcP8A7wNVodSuIkWCSVpLccKjchR7VBLdxRlleJy3Yqau/VEW6M3vFutSeK72K5mgtrSeNNm2FAqsPXiuduIHtnAkxnqMHIpjXkWeFkA9aju5xIo2uxGOCRyKlu+pcVbQlvLkvAEyevrVPdUe/IHOafCnmORnFTEq1hwbFOVfMlz2AqJ1ZDhhx69jVy0A/s13XmQyYx7VTfQVupAGB4Pal8x4RujbpULgqRu4J7U3JKkVSl0E4k6a5qcbfur+4iHokhFSjX9YByNUvQf+uzVjnhqk7VHMx8qNkeJtc2sv9rXpUjBBlJBq9FaTT6Il5GYmw+W/eqH/AO+c5/SuYpAADkdaXNfcOXsdzc3mpWllDcWlzexgfxI7bR/StLTfFuvzoiyak7cdTGhP8q4C3v7qGIxRXMyRN1QNwfwq9pmo3NtKrQygEcfOoYflQpNbMhwO7034g69HdyWzS286ryC8WCPyrQh+IeqESM1tasE6qMgGuNt4mvZDOJY458c7IgAa0LTS7iSFlBgy/B3Ag59aftpLqQ4I6JfiHPdWzSHS4sKef33GfYYqG48dTPZgvpwERP8ABcFT/KuVm0+6sEaMNA8ZOSAxz+dVru8ia1EK2rIQc58zNUq0+4OmrnVjxRY3LiOXwvYOx5LOykn3ztrLmvrU3ZFnpKWjfeIjunA4+mKxrS9W3Uy3NuXb+Da+PzFQpqO64aTYFJGOvah1Z9xKCO9g+JmlxW8cE1nMpjG0lWz09zyfxqrqvjXQdUs0hl+0KY23xlk5U/X0ry2+Km4YxjAJzUHPrT9tLqaKlE9Atbi2uLq1+zSCSNZd5A6jC8Z/EVzN9JvvpmPBLH+dZljcy2twskTFWB7VfvAHk83p5nNV7TmQlDlY35SDUeR2pOcY4xTVGDk9qVy7Gzb4NlFz0BJ/P/69XNLfGoQ56JaPz+FUFwNOY5yRE34Zx/8AXq3YuTdXLf8APO0cD+Va30MranNSEFvpSk96a64bGe1IuSfWuS5vYU5PammnnIHSmc45pghhwOveopOhqVuaim4BpFDYWINb2kMHsdQjBwTHkD1rn4etbfh4jzp0bGDG3X8auL1IktDqrcefFpI3gGSFot2PToKyvEemFNaH2dNy3JXgA/KxHzY9s5qxplyv2TS158xJyCPY85rvJLaKJVvZFH7tcjPc9q6IxUkYNuLuYerXCwPBaH7oUKR79zVEwb1kkAPlqcZrNubr7RqfnPyu/AHtmrPji+eGCDT7UeXCRukbuxpSmknJjULuyK03iGy05mTHnSYxtXkD8f8ACt3wRbx6vcxm6RPLcMWRjtI9MDqf0rzjKRviOIu54Hciu0+HsssGsQLKQhJ+71Ofc1w1605QdnY6I0oxZ09xpNrFLKDFAAp4UR7v1NcrJbW41Nw1vFs3dGjUiu88RhY7lgTy3IBbH6VwupSR+eJFIBzg/hXn05uTvc6HFJF2+0jT5pcLZW4V14woGDjrXnF/ZRx3MiBSu1iOK9KFyWtoJd3AO2uJ8RQ+XqUuQRu+bFdUGyFa5zzWrD7rA+x4qEZjfkEEGtEcGnmNJV2uufetoy7jaO10m6E+jQSk5KphvwrQ06Tbb3lwc/JFtU9sscEflXI6S0lpZzWsmcPh4z6jv/KumjfZ4diXkGeUt+CjFdsXpc8etT5ZNmTJzJgdhTc/Jj15pWOCcU0dKzMjH8T3OLWC3VuBl2HqTwP5Gufm+W3iXPJ+YirOsSma/l5yqnaPpVW5bdLx0AxWMndnrUo8sEhlNooNQahSUUUAFaemL/o5Pq1ZlbGnri0Q+uTTRFTYsgcVl6ic3J9hWsorGvjm6k+uKqWxFPcbHIFtZB3Y1678KtEOm6Q2o3KYuLrlM9Vj/wDrn+lebeEdN/tfXbGzIJjaTfJj+6OtfQDbVRY0AVQMKo6ADtXl4+tZKmjoiuozUtRj03T5Lu4bgDgdz7CvHNTu7jWL+S4kJXecnPaui8Y64Lq8FquTHBxgdC1c2jMWywCr9a4YLlV+prFFiGNIl2piiYkptXqartdKDtjUk9Kr3s7Qxlz/AK1+FHoPWqhSlOSRTaSuU9Sn3yCJDlI+p9TVKjvzSkAV7lOChHlRyt31EoxSmlBFWAlJTjyaBVCJ/uXAz91+D9apyqY5WXpg1dnXdGezDn6VHOvnJHLxnGG+tVONxRdjd8M+Pda0BlSG4M9uP+WM/wAw/A9RXe/8JP4Q8ZQCDXrFbK+cYEv3efUOP/Zq8daNV7D866bwKtje3raXfwpJDKC0ZbqGHofpXlYvC04RdVKzXY2jK+hpeIvh7PaymTRLhby2blVYgN+B6N+lcVcwTWkzRXMMkUg6rIuDXca82o+BL6E6XeSPp8+SIZfmXI6gj8ua0rXxd4e8RW623iG0W0kPAfG+LPr6rUUsTUUFK3NHutwcTzHf7/lTWlx6CvRtX+GnnQG80G7E9ueQFbeuPr1H41wOp6bdaXL5d3bSQt/eYcH6GuyniadT4WTy9yoWZuxP14pNvq35Umc+9PCMfb61vqAnyj7oH1NLkkdc09YV6sSfYcCnjC42qFx+dOwyEKx6Kfx4qSNACCxwR6DNOdsnLHP1qNplHv8ASiwE7SMf4mIHQE5pYZjHMkmfunP4VUMrHgDFJtJ+8SamUVawHcRukiqQR8wzRtSOPbIcp1y3SsfSGM9oNrHzIztx6itZpIzGom6njBr5+pT9nKxqnfUuaPst7tXT7rV2kR4BHQivOBdositGxKK20+1d3pVwJ7RGU9OK4sVBpqTGefePrD7LrxmjGI7lfM/HvXNFM816b4/sTc6L56Al7Zt//AT1rzM19Dltb2tFd1oYyVmAA6UufSkpMHNegSLTh90+1AxSfx/UYpbBcPvL7g4oHA5pEBLHAzmpki5+bLN/dFZuolsXyXIljLt8oOKlVFTr8x/SrVvZz3LiOOM5P8Kius0nwcjBXvpTk8+WP61xV8VGmrzdjWMV0OLAd24BJ9AKv2+kXsqFxCwUevFd3/wjum2Q82Q4C8/M3FYGsagbtzb2DP5I4LAYB+lZ0MQsRJKkr929gk+VXZhSWywHY5HmdwCDigcCtCz0W5uXwiHGeSB/Wuh07wkXwZSB9Of16V7NOi+iOOdZLdnIRh5DhAxPsMD860rLSLq64CHHXjgY+p/pXfWfhm1hZWOCRznqc+1bUNpFAMRoB6nvXRHDv7TMJYjscXpnhUBQZSeeuP8AE/4V0lnottABiME+p5P1z1/LFa4AAzTQZC4AjwvqTW8acY7GEqjluQrax54UD6Dk0/7DCRwgz64yasqvcgVIuParM7lFNPAPUmmXWjW1whE0KPxjJGD+B61qAAjNOUD0zQ9R3scZeeEojk2szxnsrDcB/X9awL3Rru1LebHkDPKHP6dc/QV6oFB6gUya0hmTbIgYe9ZypRZpGrJHj/lEHHIPcHgj6igb0PBIr0y80C2uAA6AqDnDDIrHvPCaMT9lmZGwflkGQT9etZOi1sbKvF7nILcEffAPuKuQ3WPuv+DVYvfD97bk7oS6jjcnOfw9KzDAQcDrz1qbyjuO0J7Mn1R72aJRZsij+JQSCfcGudnM0L/6THIh67mGR+f+NbamSLpkVYS6BGJUBFF+YFFxObDlh8rZB9DxTlX1rbm03T7ty6ZhlP8AEhxVO40S9jGbaVLhfRvlb8+lKzDmRUG0djUkN3cQMWicgnrnnNVpjNbkLdQSQn1ZePzp0ZDjKsCPai4WNy116VY9kkKH3Xj9KgmvpZy22XA9Adp/Pr+FUUOOhFO49BVE2Q9/QggH2x/9f9aXqCOP6f4fzpiyOoI3EA9uxqRJhn5kHTGV4NACDCqeuf1/x/LFKqtK6pEjOx/hVST+IH9TVuyjsXbNzK5OcCP7o/E1uxCOO3xE0UUX92PAH4nv+NFhN2MuDSXBBvJREP8AnnHiRv8A4la07O3htxughVG/56SfO/5mqFxrVrbBhCvnP7dPzrGvtUu7rILiGM8bV6kfzpNpAk2dDqOrWliha4m3v05O41zd14jurgN9lQRxgf6yU4H4Dv8AQZNZd2iqoOMsOeeSPw6VWVud4JZ+m7OT+f8AhWcpu9jWMFuXC7zlXuJXmY8Yfgfgo5I9zipjtL4HJH0wPw+6PxJostNnl2+avkxPzgjGfoOpP1rah0qFUQYLuvOW5x9F6ChaibSKltG7rlAMdSzHA/Bj/JRVuO3G3c+W79CB+X3m/GrjrDARJPKqkDqTlv8A634VQuNaWIlbOPk9Xbk1e25G+xd8uOOMNNtRcD72B/470/OqF5qCQBmto9x/vsc4+g/wFY1zeTXE2VLvIOuMce3oKYk42ybwGZiMmM4Ax6tUcy6FqLLb39w8qiXLZ/hA5/EDp+JqV7lnc8AEcbY8YH1P3R+tRM4dWB/1b4HlsvX+ppfMjQiNVJYdBgEj6DoKaAb88i5BCr0OCR/491P4VIHMZVUy2RjGOnvt/wATT4beWdg2CAePl6nPv/QVuWmieTCGnBRTyFxlj+H9TS50t2JmZbxSyEbwC2OvX8u35Zq/HbRxIHmYLnnk8/l1/PFTszRzCOMJCT/ExBb8/wCgp7ac4ZckZbo2NxP07VEsRTjvIShJ9CrJIrgeUhjQHIOeT9B/gKgmuYoEJyCR3bGP8PzrVTS442eSeRwuOeeT9TVGNdFNwu5XkYHALcgfSueWYUltqaKjIw7m/uZxmJSqdnbP6DqfwApkVhcGRJDbTyMx4LREk/QdB9TXYi+sYEYQR5cchgvU/WmR+IJzHkwDd0yTXJPNF9lGqpGM3h7U5RvWERluPmcBse57D6CrNr4RnaL9/cxo391VJX8e5p0t9eSSFxOUHoOajN5ct8sl1Kc+prmnmNR7FKkjRtfDOnwMHvbl52HRThEH0FX5YtGiO5mQ8Y2hiR+Q4rmTy3LEjHUnNRCJASTnk561zzxlWf2mP2cTo5dW060U/Z7cnH9yMCozrzsoMduAD/eOP0rHLAf/AF6Y8qj+IVjzzn3ZVktjSfXr15SqlI1x2T+tVrm4nuSDNcSkjsrY/lVWJvNLCNGfb12jgfjTgs5cAQEIf42IAHvVrD1ZaqLFzxWjY10aTAeRuPfNQi0RHDxuQSc/WrDoUCNPPFBCx++R1+lVb28sE+W3uJXI6uVxu+g9K2jhai3aQudPYnQMGO4nGO9LuG04xVG+kOntAzpI4niEqFm4IPtVD+0nLbYo1G44wef51m8NJvRl7nrWrzQXEWnyy20E6SWqHkEMSOMZ/wDrVhS2GjSMTvm09xznzAVH8jXC3uq3zymD7TK0cRKIqngDPQCqqwXc/Plyt7nivYo4l06SptbHO6F5Xudld3o0xv8AR9ZinXqOC1Pt/GckEDylGkCEAsuQOa4prKRQDLNAmexfJH4V2Pg3Ro2sBc3cX2m2NwjKnK7yvp7Vy1pwlq0kaqHL1Oytb/VG0Bb+QJayy5aGFgWZkHVmPG0dMfjWPB4+DRq+p2LpH91R/Afcjv8AjVbW/Fb6pdzCCeGFs7CjDbtA4Cj2ArnNVspZbMtzsBDF85AGe1cytzbWQ1Huegy+KdGu7OZ4pBNdSRFP3gAIBGMKDwB9M/jXlrsUJDqyjJ6g4/OqUtxAkZht4wc9ZXHzH6elWbPzo4RJNcNb256Z5LewFaOloUlY07fT3ntEnjkQk/wkYx+NWn8P6qtsk62byxMNwMRDnHuBzWRa65LAdnlpJHngbcH9O9dzo/j8afZw213aPCgHDpySPpWTpzTBtnFOrwsVmR0YdQ6kEfnQr56EEV6HZa1o2s6mGujE1rEu4JIMb3PBLfStW48J+G79C1rEkTHktbvhR+FE4RWzEp9zy6G5mhOYpXT/AHWIrSg8Q38QAMokHo6g10l78O2Cl7DUSU7CdfvfTFYF74Q1u1GWtPNA/wCeTbj+IrJwTK5ky3B4o5AmhK+pQ/0rTh1vTrpfLlcc9pE/yK4aaKWFylxG8TjqGGKap96l02ttB2TO/S0sWmFxaxWzSqOCuCM/TpVBNNnnmmeXKSNz5jtvJP8AhXJxu6HKMQfY1dt9Yv4SAlwxHo3NbU8TXpL3ZGcqMZdC3d6BqO4uCk7juDgfkayprW7ti3nxyoByW2k/kelb0PiaQACeBXHfacGtS317TZ1CzbovZhkD8a6YZpVj8cbkOguhxAlJyCPoo6/iakVgrbU647Hj/wCvXeGz0m/Usot3J7rjJqvHoVtA7tCGhfGEcfNt9wPWuuGaU5fFoZui0jm4me0MckriWQLlY35CD1Pofaop5pJXaWZyS3T1b2A7CtSfQnLMLaZJipyEYFefU+prHvNOv49zXEEox/EvNd0MVSqfDIycGt0SxXNuvyyRtx91B0+pNV3PzE+5qmZDlgwKYH3Twas9cccYH8q87NHdRZ0YdWbJ7QqXdCOcZFUGbDsT61btABec5OVwPSqsq/O/1NeTGx0dSbR8G9kKDgp1pmpaVJe6huiy0jABVxkZpmhnF1jdnKn+ddXpcQP7xWIbpkV1U6vsZX30Mpx5nYj8P+HYtLHnz7Zbw9X7L7D/ABrV1HUbbS4PNn+aRh8keeWPv7VX1XVE0yHEn724YfJH6e5rl5m8p/7Q1Y+bcOcxwE9fTPtWd5VZc0h6LRFq7upJlOo6s/yn/VQjv6YHYVg3VzLqEglmIAHyog6KPYUy5uJb25eS5PJOAOyj0FPtlzGo7jmt7KCuA60+V/ocVq6fYy390UjZY41G6SRzgIvr9faq2l6fLdyvswsUeWkkPAUf4+1JrF9HfQwW2jERLGeATh3Y9STQo3d2LyQ7VNUgmjOk2KNEgf76jcZWHRieo+lZbzPax+VbTLJc5PmSFvu9RtXPb3ouXnsFARfOncESyqMgAj7oNZRaFnw0bof9k/410RihpE8zHaC1ruPdkBH8uKFjtZBy8sTfQMP6U6BfLYm3uNv+9kVpxCWGD7ReKk4x+6TAYk+p9qTlbYdiO3t/siebJOs0jLmGKQ4H+8c+lU5zcvIXngEzE5LqM5/EcU+e4iuZXkuYnEjdSjY/Q8YpoEKFTBcurHswxg/UUr9wsRZtyfmjkjPsc4/Crlkqu3mPcyC1jIDlhjn0HbJqSC3vLuUAyxyxDl2JDACmancIyLb/AGRkt42O3GVPPcjpmi6egBezy3JJaKJ414RV52D8KpFYcfvYpUb2Of0P+NRhbZgcSyRkdMjP8qtWq3TMq286S+i7uT7YNVawh9sXdkjtLmTef4WBAHv3FXryZ1gFvbJDPAAC7Dbl29cDnimXEj6ZbCFrcNcTL+9ZBjaD0UEd/Ws5DaE8mSIe2D/9epsPclLQAATWssR9QSP0IpyvGoIt7yVP9lgQP0P9KgVmPEF534VjirtpbSxLJdXcSOseNgAGXbt+HrRyhcvGO5s7DerQy3c3ykcBkTH55NY+3ap8+ymT/aXcAPzBFR3NwZ7hprhZVkdizEHI/WpobpoyRbXrIT2bIp2aEOi+zqC0N3PESOhXjP1B/pWhpzPse5uJIZoYwdocAl37DLCq8dve3U8cZjhlRjgyYBwO5J61Hqk8DutssMkdvASEKcbvUnPrStcAnkM0zTXdm7sxyzxkjP48j0qugti+UmnhI9Rn9cinRrCsam3vpEfP3XXGPxqYC8aAlmhuR2GQxp7AFlZXV3cqkd5GyZyzMT8o7nB9KmvrmUz+WtoXt4jtQoMlh6kj1p8zfYNPRJbbZPdj59nVEzwPTnFUFaBCDHcSxuOm4ZH6U+Zitceslu5Jfz4j/dwG/wAKv2KxurgcEsnPrzUSPdSfLHcwzZ+bDMD+hq5pUIdy95iNS6hSvQkHsK0p1N7icbm9rhMWoo8WHAUKydeKth1KKFiAGPvHkrVDWGePUDLCQSowy+1XI3t5UV1Zo3wMxnua66TOWsvcX6mdqMrofLRFYn7rkdBWduJzHENw/jPrWpqbPjykA56N3rJkcx/u4+F7n1rdysZQhpojo9Bv01HT20LVZcKAWs52PMbf3c+lYtnGbTz3vJllFuTj0du34VQY9F75qC/ufkMY6Dj8aOaN1JrVGtpWcE9GVn83Ub/C8vIfwArauFj0qzSNOZDyvr/vGm+HYFt7d7qYYLDPvt7D8arXzNczNM/3m7eg7ClFaczJcteVbGTM5YsTkk8k1NY2zStubhB+tX7DSmvRLM2Ft4sbj6nsB71bliWNQqDAHFJwe7LU1siqVCjCjP8AKo5G2EHGW7KK2LXSppY/MciKLu7nAFWIVsLRgLe3kvZycBiMLn2rPV6QV2VdLVnPAHAdkKj3FRhfNcsckit3XF1CSEie0WCFD/Cvf0z61m6Sqbn84hQeBnvTlGcF7yBST1Rm3kexPTNVIZ4yNrnBHAzW34iQQou0YBHWsHTbRbmV5ZwXiTqoOC341MdRp6XZO424JwAeh7UsUnlvkVfMmkOiBrG6Xb/dlBzTf+JX5TqFvVfqudpAq7LuF/IjZleFiCCcZ/yKhs5CFePseaiBKZKng8U1Dhg3tg1LKSJ5xhhznjOaiB+Ye9OkILcHjFRk4ovqFtCKZcSGkVs8VKMscmrVpp8l0cRJuPXgc0mxJ23KKklgOPxpz8NjFXJtPljfayEEe1MFk/oaAuU/pVu1lTcA+R70fZHHag2r+lAXOr0ZSGDD5l9RXXxuyxZ615lpt3d6dKGiOV7qeldnZeJLa5hCTKYJf0NZyTIaI9WO5nI69xXMXBwx4zXSag6MG2SKQ3Oc1y15tVjk5pxJWpHJuZeucepqlNMEyqnNOld2GFB21XMRJ5q2y4qxGTk5NLTvLxxSbDUljehzWqh82yBHLIefpWZsOatWMhjco33GGDVRepMh5pp609l2sVJ6UhArUDWAAstnOGjA4HUnNT2mBHqzgY22wA59TURO2OHByS0fGPf/AOvT7YFdP1h8dRGv61o3oZLc5yXO845xTV+U1PIoEjcc5qM1zG4ueOaT5SKQHBpwCk5BxQmFhpXiq9xgKT61aYFaqTklDnpmhgiKA4cVs6LhtRVSOHAB49SOaw0PPFaFnPJb3Ec0LlJUbKsOoq4sUlc6XTI2t9fFozbmSTAC9M+tdp42vfs1jDZofnYZb/P+etVfA+nRXIOr3IUupYu2MAY/xrA8QXzahqs85Py7iF+ldHwxOf4mZ2dpBHYg1q+OVW4trG7jHEkYP9P6VjE1t3Cm78HxN1MMjIf5j+tYVNY2NY6SuckkbhCse3JGd2cAV0PhWxlh1a3Zi7vgS7ugC/n/AFrnxuCFRyCcYq0L2exu4mlVjgDEYOFArkkrxaN+p7J4nCHZK4B3p1P0rzHUCFuWGGxnjrV3WPiBcXlvHDDaQx7BjczFia5ObUZ7ibzJ53+kagVxUKUo7m0mmdRayhrVlO7jmsnxWm828/8AeTb+VUoL9oj/AMfE/v8AKtPu9Q+1wCGRsqvIJHIrpWjM7amIR70+NscGpJLc9VIIqIAqcMCKtFG3akSWAbHzRNjPfB//AFV0esYgjtrcH/UwqD9SMk1z3hcCbUI4GxtkIz+Byf5Vtas5nu5nPduK7YO8DzMXpKxmH3702aQRQu5/hBNOfOeaoa1KE02Ud2wopHPTjzSSOXU+bOWPcljUJO4knuc1Ih2o7D0x+dRiuc9hBQaKDQAlFFFABW5Zri1iHtWHXQ264hjHooqomdV6EoFYFyczyn/aroSMKa5uU5dj7miQqW56H8HtPL3t7qDL8sMYiRvRm6/piu28Q6n9gJdTlyhVF9z3/CqPw3s/sHhKFmUCW4bzm9wfu/piuthtrYzedPbxTPyDvXPB6gV4GIqKVZt+h0rY8RubsG4cKCWJySfXvSfa0BCquT3r13XfDOnt/pUVrHJCx5+XlT6VzcnhrSy5ZICp7bWIocox0aLUrnFGOJR5rAg9etZNxMZ5i7cAcAe1dX4m0Ka2tTLZ7nhH316kD/CuQr0MFFSXOZVHd2EYZo2jFLQCK9EzGlaaeKefaloAatLilprHFAHq0MnhPxqCrf8AEu1Rh04Qk/yb+dc1r/gHWNJimaFBfWnVZIfvD6r1/LNcvPCBIySLh0OD2IIro/D/AI31fQyiPKb2zXA8qU8qPY9a810K+H1oy5o9n+jKTjLc4vZKXKkbSODkcirOnNLZ38FzG4MkLhxz6GvV2uvCXjdSLhRY6m4xuPyPn69G/GuR8R/DvVdKLT2R+3Ww53Rj51HuP6ipjjFUvTq+6+zNLW2Ow8Uwx6/4TM8YDMiieP8AqPyz+VeRPMMYRM/hXo3w81B5LB7CckSQsTtYYyp6jFcX4kshp2uXVsoxHu3J9D0rmy5KFSdCXTVFT2uiPQ9b1TRLjzdNupID3UHKn6r0r0XTPiFpWrRLa+LdNQZ4M8S5U+5Xr/OvKmdV6kVGZv7ozXo1cJTqa7PujNSZ7Hf/AA30bWrf7X4X1KNd3IQkMp9vUGvPvEPhTWPD7E6jZuIc4E0fzIfx7fjWNpesX+k3QuNPuJLeXuUOMj0I7j2r1Hw58Wt8S2viG2DxEYaVFzn6r/hXI/rWG1Xvx/EejPJmnA6DNRtKx6cCvdrzwX4P8WWzXOjyx2krc+ZbN8vfqp96838SfD3WNGlYwIL+2H/LS3GSPqvUVvRzCnUfK3Z9mJxscfgt6mnAe1PZWSQpIpRx1VgQR+FOJ9hXctdSRkQ+pqQsRwFApo6Z6UuM96oC/oc5hvcHhXGPxrpdyuPmUfjXGxnY6sOoINdNHcg2yy/55ryMfR95TXU0g+g67CpCxVRzycVt+E9Q3I0WOfSsOaXJSJlG2Qfe9Kr2bzabfRsCduea4pUlUhyvcs9PuIku7OWFwCsiFSD714rdW7WtzLbyfeiYoffBxXstrL5sKSA/eGa898f2P2fWVuI1+S4TJ/3h1/TFGUVeSpKk+pE11OXOe1L9alSFiOSB/OnrAoGTz9a+kt2Mr9yuAWPygmrlhptxezCOCMu3t2/pW1oOhT6jhyTFbDq2Ov0rqJb2w0BVtoImaQjO1Bkn3JrzMVi+WXs6XvS7Lp6msI6X6HP2nhS9YhXVIk7ktkmups9IstMiBl8hRjlnHX86pyeJJTEfLtRE2cAyNnHvisW7N1qUoklhkuCOm75VH4VyqhicRpWajEp1Ix+HU6xNQ0mFC0csZIP8A5rB1fVLu4mxaymGDHpyazprS+ltxBO0UVuDny14H1qJYRbpgzKcfnXZQy+hTndvmMp1Ztdhbu4lMf77zp1HXJz+lXtLurFiACoYfwt1H4VQSQN9fyNNlhimxvRSR0PQivVpxjD4Uc0lzbs7azu4/wCADArQjvWPQD8686j+025zb3BKj+CTn8j1q7BrkkPF3EyD+8OV/OuuNZbM53SfQ73+1Y0OCG3elXbW6E652so964uwv7Z28xCrE985rdgvgcZIxWsXczasdArrUqYPesmK5U9DVuObPQ1VhGgI896cIxVRJveplmz1NIROFxTwtMSRTUy4PegBAtKB6U4AU4KCKAuM6dTUDWySSbz5hP5CrW0DoCaNrE8nA9qAIvIXHYfrVO90i1u1InhRsjBbGCB9RzWoq7RSkNjjH40gucZfeFYmb/RZynP3XG4fh/k1hX2g3dsC0kO5AM7o/mH5df0r0sW8e4uUAf1pssY24Gc+wqXTizRVZI8ha1YE4PI6juPrSq00J4Jr0i802G6BNzbKwQ5DuMEH1FYk3h0uJHtpSqjhVk+ZT7561m6LWzNFWT+JHNx34K7Z0DKeuRUUul6VfEsEMEh/ijO39On6Vb1C0Nm2LmMBf76HIH1qktuso328iuPY1DbWjLST1iyrceHLxDus7iO4TJO1/lbH1H+ArLuEubQ4vbaaH1bG5fzHFdAjXFueCeKuw6qQAsy7hQuVi95HJxusgzG6t9DmpV966SXTtG1CTzDEscxOd6Ha2fqKo3Hhm6jBaxvBOMcJMOfzFPlYuZGYAPTmjey8KSB6dvyplxFe2RP22zlQDjeo3qfxpkcyS/6t1P40rjsSgqT86A8YyODTWt1I+WTDE9GH9f8A9VPTk+v05qeO3nlHyQSN/wABxUynFfEw16EEOiG52tNOoTOQkfzMfw6D8TWtbaZDanEMIU+pO5vxY8D6AVAml3oIYIsfuWwRV2TT7ia2K3d0TGeoXOT+Nc8sVh47yL5aj0ILm+sLJCJpQz/3UOT+J61j3WvyyLstUWJP1q3Z+HLCSV2nafaDwGIAq99h0K1bBjicj++xc/lXNUzGnF2RoqPU5XzJJWJLM57nJ/nUy2tw4+SCWQ9gqEKPqa66PVNOtQsVsignsqAU866IlJEOfdjXNLNLbRL9j3ObtdDvbmLy3i2ZHIIwPy7/AImtGLwq8bhri6ihQenLfh2FW3124kGI9sYPYLzVKeaWU/PM47kjjNc88xqSfYpUkiSfT9JtgBJeSGPvsOCfYt1/UVNayaMpzaQLlBxvyQfc/wD16x7l7QsPPZSOmCc1YhZCAIgBH2IqJ4uo431K9mjeh12BNwe3VSv3di9azdR16SacJFHsU9WPWqM7SL/qo9/44pd52jzAinHc1zc8m+Yqy2JYptjboo1Zz1Zhk/rU0t5cP9+ZwPQHH8qpNeQIMeYM+gqst+sjN9mRpCPvMRgD8apU61R7MV0jR3FuXLN9TnNGAB8oA+grOimvbuQrb2xKqOW/wFNd7sy7TPFDGOpPU/QVawdR76fMOdGnuxjNN80bsBhn61HpGnDVp2Rbt2Ea7m7Z+tMj1+3sY2j06xjik5DTnlz9D2/CtFgor4pfcTzPoiR51Vyp3Fh2Ck09BNICUgc/XAqx4anF3aaleXigQQISGA53YJzn14rlpNSu7pjiSR89lya1jhaUd7sV5M6CCG6nZwqoixjLu3QfhVS7dYyB9rXjnIHX/P1rT0FJrXwnqlxICZpwYkRzg4xj+v6VywsmXJmuYEx23bj+VaclOOiigSb3Z0NnDFNpdzfIzOluMPvOCx9uoA/Cs+bXR5HlW1pDCnfjJP1PWtO4jjsfBEMUglxdybg6HBIBzyD9K5tpLRV+S1Ln1kc5/IcVfO47fgCgnudDcXEi+DEuWYpK821McAjP61zZlvLhTjz5R9CRXVeKJDp+jaPbQNtYqX24B2/T865ljd3flxyvM6MwA3E4qOZtlRSOh8Q2sg0HSbYNErou5t8gUjjHSubNrGFPmXkYPoiFj/hXW+MdJur+7sltVXZHbgFicDms+DwrOgVpZkCryVAyT7VKelxpoTxY8Iv7aC4gmzbW6Iq7wARjOfxrM094G1G1jitY1LSqvzMWPJ/Ku517w9BfaxNcSyHOxFC5wBgYqjZaTb29/B5FopZGDNITkDHoaUfhQuZHHzXs7zuUOCWIyiAHrT7Ww1K8c4incbSQZDgdPeu5NnbIMymOMHnGQBU1jPBe3ws9OZZbkjG0cj35/rS9oktA5jm/D3gu91K/23TRwWkY3zyZztXv+J7CvS2NtAqiNFgtYE2QqQAQvcsfU9axpNYtbK2FhFsWYHzHV2x5rdjn+6OwqO7uILW3bUNUk+0lcBY4xlQT0wO/41x16kqnuoavucVc6dF/a1y0X+kSSSs0cZG1Rk5GTVaay1eO5yI3Ricfu2AUD8OMfWum+32rlp57gNLMdywsNm0e9XY1ErKxZHjHzZH3R9Kp1ZR3QzjZr8WrKkqQXc6Nly8QCj2B6mq+yDUpWcpPC3UuG3qPwOP0rqtRW2vZTDBbrIwPLkDA49azpNMlnP2NFaJEGSQQB/8AqrSFVW7MDIjtIliVrG5ikmIwRN8hH0zxQuj3rh574MkSde5b6Y/nWpY6RHA7Mii7lXlSeEXH8zVOWHWZtQMgSSNycF92FA9Sa0VW7smMpz6ootzaWUYjhPB7s317k1a0vzbILPdXUtug5ESOQzfX0FW7q9g00xH91d3wO4ysmMeuKqR2q67cvKBLABy8m7KD8+9F01tZAatp461eG6PkSedGThEdctj6108njuazshHeQKk8o6xvuKn/AGv/AKxriPJt7WDGkzxyXQOHeRtrH2HtVKDSr+6lZp1aNFGWkbkY9vWiKimpLSxLinozqrS6g1q9/wBIvY2duSzggIO+BiuwHhjw5PYqkWZJAMmeN+Tn0A4rySXU4rSJ7awXZuG2R2+831P9KfpAuY8Ti5ktbcclgSC3+6K1rTnUXvbERpKOqPSL34dqIjJa6kEJ+7HIu7PpyO/4Vg3ngvW7RwogSfjP7lwf0PNUE8caja3WbaYywrwBL8x/OuosfH1xHZNc3losYbADBvmb6DriuZQWnMX7yOJnt7i2JFzBNER/fQio1cHoRXo9j4306/glS8EaqqjZCP4zXJ30DarqLulmluWOAkYwFHua2jhOd6SRLrcu6MdWIOQSPcVbttTu4D+6uJMejHI/Wuk0rwJNf2AujfJAH5jUjI2+p+tUb/wXrNo/7qJLlTyPLPJHriuSdLlbRopJkNv4juEYedGknuPlNakPiS2kUecskR9cZFcpdWlzaErdW8sTA4O5cc1CGBGM1m4FWTO1aXT747i0EjejAAn+tcneoI7yZEACK2AKgzx1qNpU5Uthh1qk5PS4JJFyzP73n0qtOQJXHvTLa4Budm7nNR3ufNlwhyOhoUXfUXUlslC3W4DHymt5NTSxslES77l/uDqAPX61zWks8t2sfzEkFQMd61dTlj0xY1OHvQu1R2T61sotuxEtyO4mFoTdXRM16/zKp52+5rEZ5rq4aWVtz8HmpBvmZ5ZW3M3JJ7mmAYkIzgHiuhWirIViTA8wkng1esLQzu7s/lW6Y8yVgcL/APX9qNM0yTUbgqjiK3iAaaZuiD/Gk1HWBNEdItUMdsjkKIx/rDn7ze9JK4Mfrd86ullpULmzJHy/e8xv7xI/lWYZILMyQIf37DEkqc7D3Uf407dHaI0VvKhuiSHduNvstRu84Q+dEs3uyhj+dXew0iBIV3D7Nd4P+0Cv69Kn2XqL80aTAegV/wCXNVDNDvP7nywf7rH+Rq9bQQsi3E0rLbA4wRgsfTPpQ7jFhW2SD7Re2uwBvlVWKlz34Pb3qG4khvJnkNyyMegZOAOwGP8ACrDXV1JJuQo0Z4WNcMoHpioGaLP7+0VTnqoKH/ClewyKJLpOYpI5VPH3gT+R5p8dvNcXSRPa4ZjycFcDuc9MUkdrbzyhYpJUdjgKV3Z/Kr0sc1nbi3sZ1eXJMrBsH/dA9KrnEVLm5hRPskDMkKt8zqM+YfUnrj2pIZZVz5N0GA7McfoeKVmlUb7myRwepKY/UVGxtJSMrJEf9k5H680roaQ6UuwHn2qOBzuC4/UcVct1tLGMXUkckc0g/cpndt/28fyqOys4EP2prjMKHABBXe3YfT1qtcfbppmeZBKrcgDDBR2A9qa12EPVQCGhvssxyQ+V5/lUkv2qRSskMU4HHyqG/VeaqmSFuHg2Ef3WI/Q06CKNnVYpXEjHAUrnn6ikFiS0tYLtthtXhKAvJIHICqPUEUy9uIbgq1vcGBIl2xx7SOPXI7mtG4uZoLVbO2lExH+uJIOT/dwewrM/drKFuLJSO+3K/wAuK0UurFYapvEAWOSOZT0GQx/XmkduP9ItCpJ+8AV/+tTmhtJH+WSWH6gMP8a1tMhMCtcfa1eBfupkrvfsKHNBYj2RWdsIfMaGe4UM5K7ii9cfU8GqqSzDKxXSOOmHPX/vqn3U93LIZrm2WYn7zbMn8xzVOeS0d1DQyQMOu1sg/gealeYFt/M4NxZI4weVGPxyOKlsLe0md5pVljhg+ZvmBB9B61WggRnIs7w+YcBQylST6Vqag91FBHaQ7bmNV3SscPlu/X06UmBn3TyXF00kd6p3tna2VC+2OlOMdw8RV7eKdAfvKAT+a81XMsKkrPaEe6kj9OlMjFqWBWd4z/tLnH4inqFidkt32xm2milJA4bP4YI/rW+ttBZLZ2kTM8izDzNwwd3+e1UtNE8Ecl6blJ44uI13Zy56dfTrVnR47i9uI5LnYGWbeTwM8VUHaQrOWiNHU2b+0Hkh5dOCp7irSyJNCjxxEOOuR0FVLs/6fIYshwcg+vtVkFngSaJtifxp3zXdS+I58Qv3aK928hUxAA7uh74qhcIqptUZI6mrl7NIoKKPvHj1qCSMrGCxGT2rWTMqaslczujMx/hFZXM86R93YDPpmtmaIsjAHbu4yap2lns1Jctu2KWPHFTZvU05knbqX7mcIqwJwFH8ulQbwQS2MAVVd/MmfceM5pWJXAz1P51XO7EuCbNy1m8qxjgGNgJcjHUn1rTsraJI0muEMkjn91EOrH1PtWdp1uJpl3/6tQC3v7V1KLbabJHc3kyyTOMRpEMlR2UU03UfL0W4OKjr1K/2VmuBLqBEhjOVhUfIvoMdzVgW9xIr3MMaGcnCjIAjHrge1Q32oXUCJK2mH7OX+aRmy+CfSpdTuJ4bsfZ1Co8fyRoeXJ/vew6muyjOnJWp7GM4yv7xg+LpJZtOgOWECsQMtjc3c7fSud0u18/Ds4UIwOCDzWreWlzeQ3dzNOJUh+UMOhPcCsq0do48K2BnOK5MTK82kzemrRLfiGKOaAsrAsB0PGBWRaoLe1CDnPU+tV9ZnbzM9RUqSCWKMp/F271jF2LUdCTyCQuOh9qUwYPUH3ANdAtkBFGGC5IGc4BqI2SZ4DflU3J5jnJYgjEbhnPrmoCrKemPbtWrd2ZDudvHWpvDdjBezS/awXWMcLngn3q7qxV+piBs0HpWhrNvFDfyRQqEQdMdqolCMZ6evajzGncSIYODXWeDmaG8DJj8a51bVyAwwQfeul8KxkXIqG9CZG/q6xvcl2jXJ64FZrRQbsmIGr+psPtWzviqeOakzK7QWxJzGVphtbZuimrJA+tBBI4FO4FdLCEMf7pHemHTYuzfpT5rlIjgh2I67VzTP7RgGMrMPqlF2FiM6cOgb9aibS89WBqwb+2P8bKfdTTxcwk5EiEfWi7C1ij/AGWRx8tRNprDooNbEZWRCVIIHoaYcg0XYXMZ9MJ524qM6Y3UCtzJpO3Wndjuzn5rBo1LEVXMYVVYHnNb2pMfs9YTdRx3qosd2xZ8mU59qi7ipp+ZSOlMjXMqDpk1sho0z87wH0kHB44ABqynOgag4/iukXp6VXm+SVF78kEeyn/CpkJXw5Lxw15/IVb2ZCMNxmR8+tQFTnB7U8yAyHJPWpFmUnHFc5tsVsUq4yKfMy7vlFMQgnmgCQ8j0qndDCcVYkbBqvc8oMetAIqr1qzGcYNQYwal6LVIGdpoviKS30W40+MfJIQQ3cGs4TwtwJUz7nmsvS35C54zVaflzkVo5uxmoK5v8EZBBH1rsrPTGg8ENNJwLgtKuewXj/GvLLWN5buGKHcXkcKAO+TX0VrdjHFottYOQwhtzEfqV5/UfrTj70WTL3WjwO5jCvuDnOeB6VX2kk5JJPf1qzOD5z98EgU6ytJbu6S3t13SOcAVxWuzqvZalTyzjJ/GiOPnNeyeD/AGkxFJtXJvpDz5Z4jB9x3/ABr0UwafZWJSzs7aFUGAqRgAV0xwknvoYPExWx8tGIj7ysPqMUhAFexeJL5PMk5UY9hXn2pzpJKSEBHuKU8NbqEMRfoc506UhbqGGa0Z1gY7vLA+nFV5IIzyhI/WsnRkjZVEa/guBG1OaZskQQM6/wC8cAD9TWnPHyaj8IweRpF3MTkzSCP8AM/1q/Mm5Sa6KcWo2Z5uJlzVLowrhMNkVzniWfmOAdvmP8q66ePJIxXB665fUZgc/Idn5dameiKwsbzuUn+WFR/eOaYKkm++F/ugCo6wPRQUlLikoAKKKKAFTlgPcV0qrjA9BXOQLunjHqwrpsfNVxMarEk+WJz7GuetoJLu5ht4RmSZwi/Uniugvvkt5c/3al+Gen/b/F1pkBo7cGds+3T9SKzrz5IuXYdDU9is7dLOBbVRtjhiRQPQAVoW80cyK0Th1IyCKw/EV79ktruUdWTYPqa5HwrrsumzkS5a0ZvmXuPcV824uXvHWloerwuYz0yh4ZT0NZur6csSG4tstbseR3Q+9W7WdLiJZInDRsMgjoRVhJPJywG5G4ZD0YUoz+zLYlrsck6gdWBB7da4bxb4c8ote6cuY+skS9vcV6jqemIoNzZnMLdV7qfSshtg4K81tSqzoTug0kjxXrSV2nirwyFZ7zTACOskI7epFcbjnkdK92jWjWjzRMmrDQDml9qfjijFbiGduKs6ZaPf6hbWiDLzSBMdOvX+tQV2PwssVuvET3LgFLSMvz/ePT8qyrT9nByGld2IPH2nCx1syxqBFcjfx03d/wDGuZYblI9a9S1fTX8VaKHspIJJEIeNg3TjkH0rzS/srrT7gw3sDwyA4ww4P0NceV4pVKSpzfvLRjqxtK6KilTC3mDJQ9R1roPDnj3VNEdY/MN3aD/llNyR9G6iueztm5+64waoyrskZT2NddfD06nxK4Rkes33ibRNYuLTUbFPseoI22eJwF3oe+RwSKg8deFr/V4YtR023aVkX5lXqy+o9a8tQNn5FJ/CvS/Ct9r+mWUM+i3P2u1xl7Oc9D3A/wDrV5FbD/VpRqUpff8Alc1Urqx5vNE8MrR3ETJIpwwYEEH3FIRj/V4Ir2Zta8LeMl+y6/aCw1L7oZ/lIPs39DXN+IvhZqVkpuNGlW/tuoAwHx/I11UsfG/LVXK/w+8Tjc8725HvT8ZQEdRW9o/he81G4kjlmt7QQkCT7Q21l+i9TXV2fhTw/pu2W8nuNRYAllP7qL/E/nWlXHUqejd35CUGcR4duLuG/RbEStK52lI8/MPoK9h8F6h4q01tmsLbJYDo10dkmPbufyrnn8X6bo8bJpUVvZb+qWkYB/Fuv61nnxG921tNg+VNKY5GY5Zf/wBdeViZVK+sadl3e5aSXU7zxgfDWuRN9osFlmwSLhf3ZB9c9/xFeIavZxWepXEEEyzQo3yODnI7fj613HjKxD6C8sLNuhcOcHOV6EfqD+Fedg125TCSg5OV127EVN7CAUtFJ1OFySfSvXMxcir+mu5O1TkYwQTxUFrp1zcE+XGcDqTwBVq2iW1uQokEjHgkdAa58QlODS3Kjo7m0PLXaHZc/wAOaddRb4T69qgXypsM4yV6Zq8vzxDPcV4UvdaZsb3hm6M1guTynFM8Z2n2nRjKgy8BEgwO3Q/oaoeGJvJuZYG6NyK6oxLLC8Ug3IwKkexrk5/YV1NA1dHkII7dfarltaylw7hI0HOZTgfl1rfk01IbiRE8uBUYj5euPr1qVLK3jUy+Ss3+07cV9eqnNFOKvc5LlGXWZvLEX2h5EUY2xLsH+NQwS3czYhs5TnjOCD+daB1SzgB4UN/ciUY/Os298RXmw/ZkEQHQr8zVnCmo/DFIbbZrtpeoKimJolkbqNvT8aQaNqk3+uv1Qei1xi63qUc5mS4l3d9xzn8K3rHxkHKrqMAIH8af4Vo4Qe2hLU0ax0C2iG+91FyPdsVFKuiQDCPI7/QmtnTbzTb9hLB5Dv06fN+VaiQQbt0dmhb1xSWGe/M2T7XujkC8UiYt9OnYHvtxmmpY3UzAJZNEvqxru/KaVdsb7G/2ulNktrxQFV4tvdz2/CnGnUT2svNg6iOKOl3i5xESB71WkRojslQofQ8iutuLCaUlTdKo/vHP6DpVBPD0ClpHnkmx1ZeRUxrW3d/RFcvyObNtEzb1BRv70Zx+nSpYZr22PySLOo7H5W/w/WrN5JpgfbbyyBxxwM1WjkL5wjNjvtINdMKqeuxEomhb6+qkLKrxyf3X+WtW31aZ8eWyfieK547XUxsAQequOKYtsIyDbu8HsOVP4f4YrojUZi6aO7tb9yB5rLn2rSiulboa88hvry2b54xKg6Mhz+JFatnrkUvBYKw6jofyraM09zFxaO3SbPep0m6ZauYtr9WGQwP41fhv0JAPWq0ZNjoUn5GASPWp1kyetYsdyCODVhLg0WA11cGpAVx1rLSf1NTrLmlYC6QD0OKZNKsZVR8zt0Udf/1VGr+4pkk9vkiSSPcOuT0oAnaRVALkDP40iyAqTtYDtnqfwrB1LxZptihCM07ZwBEpIz/vdK5/UvEV/NNFlhFauR/x5tkkejMeR74FZSrQjuylTb6HYanq1np8RN3NHHkfdPLN9B1rl18RjXWmttNurWyI4Vrpipc+gArn7rTbK7ljmubieBRw0kYJc+5BOD9eK3tHbQdLiVrXTzqt2Dlbm/HT6KK5amPow1clbyN4UW1tqczrOk+IbCWR9RtpZYVJ/fJ86EeuR2+tY1vDazyE+a9oQMs6scflXoN54g1AajLqEmoGAMMeSgAjUemMc/U1lX81jfzG6ultnmYcsIwCfrivOqZpRWsbs6YU5tWZgxXl3C37qVb6If312sfpWhayresEktJ4ZMc7l4/OrMWoWkK4jjwB2Vaa+sbTuSAE+rGueWbvaMS/YeYr6TIeY2C/U1YtrO5h5NyoA7YzWHqOsXzNuBVYcgYUEms+4lvZlRkkdgCSQWIx+FZ/X68tU0h+xj1O4+1hY2LurAdScYrBvLnTXlVzZxF1OQwwoP8AjWZH5hQeaxbI6HtRJFFIQXXJHI9q5pYyrJ+/JspUox2RtQanCmD5KKPRFH86JdfBcRxRAt6M3SsnAAwBTAiRsXVVDHqT1rncnPctJLY0pNTunJ2lEHsuagluriT/AFkz/gcVV85DwDn/AHeafKsiRhzFJtPQ4/pTjRqS2QLexFLGZFw0jkZzwackaryw3emR0pqmduViH4k5qR0YWZledEl8zaIx/dxnJ/lWyw1SWj0LlFxV2NMKGTzMZcd8U25I8sg8DrmkMLi0NzLM3k5xuFUjdWSNyGk7/Wto4NJ+9NGHtG9kWreVMAeZk9gOagvr+KAskhfd/d2kVoARf2HNfuojC/6tf72eB+dYU2tSmHbtjJ7EgZFaLDUr7tgpTfQasxnbdFZSPgdcYAq/Z2mq3S5toRHCBkuxAArWtWubPwtLd3SNJNcjbEo5xnpx9Oa5SQaiVETNIIz2Z8D8q0jGF7WD3n1N+z02e+Eii7XEXLsPbP8AhVKSXT0TEbSzc854z+NbCRxaL4ZNvJN5d7drkkDOAev6YFct9ntkxiWV26YACiq9pbSNl8hKCe503h+Gyvobiea1VLeBCc+pxn/Cufl1SRuItqJngKP8K6jWWbQfDNpaxomLrcZUfk9icn6n9K5WLUZSwW3EcRPA8pADz79aTm5O9xxijqfCQmt9L1DVZgWYKUjVs5Jx2H1I/KuX+w3MhLzNFFuOfnlGefbrXVeMY2tPD+mW5Vml5aR+vQc5P1J/Kud0jRrzWA5tFTYn3ndto/D1qbuT0GnZXOg0yGLRfCVzcyyMZLwmKOWIHA4I7/8AAq5XbZoPuTSn1Zgo/Ku/1vSWu9L07TUmMSRLub5eTjgf+zfnWbbeFLVHVZ3lkzgcnAqlFy1JUktxLthpfga3aDbE13KC0RGQQfX8hXKm7upOI2b0AjTH8q9TvrG2eO2geGKVYkJAZQcZ4GM+wqvHbQK6IiIg3fwgflVRhzK7ZKnboYWu2lw3hXSrKCF5J2be5xzwDnJ/EViQ+Fr+QgSGOLPqc4rvb7WNKtpES4miBQcgEnknnI/AVRg8R21/qMMFlJLk5AXYAp+p61KUbXb1BSl0Qmr6It9a6ZZySuiQqflUdemDn86g/wCET0y2lUSJLIeBzk81S1vxVcW+ozQQQIjQny9xOc4//XUOja9qOp6xBBJKqQZ3OqgDI+vXrSUoqPmPlkdVqVtbNHAJhExVMKWUcZ//AFVWWHTkeNGkiefcCicHmuD16+ll1S7VZ5DCJCFUtwBTvCmP7biY87AW+nb+tQr20L5LK7Oq1TXtOtr1tzu8qKIyqg8Y6+1ULbX4L7UoLa3tpA0jj53bA9c4H0rldTuBPqN1KOjyMf1qz4YLNrCSBQREpc/hSUdB8qRd1HxRfG6mRBGh3kMQCc/jUVjqN3d3BSedzGqM20HA4HFYMshMrEtySa1/Cloby9nDFxH5LAso9cCm4JK49EVIobu+x5SyzEnA5JFegaRYDw3ZrEzKb+cAzsD/AKtT/B9eeau6ZZQabbLKiKrbcQxkdB/fP9KxNSvVndkhYsehYngk9ST3NctWrf3Yi3I/G2kSXF1HcxyQooj2lWODx3Fc2lx9ngK2bzSno0vO0H0ArvJ9NWHS2luJHlupFUeZJ1weoHoBWG8kduFtNNhDYBJf+EGilP3eVjuYcNxLfzA3VvFMo4aQjaR9TUyXNjAJYreWeFs43Md6Y/z7VuR6bBNGIrlxhj8zH5VGfX2pr6Dpc2orHoYmu0jGJJZv9Vu9QPT61fNG13sFyDSWvoTEZJrWa2blTjDNj0B71Hqmt7rkrc28scY6BRtBPuadrvh3V2cyMYZIV4Uq+MD6VBHKmkWZ+0TPcTSAqByY1Pt6moSjJ824zWtZ7f8As5JJUaIHlIycEn2Hp709IpbsAXDGOHtGnP5n1rmYrqTVJFhntftMp/jVipHue2PrWnDLa6R5sMV7IZyODJyi/THf8KmVO3qFjT1Kz09CI5YRLIcbUUfM34+nvUFxprSW32fzvsygbhHEhIUe57mqWmXOorOzpb212ZDy6yc/ifSr+q67HARbFvKduGkwTj6f41NpppLUDIXQYbWZTdzef3WFQQT/ALx7CoNSuNRNyPKhlhVBsRYxxjsOOK6GxSOaGR7S6jXPLSnls+9TSXMs52WpIiHDXG3k/QVXtHfXUDniiW1t52sRwST9Uh2gMD/tEfyqpe3MOsTRrsngk+6qRgOv0A9K6S40y0mX50VkU5aRuvvk1WtLSGFm/spTGGyvnvyT7L7Vaqpa9QMuLSLew3GaeK4u1+5Fu2gehOep9qzrqLUri5CzQTGRzhRjg/j0rQn0C+eUu0kZQnLSMcBRUlxerptoltp3m72O5pznLfT0FaKp21YFPEWjMDMEmvOoAOVT/E1XhvLya7LQySea5z8rHH41fsRLqsxNzbQTIv8ArJ3G3aPqMc1NNc6dBDcWdn5kCscNNt3F/r3x7Zp862tqFjQXxReaZbxwrdfaZkPzZ+6PYf41t6L4/uJ5fINo++Tl5EfJA9ST0rhbTRpbqUGK4ia33YaYkjH/ANen6qZbBTbWcUqwYyzlfvn1JpKMb2T1E0jt9a8UafepEtvIsf2UHbC/8T4wMk8HHWtnSdE0C40e2FwIpZAmWeNvndjyTx/KvILKykvUeUApBHzJIen4epqzPqeyOOKw3QxxnKspwzH1J9a1ldpR3J5Ox6Ve+BYXUfY7l0nkOVhOHCj3P9a47W9Lk0jUZLO4ZHkQA7lGAQaTQfEmrxZla9YW6/fMnOfYd6q6vrP9q3rXExKMRtLDkHHfFc84a6IuN0ECoJdxUA561HcMTI20jrSxQySRrKjqYN2Mngk+gqC4EiSEtEwU9CBkfnWai7ldR8dw8U4aJtjjuOtQKjTyGSbLEnJJ6moY2TczDk+ua0mKiJfWto+7sRIgAOx8DA4pbO2+0SNIxKW0XMsuM4HoPerWnWpvDIXkEVvGMyy/3R7e9UrzURcINPhQi2Rz5Yj4LZ7n1NaxXVklrVtSjcQRaP8AJaxcKAfmcnuw71XurlLb926RvdMuJJQMYB7A+vvVcWsdpDLFbTp9rPys79FU9gfX1NVPs19Cvyguv+wwYflVpR6MpAbe1c/uzLF+Icf0pyWUoYm3uom9txQn86gFz5Z2zW65PqChqzZxx3JkkZ5IoI+XbqAPQe9N8yDQltYLohpLuMfZoxl2KBs+gGO5qtc3sdztWSIoqDCKjYCj6etW5Lt5JR9kkRIkG1FVsHHqfc0x5Xc/6REsmO7ID+tLma3QWKkSwkZSYoR/eBH6irCtcggq/mDrgMG/TrQ0dnKP9U0PvG2f0NW4LCKzQTrOGndMxLKNoGf4j/SlzRYE7zLYIjPDGbqRfm2cFAff1qhstXHDyxN/tDcPz6/pUX2bUoxuXMgPPyNuH5VCbkocXEAH1UoaOS+zBF5I5V/1F2jDP3d5XP4GpooLuWcrcwKIAN8krJwF7kEVTtFgu7hY0aVHY8cBhV66LRotvp8yMkfLtu2s7d/wH1pWaYXK93d21ztHlPFFGNqBD29SPX8aqrCjOPJuthz/ABAqfzHFWS9zkGeASe7ID+oqN5LUrzCyP/0zbj8jTTsMPKvrZjtCzr3K4kH+NX4pksbdbi4tkS5lBEYXKlV7t7e1Q2dtbsRcSSsYIzyHXaGPYZoee+dpHZkkDc7QQygegBobuIzna2djh5I/94ZGfr1qWBXwGhuEc9Mb8Y/A1I7QyAfaLJAf7ygof04qNrOyIJjmmiPowDCq5o9Qsy1HbXU00ccluCCfvsmAB65HFR6jdQSstsodYIchCuCGPc4q/bW8+n2JjtrlftU2Cw37SE7AD1NUZ3uFIa5tUm92TOfxHNJPUCvAu1tsN3t3DoxK/n2qfdeofmjjnQ8ZKq4P4jmqslzav96Bomzz5bZ/Q1YtLeC7uFitrh/Ul1xtA6nNXqtQLdg8VjA13PbGOXdsiAJUknqQD6VRdIGLtHcyIx5+dep+orS1F7q4udtuRLboAsY3B8gdyD3PJrOlYR48+0Xjg8FD/hU31EEUN1GN0VxFNu4xvBP5HmkcXUkyLLY53HaCEK5J9+lQj7K+TvljPoQGFa2lNLbWk1zHcjBBWFd2AW78eoFXdgV9Xntl22URdI7c4O3kFz1z/KtHw5Gu6yKSl181uxHasotMf3lzaxzjuxTOT7kc10Hh2JZZrN44UhWMuWUE8+/NVBpMTWjLEpP2yTaScnKtjofSp/3bxrNgiXoydvqaqbma5lUj5GYlT71cjLvCr7cDo5759K66PxGWIV6SILmZl446cGq0DF1O4n6mpLqTa4UqD6E9hUIkY7UIBwe3etGYxVkQauSLRccYPaszSyxuJ3BJ2xnPPStHWTi1UDqTVfSXX7NdjbghOtQjR7aGaZSGPFSo+HjLciq0vJ6VPEVZcg4IFLcvY7/RIEayBZSwYZ+X9KzNY1FrRzFAwa4IwZe6Dso9KXwtqP8AxLri3MpSSIbl5xuHpXOzO0kruxyzEk104ampqz2M3o7m34dvppJruCeV5EeIkBmJ5FdJJMYdGFzKRJcsgjXAwOeg+lcd4f8A+Qi3GTswB61292kbtZ2zANKmJGUdFA9vritGlRnJx7ES95JMxdY/0XToLBCAQN8mPU9a5sWwLElyF9a3dQcPcTM3Jycmsh/WsVTSXvbi5m9jPu9OEyby20DoD3q/o1pp9/KkF5fx6a+QFZomK59yOlJ5nzZYZbpz0FULgfvOO5pStHVFwvLRnWSaXLpWoPDJfQX8JXKSwybl/wD109s7SCrfnWMb4lUChUwoB29/elF0T1NYPV3FZ9S7dXkItWi8sblUjPes/wAJDL3Le4rOuLhS0mHU+2a1fCAHkXLd91O2hTVkZ/iIg3+R1xzWXltpCmreruz38m7jBqk3WrWxS2LFq5ztIyPyrttI0a2uNPMx81GAzlXxXE2C7pQDXpWltt0ghemOKzbImY7WqZx5s+R335pptgTxcTj8jVsnr6005xnBxSIKv2eUdLxse8YpBDcqR/piH6x4qzLnyn2/exxVBpJktgXOJBzlj1pjHrFfRltlxAR15Q0E34HL2rj6EVkSauytJhgWB79B9KrnW5fvfKF7jNOw7M3D9sPWC1P/AAM0FbkYzYwN9JAaz7fWg6kEL9eatx6ip5YA/wBKVhajkE4v1m+wukezayow596sS3BXg2lx+QqH+0UyABkVPFMsibgcexOaLBcrfah/FDOv/ACaBdQ9/MH1QirXnADIbj1zTGkBH3we+M0C0KN24ngHk5bn0NUFtJSRmNhz34rXmulhUncAcce9YN7qBkkYK2BVRHr0Jr+3MUmdyOD3U5FV4AWuEB6ZFPkuZI9GjaJwG80huAc8U3Tb57i6SJoYQ2PvgEH/AArdNME3Y0pY8XQJzhVf+bVLKCPDlp/00uHf8hS43O7kYzEenY5H/wAVT5lI8P6WD1Jlb+lVL4WJbnKspBNJjb1GTUr9fSm85rmNyN+ueadH60vTqKAeCKaExHwcHrioZuq1IQR14qOXgrTAbj1FMk6CpgaCM9aoB9hkTJjPWiX7xqxpsE01wot4ZJDnHyKTW/a+BtcvHz9nSBCcZlbB+uKag3sS5JbifCvS/wC1PG1luBMVtmdyOgx0z9TXrfiS8+86/elYqo9T0z+QrK8DeHE8JaVq19PMstw0YQuBgAdgPxNVTcG+vVAOUt1Cf8CxzXXShyxszmqT5pXRwXijSzp16XRT5EvzL7E9q0vBarHbXk21d6ugB7gEHNbniaRGjMbAMo4wfauf0Vvs1jqkkY+RVDAe/aslS5KvMtjR1OaFjt4PENtpsXmXc6RqOcE8n6DrWbqHxKt3SSO2s7iTORuYhQf615vMzTytLKSzt1JpGUxxLI2AhJAJ9qqdZkworqaGo63c3zuTGEDdt2ap/aCUwyZx3zWgujudAXUWkVfNk2xLkZKjqSPeq97Ha29ouHf7ScsMkbSvp9a5VXhJ7nR7Nx6FKSQFehFM8wYxTonEkW/pzjFS2sBubmONBuZmC4+pq01LYT93c7Kwi8jRrCJgAWQytjvu6foKcw+UfnVu7VUnaNPuR4jX2AFVJMk1seZJ3dyo0W6T7wUDLbj0GAT/AErzC8kaW7keQ5YsSffmu+8VzNBpMrK2GOF/Pg/pmvPFGdzZ6DNYVXrY7cJGybGscsT60UUVgdgmKMUtFADaKdSYoGTWC7ryL/ezXRAcnvWFpK7r5PYE1vL1NXA5q71K2ptizkPrxXZfByzEdrqGoMq5ZhCjdxgZb+lcTrTYs/qa9W8FWo0/wfbJhQ7qZGI7k9D+WK4cwnaHL3NcOtLmP46uHlit7eNvmdy7D2HSufVGEIVThh+NWtXnNxrs7A5SMBBUWOM15U3ayOtLQ2fC+uy6VP5dxlrR/vL3Q+o/wr0y3ljuIFkjYNGwBDDoa8axk1d8NeLn0bUfs1yS+nucHuYz6j29RUxoyqt8opNI9dhPkucAMh6qehFZWs6YFX7Vaktbn7w7ofQ1ehnjniSWN1eJxuDKcg0RStEzFfmifh0PQislL7MtvyJa6o5d4weQcVx3ijw/vL3Viv7zq8Q7+4969J1XTBDH9ptMvbN1HdDWMcE9MH1rSnVnQndBZSR49z0OQRxig8V23ibw79pL3NiALgDLRjgSe4964g5DEMCGBwQeoNe/QxEa0bxMpRaEzXq3w1tPsfhae7YYkuXYjIwdo4H4HrXlkUL3EyQwjMkjBFHqTwK93hhSy0uO0VSFihVBn2GK5MyqWioLqOC1ueVeDY553caZePY6kgyOcpKPcetdNH4rtbiZtJ8Y2MaSr8pmAyp9/UZ9q86t55LaZZoHaOReQynBFadw2o+J7mAw2UtzcquxnjQ4b0yemaK+BUp3k7Lvs0wU9LHVax8PY7y1N54au454jysTNn8j/jXE3NpLZSGPULdoJ14IkXr9K7fwz4Q8QaNcpcT6nDpUZ5aPf5hPsVrttX1PRpLdEu7RL9l6vOu1c+oHX9a8+ePnQfs3LnXdblqF9UeNWFjPfSiOxtpZ5D0WNCTXoHhjwxqVjE02pGKyVfmRJJBuP4VuW97fy2h/sa3jhtADhbVQoP49c/jXM2msS3t1cxXEUkE8TYZJPvH3rjrYipXjJRVkvvNErMxvHWlxpfpckAxXAzkcfMOv9KqaH4m1jw8wFje+dbg5NvMcj8D2rp/EdqdV8OzIB+/h/ex/Udf0zXlWSTyTmvTy2McRR5J620IqPlZ6D4n8Wadrr6derbtaajC+ydOodD798GtbUrUappMtrEMu6BoiOu4cgV5TgEe9el+Er/7TpMLlsSwnY34dKyx+G+rKE4bJhCXNoeeXMDxyvDewtDMhwyMMMDVnTzuhuLcHIddyeoYc17Dqmq+GNakSw8SQJFdMv7udhjOe4bt+PFcxrXw1u7EC+0K7W9tl+cBiAwHXgjg/pXTHHwqwtUXK+nYnlaY7Q7mG/wBHSOYFklQpIO+Dwfxrzq4sJYL2a2bAaNyn1xXX+F5xDdz2v8EoE0ee3qP51vXrWUTQ3NysSTyZTeR1K+/0xXLRxDwtWUYxunsW481jidP8MSToJJn2qeelakui6VYQCW5nOzsqnlvpRf6w7XTJZxNMQMbm4X8B0qidOvb+bzLqYL6ew9q76VLE4h805cq7GcpwhoVL6/Ekfkwj7PbdkB+ZvqagjiLANDEQBj5jwK15dKjtTuSIzt3bqaI2YrkWoLDoGya9FQVNcqRjz82oxIlkhIJHPBIqa1j8mNUXkZ60L5+4meMIH6beOlPt8KpU9a+frpwk4nVF3VyW2PlX0brwc12sDB0B9RmuIdejA8iun0a58yADqwHNediFdJlIxPG0kdlKk+1R5q4zgnLD2rkZLqaUDzWbB6DoK9T1GKCe0dbmNZIwMkMM1y11o0F9H/xLJTEMfdxwf619HlNX2lBXeq0OWp7srWOSXGM04VZ1DR73ThuuISE6b15FUlcjrg/SvS2EmnsLJGkikMuRVOWyOCUO72PWrwYGnUrJjuYyma2kBQvG46Y4NdHo/jPULFwtwftEXcNw351UKhhhlBHvVaWxR+UO326ikrrYHaW56Rpvi/TL4L+9MEp/gl459j0rVN98wZZSR6djXis1rLFyQceo5FWNP1a908r5EzBAfunlfyrT2z2Zm6K3R7JPc289sy3NudhGCc4rCNzo9gjR+fMUPJjDEisrSPG8LkR6jH5Q6b4+R+I//XW40ukzxi4gjjus91GT+IrKdLn15n+Qk+V2aM5dX0tTiy015G6Z21qW51C4dfs1gkakZy4xipYNQZI8xWRVB0AAB/Kmza3f/chgiiY9B94/ielZ06VndrTzY5TvomT3GnGRQL2KNm/vKMAfSsq70cxHNpLkf3Gra01dQu1c39yir9AMfSo7zR9NclnvnLdyWyB9K6JVoQdnJIzSb6HMNuhk2Srsf2NK8UU4xIqv7jhh/Wtia20qNRFG/mY7heT+NVXsrU8Rs6nsc1lLMKNN2bKVKUjNSC5t+bWbeB/BJ1/P/GpY9ZliAW7jeA9MsMj8+laH2eOJMuxYD++cVBLcW6xtl40HTJGc/nWTzamvguw+rN7mhp9+WUYm3E9K2ra8IHzsMVwUkkqJ/o7KFHTH+AwKet5fSRqd4Ug8r2onm7S91L5jWD7s9C/tKBRyxOKP7aAH7qPI9Sa4aa5eZAsmAB1xxmm/apCoUSEJ6DgV59TNsRL4Xb5GkcLBbnWXfiZ4sjci+wBY1zN/qk2oSMNpRD1eQ7Qfw61nTXMMBBnmOT6nNM3R3A3E7k6gKTk1k8XWnrJs0jShHZGxbXNta2+1iXOc8DC59hUp1NQv7qADPrxWFLcKoIVS2PXoKfb3CsgLsAfQkA1yzU5e8zWyWxoPdyuTkLz6jNMe4mIwZCB6Diqrzqo4YFugA6mnSrNFbieWN1jJKhmXAJHYZpRpTnsribS3CQbwVck5655qRcKMAfpV7QtA1nWYnmtLF4rVAWe4uf3Uage556egNR6la29pbQyQ6jDdM5w6xISE/E9fyrdYKrJaq3qS6se5UY55FIW29qZZW6yyTHUNVjtIk5Ajj3sw9h9O5NW9Ye0GjQixsxAyOCbyVy8kntt+6B+FUsHb45JfiL2nRIpmZN2CwA689qtafaz6lcCKwheeT0Uf1rJi1CO2uDcRO6yty+37rH6dPyrotI1y8sbC8vFmFkHQ8xxqrP6DPXn2rVYajDWTb9AcpvZFTWNN1bSG/wBO0yeJf75wV/MVSgEs7ANmJj0+XNZ91r1/dKBPdSOB2ZyR+Va+iW8lrZyapeZbAykeMlvQY96qUaUNVH7wXNbUpmU21wRc3EUyqcFBkY/St2BtFmTEXl+btBC7iSx/z61x08c91cTSzBUeRixycAVtaDaW+jWxvtSQv5h2ptGQOOPzrT2ihHRJfIThfdkur3aabcCFYlEhQOQO2aoWuo3V1crDbqd0h578d6p3TW81xLNNJNM7tkk4UV0Gl28djo1xqcaLbS7R5ZyWJyeBz+NRKrJLVlKKjsN1/WpdNjj0+yfbK65uPlBI9B9awrG0u9QuI02yCNiN0nQAdzTZr+eWVpHkHmOcsyqASfrXTeGkaz0y41O53SOF+RG5z2A/E/yqeblQyl4kkRraCws7iI28eGdt3Vuwx7Vj6fpi3dzFbxz73bkhVIAHfJqWLTL65eRhCAfvnJxjNdN4T059PgnvpUVpAMqf5fmf5Um3BCujI8UXy+YmnvbLstTjCPgE+/0qjoSG71OG3S3hVCcuyrkhR1/wrXg0EXNw8t27SFmLMc4zmtzRNNs9MeS4jjKEdGJzk9hn3NVflj5i5kc94uuWOrNa2kkhigUIQp4DY5x9KoaRYTXupwrMjiIMGYsOw7fj0rtY9NjspZW3Rurks5Y4yTR9qs9ND3RYID9wD5skdOafLyrzFz9EYfi63mv9YWGI4igQRggE/N1P86h0zwwDqETSXG4IQxUrjOO1Xv7a06KPLyyyMecKvfr1qcao0GkzanFCvJATzOSRkAGmmoxsK8mT+IrG3vLjfOFkeLESqMkDB5yPck07TtGto7pZI7cJjnZiuWm8T3xT5XRD3KqCa17HUJ/+EZvLu9md3kyse44xnjj60KfKrBys6bUZYFtJ1me2IdBGgk6oO/P51laAbWMtDbXQm8seY6IvA/GvNzK2/ks3ue9dX4fm/s7w7e3zjDSAqmR+AFNtpWDkSNO/8YWzS/ubeZtuBywHFSeH9Zl1bUyhhSGGNSzHOT7V5752M/zrq/D+6x8MX2pEgM+VT+Q/rS95LUpxXQpanrl9Je3KpduYw5VdvGQDxVzwU0k2tGWV2dIlLHccjJ//AFGuTDdADk+1dh4ci+yeG7+6K4uJcpEDwfTp+dLlsN2sc5qdys2pXMoxh5GIx0xmt3wBAbjVGlj5MY24471z50qbcplkhiwP4nz/ACrq/DEiaFpFxeq5lYyDDIMYxj/69D5VHQHtY5fV3kTVbxZSDIJmB/OtXwUB9su7hyQsEWc/r/SquqXNtfalcXhtMtM+8qznA+mK0dLxb6Df3UIWJ2+UY9AR/iaFKNgd7WOdKy3ErtHG77mJ4BPU1u+FoZLWS9mnTZshIBb1/wAisqS6lf8A1krEemeK2dJbyvDOpz4yD8ufyH9alzY2tDE+yQks012OTnEaEn/Ctjw/HDBDqE9sGZo4SCZDjIOemO/Fc6ZhgYGa29KLjw1qky53MVjAAznkD+tDUrAZ32gJzDBCmec4yfzrqfB1i9yr6hqRc26sFhRfl8xs9Bjt71neHtAa9lDXD7YY/mlbHAHoPeu0lMcahEBjijAES/3V/wATWNeqoK3UN9Dm/GE16k/mqxCsxwU7AdPwrM03V7t2TzYYpo0bO51xjHvXSTySajciCyHmSDq2cKo9zWPf2SbvssJEpXh3HAJ74HoKzpS5o8skGiJdQ8Qw6nIFupZYFX5TsGVNaEBtzag20qsmMjb1OOuBXNJp0MM+GbzSO38IP9asT6Pq93ZtfR226zjbYHDY59h/hVqnf4QdjvNH8OHUtMfUdclEOnof3dorZknPYMewP+NOuL600y3bKxw5+5Cgxj0ArhbS5k0iMyXF08kxGPK3ZVPx9adY+Ii18sk1kk854DDJP4Dpmoqxc0lFaL8QUWdJb6fe6rMJtRkaGzZgVg6M319BUHj+3tW0y1gjZII4nyQo5x7VZu/EiRQ+RGY4bllB+c8D2zWNr1rHJoU8vmve3khUBk5wc9APSppX503oBzc+rLbwG209Aid27n6nvTLC0kuwZrl/Jt+8jclvoKli0+30tRLquHn7QA8D/e9/as28u5LychAQGOFRR+gFdyjGWkfvC5q32qQrB9k09RFCOrA/MT6k1a0pbqaEy3UqLZj+KZdxf2XvWeLBNNiE2oBGl7W/UD/e/wAKqXuoT3jKuWC9FVfTsAP6VPs1JWj94XNufVbQK9rDbmG2zkGI8k+p9asaVDNGkdwuovDZk4/fLjPsO1ZNjBBZr5+pfvGH3YOn4t/hUN7qsl9KA2RGPlVQOMduKh0nsh3R0OoahcGYb7R5rJTn922Qx9SR1rStNQtmshdPHJFCDxvAGcelYFhAmnqLq8dt45WBGx+Lf4VXuNYmuXbz0jmhJ4jden071i6d9EOx09sv9qYmkkX7PnKQo2efU1LfRRQIss3l7QwwpQEtx0FYUNtZWCRXd3DJbsTkQRyEkj3HUfnTTdzXF2J7e5hds4VZBtPPoOlSqTcvddkJmz9ie8iJljEUJ+7DEcbfc+9ZNxoFnAPMluJEQH7nVnPoK2E1G7tLFpby3jRs4REXOfc+grPstSsppzNeyMZyeMjAUegFEY1Ffl28hXRW1a2v5bOJLaBI7RRxGjDI+vvVbTYLmBfNvJZbe2X+FusnsAf51015dwW0Q8gMZn+4nQn3PtUVparNNu1FhJcSj5cn5VHoKam7WaHc5m81dbjdE1vGbUElUX5f1FMt9Ns3hFzN51vbAgBW53/Tv+lb+q2emwyqiWge4J+RFONx9/aqd9pFzdKHmnCuBxGB8o9h7CrjUVtNBmVqMMlzIv2MwPCowscbYI/A85pttpknkvPfBoIE4wRy59APT3q7baWLRxNqHzDP7uFesh9/QVVvdTvDcsWMkKdBHjCgemK0Um9IgU7m9e5wDhY04VF4Aq3ZRlIhc3bSx2v8IH/LT2FaFpFbiwa71S1gC9Yhja0h98Y4+tVdRubbVSrSyy2+0YWPaGRfYdKLpu1gK01+k8zO0ERjJ4XGMD61ehhgaz+03HmQRZwgzuL+uB/WjTdEVR9ou3SS325ijQ4Mvtz2rO1N7h7gmeKSKMcIhB2qPQUJRbtFg1cv3l19p2DTmSO3jGFjJ2sfds8E0lx5lltaS3DysvzShcAAjoD6+9U9OsikTaheLi1B+SMnBlPoPaifU7iecy7ynGFVTgKOwHtVSvfQSRXUWr52GSLnpncKm+zspzBPG5/3th/Wr1mscsMl1qaIYV4UbcM59j1x71VzZyk/JLB6bTuA/A8/rUuTGOgS6lfZMoESjLtIuQF7nNMurm0mg+zLb7YVbKlDtJPqR3q4bSVbeOWwkVbYHbvY7Gdu9U737Si/vrYSADO7Zn9RTUleyEUvsMDf6u5Kn0kX+opBZ3iH9z846/u3B/ShJoZHUMrR567WyPyNaFpZxyOJROGgVsfMNpY+lac0o7gV4xJBAbm/TCg4jRkwXP8AgKbLew3LmSUSK56lSCPy9Kt3Ut8JC7RsIugQAOqj0xVMy275EtrGWzyVJQ/kOP0oupbhYVJEVsxTgH8VNWBNclMEeanuN4/OqMlvalCyyyxsOgYBh+dXbOwe2hkuAUlmK5hjBxkHjdzRyx3uDZK3lWaPGYUW4lXEhQ7Sg7AH1ql9htpAfLunibsJFyPzFQzSXlucXKP6/vEz+tEd1E/DRbe4KN/jTalumJWLEdrexSD7NIso7eXJ1/A81YtxdT3IhuLYZbJLSR4wB1Oar74N4WKY7jj7645rUklmtLNYbZ2eZ+ZdrZ2/7IH86huXVDKV7cWc+yCMSRQR527CDnnqR61Tkt0LA29yp46MCp/PpUrzxvn7RbIxP+zsP6UixWcp4aaH0x8w/wAf1qlK24WI4l1BBlQzoeuMOKu2bBUkuryBBHEcDAILP2GKrw6ZLLcKtrcxsOpzlSPU4/8Ar1Y1SW7T5I4ne1T5VZgH3HuT71TakIhnmgvJZJXmkSVzuO5dwz/P9KVIp1UfZ7hHJPRXx+hqiJ4ud9uofuVJB/LpUqG3dRiaSNuhDLkfnQ4juXJBcoh+12quuerx/wBRUly1vYWvlxwmG4uk+by2yVX6H1p+jwyqzSi4U28fLBXwX9F/Gi6uJZbgyXtur/76447cjn9am7QtzMaziGx4LzDf3XUqR+I4qwi35OISZgOSAQ9Wj/Z8zJ/o8lvjqY33D8j/AI1HLYwuwa3vFBB48xSh/TNL2l9x2I7dDPdi3uLBDK524AKNmpdRXT7mWO3SWSCKAFAQu5W55Prk/StSFdRstOkud7SysNkSq2/CnOWx+dY0MkSH/SrNHJOTyyH9OP0p83UVit/Z8yZ+x3sUi57PsP5Guq8KW8wlh+3EmUbgvTDD61zyrZSbjvnh54GA4x+lamjIlvcxfZ7pJDuyRgjitYVG3ZiktGaMv7u5lg42kkq3pUyk/ZhlsA8Fff1qfU3je4IMSxnGAR3NQI37jGMk/ePvXbS+Izr3dON2VpSpG2RSccAioMCPy+obmpmIIYE4YdKrHLOpbnHWrbMUinrGfJTPc1DpCFobvsCoFS602Y4x2FM0zI027OcfMKnqW72KFxG0bYYk+lRxgliB1qSVmddrHOPaog5jYMvUUna5SvbzNXQlkbU4Y0HzP8vPcVPf2UsVxcKqFhGctjsPWn+Hpd96bhGEb20ZclhkN7V0Wmh4L+3nu2V1uVKSr6BumaqlVlTqSa+FJENtx1WpheFo/N1kJnG5evpW2155c+oXCHzGj/cq2ePes6bSpLHxDLZqSBKP3beoJq9q0MVtZm3tk2qr4Y9SxA5NdNeel11sTGz3IoQlxbx26EeY53zSf3RWfcWjIC6AmMn5T6+9Njdogdpxu4OO4rXsrqOVSH28jaB2AranKNVWe5x1Oei+Zao5+WIgcjHtVSVSSMckV2U1hbygbMAucKM9+9ZF5a26O5Bykfygd2P+FKphnbcdPFpvYwyCf4TmlDbVJxjipJsLztAJ5qu43Ke1cjp2OxSuUsAkkEH1rpvCS/6DK3TL1zbKUfOPmFbPh3UI7d3glO1JDlT2BqJIqWqDWdJnErzxfvUPJx1FYbZB54r0IHjII/xrE1TRluHMkGEc9VPAP0pKXRkqXcw7DiUYr0TTyRpeMcYrhYdNuoJRujJHqDmuwt9RtodOEMkoWYjByOnvSeopFG/vYrRCzkF+y55NYX9sTSv++LbSeNv8NTeILVo5fMyHU9GHIP41injp0rTl5RxSaOitXuZwxhaRwozkelQ3ttPOhIkYHvnpWbBe3FjNE9rK0brg5U/zr0bwX4i0nVrlrXX0itrqQbUmCgJIemCegP8AnitIKMtGRJOOqPLZrLZIFk35HUk0xrRDk5YDt/n0r6D1rwBaTpjbhGGUdVAI9wR/9evMfEfgu+0cNKEMtmG/1gB/8eA6fUVUqLWqFGqnozjVheMKqSHnnGP5GpUkuFXlxt6Zx1/+vV1oDmQfeIGWB6/h2YfSmpaPK8KLzuGRjnP0/wADWfKaXRUaeZF2sowOc8/qKkiu2PAZAexJqf7FIUMg+7u2bjxj2PpRNpLFmCcMi5bA5H1Hp7ijkYXiCfaWywaM5/2uKgvGu4VJwCmOSpzirFlNc6JcRvdWkVzbPzsk5Rx7MOhru9DTwvr21bSP7Pdnk20rkMP905ww/KqjTUtCJS5dTyye/lkAGSMVUDswPNet674E068DfZd9pcjPI5BPuDXnGs6BqGiyEXcJMZPEicqf8KUqUobjjUjJaFaWOY20BiUsuOQOaiguprWXcq7XHtVoxpJbwgylHA44yD+NSRJco37u4jkx23Z/Q8VwznyyOmKugi1yQKVdQcrtz09P8K2rzU410nTN4+QwuqspyM55H1FYVxFKsoM1orBu6rgH/vnitERQ3XhdkKlPslxuC9Sqv/TOaft5WtcTpxM4yIwyGFJkHoRVd7WIITFcjd6MpH60fY7oYK7XHqrA/wD16aqj5CftTe/FQSLdW5xLFIv1BrR1NI4bawurdWENxD82e0inDD8xVqqupPIyvkY5qvN95aPOQn7xFIwDMCDkCqVSLFyseKUigYxxQa1TTJPXPhoRH4cgbADF2ycDJ59a6uynzcbCcjkn2rlfBCmLwlat0ySf1rpdGh825HXMjlfwJr0YfCjhluyPx7P/AGf4QhiUkSXEm/HrzwKw9EtzbWSb+XxuY+pNaHxBcX/iKzslJMVsN7DscdKr3L+RZsR34FUu4HK+IrjLvz7VnuTBpUEAOGumMjn0UUmpsZ7pYl5LsFH4mma1IPtM+wjZAgt0+p6/pmuStNrY1gtDGfhiP84rRVbNtIt1vbr7OxkcoSm4EcUmnW63ARXHDFnP0HAH51R8Tjy7uC1T7sEQU/U8muPFTcYpI6aUbsnNksoC22o204HRfM2/oaZLpF8qgtbO6+q4cfpWC8RLZPcU+F7iEfuZZEx02sRXEqjOixfaJoFdJI3U8HBGORWr4Pg8/XYSDhYgZW/AVlxaxqaKQ12zgdBIob+dWLDxTcWUrsLS2LuNrMq7SR6V0UsSlo0ZVabktDupck7uhY5NQdRmufh8YW7jF1byR/7h3VoQ69pcy4W72FuMSKRXUsTBnnSwtRdDK8eKI9NtiW5lLNt9hwD+prg+ie5Nd940tpdYNs2lGKeGOIIAsgBz34+prir2wu7Lb9qt5IgehYcH8aznUjKWjO2jBxgkyrRRRUmoUUUUAFFFIaCjR0Nc3ZPopraUVmeHYyTO+OAAK1FHFaRWhw1n7xXltmvdQsLRMZmmA56V7Fd7LbS5ioCpEhwB2A//AFVwPgez+0+J4pWAK28Zc59TwK6/xVdrFprwqfnmO38M8142YTvUUV0OzDr3UefRRGQmSRiHdixwat010UsMAZHANBX5wcn6VwylzbnUMuG2Qu2cYFc2TuJPXNbmrSFLUgdWOKw9tepl8PdcjCq9bHYeBPFB0yZbG+cmxkOFY/8ALMn+leppjG5WDI3KkHg189n07V3PgTxX9kKadqb/AOjk4ilb+A+h9ves8dg3Je0p79RQl0Z6lbzmBm43I3DIejCs3V9O8pftVn89sx5HdD6GrZORwQRUlvOYiRjKkYZT0Irx4S+zLb8jRrqjl35XcvOPTtXL+JdA+2B7q1UC5AyVHAkH+Nd9qtgsYN1Z5aAn5l/un3rHdhgkn8u1bQlOhO8RaSRw3w/05rzxTB5iYW2zK4YdCOB+pFevX5wsYxkbgDWX4XsYUFzepEFlmIQtjGQP8/pSa/er9mjKNjDkk/StK9Z4iopCSsjAsNI8J6aRiJ9UuF4L3DYQ+4UVJqXjWG2jMFtLFEgGPKtUCjj1xXms91cXH+ulZh6ZwPy6VEPqK9BZW6r5q02zP2tvhR0F94qu7hj5KlB6scmsS+uru7O6W4dx/dzgVFkYzS7xXoUsHQpfBEhzky5oHiPU9An3WNwwTPzQucqfwroJvFNvrGuWl21uba4ZfJmUHKt6Ef8A165BsN94A1EY2Rg0Zzg5rGvgac7ySsy41Gtz1mCVIp22gk45Fee67pn2fVpo4FzG58xCPQ9q7bRrv7XZW9wqgsy4Y+hHBrTl1bRbm4TS9Tijt7gAbJGGA2e4btXz2ErTw1WSUb9zeaUkjzSHRZmQMACx/hz0rZ8PRyaXqYtrjAiul49NwrtL/wANS20Xm6cy3UWN23IDY9uxrg9Yu7mRlJtmhktn3jeCG49q7ViKmNThbQm0YanVahb2l1p8i3kamOA8lh0U+n6fnXL6Z4jv9DvSmgXM01mDgwy/Mp9cV0cF5HqFnIZF228sfzEc5BHPHtWFDpbvJ5UEMrkHGFU/yFPLaEJqUar26dCa0+XYz473/TzqBj8lorjLRjoEc849s16WPCdxrmjtInkMjYkhO7OSK5tPBdzIyvfSQ2VuylH3sC5B9FHPXFbvh42PhNHGnXN1dM4wxnfCfgtYY2pCnNSpSvKOw43lHUwLvRbvTp/KvLZ4D2OMhvoaFto1GWkxXR6n4gu79Nk4ZkYcJtAGDxmseOyZlBCk47tX0GAxNTEU+apGz/M4qseR2TIAyquEBPuBTNoJwErQW1wuDkmm7RGflQE13NJqzMb22M7ULcvbl1BBj+assMMg4B9632djkYyeh9BWC8Zhd4z1U4H07V4mZ0FG04nbhpt3TFU9hVywvWtXPBKk84qkQOM1NbyBJVPBweRXiySaOo7FGWSIE9GFchdyXqXMkMUYjCNgN6+ldDazv5pDr+7IG0isnxLFd/aYmtQCrgg+xFa5ZUUKrg+pnVV1cZZ3mpopS4eKWLuGGajvdFsL5TICLaY8koePyqgtnfv/AK2UAfWpodNAcFp3J9RX0f1iMfjkjmcH9kxr7RLy1JKqJoxzvj/w61nBiDycmvRISkEYVV3f7TVU1CwttQbdNGqv/eQYNZzxtCOvMOKm90cUHU45wacPwro/+EetgDiR2/3jgCq76fbWud0iAD2zWSzGm9Ea8jMXtSf2f9q+5Ed3qvFaktnHOd0Tt7E9PyqSC1EA3PKT7dBSnmEEtNw9mzGbw5cE8vGg9Sas2egSwEOt8ykc/uga2Q8jrjgDPGOaaUORl2ODnriuKWNm9nYvk7mtpl48cAWWUysONzdakk1O2UuzyKNvVgelYvz5O7GO3NRLbKyFZDuUtn0rCdec/ikwVOK2RutqMDoGVncHkYqvLfqEO2I9O9Z4iTerDIx0GeKexP8ACBXO4q9yxpkmLhl+6eef8KcHdjlmIaq8l0kYPmEjHpSwTidsRJI5/wBlSa1UJy2QtEJPbSzjDXBA9Kqvp5VcO+8Dp7Vu2ml6ndMBDZy7fVvl/nWrD4R1Lf8A6TJaW8f99pMn8sD+ddEMPiOkTN1YLdnEW32hI2QKWXPGavCeZdqtEcngnsK69vDujWoJv9eTPcQgf/XoUeELaIt5d5e7OS+SB+PIH6Vu8G3rNpfMn2y6Js5Oa7iQ7WYFj2HNT2kM92B9ltp5ew8uMmt7/hMdGs33aboVqjDpI4Gf5Z/Wlh8davfyhLUQ2sOcbkiHH50vqtCK96bfog9pUe0TMTwXq2pOrHT5URf+euEH5Hmr8vw4uxIsl3qtnYxYwy7iSP6Vh614q1Oa7kjXUZ3iBwCDtBPfgVQ0yO91W5IErsv8TsSa1U6NNXUW/VitUe7OrTwn4VswWv8AxBLcn0hOP5UbvBWnZNtZT3j/AN6ZunvzXM6zO+0WFqhkSNiXkVcZPpn0FU7LTZ7mVd6hYgcscgkCq+tWV1FIPZX3bN+FrDUnvHgsUiD4KuXwIwvXArJ/tmVJUkBErxH92ZPnC46Edqs6rd2ZtI7WwkMSD/Wuq8t7fSs6xsYbq6WGESyH+Ik4AFY/WJS1bsUqcV0N+DV9a104uryd7OPOQz4XjrkdMVgaxexT3x+xArCgCDn72OprS1i7OlH+zIXQpsAkAHfrg1kweddTLbxfLu/ugDA9azU5SfNItRS2J9GsPtk/m3LeXbr1ZuAan16b7RMLeCaNLKEnZlslj3JFXNfePTtNg023QyTuA0hxkqvbPuawYrO5uXVUTBJ70Ru3zdBmhoWkJf3agSGRFILYGAfana1qq3qxwNAojhJwA3BPrW3NEdM0X7LANtzOuCw6hT1P1PSsGLSS527mzUxvJ8zFdC+HbVru8CJGnlggsdv5Cn+JLuOXVHjs3cwxgJlTwWHXA9K3IIU0jTdkGVuZuAW7A9W+vaqsFmsQ5UZ+lC958z2E5GJpeny3t7GrI4j3ZYkdfb8a2fFjzzNFZ26j7Jb/AHiOhfoT9B0rThuYbK3kdLiMT/dC+mep/Css31kiFXmZz1O1c5NEWpSu9kDbM7T9IFzOFeX5Rgnjj6V0eswpOYbPgw2/LY6M5/wHFQvdf2NYpcxwLIZXwNxwRkdce1YkmuTDd5UccZPJPU5puScrrYLNm5BpUIK7YlHqMVo6lGqwxQcIkXzPg8bj0/IVlW9w8eg3F1qEjF2XCAccnoBj865N5GcHzHLH3NK7lK/YFE7CL7NcOFgvN8xPKJySKi1TW4IU+yRRSq8bYdTxyOn5VS8PFLC0n1CYYwuVyOvoPxrnZ7l5pnlkOZHYsx9SaqzcgUUdFYaxPNcQ28UYLMcFmOcDucVL4r1G4guUtbW5IQRhnC9m7fpiqvhyLybafUpsKiA7Qe4HX86wLq6e5uZZ5W+eRtxqrNyBJXJY5J7q6jjM8rSSNjJbP1re8VXiLFaWMZXbEu9sevQf1qDwpbKPPvplJjjG1eO/esq7iubq4kndNu9sjcQPpTau7B1I4QbieOGMEs7BR+NbXia6a3ig01RhUAZufTpS+FbARzPf3LKY4FyAvJB9fyqnqItbq9luGknk3nOOFGO1D5Vow3Zkxh5pViX7zkKPxNdL4uCWVnY6bDkkKHcdenSk8KWsE2qBkiAEQ3bicnJ4FVtR1S4e+nKyn7xUMAAcD3oc+iCzbMuLTb6cDy7aTDdGIwK6nxMkSaTYaVHcxR+WA0m45PT0rN8Pedf6xEGLP5fznc2c46fqRVbxXerc6xOyYIjxGD64p3bdgtqVWsrRB81xJMf9hcD9a6rxBJFYaJY6esKPEV3EN6j1rmPDyG71a1iIO0NubHPA5q14uvTPrDxxsdkACD2Pf9aGpN2DS5Abp1UeUkUY/wBlQK29fkFroNjCf9a53MT16ZP6muV06KS61G1gLFhJIFYe3f8AStjxrKX1kQAlhDGFwB680ezto2F9TKM6AE5yR1rd1dvsfhmwi5zMwcj07nP51hWlhcXMqKkLgMwBYjA6103i+AXFxawpPDHFDHghiSc/T6YoajHQG9Tlp5gFjMROSPmz2NdBqKvbeC7MEEGeQHPtyf8ACs0WNiuA9xNKxOMIgUfnW/4peOK20+0MSukaZXcTle39KTlFWsN3Zw0gwp25Jz9c12P2eYeB4ooomaaeTJUDlVyev5CsqO8lhTZCUjX/AGVAP59a2tfZv7G0xGDmVjyTnJwo/wAacpuVkkJruc1HpsjAmaWCEjjDNk/kK6/QbPGjx2kKSXAuJd3mIMAY9c9uK5pbWeSURKmJCQAD713dta3GmaJHbWflve42uznCjJ6D6d6yrVHH4tAdugyW7TS0S3eJzCctvXoSO5qlLeR6gSsd3G0WOI1OHb2qrqukyyyIkl0xlfJZj0+mPSsJLVI523sJQhxhOnHrXPGnGp73UrY6x5n02zeOIBHnADSdlHoPeskt2RSIv7wPJ+prLOo3InBhLg/dVDyD+Fa73EItQ+q28RlBBCREg4757Vahy7isSWsAKebKu23B5cnA+g9zW3Lc3OsLHbIDaafFgKi8Ej2/xrP03VNKcSFgWuMBbdZeEi+igcmtGKZrWDc4aaYt91Ock/yFZ1ZSirJ7itrqXRBptlavHcRxeSvI34OayLHSftcss1jAtlaNx52Msw9FFallpT3My3GqMHYfMkI+6v19auapqcVlAUGWkbhI05PtgVgpNbDucVq/hO4twZzeQuhOP3nykVTllTSrULarIXl4885G7/d9q2by5nub0Q3Q826I+WEnCR56Fz/SoI0S3fz5JBNPypuGAKpjqqL0P1r1aWHvT56srIylW15Yq5jQXF1qcnkzQxXOOrSLjaPUmrIOm6bNItorCZgP333gvrip7eKfUDLFar9ns0O6WeTgD3J7mqsulROzS20sgsx96aUYLf7oolQqKPM9IlqpFvl6lGbSbm9mZre5iusnJw2CPcg1amhj8PICIzLdsOZSvyr7L/jVi/Elppq/ZIfJtZDtDMcPJ7464qtphvZ2KxylYFGXaTlQPx71nJzS95WX3FKz2MUC41C6IjRpZnOcCtKSK20mLIkEt/6j7qH2/wAa0Z9StbZ3htrdSrgK8ifIzH1+lZx0uK8kJs55d33nEqjC/jVKrf4tEFipbTzXVyUIaR5MgAckk1ctUTS3O8eZeryOQVT/AOvV6W2OmWgXTU853HzzqQW9wB1ArJt47q4n8tI2aQ8kMMYHv6CtKfLUu9okt2FnaW7mBcs0jHAHUmtK2SHSx5kwWW8H3UPKx/X1NQXE1vZRmKIiS4Iw8uOB7L/jVS3HnOscWXduAO5q3TjUWitH8xczRK17etcNIskgdz2Oc/hWt9oWyhWXUEhlvM5WPaAU/wB4+vtVB5DYPsj2PORy/UJ9Pf3rPkcySfNl2P4ms/Ycz912Q+fujRluLe6nMhknhkY9T8w/xrVRZ7WJ/MmFxNwY4hwQOxPf8KxYJIrAeYQst0R8o6iP/wCvVGW4klnMkrFnY9epJqHTm1ZbIfu3Nq11F7WcyXttL5rnmQ9cegrYub5Ioo5ZFO+UZSJuDz3PtWTDL/ZtmZLyRpJ2H7uHdkIPU/4VVk1JLohr23SV8Y8xWKt/hWMoRm07WHZrY2oLFrgNNLcATH+IngD0HtU9wiW2ySQi4eTiOHqX9/pVS0hs7ERXU80sbMMxwy+vYnHaoYnvfPe5AhuSx/gYHA9AOo+lT7PmlaMtPuFdpXaNCXRjfrvvmLSN/cOAo9APQVRbQ7SykSWeZ5hnCW4HzO3YfSp1kaNP7R1EGMZxFF/fI7ewqkt8bm8a4klHmngdto9BWsKM5Pli/UXPZXIPEEOpPKst1Fsj+7GEIwvsBT9Fjmgie5v5pEs142N1kP8AdGf51rQfZxbtcXifu0+6ckl2PoKbbNHcyGa+Cs2NqRsPlQegHrSlGSTile3YpTVjDudSiuztuLYPGPlTa20qOwqfT9KsZ4ft0sk0NmjAMJMfN7A1q3ek6WYvtEimOEcsYz1PoPeq1/Y3upQRGJVht1GI4OgUepPrWamrWWhVyjq8V1qNyGtVikgjG2OOFgdo7cdah0/S3dnl1APbWkQy7MMEnsB7mrFtoVz53+lkQWycySg9APT3pdT1qRphFagx20Y2hHGdw9TnvVcz2iHoZl9ftdTgA4gjG2NB0Uf41Z0qKWYtKzulpFzLIDwPb61Z09IdWuRHJYwqAMvMhKbF7k9qk1GezntlsbS5NtBGcbSmRIf7xPXmqcle1g8ileX8V1cFjaxeSOFDLzj6+tT29vFqKHYGtoYFyzZyg+vuagtNEvLqREtzBKpOCySdB6kdak114rULp9osiQxH95Iykea3f8M9Kel7JgQC3ccwXSNznBOz+fFPm+0rHm6tg6Z+8yZH5iqtpHJczxwQLvkc4AFaV9eNYJ/Z1owBQ5mlU8s3oD6CpsxlSBLJ1a4miZIkIyA3Dn0AqvKVu7h5luEUscKjfLgdgO2Ks/a5LgJDNGk4JwoZecn3HNS6hYafbTLAskiygZl8s7lQ+gzyfzq1Ky1EZzNexkOm+SNf4l+YVWubtZnJlhjb3xtOKvLYPlVs7lHPYNlGPsO361pW9pdAOuowZijBZ96hzj0B9atTS1EUdPgtYIRdvvSRgREG+YZ/vfSqctjOT5kVzFK2cnDbW/Wr97LbXbbniaMgBV8t8AAdsGoVghkfEFyOe0q4H5ikqj3CxWzqFouZIpQh/vrkUxL2JgRLApOeqHaa0khvYA3ksWGOfKfOfw61PA6iN7nUIIWijGB5kYVmbsM9TT577oLDCbe1tWiErw3EyhiZBnavpx61WgWQHFvMr45wj5/SmzJZ3czzOZo3ckko24fkef1qD+ziGHkXMTZ4G/KH/D9aPdegF2e7l2GO7hRwe0kfP51CsNjcMFWGSN24HltkZ+lRqNStBv2SlV/u4df881ct7ryLVr25gizu2xqV2MT3Ix6UcrWzC46+so1t47G2uo02MWk8wYJb69OOlUBaanFkxK8ijjdE28VJHJaSEl3liY8j+P8AwqWJNxY21xG23/a2n/P40c0kFiib6VH23ESFhwdy4NWrGSC7njhCSozHkggjFWnku1X98jSKR1dBIPz5qdHtrewMj2iJLcqVBjypCdyOo/SjmT3QWK95cxTTAW1yqxxARopbacd+frmpYpb2KPeEZ41H8S7lxWTc21ogXyZ5VJ6h1BA/Ef4U6OzvETfbSowbgeXJg/kcU+SL1TFcvG5t5c+dZKD/AHoiU/SrFlbW0s7PA06iMbjkA4HuayHur6DC3MbkL/z1jz+v/wBetCa6jtbKGKSAJJc4kby2IIXtnPr1o9m000wb0sb8l3bXKQgyqZSPu96ftAgIbk549K4fWW8m83wEgqQffFdnZTrdaZFMpByM/wCNelDR3MZfBYqytlgO4zUTHc4I4BGKdNwwPTtUO/t0qiCDVjHsUPnPY1Dpxxp12PVhS6x96Me1SWkG3SWJYZd8flS1ewNpblOIIXIlGAaguohC2AQynpUs8TIcP09qqtkjvxSvpytDSu+ZPQvaJFdXd6tvZAGaToM8ED19q73ViLnRGu44ik0RCz4Odjjpj271xHhXDaxsJKCVCgfsGI45rf8Asl5p2hz20ymN3chgf4/Q10QivZ69RPWaN/U4zd6baXyczQKJMjqV71BqjQmIOAMOMj3JrZs43t9AtjtUskYLDGSR3Fc7exFme3HIUebCfVe4/CvPwVd1KbW/LK3yJqw97l2uZd1bmInHIHU1SLFTxxWxDKJE2yjkcmo5bKNidp5yF/E9a9JU+f3oHKq/s/dqFOCZyRyePfpU5tZLlkWJSSelPEVrAp3uSHfaPYDqakGpsJ5DbqEVl2L7Ct42jpNibc9YIzbm0CFjIflU4H+0azJlwSccn9K6M2rSW/msP3YONx7n2qhdwxooVfmkfqew9qUqd9UEKvLo9TEKF0yR+NVZYwM4PTv6V0GqRKiRwW4XKrlyKfd6fb2eiLJKMzy9DUvDvXyLWKjaN+r0OcS9u4sLFcOB2GasR6tdjh5ju/nUttpk1xC8qgCJOrH+VZcqYOOODXNKDirs6YzhJtLoa39qXgyDJVWe6nlkDuQSO+OtVYpgF2yZOOjd6mxzntjiosaJLobOmagNvlygOh4aNv6e9QXtuizA2+TGTzkcj61mEEYI4PtV+0vcgJIcMeM+oqkyXHW6K8x3SHH4UgGOtWJ7bHzL19P6j/CqwOMg9aPMaPQfA/xL1HQlSy1FTqOlDjYx+eMf7J/pXrtlquna9YG70uRbi3PDr/EhPZh618xDP8IrZ8OapqWj6hHcadL5co6jPDD3HcVtTquOj2MalJPVHo3inwfb3TST6YFhk6mI/dYj+6f4TXFXFrJa3DpLEwkSIlg0fzAd947jp8w9q9Rt/FdnqOnrPeaXNb3DLy1uwKOfUZIrHvrvS9Uwl9a3YA+7IFG5fcEHNaOVN6pmK5lucFbY8u1C9Xyy9CXH+yejD2NOUI0TkbRmTAbooPpnqh9jxVnW7ez0+5QQTF7YgjzHiIVj23r2P+0MVStz/wAeoydxJxjBbH+y3Rx7GpTRVuoku/zJ1KZAABRlyT7svce61m3OmBnU2ThH6qpcYY/7Devsea1U5QYCFPN+7ghVP80P6UjKZJJurM7ANnbux7jo49xg0NJ7jTaJtF8Z6hp8n2TWY5LqFPl+biaP6Hv+NdZDdQataPJZzJdwAZdcfMn+8vUfWuHuI0lDpKElXISM7jgf7r9VP+y3FUGtbuxuWn0+WUPDySuUlT8O49xmmpyj5oHGMvJnSaj4ftbzmyaGGQfwOPlPsD2rkNVsZNPmCXttNDnowO5W+hrpdO8VQ3WE1qPY/T7VAoBz/tL3+ox+NdNFaG5tNwEV/aNyHj+cfiOoNYVMPCrqty41ZU9HseWRxqTlLrC9g2R/9atfQpHklu7WQoyzQsAeoLDkVt6r4Ygky9rCYj3TcR+RP+Fc/b2iadqdtJI8sbo4JWROCPrXnVaU6b946o1IzWhmO0TAiW2ww5JUkUrraPjy5JYz/tDI/TmtTU7K5tNUuRayI8O8kIzAEA8jg8d6oXEU8ZLS2oZTyG2cfmKxvrYtD1Micx3iNx0J5P51ehSW70C6ieEO9s4nQYzlTwcfTArB3wl8ukif7rZH5GtTw7cRQamiiZjFMDE4K4OGGB+uKdmtQZjN5Bb95A6A/wB00gigYfJMyn/bX/Ctm6gvYy8OUlCsRg7SfToeazpldOJ7MAjqdpU/4VpGdwsQi2lLbYXWXP8AdYZ/LrWtqcMr6JZ3Zg8uaFjbTALjOOVY/gcfhWfbC2O7cZUbtjDCtrQ2Vxc2Iuci5TEYIIKyDlT/ADFLn1E11K2m+L9U0+3S3ilUwJwEdcgV0/hz4ny6deJLe2azoucBDtIJ7+lcqouvnSSGKbHBGxWP+NUZhCxIktPKPqpI/nW0MXOOlyJUYvdHfp440671O4u7iOaNpT3Gdo7Dir2ra5YzWkTQ3KeW4O0njJHavL/s1syjZLIrdwwBH51rWFv9o0e6sPNjeVWE9vyc56MPoR/Kt1mEkrMzeGj0NrTXWTUHuGIKQIZM+/asm9dm8lT9+TdK3rk9KxfIvoASEkx0OzkY/CmLezxSqzFty9N3t9aTxCm02Co22O3sUSIIBjLssQ/4DjP65rl9WuTPq13Kfm3SHH4cf0p0PiCZWQuiNsOR2wcHn9TVW2t5byK4lhKuYRvded2Ceo+meawxE/aSutjWnHl3GhsgU7IAqJNo70MSc1y2NRzHI6YqBFBYk9alzjAPFM3Y4xVLyAikUtKQKa6DOPSp4l+Yk9aaRglhzzVqXQViAEpkqzAj0OK9U8O2sd54aSxvcSFkP3+TzzXmtlbG7v4IBz5sgXj0J5r1OC38lG8vIZen4VnXlppuJnkut6bLpWoy2soOFOUb+8vY1Rr1Dxdpf9t2PnQpm5iGRjqT3H415eylWKsCGBwQeoNddCr7SOu5DVgoopBWwhaKQ0d6Cjp/C0WdNvJMdGA/SrONoyas+GIAvhaaXvJIf0qGcYQmt7WijzKjvNnZ/D6EJayz8bpGPPcAcVneJ7nztVjiU5WNcn8a6PRIPsejxqO0Zyfw5rgWuGuLy6mXlmbAz6CvnK0uepKR6lFWikTE0Z5oHOMjmjjdntXObmVrMmZFQduTWbVi9kEl1IR0BxUINfQYaHJTSOWTu7iYoIFLS4rck7XwT4paIxabqUn7onEMzH7v+yfb0NejhgOvQ14CQK7jwh4pYRppuoyd8Qzsf/HWP8jXkY7A3/eU/mawn0Z6bFMYGHyhoyMOvZhXPeILVIh9p0874GOCo5Kn0NaySNJEpYYJ5xVawVrS8ZYgH88nfu5AX/GvNpTVnGoVJdUadhF5Om28XQhRn6nr/OuE8aXIEf2eMc52Y/Hmu/TOWPYcCvLvFsvm6oyDO6PjPvSoPVspI4fODkc0hOajDUoNfXHGPxmnKPQUi5xTlzTEOGB2FJt9sUo/KkLDPJpgdR4IvDHPNZn7rfvF/r/StTxPYW11EstzhSh27vrXNaFZakbqK9tLOVoYTuZ2G1SvfBPX8K7y+hjvLOWJgCsiY/OvmMU44fGKcdnudUPfp2Oa02XW9BYSaXMbu1HJt5TkY9jXT2PiTQfEq/ZNag+xX3K4l456cN/jXndpqF5pUzRrITsYqyNyOP8APatyK90vXAIb6NY5T0LcEfRq9etl9Ot+8pvll3RzKo46S1JrKCSxu77TEyzQOfKcnjYehrpYtXvIbSOOIKmRhnjUAue+TXGy6fL4f1GC5+0PNZyfuiW5K56c122gfZrpvKkIaKQZDZxhhXi4qksPWSrfC97HSpc8LxM+Zbi5DEuUYjg9T+dcxpV7MusmO5Yt5ilPm7OpwcV6LeaX9mO6OdHi65YgED+tcH4msZP7TE9jhzkSDaejdDXfUpYWVHmotGVOc+e0zqrUiaDJxvjOPwPT8j/OpwmR3JrMtLtY23Op+ZcMo9f/ANdStqRGQkP4k1pl2YUqVHkqOzRnWoylO8S+U4wcCoJbcMCBms+TUbgjjYg+lU57yRh89yR/umuieb0fspslYWXUvyWxQkllwO4rE1REWZJFdSXG0gHJ46f1pZJom++zv9c1WnaN0+VcNnIJPpXDiMw9vDk5bG9Og4O9xp6+hqvJbR+d55Zg3fnips859aTnJB6dq86La2Og37O6X+zSxcLt71h6lr8k77Iom8tePrTHyybQxA9KRVVRwADSpQjTfM1cHqJb6lHKfLaOXPsMCrqXgjTEUOD7mqfAPApVz61c7SEkWvtkj5wFDDt6VBcXd1kBec8dabuOOCM1G8yDO91B9M1MYa6ICYFmHzsSfrTGRCMEZHvUEl1GpC/Pk9tppyG5nIENtK31GK2jh6j1SFzInGBjFJw45AIqQWN4I90pghA7M3NECWsZ/wBOug/qENaLCy6tIl1F0IuAOoxUbXEaHDSKPxpuqf2VJ/x6m4V+nXIP4E1SksES2Nw7EgEDGcHNafVYR+KX3Apt9C5Jew44LN9BUbX2eEj6epqj5yRgbY1/HmtK1gm8j7TcBI4Rzg8U/Z0YdGwvIhae4dcoAvpxms64/tJnINwiqO4OKmvbxJrl3hUpH0UdTirelWH2lhLdNsgHZuN1W5wirqKQWfVlK00u8KG7a6OIxvyB0/OtXT/EM+nLIYVRpZCS0jL/AEqtq8zOzRWoSO1Bx94ZfHc0zS9Ka+fO/KA8gDAPtmnGvKK5r2E4J7m3a65rN/uczyJAOSU4rG1fUzLdOsFxI8SjG5mJ3HuasXupq1qbOOLy4wcHa2CQO30qrp9v9puVjt4I1A6nGcD8e9Q60pe9JgoJbIbpVpLqM+CxWFfvNVrVZ2Qtp9gCYhjzGJ4bHofSrGvy29ssdpbMRMpzIUOAOOlY0MUtxKEjUkt1PXAqIy5veexRLY6bPdyhQykAjdtOTWlf6hDHpz2NrG8RztZhjOB2q7M6aPYCC2H+mSDOT/AO5PvXPC1mdsYJZvXvRG83zPYBtjbi4nWGKDLd2Y5x74rX11xpUMFraXBilxulCcY+vvV2yhTSbEzR/vLp+FXHf1/CssWJlkea4+aR/mYtySTQnzSu9hNmQJLq6lRFJLOeCDxj3rrJHGi6UI4FD3k4IBP8IPBY1Lp9mun2/wBpdAecBdv3vaoJSZ52muGRWPJ3EDHoAPSlKSm/JBc59bGdyAAOa6axhGjWHmjD3EnCfX1+gpIWtbULcXRYoeBheveqV7rMUspKxkoDwBgYHpUtqbt0DUqf2YJHaWQvIxOSW6kmtzT7OLTIXuWiBJ4UHu3b8BUGjSteBpGUQwJlsnrjuTWHdanLcXDYndlQ/L2GPpVSbl7q2BJmz5LSO885zI5yzGrdsbO1Hm3bhcg4HrWBpUMmoXqq7MUDDhjwT6fSk8SaktxeLb26/uLf5Q395u5oalJ8qBIvTavEZXkeR3Y8DC/hVyxZprKa5ixAiKW3NyeP8a5nTbaS/u1jjBI6sa0vEV8YY00y3wFjOZmU8EjoPwpuLb5UFkRXGtXlw4d3UMF2/d5xV3w8s13dGe5lZo0yck8DHU/hWBbQtdzJFGSWY/8A666DXGi02xjsLX5ZpFzLjqF7D6nrRJJe6hmTq99FdalNLHhYmbag9gOKm0Sze8vAVQskZyfTNZpt5ZVVYY2JJAziuqkj/s7QWtrSaMXEnyuxblQRyf6U5WikkD7GV4i1AXl6EiP+jwDYnue5/OoNIs2v75Iv4By307CoktYUQCW4JIHSNc5/Ot6PGjaYJoE3PKwBL9eR/Sk2oqyAzvE90puRZQOTBB154Ldz/Ss3T7N727jhVW2sfmbHAHerLXAU5SKNSTknbk/rWvps7wWM1zcltrLlV6DHQY/E01LlQmrDfEzNLFBZ2oQQRcs2cAnsPwrDisDK6IJkLscBVGf1pGlU8lhk81q+H4kJlu5GKRxjAOPbn9KItxQ2rIl1WVIbSLT3hIVVUna2Aay1aNSBDbRhjwMjcagvb1rm5kmPVjx7DtWj4WtpL3Uw2Bsi+Y+me1O0krsWiRoaywttKtoUbErHJ28Djrx9a5eRgM7iWPuaveIr37ZqkrK37uP92vpgcZ/HrUOhWn27VIYSMoDuc/7I5NXCNldhsjoJM6R4U2sw8y54x/Fk8n8hgVy5uOMKvSug8Webe6mLe1TMNuuCSQBuPJOf0/CsqHSJHlRHngG4gYVtx5+nFEYq3NISZu6Y/wDZvhae8dQJZgQmeDk8D9MmuQZ2YfM2a7DxJLDLHb6ewkSKAA7VxzwAOaxttrEcx2qk9vMYtSjOKYJM1PCUYstGv9SbJbBCe+On6kVziWF5Pl1t5DkkkkYFdVrF01rptrFDIIic7kjGB78VjRJfX0ipbwT3Dk9ACatSk5e6hebNLwjaHTmub66K4jXaNp3Eev8AKsh4bOWeWae4lleRixCAAc/WurttFv10SaCO3zcNnevdeec/gKxoPDdwLgfbJfKTPIVMn9a0hRq1XdIh1IR3ZL4Yt7Y6puggK7F4dmyQTx/WqV1fzPcytvGSx+YKATXe+HdE0iC5hSKWVoJcedJNgEH0FdPd/DbQ7uINYZjYdHjck/r1/KtKeCqVm9dtCJYmEDyHQo5bnVoh87bfnIz6VJrlvcXOsXDomEB2ZPHQY/pXeDwvc6FqixyTi4MoxEuza3GOvauUvUu7e8MV9aTwzuxPKZBz6EcVpTwcPaOM3sRLESspRW5m2GkvJdwrJIANwyBWtr1jBLqQDbm2RqOvrz/WrGlRNHeh5go2KTjIJ9OlVL/ULR7yeX7SWDMcBEJ47c/QVVsPTrWeyX4kOVacbrcht7WGKVfLgQSEhQSM/p0rT8UAubeKNVDhCS/cAnt+VZNterPfwRWqOMuDubBPHtWw7XD6lO04jEKKAg2ZLZAPJ7YzWGJxNPmUqa2NqUaiVpi6HYraL58mWuXHyBh90ev1q5qFwlrGpMgGD0PUj2rAu9YntryaQyJPGAMKeOcdjUUOo2F1MZZnminbpv8AnVT7V5NWMqsuZnRFWQ+6u5buRsLsjHAHfNQRaY0nmF9qJwWPQD3zWgLIAM8nzheRHH95s+oqtdSzXAUSL5Ua8CPoB/ia2g+RWgLfcrtbImBYs2R1nbuPaugtfB1m+jve6rPPG8nzRAHBA9SPes+yRY1Et2WSJeVGfvnsAPSn3F7casx82Vhbp8oTv+JpqqoXb1Ymm9jGsbfypJBZxGadDgu+MD6e9VSdRN0WVZkmJx8uetdNZQrDBI0jKig53EcD6UlvbDWZmt4HaCD/AFjN0d+3HpWfPG7bKTK8Wu3NjabJ5/Ouc429l9s9zS6XrlokryPA/wBrkJAdvmxn0rdufD+kG2BmhCbR95WIP1ripp4bK4ljsV3ODxKzcgH0pU4Kq7RWoXVtTckhbDs6pK6nc0KH5nY87m7/AIVSubSYpFeaqAkDthLYHDOB2wOgrE/fyTA/MZG4Bz/WtePUW0+3MckouLjjGcMqfQ967FVnCV6i5mtvIzdJWtBl6dtqebeqsMBGI7FD1HbdU97cwaQ1vLdNDf6gFytmP9Xbgjgse5HpWTb6tHM7NLAy3L8CVPmKn1ANTx2VraSmSeYTTkb1jlOOT3brzWscVFtzq6y6LoiHSktFsQvBPqV0t7qMruJDhVxhm9FUen0q/a2E2pzra2MabwCWXcBFCo7se59qpXzXJDzPuVVxumA5I9FA6D361e1O7gube2/0RNO06JAEt4ziSY/3nPXB966E4Ne1rO/ZIh3+GJkT6dAZZBC4MELESXWfldvRRUknnS6dKbKMQWEI+Z2ON5+vc1Zi+zzQy3uqv5NsgAhto1yZGPQADt61oeSpiivdbTbEvMGnLwCT0LAfhxUvDxl+8re6uiD2rXux1OVsbe4kdWQtDGPmMh4AFXbjVTH+5g/eIBtd3HL/AFrevY0lj/0wY1J3VYNOUbQAejO3QD2qlrGgx6ZcmG4ura6u3QSS+Wf3cIPQZHU+wrKWCfK5ydkaLEJvlsYkNva38pWOKSGQ8ko2VHuc1P5EcFs0emyxvORh3ZsMfYe1S6ZZX2qyvp+h20k4X5pHUY/Fj2+lZ5sbtLyaBo8tE+x3Byqn3NYunVUOZ/Cac0HK3UpG0vROI/JkEjHA44NX3lj0qMopWW9bhn7J7D396mnvRZoIbSQs+ctITnn0A9KjV0u51Wa1Wd2OAE+U/pUus3ZSWg+TsZS75ZMAEu57c5JrW+zrpUIkZw2oHonaL6+9aSxafpjyLDLsuyMb3+cJ7A+vvWY+m3L7plMdwCclo3BP5da1VeNR8qdo/mKzWpnyNJLIXkYszHvzk1pQQppuya6jJuSN0ULDgf7R/wAKuRQLo8S3Fyoe9YZiiPKx+59/asu4lkuJTNM26RuSTWt1V9yC91dRXtuJdyS3czSzOWZutXdNtIrJVvL0kDrFCDgyH1PtUlpZxW9st3qOQrf6mHoXPqfQVSd3mlaSViSeAOwHoKiVKFR8lPZbsOdxV2Tz6xeSyuzsNjf8s2XIH0q5p8Nrc2r3V9biGCPo6tjzD6AVXtrYG3a7uF/0VDg84L+wpbh3vtvnDZEvEcQOAg/xqHRalyUn6jU1JXaL1xcWt/MsiXSRKo2xwuNoQe3b8asWtlJKd7kC3UFmdTnOPT3rGt9MWV2Pm7IUGZGbHA9ven39/IyxRWAaG1i+4FOGY+pPvUJ1KfuRBxi9Sa4vhczICGS3i/1UZ7e5960bK4nnBjinPlqMueyDuay7C7vL24SAxxTE9TIg+UdyT1q3e6hpqRPYQ+ZHEGy8kfO8++ecfjQ6kFDk5dSXTd73Jbm9S7uQfm+wxcgE/wCsI/iPtWvBFZ6lbrKkSSIw4yPSuXFnHfI0FtcJKDxsYlCa0bsPpmnQWFuskigZmlTOAD/CD/WoqUoWiqbuxqTv7xKLRLuOe101RBag5kZTzK3oD6Cs+48LXKYaCRJPY8H862bTWNPECw7Gi2gKoI/TirmqXLmUWVrg3EoByT/q19frWUlODs0UpX2OcmV9MsJLOwVpZ2/4+ZkGdv8AsA1lxajdx4QOz8/ccbv0rvLazitrcRwA4TqSck+uap35S1WF0ijmunJEKlMnPrn0FRzq9ikzLmuLfRoB5sEa6hcJiQQ/KY1Pv61hm1spctDePGxP3Zlz+orpLnw0lypkmklM7Dczk/eP0qlBosGnMbq+kEkMfKxYwzt2FWpJbPUaYWdi+kWklzsW5v5BthROdoP8Vc1IJI3bzkdXJydwwea1NT/tG5umupoZVJPG1eFHYcVb8PS3F5M5uJs2MA3TGVQ2B6DPeqTaV2HmRabALCwOq3OAeltGw++3r9BWYLudpDI8rF3OWOe9aeq6na6hMDPbMYoxtiKPtIX6dKZYaRb6jMI7S7dGxuZZI+g7nI4p3VtQXdk1g6zWs93qiCS1jGF3Ly7dgDWaRZSkEpLbk/8APNtw/I1seIoLi4EMGnRB9Ot1AQRuCWPckdc1gwW8811HbJE4nc4VWXBprbQF3LsGlyzI8lpdI0ceN7NlMA+/SrOoNcxBYRC0tko4Yjcr+pNGuyR2SRaVaSl0j+a4ZTw0ncfQVmwzyIw8pnDHgbTyaTugWupXuWthGMQCN89UJH6UkCrIhKXIU9lkXr+IrpNZkjtLO3s72BJr0jzJS4GVU9Bkc1jiLT3wPJkgP96N8j8j/jV8ySswXcitFuHvEhRgAThnjfIA9atalfGaYxSKJIIztRZVz+NWJ9Gaz00PBOnm3f3TMNjbB6devrWW1tqdtCG2OydCVIkH6Zp2T2FcVorGbnymhOP+WbZH1wab/ZkbYNveLz1Eoxg/XpUYu0PE8CE9MqShH9P0q4UtyiGOaSPPZ13AfiP8KTco9Rhpen6n9rjEbMIs/NJG+VAHP9Kgu9Uae9YyRo0K/KiuOg+ta/kS2lkAjxvNOc/KcEJ2xnnmqzTzqpjnTcPSWMH9TS9p3QrGbM1lKOVli5z8h3fzqWFYSMR3UfHTeCp/PpU7Q2UwO+22sf4onI/Q5FRPpdu5Hl3bIO/mJ0/Ef4VSnGWjHZmlpkd00yby4tmBZ3zuG0dahuLtLm7aa5to5CeF3DBAHTmswSGzEsULpKTx5nOAPYVXkuZ3UK8z7R0Ga3hhJNXvYyc0T6naS3FwJYEyvpn9K1/C6yw29xbSqQPvpn0Nc4JpB0kP41e03UpILqNpcFT8pI9DXUlUiQ2mjeuRzVYnaqj1NW7ldw+X61SlOJVH41oiSnrJO9R6Cn2rH+xPpJUWsuPNUY6Cpbc7dGjyPvOaTGV5JiybW5x3qGGXypc4BHpQ/U/3RTZVAxg0k3e4+VWsdD4UgW5v5WWWCK1YBZVmbbn6e4q9qBlS4aJr03q+aI4mLZAX0rM8KW1xPBeMLZZ7LGJOQGQ9iKu2MJbVdMtIl4Vt5z/Wum/NFIzj7rb7HpFsoFukLEF1UBhnpxXO6nLF9raCNf8AS7P5x/txnqK37uGJQ1/YkNcwELewnqV7MPpXIeLsLrIvLR+NgIYN049PSuHL6Dw8akn9p3+8yrS5pR8iLUbdVPmwHMTfNx2rOleRVHzHBOauaTcrLbShGEiI/PuD6U+e0jYBlJ2+ldcYu7UWTKpFK81oYwVpHCr8zHgVaigSK0lkmOXJ2ov8zU8s0dsB5SgsCTWaRJKGYZO3k+1aWUPNijOU9domu94Z4IosBY4xwM9T6068s40s43kOJW5UDsKqM0cVpDHEA8v3pG/pVq2865hkmOSsf97pmuyEr6PVnNNJe9HRXMi5jkC+WvfnjqaqX0sszqsrE7BgDsK3SyLG5UEysMbiOlZFxbsDyOvf1rOadtGa02nK7Rbm1KGLQ0tIMGRvvH0qjo2kLOstzcgmJAcD3qHy1iUsQC3b2q2uqSJpptAu0OTlvampqTTn0RM6UoRcaW7erMO4VPMfywAuelQpJ5fBHy/qK6Lw9piTvJPKNyJ0B9ayNSMZupGQcZIAFc86LUPaPqb08QpTdNdCBjkZU5WkABxmosujZxwexqYYOcflWJ1lmK6KELINydM9xV1YYLgqJW2EjiQf1rJBz1OMU+KVoyADwO3+FJaCaL0unz2tyFdcr13DoRXTaVo8UaLfagu2I8pHnDSf/WrM8P6iqXkQlUTRDOI3OAG7de1dDqo1NWSa+tWSOQZV8qVx7Y7U2217qMpN3sya8v3nxI4EcKjCqOFUe1O8O+JtGs7ww6zYR3dtIR++BO+P6CuJ1rUGkcwpIxUcYXpWVGAx6mlFcrHyXR77faP4d1K3E9jZC6sH/iimIwfQjsa5nVfBWlyWhTTJ7jT5B8yrJJvjJ9D3B9xXn/hrXb/QtQ86xckHiSJuUkHoR0r1ey1nS9a0/wC0RvNY3IH7yCRDIhPqpHOK64Sg1qrGE4yi9DyC+tNb0/UHimRzcKDhlOdw9fcUywu7gW2LqOT7N5n3gv3X9vQ+1euT29hqNrsnngZR/eVgw+hxXH6/pC26PPbXscykgM68OMf3l6MPfrUSgt0ylO+jRgNeTecyHetySD80f3x/tDvS/a4CwBmxETySCDGf9k9a249BgW2WSHVnmRgHDRoPlPsc5FQanZx2wWS4ubnBIMmIRh/qOlS4yXUfMnoYN55N3K4aSPzweJEGC49x6+9XNBvINKjldrpxI3BWNsAe5qSJ7J5Mfayttncm+LDIfY9afLZXTs0sS20u45EoUASD0I6fiKhpvqXdbM0bfV4dRlji+0MC5wGeXaAfrW3PoF7c2jLNG0kWOu9Xrg72zhVWzAbObPK4LRN9G7fjVjR/EWpaGRGrGS2brBLypH+ye34UuVbTYrdYmhqPhrU5cOlnKzRrs3Kc7gOhP4Vzrme3uPKaRo5FOCrHaVP0NdnZ6ha6md1jKY7kglreQ7SP909GqPULeO5+W+hYyD+Jh8w/HrWNTBRavBlxxDjpM5W5F35Ya5gEqdQWQEfnVdTb5V/I8pwc5QkfpWvPpUiEtbTYUc/NkEflVVVvNpTYJR1I4c4+nWvOqQnT0kjpjKMtUTa4kcssV6shj+0xiQccEjg/jVOGC6DZguUfP+3g/ka0ldLnQpEltxmzkDBRwdrcE/nisdpLfsZU+oDf4Vnd9CkT3C3EbZubRSR/EydR9aiilt4biObynjdGDDa3cEdjU9uZN3+i3a8jPDlD9PSpbiW8VF8+JJQOASqv+o5ou0OwmtW0X2z7VDMIEul85AeRz15HvVSIXw+W3kWUdcKwJ/KtAyRXuiSxmALLZNvCrkfK3Xr781QWG2kjBEssTehXcPz/APrVXNYSInLxEG6slw3cqQT+NGn3y2V7DcRo6vGwbbnII7g+xGauRwzImLa7RgDnaJCv6Hii6a6bBu4ElXGN2wH9VoUx2GanEILxmik8qGcebECeNrcjnpUaC6dcApOB2BDVfRbfUNGdFj2SWJ37VJyUY88n0NZwtrdmGy4dP99MgfiP8KHJCRXuIo4wVmtArZ7Aqan0ya1sL+KdDMgOVkXqGQ8EH6jNPWG9APk3CSAdhJjj6Go5vtKjE9qHzzny+PzWqU33Cwy/0YwXLiK5i2N88e44yh5Bz06VUOn3wTcsTOvqnzCty2ePUdMaNoyJbJdwCnlkJ56+hP61TP2f5TFcOpP99MYP1BpupJAkY7SSIcOhB9wRinQzRNKgmyqEgMw5wK24xdswEMySg8YLg/o1U5oyrEXNmp55O0gfmKanF9AI9SgFjevAXDKMFHHR1PQj6iqhXcQE+Yk4AFb4itdW0zyirRy2SkptbLNGTyAD1wT09zVPRIrS11OKeW5JjQkjcmDntT5opXDUveDLJ/7fVpkKi2UuwI5B6AfrXpEMa/ZHZuXyRis/TLnS712mtJEa9dQs3BG8Dv8AXmtq7RbW1Dfw9fxrirVbySBamFFMLa5OR+7Jw4/rXD/EHRltrv7fariGU/OB2b1/Gu7uoQQHHORuao4Iob+0ks7kBlcEKT6elaUqnI+YTR4xRV/XdMl0nUZLWUHAOUb1WqFevFqSuiQoptOUEnAGT2piPSdGgMXge3J6yEt+Zqtaw+bqNvH2LA/gOf6VuSW32TwvYwZJ2oo/rUXh2APe3Ep/gUKPx5/pWuKl7Ok35HmwXPV+Z02qXC2Phi7lbg7Co+przHSlKoWOcmuy+I1wU060sUPMjbmHtXLQp5caqOcV839j1PZiTKfXimTMI4JHPYUozVbVX22wXu5/SijDnmohJ2TZj9eT3owKCaTNfRbaHKL2pM4o7UGmAh6UlKaaaQzv/BfigkR6bqUnPAhlJ/8AHT/jXoFsnVyMnoK8AJIHfivavCLT/wBj2/2p2dgqrk9c14WY4aMHzx6msH0N+SRYYizHhQSa80vAt1NLM4+ZmJ/Wu08R3HlaZMQeZTsFca+AoFeVdp6G0UefPE8blJFKMOoIwacAo6V6HqOmW+oJi5VS5+6y4DCsZPB4Ex+0apbwQeoG9z+A4/WvsauIpUleTsefG8tjlt2Kt6fY3uoyeXYWss7AZOxeAPc12tnpnh/T9rQ2k19OMHzLk/Ln2Udvqa0ZNVmkQRqqxRDgRxgIo9sD+teVWzhLSlG/qbRo9zmbLwhIX/4md2sOCQ0UA3v+fSt22g0rRh5ltZRRyKP9fdtvb8B0FK1y4B5CZ9OKzmitNxeQK7Zz853fzrzp4yrXf7yTS7I1VOMdiS98XBmCosl2w4+UYUfT2qbRtTlu4He9h+zyBsAY4I7VVNzAvCLjH91cUwXq4+WPP1NZ1IwlG0Y2fe5S5k9TP1zSWu9See0ZRG4Bbd/e7/0qunh8/wDLSc5/2RWnJfOTwFA+lQtcSt1c/hXXDF14wUE9iHTTdyylqfsLWk0jSQHB2uc4x6VOsqxIEEu1RxgGssuxPJJ+ppuawqSnVd6juVGKjojV+1RgYBZsDHNR/bcZwlZ287TkYx702Ni4BwR7ZqPZoqxoG+kP3QBURuJW6yGqrnAwDg0b1Tq4/GnyLoBLIzMcEn86bmkRjISIkkc/7KE1bg0vUJ8bLVlHq5AH+Nb08PUn8KJc1HdlYkZ60ma1U8PXpP72a3iH1JNObStOg/4/dUUY6hCB/jXRHA1Jb6erI9tHoYxfHFMZgTz1qbVH0sSQppcskkhyG3ZOfQ1mXLvDNHHje7cgL0rOdBwly3uWpXVy8GCjC07y52UEQ4U9yQKht7WaSJpZG2KOmf6VY02w1K5crLL+77ADHHqaj2dtWw5uxa0vTXvZXSW6ht1QA5PcVpf2foVsCbrVmlx1CHH8qztQsLZkMEeSw+9JnnNc3fXaKj2tv86huWA/QV10JwSsopszalJ7nV3N94YjiKR2005P8R6/nWTDeacJB9k08kjnMjZwKxbW2kuGCkGOMcl34rXa4hgtmhstiv0LvVVKz2jp6AoJFi/1yaCRfKWBWZcnamSPSs5tT1C8kEYlkZm6KDgVXgs/PmCmZnkY8kL/ADNaMsY0iJRHtaSTqxPIrOVV/C3dlKKWwTf8SxUkuJBLK3Ow8k//AFqx98kzkhSSxzgCpJbqV7nJVXkbgZGSa3bREsbY3N8/J6KOhPoBUN8q13GQabZw2yGa8ZDKeiE9KoXpe4mLySxoueETkCop5zcXMsxTaGPCjoB6Vo6Vp7N/pNyNsY5w38zS1j7zALTTViga8fLBBuCvwDUN5qTXcapLGmxTkL2/Gn6rdz3riOFdluv3Qe/uaZZaXJMd1wMovOF4zTs0uaYXJ9JtZLyQMwWOBewAAP8A9ao9bu4ZrhY7Ufu4wQWH8R71bu7iMx/ZbP5YyBvb19qqw2YeUIoAxyWPAApRjd80hXKthZy3soVUbb3IrX1G5+y232KwGHxtlYdvb6+tT3H+hRJHZt+8I5bPCg/1qjEke4J5itI3Yc0tJPmewGbb2U00gUKfc46CuhUR6bbCK23famyOeq+/1phvI9MIVoWMhXIJ6VmyagS7OqbnY5yxyc1LlzvbQeoq2eSTgtI56981sQwDTbZZcgzkjauM7j71WtUWO2a7v3YY+6Bkc9gBWE88j8vK59ck03eenQSRruY97SzyAyscnJ5qxFMlkouLuJ2LHC+n0rN0i2DzLNPlYxzuI4Huaj1fU/ts4CZFvH8sa+vufc02nJ8vQaRZutZMkzyeSZCem44AHoKu6QZLotcXBWKBRuOB0981kaTYSahPgcIOp9an1m82K9hC4aFT87D+I+n0FDV/cQWRQu7+4lnkEdy7qWOwMccU7RreS7vN0mfLyBg85P8AhUFlatd3KxRrz3PoK6DV7hNNsV0+0U/aHA3sBkqvp9a0k0vcitQKviHUkndbW3I+zwnqP4m7ms/TraS+uhHEOP4j6CoVs7lgMQsATgbuM10dk9vpWnsEkH2thwSOhPf8KiVoRtHcCprl19khOmQkA8ecw/RfwrEtoXnnSOMZdjjirMkUPzPJLJJIxyTt6n61taZbJY6dLenCSBeC3PXoPrT5lCOm4D9SaPSdLW1gGbqVeW7qvc/U1zqWs0mNkTH8KvT6nLcs0jOGJ6naM1c0O1kuphcTM3lR8/MeBjqfwqYtwjdjsWrARaPp8hEirfOuVz2J4/SuZNujTEzTM4cksyjk1b1bUhe30kkakQr8kfH8I7mk0i3a8vQArMg5aqipQTkxGvplqmn6dNexLhwowZDng9B9TWZcXktxK8rhd7nLHHNWvEF8N62Vv8sUXL/7T/8A1qyIInup44lJ3McfSlGLfvSBWN3w/FJLIZ5SfKTPJPA9T+FZuqXsc95NMMLGxwo9AOBWhrUyWFmllAx3svz4PRf/AK9c3MPMXYoLMegAzmnThzPmYXNLRvLvbzgMY4vmYgfkKm1y+E1yIojmGLgZ7nuatQWsumaAyW6ZvJepzjBPv7VlR2DpGonniVsc4O4/pVtRvcSY2xilvbyOBP4jz7DvWh4lnEbpZRt8kYBYe/YVa0mGPT7WW8XMpx1IxxntVOWWGSVpjbIZXOSzktz/ACqeZcwbmPGhlkVEBLMcDA711mrQtaaHDZWqbmfiRgeOOvPuaraNIzylmXEK/wB1B1qOeKe+vZzZW88ybsKEQt0ptym1ZAZUViWXMk0cQ9DyfyrpbQx6No52b3ac4LjgjIqOPwzqirHPeWb29tvALuQD9Mda66HwFe61bQSvepb2vVRtyx98fhWkaNWpLkS1IlUilds86/0VP9XaJn1c7jWxo8qpaXMs+1E2naFXA4HT8TivQ4fhro1lbvNf3FzOI1LN8wVePb/69O8C6Ta3Ms0jW8bWkPypG67hk5I6+grZ4OpGcacnqzN14NNroeQQ2F3ezAW1vPO7dkUnNbWkeHNQtL9JL60ltGIPlLIOWzxnH419BQxRxALDEiD0RQBXGSkax40GWAgtT94kAYXk/ma6K2EVGKV7tuxnHEOd9NDA/wCFaX99evcX19FCr4+RFJIGMCrOpeANJ0TTWupJri5uAQIwxwNxPoO1d1feINJsgTc38K47Kdx/SuL8WeKbG/jga2aSS0iYs5C9TWlanh6NJ2tciE6s5a7G/wCHPDti2nQ3VzaQvdSZO51yQvYf1q9qOm6ctvJNJEiPGhIaP5SMDsa4m4+J2yER2FiECDaPMOeB0rJtPFWq67dyQyMiw4y6qMZB6c0RxtGlT5YauwnQqTd5bHY+G4ryK1kvbaaJTISGWbo3cnNS3Ws6JI7RazbRRPj/AFkTBhXkOq6pdG8nhN1I0aOwVVOBx9KgsLa7vblCbe4MW4EyFSQB6k1hSx04U+WMfmaywylLmkztNb1LTbOOVd0nkyN+4VRkkD1/Sse38WS2RzpzzKfRn4/KtPVPB+ra8bdtOt4o7dUP7yV8Aknnjr0AotfhXqAj3XN/AH/uopwfx/8ArUqSxM43jpfUcvYr4ivqeu6nqWj/ANpXU7RyxjbGVOABuAwK5a41K8uifOuJH9ia9M0TSNJFk9trMM89nGdg8rJAYZ5OK108E6HfR79Du4AeyNjIooYGpiF7RyFLEQpvlSPOPBtlNLLK3lytI+FjXB+Y9aWXwFr9tZzXV9DFbxIpY735rshp95pWoTW0WXu7dS6kc7ff8OtZes+IdV1uCOznlXyEbLMBjd9az9nSpKcqmtnZFe1nJrlOY8M6dIL1bhzhUBH4nitDVxcF5FBaO2VRn1c9Tz6c1rQRpFECoGF7dz71W1CaMBnnfCMu1VHU564FePOrzTstjpt1ZlyaRa3EbFo2CqgYODzzWYsVtYgtbEzT54kPRfYCp7m/lvv3Nsojt4+CM/170+2smfLsVRF6u3AH+J9q2iml7z0FcxXa7mugwWQzMcDbnJrZS9lsrZlvpFnm7Rtg7fqfWpA7FhFpsbDf8pY/ec+3pWvd+Hra20oC7hMt43Vg2ME9h7Dnk1ajz67JCcktGYo1a0nLtLG8M7Darg7gv0FWLK3FpHI0rrKSAyxjhj9azilrYrmMedcf3m6J9Pes1pJ7mcnDvJ/sgk1HLzLTYrS51bxOwEl9j5RlIx91P8abpU5s7t7yXCxFSoz1Y9sCqEFxPpsBW9mLsV+WIkMF+p/pTbbWYJLlJ7mAiSPgFTlfyNJJ2aQuUb4k1S5ZxGxZBjcIwecdiay9PspbpmJwFUgvIeAn/wBeteTSre6lFw9wx84l2DcNJ7DPSi6juPLAeIxWkY+WKM5Zj2Gen1P5V6VCcYpQo6y6sxl3loQu0CWssFoAkI4luHHJ+n9AKqqgvGW2tLc7ARtY8OeOrH09qfb2dxekG4IhgiHU8Kn0HdqfeXkUCm1sVYKw+Y5wzH1J7D2rW6g+WHvSe4ld69COULp0myB0d2BDSkfd9h/jVCQyM4L5Zm4GOc1NFbzXUwjiBlnbqRwqj3PYVc3waZuitiJbtxh5j0Hso7VlUowiuXeb7Fxm9+gWtz/ZqEmbzZWGPKzlV+vvSPqgnIa9t45SP4uhrMUu8xjjUSSM3pnn2960XtfsChyQ10OQn3gv196znhvZtO/vFKaluXoobNZUvLmV1c8xxyHAXHT8KbPcaqL6K8tWV5FPyOh3bPwrGlaWeQujiXPJYHGfoKlt3EGJJmdCOVjHBb/61EnVpyUp6+olCDVka+n6he2S3kvmhXuMie4kQM5z2UnvWeJDqMyxRlorJDlnAycdz7mmSajLcbxMqOmeFYZx+NXFniuLRYjD5NvHywU4Dj0JrWOKU581fZbLoQ6LgvcNW21Ly7aTTtBuJ7XSipM9wyhWdvQEdj61n20Ul/HJb2bC302HLTTt09/qak2R6lcxxm5igsEGSkY+YgdgPU+tZ2rT3up3CabY2r2WnRnCRkYGO7Oe9a+2jXfNJ2iun+ZCpuGi3OentGk1N4tOaSZGY+W/cj1PtW1cXUehWoihl86+YYeQdB7D29617LTorXSp5on8mzQ7ZbtvvSN/cjHU/hXEXtnexXaxXMEyzygMispDMD0IFZypur7zVo/maxmvh6liO+8+QK6MXY4GOc10cAi0SISTc3zfdjPSPPcj1qlDBB4bhE1wVk1Jh8q9RH/9eudu7qS7maWdiWJz1rD2Sqv3dImnM0dONVujnzXEqntIARWjGlrFbRX13aRxksCseT849cVm6NALawF3qkYAx+4h6Fv9o+1Q3U8t7MZJmJJ4A6YFTGjKT5ab06jbj1NK9UajOZlvY2c8BJPlwPQdqdZ6RIGaW9BitoxlmHJb0A+tVLCx3qZ7nK2aH5mHVj6CnXmqzNcKbfdBFGNqIOw9/WhTqwThHoS4Rk7li5uHu5ASAkCALFEOiD/Gp7S2a5lIGFjUZdz0UVHpl1LqEwhmghlUcvIRt2j1JFTXt7YywGxt5ngiDcsF3B/qeuKpYnljyxVmJ03cpalcQXLrHbLttozx6ufU1DbxSXE6xQIWduAP61MNMmfm1kguB0GxsH8jzVq7P9k2ptoDm7lH72YDhR/dU10KrCEVGDvJmTi29Srdzm1V7K2Zf+m0y/xf7I9qzzEpPTFKTgcfrWvCiaXaLdXahrqQfuIj/CP7xFVKMYR95XbKTbehFG6aPCywsH1CVfvdfKB/rVGG6ubdt8Urq3UkGq+Szs55ZzuYnua0rC0/0Z765KrbIcKD/wAtG9BWUsPCMOaW5fO+howXn2WyXUNSjjecn/R02AMfc+1UnurO7maZ3nhmc5Yn5h/jiqM9xJeTGWfBJGAo6IPQVLZ2Mc0oDOIowNzsTwBUewnBe0uJyi9GdHo3nLmVr0T2ig4VeS5A6VUh1GW3v5Lm8tT5j8DjG1ewFZWpXRvBHHaDy7SEbY1zgn3PuaZazX7Sx28bSszEAKTlay5ZX55x3Cy2izttP1O2vreXYXV0Us5YYAHuazo5P7UuhcSoRbKCsGP4f9oj1NUtR1O3tVfTxEsqEDz3iOzc3oMelU4pbOXi3uJbZs42uMgn2I/wrOMISbew2pJHYWu6PdC7k5A++Bk+lY1+H1G4ltrYI1pE2ZD90SN6cdhUkpv7XRnhSRri9kOM8Exp6jPNZWh30mklkuUcqx5BXBFEKMpXcXewc1tyY+HoZtyYktpB0Gcg/SnCzlsrOXT9MAnvJV3TyjjanQKPc1uXOqRLpy3sSgM7bIlYY3N/hUml2wtrPzZCXuZm3SSA9T/h2qNVuVc8/ntbuzb97FLEw710FnfXGl6L9rvZDJdTHFtG/JUd29a6W4aNQ808gEKIWOQP85rmpnhuZ3m1WPAkTMJkOAi9l47nrVR1ByvuYpmsp2Zrmz2uxyWhbH146VseHtPsYSdVeY/Z4ThBOMAydsmkttCtr9S9s0kUeeDndn14p+q2lzqFvFb6UmdPtSUC5wZG7t709R3WyMbUrHUp7qW7eMXLSNuLxNuH4e1S+HtMa+vz9qVorWAGSZmGMAdvxqu1rfWsqr5M8bk4G0EZP1FdFrGoy6XY2+n7hPcum+4MnIAPRad77jfZHN6tfjUNQmuEXZF92Jf7qjpTtKinvb6K2ttxkc9j0HcmpTJp02TPaNE396B8DP0NdDplrDpOlS3dtKFubxClvJcfLtXv070rpu4PRWMjX76E3z2kUELwW/7vcy7t7Dqc/WqkLWE0scb2roSQAIm6/gahbSb1V3JCZk/vxkNn+ta/hSzWJrnVdRTbbWIJCOCCz44FVrJi0SK/iDSDHqcga+gDAAiNzgoMcLnpVWO21KBt6I7R/wB5DuBqlcXD3N1LcykeZKxdsdif8K0vC9pPqOswwQSNGAd8jg4AUdeafxOwbK5QN+Q7ia2jcnvt2mmzXEciBY43jOPm+bNaOv6wbjV7k26R+SGKJ8qnIHGc++Kx5BgHcevXjrXbhqMXLmfQznJ2ImCbvlGR7007cgcGmu5bAXAFN25rvbsZWJGjX+HnNMePaDuHHapAuEBBP4UighflJJzg+9G5J0FhN9os0P8AEowaifBuOaq6JIBO8fTcM496tT8Tj61k1ZlIydaYeefoKtRn/iR22M/eNUtW5nbFWgCujWo9cmoexXYrY3VILWR7GS6Ujy43CH1JNQj34rc0OCOWzRbqOSS2aQu6x9SB/wDrqUm2ku5TdkWba1NjoriV9u9hI7KfvjGQtbXguykaU6ncghpWCxZ4yPaqAgHiDXI7KzRksosFsnOAK6nXryHSrJ5kUKluvkwKO5PevTdNqm7bvRHHOd5KH3nPXHiKTS/G8t9Ed9vkRTx9nToc0eKPsq3sv9mz7rKX50GflUHqPwz0rl7mKWPa9xxJKN+D156ZqBZWTT5SNxTBHXAFZ1qapwSRpa51Oi2cVnBsjmEiliSymrF2DEWWJsxMeD6VxPhXWBZXZguGPkSng/3TXdna3uMVy397sKUXGKT1MdYHlkwAeoyaW5dbdZbdOdxGW9q1JY1jtnEeRnmsqODzLhfNHyHkknrWy920VuzHmU7yey6DbJAtnczMQAMKvua07C6Q6FLHwGzj3NYZdjiFT8u7IUU+0nELyl/vgYAPrW1KtytW7WIq0PaJt73TOo8PxQtps81woIBOc+1UHtJNTaaSMKqIMjtgelULDUJkhNqvKyNWdrV/NbRmKN8bn28GtpYmPIlYyjhainKV93p6E7W4DMpwQOSaz7jBk+UfKOBWfcXEtu/lJI/mkbhnkGrEV4siiOcFJD7YFc3tFLQ7VFx1Zp2uqPbWMtui4L9/SodI037TcNJKMxLzj61VdTHgnp2rT0bUY7aC4E/LdVx61vSkpSSm9EcuIg4Rk6S1Zka0sa6hIkYCqvHFZxbDblOCP1FaS28uo3+FGTIck+gqHWLD7DdeVncMdawqQcrzS0OmlUjHlpt62IUZZACDg+npSnIOCRVQjB4PfrViF1kBDcOO3r9K52dJMkhRwycEfkfrW1a63ctFFbGdxEgIVGOQAeoHtWGc9ev9aVWIHB6H8aE2thOKe5cuLRmZnjOWzkr3x7VUKsh+YYPoas29yQwVyfUGug0iGw1OXZqZMZjBbzF4MgHY+/vTTvuJtxK/hvSjfsZ5mEVsn3n/AKD3rp7i4ESpFar5UCjIHc+5qhcX0BVYYSsUKcIi/wCetUL7UktFxnfM3Qen1qNZOxnuzft7+wjkVNUuZYFb/logBI+orpTodkYllg1fz4JVyriPcCPevFbqZ5pmd2Ysec5rR0HWrzSJ1ktZC0R4eF+Ucd+P6itYKC0kglB20Z2k3h2CO7MtnqSQJICsq+WSjj6etZ89pc6e8lvJeqbIj5HY5IPYg10tpdaVqGnC7huVtp8jfbzNgj/dPQioJLC21COVWntnUj7vmqCR7V1OCa9xmHM0/eOcmbULmyAM1tM8ZG0FRmQe9WZ/tqRQG2itzG+N9uv/ACzPcg0Xelz2SBrKRJIY/QjzY/oOjD2rO+3ykRsGiSQkqZcfun9mHVTWDjJPc0TTLWNTMzw+RGwBysoIxj+6wPBFUEtrmS3lV7FfJjb5omPy/VT1Bq22oyCVY1hDybOYGbByO6N0I9qi/tFijs4Ldw0YOY/Z19PpStMaMW5024jRZYYJNh6K33ga7PTZbttNhh1i6V2xhdyBnQdgTWL/AGnIhUSAby2AyvmNx7N2P1obUcyjckjdd0f8Y9x2P4VLU+g277mo9sm/EN0TzwCnBqPULCK6iwyxrOBxIgIasTU9RnSON7JjgENvXhkI9R1FXrLxnNcReRqvU9LiJBuH+8O/4VPK5rlmwSa1iRaSLu21H7NOxaCZGjO7kcjjP44rBuZUhkkjurOMSKdp2/Lg12Jv53iDo0FzCOkgiVsfXuPxqjebbwEyook7MoGPyPFcs8E1rFmscR/MjkxNZs2F82M/mM/zqcAOuYLlMj+EnbUt/amJi5tEcAYLx5H+fyrNZ4cgKJI275+auaVOzs0dKldaG7pst1Fex+eC8Mn7uQg5G09arX2LW7mt7i3QvE5QlSVzjvVSJG2kw3KevUqa19SeSWzsbqDazMnlzLw+GXv+II/WsrB1Mpnt5GKhpIj78ipYITt3Q3cTHOMFip/I0zzY5Jf3tqm7GCUJQ/X0/SpWgsQoZJJ4nPUMA4/pSbS0GaNndX9nco06M8DfLJwCCh61X1Jbe1vZIHtlCqfldCV3KeQcdOhqGKB2BNteQ9OhYoT+fH61enW5bRkuCFeaF/LkBIcsp+6fwOc49qlK+gdTNYWjH93JIn+8M/yqSNJECtBdIT6bsH8qrvcwkkzWyBu5UlT/AIUsZtJEPzTRt24DClZjNO1vL20nWSWIzRKfmG0HKnrg+4NV9agtLW7MbW2InAkjdGIyp6cetQW8TAnyLpA2M43FT9PStWD7Rc6XKrIslxb/ADoWw+5P4h+HWmnbQT7nOgWxY7JZE9N4z/Kp4mlRwYLlDn0bB/KpAbVi3nWi5I6oxUj+n6UGGxZBseeN/wDaAYf0qnJMZNFcXttIs5hDspyGZc/Xn8adq1pZwyxyRRn7POu9HVsH3BHTINQx2zbSbe7jzjO3cVP09P1rQ0yG5nimtJ03MyloJDh1Vh1B7YNJMT0DwtrFro8wXZK4dvm4GSDxivQp5/OtUZ0dEf5kVxgge4ryKK4WC5V5bVd6MDjJHIrvNA1O51y1mghtjui+cMXHH+yKmrDms2J6al9HDJKuchjtFZ5JjJZTjDHBpbckSr1AOCR6HNEiZleMevFRFJMNyl4k0oa9pTSxqPtUQJQ9z7fjXlrqyMVYEMpwQeoNex6fKba52H7pO1h/WuT+IugfZpv7TtRmKQ4kUDofX8a7MNW5XyP5ENHEVd0SHz9Tt1wcBtx/DmqVdL4Kg3XUkv8Auxj8Tz/KvTgrtGVWXLFs9E1wYsLdT7VZ8N2m2CP1kJkP8h/LNRa+m5reJRySAB+lbixpYW7sW+WOMKD7AVyZvV5YqHc5cFHmm5Hn3iuf7Z4icnlIRtFVgOcUzd500szdXct+tL0avFk+nY9ZKw4j5qx9VkLXIUdEGK1zwCT0HNYErb5Xc9zmu3L4Xm5diKj0sR9aMU4ikxXsmA1qTtTsUtAEf4UtKeKAaQFvRbJtQ1a1tQM+Y+D9Byf0Br3KzhW3t47cAb1XJ+tebfDG08zU7i7YZEKbFyO7Ht+AP516huGZXxwoFeDmVXmqci6GsFpc5TxhcA3MFsD8sa7j9TXPbiRk96s6tcrdahcSnnc2F+g4qptwOK8yxulYGuoQfvE/SozeKPuR5+tUPxoP1ro5V1IsXDfSfwhVqJruZhjefwquOTSE4znimoLsA6SU55JP1qPedwGCD60hmjHG4MfQcmq13eiAlQrb/RgRW8KM5aKInJLqXlZtvJyabJKsakt+QrKOqH/nl+tIbu7l5SIAHvt/rWscHN7qxPtImmk29iNuFA4JPWiSXH8YXB5qto4tfPlbWD8oA2kN3z6Cp9XtrS4WOWyV4o1BB3A/N71HsoqfI/v6D5tLoGu4V6yKKq3GoxBcJlueT0qgDbr/AAu344qxZwyXblba3XaOrHoPxrp9hSirttk3kzdt9MurhF/1Shx8u5shvStC10JYED6zqdvaRj/llCQzn8a5++vfs8DQF38xQFHzf54rHVpZ5AibpHY4A65rnjSk1vZFHb3V14cgG2GMvj+J2LE/h0qtJfWlpD5sFmioOcEYNZ1vp0NhH5l5mSfGQoGQv+JrMvftNzI5WMxQk5Cu2PzqIUI33b9R3Nn/AIS2WIH7NbxoT/EeTS22ra1qZ3LM0VuOrDgH2FZlrpSwKLjUmxAOQq8lvTmrN7qsLx+XAZUTGMKAOK6nVklyU9vwI5E9bFbV9SZwYhIxkDcncTx9azrSCe9mEUALMerdh7mr2nWa3cuIbcBAfmkkbIFa8yhQLfTT5OD+8dR1FTKqo+6tx2sMjtINPjMUaGa4YcuR/nipbC3toCDczIZOmCcn/wDVVyOL7LGm8tJIfuqeSfrVm00yNrg3c6KJO7AcD6e9csqtt2G40wSTB5fLDiMZCL04/rTE1KV7VgsS2yDnLHn86nvrsv8AurUBYhwT3NZGoWU9zhBKqW+OQASSamHvP3gMs6tJK7KAq4OOOaksIpbqTCtsjzliBjNSwaRFHwCzgck9M+1Onu08sQ2y+WQPmYdh6CumybtALi6ndwxRG0twGJ++3Ye31rKghe4k2QLknqT0FaFvZK5wmDnqfSrk8cVrb+XCmZW574H1o92HurcLjMppNuRgPcHp/ifasiQT3Uu+XLyMas+SXlXz3LyseTmr++Kw2l4ixbofb0p3jDzYtRtlZR2I8+6TczDr6ewFQTl7uUPJgKOFQdFFR3eprLPuaM8DABbgfQVc00NIDJIBFEBnpjAqbte9LcLMfZ2CHDygKg5x/WormRppGQZitgc4Y/eNUbu6827k8qRxCOgJ6+9Mt45Ll8orFB1IGTQua/NIdjUtIEkbMZLY4OBnP40k+qgxmGGIqh4Y55PtUd7fJa2v2a1B8xgN7D+EelZcSyXDiNF+ZuPp70WcvekCSLsMzyP5dvEq579cVc1byobVI2JNy3OM/dHv9aZNFFpFsjby1yxBVc/qfasOWaWaVpJGLOxpxjzO62AmLM74+Yt0xWtZeTp8TXF2rCTAKqf4iew9qXTLRLCA3l7wQOAeo/8Ar1l39zPqVyZPLYjoiqOAKElJ2WwXEuLxr26MkzfMx/Aegrb0vRhMUlLvu6kdMfSszTdPHmebejy4k7N3Nas2rGO6iNpxEnX/AGvwqaj+zADT1nTEbR24LTwxkoc965XRNPe/nVmBMKnnPQn0rpBrz3cnlRQgKRglqz9QmfTmS2tnVRs+ZQORntUQlKKceoWK+uX/AJoFlZKfKQ/OV/iP+FZ9rp9xPIqbCqk4LHsKeskhbbHkMxwNvFbkO3RrP7ROVaVvuDOSzf4Cr5uRcsdwGTT29np5trSXbIeGcDJx3x7msJY7bdgCaRuwPANNknVmZnbLMcnFbGjWoWI3tyhESjOTxhe5o+BXfUB8sf8AZelie2ZIZ3IA7k+v5ViT6ldMXZ2PzdWXuafq+oPqFyzhdkSfLGnYDtT9B05r24C4Pkqctz1PpWkYqEeae4XNXQrV1hN7fEBFXc27qB/iay9SvxeXckzYUHhVHYVa8SXsfmfY7Vv3Sf6xgfvMP6Vj20D3M6xRDJY9fT3qYxv78guauiWrXswbaWRDnH94+lGv6gtxKLW3AFvF6fxN3NaV3KunaYLOxwZ5RtLZ+6O5PuawRYlR+9niX2HJpRs5cz+QDLG3e6uFhjJAbqR2Fbevzx2FqljbnEjKPMwei9h+NLYIulwfaFUyFiBuYY/CqFzNE8rzGJC7nJZyTQ5c079EBlqCxwoJPSuosyun6VJ9lKyXJGCc9D6/hVCyLyNvcfuV/urgfU/Sqk91HNcuYFGwnAA/nVSTnogIjaNuzNPGGPJ5ya0rGD7HE9zGS5xjLDGB7fWq1hayXFyFIITOS2OgrYurBmIghlIQYL8EnPYAVSjOUuRLUmUkldsyLmVJp2mMKl26luas6c0skg4IjX+4oAzW9a+EVnsvP+0SLjJIkXaMfWptMghso9xhZoQeduT+JNXKhKLjG+rI9rFp2OX1GUS3UjRh/LGFBxwcd6kt9IvLiLzfL2wAgM5Pb2r0izubGaLy1SBoz/AyAZ/HpWXcWdodX8qyi8oNjeN3y59h071118DDD0+Zyu3ovUxhiXOVkrENn4PudTsUEd0IbckZ3DJOPSt2x+G2kwjfe3c86gZIJCgflVOPVdS0D93crBdW6nAMLAMB7g/0q1qni23uNKlitmxLIuG9VHf8e1dEaeHoU7zs5L8zL2lWcrR2GeFNIs7nWJVt7cJYREsFPOewz9a9FhhjhULDGiKOygCvJNJ8cw6Vp5isrMvKxyzueOOnFV7nx7rd9KsMEkcBc4HlryKyw2LpUYa/E9S6lGc35HY+LJzqWu2umREbYj8xzwCeufpXSSappemW6RS3sCLGoUDcCcCvDtUubiCYf6S5lky8jbskknuayy0kz4HmSMewGSayhjpRqSnGN2/yLeHTik2eveKfF1heabLa6dK0jMcSMBgBR1Fc7p/j1dL04WtjaK7ZLNI+Rlj3x+VY+jaTezWTwWdqZbtwTgkDafx9BWlYfDTVpdpuri2t17j7zf4frSjUxGIn7SC8g5aUFyyK3/Cba/qF9HHHdeUrHG1BgAetY3iO6uI7kxLcOuVy4Vscmurn8IQ6LfW8K3TXN1KOfl2hQenH513dl4T0W3YStYxyXBHzPJ82T+PFOGHr4io4Sl8IOrTpq6R89x2807Dyop5ZW43KpNdzY+HdQv8AQxZ6dAHmG0SO7YHXJzXqmtyW+maLcvDFFESu1Qigcnj+VReDrZoNJV2HzSnd07Vo8GvbRpt36sl4huHMkcDY/C+/kGb6+hhHdYxuP51esPCdrpeupYQzSXG/a0rNgH6cdq9KkmihUtPKkajk7mxXBabrljBrV5qGpTiMEkRr1JrTFUaFLljHS7/AinVqTu2dPZeG9GspC9rptuHJzvZcn86r+MpVh0uK3jChppAAAOwrGv8A4kaZAMWsEkx7Z4FczrHiq61eEXwtvLW3yUGeOvU+9VicXR9k6dPcUKNRyUpHrOnQi3063ixgKgz/ADqnrd9BaWUzG4TzNh2oGG4nFeJ33jHWLgEzXzqB2TiodBd9T1LfNLI4VSSST3rN5ilT5IR6WL+rO/NJnoWi+KdJ0jTzFezE3LMWMYH9aw9X8badLOz22l4ZR8su8hv0rlb3w9q9/qc507TLmRCxwxG0EdOp+lPvPC2p6e9vHf8AlRyyYPkq25gPU44/WsI1sRTpJR0ijV0qTld7mzd67qMSiW2Dia9HltuJJIPapPJmj09gGVrgLwcADPp9O1PumgURySMqrCCob147flVTfPqA7w2YHT+N68qrUbZtFJbFRdeCR+XcJmZeHMfABpjLBfW7LZ3Aa6c5ZpjhtvTApNS0OFEWS2LieU5CHpt7sT2FUZoI7a3P2UtNcj/lqv3R9BVRUbpoejNAWkFhEvnxMSOFVf4j7mhvMutnmsFQD5EXotY1tfXcMgCO5fONp5z+Faq6kLdtuowAzEZCoMED1NNpt3YWsdFoy2ejQnULwq0zD9yh/maw9b1ie+3FspETkKO4p0Ulndt5guN8n8Ky8BR2AHSqs9nIJHe8zFADkkclvpS53LSWwrWdzOgt5ruYpCoOOSx+6o9zVxPs9jKIrV91ychpv5ge1RXWofJ9ntgI4fTufqe5qlaQT3N2phXODlnbgKPUmt+VyV3ohbFqaMTPtCF2J47k1ZgsobRh5iefc4/1Z+6vua6HQfD1/qUUh0eAmMAh7yQYBPotUL3R9V0kkXenyhc8yxfOp+vf9K6sPhJVVeStExqV+TSOrMK/iu3kLSKXXPBXmrFmt1bQCW5lkitz0j3fM34elaM7LbALIRLcsOEB4T6+9VZE83JuD5jHqT/Sh4RVZ8tD4V1f6CVdxj+83In1eG4CrcQbkU5UqT+opUsLG7Qy287RKpwxIwcn9KQ6bAmyWbekPZR1f6f41DqPnun7mEJEOka+nv71lGFWnJxp697amvNCaTZdW0kRPs1qBbWhPzzZyX9//rVRuLVLm8+zWULCMH5pm4Y/Sm6YbxmIt2eNVHzs/CqPfNXJNWQEwGPemMOynaTURryp3094p07vyIS9rpaGO2YGfoZm/h9hWNOJnILKxjY8erZrXaDTrlgEDo+chWzn86cLU2gD28ZmmP3WOMJ9feumnWhBc7fNNmbi722RUWKOxjE10gL4ykJ/mapSyyXE5mnUY9GGeM1MyzrK0t7EX5yM8gfQ+vNW4LeKONbu/BVOqQ55b/61bWUP3lXV9hXvpEhgtg8TXM/7iAdAOrfQVJJaTtpjXt3ItvaIcQI/WT6CrZWFFN/rIYog/cWIBDP6E+i1kN9u8R3rz3LeVbxdT0SJfQD1qfZRs6tXTyGpu9okdoounzGWCryzdlHrWodTaJRFaMTEOruMl/8A61Vby9gtoPslpERb+n8Uh9TVS3SWR1UAyXMnyoi9B/8Aq9a5lhvaRc3ovM09pZ2ZsyXwv/s0N5E7+UcReWxG36DpVpkiglkaK5WW/wAbUaY/6tfRT61l3j/2SixRTCS9biRlHCj0FUlkVVUswy2fc1ny1XD3W3EdoXuZ2o2eovI09xE0g/vJ8wFauh6XFaRJqGqoDnmC3b+I/wB5h6VoWs409fOlLiUj93D0z7n2ofU/tBH22CKcDocYI9s0nWm48trLyK5exTvJ5LydpZTnPQdh9KtaXYfaA087eVZx/ffufYe9WILSxugZVaW3hUjfu5B9gal1SK5uVVLIRPZxjCJC2T+I65rb6xCyhT09TJxe8ije3huSqIClvHxGnYD/ABpLWOa5lWKFSx6/Qep9qigtZ5rhYFiZZT2YYx9a0Ly4isbdrGybdIf9dMD94+g9q2co04qFPVv+rkWbd3sMvriGJfstlny/+Wsg4Mh/wrNa3DSKIssWPC45zQvHXn+tartHoVmLq5/4/XGY0/uA9yPWpnCFKHvayf5lRnJvQRSNEgcED+0JRgnqI1P9aqxajcxJtEpZP7rDIrnZ7+4mlaYyNuYknPNavhyza4V7/UXZLJGJPbzCOwrCVBRhzSepspHQWf2SK2S/v7SNcMDGF48w+uOmBVS9ii1K5adL7963RZht/AH0rB1PXPtV2xEf7hflRQeFHtVjSM6lcCC3V9+MnPRR6k1CjUp/vGFos1rLQpnuP9KIS2X5nkVsggenvVfV7w3VyscQMdrCNscZ4AHrj1qxfal5ey105tkUHUg8u3c5qNNTkkKrcRRT57MvzH8RVxxEpTUqi0FyaaENnC9zcxwwrmRjge3ufar2qSwpF/Z1o26JTmeTvI/p9BV2eW20yMxRL5N3Mnzsp3GIHtWcmnl0JtZ4ZsfwhsN+RrZYiFafvOyX4mTg4q5VAArRuBJpluqowF9cLyuOYkPf6mprC0OnxPfagmBH8sUZGSzdvwrMeWSaV5p33yudzH+g9q3c/bS5I/CtzK3LqxnloFAKg47nrVrTorezU31xysZ/dRn+N/8AAUum2n2252klIUBeR+yqOtRaneJe3KmFdlrCNsKe3976mlUhGcuSKKg5LVkFy9zcXL3DuTI5ycHkfStHR5r+7ulhmlJtVG6VpeQFH1qhCHlkSOJS7ucKPepPEt22mwLpcMimRvmnKjofTPpWNbDwhbl3NYzb0ZZ1TUbLU1FvcQSrDESsTxNggfTpVOzs7iOdE0PWZg7H5YpQRk+npWJHelRh1BHtXSadcLpunfbiALyf5LdW6qO7VzWnDQ00sa3iC7u4YrKHynu0jAa4dejuPUDtVe11bSZ7hnv7eVHbA2ycgfQVz8FxIp3xTNuzksG5Jrf0e4e98yTUfJe0t13O7xgtnsAetZ38g5bI39QlKQW9raOsb3S4BxjYndvrWlp9mscHlRMUEKfLnvg1wmo3dnqtwJ7j7TBKBhXRgwA7cf4VY046kriPTdWSVT1V8g49cGkmhOLsdRqskdtEbqVynlcrGvHmOeAPzqhbaMl3bb7y3Et1KxaRycMT7ew4qv4k1IwahbrLaSz2cCAhh90v/e/CrNv4us7kR7v3LjIII6/lV30JsyCXwlAJFlDyrEDllOGGB15rO16K91O5WeGI/ZEXZbx55Cjvj3rptQy3k2kTFWvcNICcFYx1/E5/nWtLFGvlBUUxqdny/wAHpVqKaFztM8qWC9inVIUlSVmCqMEc10viLUTYra6Wu25KIDcmT5gzdgRXS6iFsoJZ2kD+WP3cajDM/wDD+dZ2n6Bp9/Zrc6hIzXLE+cU4YN70/ZJaJj9pfVnHyyabOoEtkbdv70Dcfka6G2s4NG8PTm0uPLutRXEclx8pCdwKnm8GQeZHJDcSm3JzhlzuAPIBqh4hs9Q1e9E9tBvs0URwqpHCjvj3qUpRV2O6lscxc6Lc2ymV/LeKPkujgisuWRpHOOFq5qsb29wbaRSjL99f8apMeijoK9LDJxhd9SJu7BRtXd0btSZIOXOc0ZyeTTwcrlwCO2OtbEMIm8s5PKntUjN0aPOCPut1FRqhJBAJFWwgK8AADp71aIZVXdFOkgGNpBrZmYPLGR0bkVnsm0HcMgj1zipdOcsqhiDsOBSkgTKGrczvjrV+4402yHT5M1n6ox86TH0q/dgixs1J5EdYvY1KecDpzXUeH5JI9BuZFxhVYE/liuWNdHo8LN4cuZPNKIvGz++Sf/rUU1epEJbHdeD9OXS9A+0MM3FwN5PfnoKg03TE8WajdzTsf7P0zgAf8tHHJ/lVnxFPLbeFbSK2H+kThYk9iRiqGt3T+GtCtPDOjsPt90vmXcoOCCeo/wDr17M30POpJu8nuzgNZuWutSuJGOSzkADoB0AH4VmXlxHHH5LM3lH+HuT60+5dVlkUNnYSN3r60/RNOj1bVLeGUsVc847AVx1Z+0lZdDqdox1KKjTyBkuMegrtvDt4t1ZYDl9h27j1NSf8IlpsTOmJgwOOSKsW+ix28DJaSOHB3DdgAn0onh6jWyOGGOo83xMW5ZkjIHKtx9KqXILaeMZ4ParsbedGVZCrDhlPUGo50CQlFzsrkhJttM7J8qs0tzLije2kSZl3fLkAdqokF5C3cnr6VuFtsoVsFGjIFMs4Yv7IuBgeYPm96640+dWTOd13BtyWrsigWFvdR7QCVHJrnrl3kuSZScK+4V1NtZLcaZJcsfnVu/pUfh20sb7VP7P1B1iiuTsSY9Fbtmsql42v1OilOMrpataMzYljuIw8iqXU/K2Oa2be50i7g+y6zbeRJ0W4QdR6mo/Efh288LXv2C8IYht0cinIdT0IqvbQre6TKm0NMM7R3HNEaftNEE5qCu9jGntGj1J7W3uBPbqch15AHanzAGQlR04+taWlaRPDHsZcSSHkdzT9UsDbuVddrDt61uqUowuyPbRc7JknhEK1++4gHbxWb4okWfU5CnKrwPfFMRpLZi8TEE8cUlhD9q1GGN+dzc1fPzU1SXcy9ioVZV2+hkurL1GM+tRY5rsvGtpFbrAsSqOOwxXIlee1YV6Xsp8p0Yauq8FND4Jf+Wb9T0PrUpz0JPH6VTYVLbyENsfJB6HuDWFjouWc5HPJqezu5LWZXRiCpyD3FQFSp2sPekJAIIo2DdHeXHiixvtMjWXToY7wEbpY16j1HvXH6kMzs6kujchqqq7RnKHGeoPSr9pOu4HC56EMMg+xq3NvchQUNUZwyDzWpFZxwwR3M0h5+7GOrH0FXLi2sJSrW8UizswUW3UsfY+lddp+iLoqrdaiiS6oQPLiIyluD6j1pSaiJzuinp/h4xwrea0oM7jMNmOiD1b/AAqSTSLOQ/8AIPgK92XIxWqjSzDDuWkY5Zj6U2ZHjj3fwZxkdKwcmyDHuNCsABG1sVYchlkNYGp6XLp7GW1dxGeueQfY11rIS4INOEhtwfMiDBh/EMiqjJp3A4d7qVbPcbYCzLZaIkkA+qnqKkctDJbGZJVWRf3UoOJQD0HoRXYSyq8YRoozHnO0qMUsqQTSRloo3MeNpK9Kv2rA46e5eKR4TD5UxGH2rlZcf3l7H6VE8yEBYEZdpDGFudvqVbqK7x0t/ME0tuhuG6uV6iqa2GnxySeTAu2X757/AIU/bMDkI7qLeJA0iEZBmUfvFz2I6EVVuBbyn5isT44mQfK59x2Ndpd6dp4iaCO3Cx9SVPzfnUM2n2EltDB5JEcZz8p5P1NDq3GtDjrO8u9JuPNtZTG+CCw+6wPr7VuxahdalbCa30pFA4Z14DH1xWre6Ra3s0byKyxIABGpwMCtER71EMSokUa/Kg4AH+NL2rWwSszmpHuEAMunzq3qjDmqF3DBOnz6dMkufvAHH44rsy52BCFwO+KaTzwcE8VEpc6tIUXy6o85e2hDMryyxMOzKCK09Ity9jeWaTxOXXzYcEgh19vcE1t65pMYUylQ46nBwfwNYFn5dleQXENxsaN922VOPoSOxrhqxcHbodcJ86KyS30YKyhmGMYbDCo5bjIUSWqBgeq5U/lV7U9PuItSkksMtHJ+8jCtjg89OtVZrq8RQLmFj2/eJ/XrWWm6NOg1vsjLkvNGRzhhkVoaKI/taiSeE2s6mJwTggHocexwayWuo5AQ9vj3RsVHsXjypnX2deB+IpqIGs8V3bO0bqZEQ4O4bgahMkHSSzjH+7lTVy/E9xa2t9BIrT7fKn2HaMj7p7ckYrLme/BLOrYH95f61HLfqCZJ5dqejyxntkbqnst9rcwzwTxMVYHaTgkdxis0XGBiWAE+qnBoEsLN9909mGRT5GBr6us1vdv9kkZ7ST50GMjB7H3HSqaXMZXEtrHn+8MqavWRF7pMluk6efC3mQEHBYHhl/r+dVibpEAlQsB3K5H50noCIQ9q2RmWNv8AvoVKkZGGguY+OcE7T+VV0kj3EywKQf7pwamP2WQKFaWP1DDd+tJjNHVBPJbQ3cSlkkG2aPAIVx6D0PX86NG1u50sqsEEQy277u05pukbEle3a5jNtONrkHaUPZhn0P8AWqc76jasyMjuEbhtocfUGh+9oLyO5v4JkEV+RGqXB+cIchW6/rz+VJaYkvGf05rF8N6ne6pO1pcuhgfAbK8g9iPetqzheDUZIJhteMEEHuOxrOatElaOw2/iZJ9yDqMk0kDLeWklvdfNE4I59Kv3DqsHqSMVjK/lBh75FTSldeaG0eceIdJl0jUngcHyz80bf3lrrPBltsgsgRzLL5n6/wCArotb0mLxFowjBC3cXzRt/MVW8P25XUbOJRhYuCPoMV7mAq+133Rw4t2ikdJNB5+t2wOdsYMh/DpR4rnFvolyxPzEbB+P/wBbNXoU23Ms5HONg+nWuZ8bXInhitVbpl2/kP614+ZVfaYlrotDbBU+WnfucnancvDA1Nk7qrWC+UhVmBbNWgM/NXNPRnYQX0nl2rep4rHFX9Vkzsj9OTVAD0NezgIctO/cwqO7A0hGKcQaaTXaSNIoxxSijkUAIRzSEYGad3qext2u723tkGWlcKPxNTJ2V2Uep+ANP+x+HYZGBDzkykHtngfoM1ra5dfYtKlcEBmG0fU1fhgW3gihiGIogFHsAMCuR8cXW+W3s1P+239K+UqT9rUcu5tE5uQybkEeOOc1KVC85OfrVcRui4RlLZ6mmxQT+YTNIGT0xzRZdy2yBILmQ4WEKPVjUosZcfvp0T6Vm6hqbLCFjmcsRx2NZKyXF1KI4y8jnoMk17EY0krqP3nM1N7s622ttKUsdQ1RlUdlGSfyp98+iW8JNjbSyADPmzcsfoP8aw49Pgso/Nu5g0o/hXkL/wDXqhLLd3eVjjlZCTg461Ua38iSXoL2V/ibNZtfjjGILcD6npVZ7y51U7Ft0Kr1bbnH41BaaYQwfUXFvD6E8t7Cr81/bxQNDauI0H3Qq5/OpniJPSLuONKEdkVpp4bWB41H7zpkYBJ+npWYHklcKpZ3PAA5NWrW0W9uCI0llcnLuxwB9a1LpLfSYM2hUXJGNxGc/Ss3NRdt2zRIjttMitU82+bdIBkRjoPrVG6a5nkk8mJ1hY/xccf4U2XULqZsNKxJ6BRWpp2nhE+06k5IHIjY8D6/4VN3D3p7gZ9rpTbRNfN5VsOSRyTWhLqVtFAIbRnjQDA2r+tVdX1U3OYYTth6dMZA9B6VDpumTXrbj+7hHVz3+lJpyXNU0ALS3S8uSscDTOeWeRjgfXFal2ttpNuwtyqXLDgqMn/9VSSTx2EJgslVj6+h9TWWmnzXMu6Te7v3pX5neTsguU5bq4nYb5HduwzWrp1hFbR/ar8jeOQh6D6+9XLe0g0xS7BXm9euPpVO4E97IWZTsH3V7fjQpc+kdEDZW1TUZb1ikalYf/QqbpmmNdnfMfLt16nu3sK0rTS8ES3Qwi4wi9TVq43s2GASNecAcYpTqRiuWmCGhS8YgtMxxA44HWrUaLbKI41DTEcDsPrUFvcRyExWzFn7sBwKuNE9raNKjJ5h7yfxVzSfTqLcntrVUHm3DZJ5LH+Q9qivrwTDYAViHAUd6yr25l+z75rhg/8ACO2fpWO887xkSSs30OKcKLerYzfhlhgBDOqhjnluamnvI44BJligH3gK5uytVLq9wrYJ+XI6fWpNRvzOnk25KoODkY3e9b+xvLQRcm1JJU2xbgp9OCR6VWiUzsBGu1QcnHNQ6dZtKdiZ2jhmNa/kR2KeY0jKgU/Untih+4+WIaEV/KsCLHFIRMeoHYe9ZTPIWAJZ3PQU0lp7g+UG3OeBnJ/GteCOLTYfOuPmkP8AnAp25PUdyK0EdorS3IYOACB657CqV3dPdS75CVx0UdAKLm5e8lMjd+gHaremWQbEtzgIOinv7mjSPvPcQ2x0w3DfaLhtsa8gdPxNQ3t3uVreFmMIbPPVvrVzUZTO/lRypHGBg853flVW3sElk2+YzepAwKFLrICGws3vJNqZCfxN6VqXt7HYwm0tAPNxhmHO3/69JJcmwcW0Ma4A5Ocnn1qms7b9kSAM3YLyaTbk7vYLFOOGWRsIjFvetyzWDT4GyyPcEdzT4YxYwm4uucj15J9Kxpp0kld8qCxzgdqG3U0Ww7BdRNLMXmm3EnsOn0rT06wijQ3BHKDcC5zj0qvpls8y+fKhaJckDpn3NN1bU0lbyLUYgXqem403zS91C0FuL+acIHK8HIGAcU6zhuL+TZuOwdeePpVG0imvbhY48D1bHQVs6rLFplvHBbn/AEk85B+6Md/elJcrUVuFxusXUccIs0K5U5cjoCOgFZMJM0ixxZZ2PFVOWbuzE10+lWsem2jXVwpaTGdoGSfQCnKKpx8wuOEkOj2y+dH+8cfKep9z+FY+sIsNwksEzTRzLvEjdSe9NvBeX9w00yEZ6bjgKPQVNp1m3mbrj5oYssAORnv+FEVGC5m9QL+i2Kw273t+dqqM89h/iaw9QvDeXBc5WIZEaZ+6M1saleRXiJEVkEK87Qcbj71TRYvMCwW6g+/zGlCWvM9wGaLYG9uAzD9yp59z6Vp+IZZpVWztlC20fLsSAGP+ApLydIbSNI3ZJSTlRxge/wBazfLedsKjyk9gCaE5TlzAQxWBdwrTIGPZfmNbJvU0mD7MsEgJj+/069/rVjRNDnuABCjPOR8qKcfnWkfAetahI011dW1uzHG0ksQPTjit6dGpiH7quiJVIQ+JnFm4twVMUKEMcfMMmtrT2WKMy3QZEwTwMD2H41tar4QstGkhL3LXV43O0KFVR6msjULjfdtatHhYgGwe5NX9WlOp7JfPyJdWPLzIxpZOC5OBnqTVvTLdL2UvuHlp/F71aMcVwnkvErBvb9afd2gh002tiVhZhx7DvVVsJ7OUacXeTFGtzJt6GXdX1peXhs3ujFboSBIRkE9ya62x8MaN/ZRu31JrlAuQsZGM9h615ncaTdwuF8lyTwCvINdR4XtTp9q0l2xSSTnYTgADpkVpUVKhTaaux6z2Z0lroVxf6eYrcJFCTtLP3HoKv2fgeCIgTXMjeoRQB+dZWm+Lb+ytXhnitpcHMewEbc+vHNEXiDUNSnMcbSLHj5sNgZPasVUVOn7kteuguVt6o0bbTrT+03itF2QIcNIzenU5rebV9Fs/3UUibgOiLkmvOry/mjlngWYBVO0lehrOjlkmn2qxL5xj1rkV5e/Nts1UbaI9C1fxHDdWjW8IaNc/O7dx6YrJHihrOIwWhXyyfvBMk/iapPbypp5ht7WV5nGNwXPHc1l3Gn3FsQtwixMeRuPb6DmtKEajlzQRMuW3vMvpqcl1efuogHc8noPfgUmqXVxbzqiTFWZdzBeOtLpdpHDG9xM4K4JyOOB/jTrX7HPOXeESO3J8xicfgK2jSq4mTUnt3Ic6dPZGLLO8mdzux9zmtzTbWdbErbWzS3Eikj1BP+FW2jlSQH7OUtTwC0QQE+w61vafos89ms8MxgfORuGVYfz60OhTjVUJS06h7RuN4o5yw8G6pdJlvKixzhm5/Km2+hTadeOt8u2VRxg5Ur6j9a6t7zUtP4vrcyRDH7xeR+fWq1jeQ3OqNeXkqJEp+XzCcYHQV14ijh4wjGm7tvcwhVqtty2Rb0nTfD1wInjt4rubHzs75AI9q6G7nj0zSpZLNLaBVGB5adSelcfql14YuS8qmSG4GRvgyuff0rGOpytbtH589zaRnKBlwePU966q1ehRpuMLc1uhlCnUqSvK9j0nwRa+VaSXL8PKcfh/+uunLqoyzBR6scV4q/jTUlgWK2KwoBgbRWfDqepapfJHPeSsDy3zEDArloZhCjSUYxuzWWGlOTk2d2dbsH8VS3moXCxQRttjB53Y4GP51p33j7R7fPlM85HpxmvKtah2akIIQ8jhBuwMnJ5qaz8N6zejNvp02P7zjYP1rKlia6v7Nbu97GsqMNOZnTaz4um163xDZmK3hYvnJ+Ygd65u48aa/LGII7wxRYwAgxgeldL4e8Oz31jNpySrC20iSTqAc84/lW1ZfDHS0Cm+uJ7hh1CnYDTo08RiG6i9LicqVP3WeY6fd32oalDDPcvKhOZG3dh7Voarp1zPqvk2NrPLtQZ2qSCT713mt6BpOlT2dtpNokU8pJYg5Yjt/Wu8tYkt7eONFA2qBkDrVUsE6tVwk9txTxCjFSSPE7LwLr97jNosCnvM+K6DQPCw1Sxl02SdoY4sB5I8Esc84+tei6xd/ZNLup84KRnB9zwP1rJ8EReXpDTtwZXJz7VrLB0oVoU16v0M/bzlByKWn/DvQLVQZYHuX/vSsefw6VX1rTrC01awstPtYbdT8z+WoGfr+VdRdavp9qP395Ch9N2TXD6p4hsofEJ1SY+baABYgBy5ArXGujCChGyu19xFL2kpXZ12va5Do2km5ZQWb5YY+7H39u9eWobq/uJL28ld5JGJ54z/APWHapr/AFZ/El+9y6Osa/Ki9FUeg96rJqKC5ks9rLMDtPGQcentXmY7GOq+WGyOmjR5Fd7j2tYluVkcmT0DdAfapWmitUWS4ICA/dPVqqzSypJuhQTM2QuG4U+4rCllFxdH7XMQoOCSOM+mPSvNhRlN3Zu2jQvr2W/lPBSE84UdfrTYLN5QFidotnU4+UD3qcw28VusrylYz90L1b2FRSTS3eEAKQjhYx1P1961TtpERLajzr6K009d8zna05H3R3I9BV7xJ4ZsbbYba5la5ztG7kN6k/jmuh0Gzh8P2DXNyyfaZF5U4JA7AVy2pao1zLI9ucuThpewHotazahG28n+BKbbutjINhFZITcsJJR0jToPcn+lVIdQu4yW85sk5weg9BinSn5wFySx55ySatrbR2aebfqHkxuWD0/3v8KlK0feZfNqMMsE0Pm39oI0PAljypY/SpwYZxHbWlx5UB5KsuP17ms69uZb6VBjcWOFQevYAVp3nhu80+RBftFChXeTuBK+2OuavklGPM1ohXi3Y9L0Pxrd6PYRWzxQS2UShQoGMD+VZep+JLjxhqyWsUyafpwb55McLj09TXnct9La3Gy2d0gAwFfkk+9aVlrkoAjMAYeka4478V2/XJTajV0j5dTBYe13DfzPYV+H/hy40kJEYZ0X52mZvmJ7sTXml/pVlb60bXQ3uNQfosJ+Zc+ueuB71Wl1YzxNFYXiw7vldGYgf4V1PgzVP+EaDm2hhunl5lkb759gfT2rqVeNd+ypvlj9z+Ri4OmuaerOU1XRNasrhpr+wkkHZ4ju2j0xVKECSJppGMcKnBLDBz6AV6b4m+Ilo+neVY2ZS/kOOcHb9B6+9R+GPAK6vZfb9cuI5ZphlLZH4jB7k9z9K1Tt+5w3zfYm326h5k5M4wFMdvnIjz973NV305JHPlhlbHbpiu68aeCLbw9H5kWotbE5KQv84Iz6dcfjXKS2uoT2ImtLG4kss4aVF5f6Drj6VlUp04L2UI803/WpUZzb5m7IzduyJktEMkg+/Ie3sKz3EyHGWVvpW5bywEiCIlJBx5bKVb8jT7orCVQDfcnkDsn1rmrYOFGC968n0NaeIlKW2hXjuZbSFTeqruR8iYGQPU062u7Rr1bmVf3qnKiUblH0qOW0WXLyuzSnkt61HFYKv726crbD0HLH0FYVKFXDpVJf18jWNSnU0C70ebVdQa8nvTKh5LDkgegqLVJ51gWG2t3jgXhExyfdqS6uXMo8pWhiX7qqcVbs7q7uJRGiibI5DDoPrU+3lz81ZXXYpQ09wwYrd5rpI0RnunPQcgfX0Fas0sekQvBasJtQkGJJh29h7CrpurcSzRLiAthTKi5OO4z6VVOipIZHs50lY88nJ/EVt9YhXnyyfLH8yeVwVzGx5QBIMlw9a1lZxabbLeahHvuG5jhP6E+3tUttZJosZub0iS4bmOPt9T7Vl3d3JczNLM25j61rOp7V+zpfCt3/AJEpW1ZHf3L3M7TSkljx+FWNHsHu90sjmGzj5eT19h70aVpxv3aWZvKtI+ZJD/Ie9SaxqCyhbW0Ux2sXCqP5n3qJtfwqa/4BotNWRXl4ZX8lGP2aI4Ren4n3pkBd5NsO8yHpjrVe2hknlWKJC8jHAArdleLRoDbW+HvJB+9lH8P+yKzq0oQShFe8NSZYOsPbRi3hcXLYxI8gyPdRVMvYy/ft2t2PUxHI/I1lrhc9u9akFsLey+33jiNRzEhHLkf0rOVB0VzJ2YKSlo0aFpZwWb/aBIs8pXMEbjbk+prkfESapLdPPfW8qgng4yv51ZbU1vJvNknBlPUNxj2Fa2nXFwz+Ws+yI8sW5UD3qfaThLmnqxqCS0MLw9pJ1ObdMTHZRfNNJ0/Ae9TeJ9WW5AtrIeXaQ/Iqr0xW9dalaXEb2rW/+iE8NGdhY92rGk0CzuAVsrwxMTwk4/qKqNaM5c1TTsPldtDnrO3lu7mOC2QvK5wqjua6nUpovDtgdPs23XUgHnyDufQewq5Z6bL4b0ySeGL7VqMmVLxjIiX2964m5llkuHe43eaTk7hg1spKvLR+6vxJ2FEjbt24hupOa6vSI103TjqepEtO4/0eNvT+8apeF9JjmDalqIxYQHO08ea3YD2ql4g1V9TvmckCJeEUdAB0omlUl7OO3X/IFoS/2sJZXedWLMclutauiQLfM8zZFrEd0j9OPT61zumWU2pXsdrbLukc9ewHcn2rc1+8h060XR9OcmNDmV/77dzWdWjG/JDcakzUudauJLhmtiIoAMKnUYHr70kF5FdTxwy2SySyHG6L5ST/ACri455I/uOR+Oa6+zkGjaL9tvc/bpwREg4KD1P1qHSlS+FjunujXvfssVq+m290sDbszFud/sTWU2l3KLvWMTRj+KMgismznNyrOEf1LN3P1ra0e3kFwZ5DJFbQfNIwyPwqoVKtC7a3JcYvZli3VdF059RuABdOCsEbdR6tXETytPPJLIxd3Ykk9a6+91iS9lfzIo3ty2VSRckD61UXT9NvpViht5oJnOB5bbl/I0RxCcnKe41CyKPhjS11C8aSc7bO3HmTN9O341F4g1U6jqRmiGyGPCxL/dUdK6rUbEW+jDStInhMgOZwzbXc/wAv1rjLnTb20J+0WsqD125H59KqnOM5c1wEghkuLlYbcEySMAgHvW94huDpkEOkQSK5j+edh/E/ofp/hUvh+JNG0eXWLpQLhxstVb+eK5aeV55nllYs7kkk96p2nL0Ei8l+SPnT8jXSWFwuk6Q97wLu5+SAN1VT1NYHhnTDquprG5220X7yZj2Uf407xPqa6jqRMIC20I8uJR0AFQ6UeayK5r6F63vLiAZgmcHvhutaui/8TO5aW/ih8i2Uu8pQA8dOa4mJ33KsRbcxwAO5Pauq1120bS7bTNwNxNia4x19lNZ+xcWNsnv7i11a+N21xc20pwFJwVAHT6Vas5NWNyhtL+K85AOW5I9CD2rlY79OjKV/UV0nh+SKzs7nVnwdgMcKn+JzUJTTBpWOg1/XI7LWLJbi1e4ggXexAwrOeM/gM/nV2y8R6HcmR9626scBCOQfX6VwsOq3seWFwXzyQwyp9eKvaQINZv0hnsodzfM0kWU2gdyOlNVLsh09NTttSeK2tUhhmH+ntsRh0werD8P6VatIYbSPMe7YF5yemPSuP1R4NY1eGCC6kgNuvloqxllAHcEfzrPuvEDaW0tst81/kFFCDCr9Sa3jJzdooUaLau3ZHM6xcm51a6uM5LyMR9KrpE5U8FVHOTSbDvy/32OT7VbusIVjB+VR8xPTNemkZlMjb94nJ9KACGAI4zyB1oTl2Y7v9kY5oiyVYoucHrnFFhE0kix5CgnHRfSrEMx2qjEFOoUnABqkhQsVLFsHnFWbdQAWY5XPAPUirTsQ1oTj5FYZUhu2c0zT+C/y45pG2qpYdT+lP03b5LlQevOfrRJ6CjuZuo8zP9a09TG2K1X0iFZl5zI3+9Wpqp4gXHAjFYM26mfx1roLCTZpKREcS4P/AI9XPMPlP0rooI/9H08eqD/0Kik/3sUE/hZ2njqY22i6WynDKQf0Fcteyta6VcarO3+m3v7uL1Re5r0XX9A/t3w3KkYP2m2QPHjvxyK8x8f7oE0q2PGyDke+ea7cVUs1FHHh9YnN2Nr9pcBvuA/99H/Cum8KwRxayD95thA9vpU2iWKwaNHK6csN7Hg4Hp+NbOkaR5Dtfykb24VR0UHt9azowc5adDPF1lCm79TVuAZIw4bmMYx6iqLtkjA4bgVfjbawPWqdxF5N3HyPLdsqB255FenGelj5rl102ZXuYcOZB8s33XUnhh2P1qpcoXiZRwRyK27uLzI94Iyg5U9xWW4Gcg/hXBisPp7SB6+Axt37KfyM0nMMDnOQdpB71RdXjldEOA5x+FWrqQIzKCOG6elEg3OrDqRnpWPoekvNFezeQWlxbj7gO4mkTThJbzF8jyxlcdjW74b03zrN5pBxNN5eO+AMkj8qx76dhfXccAxG2R+VOEk5e/shThLlap6NlTUby8vY7YXszTGIbVLHOFHQVWi0rU0gfUNNzKiD94inlR6kVcs7c3UDNgHYQDk8VmXN3c2t1MNPmkt1mG1wp4x6VOq1iarW8Wavg6+ub7VVaVwsWSCCO9bfiyAM4kBy2K5/QSLRYyvBzk+tb+p3n2yaMRqAoAFenSqJ0nB7nnV6MlXjUjtY5GUfXHpT9MmEGowuQAAeTXUa7pcNvaxSoMtj58etc3LEThsHJrGdOVKSOinWjiKbS2ehN4ovVvbwbGyijFY8llIbbztp2djViSPadxGc11WowonhlMAYAB/GmoOs5TkRKosLGFOHV2PP2Tnmk2lSPar0sYIyB+NQOpUZ9a4mrHpJ3Ee7diu7DKOOnIqZlBQSKQQapvk9sCtHToUFtIXyQe1EYuo7ESmqcblckdufrScg5XIp5CsSYzkDg+ophODmo2Nd0aFleFXiLPskjOY3HBBrvtC1CS+tmR5lMzH5gT1HrmvMSAQSCMVatL6W0mR42KspGD/jSdmtTKVNt3R6a6kMRkcURRPKNqnCjuTwKztL1i3vrXdI6RXHdCcDPtVh5WTjAFZEtWJYyDIwLAbOnuaLmd5H3SEE+lQeaI0DKwZjyVx0NQm4admJAyPQUCJpZVllG8BB3IohJWb5VLj0I61WUSzSBIImkYnoo6VuRaFrl1IhtdNu5io5ITAH41Si3sgZmtMWc7ieOAp7U2Viq4Iwe1TXWjarBcsLmxeI9fmIFZ13LeBgHt3JA7kU/Zz7CuiwQjIuX+cnBFQygxsVJ/I5rKub25TOLOU/iKqy6ncA82c/Trijkl2KR0kE44WRiF9RSiaLzD5sm1R0PrXKNrcahdyzRt3DDFN/tqFm+ZiM+tKwcp1plhaUAMRH696jllVWIDAoO9c9HqEbD5HBHXOale+3hcBT9KLBY1hMM4b7prD1OwQ73XOw5PHUVOZ4hhjJj2xxVLULtWlCgmRR/Cpxj/69RU5VH3hwT5tBWxdaNF5cwaa0YqSwx8h6c1DFJexJmNn2/wCycg0aRJBFdSRs0nk3CGNlI9eh/A1SNvPbsyI/zqcEK2CPw615zimdq7BNcKHJnt0Yn+8m00jG0IB2yJ/utkfrU32i4ChZfmUdnXNJm2kOJbYA56xsVNF7DsaGjJBKLm1a5TyrhMAMpBDjlcfyrO+z38DMsbNkZU7G6npVhY7XepgmkhIwRvXOD9RVvWrN55Yr6ykR/NAD7W2/OOuM4pKYrGO1xOCDdxByM8unP51G9zatwYSM/wB09Pzq7IuoW8bCZJQvU713D86hjkt5UJubWNj6p8rVfMtx2H6ZcW0FzHLDN5ciNuAdePoT71ev7Jo70zadKWgk+eNlOOvUD6GqSW2nvH8vnxP15ww/pWhbJHc6bLYidHlRvMtyMg57r+NS2nsIpyy3SPi5VZAvJEig/rVd5YWILW+z/rmxp6x3kXzkSFR3B3CoWmcyASxqw75XFCQyZRbsBiZ0z13rn+VacrNd2cM0Uwe8h+R9rcsg+6x9x0rMYWbL8qzI3swYflUumTw2lysvmhkOVeNgRvU9R6UrXBluK91C1JO5wT6rmursLj7Xa+fcyhrxI9rAKB8v+Iri5leCdhayuYTzFz1X6e1XNM1C7iulWSTaOhLJ2qeW2jE1fU6Ukm2VQxJwWrOlky6+jda0LzMUqhGBhlQbG9fWs+ZCu1gOxqYx5Wyb3Ro2ExtXWTcfLbir6Wbf2/bXkDAROGDj37VkhS1nCvY/yrTsJxsSNyQOgPpVUq7oTU4/MipSVSNmdGuFQK3BY5rzjXHE+o3jI2VJ2j2xXfI7uj/L84Qge5ri9R8OazBFvktGYSjepRgc/lXGpOc5TfV3NYJRSRzNvEYpduM5OQ2a0AwzgdarCyuLabNxDNF/vqRUs0gWFm9BW0lzSSL6GRdN5k7k9jiowOOKAM0oBr6CnHlionLfUbyKO/NOIpMVYC0004e4o6ngUDG11/w3sBLq5upQCsKFlBHc8A1y1vD5smD90cmvTPBtp5WjM5BUzsT+A6VxY+p7Oi330IUrzUEdWsoZCM9e/tXmer3RutYuZ85UHav0FdnrF19h0m4kBwQm1frXmELymQ8gjqa+fowumzsRebPmK24n2qzHkA5OTWeS8g2qDj1q+ilQozxiqmrIZzthpcV04IeYxg/NIwCirlzNHpH7myRCXHzMfvU6+v2CCG0UBcdQOB9KoQadPcy8sMHku3T6133cvensZiC9uppAkf3ieFRQK1be0W1UXGoy75QMhWOQv+JpUittOiAhG+Rhy54J+ntVKSOa7kzI+R2QVN+bRaIGyHVtRa8YIq/u1PB7mksNLmugJJP3cH949T9K04tOt4AHuB8w5Eef506eWe5+WFWVBxuPHHoKamrctP7wuNnvI7WD7NZIAw/zz71mrYz3cu4lndu9adtYhdzM67R1brx60+TUbW3jMdtIcHqQOSfrS5uXSGrEriW1rbaYm5/nnI+8ecewFQ3Be4DSOBtB+70B+tQPqSPIoSFpH6KCe/0rQh2pGZbxlB67B0X6+9TrH3pasGFnp6f626jUKfuqByf/AK1PuJWK7YgsKDoScY+lYdxfzyyORNJ5eeM8cU23t5Lk7n3+SOWbr+VNwk3zTY7Gvb20chIikDED5ivNLcanDaZgSN94+8ehNU5NQS3hEdquAR0z0PvWWPNuZsANJK5/EmnyOestgSL0uphpAy26l+i7iSR+FaVrLLCokuyN7fdiUYx9e9Q2+nw2qjzSJbr+6Oi//XqzaWgUM8jZ5Lbj2zUTlC1kDEWA3FwZpS2Oyk5A96nAMzGK2yF6NJ/hTo43u22xZSAHlh1b2FaeIrGIbgNw6KO1YSnbRbi9SOCCGxi+6Aeu3uT6ms26ae5uVcyMArZKjoBSXdyZZMlyGyP/ANQpYpCrfvMAHI5PWiEXH3nuBWlsVmm3u7tnoM8D2p621vBh2jHHc1Jc3sUAUOcE8D5azby8RhnYzAHucCto80tOgakt1ObhsIQsY6e9NhtVkOSdsY6np+VMsvNncOIlEPqBkmmazcKjJFCSXU8qOn0rVN35Iisa8Xkqg2MFjX0PWqGpR/aZwqSgj+EdcetU4yz4UDLegrUgihiglc7pJE+9j/PSs9YsdiGNF02PcV3yMPvVWkuBKd0qBj6t/h0qGa+M0jPIc+g7AVc0+xNz++mBVByo9fc+1U04+9INCawilYCTaFjH4cepqtqM6SzAQr8ijGfWmajflt8ELkxZ5Pr7fSqVvDLc3Ajjz05PZfenGn9qQXJI4HubnZCDt/iI6D/69azzQ2UKQ20Za5JwM9R7mllmg0e18uPBnYcZ/maxoLuYSs6p5krnJfrVJe01ewrj7pZbe5wxDyOA2RySTWvZWaWls11etg4zwensKZZ2zBxeX20SY+VT2H09ah1EteyAvMqQqflQAk/WpnJSfKthq5n3t1JdOC5OxRhFJ6Cp9I083cgd+IVP/fVOgtLYvtd3PvnAq3O8lpL5McgKquMDoKcp6csQsGs6hlPsVkrFBw7IOvsPasmKwuXYfuioPdjir/nu52Ifm6ALxV5LeS0RZ5W3EkfJ1J9hUxlyrligaH2jW+nQGNHBlxycZ59aypIoGkaSV5ZnY5JPFWltrzULxlhiJnbnZjGBV06LNa3CC+KAgbiinJH1qvZThFzaFzRva5R0u1haZZGBi25I6kYHc0k17KzkCRimeD047V6DZeEob+zje8kkjQ8iNBjI9zWifDegaXavPLah1QZzI2ST2Arrp5fUqR9pPReZhLEwTstTyu1he7m2pnHUt6Vvx6Jqz2/lafbySxyABpG4AHcCuh0TS5Nf1R5I40t7WM5baMKq9h9TWzrnjbQvDeyC2Q6hPGcMsR+WMD39a5afs3J8zuuiW7/yNJSm7KKONg8AaoYhJeSw20YGSSScCl8P6KsmofZ7djKC3+uK4+Ud8V03iTxnHr+mW1vpaSRwzANJvGD7KPatPT20PQdOUy6lAbxh+9Cndg/3Rj0ohVpVJxhNcq6ky9ok2tR1v4U0aFy7WaTSnktId2T/ACqh4ovYNPtxp2nRxxSyj5zGoGxfT6mm3fjewUslnHLPIBwQMCuGl1qSO/a5ePfcbt538jPbj2r1MXiqMIeyo9evkc9GlOT5pnpPhXTBYW3mSITPKuSeyjsPr61oanew2Fq09w0aBR9wHknsBXkl74u1q5ODclIyeQvFVmm3wmXUZ5JZCNwDMePpSWYQo0+SlEbwspy5ps6GHUYLjVJb3VZ8AHIQc5PYD2Fc5rdzDc6xNc28gZGXBUjBz2rDCh5BFA7h25A65q/pumXMl15l1G0adBkYziuSNepSg2vVu2p0OlFvU0bcPDbGcx5OMnceB9KrSXzu3ARWPtk1HrN6I5mtldmCnJ7c1RjmLSKrITk4XHrURpVqv72XUd4RVjTtvPurgB2ZolwSo70msTAukNnCSU+8SO9akJTT7UnA808L7t/9aqSu27BO09T61phMG8Q3KT0X4kVK/JokZ8kFw0W4RPn0Xqav38o0bRxICftD8IAerdz+FXrYbnByM9s1HqMNtf4SeMMi8L7epq/qcZ1vZwekd/8AIh4hxjzSRw9nqjQ3CPcRLOoOWRiQG/KvQtN1Cy1HT0ks7CG0GcOep4/2utcpe+Ghkm3nXaD92Tr+Bq/MP+JQbS1lWAYCkkc4749zTxPLTXs421NIP2nvI9T07w5Z3Ea3aXrygoAwhk+X9Kk1O00vT9PlnkhyIxld+SWbtXkugzy6NMklte3KuD0Q4VvYiugvtX1PVrVpLqceSvzBSOB71csdCnBQp6WMvq7cryOg8OafbXsE1zqJj8nPyo5wCfp7Votqei2A+RoVx2jUV5lJczSjDSMR6ZwKbZxGe6RMZGct9K8qb5oq2nfXc6Yxs7s6jXtdivb1JAW+zxjCLjqe5NF140u/KEdrEkKKNq98Cq95pV9fJElja7ol5ZyQBn61C3h6OEZv9TtYMdVU7iKmNNy2RV0txtvqWp6tMY5bqQoBz71lXx2Xksays6IdvX8637WG00qGWVXeWEEEtjBYnpioxrlrbvmz0uCLPO5/mJrejh6lVtxWhEqkYbmHDZXdz/qLeZgOpCHH510ElqV0iO2jZI2kwpZsgY6nmpLPWb++ZkaUiDHKouAc9q6u0glihjga2R7eRcuXx+graGGj7ZQqPRaszlVbjzRRzuneDLa4VTNqRYnqiAKfwJ4q/N4fsdP1S3t7ASNKy4cyHnkjHtWhe6Nbxkmwme3YDJGdy/lWTZ37W05u5VMjhggz0x649K7sXChTjGEFZye/kc9OdSTcm9jVWbVtEuH8/S0mgzkT24BYj3FaC+LbSeynETbbkIQEYYYHHHFULjxxaWcfyI8ko/gU5U/n0rGv9cttdUSrYx28iH5nH3jx0z6V018ZQpUnGnLXoZ06VSck5I7PwdD5Wnb9+ySRsn1xW7Lewwt+8uIkUDozAGvEm8R320rBK0SHsDms6Se5vbhFklkd3YDk81w0cyjRpKEI7G8sK5ycpM9Gv9bsx4rN3eSgWsPCMOd2B2/Gnah8UNNi4s4JJyTgMRxXFa/bsfslvCrSSYLAAZIHQfyNQWXhDXbk/urIxK3O+UhRj6Vnh61duTgt3c0lSppLmex0r+MrnxGJbTykjt+CyqM5OeK5m51q+ctCty6wRkqqrwMV0nh3w3LpmoLZXDxm6mILtH0UYP611dh8P9Et23TJLcsf+ejcflSjh62JnJt7aA6lOktjxyWWSeTAZpH6AEk10GtWjyw2VrECT95j/dA4/wAa6HxNfadBfpo+j2kEUMbZnlQDJI52g+nrWTPqPksONz9FjXr+NceJgqM+RO7NYTc1exNaRJYWSO2I9vTPYd2Pv6Vh3kzu0k1lEU3cM5OC9WpRLPKs163GeIx0FNu0e4GyPbGu0GSQ9EB7fU1zQ96RV7GBatP9pzAX80nonrW296sNsovlS4nB5GB8o+vrVdriKBDDYqwP8Un8Tf4CqzwRT7fJZy5455yfat+Ry1Ww7rqXYnsLiUyNM4c9Ek6D2BrasntdOQ3rQF5UP7tByo/2j/hXPJYrbEfaP3tz1WJRkD/eqCTUbkztJvaMnjHQfTFRqtgcUzcuZrrVZTNdsyQkZC9C31qjKjzOIrdB0+gAp1pfz3MTeasaoBzI3GfYe9EhjuIxHZXKxk8Oj8bj9ahXTuxNEMk0GnDMGJbk8GT+7/u1kXE0k7u0jHOM/jVuSwu45cPA5yeCOQa0tG017i9WG0h+06g38H8MQ9TXZTit1qyGxnh6B7G4iu5oy1x0toQMsWPRsfyr0bQPCMs9yuo+IT5s2dyW5OVUnu3qa1vDHhe30jFzcEXOosPmlbkL7KO1O8T+JrfRoWUFXuf7vUL9ff2r1qWHjRj7XEP5HJOq5vlgReK4NEjsy2rWsMrY+RSBu/PsPeuB0XQZ9X88aPCLOyyf375O49lHfFb2kaBe+JJxqGvl47RjuSA8NIOxPoPau5mltdMsgX2QW0Y2gAYHsAKfsfrL9rVVoLZf5i5/ZrljqzxPU/B+saV5kklsssAOfMjOfxIqkzz6bDu88icjIiByMe9d1qurX/ii/On6KhEK/ff+FB6sf6Vvaf4L0y30/wCz3UAupD8zyv8AeZvb0FcawXt5t0vhXV9Tf27jG09zyeHWPLulllt4zL0Lgc1v2XiPym32cksMx6FWKjPvTfFuiaPpdyi200rMCd8Od30UH1rP1Lw9rPkxXMunSLbgBkCclR7jrWUPbUZONN7dtUU1TqWbNSCS71nVkvddP2mCNh+5aT/W46An09q9Xs/FegyWixXdt9iWNcBQvGB2Hb9K8CtGuvOEduXDg8g9B9auT6oXLW1yTKgH+sjOPyrShj/Yxa5fe7k1MPzvfQ7O/eXxl4h+x+HLSKNIyczuANi92J9fYVd1T4VTQqGs7ydJsfMSAwc+pFcxoGrWthGiWkr20n94Ngn6+tdHqHjzWLaxNvBM05l+UOq/NzXVSr0VF1Jvmm/60MpwnfkSsjjrnT5tLupItSeKUIdqrD1kPoRWZdXJnuj9ozE6/KsbqVCj2r0fwFDo9vcyXviRmbUH+5vHyRA+nv7mum8WWXhw6S15M0E6t9xBgsx9jWsabf7+u9tl0RLml7kEeMQWj3D7Uwe7E9APenOVUSW9ixEJ4kkxgufQe1dBo/hu81y3m/smA2emZP77BPmN6L7VQ1Dw1rmmKQ1qt1Eo+9F8rfkahU3i5c9RWgtvMrm9nonqc7JZuv3Wz9etWoY4tPt/Pu/muTny4s42+5q3vTTbcT3IzcsMpC38Hua527uHuJGkmYszc81wVaNOtUtS0it2dEJzS94urqd1nDsJUPZxkGrEVtZ6gkkktqbdY/vyRNhfyrP0yxkvpGIby4I+ZJD0Uf41Y1HUAUS1txi3j7dNx9TWEqUoz5Kb1NeZNal6/gN3bx2+lTQiBRxETtOfU+prCl068hkWOS2kDE4HGQfxp6ThyAFIY8D61uyTyaXbKrTs92wzszlUHv70RqVMP7rV7g0pbFdfL0O3KoQ+oyDDsOfLHoPesZizuzMcsTmtU3NtdANc2ymQ/wAcbYJ+tTWOlWk7xyNdbYScMrjBJ7AGtKVeELzqfF/WxMovZFfSbBGjN9fnbaR8gH/loR2+lc54l1iTU7lsHEI4VR0AHYVteL21GRtn2Z0s4xhdnK4/CuSigkuZUhgQvK52qo6k1rStUftZv08gtbQl0yxm1G8S2tly7Hr2A9T7V0utXlvo9gNK09t7f8tpD/Gf8KsyeR4Z0t7aBla+kX99L6f7Irip5GllZ3OSetNJ15XfwrbzKNGDVZFVVkRXA7jg10tuZNO09NRutiSvzFE/XH941meF9JjMR1XUvls4uY1P/LVh/Ss7XtXl1W7kdjiMcKvYCs5U41J8sFtuO7sb8d3Id00c5Zz8xZTg1btCNQmH24QzRKuXaUdB9fWuL0m0ub+9jtrPd5jnqOgHcmum8Q31vptpHptoRKyEGWQ9Wbv+FZTocslGL1Y+bQ0dSew1KzitUkls4I+E8tQV+pFc/P4ZuxzZzQXS9grbW/I1HDrMbDEiFD3I5Fb9sPsVquoyIHMnECMcHJ/i+lKLq0dAaTIyB4V0TAVjqF0PnkA4Qf3Qa415GkcuxyxOSa7aLULoJtkdZVPJV1DCiHTtO1WbZJY+U+NzSQtjH1FOliFBtzWr6icWZ3hHS45mfUr9SbO3Pyrj/WP2FbmpaXO14b/XU3LkeVabsZB6A/4VZeO3mitYtNvIo4rcfLC+Rlh3z3NPmW+k82a/3P5cTeTj5hu9frXdhHSqSdSb16Lsc1ZzWi2ILR7eaSO0toUkuCxaXAwI8fdVR0x6mpdTKNby2qTDyID82BzNIf4foKbotu+n2saFwNRvBkE4HlJ3J96o37xRrLNDkQxKREf4mPQsfqRW6/2md38MfxZDtDbdlBAjTXDOcRwgL8vdz2/CtLTCtlpp1FuJ5Tstl9f9r6f/AFqZoGnm+XfeMqW6DzJeMZ9fzqwLhby+ku2TbbQ/LAmOAO3H61jVoQrVVCC9TRVHGLbZmyQSxn96rFm+Ynuc96vaHJctdoiyuluvMh6gDvntShnlkZiSzufxJq9fZtLZdPjwJZhvuGHUL2X8f8ayxOAUGlB6scMQ2tUUtU1K21JzHcWqSW0bERkMVOPWst9I02c/6NdzQOT8qyqGX6ZHNXXs0wNhKgVpWOiPZiPUbzAhVfMRQMsxzhePc9KwqYatQ1expGrCWxDc2E2j+GXtLEebdTtm4deCF7DHpXDyRSRHEqOh/wBpcV1N6bz7ZLJfrLHLIc4cEYHapre9uJGSA+XOjkLtlUEc+9Zxqypu0kWo6XRU8FWUayT6xeAfZbIbk/2pMcD8KwtTvZNQvprqZsvIxP0FdvrL2C2v9j7XSBCHZoOBuI5yPxrnpfD0L82GoRSN2jkGxjVwrRbuxWe5kadbS3t7Baw5MkrBR/U/hXReNrqK3a20izx5FmuHx/E/etDw3pkugWV9qt9Fi5RNkCcN171xM8jSzPJKSXcljnrzWikpMOpoaXDcXU8UcJIDn17dzivQrOwttHid4J1We4XarP1A7nHpXOeDbdbaGS/lGC37uJT3/wA/0pviS5llm+clEH8RPLn29AKVKCnOxajdcz2R0F3b6dF4dnisrtd8h/eTH70h9PpXAz2D2215CcMflHc++K6Twfo15rtyDH8lnDzJMwwqgVS8UyQS6qyWT7oYhtD/AN4961w/uVHTi79X5HbiuSVGM+Wz2X+Zh7vLLELlu2TULSM4LOc45+pp8qgkZkHXmkMZZVyDt6V3nkix72RcsQWPT0FSKVLbUclF5JPek+WOPCoT/OowAq5AwxP4UCZPHF5rFo1VOM7c1J5YIwCoPXpRb7WjYKwVh/e6t9KFGZMY/Kncgnbb5J9QKj075LRmJ6mnzDCsQPlxgmq0bY08be70paIIasqXXDt7GtO/bfHbyDkmMVmz8seRmriv5llFxkplT9Kxlsa9Su4+QnPWups8PHpuOcIB+tcqzYB4rqtIOF08cdAP1rP4ZKXYU9YtHuHh47ba4f0jH8q8R+LEZTxFGmQ2IQw/EmvatD3LplyzHLFQK8T+Kcjz+Kh5m0MIlXC9uTXbVaqWmjloJx0LelXBvIbaxjjYeUA024cbR0/pXUmXNssQwBnOKoaA0enxR5hR55k+znd0U/wnHuOat+SqK5kH75SAhHII711Ya0E13PKzODk1LoJSuqSoBIucHI7EGmNSg8VbbTPOUbxJgGCqx6HpVK4Quc4wwNaDSlY3TAKkAj2PtVGU8qf4Twf8aqTTVjBJpqXVHJ3kLNeyhehbr6VJJMIwg4IAxxU2oSJFcTgEEh/u1l/fl54yc1587Q0W59RQcqqTlsegaPItlpSknOy2LgdtzH+fSuLX96ZjjbLyCuOtXf7WkEJhU5V8AgdgOlU7hWmuIngyHkYRt9fWpUbq/U1UnGVuhZ8HReZFrUb5HlweYB7g1jaVax3+oGOckJknjua67Wmj08an5aqjRwpbfIPvHqTn1rjNIn8i+ikJ+UnBqqMkppPa4VouVOUo72LMw+zXMkXZTip7aZgy/wB0HIqLVsPqzBCCGxg0x1e2mMcowRWjbhN22uOm1UpxUt2jtbwJc6Yu/GDgg1zN7aybWOCVXvUtvfObdYSx8tTkD0roLGKO605wyBiR1FeipKu9Ox5bTwkby2ucLJHvQ4HI9au6hqPmaRDbqvI4NXbyylC8oApOOB2rMubbYpKjj1rn96CaXU67QquLl0M2NHJKqCT147VBNETuz1FbOix5llJXIArNuRtnfHrWE6doKR0Qrc1Rw7GdswcYpxlZUKDgVO6hh0qGRcHkYHYCsNVsdGj3K4cxuGQ8jr71YVhOMLgOOcev0qJYwzgY4p0kPl/MrEEHgip5bq4720HLgHDZA9aMAnvQkglJ34DevY05Edmwikn2qSxmXXG12B68GvQQ5SwtC5LsYwTjmuRsNLacgyNxnkD/ABrr4XCxqVk4jG1VHXinyX3MZvsWrXTLq4mVXKWwbGDIeTn0H/6q6iz8KaZHHGLnVLiaXdlkiCopHoep/WuXXVJVKeS6lzwWblq17fUGtol6GZuRmuinTp9TCTkd7baZ4atrcomn2o77pcyNn6tmnXN0rWRhtZEij6KqnaPwArkra+vJ5QJbcODyT0H/AOquhV7dYkmnkgRhjaiDOB9eldcbdDF3OT1O3kEjhvMLryx55rm9VS5ZQduyP+Lmuy1zxDpUcpMuoRR9jHGdxP5Vx88p1KUjSLDULtCc/JEeTUylHuNJnOzKvmMQGCj1NQibB53f4V0N54f1nyt7aQbcn+KeZVI/CsubRtQT/XNaxf8AbYGsWaorxz5OCSfrTZrGzufvwpu/vLwf0oNhOrfNc2v4NTSssZ/11uw9mrJruWvIrP4djfmC5dG/2wCP0qu+havAf3cRmX+9E2f0rVjnnzgRo/8AuyCr9vfz2w3tDMgHcDI/MVPKmPmkjnY4rmIZuEcOOm4Y202W6UvlreMsP4lyK7SPU7DUlEd0ULDoc4IqlqOgOVMtkYrpT/A4w2PY9K4K+Gm3zJ3RvTrR2ejObgltn5ZpYnHI4DDNX9VtEvZY7u3kV/OUFgTtJccH+lZssccVwYriCa2lB5U8/wA61bSCKbSrm2juI5GQieMEEEdmBP5flXDJOOmx03vqZptLq2JAEqg/3TkfpVbzJUk+dEf6jFXTDeQLujEm31Q5FNN7If8AWqkg9HWpUmMqidc/PEy+6nIrT0+4iuLOexMh3OfMiBXkOO34jNVEuLOT78LRn1RuPyqS3+zrKk0VwElRgw8xcdD7U7rqhNCQyzRgmKRh67WpzXbsR58ccv8A10QZ/PrUuq6Z59689gA8cwEgEZ5Geox7HNZUn2u1YK7uBno4oUYvZjLoe1ZiTA0RP/PJ/wDGpLWOKG7juLS7KSRtuXzE9OxNUhLIwG6FG914oWaLPzh4/XPIo5X0YGh4hs5FvDcWGHt5v3g2HAVjyVH0OazvtF3HCRKHYH++mRWjaTw3OnT2bzgsP3tuemHHVfxH8qqQS3cCk7nAxjnkVWqWokSpNbSxgSWqbsctGxU/l0/Soms7WVDtmmjbP8Shh+lNN8S+JYYnAH93BqRprU4OyWMf7JDVHvLYZZhsmudMe0MkclxCd9s4Y5I/iTHv1qgrajb4yJMD05GKuWzIGSa2ukEincoYEEEe/Srd8jed59kD5Uo3ssbbgjHqv503N9RWL/hq4m1ECC7n27STDGVGN31q3cpIsETMmGLFWHcEGuej1C4SVCGywORle9db5jXOnJdswkZm2y7VwFPY/jUttq6WxLVmRx5aKJcAY4pb0bJk8vjaN1TRpgptGR1JoUZdy3O7pXPfW4zRtLk+Wrry4GCPUV0WmTx3Nr9llcAMd0L/AN1vT6GuDW4MN8eflrd065QsoU4Rzlc9mrOa5HzITV0bOQzNHKoJXgg1g+ItBtdRsZVtlSK6X5lIGNx9D7GuuZY723FwqgTxjEnuPWqrojDJANK/JJSiTrseEPG0cjRyKVdDtYHqCKBXeePtCBX+0rNORxOq+nZv8a4TtX0uHrxrw5kZtWEIJ7Um0inUua2AYVoA6ADk0/FWbSH/AJaN9BRYipNQjcntbc4SKPBkkIH1Jr1e1g+y28MCjCxoFA/n+tcD4TtvtOtwk42w5kIPfHT+deinBkya8LN63vRproTgot3qPqc540YGCG3/ALxLmuHESxNyDya6HxXe7tSlOchfkH4VzzSNIwIzxXDRT5T0DUhVfLG0daey56UyA4jGetOlcJGznoBmsrNuyHczoLeGHLzOFUfwnAJNMuNQjPyLIkcY6BRmsrU7sXUwZRhV4B9aZaWU90NyKRGOrH+lel7O/vTZlY0raWCWXZCJZpD3PAB9c1bu5lsIA8WwzdOeR+FVrdXETpawhNjAZJ6n3pp0qe4lLXM4z6AdKl2vq9A0KM2o3DsW8wDPPAFS2sT3DK91K2w9Fzy1aMOlWtrIpkJlk7Ken41na87JLGFG1SDyOKqEoyfLACe61UJCIbYKBjHTgVl20Ml1MI4F3OeSfT607TrCS9ckHZCv3pD0H0961ri6t9MgMFou5yOcDlj71TtB8sdWFyKa3XS4C4lBmPGcDP4Vl3N3JcOS3C9lpxhvb2XeY3Y+/AFaen2MFnia+kTzuqRnkD3NO6gry1YEel6YXAnvcpD1VTwW/wDrU7UdVGww2wVQOMjoB7U7UbyK4GGnkZe4QYzVewghuGIhtiyD7zyHIFStffmBSs7eW7mEcC5J6k9APU10Vrbx2KFLdd85HzSkfypGwq+XYERLn5mUYzVjCwQgyueOgzyTWVSo56LYGMjEUPzzSKCevPJqdITdlXZiLcdEAxu+vtTYLJryZZrlBx91Pb3q/dXS2yFIQrSd27CueUtbR3C3Vle5upbOcRIsYQjhl5IHpisi9vJPOb5w5PJzzirDtLcREvhGb+LrVcaVtPzSbh6jitYQitwuUdzSONvLk8Y9avJFHbxGWSX5x1wc49qlWO3s4ywGW6Z65rLm3TuSRgZztHQVtGPtPJCbHXV0JZNzkBegHXAqSztDd4YqVjHc9/8A61Os7JDiSYYT09f/AK1ay425+VY8fQYok0tIhchMUzqYY3CKTjco+6KfHplrEPnUsy92Oc0hn3MY7aRdufmb09hTZr2MnaZMMOwrN8y0QlctxxoHwiKv0FSMg2suOG6n1rOGobFxHHgep71ELmcsZCHKfXgVCi7hZla10srcyNMAY0b5V9frVnUmuJF8mECOL+JicZ/+tUV1MWciGRgvTP8AOq6GSSURxgs57n+tbXbd2OwkWnKTiS4HH90VfUx2CeWkRLEZyx5NTjTiYwsUTzztgAL3P+FXIvCOqXTh7ho4SfU5xWlOnUr/AA6olzjHdnOzXQ+0MzQoXPPIyauQC4MRmKhIwM4PFX73w9DaXqh7g3Eq8soHyg9h9a63SdCjktQ2oQh2bkRnoo960hh5VZezj038iZVYxjc87uZhdXgESMVA42gkmpRZXTuhaGSKMn7zjGa9Rmjs9Mtml8mKNF6ALyT6CufgSfWb4u4IjX8lHoPetK+GVJqnF3k+hEK3NrbQzrPRWubYrbBF7eY/Y04eFUhUvdXjux5IRQP511EjpZxrDbIMLxgHpWJqt6WJiQjP8RHb2rr9hRwtLmqasyVSc5WiZa6faJcA2seCOrsSSTWrDH+7VSMuOp7VTtr2yt4yZWLSHsO1NbXUkfyraDOe5/nXNh6lGDdao9X0XQucZy91DLC4Frrd/OMs6qiqp6Zre0Gz+0Tm8vXQrnI3H7x/wFclfTSQOWAQNL8xI61nmeYvvMr9MD5ulTLGKpUUpK8VsvPzKVBqNluz2GbV7G3GJryJce+f5VxvijXor278uGRmtY/u/LjefWuXs4XP+kuC2BlQx4+tPmjudRkBtbeR41GFKr1or42tiv3cVp5Cp4eFJ3bLV5rl3NZLZJM0VkvJji+UufVj3qhZwxMxxGioOpbkk1YbRbuKMtPsi9Azcn8KtR2q+QURcgcE/wBa5PYzjJU0rNmzqRtcz76YrN5ccpKoMccAewqkXZjjliePU10FrptsrHejSN6MeKL+2tFuoZQoRoVPThRnv9a6KuDdGHNNkxrKTsiraWs6IiW4V5nI4JAz+PpXQ2vw4125Uy3L2sJbkfPuJP4VyFzK1zM20nymUquDjrUvhDxv4g0m6S1jnNxCDtaKbkLjrXL7KpKPNFo12LtxoN5pWpGDVIVjZBuG1gwYVT1CRrmbZEheNe+3OTXWaLqVlqXilZ9fu1QuTJtfo2OAvsBXUa3P4RhVniuoopeTiAbgT9KKNdQqXnH/ACM5RclozzzShdQBT9lQIPvOwwQK1LSN7+7JAbYvJx6VR1rW4J7PNsknkqclgPven4VnWPiWa1BSEohOMDHNdcsS60lzL3V0IVK12tztLvw5aajD/pMSlh/EOCv41yd5oEGlakogmafAzhsfL+NVote1DUpfLaZx8xBx0Ao1PbCEBkYyNycnnFa4nHc69nCNhU6Di7tlPUori6utxdIkThPmz+P40tsm35DOZZD2UcfnSRLLLIFjjL5HGBk1pafYzRTEGEidztVD15rnWJqwiow0XkaSpwe5XaWa0lBkKAMvCmoJbx1H3sD2FWfEmh6nazNJdWzMM/Ky8qKybbz5riOIBRzyMdBVvC1rc0tO4lUhsjU0+BCHubliVA4J5AHeqCSSXMjPDE2GJx8uAB2rV1C6htEjt8gbuenQUQzq6goRj2rfB4JV1zzZlVxDpu0UUrfTp3lJbChuTk81Y8SS3Fnp8cdrCzI332AJwB04rUtMP1IAHJ9gKkFyjMc5JY9Paqp4SnWruK+GP4syliJwgpS3f5HmU97dOTukyvovFdx4bvJYtAE9+/7mLLqMAYUdOff3qzfaLYXoLSRBH7OnBqnrVv52mR2Uc8Uabhv652joKnGxp02qaa13N6VT2ivY6rwr42srqZFurtLeHbsEDR4Gf97/APVWj4p0zS/7PN5DbRDLDEiN1z7DrXlMGi2sLZeaaQeijArp9OQx6bILdWSIAt8zlsY706uPgqfJAn6v71zpbbRrW9sYzfzFIgdwQNt3fWpMeGtPXfsiYr9XP61w73U8iAPM5A7ZqKCM3FzFDyQ559h3ryo1KijyqWh0+zje51Go6zA9wl0sLxW8eAkYA+b3Iplz4wunUiCNI1IxTdR0u7ureCGxtt6n5mboPYVDb+Fr2RysrpHjr3rSnQqzXPFMnngtGyC01K81C8CNMSg5YDoaq6wwW/ePcTsAB54zXQ6dpUVhfCFJDIxwXY9B7VqTwabZzPO8URY5ICjJb3ojRqVJNJXsDnGJwMVrczgiKCQ++MD866bS9OlGlSwRsiXDIRl2wAT7/SrF5r1u6xJHbSo0pIAYY4Ht6VRvL4QJDEGVXf5yXPTsK6/qSVWEH11ZhKu3FtEdloNrBIq6tJOn+6AFb6NzXRXum6HZacj6bHuuXYAM5yw9ec4/SubE000gaKSWYA/wjC/SrFsD9tjE0TQqSGYk/L9a7sTCjSpOMUrvQwpznUmm27HcJ4Xs7uytZHnmtL/YCJkOPpz0x9ahms/Eekybo/K1K1HJIOyT8uh/Ssy38RXOmbVe4inhPG+M8fip4qzL47tXjNvbRMJ5AVBQ/LyO4rrjisPRpqHNsjF0qs5XsQaPqUTa3Ne3zJFuO1Qzc56Y/IVoeMPFQtbEWumMXu5RgsvIjX/GuC1DU20yCazhtonVwGYy8561Hoa3d3h3ZUjYYSJVxwO5PpXkxx3sqMlBatts7fq/NJOWyLel2xAMs5Pq7eg/xNOl8mOSWaOJUZuBz0qrPdTw6g1rbqbiIgEA8fU59KfczWrh4hIqykYBJyo/GvHlzTd31OiwXk8Nu8TyEEkfcBzk/wCFZN1fveORuCjqFA4z/nvQulXMbb5SJVBzvXnOe9SOIrWNZrlWKHjI4JPoK6acIRW9xCWlvLOcFVbHOegHuTVoTiHEFiC87fKZcY/L0FVfNluSUQGKDqq9z9a6TSbFLC2865w0jqcj+6B0H1NaJOT10Qm7GfqPlaVEVAEkzKBknJZj1P4U1PITTYvt8YaUj5UI+Zue/pVa7u4luXnYiW4PCf3Yx/jVa3neaOaVvmlDfebk4xUVX7R2jsgjorsW+kkmVckKB9xFGAoqlY21xcSlFUADrIT8oHua0lgE4Mtw3lwjq3dvYVBe3oEPk26iOAdAOre596ORfDHcakyR742cQgtpCx3ZMh7/AEHpWp4f8US6PO8sUUatLw5Cg7sev/66n8BeGbbVIrjUtaO3To8quTjc3c59qjl0u0k1h7XQIZbmRjhRJyEHdj/9etvYTpcsov3ntbcn2kJXizqdR8aXNxp5jto47e5dc7t2CR7A9KXwZ4fguZU1HVriO5uwdyW+7IjPqQeprg9Z0LV9PZnvbWULn/WKNy/nUOmz3sSCUzOIFPLE/oK0WIq05qVdczXcj2UXG1N2Pcda1e10i2827cAkfIg6sf8AD3rgkOp+Nb8lS1vpqHDS9AB6KO5965S71UX7J9u86ZUI+833gOx9q9G0DxlpUlvFAYfsaIAoVeVFdkcVDFT/AHj5Yrp3MXSlSV4q7Ok0rT7XSrJLayjWOJRye5Pck+tcn4s8VP5g0/R90k8h2ZTqx9B7e9UfEPiK/wBZ1FdK0SMlJDjI4JHcsewrovC3heDRAZ5W+0ag4+eY/wAPsvtXW5vEfu6OkOr/AMjLlVP3p7lHw14S+xut9qbCfUTyFP3Ifp6n3rc1bUbfTLYvduC5BKoDyf8A61ReIddt9HgYuytORlUz0HqfauT0TSLrxRd/2jqpdbDdlVPBm/8Asacpqn+4w6u/y9RKPN789ita2V74v1Jp9ot9OB2ySquN4H8K+o96t6n8OoDl9OunjI52y4K/nXfqIbW3CoEigjXp0VQK4nxL4ilvp103R1aV5OML1b3PoKyq0KNGFpq8n97ZcKk5y93RHCmw+xTOkwW6uQSI4ogWBA/iPfFZ0dzcQSPiR0JOdp4x+FeyeFvDkOjRmacifUJR+8l7D/ZX2qt4wi0eO2Z7+2heUglQAAR7k+lcU8u9nSdSbszdYm8uVK553pOp3RL7wZY1BLMxwAKdJNa6nNHm7MUP8UeMbvbPpV/TvD95rdlIbIJaaevMZcEeaf8ACsjUvDGqWDFntWkjX+OL5lrm9niFBSafLv5Gl6bk0tz0fQvFl7pdtHbQNDLaoAqx/dwPTj/69Zvjn4hC5tBa29ukDnlyDy3/ANauHCvp1tuklY3MnKRg/c+tQz3MF3zf2ySP/wA9EOGrSeYznBQtZdbExw0VLmRjT3L3MzSTMWYnPNT6fYvfSnnZCnMkh6KP8avR6NbXUg+yXZReNwkHT8aNXjubWIW8EDraL/GvO4+pNH1iDiqdLf8AIvld7si1G/j8lbOwBS2T82PqaywnPAJJ49yaQH862rSOPTIRdXADXZGYozyE9z71r7uHh3b/ABZOsmPhgj0a28+cK984+RDyIwe596xppXkkLuxLHmpJppLiQyysWYnPNSWFjJf3HlqdkY5eQ9EFFOHInVq7/kF76IfpVnJdSM3CwR8yOeAPYH1p+o6vBczi2hdY4IuEXp+J96r+JdYiggXTtN+WJOpHf3Ncnnqe9YKj7Z+0asuhonY7S2up4iqxSMGbgAHIP4VsSSx2EkUlxDCb1h8xRQrKD6n1rC0ezXRdN/tLUsi4cfuIWP3R/eIrGbXpHuJJJk3hjnOeawdBzbUNUi+a+5raho9pfzPJBfSRStzsmGR+dQaX4TuHvgb4xizjG5njbduA7D61Noso1W62QhgAuXJH3R3rVv7xGIgsvlt4/lyOrnuTQ61Wn+7v/wAALLoc74q1h7mX7NbqYbWIbVjxjA9K56BHlkEcalnc7VA6kmu6e4heIpe20E6dMsuD+dXdN0vTdOnS+8lreWRT5SytkKfXFbQxUacLW1BxZnbYfCmkMuQ2qXC4kP8AcH90VxcrtJIzucsxyTXSa5oup3V09yjJeIxyGiOf0rL0zR7q+1FbTynjbq5YY2juTW1GUFFzcrvqSy94T0hL2Z7y94sLb5nJ/jPZah8SaxJql8dnEKfKir2A6AVo+KdUgt7aPSdM4tohgkH7x7k1haOqNcsXxwuRmrpQdWXPL5CeiNDSY7rfGGd2LnakXUk+9dHrCxafapZId1243TODjaP7oqTToF0qxbU7xR9pYFbdD/CPWsA7ridppmJz8zFup70KlGvUtFaLd9zPnaV2XI8FBtBArT0yR7aJ7uYyi3j9DgM3pWTpdtcX98sduSoPLeiqO9aOuahHLLHZWiFra3GM5wGb1NY1sLFTUIO7LVRtakj6gbkhry2if8MMB6Zp4tNOvQIopZ4HLAhGG9T7etZXm9wygf7XH69K1YIjY6Z9vZytxL8tuo7+/wBO9ZuFfD6J2D93M0NRtLj7BHY6fh485nZWG5sdselZ8sbx4h27Uj4HGMnuf8+1UI2ljwxdvMPzFs8k1oWOpXUtzFDIVkVjgmQZwO/Na4bGyoNqUb3+8mpQ5loy9pipawyahcY2xcRoR99u1VAXkd5piDNK25/r6fQVYur+wu5RCRIIrdsKyfdz64o8mF0Z4LmOQKMkE7TiurD4unOo51HZ9PJGFSlKMbJFjRrL7ffBXUiBBvkI9Ow/E10NnGNS14MQBZ2ZGQOhkA+Vceijn64qgjrZaXHDYETXVyRyOQXP9BXS6ZapY2UVsq72HLuf4mPJYmuqL+tVrp+7H8WZP93HzZozpFdKyNGksZ45Ga5XW7Ow024EtlZKLogRptPBdjgDH9a6aSVYrffGMD19TWHoq/2prE9+5HkWxMcQ6hpD95vwHH50YpKpONJLffyQUm4pyMC78E3Iy9vdrLI3zMJF28nrzWNN4a1aC7SOW2IV2A3g5Ue+a9W2HOw8/wAWR61j+Irt0iiig3GaRhGgz1Y9z7DrWGKwNKEbx3exrSxE27PY4fV9TmhultLOTy4rZdny9z3zVKa/jmUC/s7efIxuK7W/MV6ONGsJLOKCW3SRUAG9h8xPc59TzXN6v4e04XRS0aREBG4Zzyewrhr4GdBc9zelWjN8ttSPR5bAmyubyP7NYxDbHFkku3rTtA8LzeNtenuUUwaRG+N54yB2H+NU7rQ5r/xDaaXDuKYCj0jXufrXoWravb6Tp8mkaYRFYWUWbmVeNxxwoPvXDiJyjb2L95r7l/mz3cPQvC01aKf3s5j4ieILTS9OGgeHAsVso2yypwXx2HtXmBV9gweWqxe3TX9/JO5A3EkL7dhTAmYwHyD1wK9jBYdUKaXXr6nk4uv7Wp5LYrzqqEc9Ogx3qJidgVWbJ5IzwKnZW2llUknuTk1AsbdByTyWPRRXSzmFCvja2T+OQBSxjgrwADkt3qZljZFCyEkHv3+lMPlg8sCR1oehI4Ih5DEt27Uo4JONtNaQKcqBzxzS7hnj5j2yelFxE28+UwOSMcVHEN0VvGcfM+Dilb51z3wRQhETWrPwqvz9KUthxWomrRLFfSIgAUdqZZNw0ZPDcj607VCDeSMG3A85ploPm3sBkdqjcroNmTGa6rQ4zusQQdvBzj3rm5VzNgd+RXbWU0SaRp0eQJjMPrisqnwv0Yp3cbI9R09nj0SQjDZkA/CvGfigiweMnQHIKqw/HmvX94j0aFc43ymvL/ibYtP4gtb4KQkkYUnsCKvAz9pGMJdkZyXK3YyEurm7lSSSQhkAKgdBitzTtdZzFDeKepUSA9z2IrEgAWdM44GDTpoladgp2g8+2a+i9jBqx5lVuacWdqwpuTVHQ737bZAP/rovlb39DV4jmuOejPKjFxvB9CTaVT5VwgHUnOarYDqyNgjGass37oiqMknlo7k4AUnPaplK7uEKfQ5SZHlupG6guRmnNGsdm7nBdSfypXuUWKNlYMSxYr6VVkZpA/X5s4Fc0uSG2rPfp+0klfRIqWEzST4HBA4B+tbdjKkV6spJCRfP+NZljp08S/aZFKAEbc1LcSBWZU6E8+9ZaW8zfeXkX724e4slRicTSGRz7msqazNvNsf6g1cJkGEbgY4FSXal7dJeoXg01FOL7kOpKM49mZisRdIzHowrT1w73jlAGTlT71lzIQ+ecHpV27uFm0+EEYkTrV05rklFjqwftIzj6FeCXDncccV13hK5Jt5os5AOT9K5U2zLYpcgggnkU+xvZLd2aJiMjaa3oVHRmnIzxVJYmDjDodbBKk0rJgbgSOvSq2qaeSWZAGz78Vn6JKX1CIM3DHmutmjiF08JOEwCK7YfvIuRxS/dzUOpxVmotp5N4wCKxLlcSOSM5JxXa6tpyruaEZBNctd25Utu57VhVi7cp0UGuZy6syypAGaQorDaMVcu4VRF2nBxzVWQZwfz4rknG2jO2ElJXRAB5bcDiopXLuOmB2q0VDEBVLN6VC7JC3yhWcdSegrN7WLXcijtzklyV7gd6vRTbWVTwB2B61RaYv8AM7Ek05CcZGKgqxsrd7jiHAFXbaXaoBy2TWFbLuw3WtPzDlUQM8mOETrS1JaNyJw4B4LDtjgVONUitJcswluG4CqN5H0H+NYsMcsi4uJjHH3jiPP4tThrVhphK2kYZx2TnP1NXG6M2ux09pLrV6oS1SCwibrNOcsR7KP5Grs+meG7ECXxDrtzeyZyY92xT7bV5/HIrjkk8Qa9gQ/6Jat/ETtGPc9TWlYeDNPRt2pXct0/cRnA/PrW8VKWy+8zdo7s2T4+8MaN8vh/w9bSOOkkkfOfUFsn9ar3nxF8W6yBHZ2BgRuAY4Wbj6nitjTNO0qwwbKwt0YDG9l3MfxNbAuztABwB2HAFaqlLqyOePRHnF1pfjDUJMziZc9TJOqj8hUB8Gayx/0m7tl9cSs39K9FmuQM5NUJ7tRn5hVewj1Ye1fQ4l/BEi8tqaZ9oyf61Xk8IBRzqBJ9o/8A69ddNeJySw/Os+4vov7wNS6VMFUmc0fDYjzm8Y/8AI/rUD6Tcx/6q+b2zkVtzXsZJ+YVUe7i9azdOBSnNmYyapFgO0Vyg/hfB/nT49TvLZ1JtpofUwvkfkcirD3KE9RTPOXsankXRl3vui5/b9pfokGoRxXC8jLgxuv0Pr+VOtLKKC6S50y5WZYz88Mo2sVI5Geh49KzpFilGJERh7iohbonMDvEf9k5H5VhVw6qblQqOOwX1jdWl1I9ujNEWyjRnPB6cdaYLydci4xIfSRQT+tXFnnK7Zjv4wHTgj60wXMoTZKVlj9GGcfWvKr0J091oddOqpFFpbaRzutgmepjYj+dPjtbeUnFw6f765H5/wD1quAWrHMlqoB7xEr+lKLW2biOdox/00XP8q5XU7GtiSG2ll0eW13wu8D+bC6tyQeGX9AfzqnHPd28eHMgUdnGV/wq3a209vdxyweXcKhyQjZJHcY69KXUVubC+dEZ1iOGQHn5T/hQ5cwLQom9UriS2hb3A2n9KhdrORgsiyRZPXhgPw/+vVyS6icfv4onOOuMH86gcWMiDCyIfruFOL8ihEthBPHJZ3ETurBlyCpBHSrWtac63SXdoWEVwociM52N3HHvVY2sYQGO4ib/AGT8prR0uC5ltp7IqQsg8yGRTkBwOmfeqUn3IZib5gcSsrY/vrz/AI01nVlO+HHujf41ZS/mU7Ztr44KyLmnSXVuy/PbBc90OP0p8z7DsUg0AXaJCp7bl/rWjox81ZrGWRfJm5Rww+Rx0P49KqSQ20/3ZTCeuJFyD+VNXTJXcCBo5Tjjy25/KrTXUQ9rq7tyUd2wvGGGRmtjwzrU4la3kERgl+V8jHB+lU9VW4Ngl6FaKaLENxHj/vlseh6VkQajJG+dkZJ6nGDTUbiep6VMrWskiMcqSNp9Rikjw0QkB4GTWbo99dazp7b4kUwISp3fMw9MVdgbbakDlSB+tclWHLsKLvozPuAWLPnk9KsadceXsgZsFhkn0Pao7kBZUUYI/pVS+Qxy5HGelFlNcrGehaJqLIRIcF04dezD/wCvWrexrGyyw828vKe3qDXnekagY5FySSowR/eFd/pNzFNELaVh5M3Mb/3W7VzuPI+R/IT7ohKq6sGAZSMEHvXlnivRDpN/mIZtZjujP931U16lPDLFK6E7XU4welZeq2J1SxltbwABvuOv8J7EVrhMQ8PU126kSV0eS7aNtVtSe80q/ltLyNTJGcemR2I9jTYtSRiFaNgTxxzX0kasJK6I5Wi/BEZH29hyavYAGAMAdKdFGIYgpHzNyT/Skb25JqrnFWlzs7HwHabLW5u2z87BV+g9Pzrfml8m2lnY8IpP41Dp0AstMt7UDDKg3f7x6/rVDxPceVZRwA8yHJ+gr5HFVPbVnI9KhDkgkcLqUxecl+e5+tPsESQ7ipB7VJcQiVW3Dg8ZFTwRRwooBIxxWjklCyNupNiqOrybLYJ3c4/CrhjPmBlYgdxWTqbiW8K5+VBj8a2wNL2lVeWpjiZ8sGQWOlhVE1/lV6rH3PuabqGqYHl2+ABwCOg+gpbq9hlB3rI/rlsA0ljE05LR28cUQ6vtyfwrfX4plWK+lS3Ut0FgzuPJb+H8a6Ke4EAC5UOeC5PT6Vn6ndxR2/lQcORxjr+NY24tgHJPYdc1Mo+2956AkdE15Zwk7pcv6gE5pJoYNQhRpFcRqcqTwT7Y9Kq2NhFEhmvcFgMhOw9zSSyTX+UsyojHBbOPyFZqOvuv5hYZPqbR/uYYYlRCQMciqv2i6uJgsIy7HoigfmabDZXEt21uiYKHDOegFakr2ulQFYyTIw5bux9vatXyx0irsYsca6bGZZ5Q8/cnnH0rHvbo3Mu5uFHTJ5qtd3Uly+6RsDsvYVo6Xpasgub7Kw9VTu9UoKC557iuN0+we6/eufLtx1Y8Z9hWuMMghgXy4F6Bep+tPJaZlGAka8Kg4wKJZDGQkUZeU9ABwK55VHNg2EjLbKvG5/4UHWp7Gzkd/tF1gydl7KP8aS1gitnM11IDM3c9vYUuoX4EYWEfL0NZtt+7ESRZurtIk8uI8k8tnmswTB2+YYx0+tVpJUY5wzZHrTY3kclYkUEd8U4wSQzQDpgBmG7rjuabPK+0bdoX0zis4s0LOrKu7GARUTNx8xNacgWJnUM26WYZ9F5xToBb7wFZixORu4Bp9pbg4kn4H8KnvSzRtLIFRQqjI3etVzN6C0IGupmkZSqBR90jmqzrPd3IjDO+euTgCtNNPH8chIPpU8VuIwVi4PdjS51HYLozmt009FAkbcW6d2qstvdXd4ZWjII9BgGuiPlKV3Y3HpkcmldgpyDjFP2jS8xXMy3s3DZnGEUdPWrk6iWEKpKIeuBzTyS3fFPCqq5J461K7yE5FWKxiQfdJ+tXLe2VnEcSgMeMDrULSqMZYYPqau6brFpp7GWOEzXGNodugHtTjacrSdkDvbQ63RdLWxhBYAzEcnrj2qvr+rCzBgt2zcEfMeuwf41h/wDCUX1yx8spAnTIHJNYN/duLllEuSep75r0amNhCn7GgreZzxoScuaZ2GhWkESLe6hMik/NGrNk/Uir9x4n02KQRxyPK56BF4/OvK57ib7RtaQsTwMn9K2LS0njhL4zNjJ2rnFRDFToxUYJamkqCk7yZpeIdbe6uFMgZYx9xe2PX61UfXrmO1WC3YQJ3K9WPuahbStWv7gSfZHVAMAPwMVNd+Hp7ZFku54lyeEXkmsXGsm6srp9WUvZ/CVbaedwzSSymMZJ7lqj1KWN5FWM9Bzk9/Su88H+Ef7ZhaW6c22nrlQR96Q/7Nb11b+EPCyny7SKW5x/F87k/wBKwlKNuepLXot2ylLW0UePpBcyAGG1ndMZLhDgfjWla2SrDh2AkfjOcDPpXSeIvFVxqcBhWJbazByY0HJA9a5SO7W9i3xZCHIGe1Y3lJXtZF3voSabYHUpZGnn2CNihwM9OOKvXGk6dZw8F5ZG5AZuB71Wt7W4tbXzhIVifnI6lvQVLYIJ5t1ywSFCCSx6+1exU9hGnGFNe9Lr2OROo5NyeiMu+vlk3W0DD5cB8fyrVsdQum0mCCKQqqZjP4c5z9CKw7+zEeuXc0EifZZDuBz39MVbsRNBDMCQ0L4JwOSBXPTqRws/ddzecfaQL1ustxKsSNvlY8kZ6V0KWSxRqnCqO5rlYNQe2Zjb4Qt1Peo5b25uZArSszHgDNVSxcYN1JK8mRKi5aLY6e+lgt7ZvJKNMeBz09zXO3i289hcwTzt5sgwpUZAPvRceXBbfMd0jcfjVW3tric4ghkc+ynms6uIqYiakltsioUowW5FAkUEEaMzyMo69M1cjtktUkuUjSKR+Txk5NFtZSrdstxG0bRYyrDvVHXtQeIAR7XjV9v44rntOU+Tqa6Es8skw+dj+HHFR2dqJLjauSp5ameFr2OXXLdNQRHtpMqVI4Bx1rr1jivtT8u2RIYAcDaMYUdTWroyikk9XpYmU7M5rWL+KMpZxsiuxGc8AegrotE+G+oavD5015YLCwyrxNvYfXFbOqeHtN1KER3FqgwMK44cfjXJRWGoeF9RDWGqypaMSCuSCR6YrorYGpQpc0WZ068ZuxbbRItL1CWysJHvZFJTcq8sRkkACo7eaM3Hkw2KvOOGafqPcirvhLxXpeg6851KKUsyBVlAzszyT/KvTLjUPDV7At3JPaENyHOAwrio1o0Z/vot36lTUmvdZwJ12FYDb21shZBgvjAz6iqNlBfSMLu1A+Vj8zHvS+Krqzm1FlsXVbZPusoA3+pP8qqya7LFCsNkiqijALetdssTTnVUvsx2Mo0pcturOthu7lljF0q88MOu6ue1qC1GtZtrdEYqFdwcDP0rNh1m/upVQSEMOrAY6VU1e4NtKBNISWG4geppYjHSqx9n3KhQUZXRR1vTrqK/dmkinUngo3A9uaitbLbMimchm/hjBOPqanZy4ygLE9q1tEszkSSIQ54wRzioeMqxjaKsX7OPUZLcpDuiWH5iBySQSKotqEwcIhRGP90f1qxe6PrM0s1x5Cbi3CK2SB2xWPtn+2LbvE0UpbGGXketOOGrKLb0Quanc6LSoWn3TTu2z1J7DrWY+ZZHaNDtLEjAzWlqd4um6dHEq7nl+XH+yOp/Gq1rqcMhwDsb0PFXgsAsQuecrIzrV3T+GNyOPTrmXGIiiH+JiBW3eWkzaMYbJo0kbAG/oVFMhkkl2xj5ix69sVclmVWIUjA+VR9K6KeBpTxPs1rGK19TCeKmqfM93see6ump2h2zo8AP8SjKn8a0vA8LtLNc3MhIxtVmOeOpNdko81cSEFccg9Ky0s0eG8hzHaQSKyqyDkZ6/nWmPw9OjFQhpcrD4iVS/MtjKtPiFd293MjRxyWu4hAPlZRnsa17TxENXlKQ3cNsuCxWXIJ9gehNcWfD+64dDcxiNTxJtI3fhWvoGhWkV6H8ySd4+eRhc/SoeMp0I8id7Groqep2Oj2TajaTmOeRBnaWUHPHbJ/nV+x0+2sxma6dgDlmkbJ47etcu+rXlvLPbwuI4w2DtPBxxWfPdTSYDSO348Vx0cdKjG1NavV3KlQ53eR1XiI2Uq+bbSvJIGJZ1zlR6D0rKGrWxO6S0BdBhXPzEj+lOs43g0iRwpeRlyFAySW6fpVaDQNTlhEn2cxpjOZDjNY+2rVpORahCKsPl1+4ICwIseeh6n8KfrDMlhE8kjmZ2wST145pINCuIdlxdFUVWztHJNdB/Y9tfRwSXZc4zhQeOaxkm5JSZei2OE3E8ZJNauhWkhuhPJGyxgEKSMZJ9K7SHT9KsIy3lRRgDJZutYsmopdzF1UJEpIjUdx6/jSlZLzBu5g3Vu2oatcHaWiR9owfvY4wK1/Kis4XBYJIwAlfOQoHRF/xpg1COzixEoac8JtHP1+pqjJG0jedev05CdhUOelg3HSPJdt5dspjiPG4/eb6n0rDaI/aHihJm2nbkDr9K3r1pW/0e2wJnHzsOBGp9ffpVVJorOPybL5nP3pT1J74q4JKNuok9dBsP/Eti3zOzSnpCrcL9ff2qN75btlF1FGyA9QORUZQOrs25jmnw6bHGnnXEjpCeRGfvN9KLcur3Kuupr6LFYrcCcmSaJP4D8o3duapa5cXz3jAb0tzyzY/QVU1SWdQiNEYYgMrGPT1PvS2l3dFhDGTKDwEbkVfPO2uwuVPVGe2FXjnHT1NW7Vo7aF5JCGd8FYR1/GtJmsYJcOqLcBcMyDIU1S/s198k9vItwH7qefyqozjL3diWupFdzyzjLnGOijoo9qZb2v2qeNCSsZP7xx/CO/40420rJIzqY1T7xbj8BXS+EvDk+vpHNKhtNKU9ejzY9Pb3rro03L3aS1M5yUVeRetPt3iOSLTtKUQaZbgKZMYVB7erGvQdC0Sz0W18mzQ7jy8jcs59Sf6VPZw2unWiw20aQ28Q6DgD3NcR4n8YPdTf2boqvI8ny7l6v249q9WMIYRc0vem/60ONylWdo6I1vFXiy30+NrazxNOcqSBuA9gO5rI0PwW+qW7XWumSASD91BGQCoP8R9/atTwl4VTT9t7qe2fUW5APKxew9/et/WNYttKtzLdONxHyoPvN/9ahUOf9/ifu7Bz8vuUzzjxH4Fk0uFrm0vEeAcbZvlb8PU1yr/AOiqTBueQcPIBlVz2+tdijal431IhGMNhGcNIPuqPRff3r0DT9IsdPsBZ29vH5GPmDDJb3Ncf1JYmbnBcsfzN3iHTSUtWeJWeo3VuQ0cpDDvkg/nXVaf421FLdvOdCo4DSLk+2DT/GltoEEoFnABchvm8o/Kx9MdzWfceEtcurWK6ECEEZWAHDIO3HrXIqVenJxou9uxq5U5pOS+8m0WGy1LVzda7eb4twZY+SHPqx9PavUftNrHaGVJIhbxr1QggAV4S9reW115DwyxT5xtIIqzPey2qiEzlyD8+08H2PvVYfHTw94uOv4k1MOqlmmddrGtXniTURpukIwTPJPRR/eb/Cuu8PaFa6Lb4iHmXL8yTt95j/hXAeF/FFrpMZiS3RVkbc7H7xP1rrbnxXbmwaW0VjNjgHkL7+9duGxVBXq1Ze/5/kjGrTqfBFaGj4h1uDSLcszKZsZVT0Huf8K5LRtKufEt19v1Xethu3Ih4aY+p9Fpnh/RrjX7n+0tYLG0DbkibrKfVvb2rviyRR5JVI1H0AArenCWKmq1X4Vsv1ZnKSpLkhuKIookAAWOJBwvQAVwXjTxSkcbwWr4T8t3ufapvEfiCbULhNN0hTK0hwAP4v8AaPsK53Xfh5rUmJ7W8huXxlo2yOe+DWdepUxbdOl8C3ffyRdKEafvVHqcPdXMlxO0js2WOetXdKhub2fYrARLy7t0Uf40L4f1WO/FrfWj22BuZ3+6F7nNWNT1CC1t/sGnYEY+83dz6muGryr91Ba/kdkX1uSanqUCoLO1JWBep7ufU1DaXsiL+7kYD0B4/KsdQSSW78k1u6ZZR2duuoXw46xRHqx9TWNXDQpQ1ev5lKWpoMyQRRXN5bw+cTmMbcMR6mqU1lDfOZY7zbMxyVlGB9AazrrUJri4aWRgSeOfT0p9kz3U8dvBHl3P4AVmqVWkucPdloTjSL0TrGYwFP8Ay0DZXHrVfXNXjsbY6fY4/wBt+7H1PtW1PciyVbazfcy8ySdcn0FUrprS9YC+s45HI/1ifKwpfWJTadRaAoJbHCMxJJYkk8k+tdR4c0yO1tv7X1JQYl5hib+I+p9hV628Mae8yXSTSfZg3MUowCfTNUPFcOpu3NuwtFGF8vlQPSuiWIjVtTg7dwtYydd1aXVLpndj5YPA/wA9qp2NpNf3cdtbIWlc4Ht7n2qJEeSRY0Ul2OAuOc12FuYfDGmOThtTlXDMOqA9hW8pKlFRgteglqLqtzb+HtLGm2Dbrhv9dIOrHuPoK5BLiZH3rI4YnOc0k0z3ErSSnLGtPw5o76rdHedlrF80sh6Aen1ohCNKDlPVvcZu+GI5prZ9Q1JgtpF9zI5kYdqr3GvQ3t67zOQc4XjgD2pnijWln22Fj8lpCNqqvoK5ZfvmsIYdVLzlpfYd7HbwS+Yy/ZpMuTxsbmt27vzYpHbFhcTkfvWbkAHtmsDRLRPDuktqV4QLuZcQxn+AepHrXOjXLnz3dgrBjnBrn+rOcnyapFc3c6O40nR76QuyzWkjdWQ7lz9DUmieFFh1Hz3uY7mzXpt4LEdARVHRbo6tdLbwROJSMk9QB6mtvUbxGKWVswWKEfNg8s3rQ6lam+S4NJlTXBf3V2ZSpjVcqqngKPT0rMlZgwhaJmPTptJPtW3Ff3EQ27w6dcOMitKyaFIBfXcKogbEe0dT64rpo45UocriZSpNu5SkMehaWLeMgX10uZGJyUHpXOzI0cS4BYMfmYc/hXR3Gmw3tw88d0JpWJbDnDD2x0rNm0G7jmwoLZ6Z4BP1rpws6dnJyTk9zOaadhdC0wXtziQ7baMb5mPQD0/GrdzcjVdSZiWjt4QAiqMYXPH4k/p+FTarKbKwj0y3y8pwZ2X+I9lzUUMXkRCMY6lmx0J/yAK2w8XiKntJbLb/ADM6j5FZbjnGcluc1elVdN08KigXl4Me8aetJpVuju9zccW0A3MfUjkCqdxO95dSXTggyfdU/wAK9hVV4xr1VSS21b/QmDcI8xWS1Ma4jIIHHPU1YsdPmvJ1TyyqdTIwIXA96HEjiOKBd08rBEX3Pf8ACuoa3YQ2eiW75yuJZPRM/O31JOK5sVgqcWlT+J9DWnXlbU5ltYuftTm1cRRIdiKo4OOp/GtOy8WXMJCTIHA6kH+ldNdeH9MuVVRbqjAY3pwce9Yd34QhS4SRbkmPPzKw5x9axq4Kth7zi9PIca1Op7rRf1HWGutPj2uluZR8m/jr1P5Vu6RLYxWUEFtIAka4BzwT3J/GvOdRs7m6ma8trWX7CPkiIGRgdT+JqitxPakNC7xkdQCRUQxVahLmavfuN0YVFZM9fnlWJDJkMO31rD0lf7R1Sa+ckxRZhh3dGJ+839PzrnI9XntdKWS9DyPM2Ix0yMdc1qaT4ms4rKK3eIwhOB3GK6o4+FStGVVWSWnqZPDyjFqOp1dw4hheTrsGcD+VYlsytdFplMjLlwMdW7VVvtUjuyhtpUEeRkK3Oag06+C3N7K7Fo4E2r6lzWOZ4pVI3hql+bO3K8PequctW94uk295qky7r+c+Tbr3J7Ad/UmuS8Zag8NpDpgkDSE+dcsP4nPOD9K0bW8eZrjWL35LSzUpbI38ch7iuGmklu7h5ZMs8jFiT9azwWF97nl/X/DHsZlilGmoQ6/l3+Y+2QFXZ+eOPant90h/0qZwIYo0xgv87Z7egqDPrya9Z6Hzu46STbGFyAO/FU5HZshcDBqd3LZY4B6VWOGc4/OkCFjQAkbc8cmnjZs+VcH6UsYx8zZqQYZTwABUgyAMCcU4KMknoKk2DAI6+4pyKMc5xQIaoDe/vTNQGLRMdjU+BngHmknTNsVI6HNDCL1KOWZVJPOMVZsuJlPP41XPX6Ve0+MmUbT8x/QVBTHXTBJOR054FbGnTJcPZOpJAZc+xzWXdKWmAwMZ6Vc0xRb36KBiOQhl9jnmlON4t+RKlY9hvUabSLVIyQ6s0n1A61z/AIrgS/8ACkk6/ft5EfPseD/Ot62lB3L1EVqzfmKj0eyV9K1Cym+ZZrYMPbPT8jUYOOtOS6IutC0OY870rQ7+9hNzbxq8ZGRzyapiIkyBlKsDjnqCOxr0D4azMLaTTJRtngkbAPXGaxvGNp9j8RzKgASUCQ49e9fQ0KzdRwkvQ8eqrQ50cla3raTqKynmJjtkHsf8K7bhlDKcqwyCPSuF1eLzJSeqsPzrb8H6g01tJZXDZlh+4T1K1y13y1XEyq0eekqkd1ubrn5DXPeIJmEcdumd0nJx3reuHEULuxAUDvXPRTJJPLdTPgIMID1NTGHPuZUbxfMlexjLZyCfy3+VgNx+lamjW9s0kUt4zCJCWYr1OOgqo9yGM8rKfMc8ewqz4agOo3csDuQqRF1X1x2rnqckPh1PUj7WprLRKxDqd3LeXz3Ludp4jjUYCjtxVKBTLPn7yJy3GMmpbhl84+WpRAdpJ659qhu2W3lURHAZcHmsYrqzeT+zHdmjb3CTuUIGQcj6d6e+YkltmGVblaxIn2yptOD61r2k6yxFJT+8TjnuO1aqXOvM55U/ZPvEbPGkumpxiWP+VZzHC8jg1s2oDytE3Ug/jWVLC4MigH5etRU1SfyNKEuVyi9t18y3YN5tgYj0AI/HqKzYztPPY1b0yZYJj5g/dsMH2PrUEcPn3BSPkk8CrnLnjG2+wUo+yqSvtuXNLn8m8hk7Bxmuv1u4EV9bOG++n51wRDIzIeGU1pTai91DAsnLRLtBrajieSEoMzrYT2lWFWPS9ztrGdLhCpCkngZ7+9UtW0oPGz8F1PpxWPpNxIqLIxICnrXWWcsd1BhmILHJOM/WuylUVRamNWnyPQ4LVbYqi4GD6mseQMQQSc/l+Nei6zo6yRllZTGvJI7VwN+vmSOsOSg4L461jiIa3NMNLSxmSz7PkjJ54LdzVQ5wc9ankUiQDtUEi4bCnNcLO9DcnOOn0p6cZ54/nQqlmCqCSxwFHUmtKOCHTvnuAst31CH7sfufeosO4+2t5DAsly/kwHpgfO/0HapJL9YIfKgUJH12jlm+prPkuZrqclGLserHtVi2gSI7n+d/0FVFXJZJHFeajt8x/JhbgAdT+FbVjZWmnHCBHlx99sMf8BWaJiTyalWTAraKSMpXehvpdscZYmrcV4FH3gK5drwRjlqqS6oxP7vJrT2iRn7JvY7g6ukY5YVWn8Sxxg4Yk1wklzNK3zOQPaouSecmoeIfQtUV1OquvFLvkR5rLn1q6kJ5PPvWYoz2p4XHasnVk+papxRK97cueXPNRPJNnlzTxHnk0uw/SocmVZFdmkP8Rpp346mrQj46UeV7UrsehUww6E04Fx3NWfK54GDQYvl5FF2IgEkg71Itw6mlMfAIppHFPmaCyJ0uyOtTJdqetUCB26+1MycfSq5r7k8qNcurj5AufTpmoWnRDiUNG3bIyPz/APrVnrIy8g1Mt0GXZKAy+hrkq4SnU1WjNYVJR32LsZ3AmN1Yex/yaviaV9KLBpEmtm54OHQnqR7VhGBWIa3c5/uk1LZ3U1rdxidpVgZtrj2NcE8O6b1N1NSWhPLcROMXEET+4G0/pTF+yNwgljP1DClv2S2vpbe5hjkCnhl+XI7HP0p8f2KTHltJF9fmFZNcqLGNp7Sn93PG3oG+U/4frQLW8tWDLHIfdDuH6VZFsWIEM0Un44P5UpFxAcMrpUc7GWdQLkQ3UaIIpx8ysu7Y46jnn0NUZZbNj+9tgD6xsR+hyK0LC7ku5JLO4feXGYgwyN46ZHvyKqK1szET2xjYcEq2CD9KL9RIrPBbTD9xK8R/6aLkfn/9aohpdyWDwmKXHXY4B/I4NT3EFqzEx3ZUdldefzFSWtjMwLQssuP7jAn8qrnaV0AthNPaXO27Eot2+Rw4OADxn8KS9jEE0lvdQW85GMOq7dwPIYEeoqTzbi3JG6RPUEcVaEqXlm7yQxzXMGCc8Fo/b6Gkp36A1bUXSNUt7CWN44ZI9gxhWyD/AF/WuhuJEMLXESMkFx90MBwepFciDZZDESx98Agj9a3dH1Oza1lsrm4Bjb5o2Kn5D2ppKasyZKzugiQtKobkqOtOvITNEpx92nWwKyyLJ98EircIAYBuprmnJxlca1MSJvKlJHFdRpV5+6CFsA9PY1hX9vsJ2DpzTNNu/JlKtyrfpV1IqrDmQtmelCRtSsRIP+PqEYYD+NfX61SV/wC9VTRL1kYSKR5iHlfUVoajEBKk9uR5MvOP7p9K5X7681uJq2xx/wAQNAGrWH2m1T/TYBkY6uvpXn/h2wJc3U6kKhwisOrev4V69NHcq+Y8Mvp0IrlvEFjJak3CoVic/N/sk/0Nepl9ZJ8kn6GNZtR0MSRsnNWdGg+1arbxcbQ2459ByRVNjXSeCrbJurps8fu1/rXoYyr7KjKRyUo800jqi+6QeprlPEc4n1GTn5YxtFdBc3K2sEs7H7i5rgkvDNIWY5LNk/jXzFKLleR6yLUByjZ7dKnVMKMVGvOCBgHrUnNOTGNlcRIztxtGa5hnLuzk8k5ra1mQpalc8ucf41hHgCvbyulaLm+pw4qV3ylyx0wnZLdrhCMqhOCfrSalqwUCK1x8oxxwF9hXMyfd/CqDdaccOpO7Z0XOggSe6nCRAvIx/L61vW0NtpMTSyuHuOhY9B7AVxFl98/Sluug+tOdHmfLfQLm7qGoSXbEZKx9hnn8am0a0uJpRKrmKFeWk6Z+lclV+H/UiqlRUY2QHa6hfPgx2sDsT6L19yaxJbK7mkLzlFY/3nH8qxT3qKT7w+tRToKGzC51dpZW9jJ5t64lcfdjUZ596vyXEckilydx6A9B+FcK33zQ3VaUsPzO7YrndtNMZxDZMr55J2/d/Gr0Vrdpbszzru65Yfyrzm3+8asP90VlLDa2T/AZ217IZYkjlKlU54GKxlJA2KGwCSPeubk6Gol61ccMktxJnYQwSTHn5UHUmpZ7pbZDFEuT2z3Pqa49PuVBL96msMm9WB0bSSu2SSCTzir9lYCMLNdEs3VUPY+9caO1Wewq50dLJ2Hc7aUhiC3J6jtSR5Lcdev0riGpR3rL6srbk3O93+YxRD06n0pzTwxrteVF7fe5rz5f4qgl+8KI4RX3C53MEcxuPtDS+ZEudgxzimreiaQsD8oONv8AjXIJ9wfSoI/vH61bw6lq2NM7r7RIW+XGSeABUwl+zqDchjnJJJ4/AVwiffon6LUfVU3qxs69gbiUeWjMzHIRAST+FTDTrxZVW5gktkYZ/eKVYj6Vx9l/x8JVnUv+Pgf7tWsOknqJvU9Z8P8Agi/160EtsYra2DYWWQEk/wC6K6ix+EenQjdqd9PO45Oz5B+PWvEdP/49YvpUsv3H+hr0sNhKSpqTV2clSpK+53PiS10GLUktPDtoG2NhpyxYyN0wPb3rotIslsLDy8ATSgec/U/7oPYV4Hb/AOujq+1RhaadR1HuOrfkSue6vf2mnhbm/j8y1Qn5BwXOOFH6Vx0uoRarqxutScRW2cmOMYO3soH9a8zvf9TH/vVXFZ47mre5eyKowSVz2bVPF93cQrZ6Wgs7RRsRVPzY9zXM3cbIytLKHkblsNnH4+tefv0ph6V50MFFLc6G9T0nTL61slkd4vtE7DaMn5VB6/jWLaRJaIYrbf8AMxI3ds9hXHL3pf4hWzovl5ebT0BKzbO9l8yCD55WY5yATkKT6CqbylyoZ+nOM1yMnSoj1FSsMn1GmdrbQfaJCOdg6n1qe+ulGLdMLg4P9K4mLoaryfeb60vqqb1Y76nrFp4QupQrzTxRhsH5Rk4qD+zYYL/ybVjPJnYGPQn29q4VfuD6VUg/1q/WuuvhqajFJGEZyd9T3aw0e0tol8yCOSb+J2GefatG9KWmnyXcqBYYxhf4d57AV4KaS+/49k+tdtRqjTtBWOeMOeWrOt8QanJEFnkVi9xIUDdhx0z9Kw9Si8yxlA643flzXN3v/HtH/vmmH7p+leZGja0r6natjpPDtmzL9sZcqvCA9/evQNFvLGxty1zMqysNx4yR7V47b/6oUknf61pBctTnW5E1zKzPX73xdASEtraSZd2CdwG76Vi63qtxPIkhtB8w2hc4CivOov4akm7U60p1fdk9BQpxjsdXcan5zBZkVXQHBKDj2zU2kGW9wZMlByc964WXrVi1+7WE8MnHc12O51WSGKTblV2jDMeman8PaPda9cFdOeB8cHfKF/TrXnl3/qz9afpf+tqPqqULpjuerafo00OqvYq0c91vCEp93PoD/OrOqaHZ2Du+pQyCcnlpmwv4V5hbf8ff4mnax/qhSoUFGeruZyk7HqlhqWn2VqfJigWXHy4QEn8aoR3ohcTSZaSUkknsK8lj7VLN94fSu+dJSrRT6GSWj1PdNKu7V5Nkc/mzEZKgcD8azfFN3E89va+UfNzuLBeQD0Ga8gs/9ZT5/wDj5/AV2Yt3pNLQxpwtPc9U8QeC57lI7qK7RZAgHlScD2wa4640e9TCNEgbpnzARWJcdPwqn6VhN+ygow0NYxu9TvYIIrG3QNKwn28NyfrQ15HGm2BGLf3nP9K4Obov0qKuGCqRu1Lc2dKErXR6LYXNxcyiNiNqjJwOtR6qyrdmNCQFABGeM964K3+9TJf9YfrWMsO5yvKVy1aOiR2ixvK2I42c9sDNb2g2ckasHQCc5OD2wOBXmEHWp4/vGr+qRdtepM5tbHc6jo93DG7QPHNKSSV6ZPtXMumpNqEFrcRyQM7gY24BHfBrMP3hUV3/AK2P616tbCUoRbirHNSqSk7NnYeMNXn05LKCzkaKXPmllOCAOB/I0zTfiBeBgupKtwp/iHysP6fyrhdQ/wBaP90VU71z0KUY00joa1ue2xaxHrVtGbJiyB8MHGNtbFvFJrGmmSxlkszGShLKMNjvmvC7D/Vt9T/Kr8H/AB6n8aWHow9rJtXMq10lZna3CPFdSrLObgocBt2QfcVPbwzS2ZuWYQKDsiVhkse5A/rXmq9alf7kf41zVqXPJtsuGiR6RY28cQZid0rHDMT/ACqJo/JBmuMeWvCoTnPPBArzyP7tJcfw1yrCWlfm/A0udxc3Uk4Cxrtj646ZPuaVEccKmX6ADkmuCNPj+/Wyw6itGB6LGFh2R+WJbs8LGOQv1rT+zR6en2vUWE9yfur2X0AryeP/AI+PxqS5/h+tXDDpXk3dil0O5IlvppGJAycu7dFFMmuIreLybPjP3pD95v8A61cN/wAsmqB6z+rKT1Y07HWlgzHOT71oWNv9lAuLh3jXqqA4Zv8A61efr1/GrM3RfpVSwy2uCkzuzqkkpImijdM5APauu0fxu0aJFcRCRVGNqrtIHtjivEV60+P7x+lXShKg705WFKnGpo0eyeJdZvtf8q100GKGRgFywUE+rH0rrPCfhu20G1D5E97IP3lweefRfQV86R9BWlD/AKsV6WDbnJynqzkrQ5Vyx0R9BeJvElpoNtmVw9ywysfp7n0FcXoGlX/i+/bUNVaRNO3d+DL7KOy147qv+vNadn/x7RfSrm/bVrS27CjBQp8y6n03a28FnbLBbRpDCg4VRgD/AD61xfirxTvY6fpG6WRzsJTq59B7e9eOS/6tvpWTaf8AH4lPF1HyqnHRCpUldt6n0L4X8LLYst9qZWe/IyF6rF7AetdHf30Gn27TXLYUcAd2PoK+bxVTUPup+NaO2Ho/u1YXJ7SWrPXZ7jUPF2qNDa4itozh5ccRj0B7mtK7+H2nyQAWk08UwGNzHcGPqRXhul/6lv8Aeq8K56GHhOPNNXb6lzlKLSi7HY6l4dbSrt0vriJoU+YmM8n0GPWs6e4kE2Iw8CD7qdMD3rirv/WN/vVHdffH0FeVUwsXN6nXTk3a56RpviC9spR5bMST0U4z+HStvUvEc9/aC2mkjidhnawxk/7VeMRffX60s3+uP1o9lNLkjNpDlCLd7H0D4Mh0ywttyzq97N/rJX4/4CvtXQapqMWm2jTPh2/hQHlj/hXzKvQfWpbn7g+lelSxM6dGyOKdJSndnr9jb3fi+/M9wWj01Th2HG8j+Ffb3rT1j4f6HqJ3JC9tIRjfC2Dn3ByK8UsP+PZfqamrfC0oKCbV2+pNRvmVnY6u48LwaFqjebe/bYlOI41XBZuwPr+FYniW4v0vnXUrWeADGNyYGPbtXOv/AMfC/wC9S6x90VxRpKdSUpdNvI649DQg/wBJlSO3HmSOcBR1roLpl0DTJEgBlvGA86RRkJn+EHtXnlj/AK8fSrzfdm+tZ1YupJRb0LtZCjULlZmkWUhickdq6Tw00+qzNJcqEtYR+8lHA+n1rhpPvmr1n/x6v9adejHlsCbR2t9q9vd3XkxyLHHF8qJnH4n3pUuJYVbypHAI6A8V53/y0/Grqdq5pYOK2ZomejwRw2UMNxfwJ9pb/V4GHx6k1j6pokGpytNbX7JKf4Jx1P1rl7v7w+lRL1pQouL51LUm5qN4Z1GO5SJ412Mf9ap3KPetHWL+HTLBdM08gj+NxwXPcmsFfums27/1ldCi6rSk9hEyfePqa6LwnpUcjvqd+MWkByqn/low/pXI96vp/wAeVa1U3GydgRpeJdXl1a9ZmOIlOFUdKx0RpHVEBLscADuaq0+D/XJ9auMFThZAehMkXhPQihwdTuV/eHOSo7AVy+iSs+rB3JLMDmqGpf6wVVg/1orPDwSfO9WxS1R6Xp1mb25EfIiUbpG9BRqFx9qlVIiRaw/LGp7471w1t9yT6VCOtU8NTrVnpbToZRlJK1ztXDAehrX0+4ew0uS5nlZnf5YYic5PrivMzU0v3Y64qmEinZM2U3JanoKXsMysbq3G5+WaI7T+VSpBb3Jxa3JDH/lnIOfzrzbtT4P9YKumqlH4ZClTjLdHpmqxSrbw2sMbi2Ub5GHO5uwqio7k8Vwsn3T9art0P0r0sC7Rber7nPUhruet6TaJZRvql3lXKfulP8Kdz9TW9oVpItvJezqRPc4faRyiDov9TXiE/wDqR9BVtfu1VL3q0qj3WxM4WgrHvYQbRjg96wtXL3s8enwMVaY/MwPIjH3j+PT8a8hHf6VXi/4+v+Af1qsVNzcIPZ7+ZFGFru59DAfZ44olQoqDaoHTA7VT1OysbmJ2uYEc9uMEfjXhz/eFMk6VrXt7JqwQhaV7np8+inXz58Nx5MEJMUK7cg44Lfiay7/w5fWaFvkljH8SnB/I1wFn/wAe6Utx/qz9a8+eEpuje2ptCpJS3O2srR7aCe+nzEIhhFK53k1bbfZeGo8HfdXLZOOuTwK81n/49/xpH/1UX1rh9gnFK/U9PCScZSfkdNeSTTlLVifs9sNioDjHqcepNWbWxiMaSTnZEhyeeTXC/wDLRvrUj/6o17MEoxVkcFaUpz1Z1l05nu5XXAj+6gHpVZ1+XI57Vyy0dqhu5KVjpGPHAP8AjUXDtyMAVz5popXKsdZGnGSMgjrSsoVQW/DiuVH3KU9KCLHXwfMgJxT3GRkgE1xq9KU0XFynXgFjkqQKQq7RP3GK5EdKUdKLgo6m3j5vetLSmVXHGdpz16j3rjD1p0feoRUlodnd4EwY9eoxV6Wb7LZ2siJvZjvPGSBnnFcA/WpP+Wa/SqS5mkxJaH0d4cZ7y3uZCmWa2VfwratkWNbkY5W2UV83WH3P+AipR1b/AHadGKglYuq7waPVdeZ9K18Xds5R3USDHr3rF1XUJdQufPnfdKRivOLv76/SoV617NOqklK2p5Lw6ktztbsjzVGCe2Kj0tHTXLVo2K5bacdxXEzf6xfrUcX+uX61wYmfNUvY66dLlpctz1LxDK8t3HbR8gc4z1NZhtJReG2IBY/kK4lv+PgU3/l5ahtPoZU4cisn0O4ayP2w24bJBwzDoK1/DtmunSXusecUjtP3SE/xsex9q8wT/j4anSf8esn+/SqJcuxcYyvv0O0urewmae4tiTI2Wxuxg9+KykiaW3MgySDj61ySdPzqSH7h+tc0ddzoacVozrTDtsPPwc7sZpEdixdeO9cq3+oP1qEfdpz91KwQTd7s9Is2Eqo+7bIven52XTOcfOMEEV53B0/Cg/eFVfVMwdLRxvodhcx7JSB07U2ycxXkbKcHOK4+f/WVGn+tX61F+Wehvyc1OzfQ7vVY8XIlxgOM/jVSL19K5a86rVcU6us2x4dNQSueoaDKHs7mLgnqKm0u/aOVUJIXPY15jbdX+lMT71bxquMY2MvZJynfqe43kz6jbi3tsLEvLlT19q5jUbYEBGysS8lQOTXA23RqZJXVKpzK7RzRpcr0Zt30W6QuoAA6Cqht3yqopaSQ4VR3rCfrQn+vT6VxTZ3RjodVIkWmJticSXeMPJ2T2FZyxvcNlmwvUk9TWE/ekX7tZ3KS6nUptRNqABf1NPBrlKUVonYXKdWHAFRyXB6LXLmkqXNjUEdE25zknNGMVzoo71m2FjpdvIqVI8jpXLinCgLHVJCScYqZYcjmuQp1MTR2Ii+tOEXtk1xtApE8vmdosJJxinGEggba4sUd6QuU7Ix4bnmo5E/KuPpD0pj5PM6mQbfcVXlcDpzXNnpUZpjSOhaQDvxTWkBOAawKTtQOxvbvSk3+tYVJ3oDlOhSQjoavWt+8eQ2GU9QwyP1rkBT1qZRUlZhy22PQma01SFTcQqZY12/u22sR29uKqNpdvuPkXTx/7MqcfmP8K4yH/WVM9efOhaVouyN4O61On/su/XJh8uUf7Mgz+R5qLz7m0/1izRMPXIrnY+opbjpS9lfRl3Om/tZmYM6ozDkNtwc/Uc1p3ZtbiCK+l3D7QSHMZ4Vx1BH/ANevOzUq/wDHv/wKh4ZdxXOvhtoJmby7heOzgjP9KsCzki52bh/sEN/KuIjqaP8ArUSw/mO52YvLiE48xuONrjIH4GkTUWhmSXyImdehUYPPXpx+lcY/3jUdCwq7judnf29qjxlWkEUq70YDcPcdulSWsCxurw3ETMOVBJBz+PH61xL/AOqj+ppKv6v5k3PYrk/abZL1SomC7JVBB+hqO3JaVWY/KK8ni7/SpU6VlVwyn1FHQ9WvULciufI2ykjsa4yToaqt1opYdRVrlNnqthePHOkigkjhue1dvpF1FIpglwYZR1/unsa+do+pq5F9wVlPCR5uZMm/Q9+liaGZonGCOnoapXdrFcRSR3CEI42nByMV4rL98fQUxuhrNYazumJ7HUazZPpt48L8p95H/vL2/Gu18P2v2XRoEIw7De31NeKX/VPxq9D/AKtfpXXioOtSjFszpQUJNo7/AMbXZSBbeM8yHB+lc9bptCkjJrkb/wD1q0xfuis4YRRgkmb8x6SufLAPB607OOK87FJWP1H+9+BfMdPrMvmXYQdEGPxNUSuME965p/8AWn60nevbw8FTppI4KkeaTbZ//9k='%3E%3C/image%3E%3C/svg%3E)
The Reckoning main quest Easter Egg continues the Black Ops 6 Zombies storyline and serves as the conclusion for the current iteration. The mission is packed with twists and betrayals, making your decisions crucial in determining the ending you receive. Similar to the main Easter Egg quests in Liberty Falls, Terminus Island, Citadelle des Morts, The Tomb, and Shattered Veil, you only receive guided instructions up to the Pack-a-Punch machine. After that, you are on your own, relying on in-game voice lines to complete the quest.
Each map also features a Director’s Mode, which provides full guidance until the quest is finished. To make things easier, this mode includes a round cap. However, it does not unlock immediately with the release of a new map. For The Reckoning, Director’s Mode will only be available with the Season 5 mid-season Reloaded update.
This article covers the Reckoning main quest Easter Egg walkthrough, offering a detailed guide on how to complete it in Black Ops 6 Zombies.
How to complete the Black Ops 6 Zombies Reckoning main quest Easter Egg
Once you start a match in Black Ops 6 Zombies on the Reckoning map, you'll spawn in the T1 Project Janus Reception area. Here, Richtofen informs you that the Aether reactors need to be stabilized, or everyone in the facility will die. He instructs you to head to his office and activate whatever you find there.
As with previous Zombies Easter Eggs, this quest starts with a set of guided objectives, helping you until you reach the Pack-a-Punch machine. After that, there are no in-game prompts to guide you, and you’re on your own. The initial guided objectives are as follows:
Find Richtofen's Office
Upon spawning in the Reception area, you’ll have two paths to choose from:
- The right path leads to the Mutant Research area.
- The left path leads to the Quantum Computing area.
You can select either.

In my case, I chose the left path leading to the Quantum Computing path. The door to this area costs 1,750 Essence, so kill zombies and collect enough to unlock it.
Once opened, you’ll find an Aether Elevator inside. Use it to teleport to the T1 Quantum Computing Core.
Reach the Anti-Gravity Launcher
Continue straight to find another locked door, which requires 2,000 Essence to open.

It leads to the T1 Quantum Computing Lab. Inside, head toward the orange star icon on your HUD, which directs you to the Anti-Grav Personnel Launcher. Use the launcher to propel yourself to the next tower.
Reach the T2 Android Assembly Room
You’ll now arrive at the T2 Android Assembly area. Proceed to the locked door labeled Entity Containment, and unlock it using 2,250 Essence.
Inside, you’ll find another Aether Elevator. Use it to teleport to the T2 Dark Entity Containment area.
Here, you’ll see another Anti-Grav Personnel Launcher. Use it to launch yourself back to Tower 1, but this time land in the uppermost section, the T1 Executive Suite.
Enter Richtofen's Office
In the Executive Suite, you’ll find a blocked door labeled T1 Director’s Office, which is Richtofen’s office. Unlock it using 2,500 Essence.
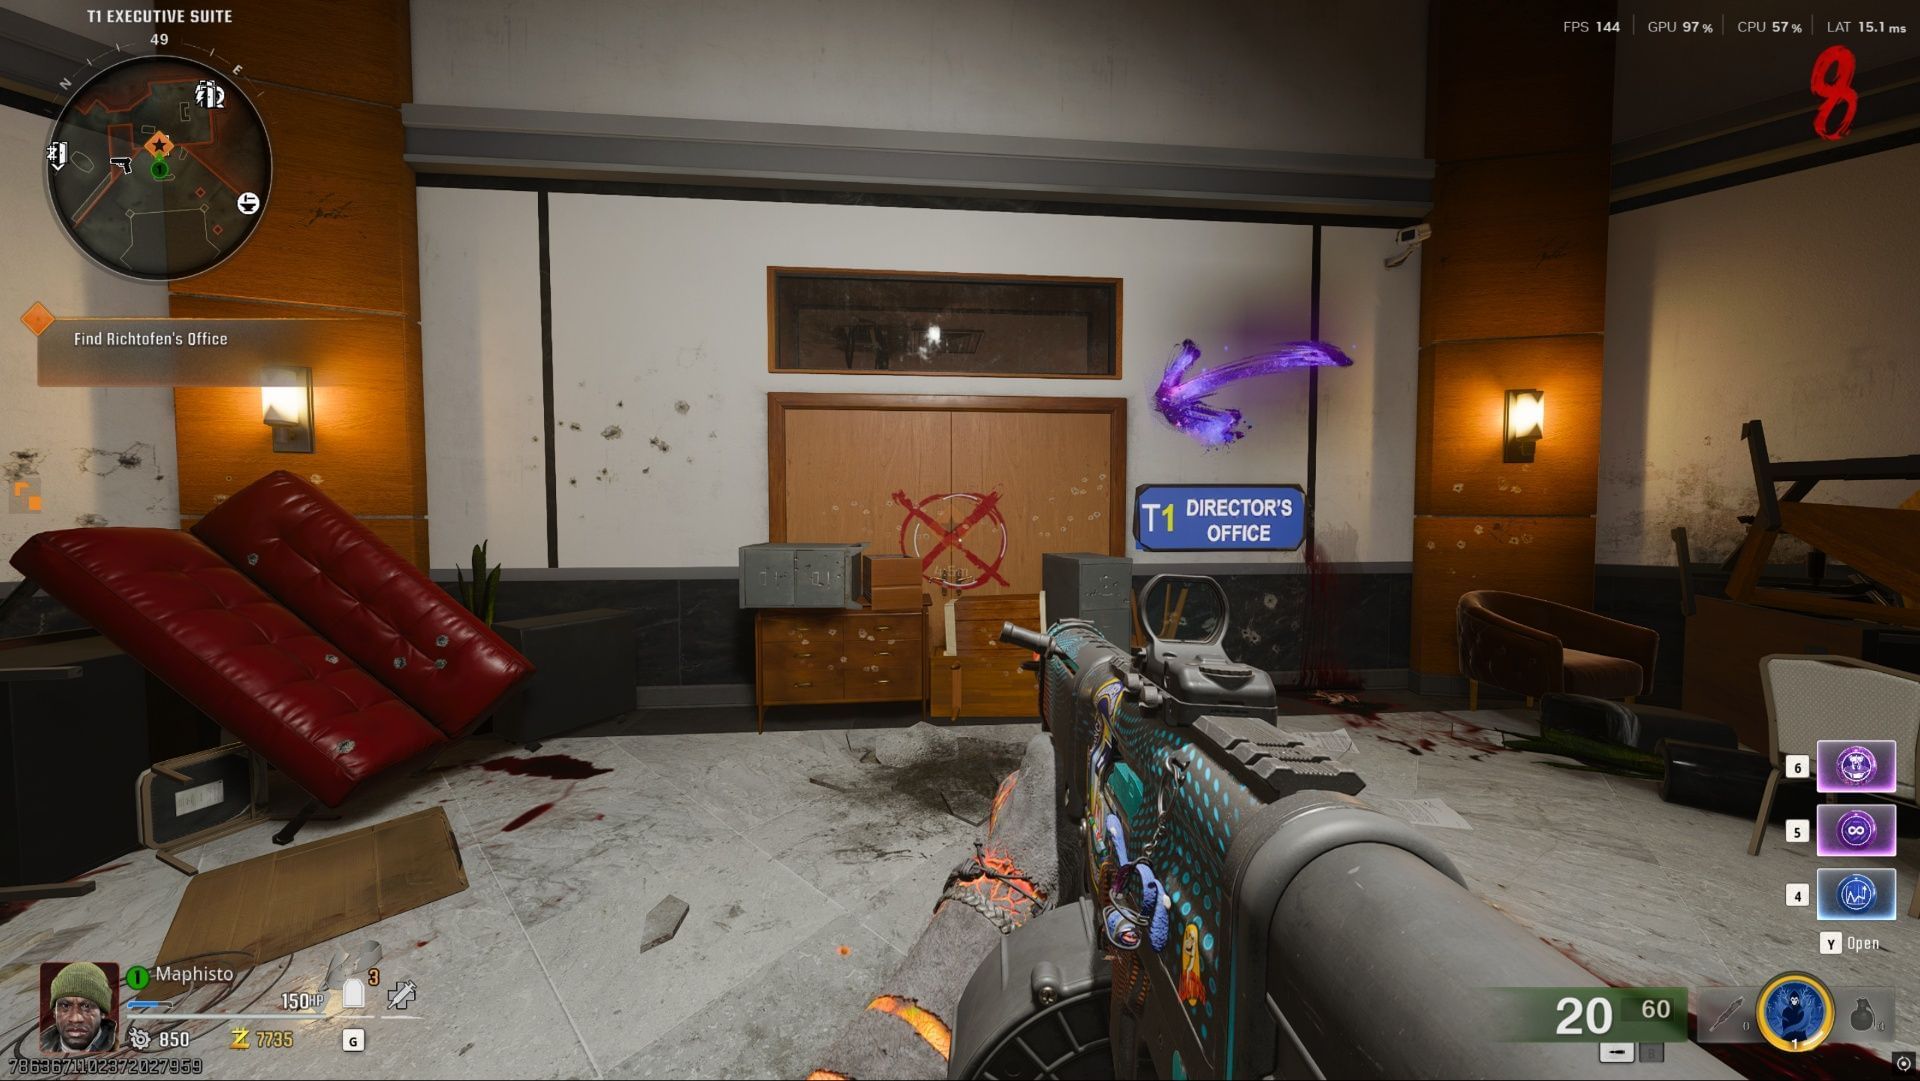
Inside, go to the director’s table and interact with the snow globe. This activates a red teleporter that leads to the T2 Sublevel 10 area.
Take the Teleporter to Sublevel 10
Approach the red teleporter and interact with it to teleport to T2 Sublevel 10.
Restart the Particle Accelerator
Once in the T2 Sublevel 10 area, go straight to the control room on the elevated platform. Interact with the consoles to turn on the power, which also activates the Particle Accelerator.
Clear Aetherium Deposits from Coolant Pipes
Nearby, you’ll find four coolant pipes connected to the Particle Accelerator. The pipes will have Aetherium crystals; a total of 12 will be present in four different pipes.

Break all 12 to relieve pressure on the reactors. This action will also reduce the chamber's gravity, allowing you to float slightly.
In this low-gravity chamber, you’ll find a Pack-a-Punch machine floating and shifting positions. Jump, float toward it, and interact with it to upgrade your weapon.
Also read: Free Random Perk Easter egg guide in Black Ops 6 Zombies Reckoning
From this point onward, the guided objectives end, and you're on your own to uncover the rest of the narrative. The game no longer provides step-by-step instructions, so you'll need to explore and experiment to progress the storyline.
Acquire the Gorgofex Wonder Weapon
Now that you've activated the Particle Accelerator and unlocked the Pack-a-Punch machine, your next objective is to acquire the Gorgofex Wonder Weapon.

To do so, here's what you need to do:
Solve the code puzzle
- Go to T1 Mutant Research Area.
- Interact with two static-filled consoles to get two random words.
- Note the first letter of each word, then match the letter pair to a chemical symbol on the Periodic Table
- Example: If the letters are C and A, you’ll get either CA or AC. Match them against the Periodic Table to find the correct element. Here, CA stands for Calcium, which has an atomic number of 20. That means your code is: 020. (Always format it as a three-digit code by adding zeros before.
- Use the code at the door panel to unlock the T1 Bioweapons Lab.
Activate the Cyst
- Inside the lab, find the Cyst on a test console.
- Kill three Vermins and three normal zombies near it to power it up.
- Collect the Cyst once it’s activated.
Charge the Cyst using Dark Aether Flora
- Go to T1 Quantum Computing Core.
- Find three Dark Aether flowers, stand near each to drain the flowers’ flora health.
- Do this at all three flowers.
Initiate Power Surge
- Go to T2 Dark Entity Containment.
- Interact with the console that states “Initiate Power Surge”, then quickly activate the three other consoles with the same message clockwise around the area.
Defeat HVT Uber Klaus (Forsaken)
- After the power surge, one Uber Klaus spawns.
- Damage it (leave at least 10% HP) and lure him into the electric field.
- The Forsaken infuses the robot, triggering a mini-boss fight.
Defeat it to receive the Gorgofex Wonder Weapon.
Also read: Black Ops 6 Zombies Reckoning Wonder Weapon guide: How to upgrade Gorgofex
Craft Klaus
To craft Klaus, you’ll need to collect a total of four components:
- Two Klaus Arms
- Two Klaus Legs

Collect Klaus Arms (Dropped during Special Rounds)
The Klaus Arms are obtained in two special rounds where Kommando Klaus enemies spawn.
- These special enemies appear during certain rounds, typically around Round 5 or 6, and again around Round 10 or 11.
- Defeat them, and one Klaus Arm will drop per special round.
- Since the drops are random, you must complete at least two special rounds to collect both arms.
Locate Klaus' Legs (Found in Android Assembly Area)
The Klaus Legs can be located in the T2 Android Assembly area. They are white in color, making them easy to spot.
- First potential Leg Location: On the right side of the ammo crate, placed on the top shelf of a metal storage rack.
- Second potential Leg Location: Near the Anti-Gravity Personnel Launcher, close to a broken door.
Search both spots to collect the legs.
Assemble Klaus
Once you’ve gathered all four limbs, head to the area where Klaus’s body is hanging, near where you found the second leg. It’s located parallel to the Anti-Gravity Personnel Launchers in the T2 Android Assembly area.
Approach the body and interact with it to attach all the limbs and complete Klaus’s assembly.
Unlocking the Teleporter Lab
Before proceeding, return to the spawn area. Next to the Rampage Inducer, you’ll see a mop bucket. Melee it to move it under the sprinkler on the ceiling. This step is required for a later part of the quest.
Now that you are done with this prep step, follow these instructions:
Collect the Keycard and DNA Vial

After Round 6, you may defeat a unique zombie that drops a Keycard. Pick it up. Now, visit the T1 Mutant Research Test Area. In the same chamber as the ammo crate, look for a locked box. Use the Keycard to unlock it and collect the DNA Vial inside.
Obtain the Syringe
Head to the T1 Mutant Research Lab. Near the containment pod, you’ll find:
- A console
- A small white container nearby
Interact with the container to open it and collect the Syringe.
Collect a Blood Sample from the floating zombie
Travel to T2 Sublevel 10, where the Pack-a-Punch machine and laser beam are located. You’ll see floating objects, including a zombie corpse, in the laser beam.
- Jump into the beam to become an element of light.
- Carefully move through the beam and avoid obstacles, but make sure to touch the zombie corpse.
- This will cause the corpse to fall to the ground.
Approach the fallen corpse and interact with it to collect the blood sample.
Defeat the Fowler Mangler and get the Mutant Injector

With the blood sample collected, return to the T1 Mutant Research Lab and interact with the containment pod. This will release the Fowler Mangler. You need to defeat it to obtain the Fowler-Mutant Injector.
Unlock the secret Red Portal in the T2 Dark Entity Containment Area

Head to the T2 Dark Entity Containment area. Near the crafting table, you’ll see a black door. Stand in front of the small console nearby and interact with it to start the scan. Then, inject the Fowler-Mutant Injector when prompted.
After you've been scanned, the black door will open, revealing a red portal leading to a secret area called the T2 Teleporter Lab.
Power up FRANKEN-KLAUS

Once you unlock this secret portal, continue playing until an Uber Klaus spawns. Lure it to the T2 Android Assembly area, where Klaus’s body is hanging. Now, let the robot use its charged attack near Klaus’s body. This way, because of the attack’s electric nature, Klaus will activate.
After that, it will start interacting with a nearby computer, then move to a different location.
Complete the SAM Trial
Follow Klaus as he leads you to a S.A.M. trial console. He will interact with it, triggering the S.A.M. trial. Complete the trial, and once it's finished, Klaus will move again, and this time, it will head toward the red portal you unlocked earlier. Follow him through the portal to the T2 Teleporter Lab, where he'll interact with another computer.
Solve the four-digit code puzzle

On the right side of the red portal, near a zombie spawn window, is a computer that requires a four-digit code.
To find the code, look for four documents scattered in two areas on the map. Their potential spawn locations include:
- Inside the Teleporter Lab, on the console opposite the red portal
- In the T1 Executive Suite and Director’s Office, where you need to check all tables and desks.
Each document contains:
- An Item Name
- An Item Number
- An Archive Date
How to solve the code:
- Take note of the Item Numbers and their associated dates.
- Sort the documents by month in ascending order.
- Use the Item Numbers in that order to form your 4-digit code.
Enter the code on the computer. If it's correct, the screen will display the "Access Granted" message.
Collect the purple brain

Go to the T1 Quantum Computing Core. At the central console, you’ll find a machine labeled Project Janus with three green lights on it. Melee the machine to open it. You may need the Melee Macchiato perk for this. Once the machine is open, collect the purple brain inside.
Head back to the Teleportation Lab immediately, and near Klaus, you’ll find a console similar to the one you took the brain from. Place the brain in the Project Janus machine.
Infuse Gorgofex with a blue electric orb

Next, return to the Pack-a-Punch chamber and enter the control room. The consoles will display “Boot Ready.” Interact with it, and the laser beam in the room will change from blue to red, initiating the next phase.
Soon after, four blue Vermins will spawn, which you must eliminate using the Gorgofex. Once they’re dealt with, take out the normal zombies with any weapon you want. Subsequently, you’ll notice a floating, blue, electrified orb appear above the consoles.
Interact with it to infuse the orb into your Wonder Weapon. Now, without firing the weapon, return to the Teleportation Lab. There, you’ll see a portal surrounded by blue Aether crystals, so fire the charged Wonder Weapon at it to clear the portal.
Collect and charge the Fungal Head

Go back to the T1 Quantum Computing Core. Stand near the west wall, face northeast, and look upward, where you’ll spot a small room.
Use a fully charged shot from your Gorgofex Wonder Weapon to hit the room, and a Fungal Head will drop.
Once you have it, head back to the spawn area where you placed the mop bucket under the sprinkler earlier. You’ll find that the bucket is now filled with water. Place the Fungal Head into the bucket and then retrieve it again. Now, start killing zombies around yourself, and the Fungal Head will eventually become charged.
Activate the Teleporter

Return to the Teleportation Lab. Place the head on the now-cleared red portal to activate the teleporter.
Collect and charge Four Vacuum-Seal Devices

To proceed, you must collect four Vacuum-Seal Devices in Black Ops 6 Zombies Reckoning that are inside Project Janus containers across various rooms and charge them by throwing them into floating purple objects.
Device locations (potential):
- T2 Android Assembly
- T1 Mutant Research Test Area
- T1 Quantum Computing Lab
- T2 Dark Entity Containment
Purple objects' potential locations:
- T1 Mutant Research Test Area
- T1 Executive Suite
- T1 Quantum Computing Lab
Throw a Vacuum-Seal Device at one of these purple objects. It will suck the object in. After that, pick the device back up. Repeat this until you have four charged devices.
Install the Devices

Once you have all four, return to the Teleportation Lab. At the center of the room is a machine where you can place each charged device.
Next, you need to pull three levers in a specific sequence:
- The first lever (with a red light) is near the activated portal.
- After a few seconds, the second lever near Klaus will light up. Pull it.
- Shortly after, the third lever on the opposite side of the room activates. Pull it to complete the sequence.
Also read: Painting Easter egg guide in Black Ops 6 Zombies Reckoning
Enter Tower 3’s Artifact Amplification Chamber
With that, the teleporter will become active in Black Ops 6 Zombies Reckoning. Enter it, and you'll be taken to Tower 3: Artifact Amplification Chamber, where you’ll find the Sentinel Artifact.
Make Your Choice: Richtofen or S.A.M.

When interacting with the artifact in Black Ops 6 Zombies Reckoning, you’ll be prompted to choose between helping Richtofen or S.A.M. Whichever you don’t choose will become the final boss.
Once you select between Richtofen and S.A.M., the elevator will take you up to the next platform, where you'll encounter three Aether Canisters. To charge them, simply eliminate zombies nearby, and each canister will absorb the energy from the kills. After all three are fully charged, return to the elevator, which will then take you to a higher platform.
This new area will have glowing purple lights scattered across the elevated sections. Among them, you’ll find several crystals, and your objective is to destroy all of them. Be thorough, as leaving even one crystal will prevent further progress. Once every crystal is destroyed, the elevator will ascend to the final level, initiating the boss battle.
Defeat the Final Boss
The final boss battle in Black Ops 6 Zombies Reckoning is challenging, with mechanics that differ based on your choice. But once you successfully defeat them, the main Easter Egg quest in the Reckoning map concludes.
That covers everything that you need to know about the Reckoning main quest Easter Egg walkthrough in Black Ops 6 Zombies.
Check out our other Call of Duty articles:
- Best ABR A1 loadout in Black Ops 6 and Warzone
- Black Ops 6 Zombies Reckoning Wonder Weapon guide: How to upgrade Gorgofex
- All Black Ops 6 Season 5 Ranked Play rewards and how to get them
- All Warzone and Black Ops 6 Season 5 bundles: Everything we know
- Black Ops 6 Season 5 patch notes: New maps, modes, and more