'%20x='0'%20y='0'%20height='100%25'%20width='100%25'%20%0A%20%20%20%20%20%20%20%20%20%20xlink%3Ahref='data:image/jpg;base64,/9j/2wBDAAYEBQYFBAYGBQYHBwYIChAKCgkJChQODwwQFxQYGBcUFhYaHSUfGhsjHBYWICwgIyYnKSopGR8tMC0oMCUoKSj/2wBDAQcHBwoIChMKChMoGhYaKCgoKCgoKCgoKCgoKCgoKCgoKCgoKCgoKCgoKCgoKCgoKCgoKCgoKCgoKCgoKCgoKCj/wgARCAAGAAoDASIAAhEBAxEB/8QAFgABAQEAAAAAAAAAAAAAAAAAAAUH/8QAFAEBAAAAAAAAAAAAAAAAAAAABP/aAAwDAQACEAMQAAAAwiaCb//EAB8QAAEDAwUAAAAAAAAAAAAAAAIBAwQABRESISJBcf/aAAgBAQABPwB+6QTgxkahED7Y4cLXxLxOqW8hnZpcV//EABgRAAIDAAAAAAAAAAAAAAAAAAACAQMh/9oACAECAQE/AFrV9k//xAAbEQACAQUAAAAAAAAAAAAAAAABAgMABBJRsf/aAAgBAwEBPwC/kZ5cjocr/9k='%3E%3C/image%3E%3C/svg%3E)
The Tomb main quest Easter Egg went live with the Season 2 update and is the fourth Zombies map introduced in Black Ops 6. It continues the storyline from the previous map, Citadelle des Morts.
If you're unaware of how this quest connects to the previous map, here’s a brief explanation. In Citadelle des Morts, players encounter Professor Krafft, who provides crucial intel about the location of the Sentinel Artifact. He reveals that the artifact is located at a nearby excavation site, which becomes the setting of the new map, The Tomb.
Additionally, when you defeat the final boss in Citadelle des Morts, it drops an Amulet. This item plays a key role in progressing through the main Easter Egg quest in The Tomb.
The Easter Egg itself is no easy task. It presents a tough challenge filled with narrative-driven objectives and several puzzles.
This article will walk you through every step of The Tomb main quest Easter Egg in Black Ops 6 Zombies, offering a detailed and structured guide to help you complete it successfully.
How to complete Black Ops 6 Zombies The Tomb main story Easter Egg
For the initial part of the mission, you'll receive information instructing and guiding you to Open the Doorway to Nowhere. Completing this task solo can be very challenging, so it is highly recommended to attempt it with a squad. You will spawn at a location called the Dig Site, and from there, follow the first guided objective.
Open the Doorway to Nowhere
This task requires you to open three doors and reach a specific marked location. First, progress through a few rounds to gather enough Essence, as each door will require Essence to unlock. Look for doors in the Dig Site with a red glowing circle in the middle.
Approach the first door in the area, which will cost 2,250 Essence to unlock. Once inside, proceed to another similar-looking door, requiring 2,500 Essence to unlock. In this newly unlocked room, you’ll encounter the third door, which will also cost 2,750 Essence to access.
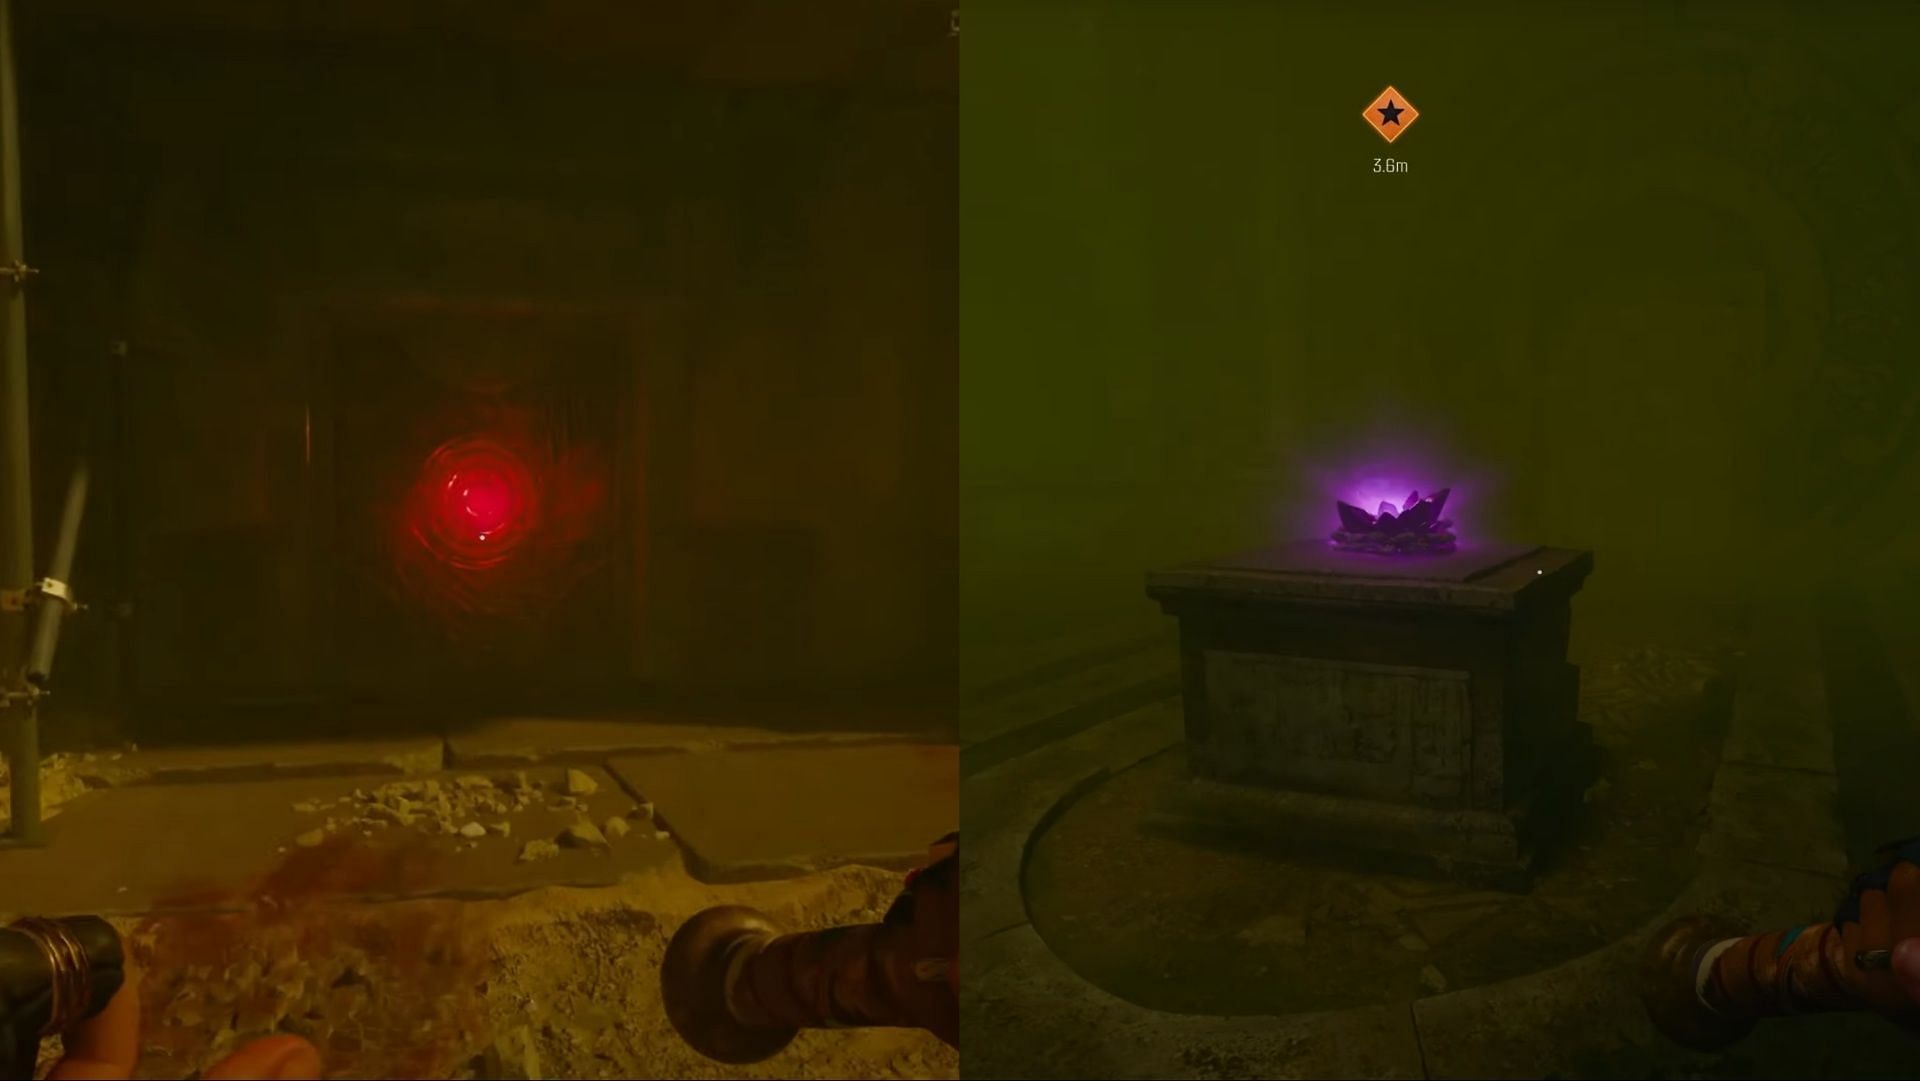
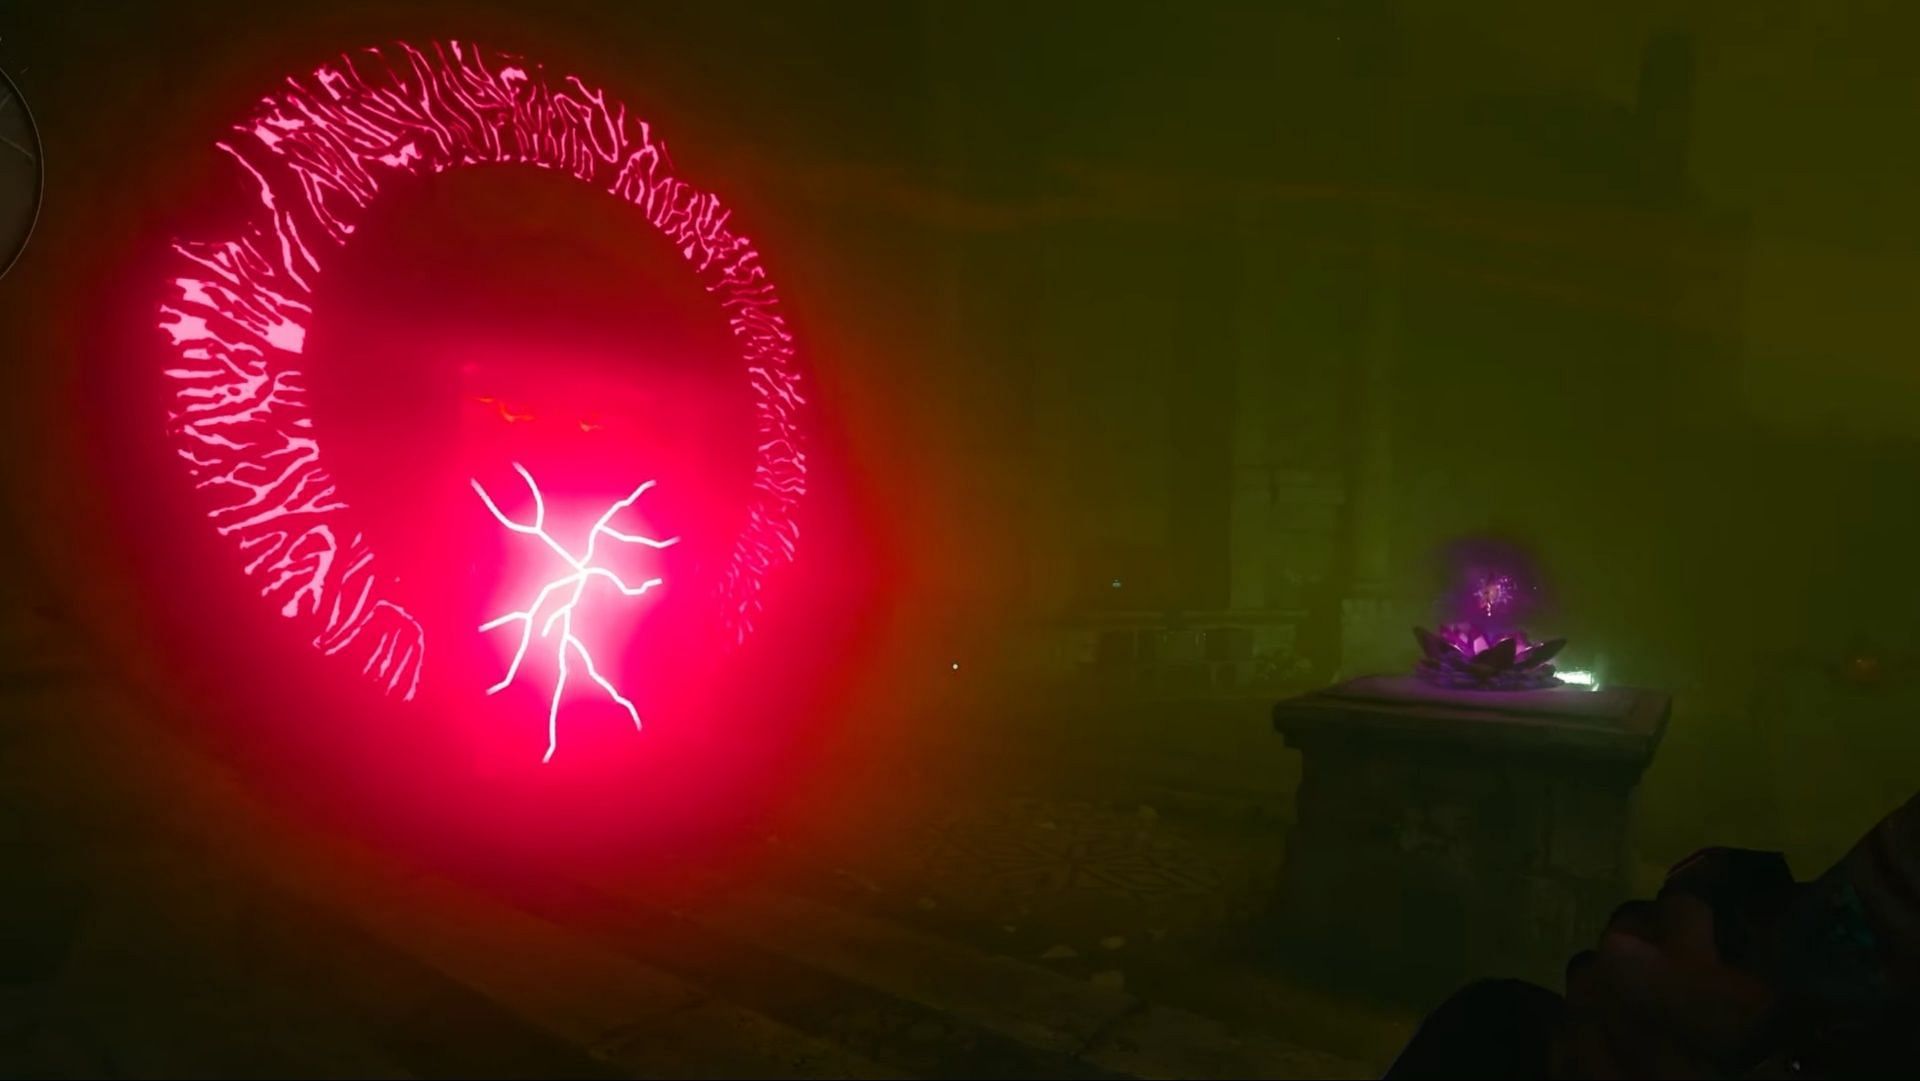
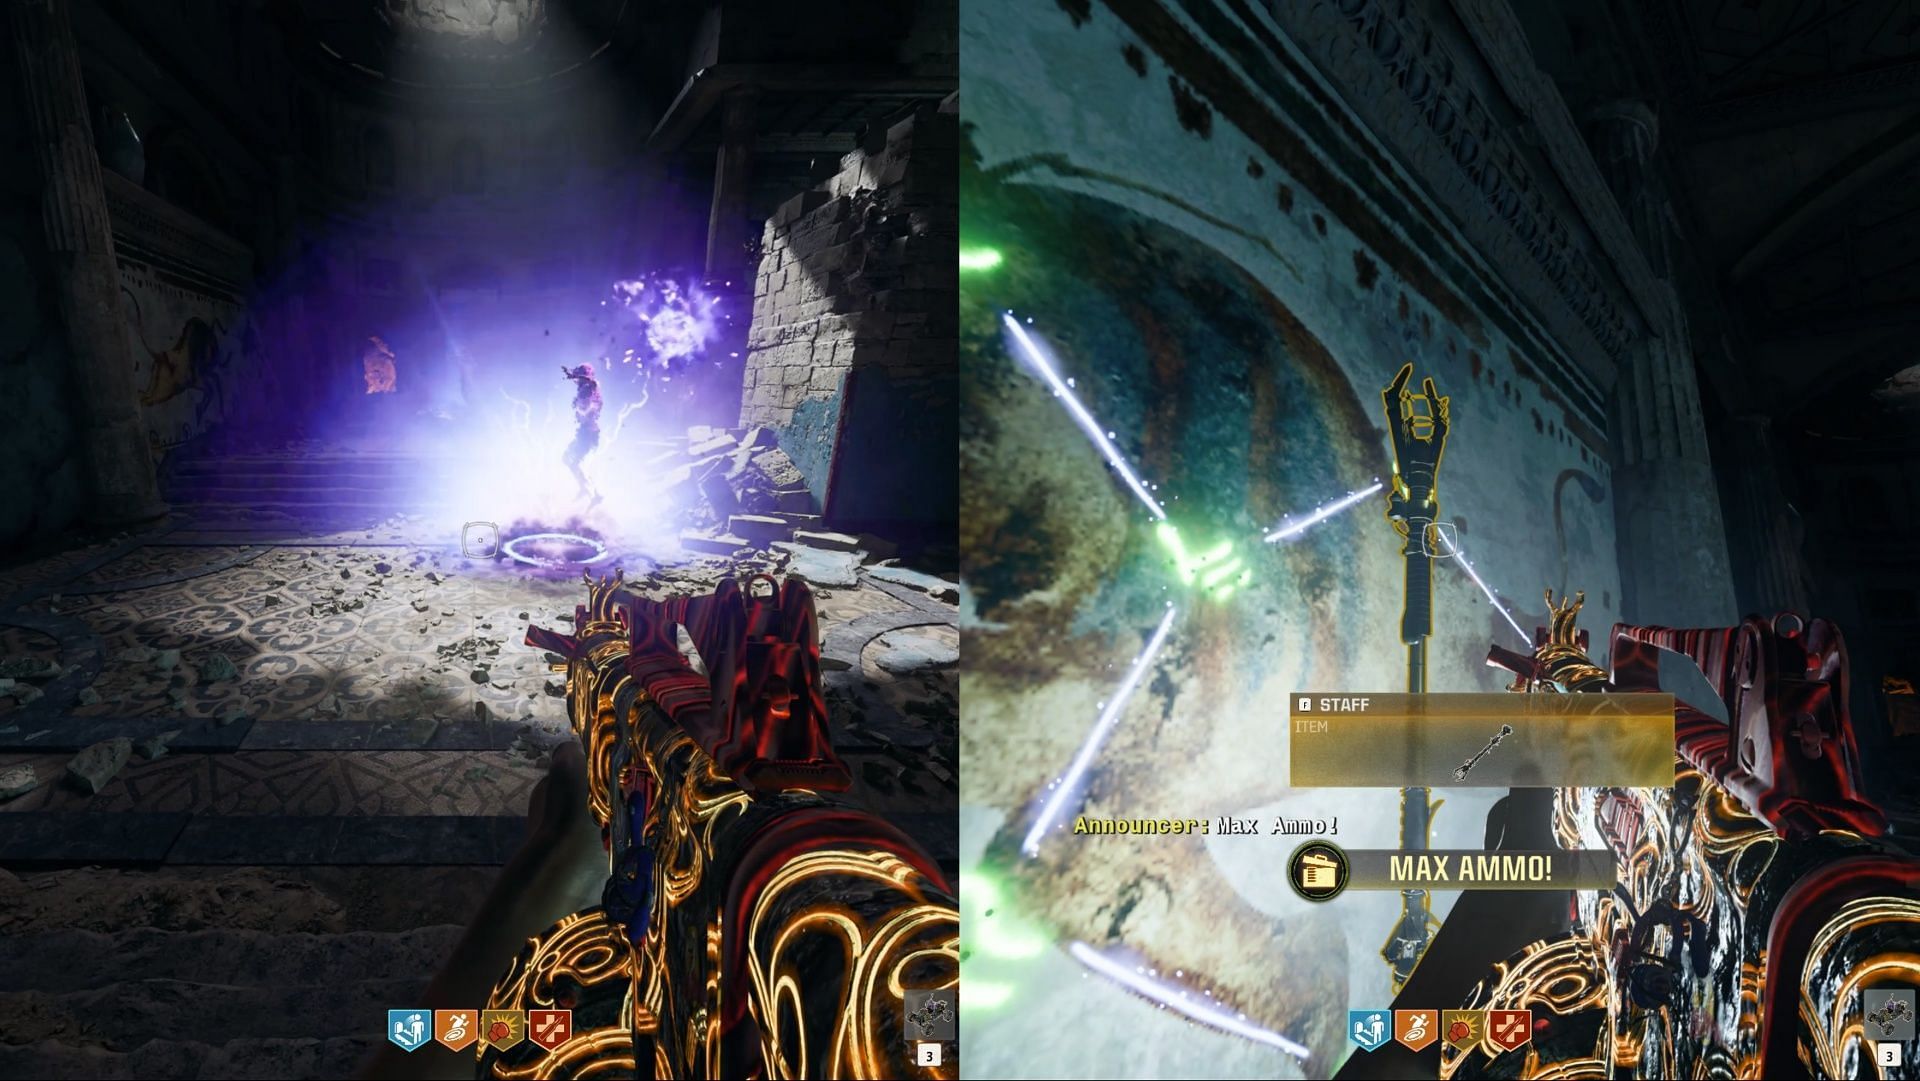
In this room, you’ll find a small table with the purple glowing crystal, which will be marked. Approach the table and press the Interact button to place the Amulet you obtained in Citadelle des Morts.
A purple ray will appear, and the wall with a runic symbol will transform into a portal. Approach this portal, and you’ll have the option to teleport.
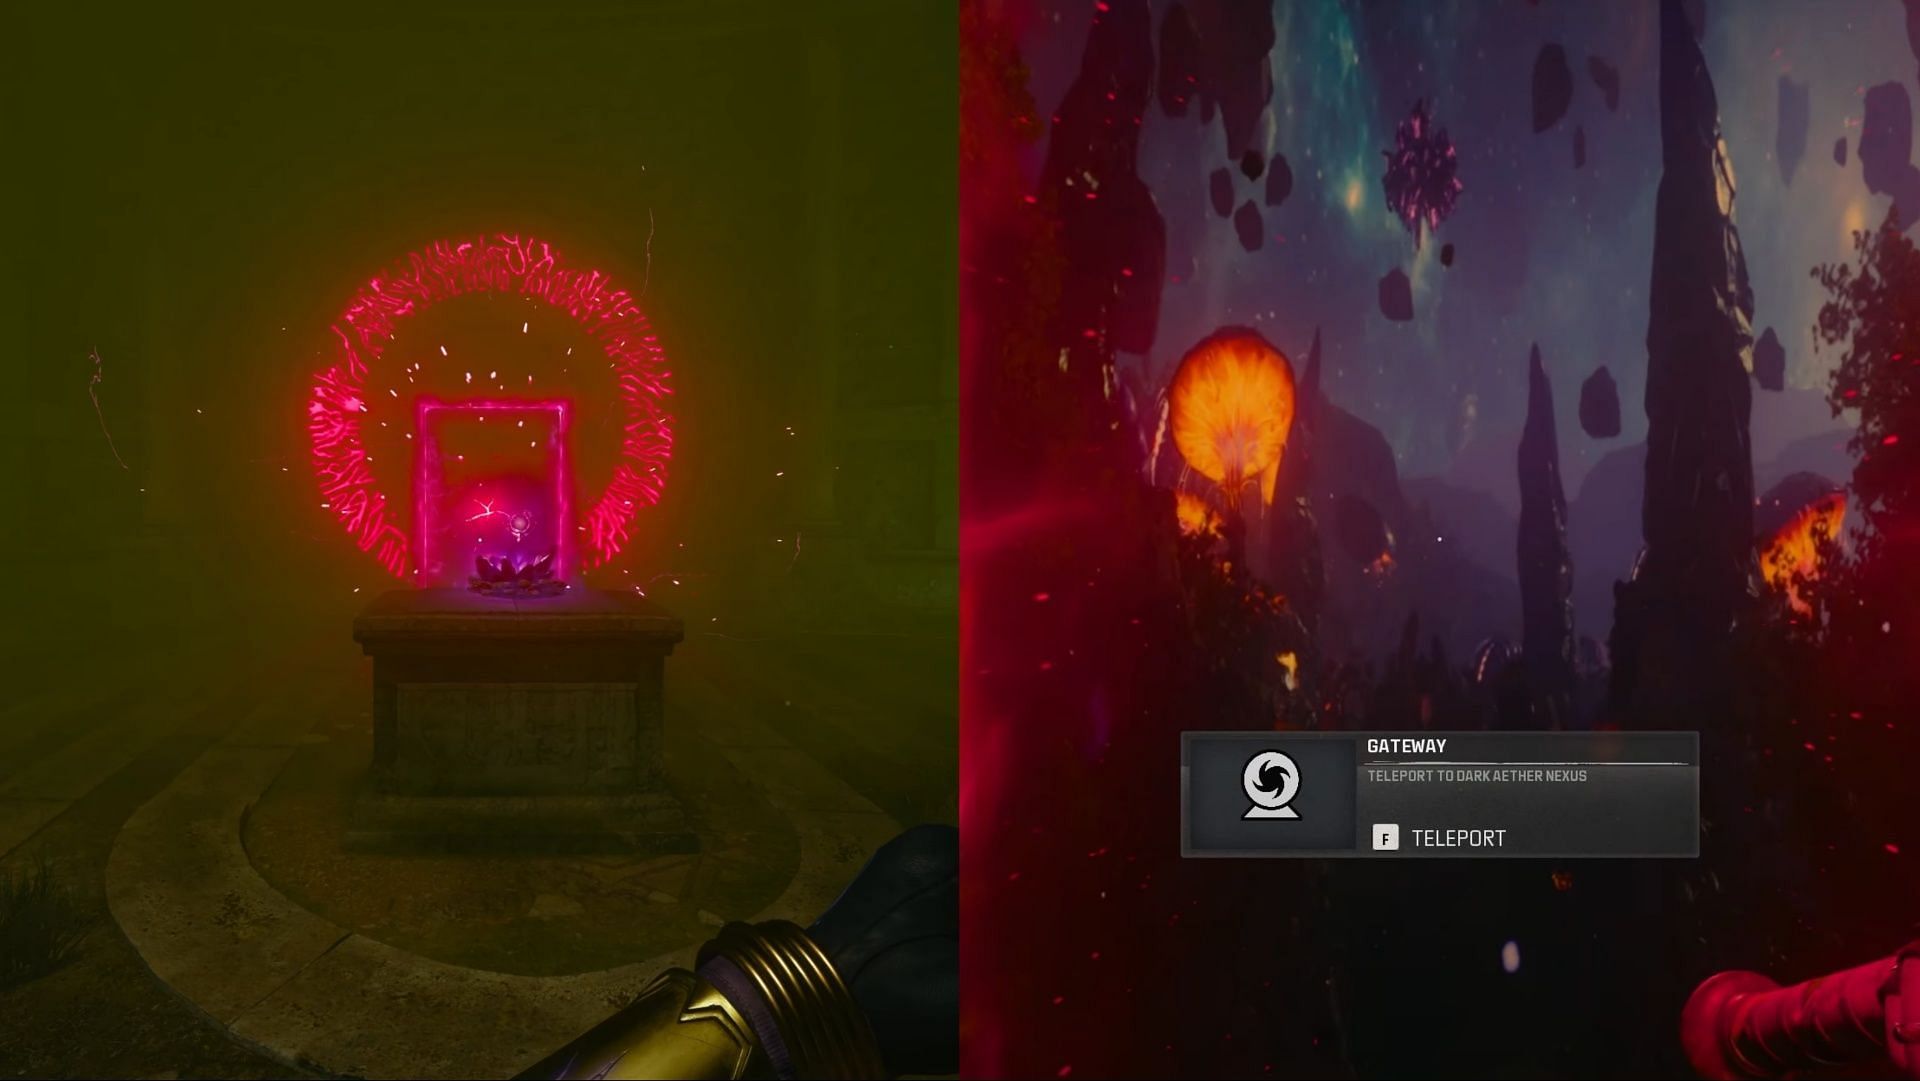
After stepping through the portal, you will be transported to the Dark Aether Nexus, where you’ll find the Pack-a-Punch machine. From this point on, the title won't directly tell you what to do; however, you are still going to get minor hints that will help you advance in your quest.
Craft the Staff of Ice Wonder Weapon
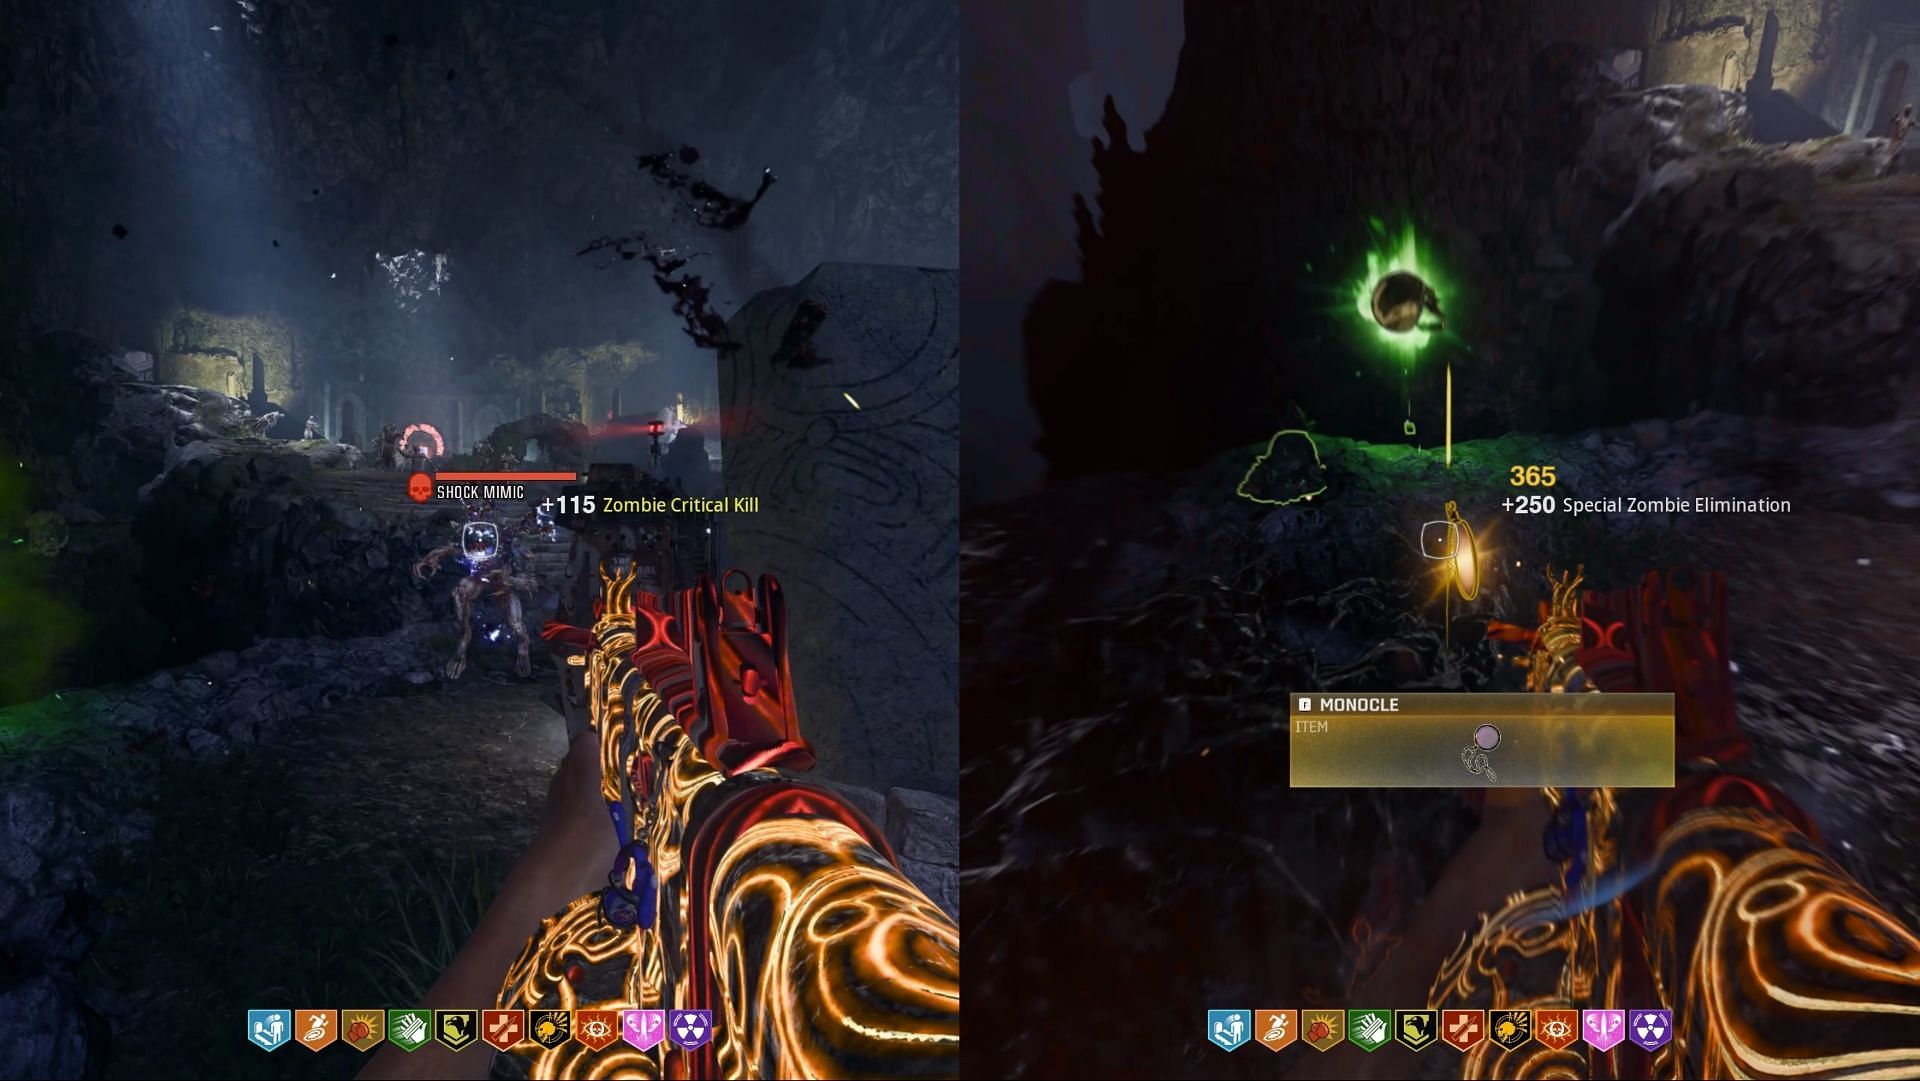
Your next task is to craft the Staff of Ice. Once you reach Round 8, a Shock Mimic will spawn. Eliminate it to obtain a quest item called the Monocle. Once you’ve collected it, you need to shoot all the Aetheric Lanterns scattered throughout the map.
Once you're done, head to the Tombs area, where you’ll find the new Death Perception Perk-a-Cola machine. In this location, you will see a large painting of a bull on the wall. When you've shot all the lanterns, the bull painting will display glowing Roman numerals. Shoot these in the right order (lowest to highest), and the room will go into lockdown.
You’ll now face five waves of zombies, including Shock Mimics and Doppelghasts. Survive the waves, and you’ll receive the second item, the Staff.
For the final item, repeat the process of shooting all the lanterns. Then, head to the Neolithic Catacombs, where you'll find a mural with Roman numerals on the wall near the crafting table. Shoot them in the ascending order to trigger another lockdown, which you’ll need to survive.
After completing this task, you’ll receive the third item: the Head Piece.
Now that you have all three items, head to the large circle in the center of the Dark Aether Nexus area. Interact with the Ice Staff, defend the location, and you will be able to craft the Staff of Ice Wonder Weapon.
Also read: How to get special and elite zombie eliminations in Black Ops 6 Zombies
Upgrade the Staff of Ice Wonder Weapon
Now that you have the Staff of Ice, your next task is to upgrade it. The upgraded version will feature a green crystal at the other end, which can instantly revive fallen allies.
Step 1: Freezing the Aetheric Lanterns
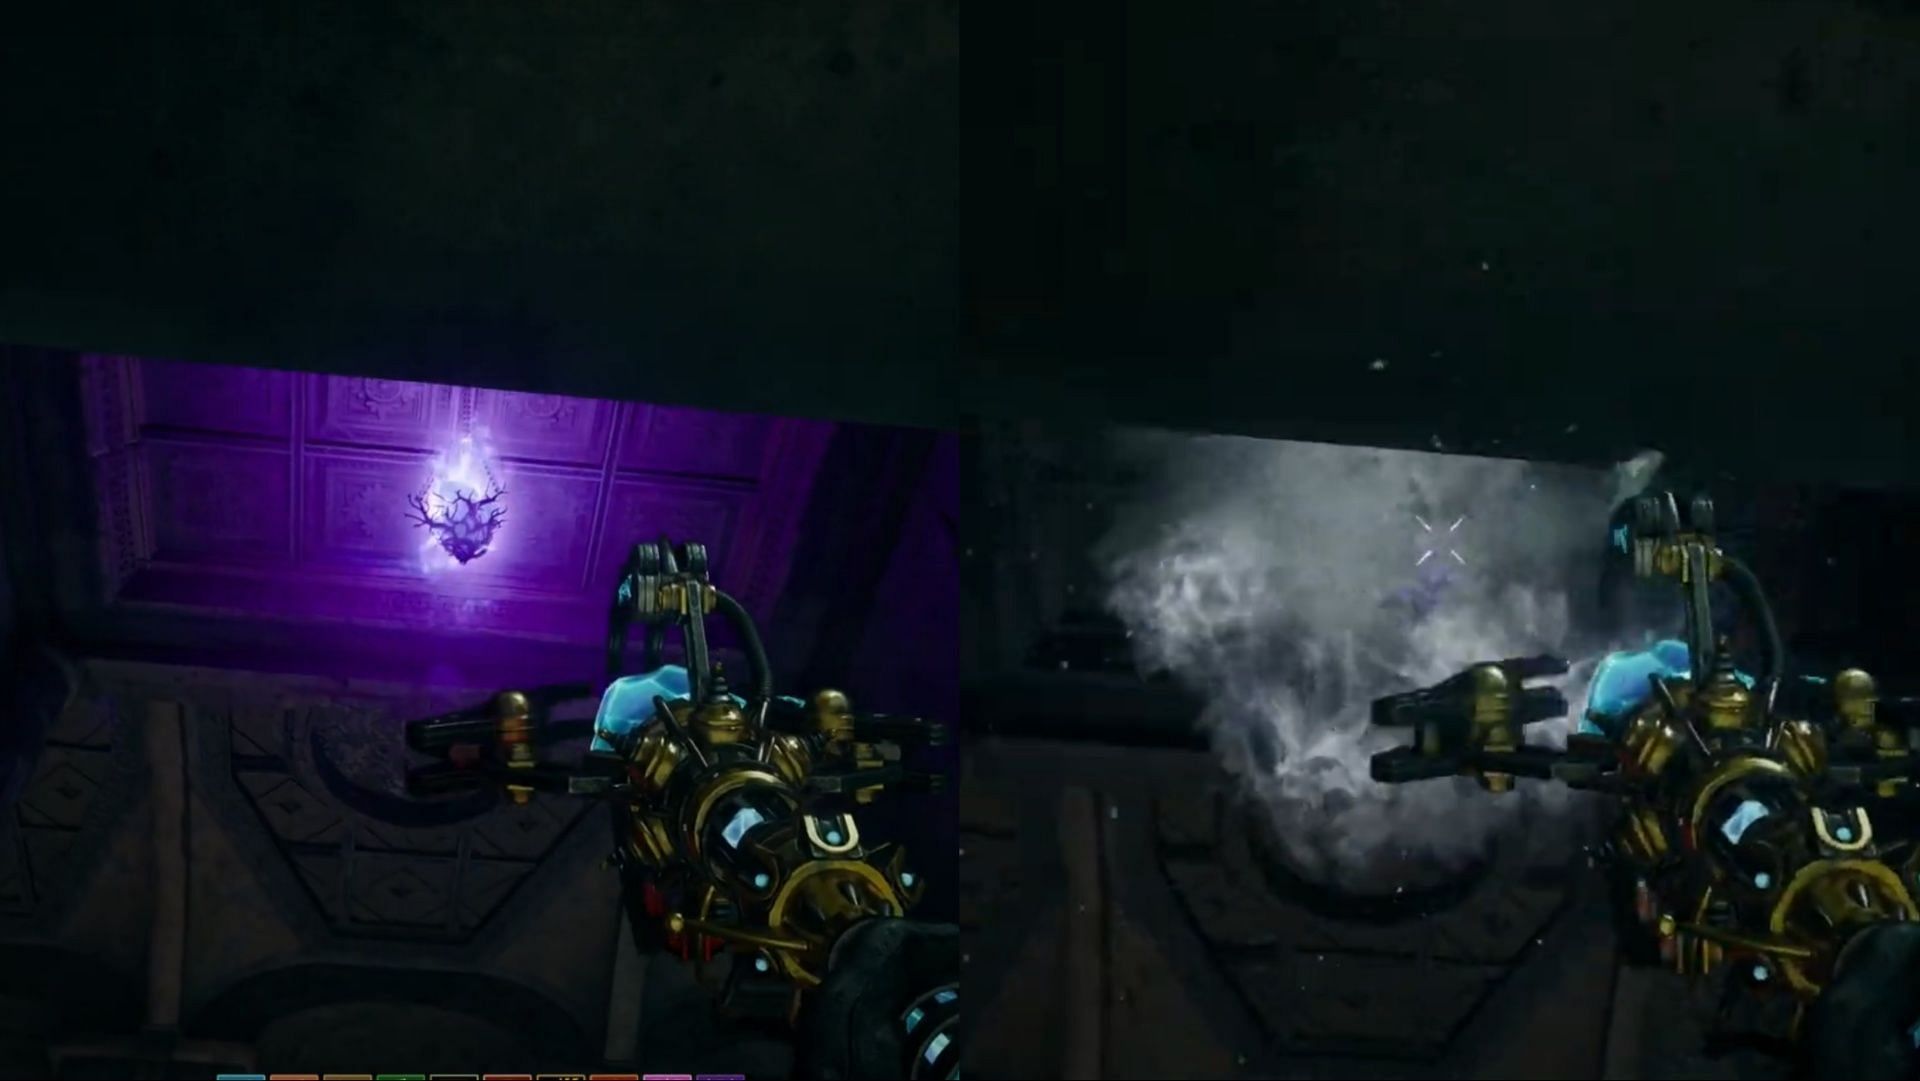
Exit the Dark Aether Nexus and return to the main map. Previously, you shot the Aetheric Lanterns to trigger the Roman-numbers puzzles. This time, instead of shooting them, use your Staff of Ice to freeze them.
You must freeze three lanterns within 10 seconds. To do this efficiently:
- Before starting, scout a route with the three closest lanterns.
- Once ready, quickly freeze them in succession to complete the task within the time limit.
If done successfully, Archibald will speak, confirming that you have completed this step.
Step 2: Shooting the floating rocks
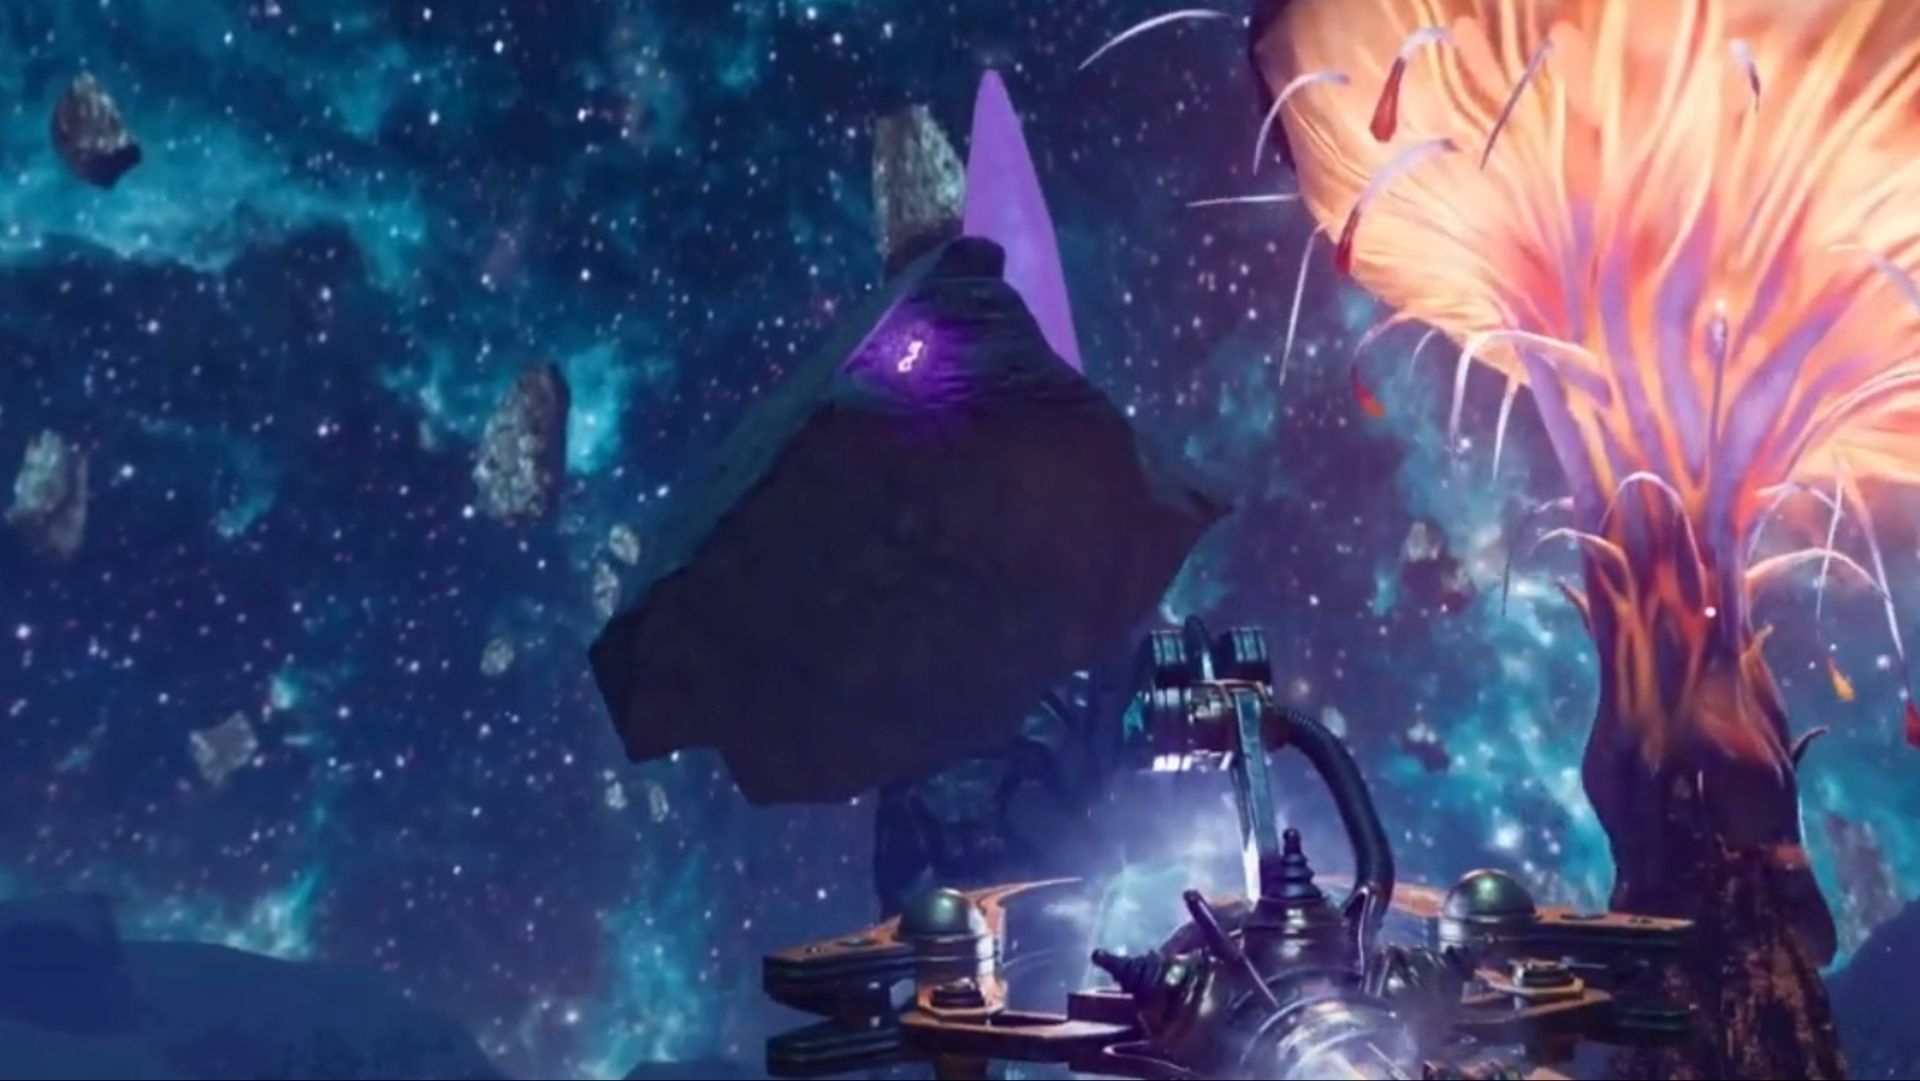
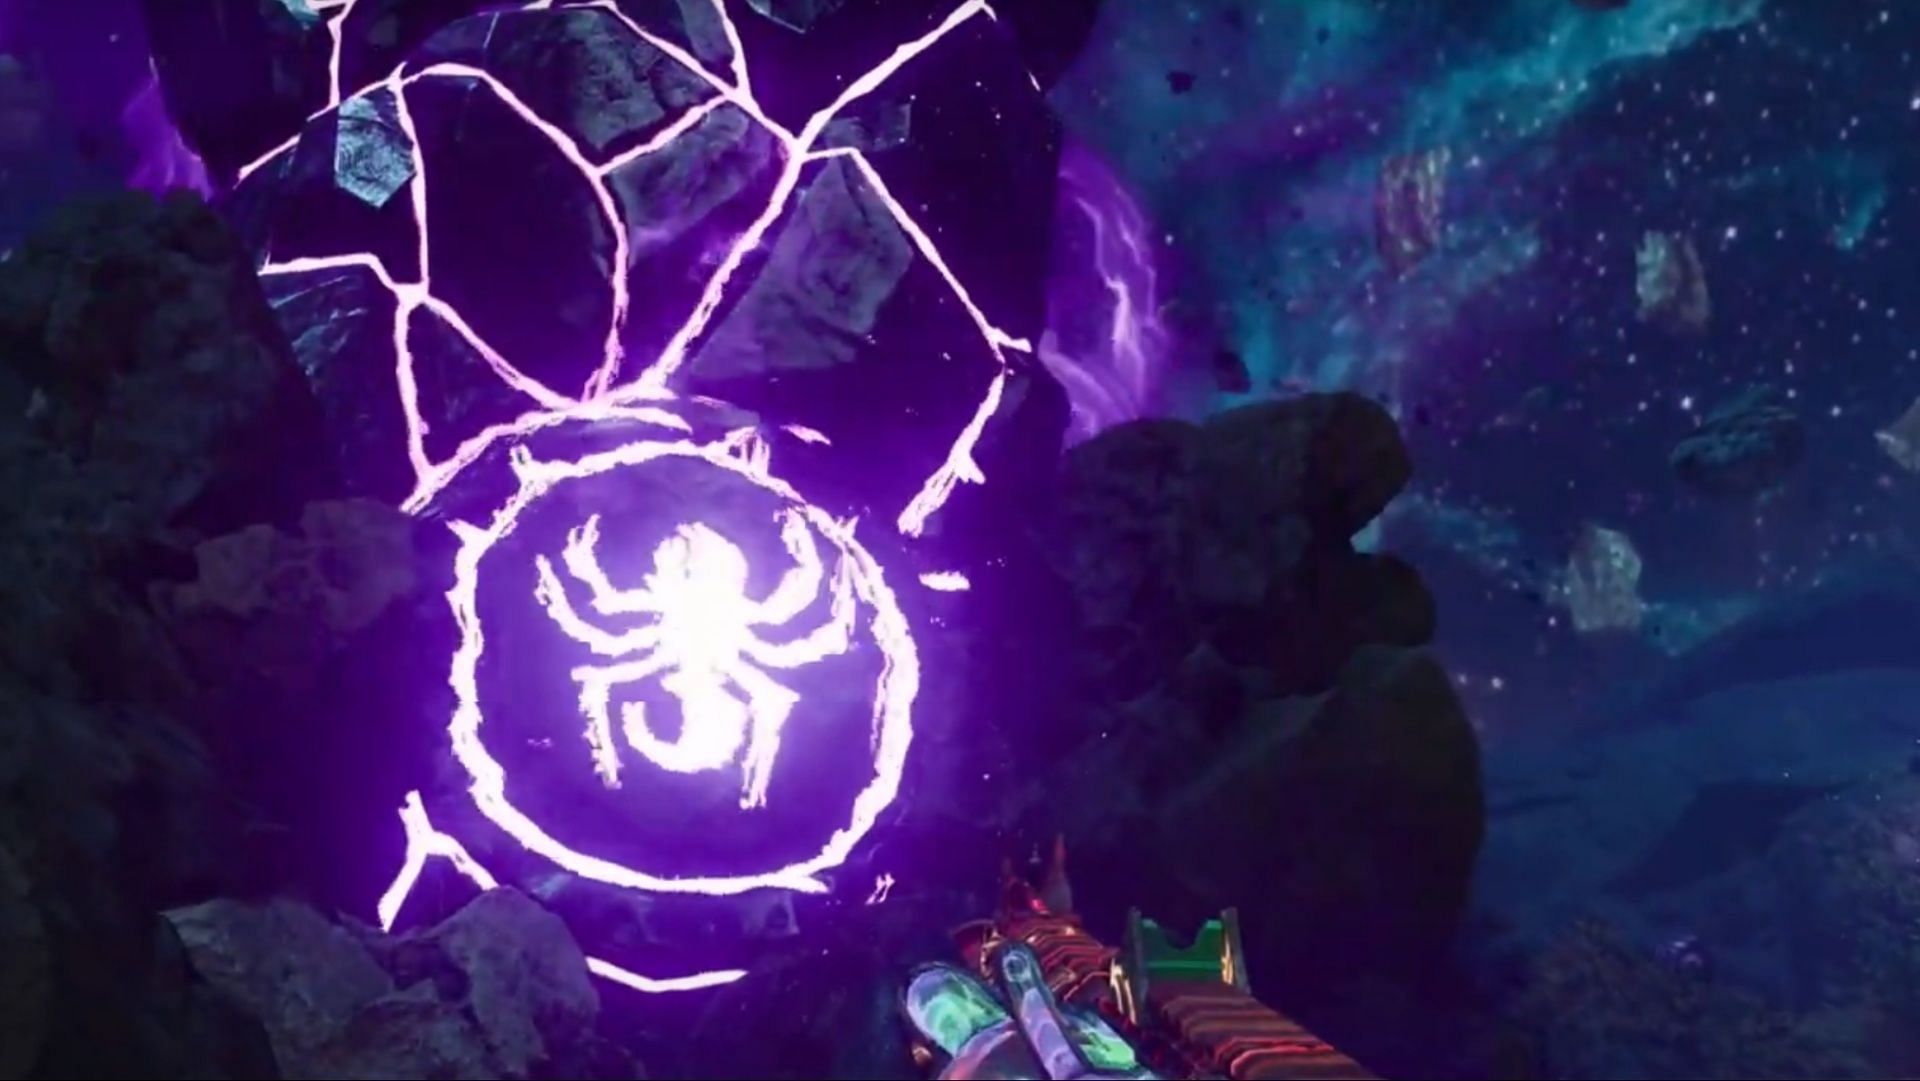
Return to the Dark Aether Nexus, where you'll find large floating rocks. Among them, three will have glowing purple symbols. These markings are easy to distinguish due to their bright color. Once you have identified them:
- Use your Staff of Ice to shoot each of the three marked rocks. After being hit, each rock will descend.
- Take screenshots or write down the symbols for later reference.
Next, locate the four portal doors that connect the Nexus to the outer world. One of them will be closed. You now have to:
- Identify which portal is closed.
- Use any of the remaining portals to return to the outer world.
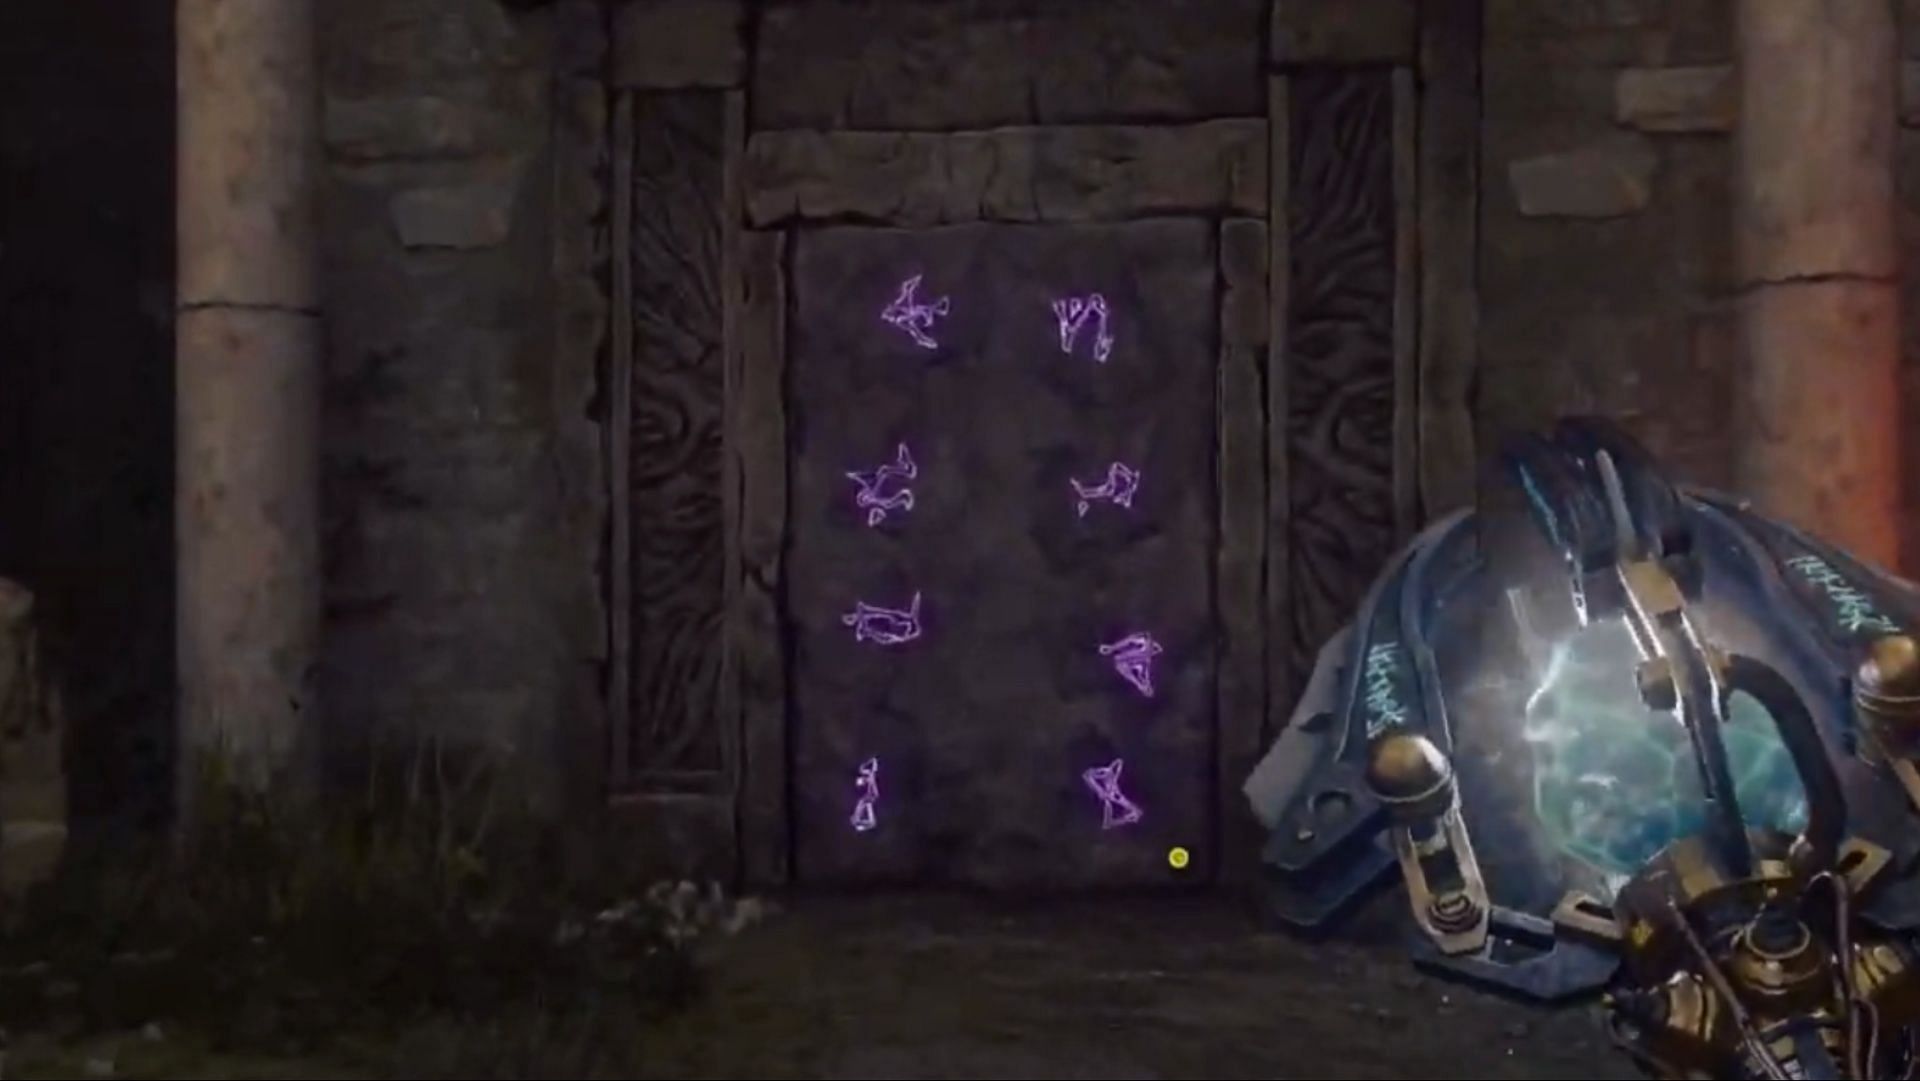
- Find the room where the opposite end of the closed portal is located. At the door, you will see eight symbols.
- Using your Staff of Ice, shoot only the three symbols that match the ones you noted down earlier.
Step 3: Collecting souls for the upgrade
If you have correctly matched the symbols, the portal will be reactivated. Enter it, and you’ll be teleported to the top of a floating rock, where you’ll find a glowing purple orb. Once you do, follow these steps:
- Interact with the orb to initiate a soul collection sequence.
- The orb will start moving — follow it and eliminate zombies nearby.
- The orb will automatically absorb zombie souls, but you must stay close to it.
- If you move too far away or don’t collect enough souls, you will fail and need to restart this step.
As the orb moves, it will eventually reach its final destination, the large stone structure in the center of the Dark Aether Nexus. Equip your Staff of Ice and interact with the orb at the stone structure. This will complete the upgrade, granting you a more powerful version of the Wonder Weapon.
Upgraded Staff of Ice abilities
Once upgraded, the Staff of Ice gains two powerful abilities:
- Ice Storm - Freezes multiple enemies at once.
- Sekhmet's Vigor - Shoots a healing orb that can revive downed allies.
Also read: Shattered Veil main quest Easter Egg walkthrough - Black Ops 6 Zombies guide
Final step: Activating the statues and initiating the Boss fight in The Tomb map
For this final step, you must activate four statues to form a bridge leading to the final boss encounter.
Understanding the statues
There are four statues in the Dark Aether Nexus, each linked to a corresponding statue in the outer world:
- Vermin Statue: Dig Site, the location where you spawn
- Parasite Statue: Shrine of the Hierophants, the location that houses the Stamin-up Perk-a-Cola
- Doppleghast Statue: Ossuary, the location that contains Speed Cola Perk-a-Cola
- Amalgam Statue: Deep Excavation, the location that features the Quick Revive Perk-a-Cola
Once familiar with these locations, you can proceed with activating each statue.
Activating the statues
1. Activate the Vermin Statue
- In the Dark Aether Nexus, approach the Vermin Statue and shoot its small crystal using Sekhmet’s Vigor (the green crystal on the Staff of Ice).
- Travel to the Dig Site in the outer world and find the Vermin Statue located west of the Rampage Inducer.
- Stand inside the circle that appears and eliminate Vermins. The energy from the eliminated enemies will transfer to the statue.
- Once the statue has absorbed enough energy, interact with it to absorb the energy into your body.
- Quickly return to the Dark Aether Nexus and transfer the energy to the Vermin Statue.
Note: Avoid taking damage while carrying the energy — after enduring three hits, you’ll lose it and must restart the process in Black Ops 6 Zombies The Tomb map.
2. Activate the Parasite Statue
- Interact with the Parasite Statue in the Dark Aether Nexus.
- Travel to the Shrine of the Hierophants (Stamin-Up Perk-a-Cola location) in the outer world.
- Stand in the activation circle and eliminate Parasites to collect energy.
- Absorb the energy from the statue and return to the Dark Aether Nexus without taking too many hits.
- Transfer the energy to activate the Parasite Statue.
3. Activate the Doppelghast Statue
- Interact with the Doppelghast Statue in the Dark Aether Nexus.
- Travel to the Ossuary (Speed Cola location) in the outer world.
- Stand inside the circle and eliminate Doppelghasts. However, this phase is more challenging:
- Lasers will be emitted from the statue, so you must dodge them while fighting.
- Once you have absorbed enough energy, return to the Dark Aether Nexus and transfer it to the Doppelghast Statue.
4. Activate the Amalgam Statue
- Interact with the Amalgam Statue in the Dark Aether Nexus.
- Travel to Deep Excavation (Quick Revive location) in the outer world.
- A Red Amalgam will spawn instead of a normal one. This enemy is stronger, has a shield, and requires more damage to defeat.
- Defeat this foe, absorb its energy, and return to the Dark Aether Nexus.
- Transfer the energy to activate the final statue.
Initiating the Final Boss fight
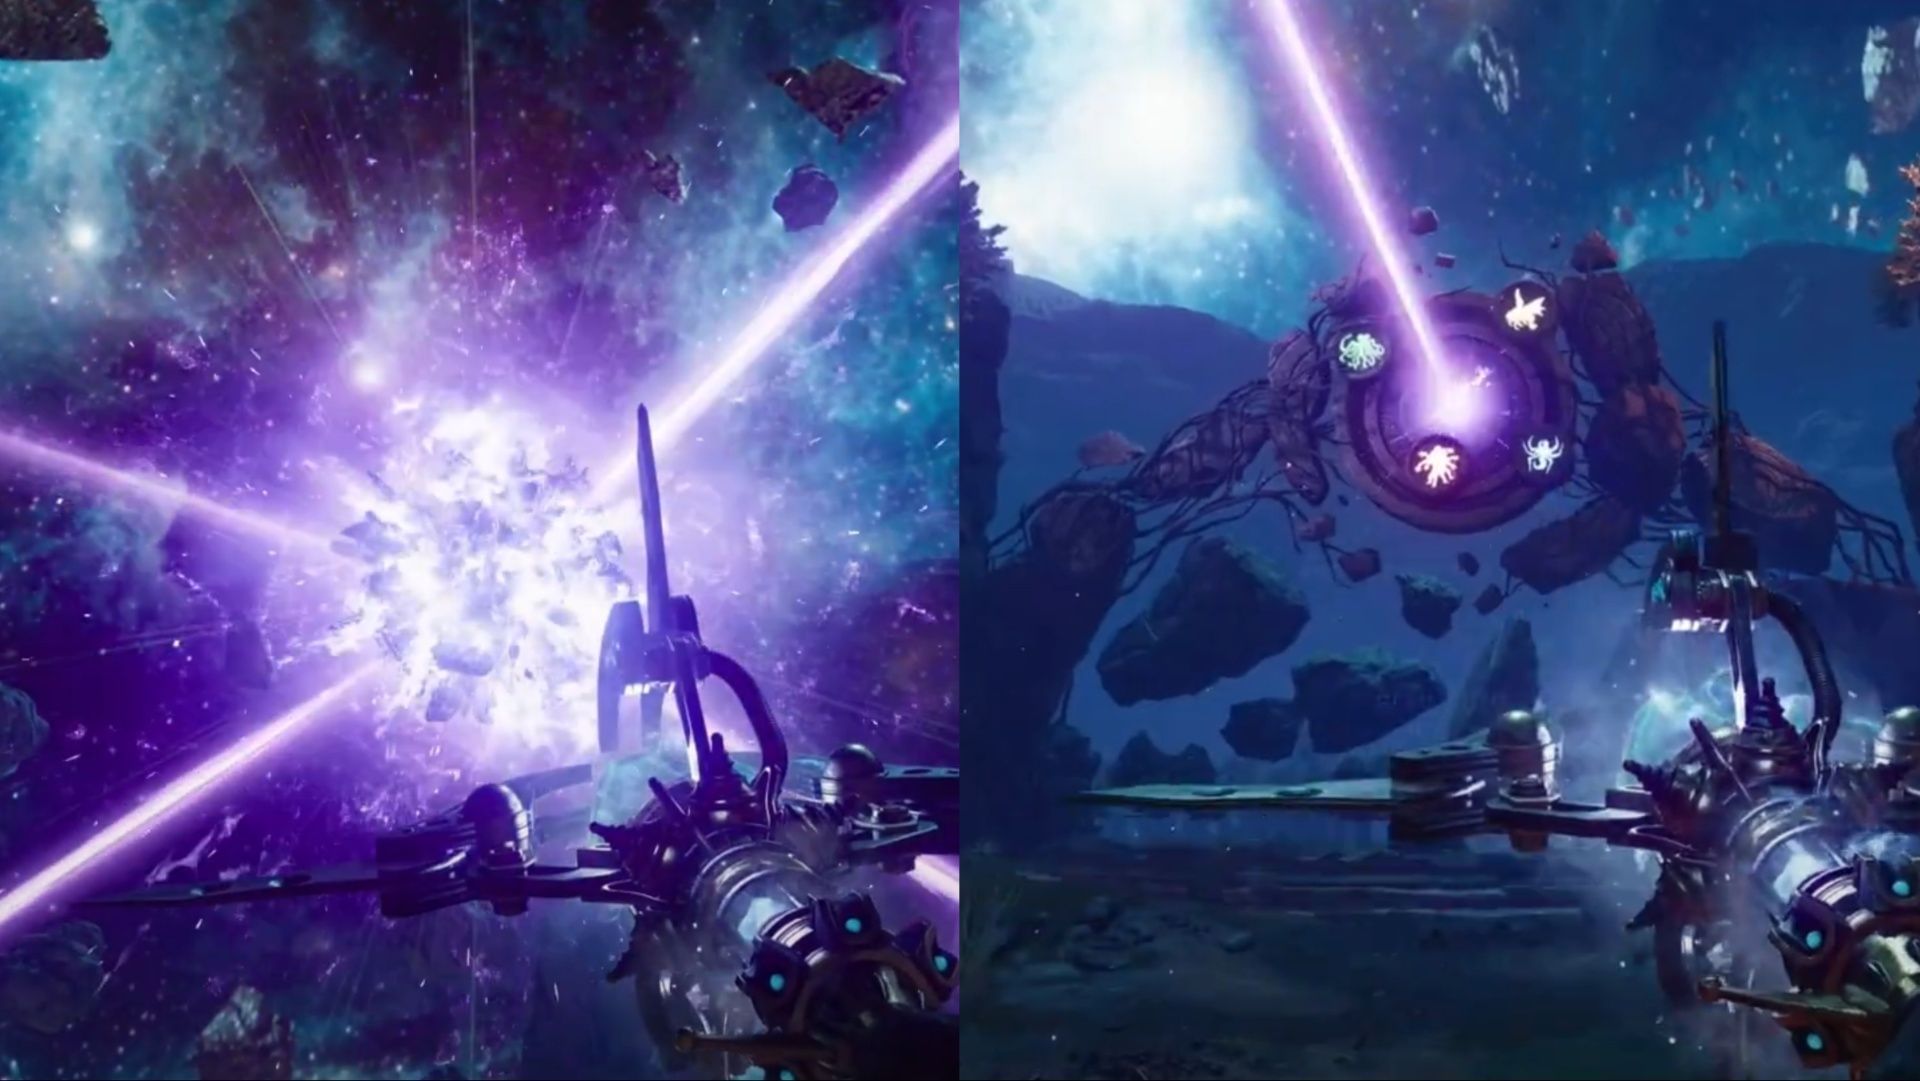
Once all four statues are activated, a massive purple laser will shoot into a gateway.
- Head toward the gateway, and you will find a pedestal.
- Interact with it to open the gateway, forming a bridge to a nearby location.
- Cross the bridge to find the Sentinel Artifact.
- Interact with the artifact. This will trigger the final boss fight.
The Sentinel Artifact itself is the final boss in Black Ops 6 Zombies The Tomb Easter Egg. Defeat this foe, and you will be able to collect the item of the same name. Once you’ve secured the Sentinel Artifact, the main quest of The Tomb will be completed.
That's everything there is to know about The Tomb main quest Easter Egg in Black Ops 6 Zombies.
Follow Sportskeeda and check out our other Call of Duty articles:
- All Warzone Ranked Play changes in Season 4 Reloaded: SR adjustments, Restrictions, and more
- King of the Dead event in Black Ops 6 Zombies: All details explored
- CODToons event in Warzone and Black Ops 6: All rewards and how to get them
- All new weapon attachments in Warzone and Black Ops 6 Season 4 Reloaded and how to unlock
- How big is the Warzone and Black Ops 6 Season 4 Reloaded update? File sizes for all platforms explored
- Shattered Veil main quest Easter Egg walkthrough - Black Ops 6 Zombies guide
- 5 things that you might have missed in Black Ops 7 reveal trailer: Potential Warzone map, Tranzit's return, and more