'%20x='0'%20y='0'%20height='100%25'%20width='100%25'%20%0A%20%20%20%20%20%20%20%20%20%20xlink%3Ahref='data:image/jpg;base64,/9j/2wBDAAYEBQYFBAYGBQYHBwYIChAKCgkJChQODwwQFxQYGBcUFhYaHSUfGhsjHBYWICwgIyYnKSopGR8tMC0oMCUoKSj/2wBDAQcHBwoIChMKChMoGhYaKCgoKCgoKCgoKCgoKCgoKCgoKCgoKCgoKCgoKCgoKCgoKCgoKCgoKCgoKCgoKCgoKCj/wgARCAAGAAoDASIAAhEBAxEB/8QAFgABAQEAAAAAAAAAAAAAAAAAAAIH/8QAFQEBAQAAAAAAAAAAAAAAAAAAAwT/2gAMAwEAAhADEAAAAMCgaD//xAAaEAADAQADAAAAAAAAAAAAAAABAhIAA0FD/9oACAEBAAE/AFJShyS0joaUPmu//8QAFhEAAwAAAAAAAAAAAAAAAAAAAAIS/9oACAECAQE/ALY//8QAFREBAQAAAAAAAAAAAAAAAAAAAEH/2gAIAQMBAT8Ar//Z'%3E%3C/image%3E%3C/svg%3E)
Null and Void is one of the more story-driven faction quests in Borderlands 4, related to the Outbounders. In this quest, you will team up with Rush to locate a missing ally named Conway. Along the way, you’ll uncover her ECHO logs, fight a bunch of Rippers, and take on their boss named Chugs.
In this guide, we will break down how to get the quest, how to finish every objective, how to solve the puzzles, and what rewards you get at the end of the quest in Borderlands 4.
Borderlands 4: Null and Void quest guide
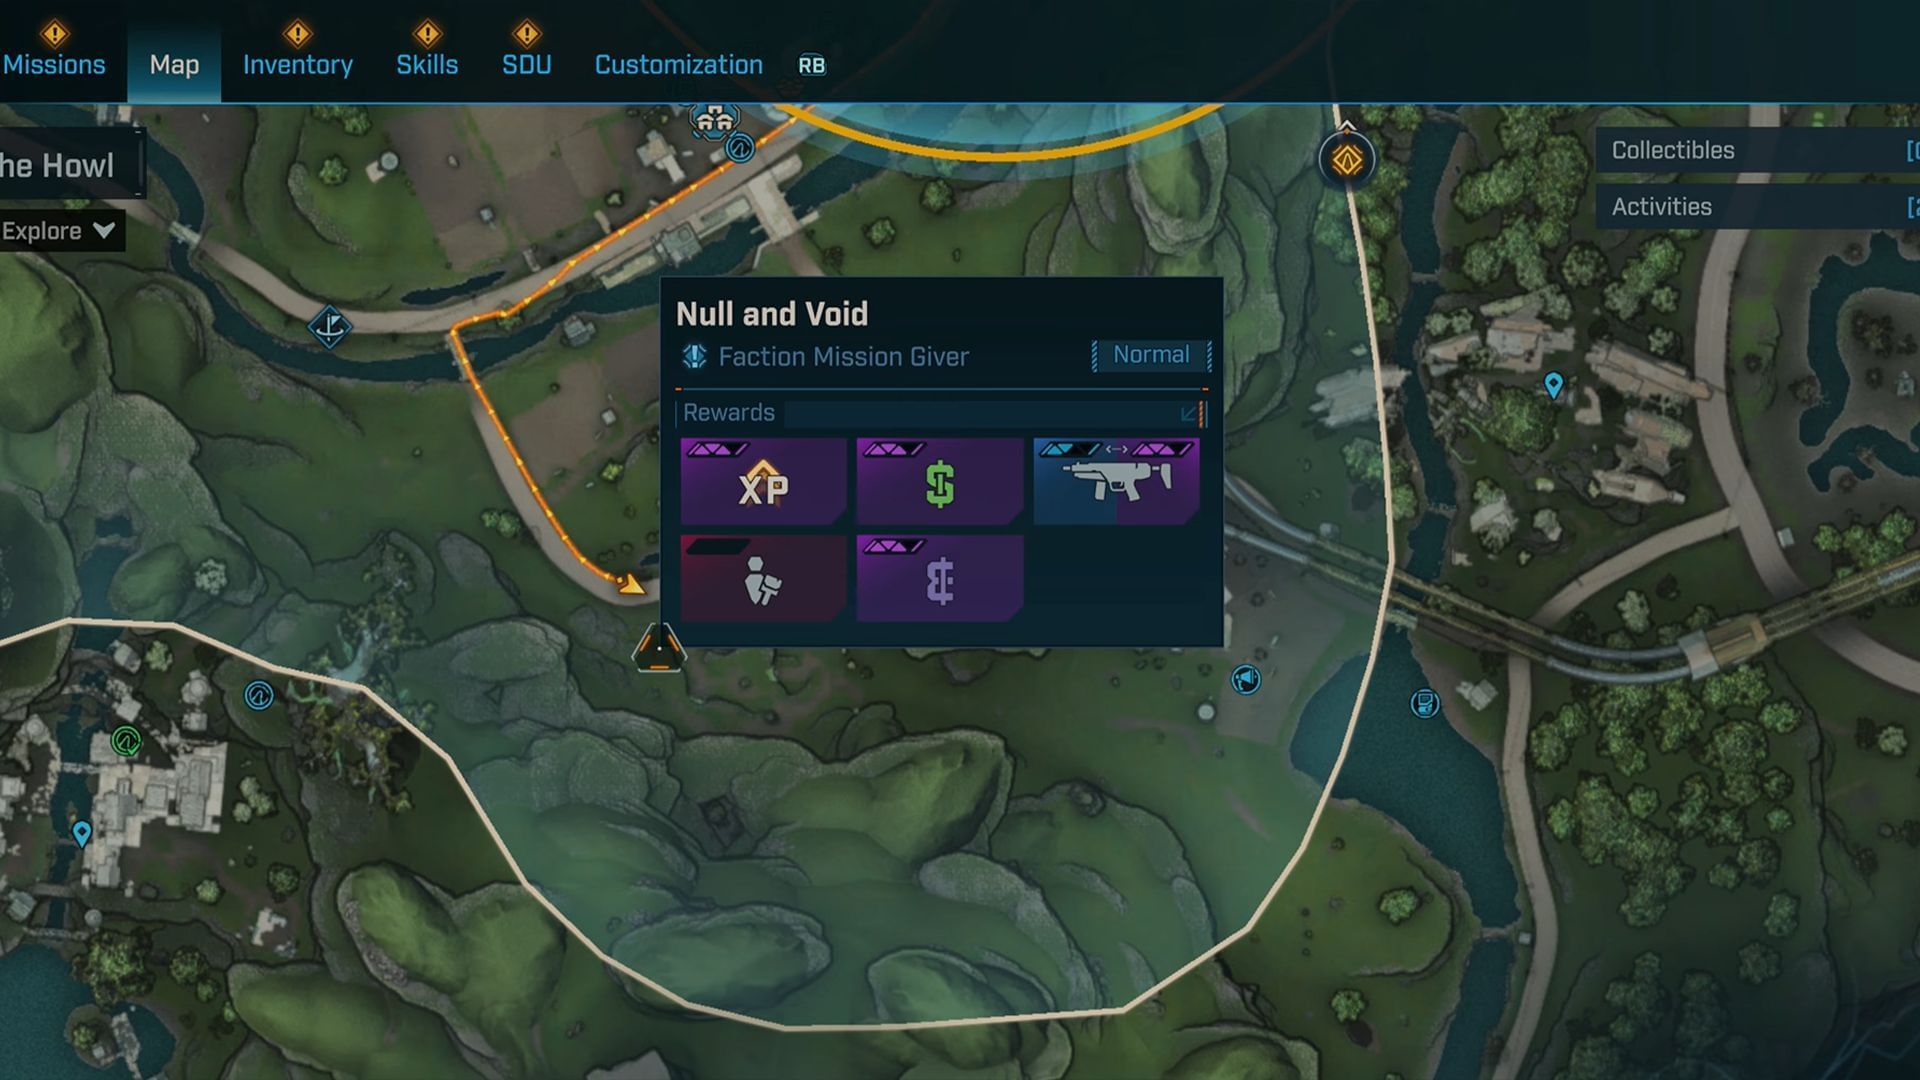
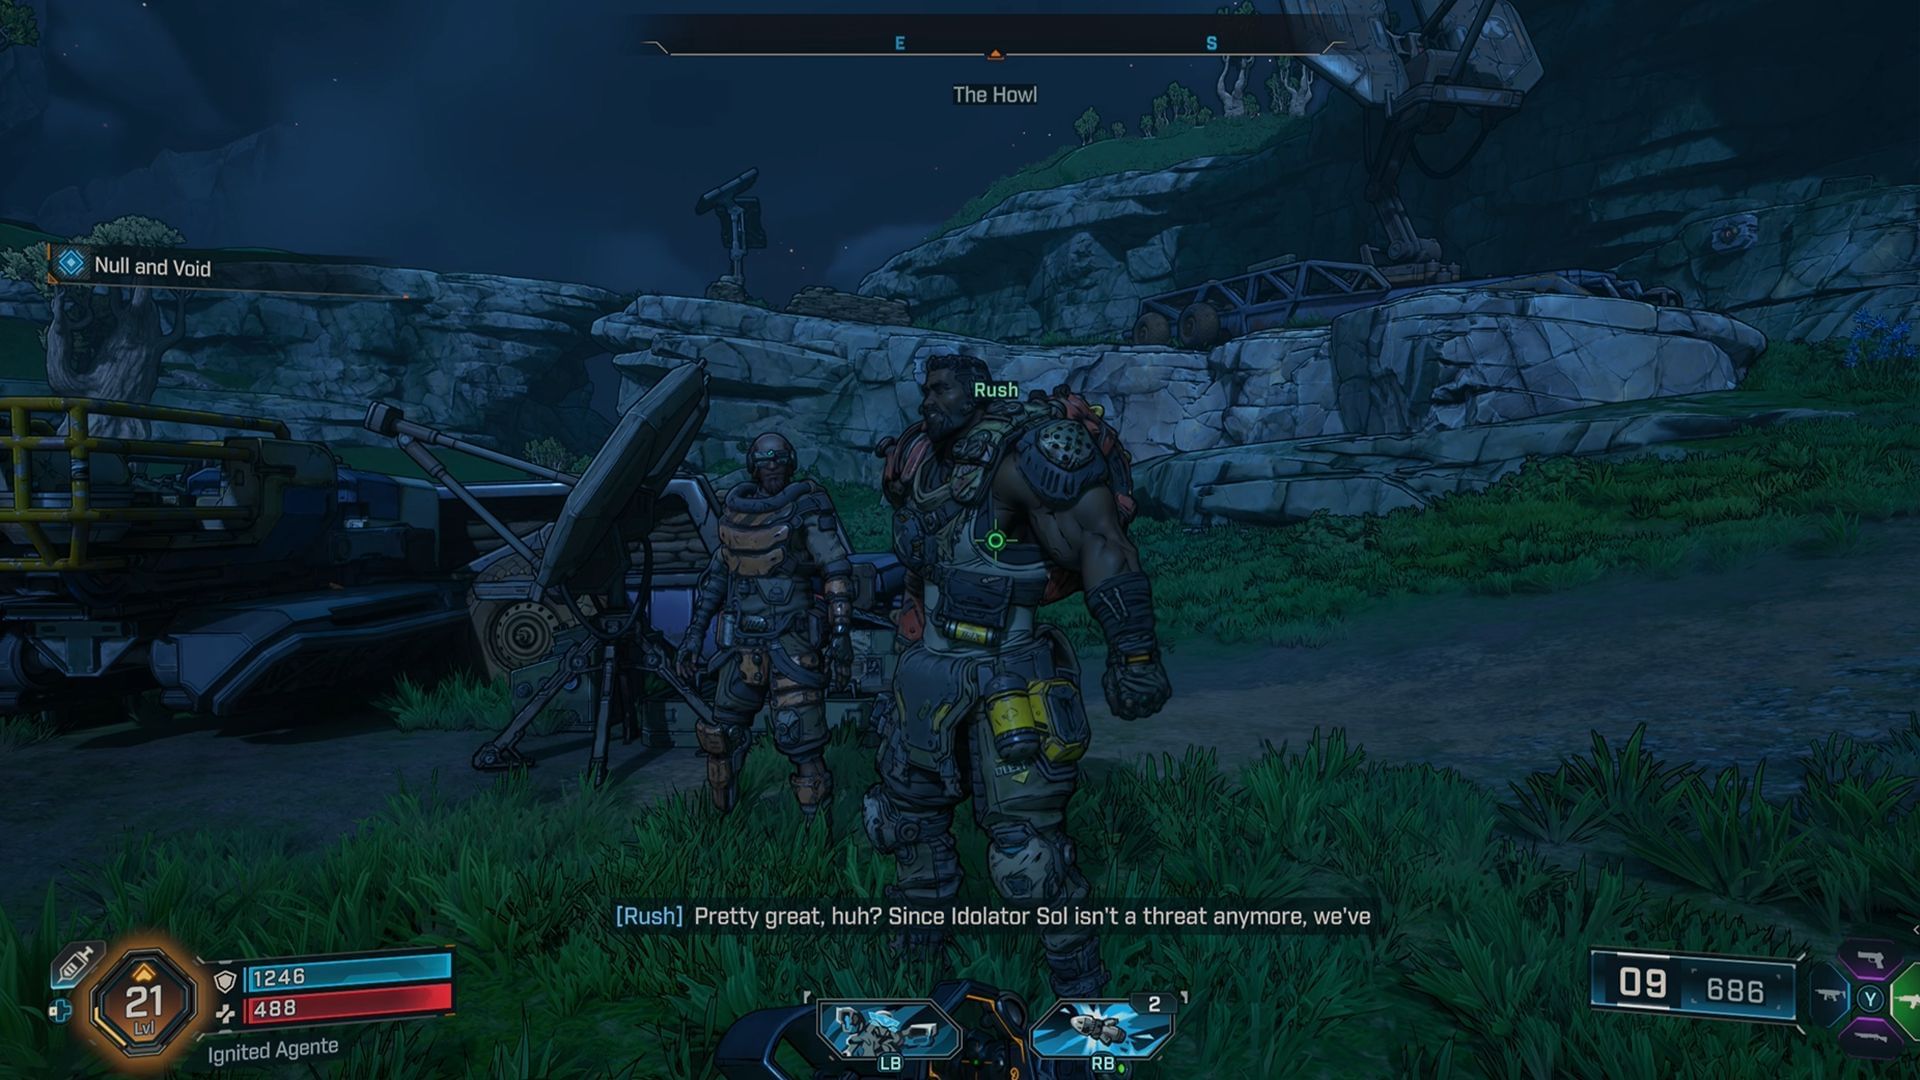
- Quest giver: Rush
- Location: The Howl, south of the Outbounders headquarters in The Fadefields
- Prerequisites: Complete Main Quest 6: Rush the Gate
- Recommended level: 12 - 14
- Time to complete the quest: 20 - 25 minutes
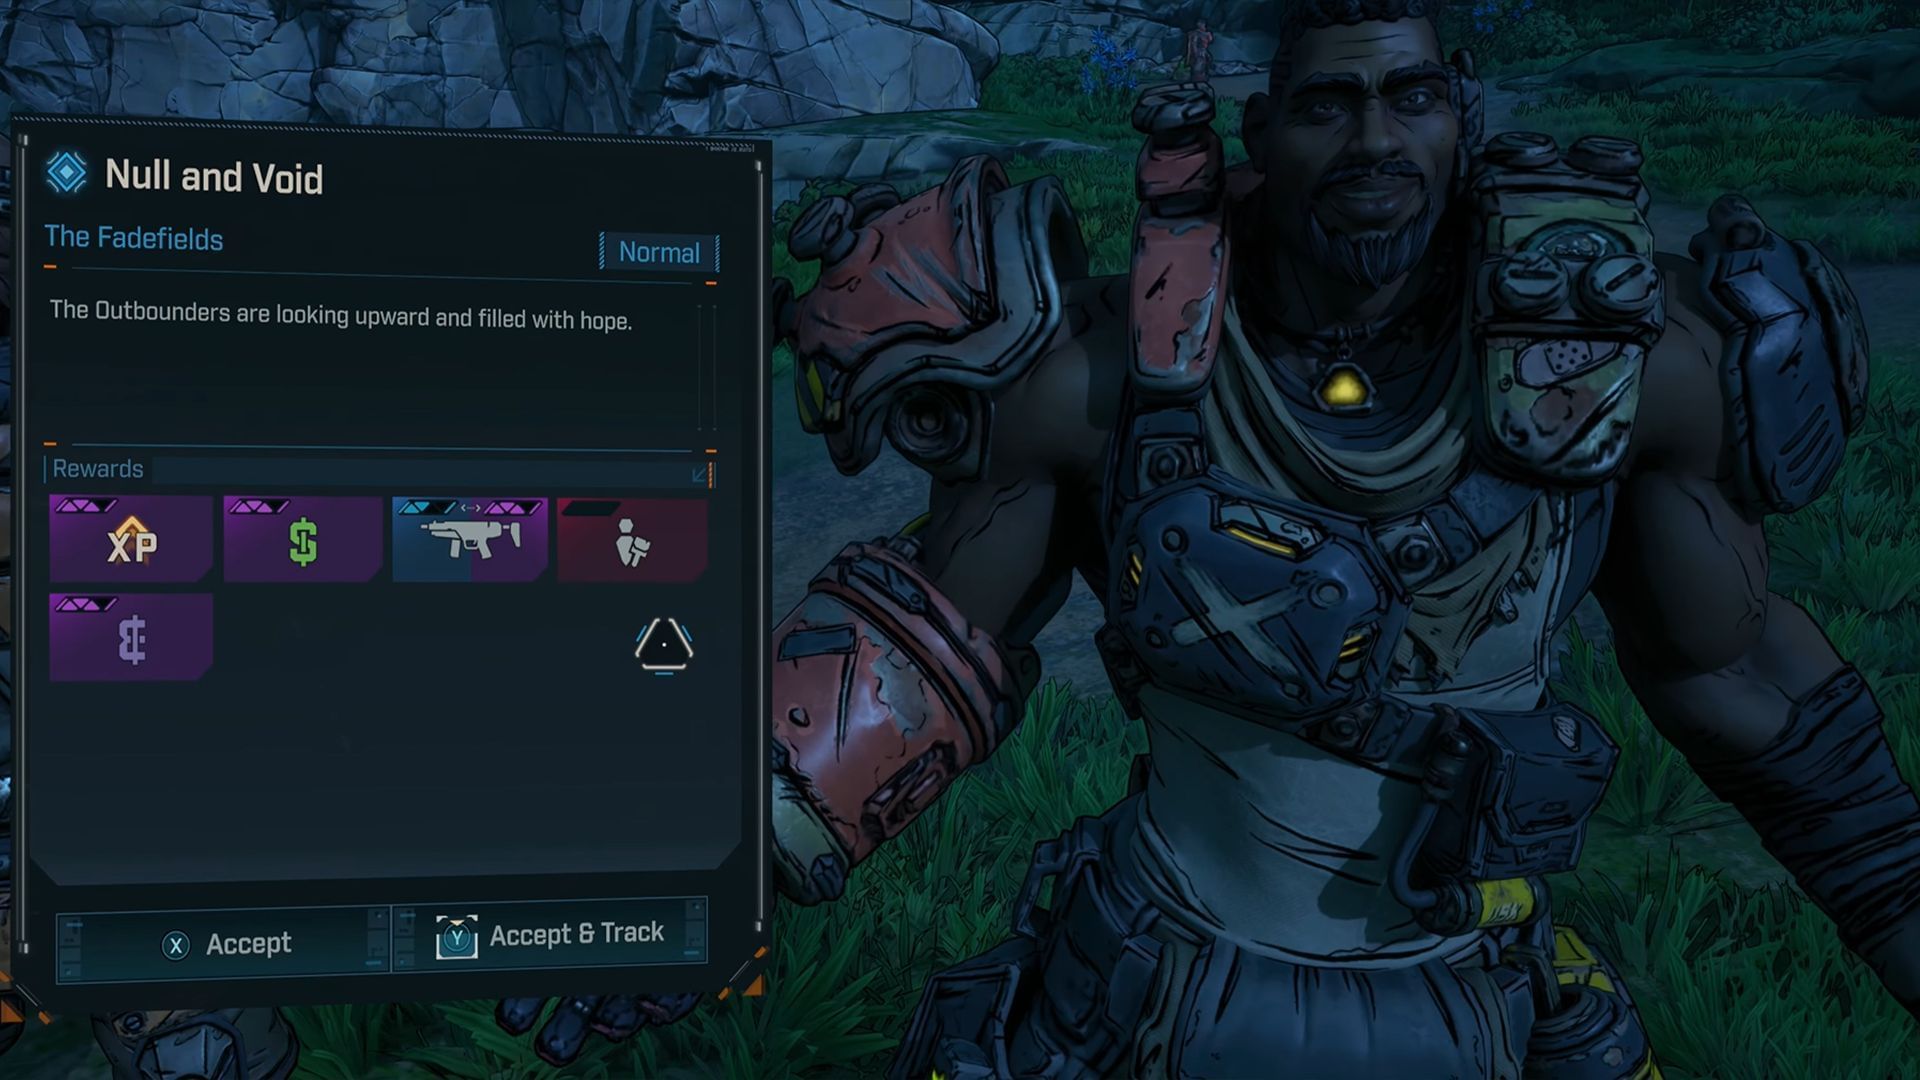
Talk to Rush on the roadside outside the Outbounders HQ to start the quest. He’ll set you off on the trail of Conway. The quest is separated into two sections: finding where Conway went and freeing her from captivity. Here’s how to do the quest:
Stage 1: Find Conway’s last known location

- Head towards the Wreck of the Nostalgia, east of The Howl.
- Eliminate all enemies in the area.
- Locate the destroyed building, where you can also find a bed.
Tip:
- Multiple armored enemies will spawn in this area, so make sure you have elemental weapons.
Also Read - Borderlands 4 No Place Like Home walkthrough
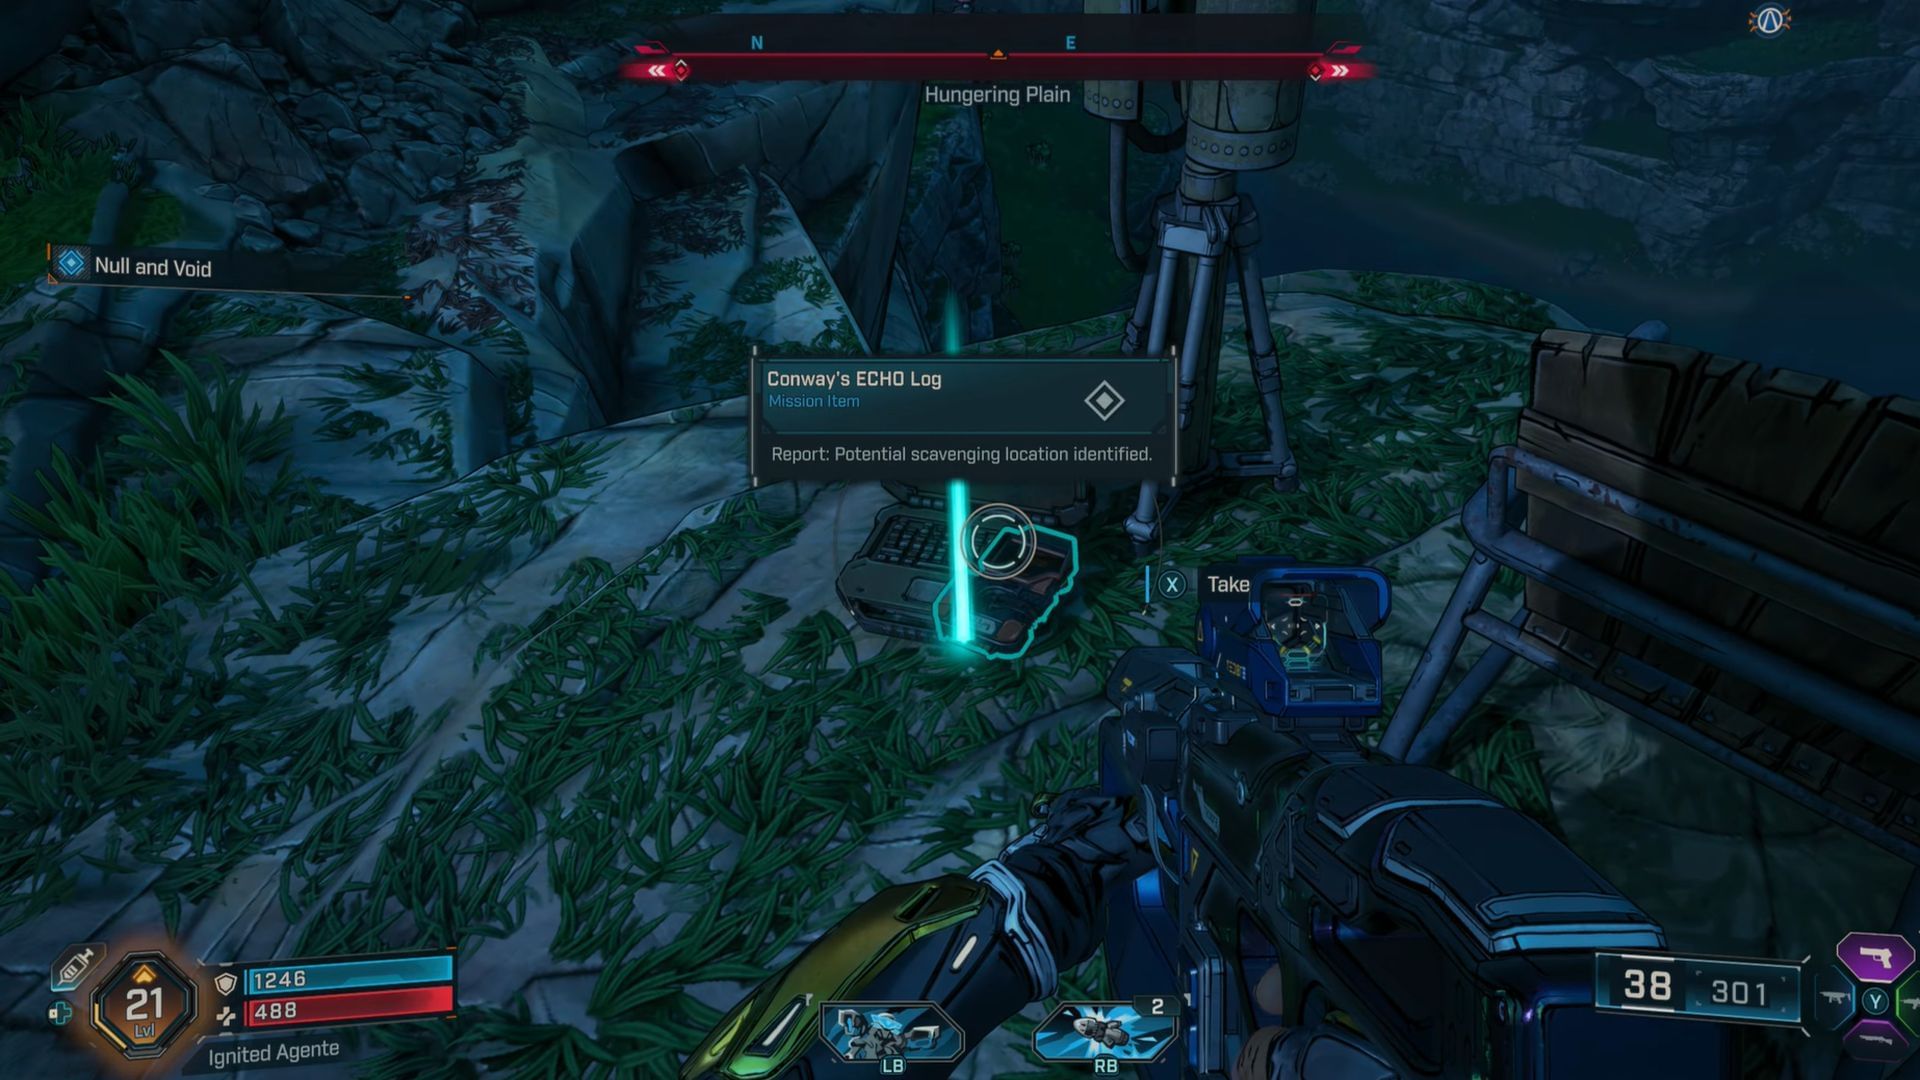
Stage 2: Acquire the first ECHO log of Conway
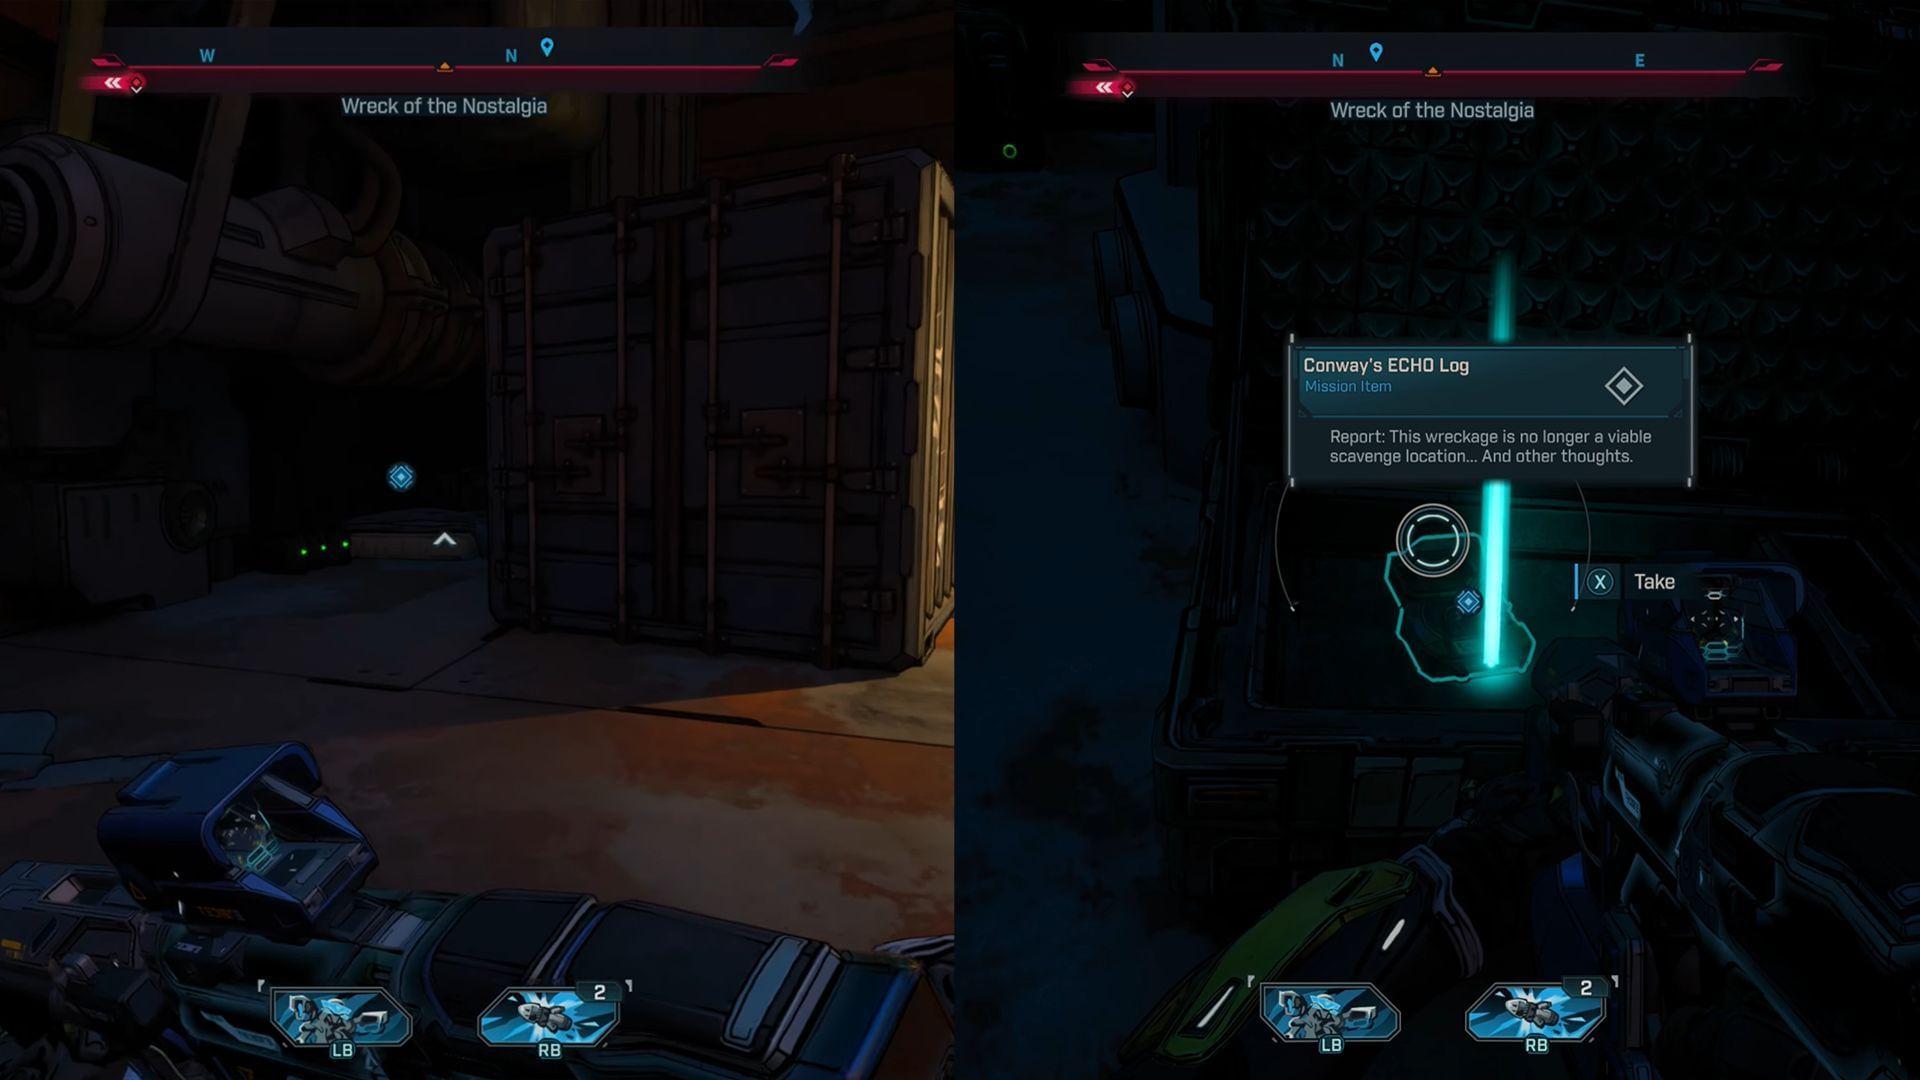
- The glowing ECHO log will be located just beside the bed.
- Pick it up, and it’ll trigger the next objective.
Note: You'll need to jump up to the first floor of the broken building to reach the bed.
Also read - Borderlands 4 co-op: How to play with your friends
Stage 3: Reach the next location
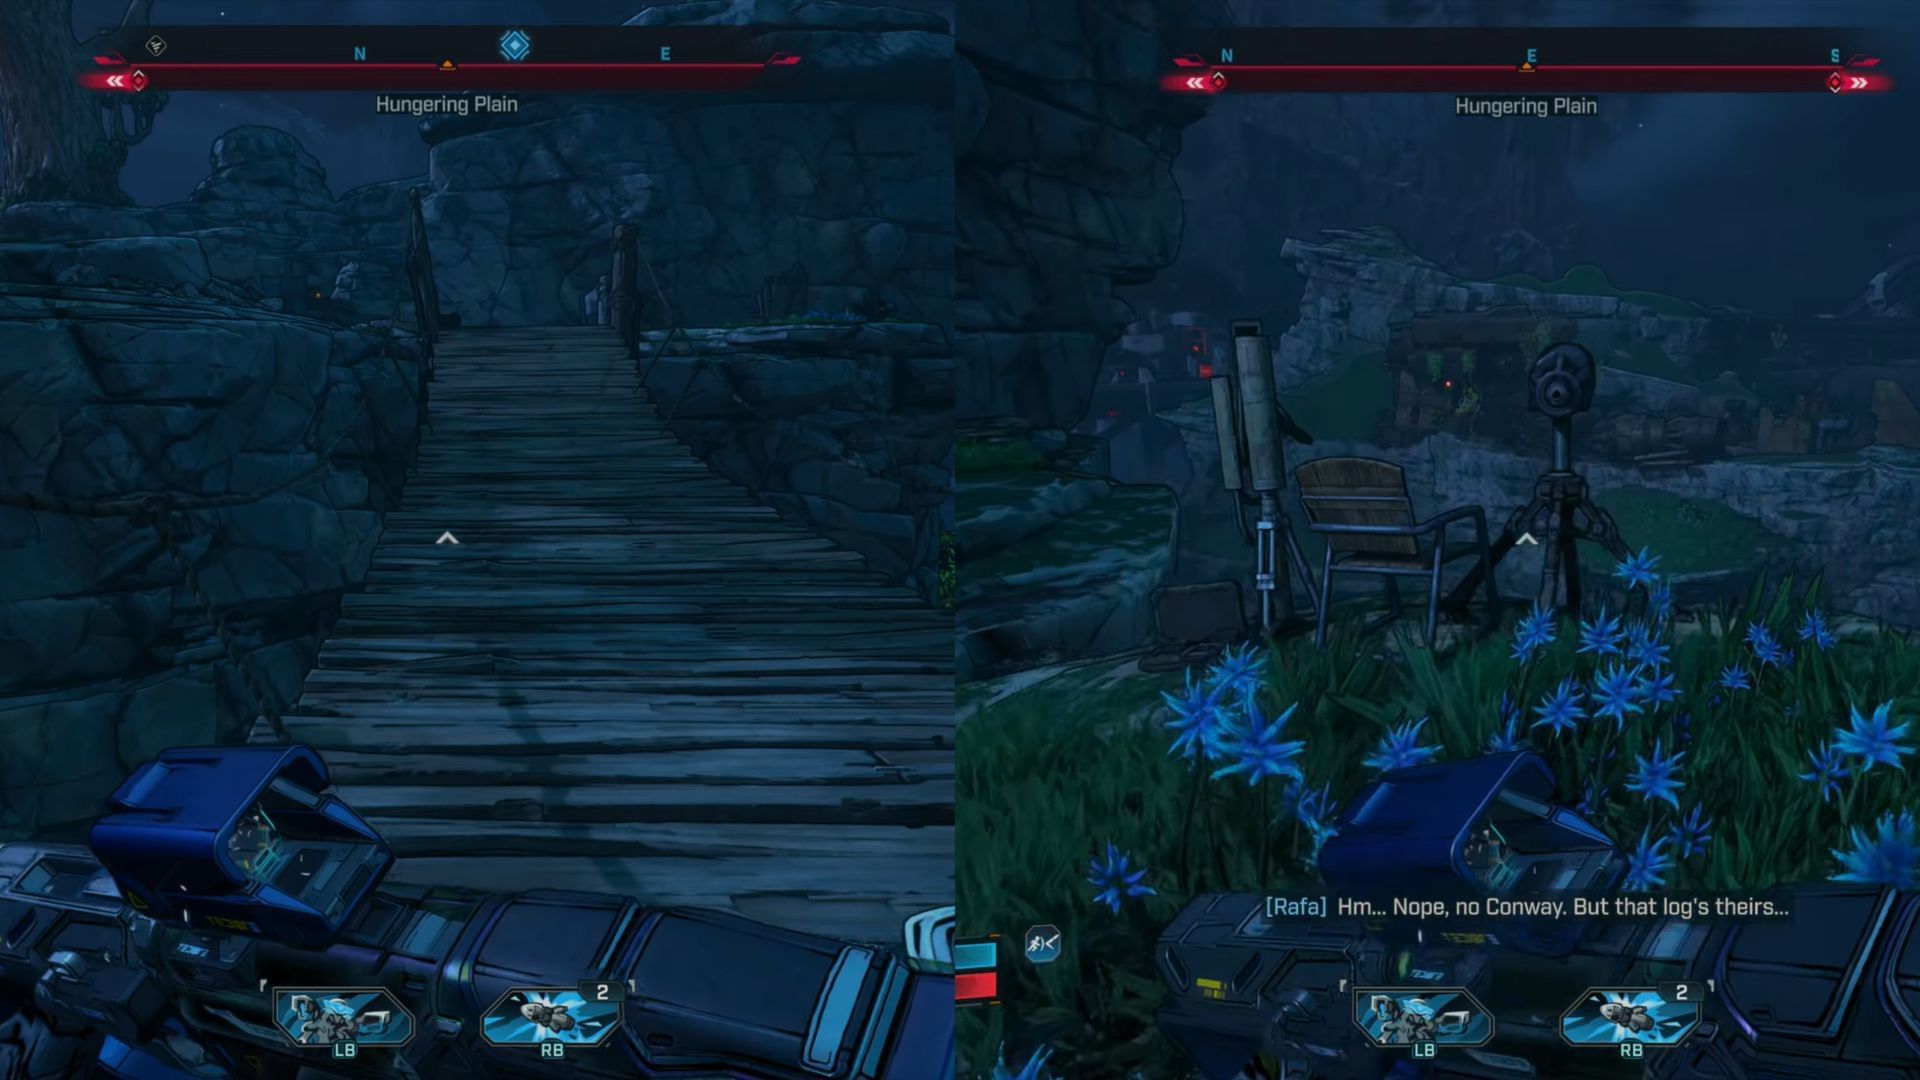
- Travel to the northeast region of the Hungering Plain.
- The cliffside camp can be reached via the wooden bridge nearby.
- Once inside the camp, you’ll find a camping chair and a telescope near the edge of the cliff.
Stage 4: Acquire the second ECHO log of Conway
- The ECHO log is located by the chair.
- Pick it up to get the next objective location.
Also read - Borderlands 4: How to farm bosses for Legendary gear (Moxxi's Encore)
Stage 5: Reach the next location
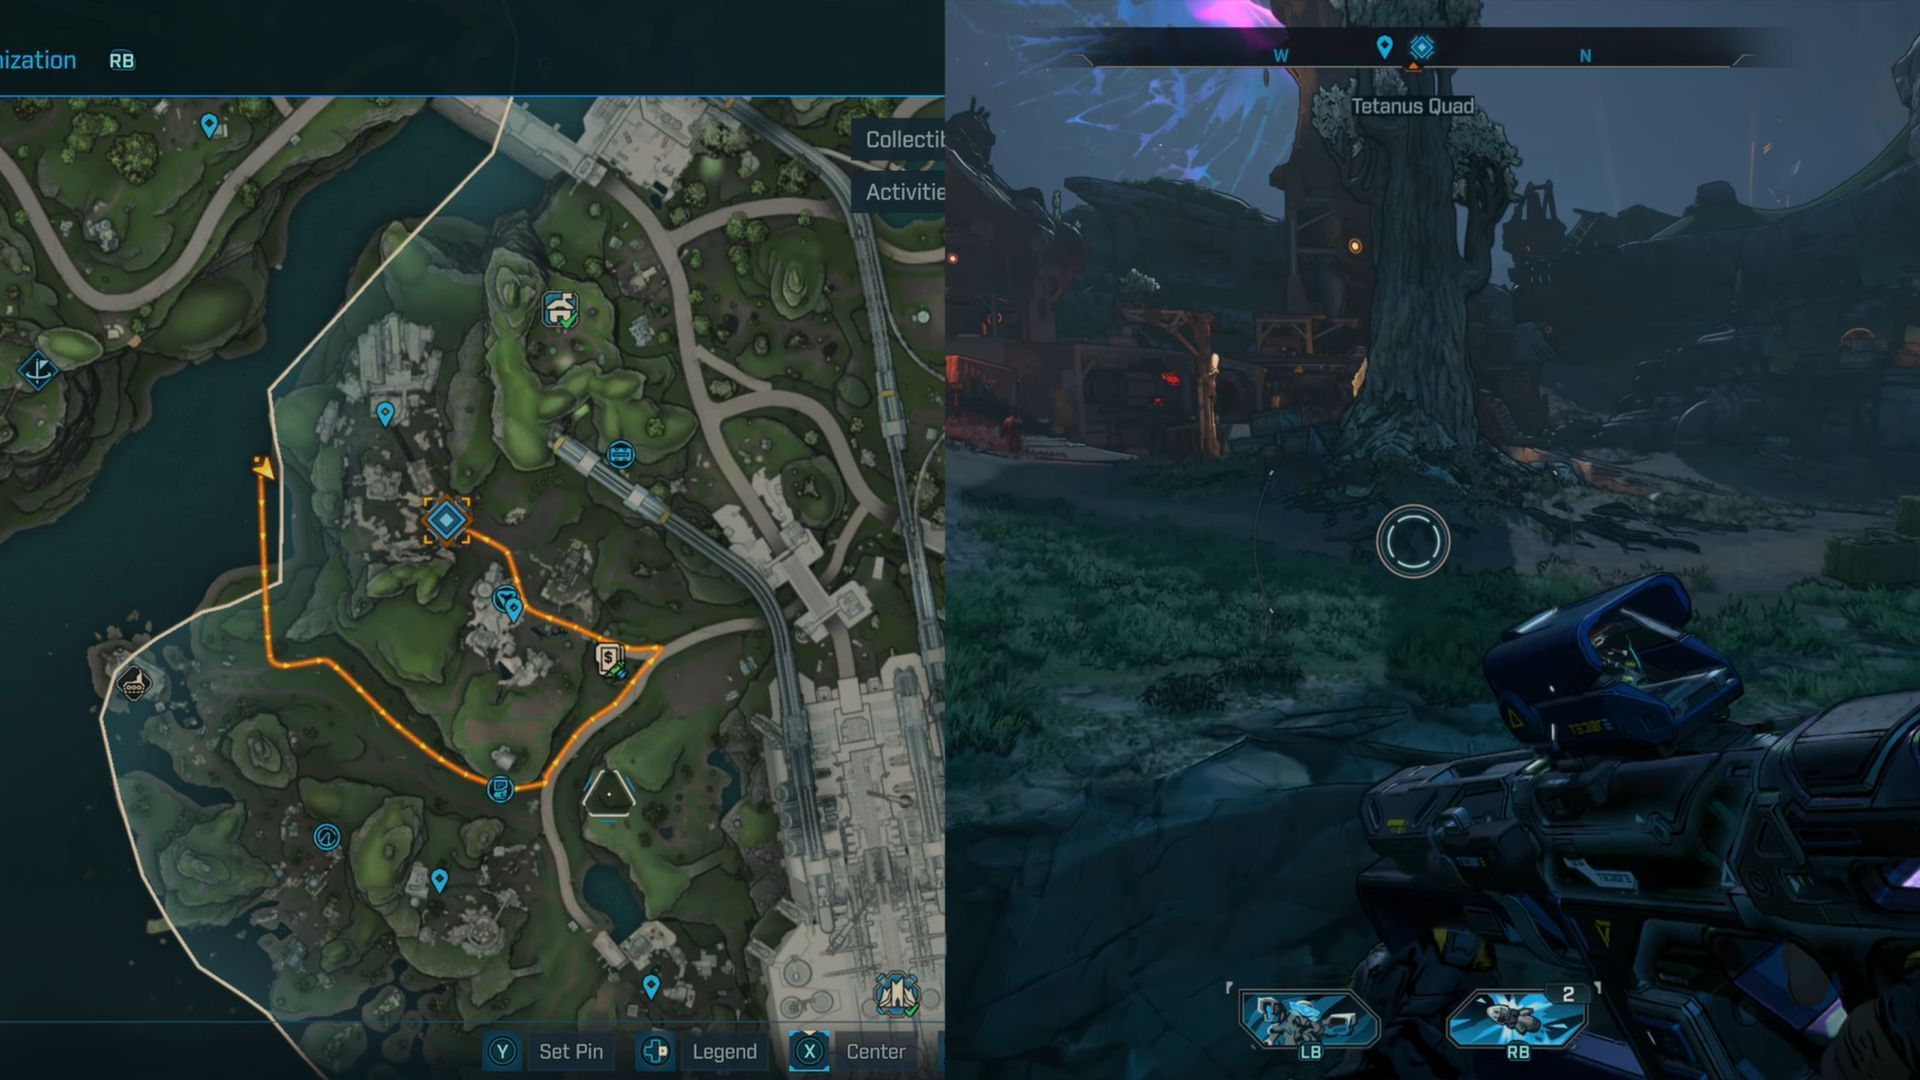
- Next you’ll need to head further east, towards Idolator’s Noose.
- The objective will be pointing you towards a metal building with a locked door.
- Near the entrance you’ll find a glowing intercom console.
Note: You’ll be fighting enemies, so be prepared.
Stage 6: Use the intercom
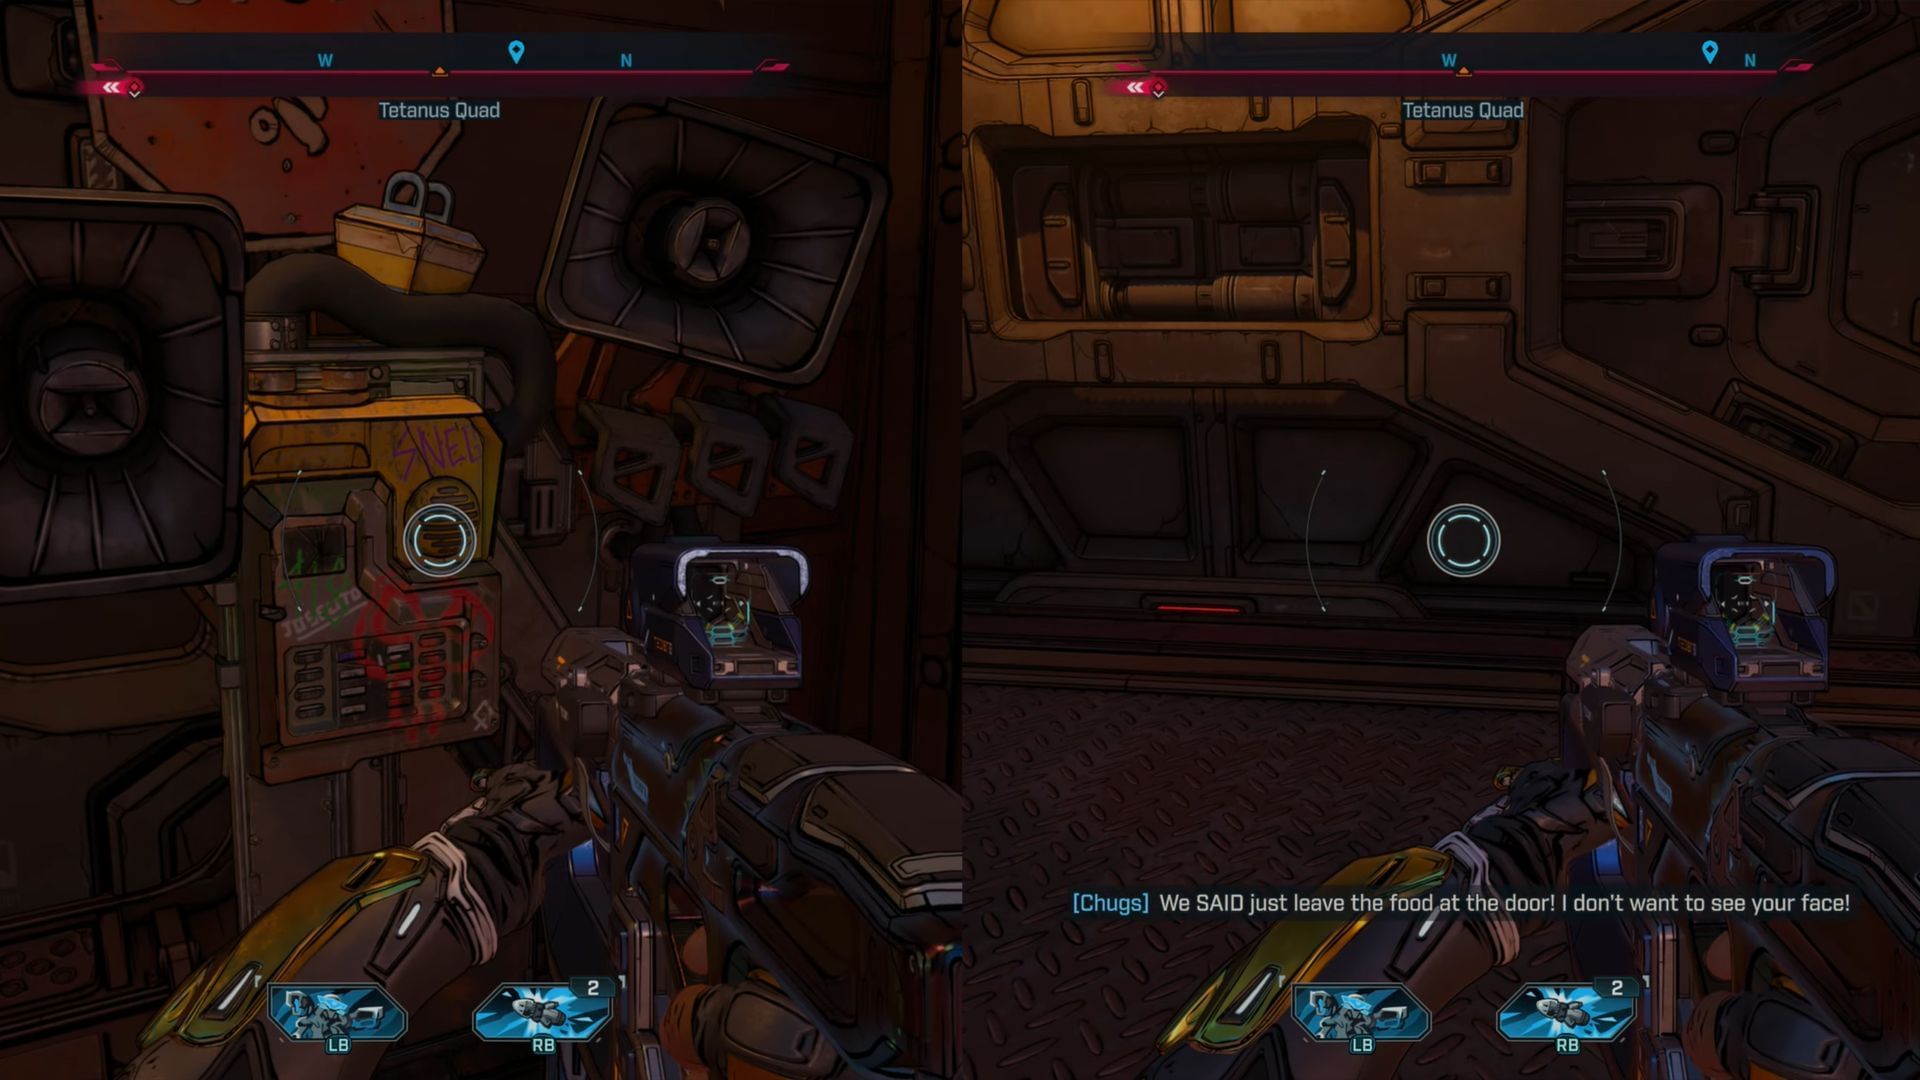
- Interact with the intercom to proceed.
- A ripper named Chugs will answer and mistake you for the food delivery person.
- To proceed further into the quest, you’ll need to retrieve their food order.
Also read - Borderlands 4 Finway's Cup walkthrough
Stage 7: Find the ripper’s food
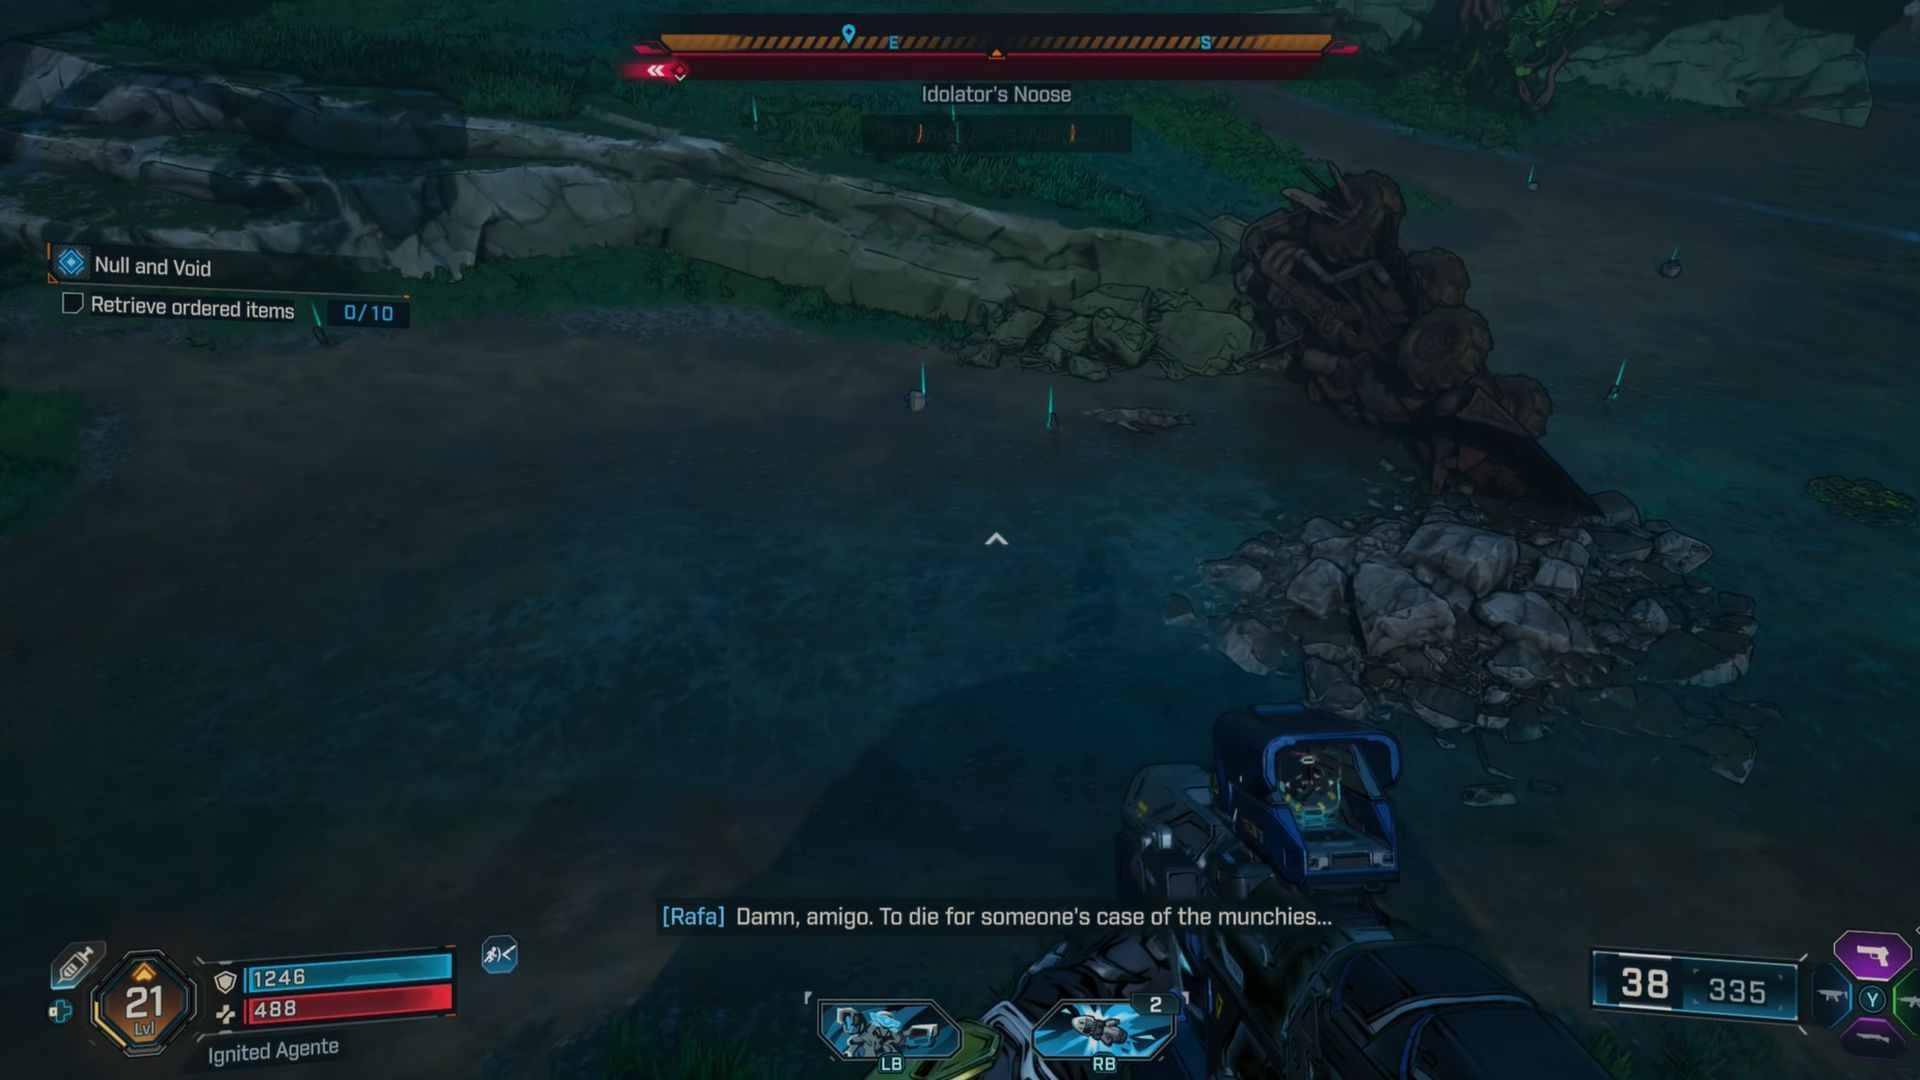
- Go south towards Rattlehead Crest along the coast.
- You’ll find a crashed vehicle with 10 glowing food crates.
- Collect them and go back to the intercom you found earlier.
Stage 8: Return the food to the rippers
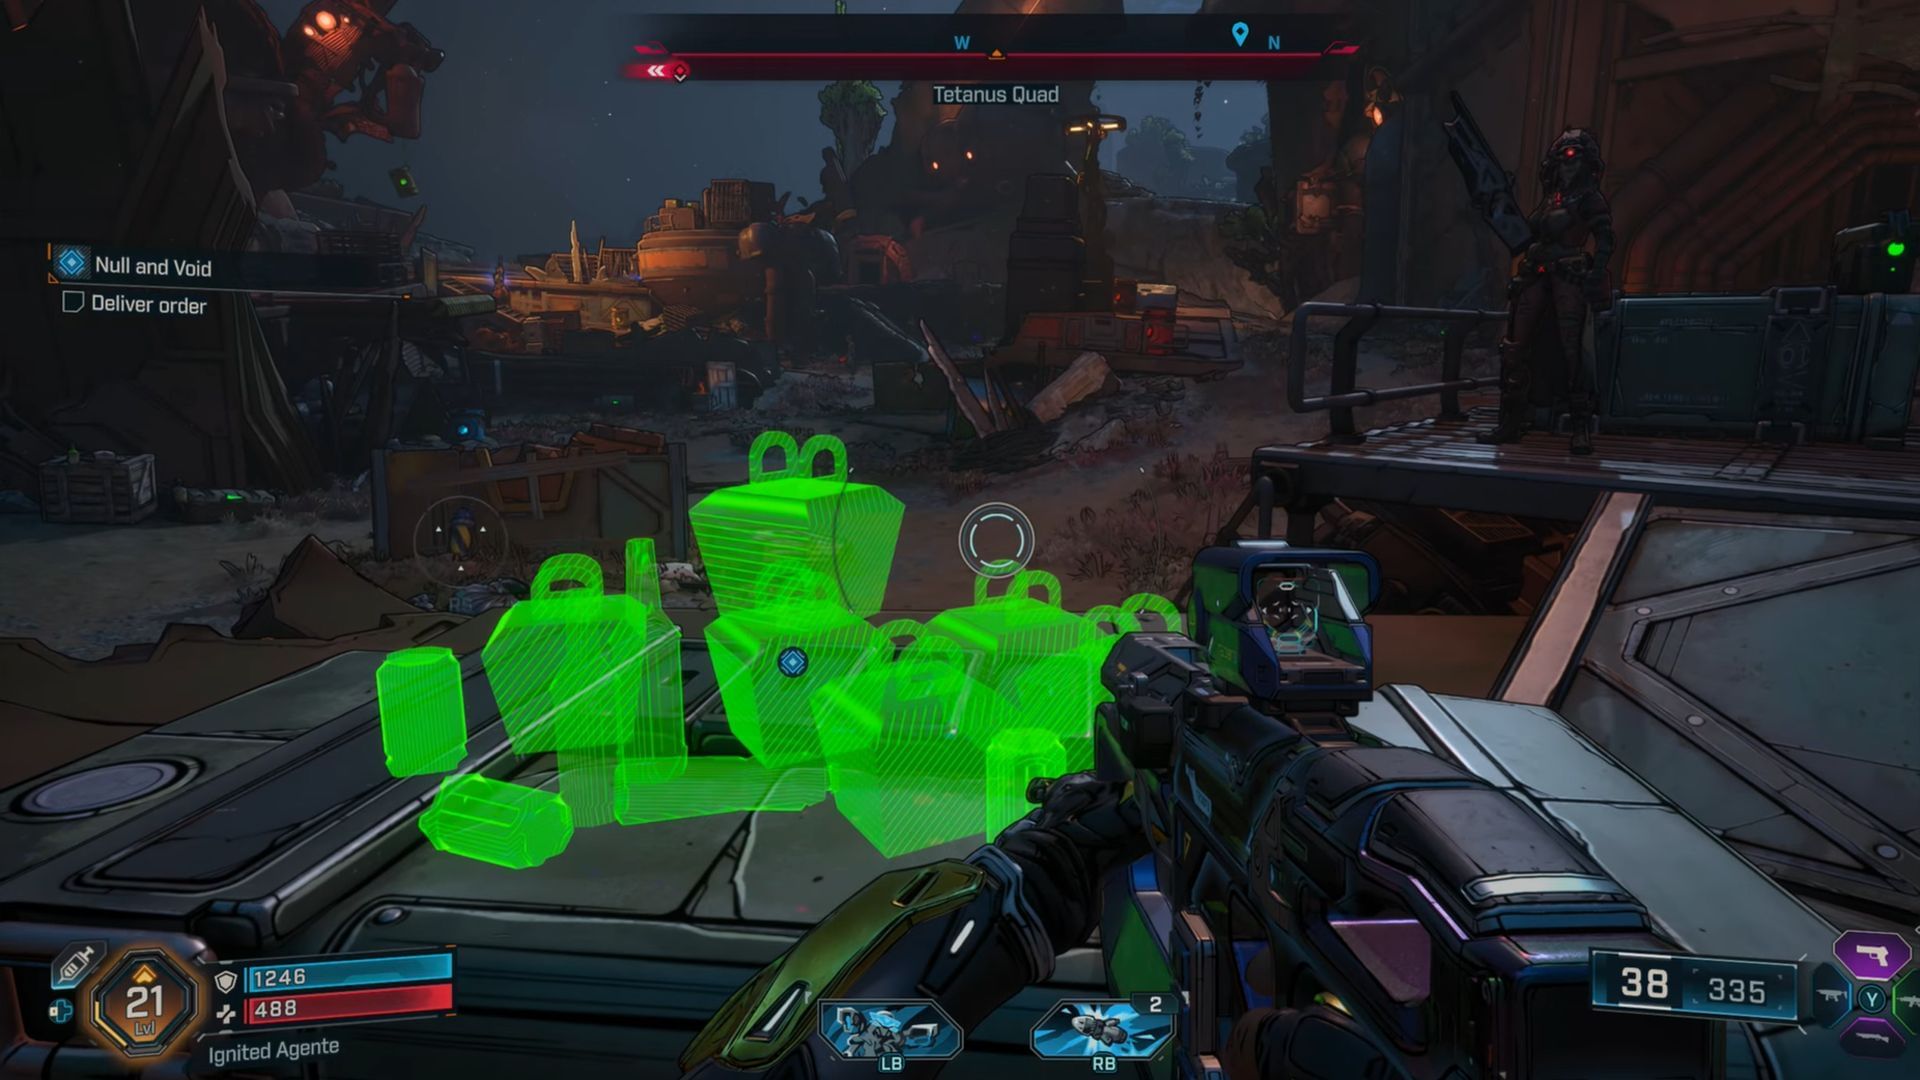
- Return to the intercom in Idolator’s Noose with the food.
- Leave the food inside the marked container.
- Prepare for a fight since the rippers will ambush you.
Tip: Use long-range weapons or grenades to eliminate them quickly from a distance.
Stage 9: Speak with Conway
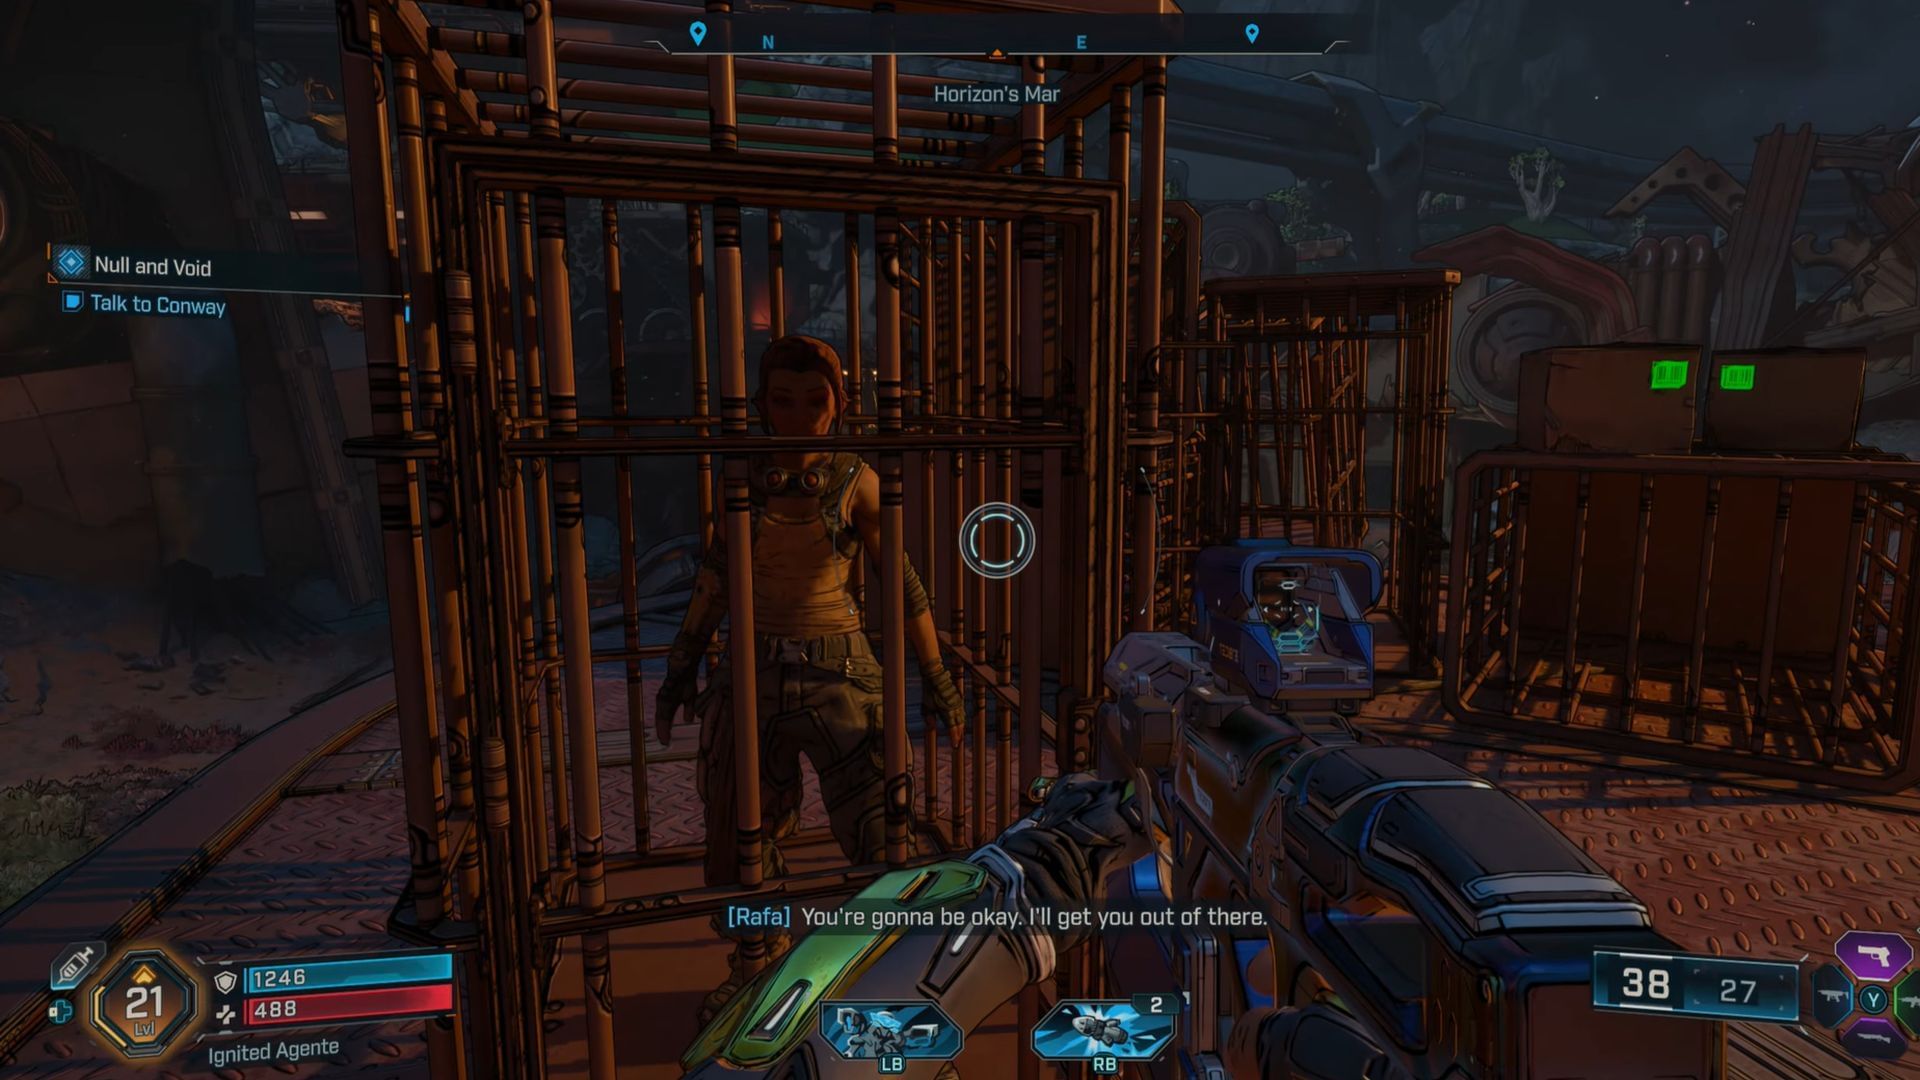
- After defeating all the rippers, you’ll need to head deeper inside the camp.
- Conway can be located trapped inside a cage.
- Talk to her to advance into the quest.
Stage 10: Follow the crane and Conway
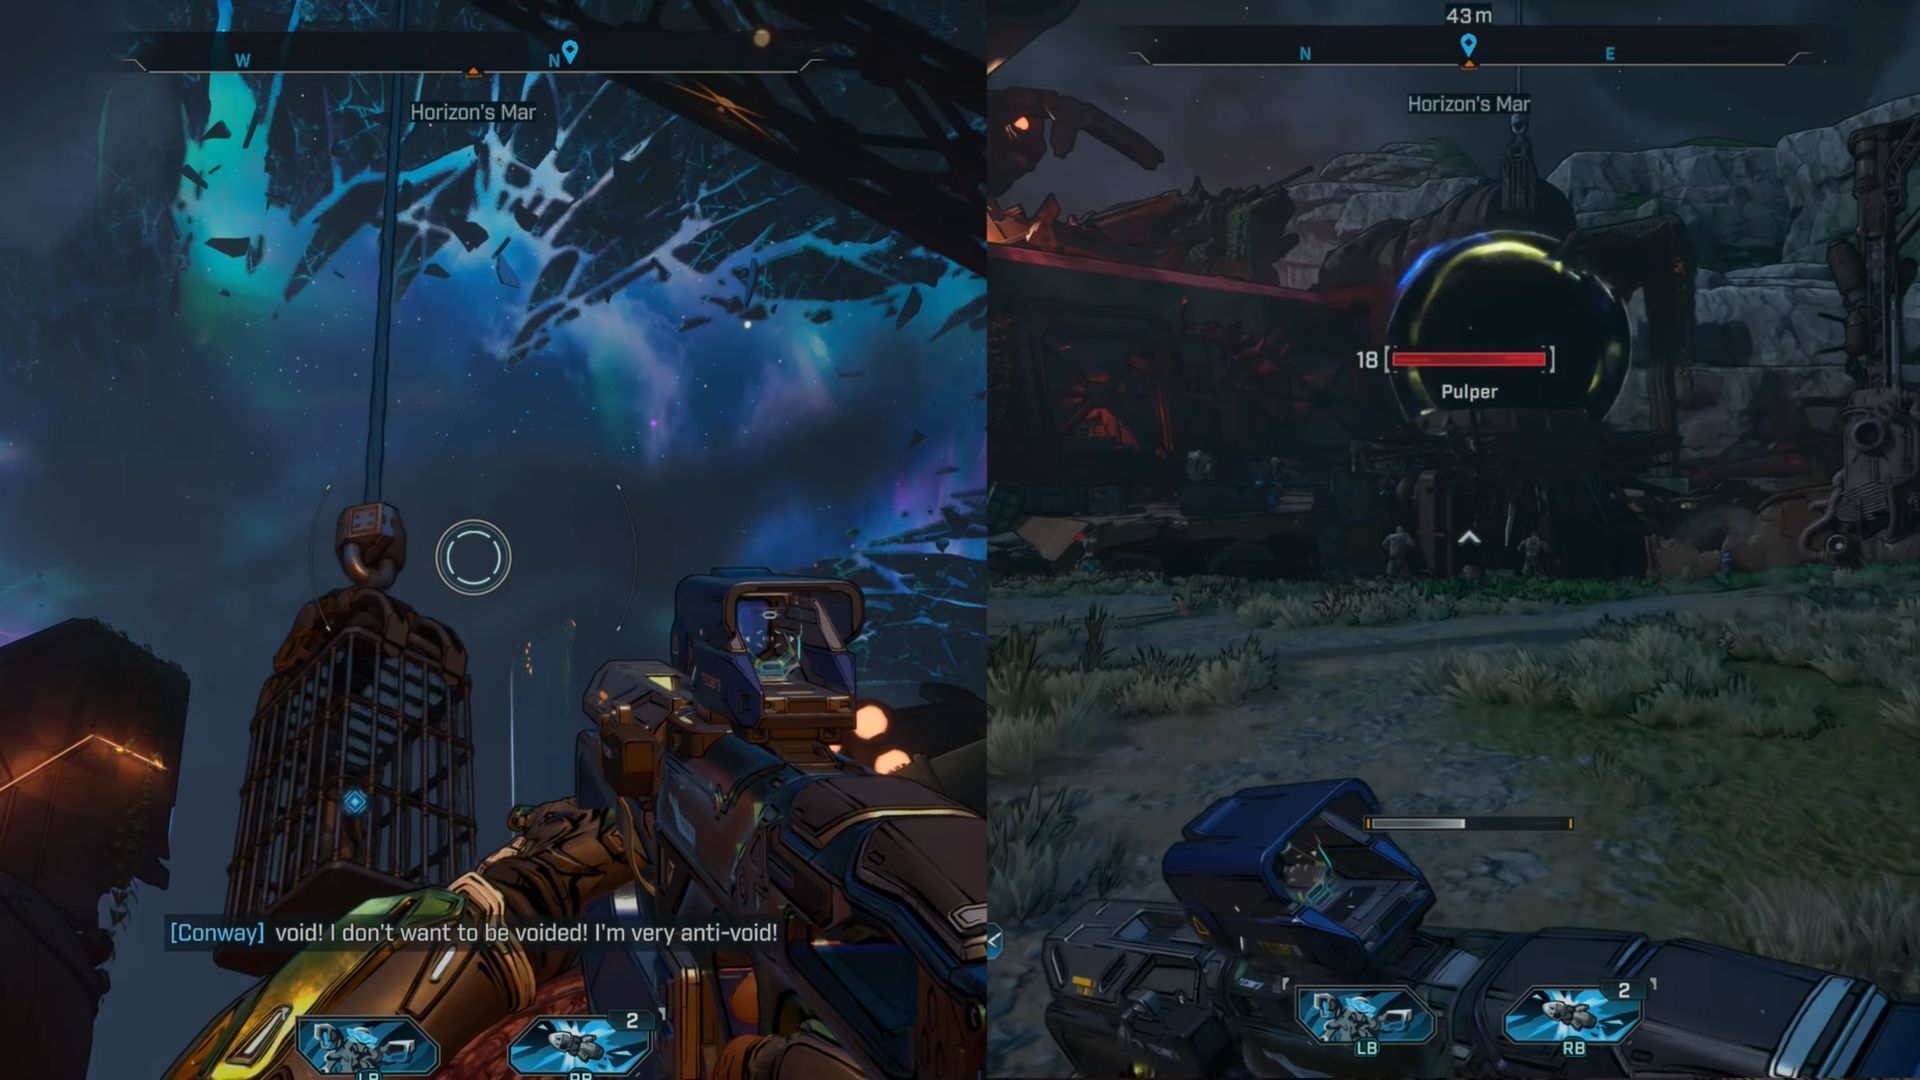
- The crane will drag Conway’s cage deeper inside the camp.
- Be ready to encounter enemies along the path.
- The crane will set the cage with Conway over a black hole.
Stage 11: Locate the crane controls, defeat Erector Ed, and flip the switch
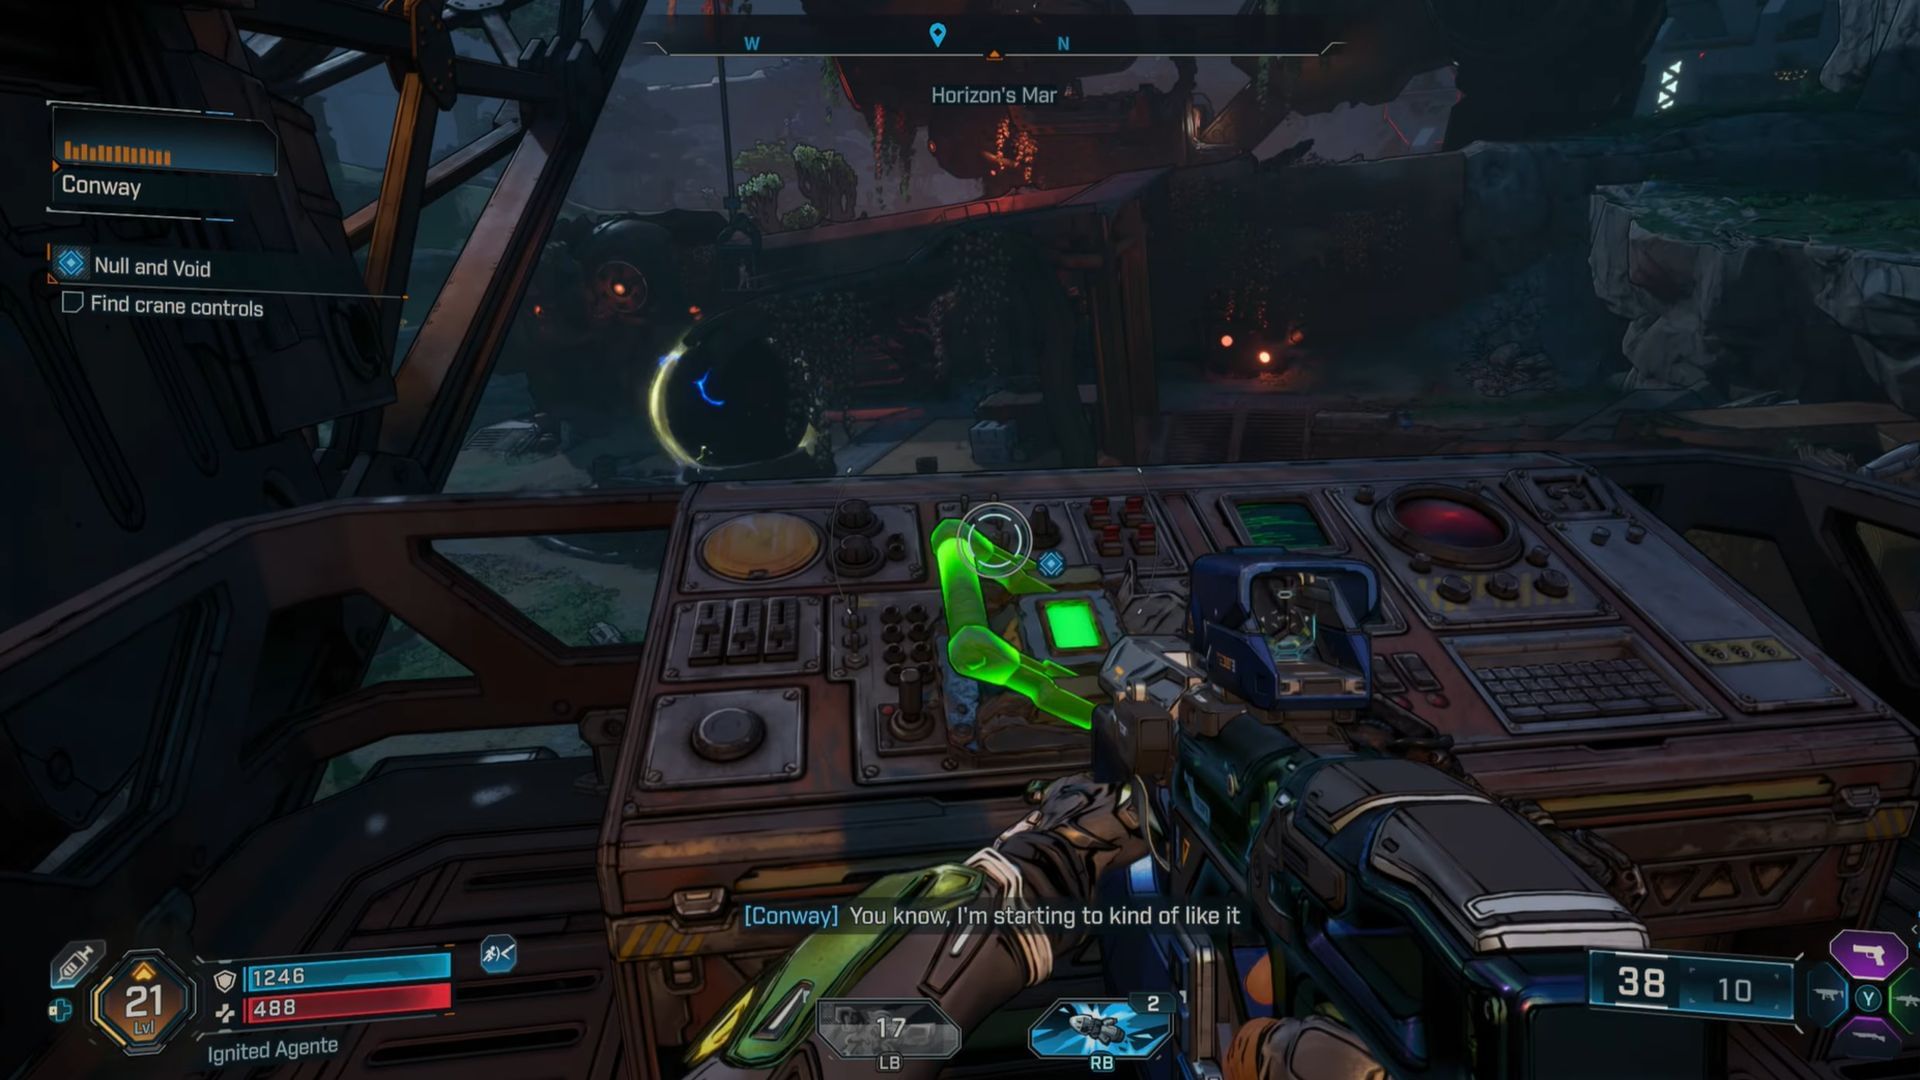
- Reach the base of the crane.
- The crane operator miniboss Erector Ed will ambush you.
- Beat him and gain access to the crane controls.
- Climb up to the crane’s platform.
- Once on top of the crane, flip the switch.
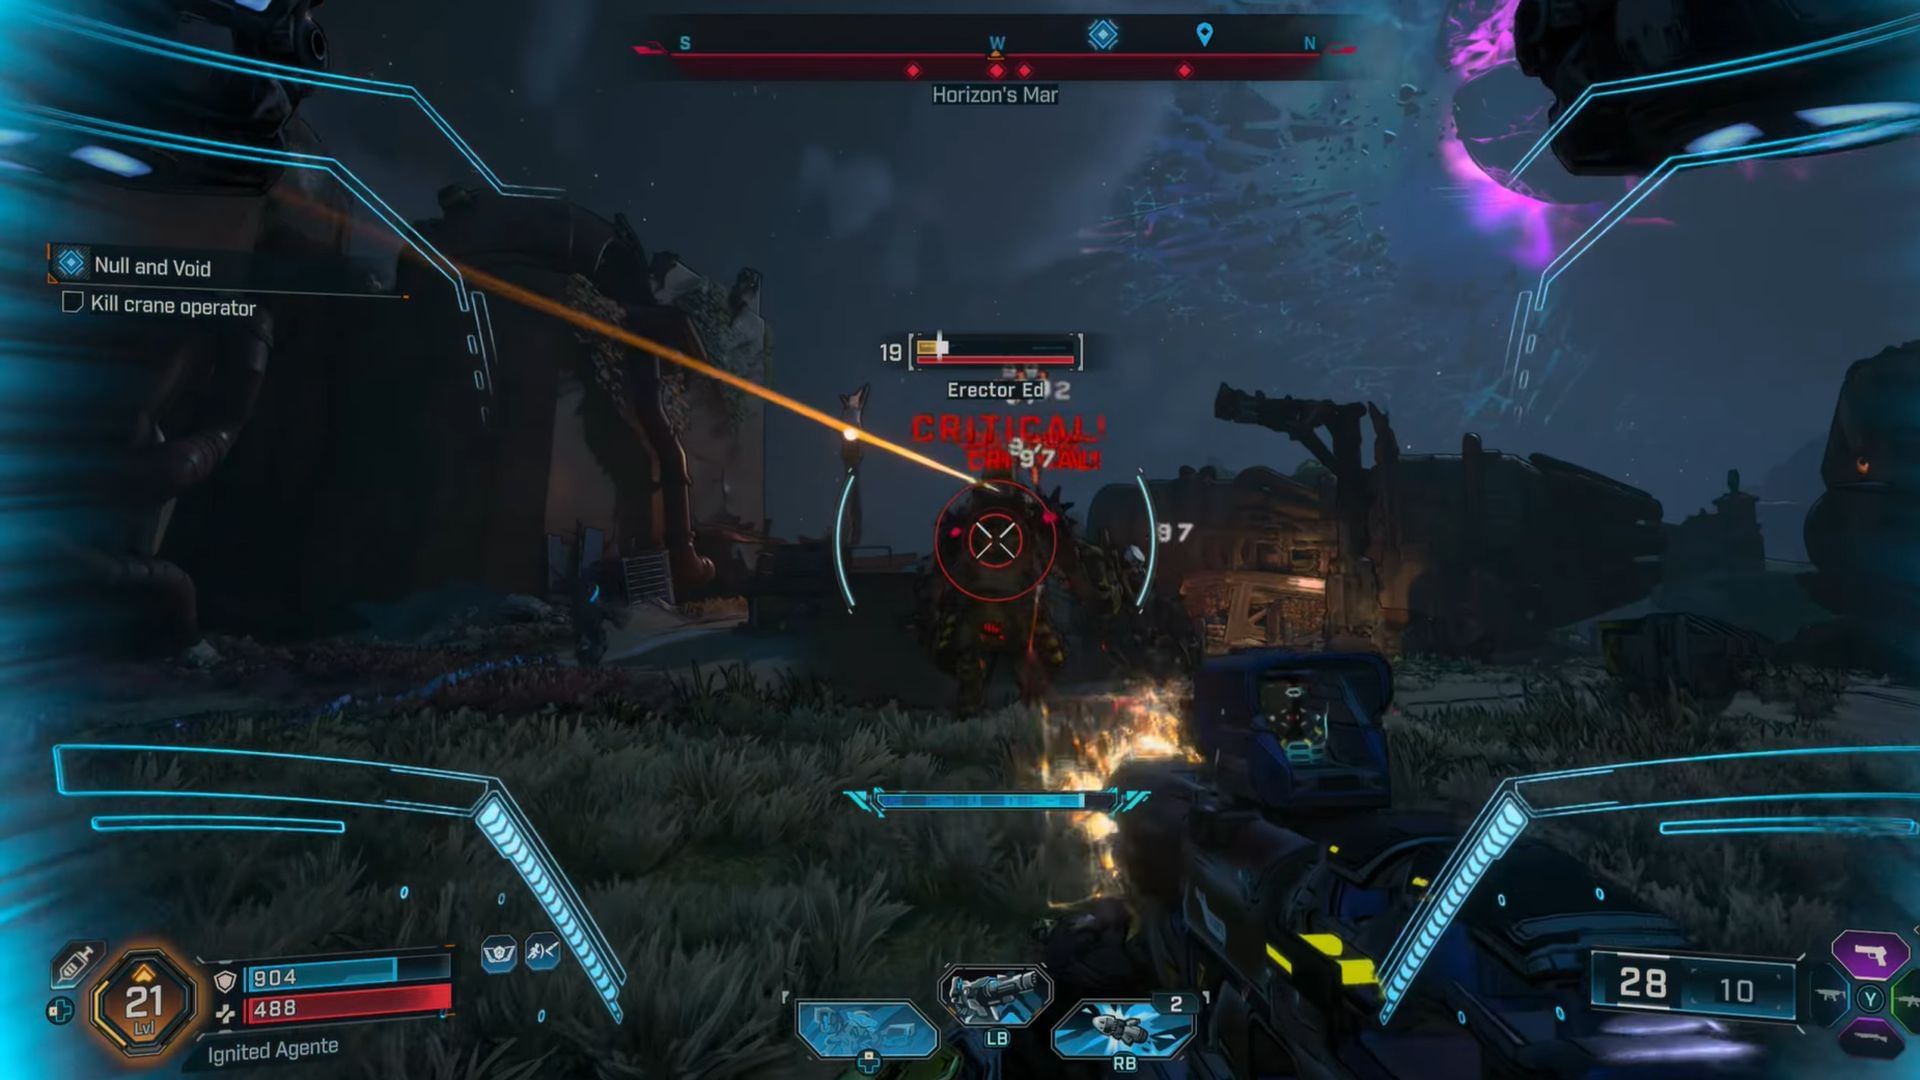
Tips:
- Erector Ed is equipped with heavy weaponry and is super tanky.
- He is vulnerable to Corrosive and Shock damage.
Note: This part can get glitched out; if that happens, restart the game to resolve the bug.
Stage 12: Energize the engines
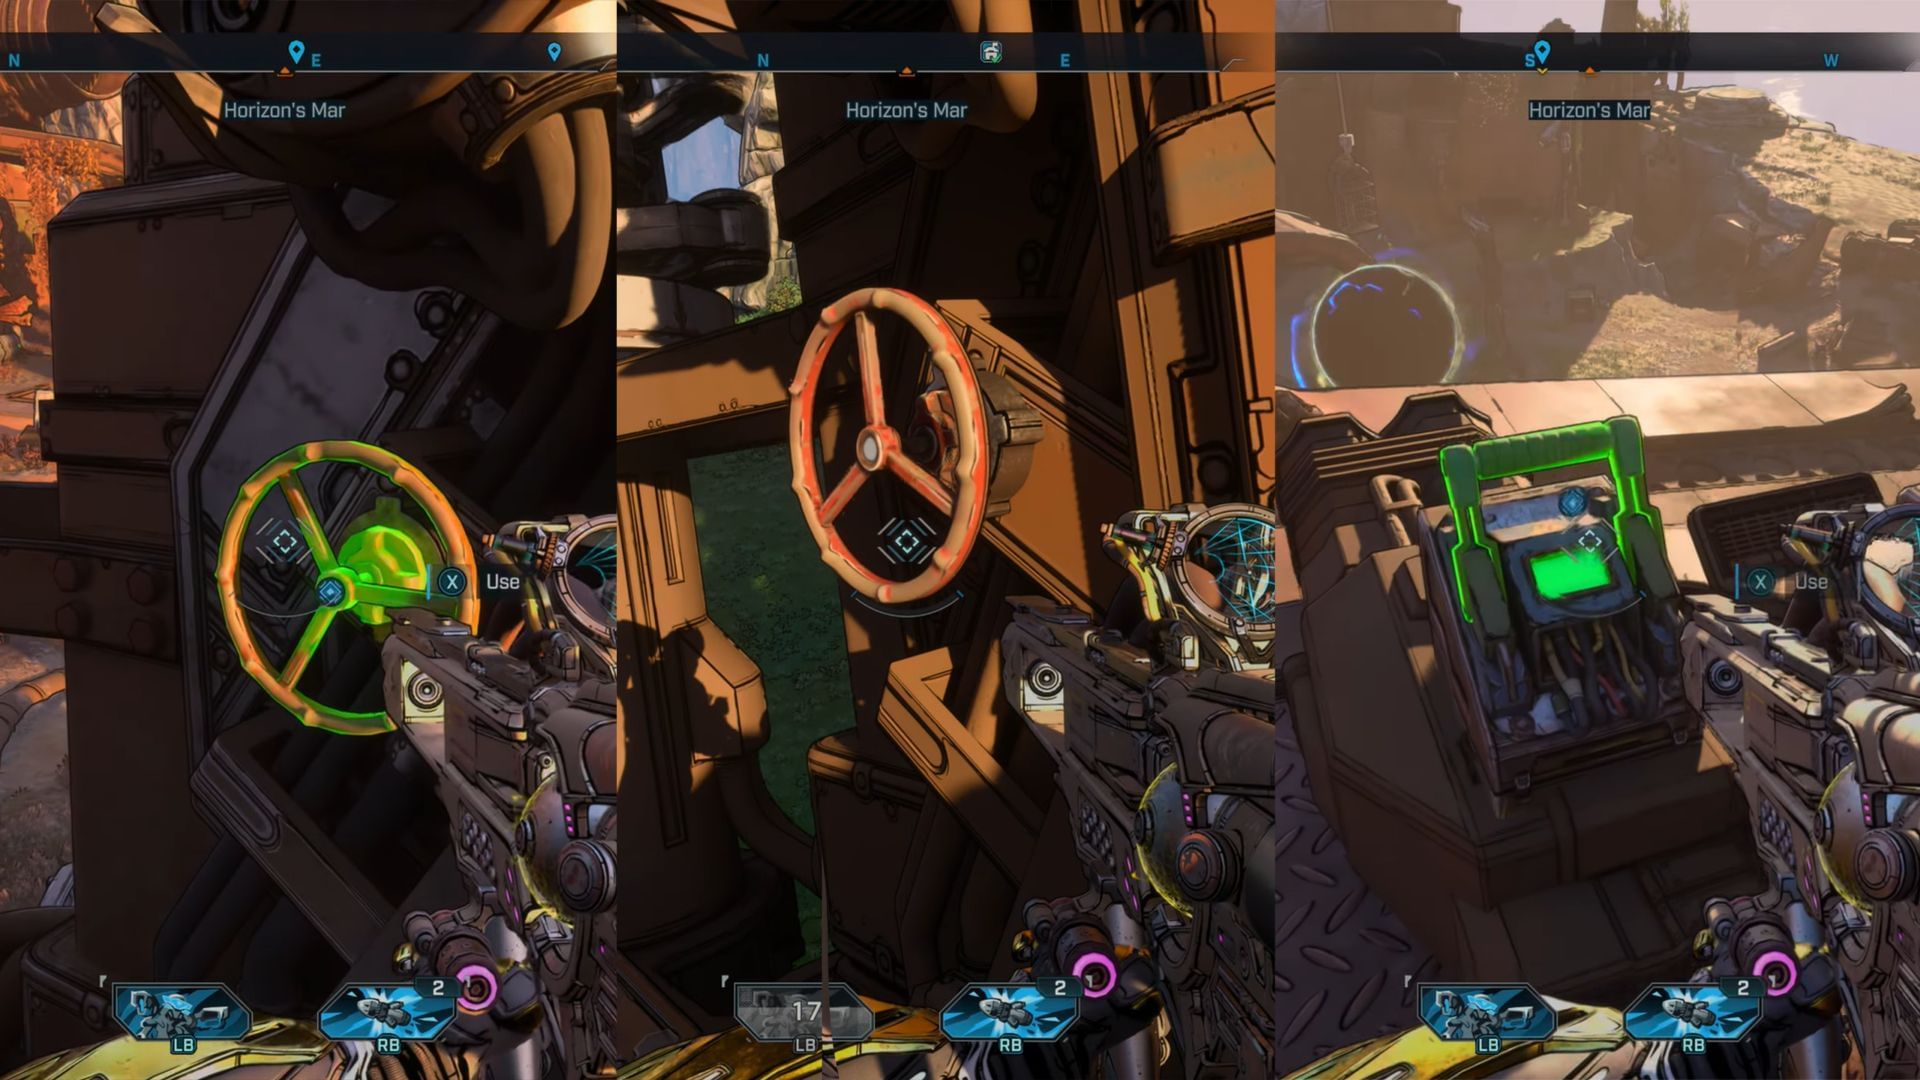
At this stage, you’ll need to power up Conway’s escape route. Here’s how you do it:
- Energize the starboard engine, which is located across from the crane, near the void. To power it, turn the valve.
- To energize the port engine, you’ll need to drop down from the starboard platform. The valve is located down the passageway.
- Your next objective is to initiate the warp pump. Climb up to the roof using the grappling points and activate the pump switch.
Also Read - How to get your first vehicle in Borderlands 4
Stage 13: Free Conway
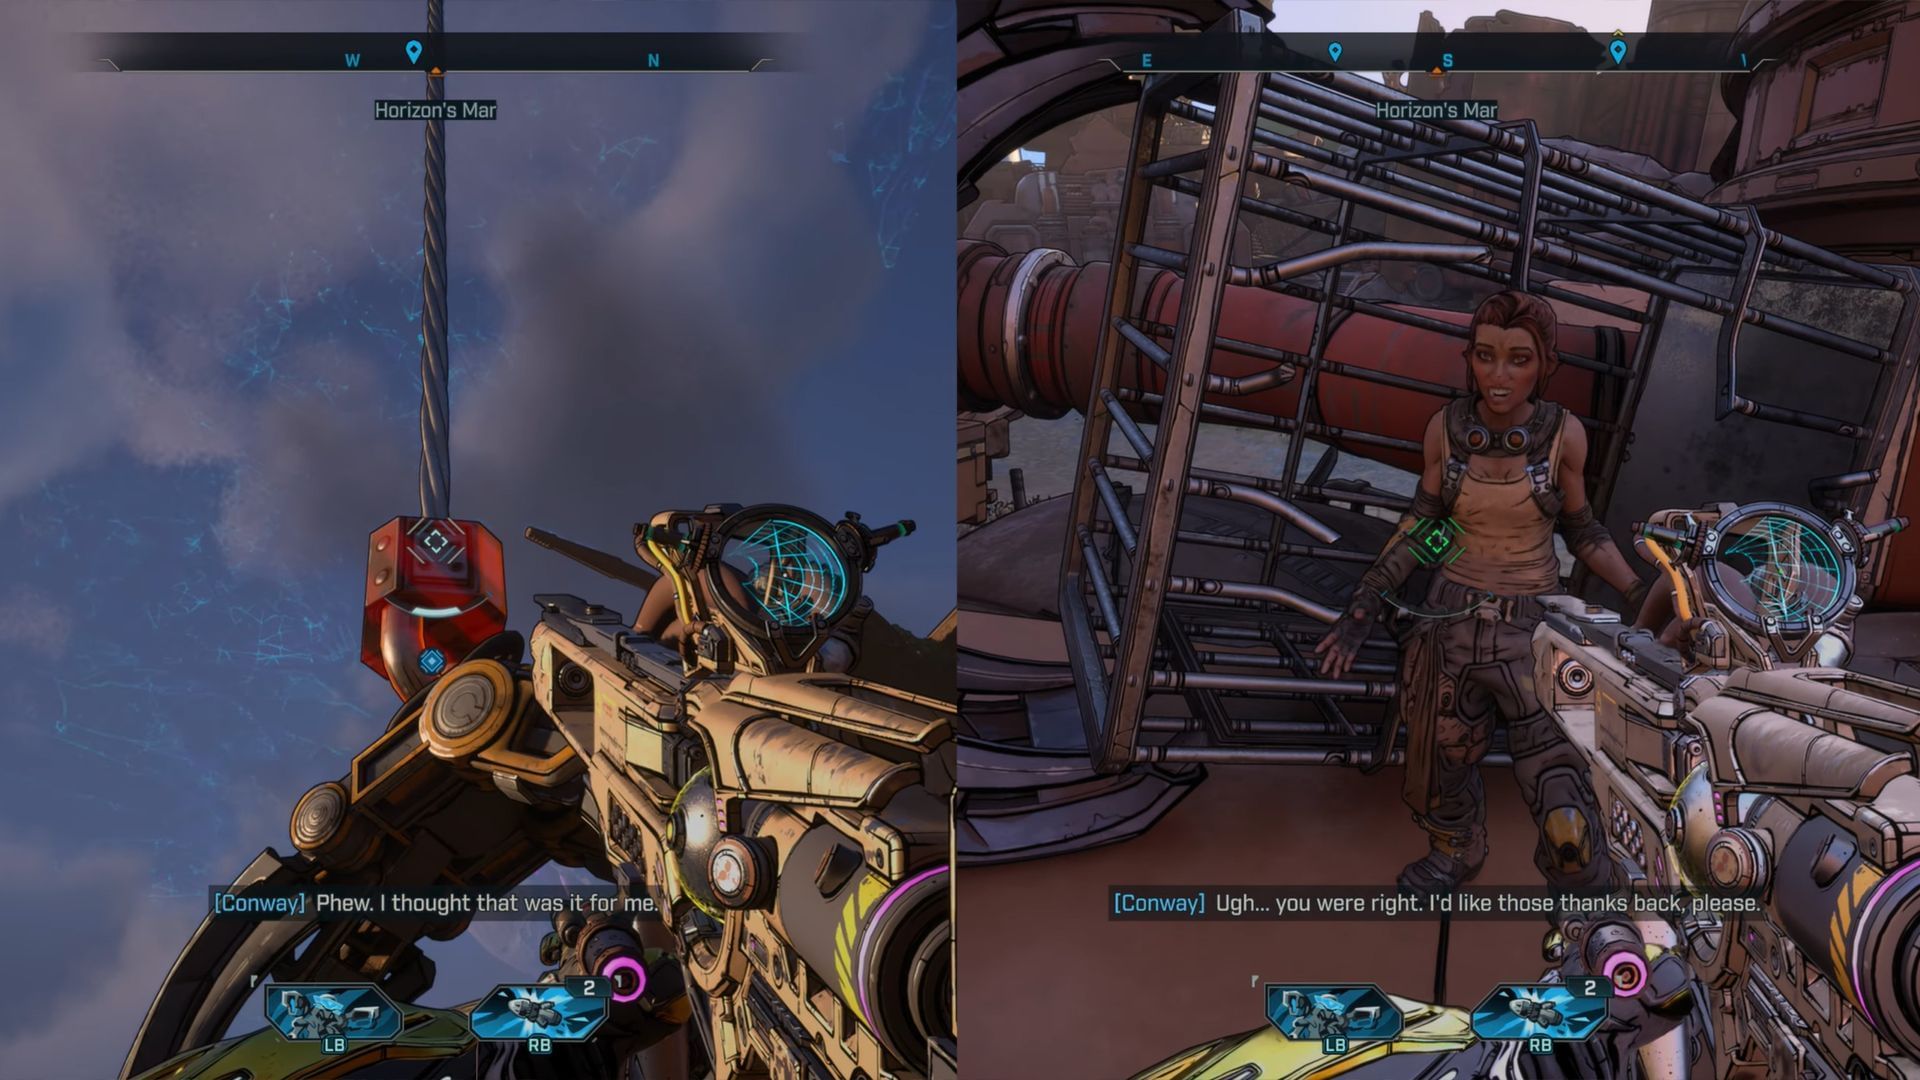
- Glide down to Conway’s cage after you’ve energized the system.
- To free Conway, shoot the red claw holding the cage.
Stage 14: Eliminate Chugs
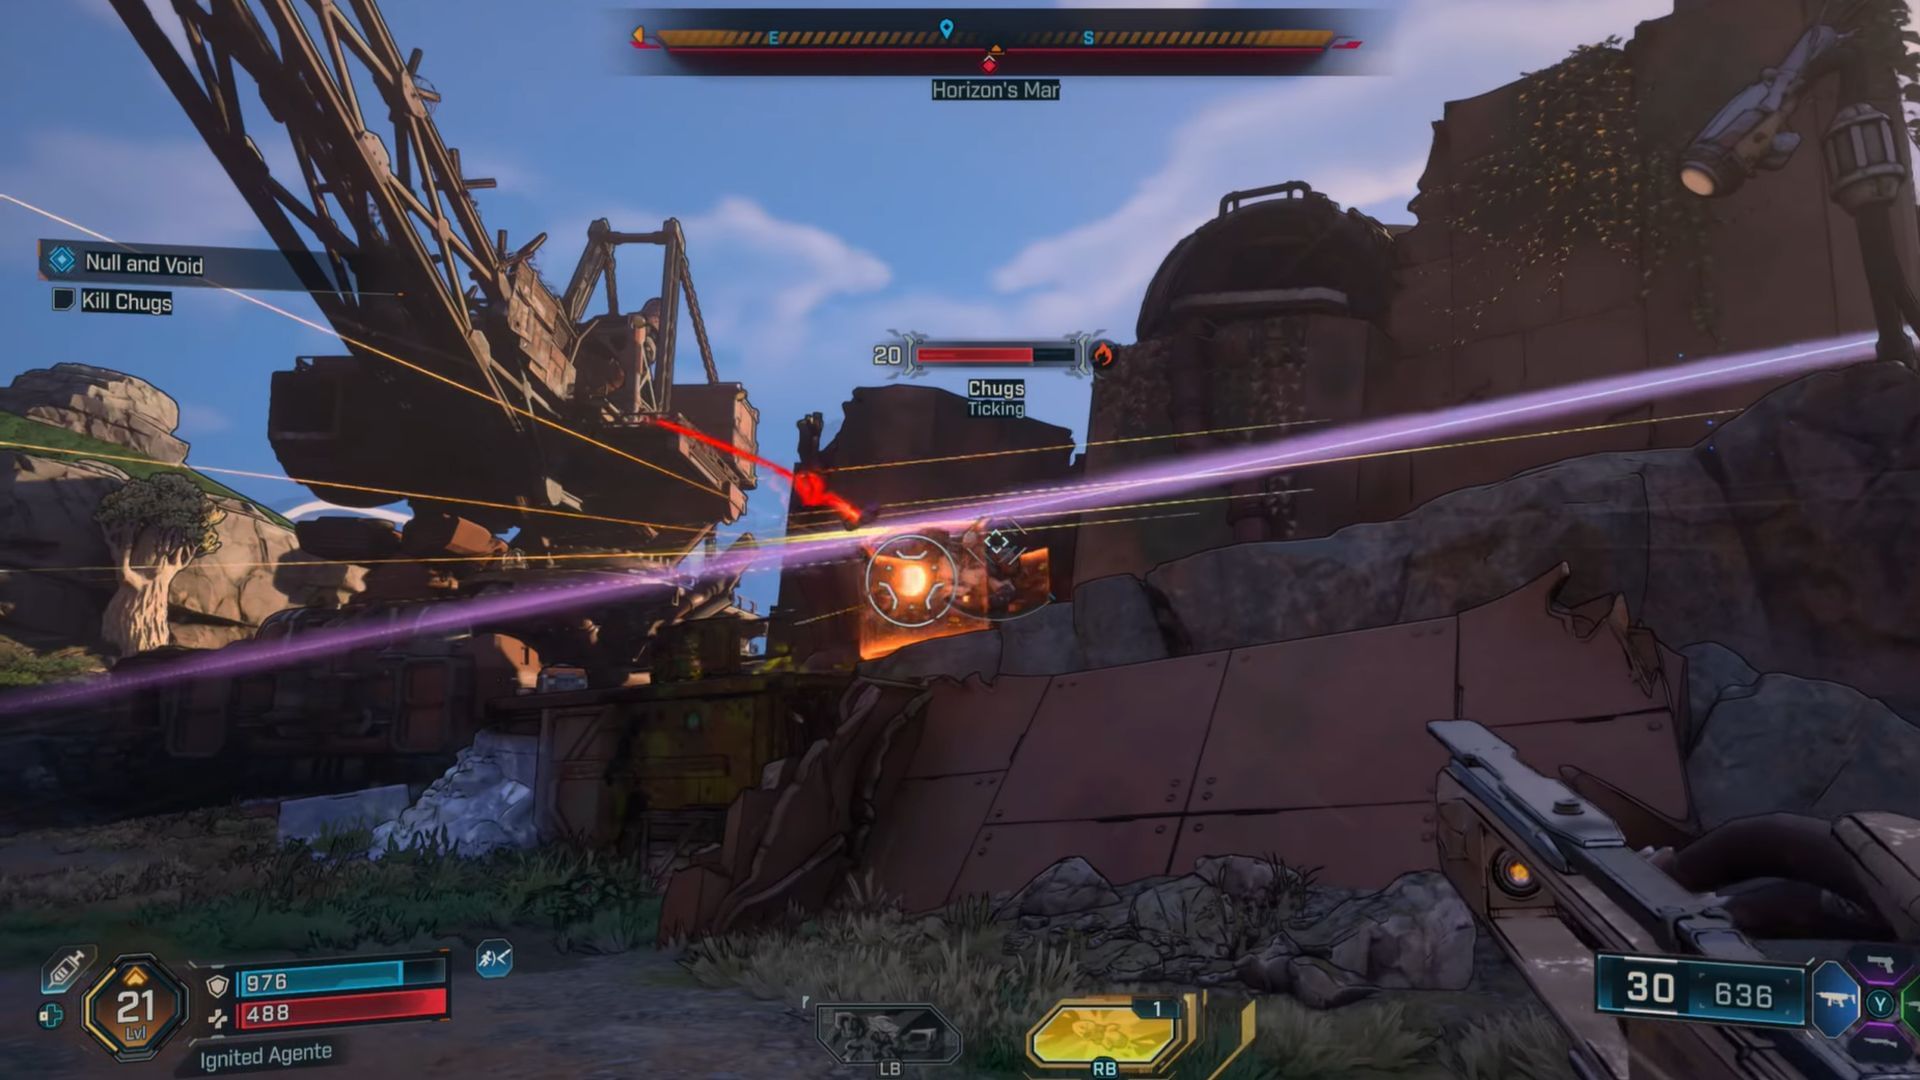
- Once you have freed Conway, you’ll both be confronted by the ripper leader, Chugs.
- Chugs is very tanky, but he's vulnerable to shock damage.
- Outbounder fighters will spawn in to help you fight Chugs, so use the situation to your advantage.
Stage 15: Talk to the outbounders

- Once Chugs is defeated, meet with Rush and the Outbounder reinforcements.
- The mission ends after a short conversation and unlocks the All Charged Up quest.
Borderlands 4: Null and Void rewards
You’ll get the following rewards for completing the Null and Void quest:
- Experience / XP (scales with your level)
- Cash
- Eridium
- Weapon: SMG (up to purple rarity)
- Cosmetic: Out of Bounds (Vault Hunter Style)
Read more articles on Borderlands 4 here:
- How to send gear to Bank in B4
- All Fadefield Vault Key fragment locations
- All Trophies and Achievements
- All Weapon Manufacturers in the game
- Who is the villain of the new Borderlands game?
- Does B4 have co-op and crossplay?
- How to get your first vehicle in B4