
'%20x='0'%20y='0'%20height='100%25'%20width='100%25'%20%0A%20%20%20%20%20%20%20%20%20%20xlink%3Ahref='data:image/jpg;base64,/9j/2wBDAAYEBQYFBAYGBQYHBwYIChAKCgkJChQODwwQFxQYGBcUFhYaHSUfGhsjHBYWICwgIyYnKSopGR8tMC0oMCUoKSj/2wBDAQcHBwoIChMKChMoGhYaKCgoKCgoKCgoKCgoKCgoKCgoKCgoKCgoKCgoKCgoKCgoKCgoKCgoKCgoKCgoKCgoKCj/wgARCAAGAAoDASIAAhEBAxEB/8QAFgABAQEAAAAAAAAAAAAAAAAAAAMH/8QAFQEBAQAAAAAAAAAAAAAAAAAABAX/2gAMAwEAAhADEAAAANBkKlf/xAAhEAABAgUFAQAAAAAAAAAAAAACAxEAAQQFIQYSFEFh0f/aAAgBAQABPwA6m/GAcvUC4kkW4ZoIyF8d5gqq/vNr9Ut6/wBj/8QAGBEAAgMAAAAAAAAAAAAAAAAAAQIAAxH/2gAIAQIBAT8ASlXGmf/EABgRAAMBAQAAAAAAAAAAAAAAAAECAwAR/9oACAEDAQE/AKWZDwb/2Q=='%3E%3C/image%3E%3C/svg%3E)
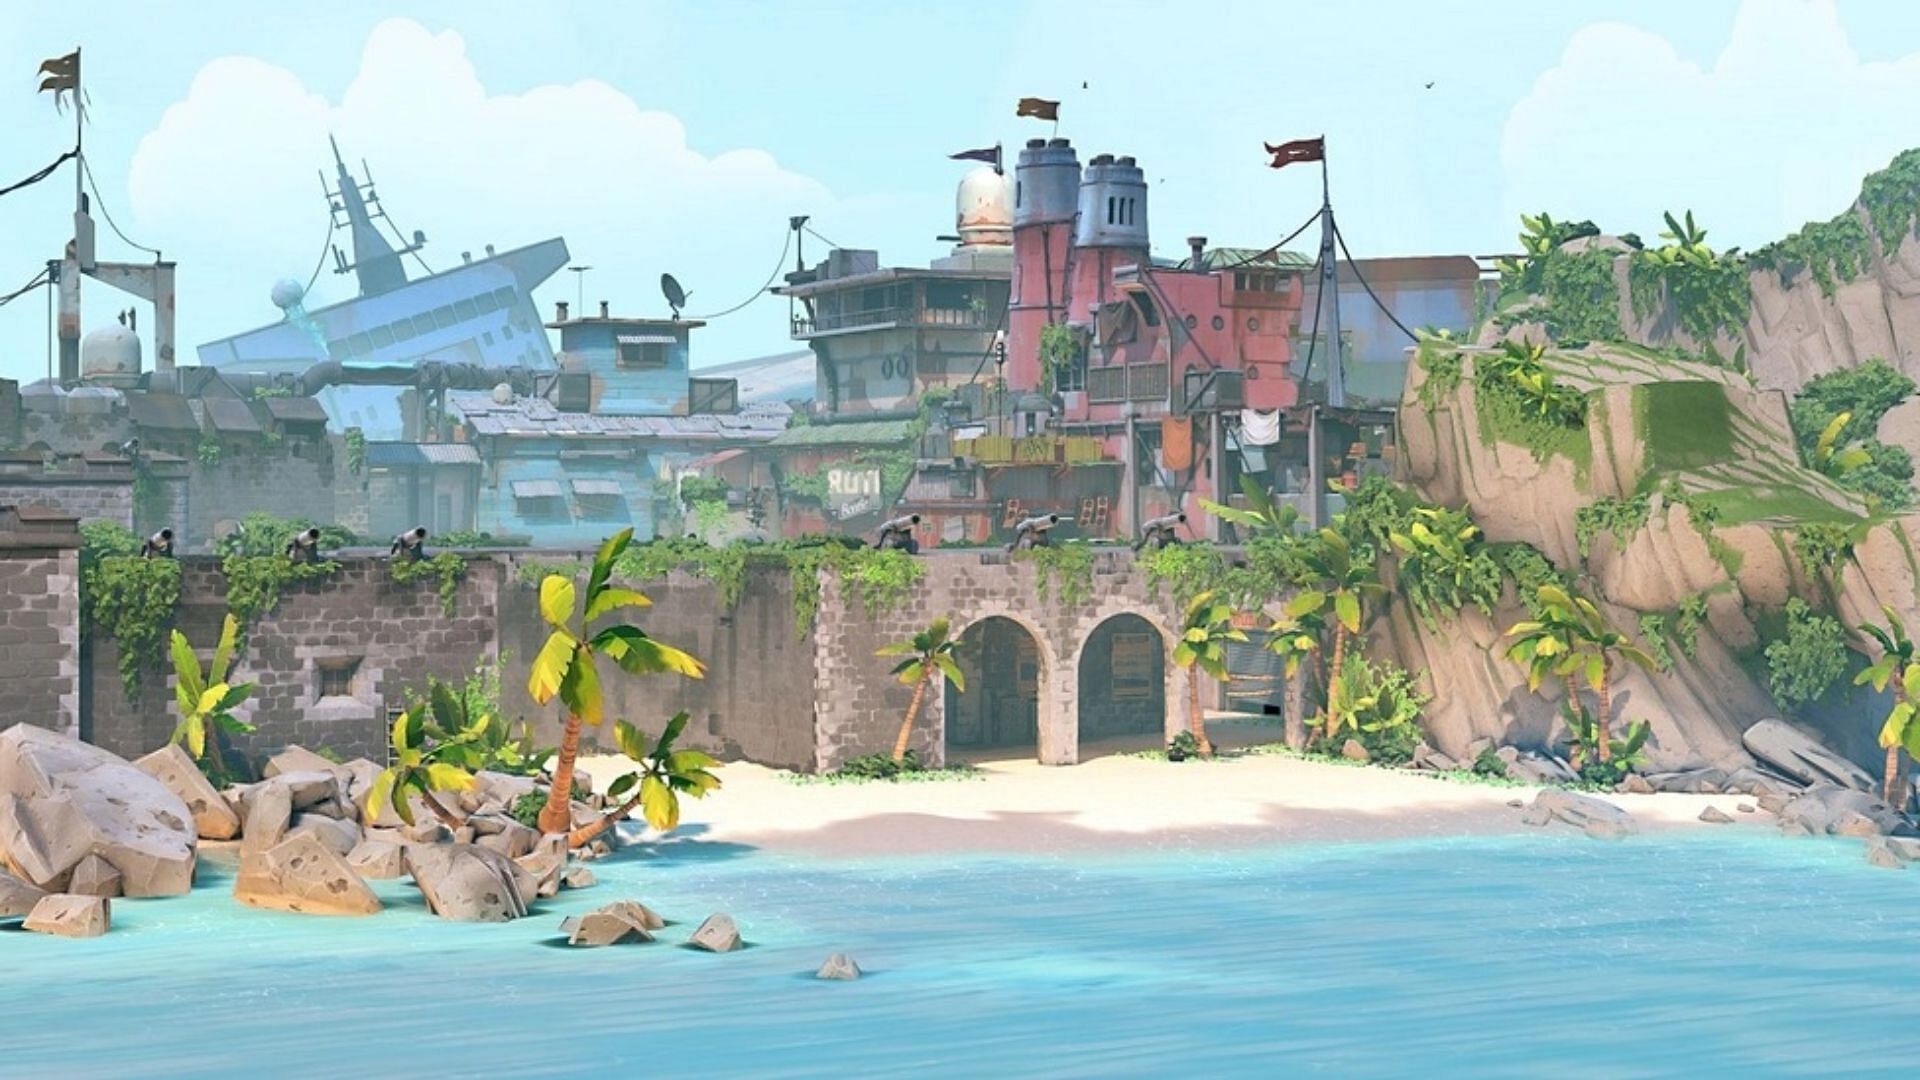
Breeze is one of the most complex maps in Valorant. No wonder one would need a Valorant Breeze map guide to help work it better. The map has interesting features with its wide Mid area comprising of many angles that attackers would have to take care of, and the drop from halls to chute can always take players by surprise.
Here's a Valorant Breeze map guide that includes callouts, potential strategies, and more things that will help better the map knowledge.
Note: This article is subjective and reflects the author's opinions.

Valorant Breeze map guide: Layout and callouts
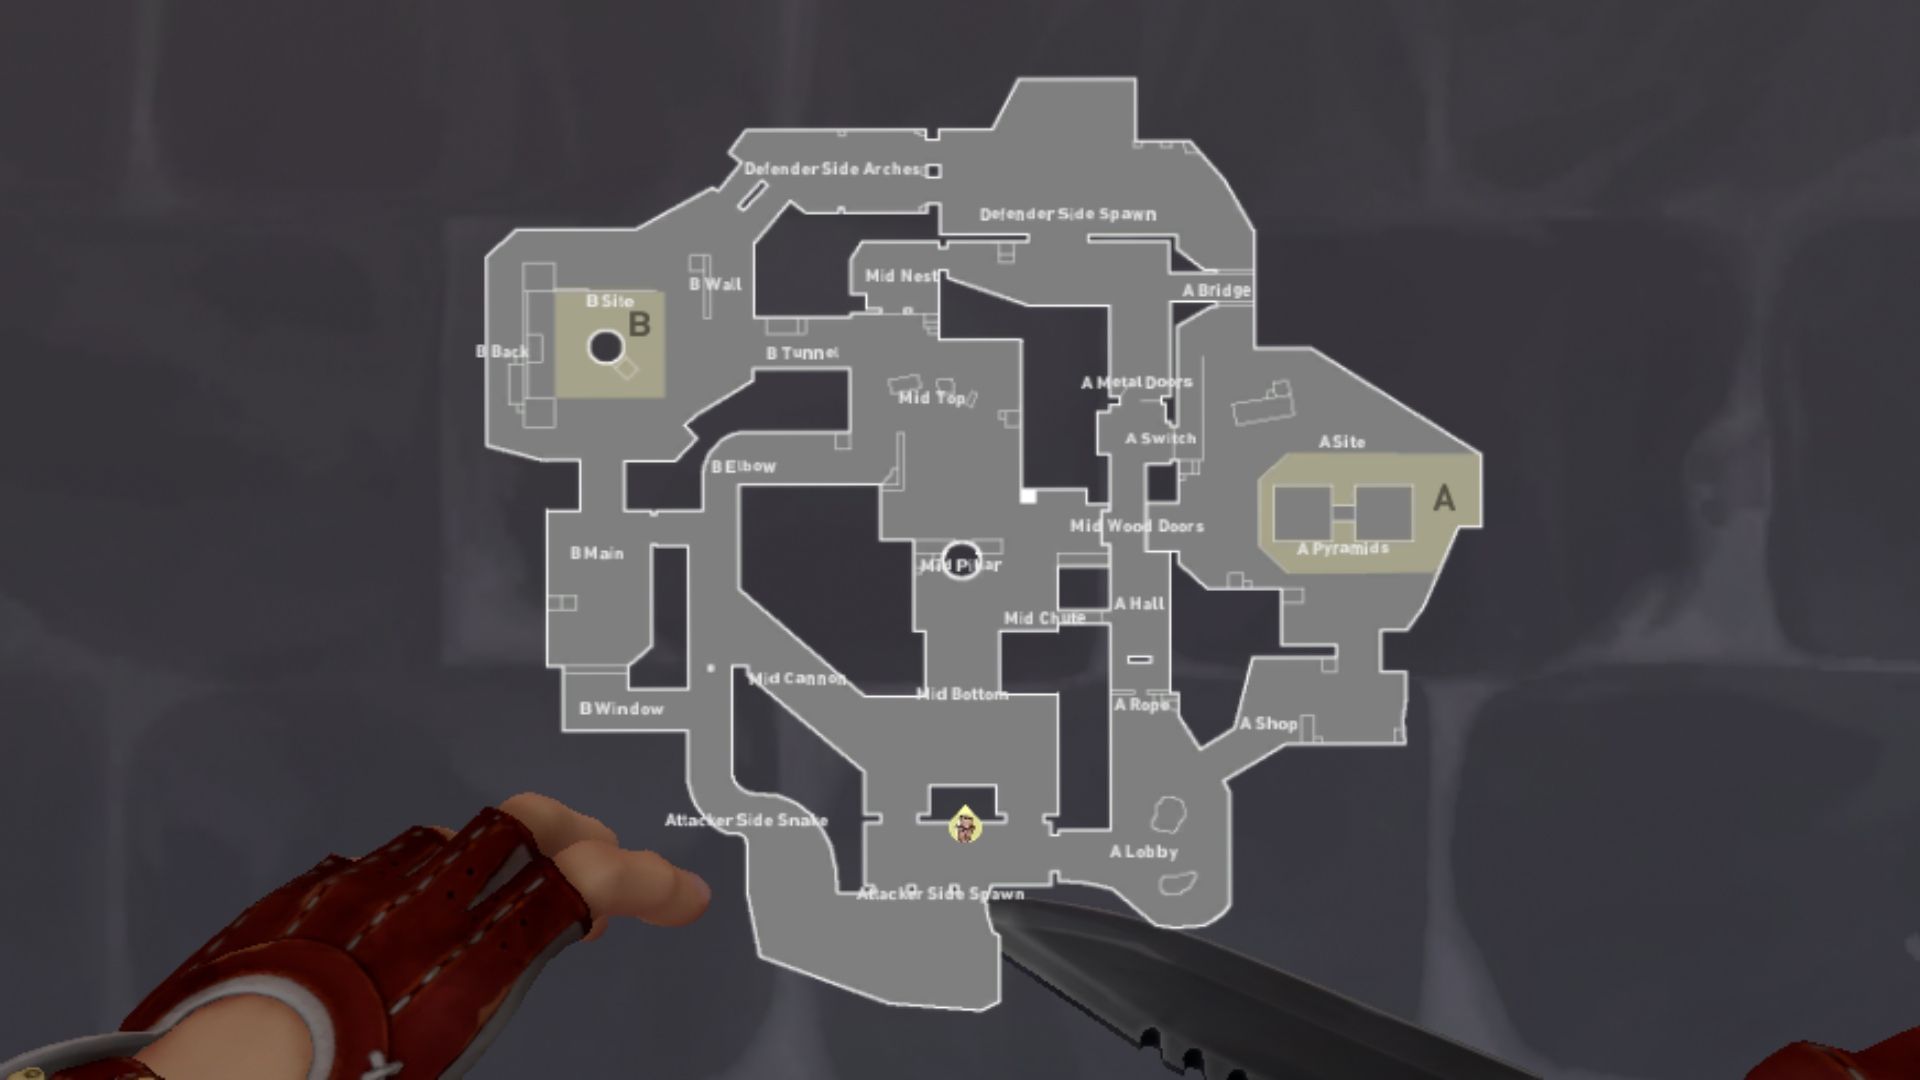
It's important to note that Riot Games started making changes to Breeze in Episode 7 Act 2. So, a lot of things changed on the map, but the wide Mid area has remained a big part of it; this makes it similar to Valorant's Ascent map. Here are some major callouts that you may want to keep in mind:
- Mid-Top
- Mid-Bottom
- Tunnel
- Elbow
- Double Doors
- Chute
- Halls
- B Window
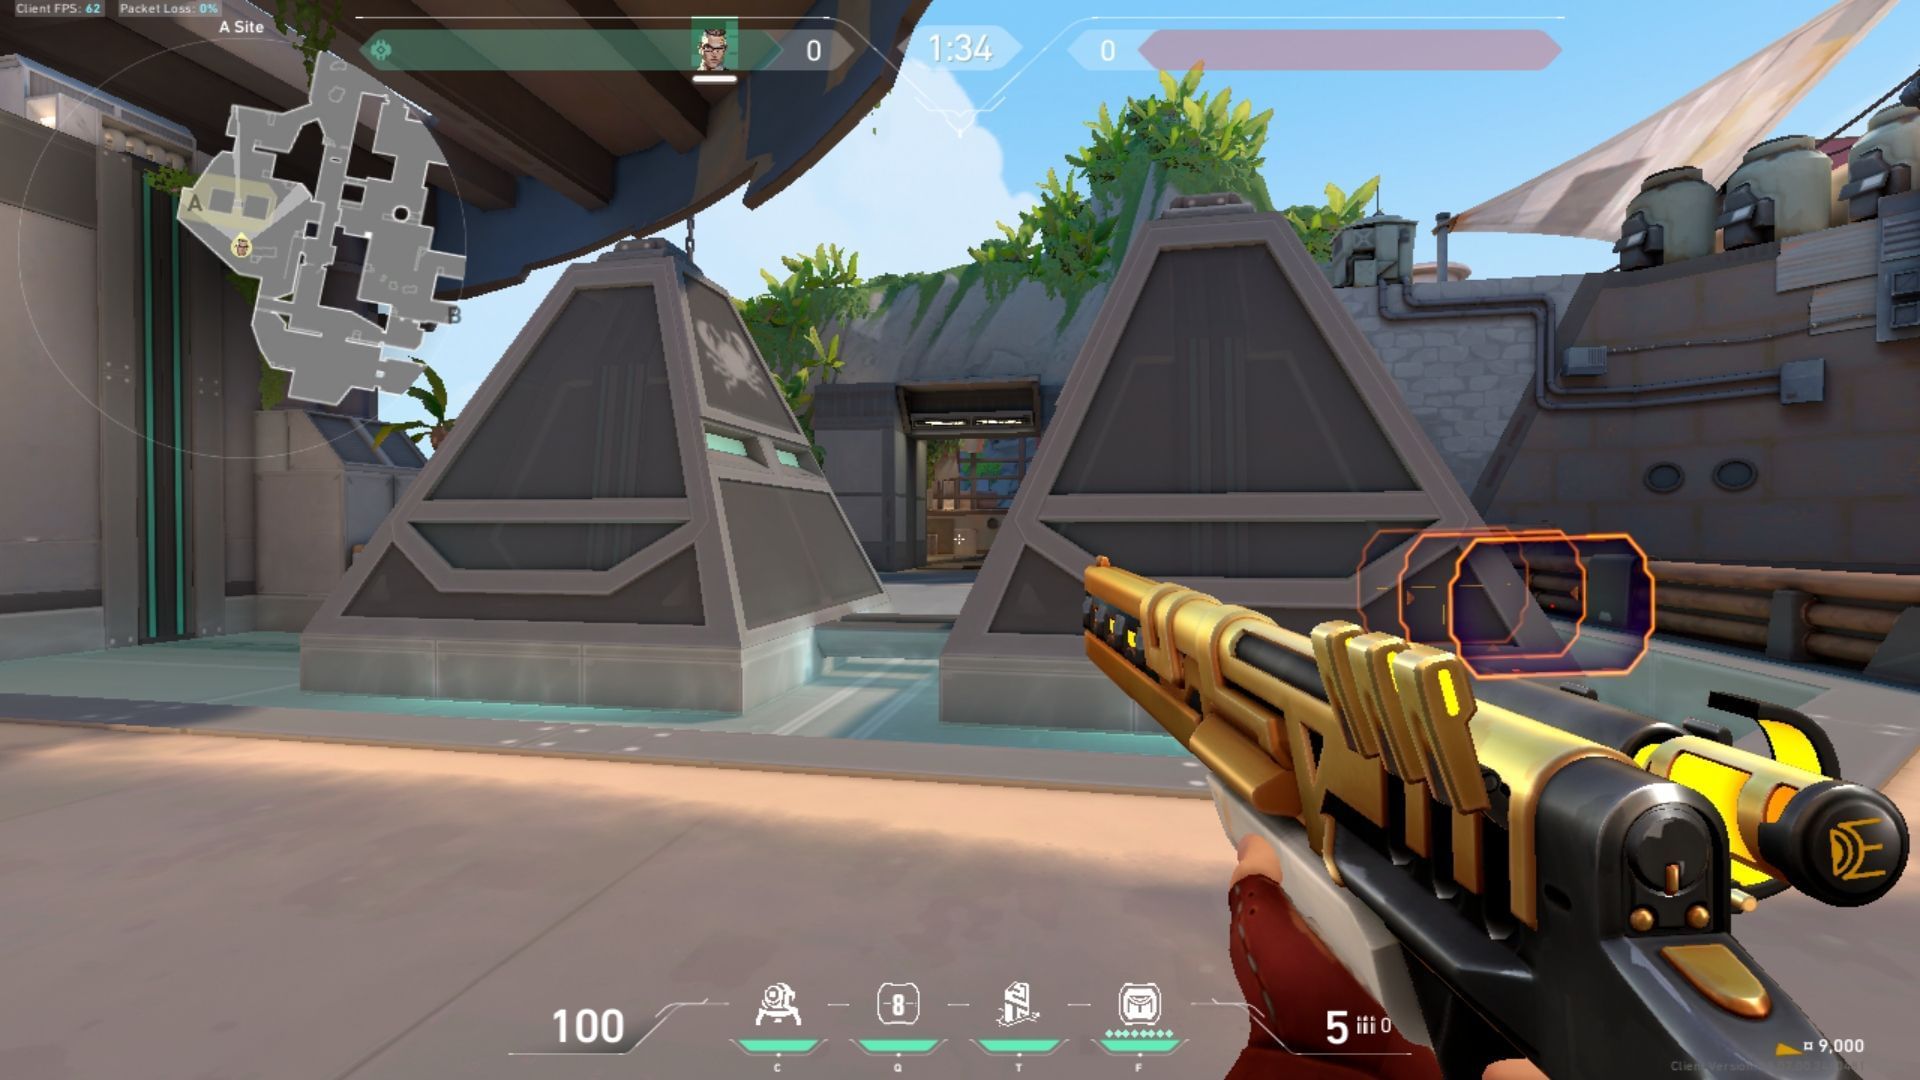
- Pyramids
- A and B Main
How to play attack and defense on Valorant Breeze map
Playing attack on Breeze A site
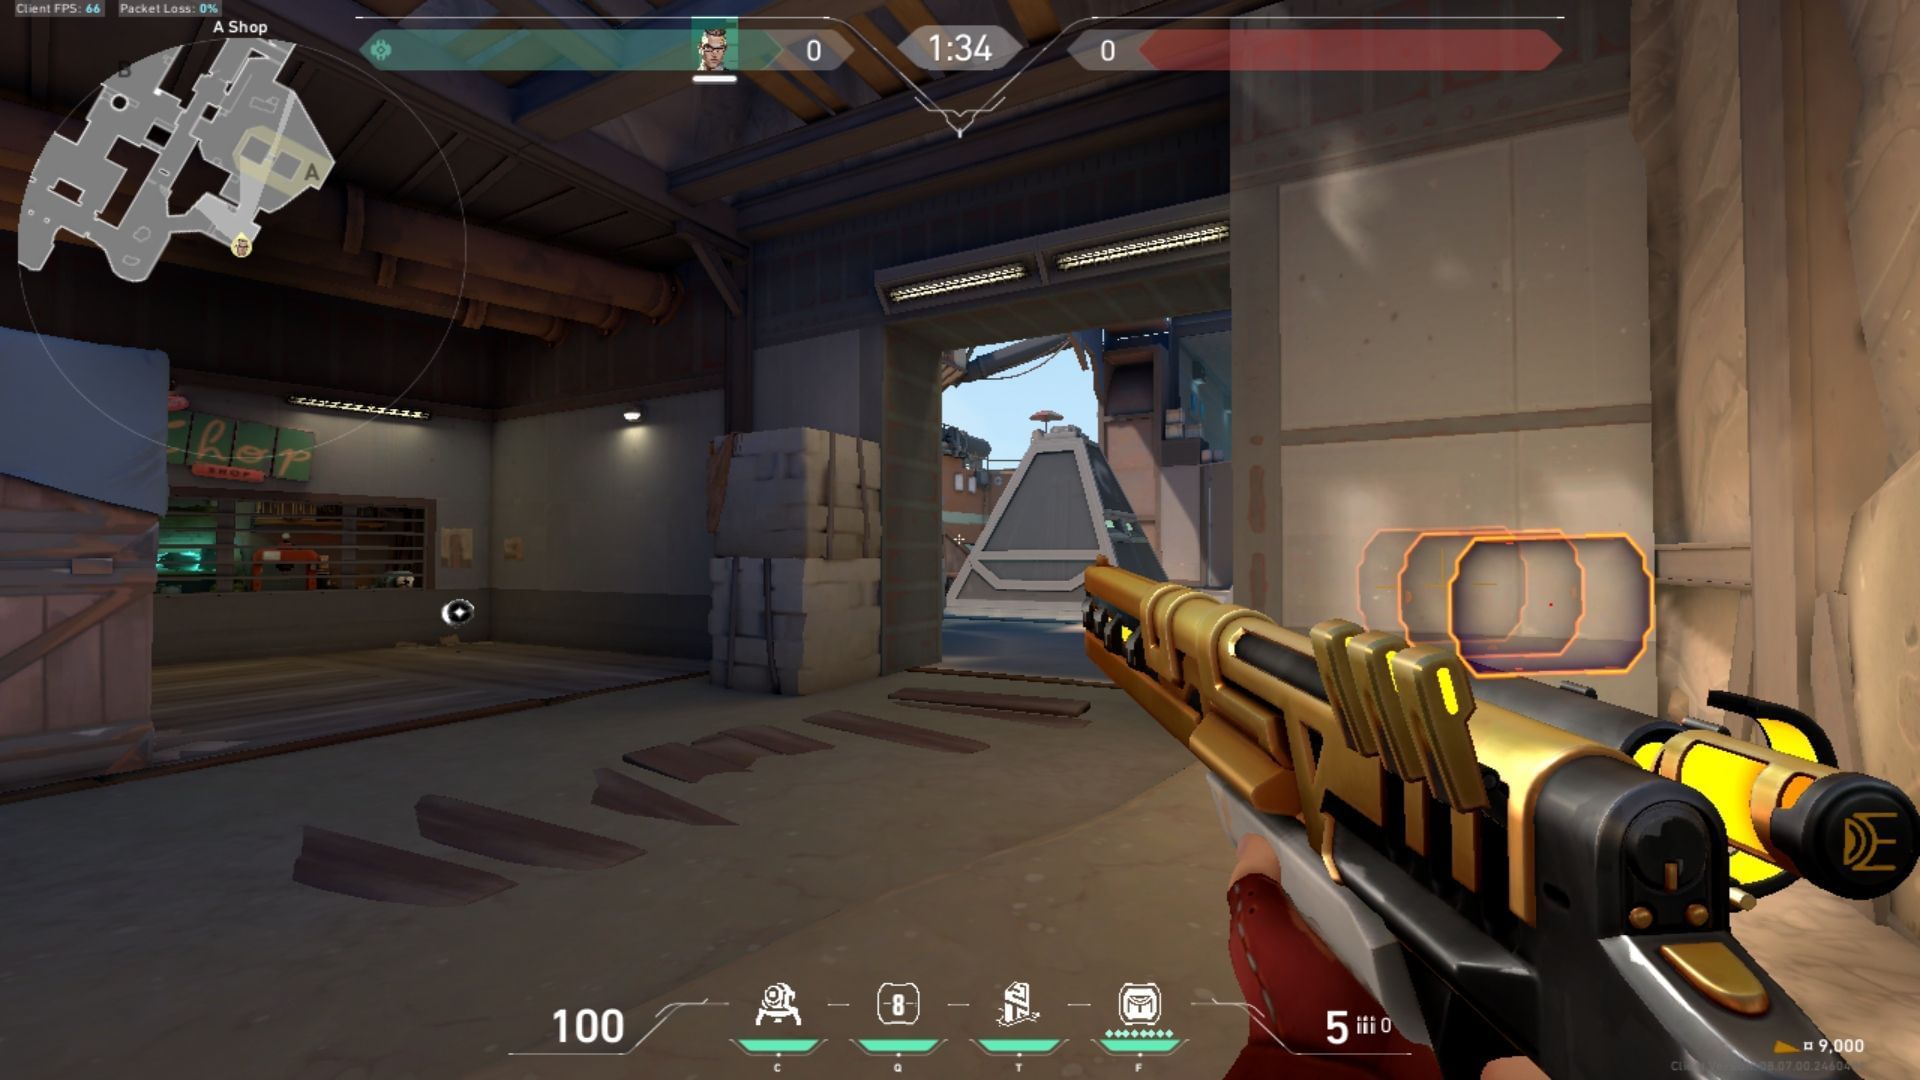
The A site on Breeze is an interesting one to take for two reasons. First off, the Pyramids flat at the center of the map make it a challenge to counter the opponents using an Operator. There are many angles the defensive team can exploit, but they are still fairly exposed. This brings about the second reason, Mid and Halls.
Hence, keeping at least one teammate lurking or engaged actively to take space in either Mid or Halls can give the attacking team a huge advantage. It would work to not only distract the opponents holding A site, but also take them by surprise from two areas at once. So the focus is: Make sure there is some Mid or Halls control.
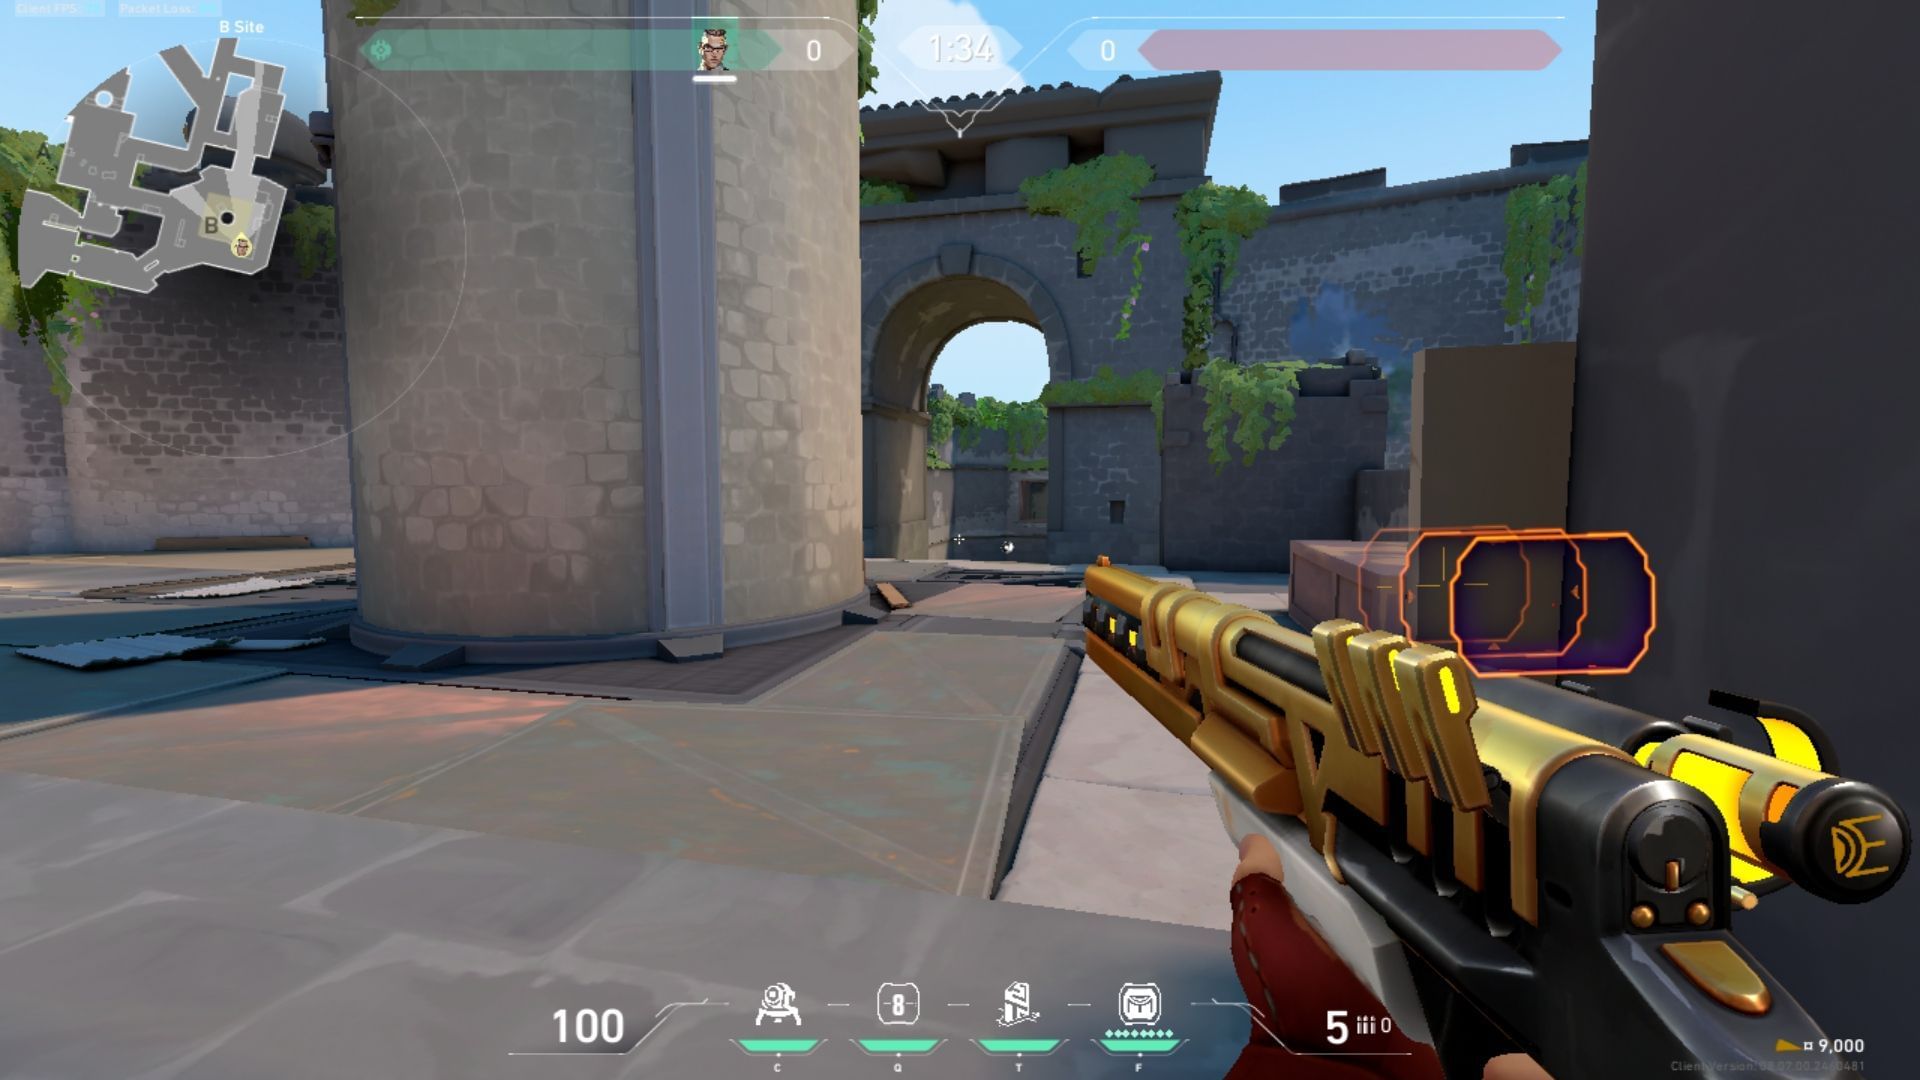
Playing attack on Breeze B site
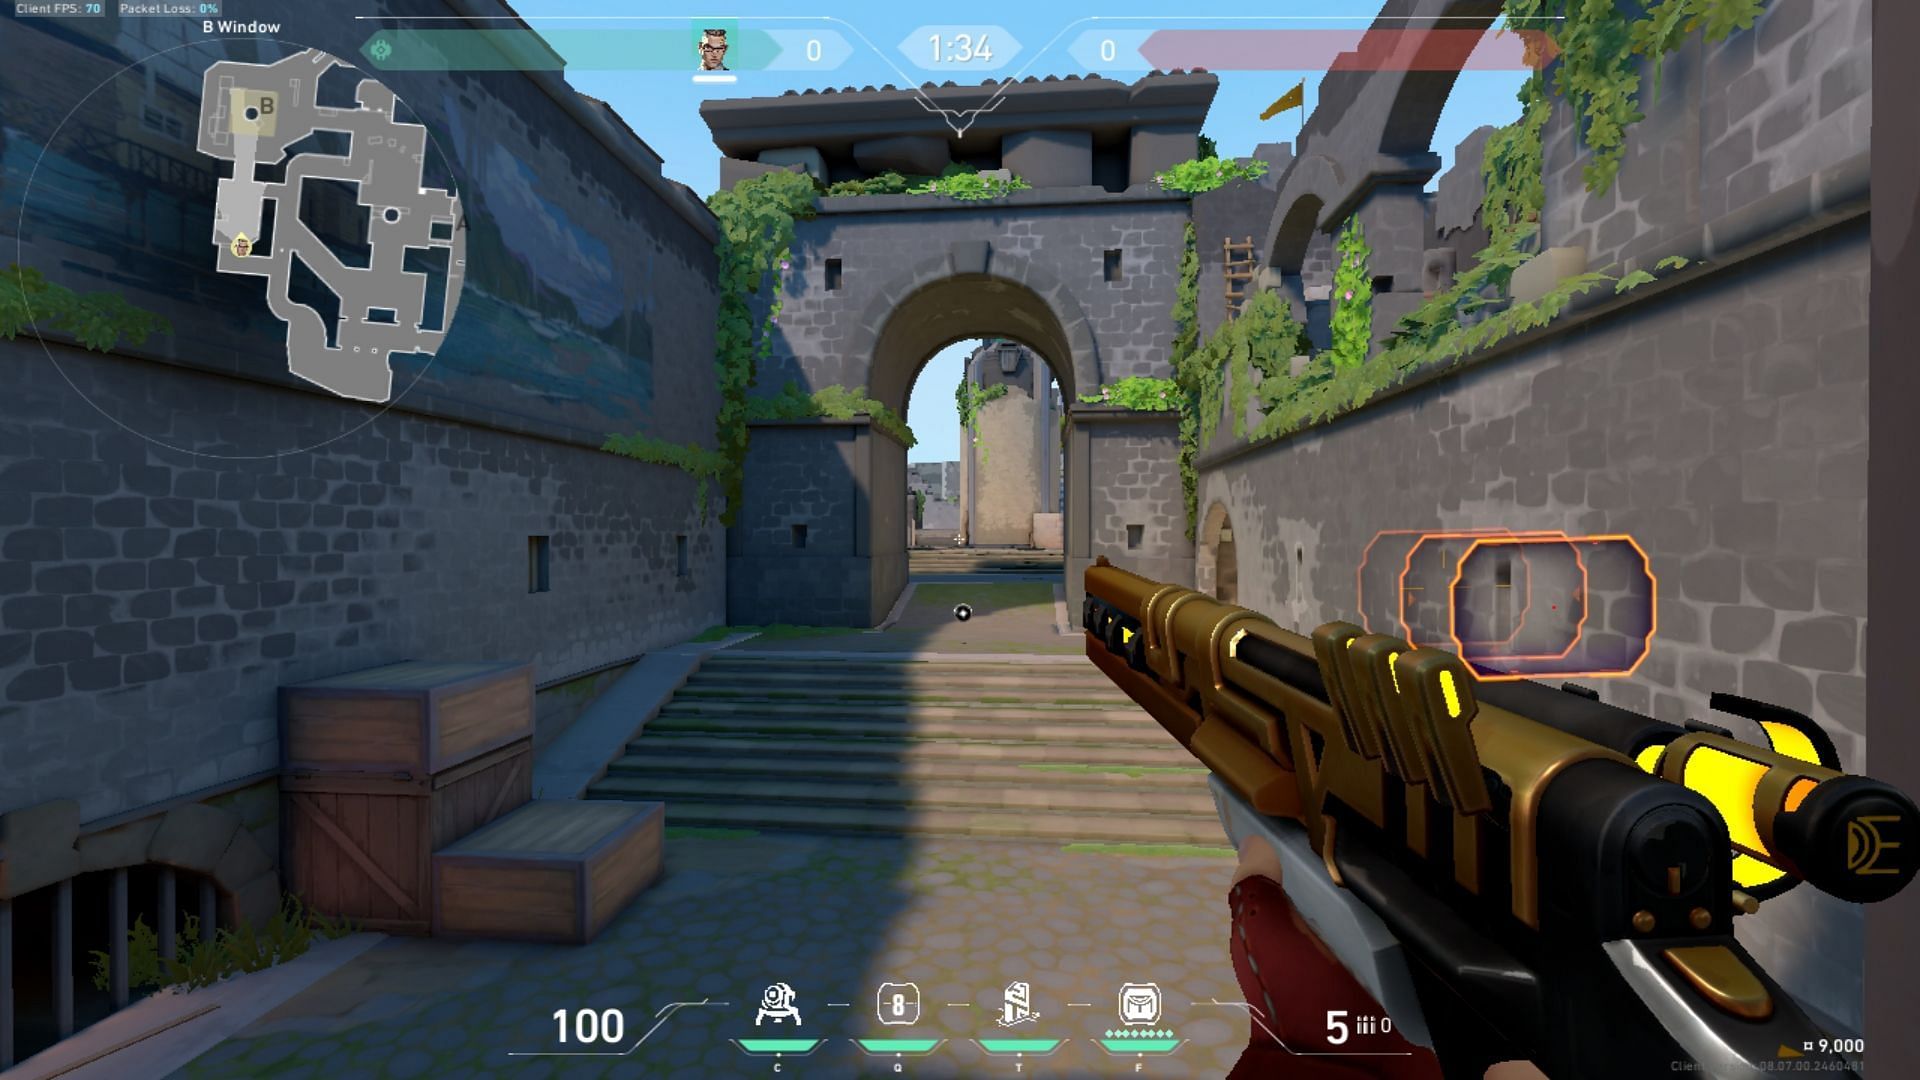
Attacking on Breeze's B site is somewhat more excruciating in Valorant ranked matches, especially if you have a sneaky Cypher guarding the main entrance. Pushing out B elbow or just holding it for the opponent's push is a good start.
Remember, it's not necessary to always gain a kill, information is worthy too. Getting a kill on Elbow would make a huge hole in the opponent's defense that can help empty up B site a little bit. From there, with the help of some smokes, B Tunnel can be accessed.
At the same time, distracting and engaging a Sentinel from B Main is a great idea. Of course, the divide-and-attack strategy is always a good way to gain control on maps with a wide Mid. However, some Agents help better than others; having a KAY/O alongside is always a good idea.
Playing defense on breeze A site
Using Operators from defensive positions such as A back site or Stairs is a brilliant strategy, but the opponents might find ways to ward off such snipers via smokes or Sova's reveal darts. This makes it vital to hold a more aggressive position. This, of course, goes for agents who can get out of trouble once they're discovered such as Chamber or Jett.
Make sure a Sentinel utility is deployed in A Halls to keep an eye on Switch. A fellow teammate watching Double Doors is also a good help.
Playing defense on Breeze B site
In this final strategy section for the Valorant Breeze map guide, let's discuss defense on B site. A Sentinel on the site may face KAY/O's suppression, a Duelist diving right in over trips and traps on top of smokes covering up advantageous angles.
Having the right Sentinel to slow down big pushes is key, and working together to take a frag would help slow down big enemy pushes. Moreover, having at least one player watching Elbow at all times and clearing out any aggressors is a must. Remember, always keep an eye on the mini-map just in case. Mid is a dangerous place on Valorant's Breeze map.
5 best Agents for Valorant's Breeze map

A Valorant Breeze map guide cannot be concluded without discussing the five best Agents for it. Since it's a map that gives attackers many options, having a Sentinel/Controller-heavy comp is a good idea. Here are some Agents and their alternatives that make a good team for Breeze.
- Viper/Harbor
- Cypher/Chamber (both are also good since Chamber would primarily help by using a Sniper.)
- Sova/KayO
- Jett
- Skye
Make sure the team, once assembled, has good synergy and communication together. On top of the Valorant Breeze map guide, here's an Agent tier list for Breeze to help make better choices.
