
'%20x='0'%20y='0'%20height='100%25'%20width='100%25'%20%0A%20%20%20%20%20%20%20%20%20%20xlink%3Ahref='data:image/jpg;base64,/9j/2wBDAAYEBQYFBAYGBQYHBwYIChAKCgkJChQODwwQFxQYGBcUFhYaHSUfGhsjHBYWICwgIyYnKSopGR8tMC0oMCUoKSj/2wBDAQcHBwoIChMKChMoGhYaKCgoKCgoKCgoKCgoKCgoKCgoKCgoKCgoKCgoKCgoKCgoKCgoKCgoKCgoKCgoKCgoKCj/wgARCAAGAAoDASIAAhEBAxEB/8QAFQABAQAAAAAAAAAAAAAAAAAAAAb/xAAVAQEBAAAAAAAAAAAAAAAAAAADBf/aAAwDAQACEAMQAAAAmbwnv//EAB4QAAMAAgMAAwAAAAAAAAAAAAECAwQFABESE0GB/9oACAEBAAE/ANFssjY4uZDGkkmlasURqdqg9dqASpb9J5DY4SwmLyPyhQH848yO/vn/xAAZEQACAwEAAAAAAAAAAAAAAAABEQACAwT/2gAIAQIBAT8A6Nbgpz//xAAXEQEAAwAAAAAAAAAAAAAAAAACABEx/9oACAEDAQE/AADWT//Z'%3E%3C/image%3E%3C/svg%3E)
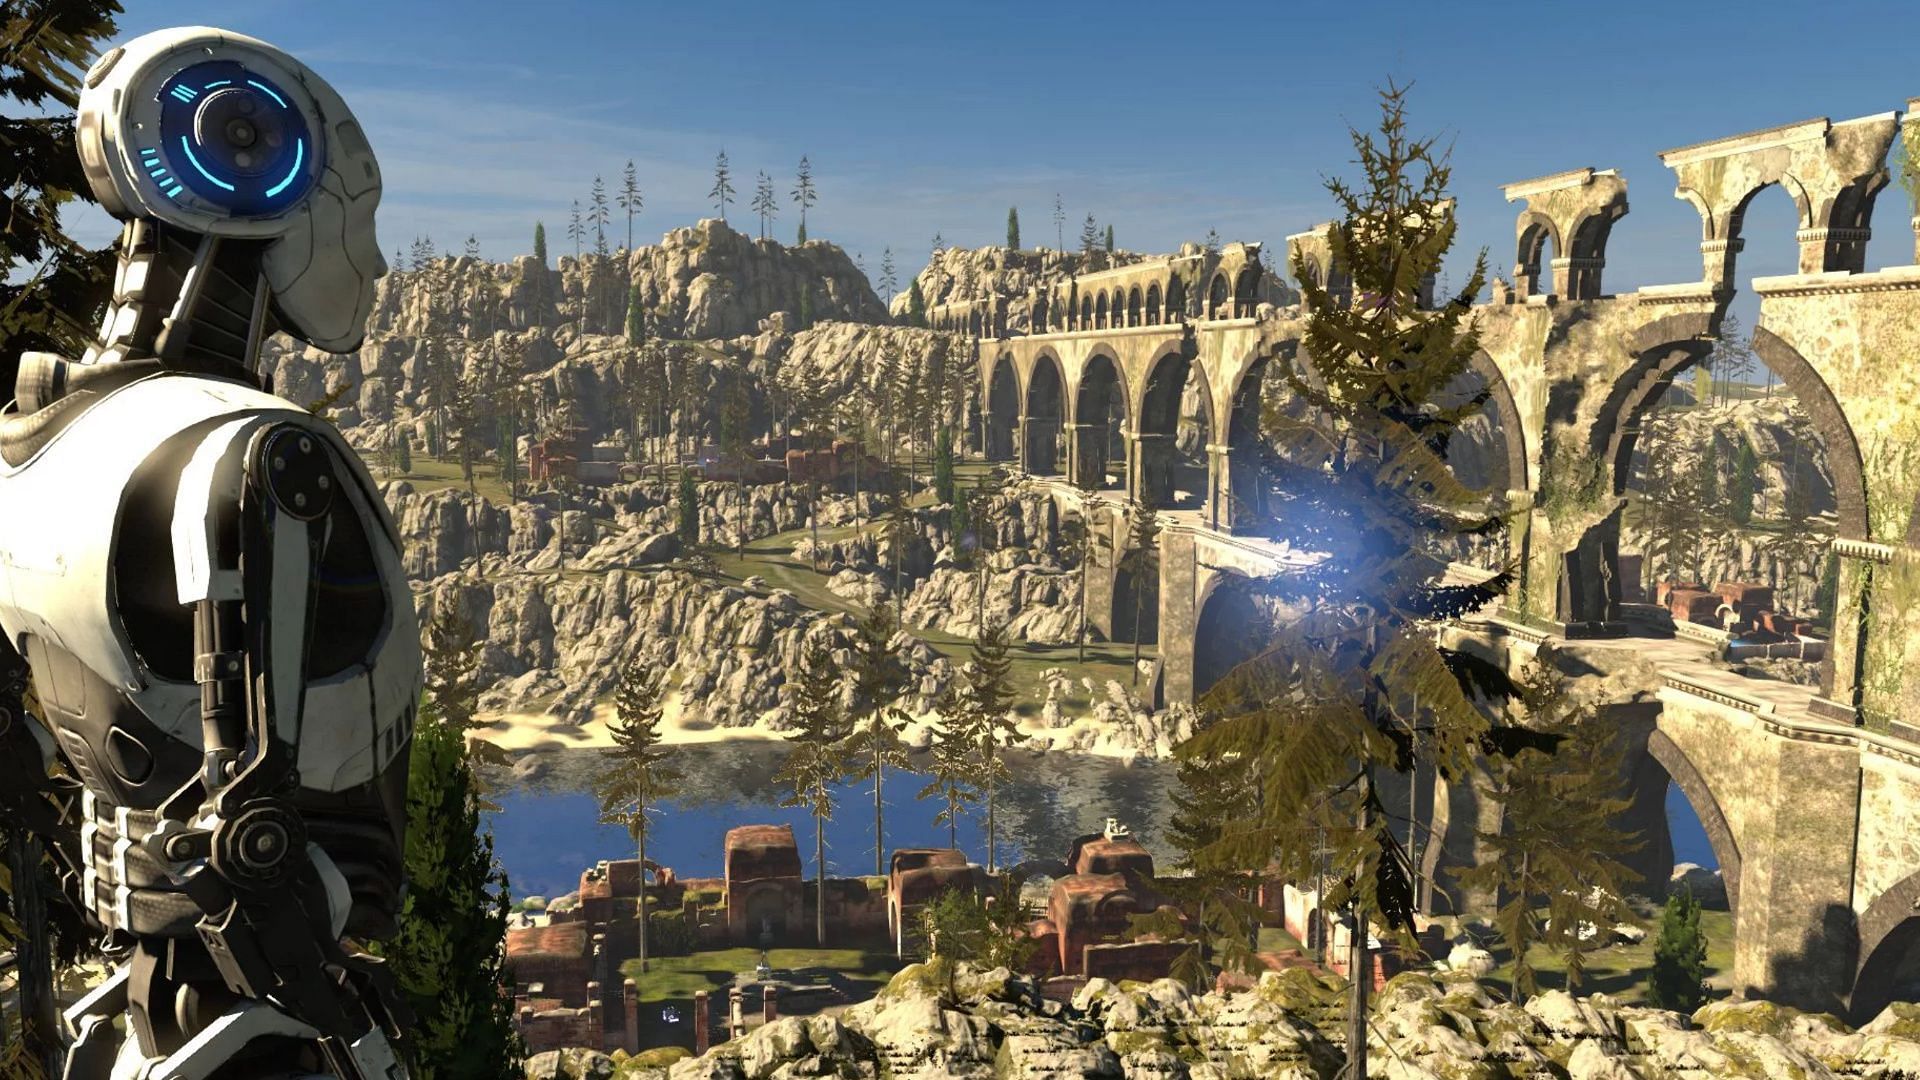
The main quest in The Talos Principle 2 features a formidable puzzle known as Ascent, situated in the Anthropic Hills region on the game world's western side. Upon entering this area, players will encounter five distinct puzzle challenges. Successfully completing these challenges grants access to the subsequent area, where the Ascent awaits.
Similar to other challenges in The Talos Principle 2, the primary objective in this puzzle is to interact with its main device. However, a unique twist is introduced in the form of laser barriers that must be defused to enable interaction with that device. To overcome those obstacles, players can employ tools such as the activator, cubic device, and connector.
This article offers valuable strategies for solving the Ascent puzzle in The Talos Principle 2.

How to solve the Ascent puzzle in The Talos Principle 2
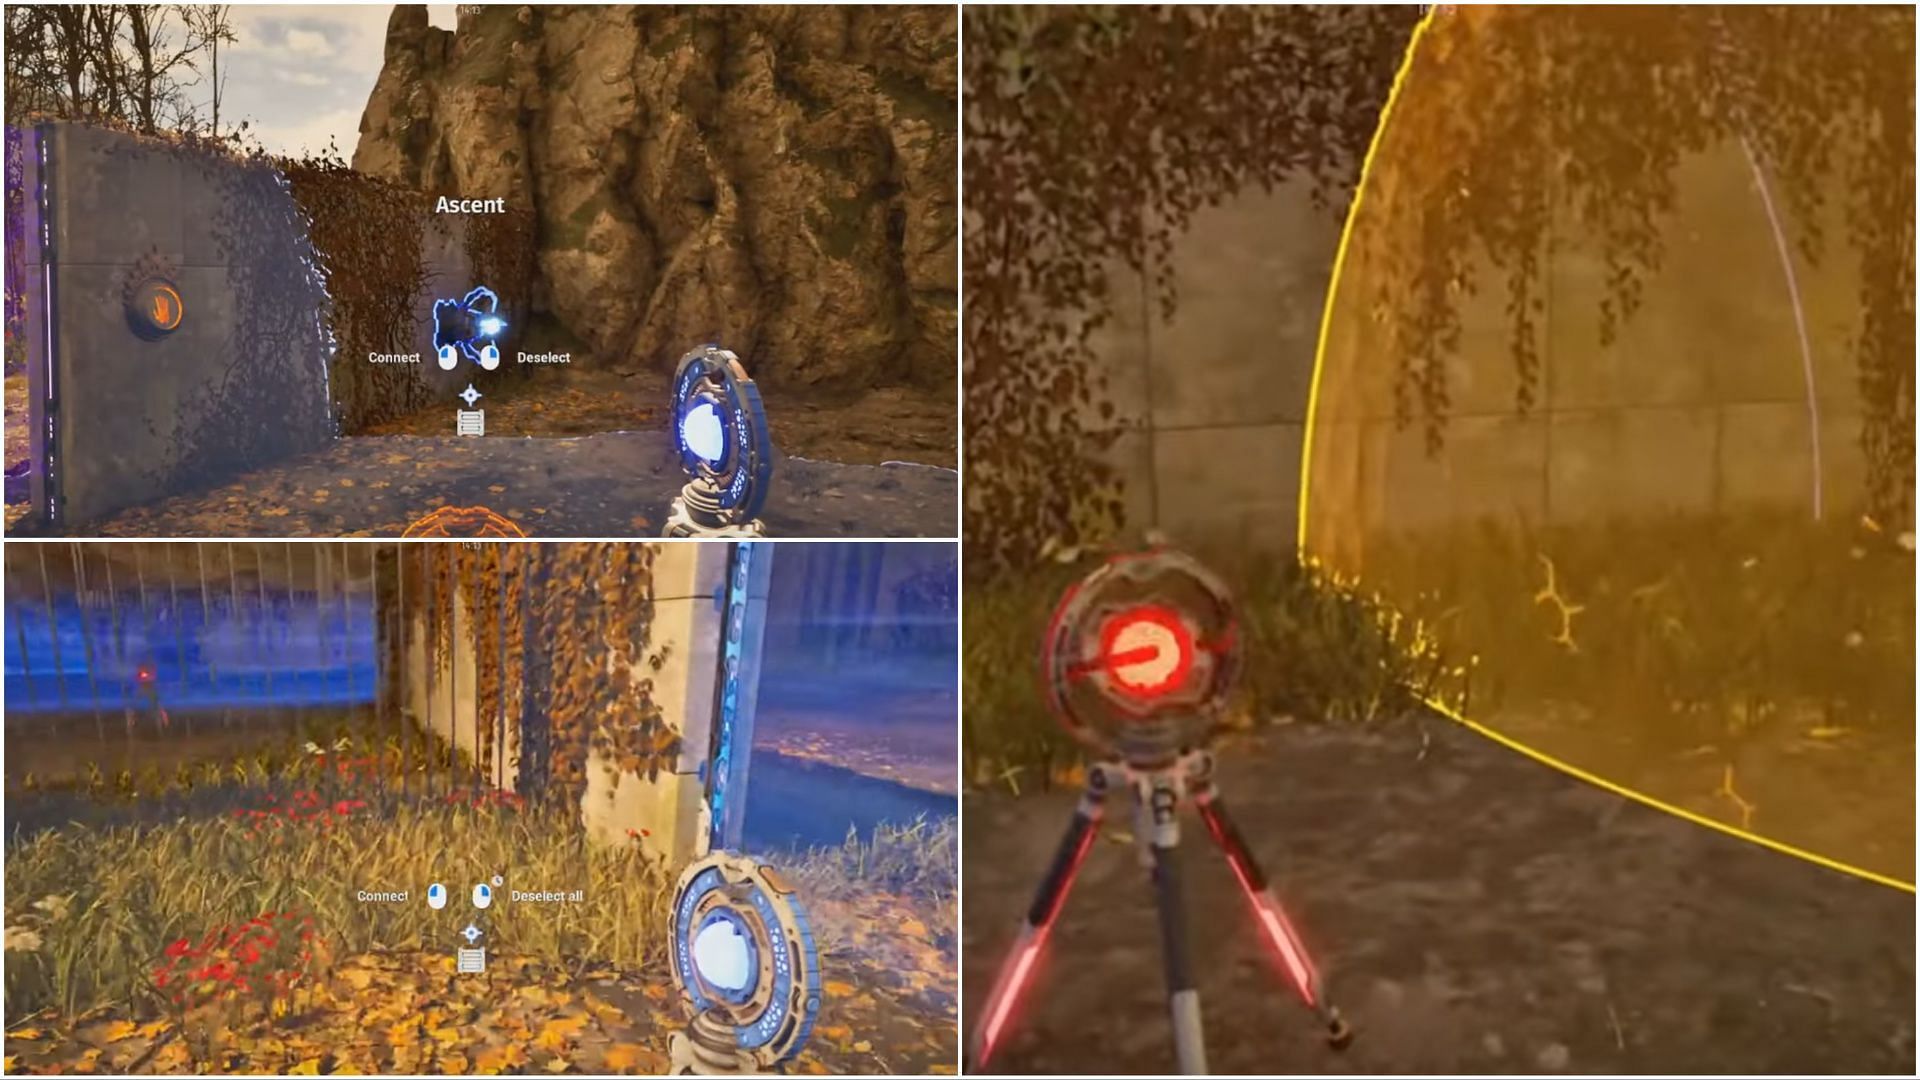
Upon entering the Ascent's puzzle area, head straight to collect the activator. Turn around to locate a blue switch on the wall and select it. Advance towards the gates and place the activator nearby. This action will generate a yellowish sphere, enveloping the gates and a portion of the area beyond. Move beyond the gates, turn left, and enter, where a cubic device and a red activator are placed.
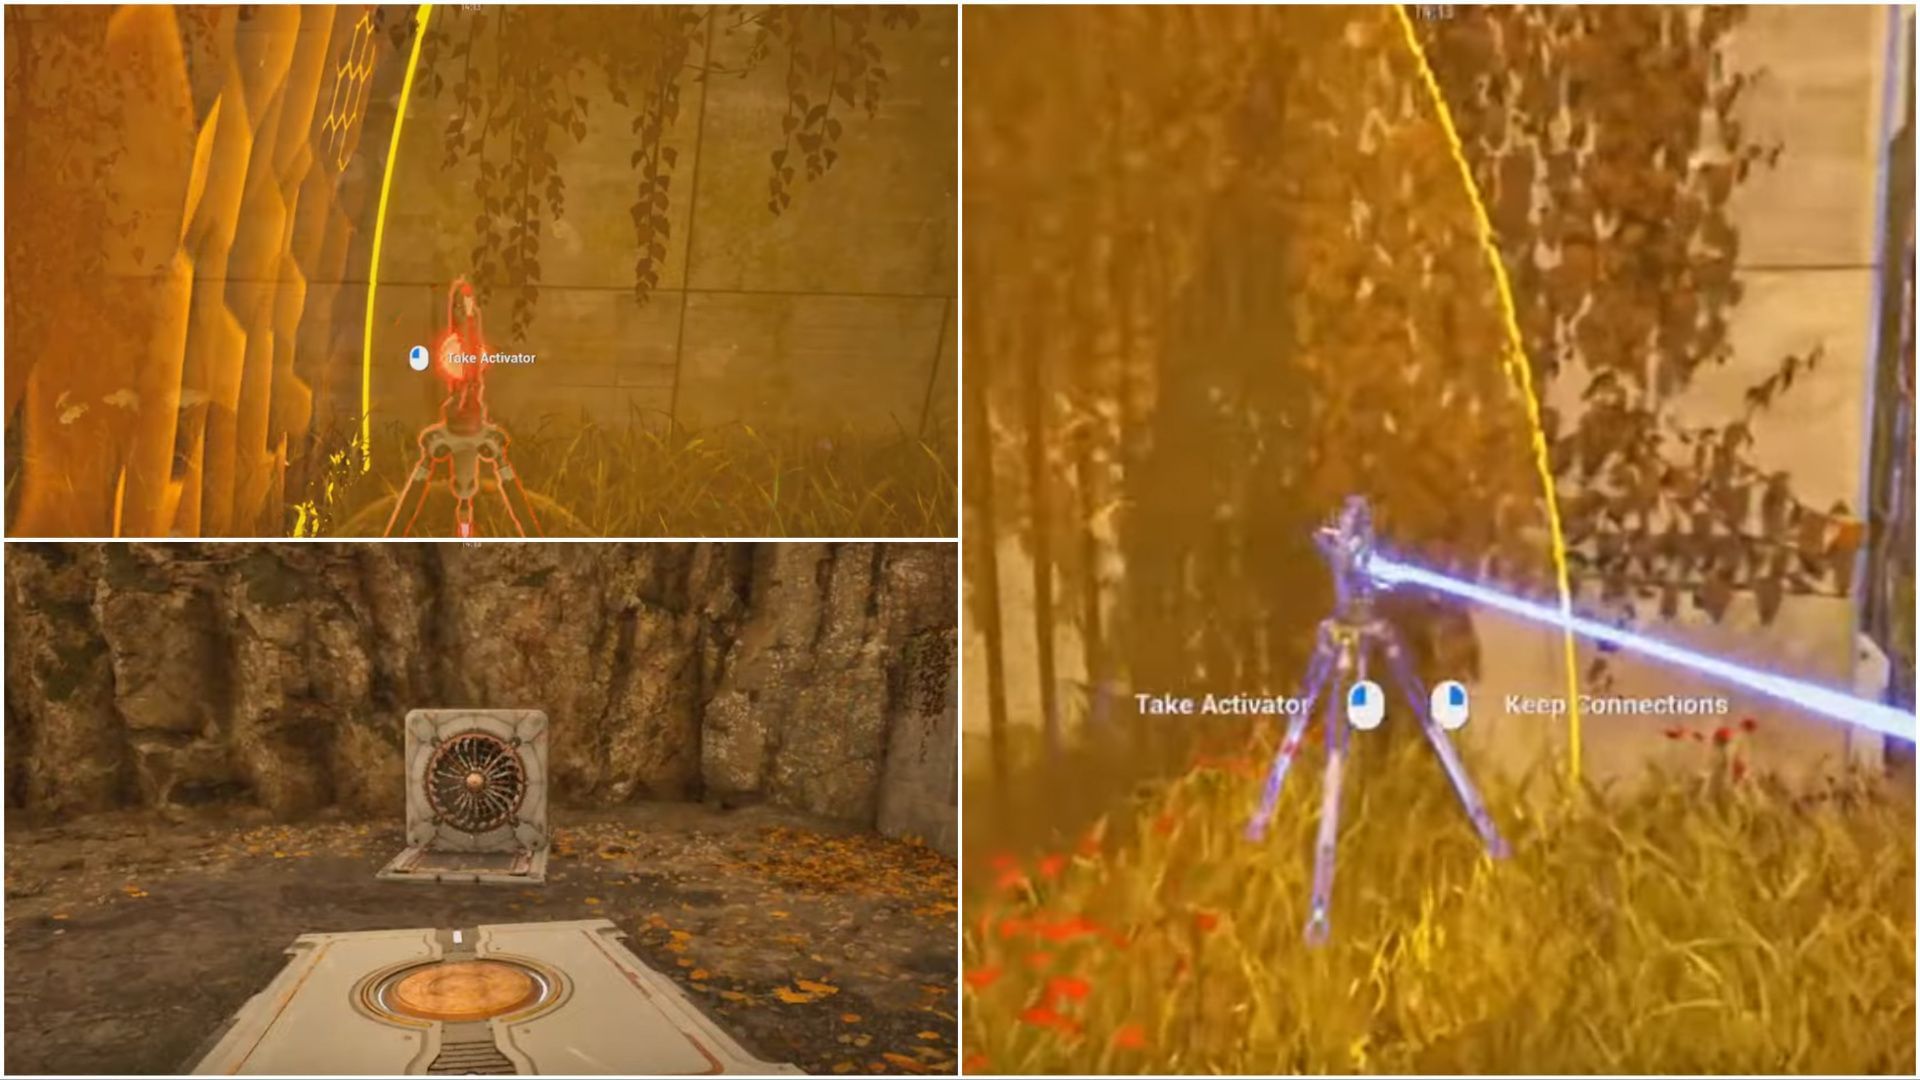
Retrieve the red activator and position it in a corner. Pick up the cubic device and return to the initial activator area. You will find a fan device in the corner. Now, place the cubic device on it, then pick up the activator you placed near the gates.
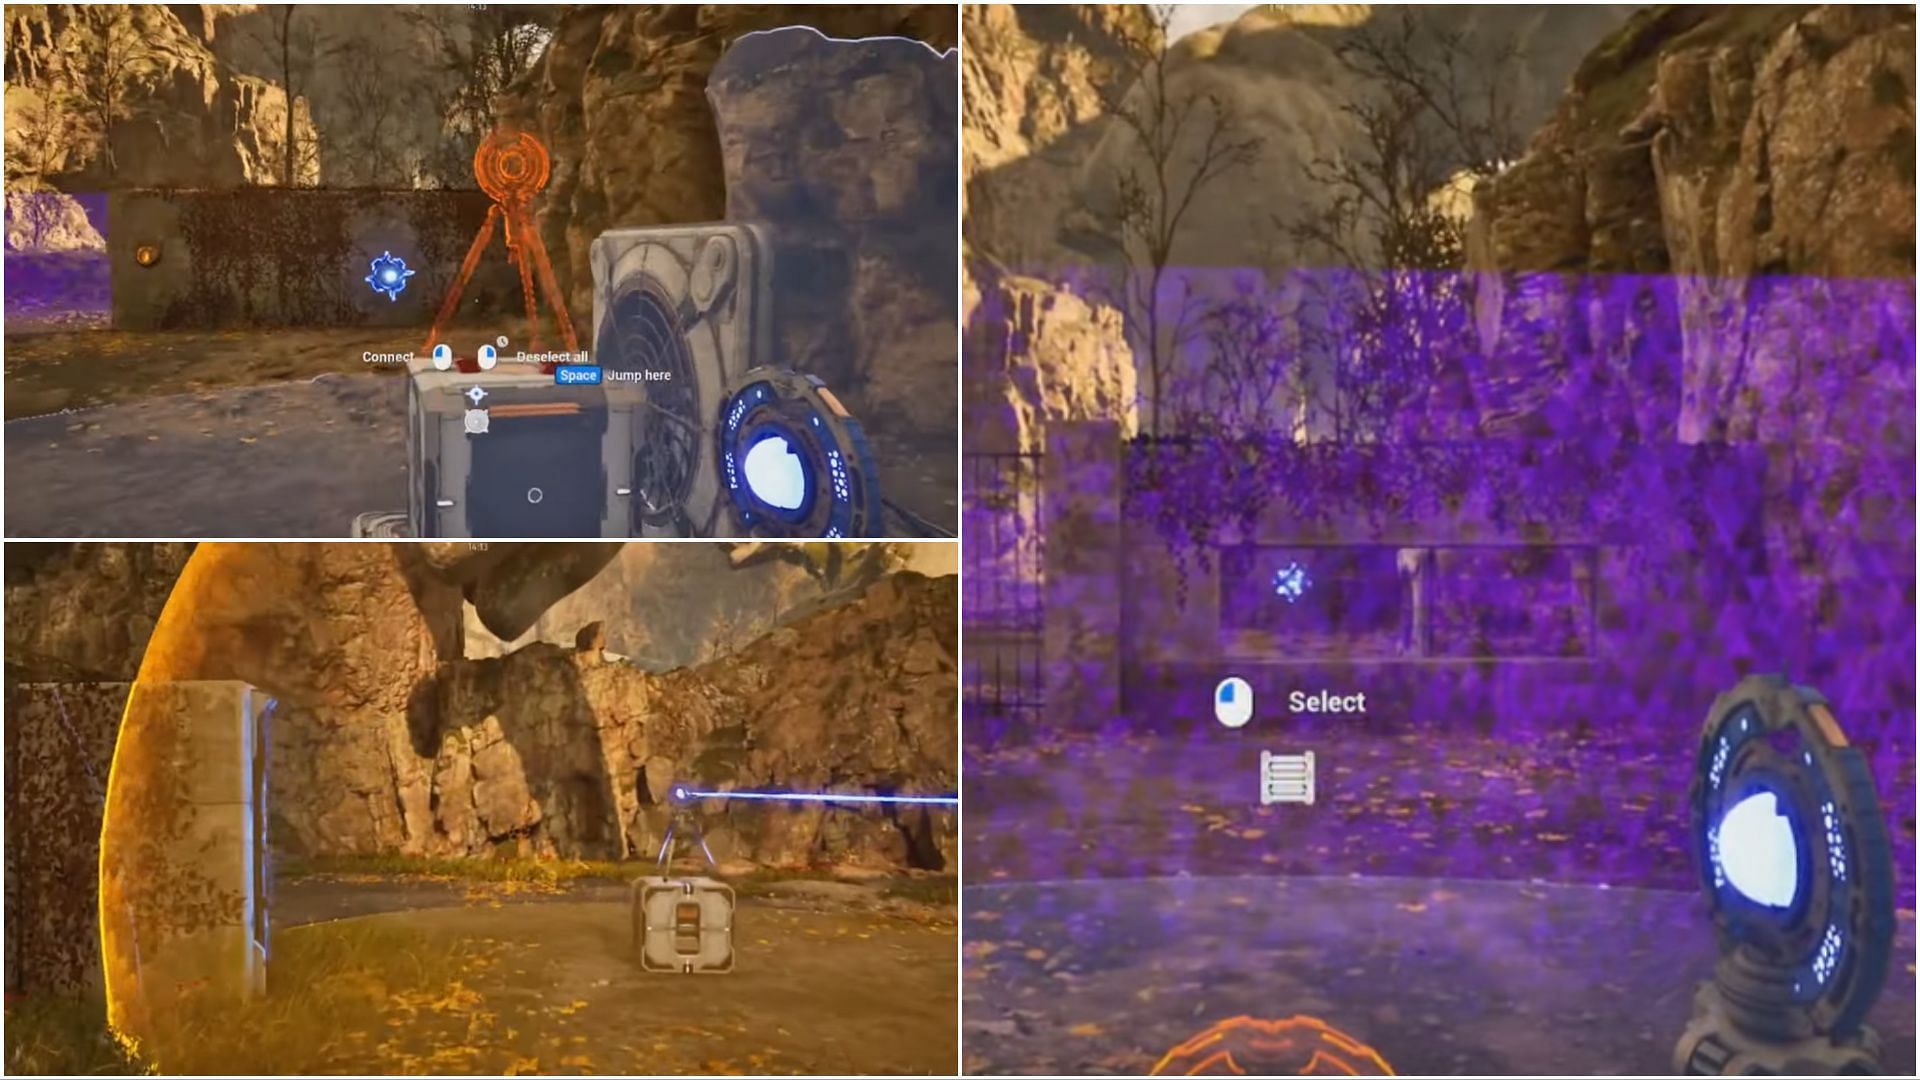
Position it above the cubic device. The blue switch will propel the latter to the puzzle's center area. Go there, pick up the activator, then move forward, turn left, and you will encounter a purple laser barrier.
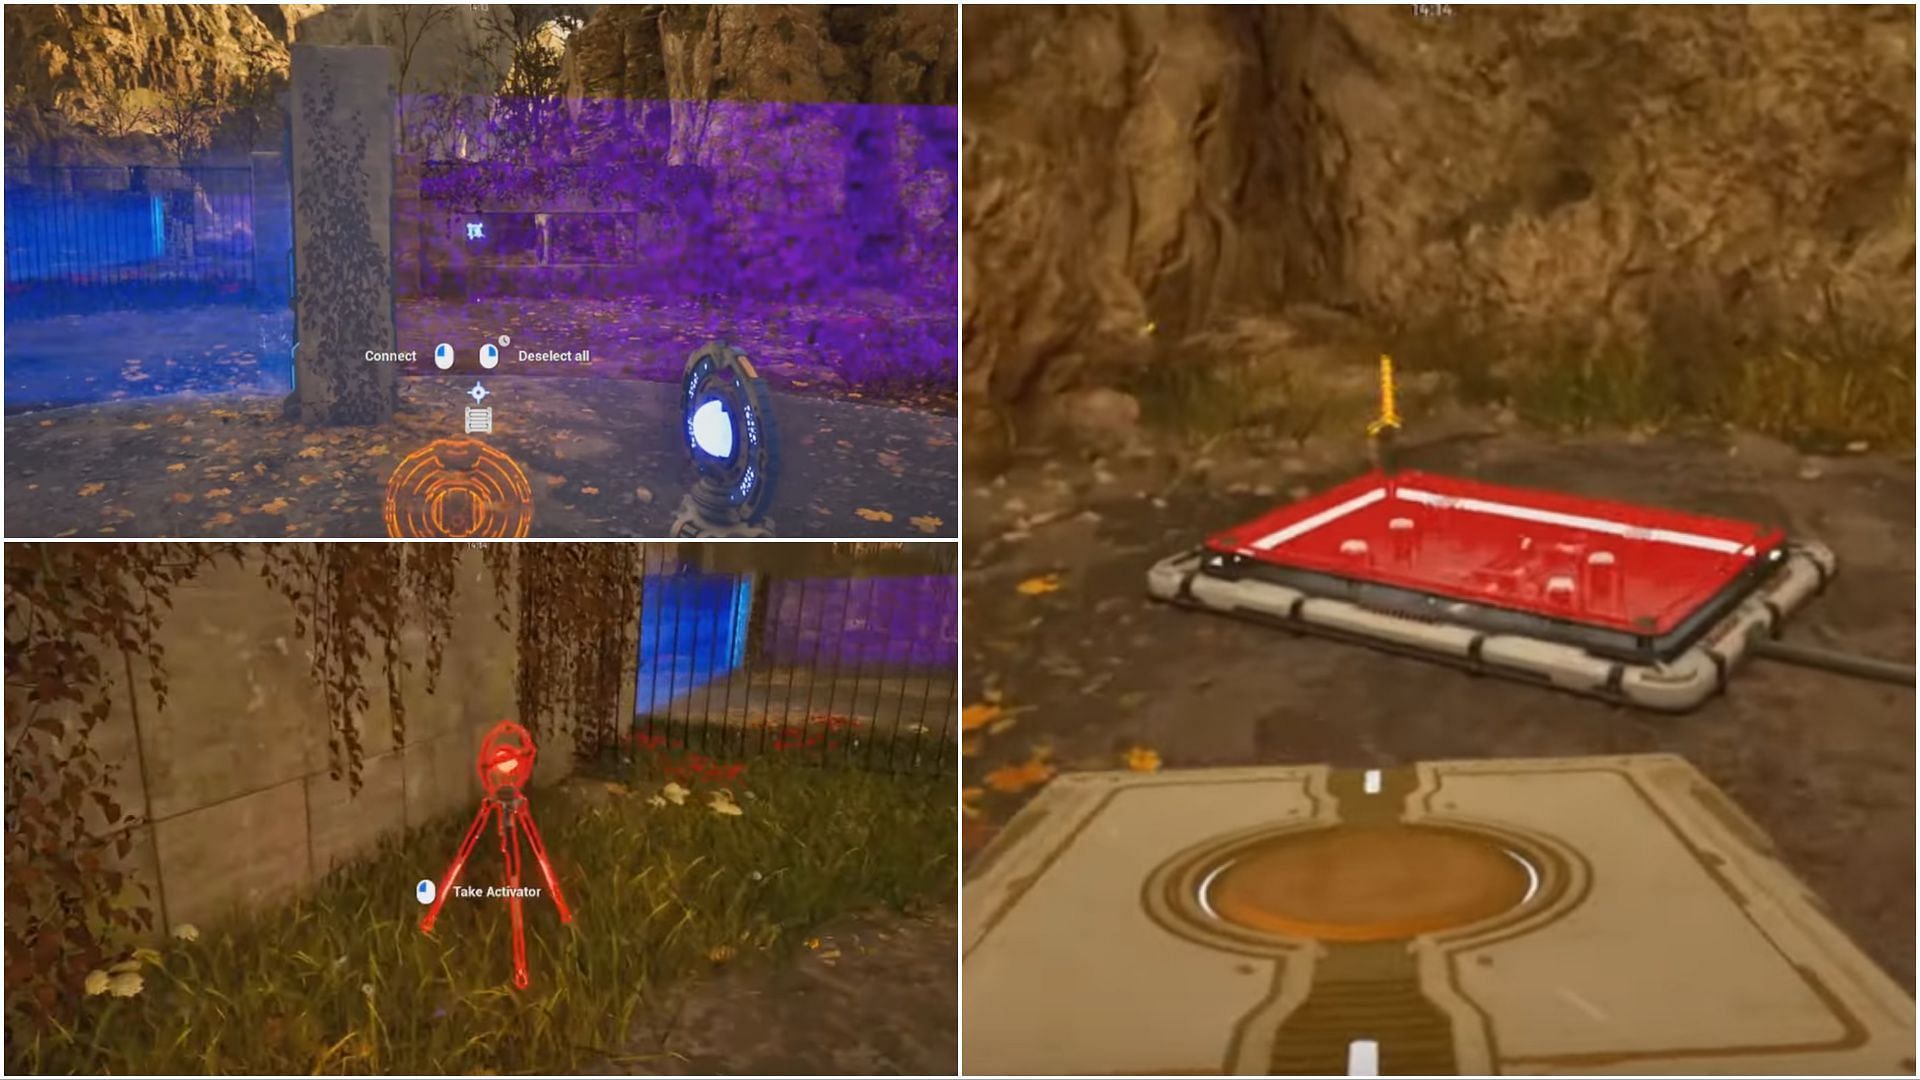
Through the barrier, spot the blue switch, select it, and place the activator on the ground. Move to the left, pick up the red activator, and place it near the previous one. After that, go back and collect the cubic device. Then, head to the activator area. You will find an empty cubic slot in the corner; place the cubic device in it.
Pick up the activator you set down earlier that's aligned with the blue switch. Position it near the empty cubic slot. Retrieve the red activator and then place it behind the cubic slot. Lift the cubic device from its place, go left to find a fan device, and insert the former into it.
Pick up the red connector and stand above the cubic device. When you do this, you will get a jump boost. Upon reaching the upper platforms, locate the main device. Step onto the platform and interact with it to complete the puzzle.
