
'%20x='0'%20y='0'%20height='100%25'%20width='100%25'%20%0A%20%20%20%20%20%20%20%20%20%20xlink%3Ahref='data:image/jpg;base64,/9j/2wBDAAYEBQYFBAYGBQYHBwYIChAKCgkJChQODwwQFxQYGBcUFhYaHSUfGhsjHBYWICwgIyYnKSopGR8tMC0oMCUoKSj/2wBDAQcHBwoIChMKChMoGhYaKCgoKCgoKCgoKCgoKCgoKCgoKCgoKCgoKCgoKCgoKCgoKCgoKCgoKCgoKCgoKCgoKCj/wgARCAAGAAoDASIAAhEBAxEB/8QAFgABAQEAAAAAAAAAAAAAAAAAAAUI/8QAFQEBAQAAAAAAAAAAAAAAAAAAAgP/2gAMAwEAAhADEAAAAM4TQU//xAAgEAABAwIHAAAAAAAAAAAAAAABAAIDBBMFERIhIzGh/9oACAEBAAE/AIIXyYc+otwW2Eg96tgCjKzM8fq//8QAFREBAQAAAAAAAAAAAAAAAAAAAQD/2gAIAQIBAT8AC//EABYRAAMAAAAAAAAAAAAAAAAAAAABEv/aAAgBAwEBPwCmf//Z'%3E%3C/image%3E%3C/svg%3E)
Gold is one of the most valuable items in Minecraft. It can be used for practical base upgrades such as powered rails or poured over an apple to create the ever-important golden apple. This makes a gold farm almost assuredly one of the first farms that any Minecraft world needs. Below is a quick and easy starter gold farm that players can build almost immediately upon entering the nether.
Materials and Setup

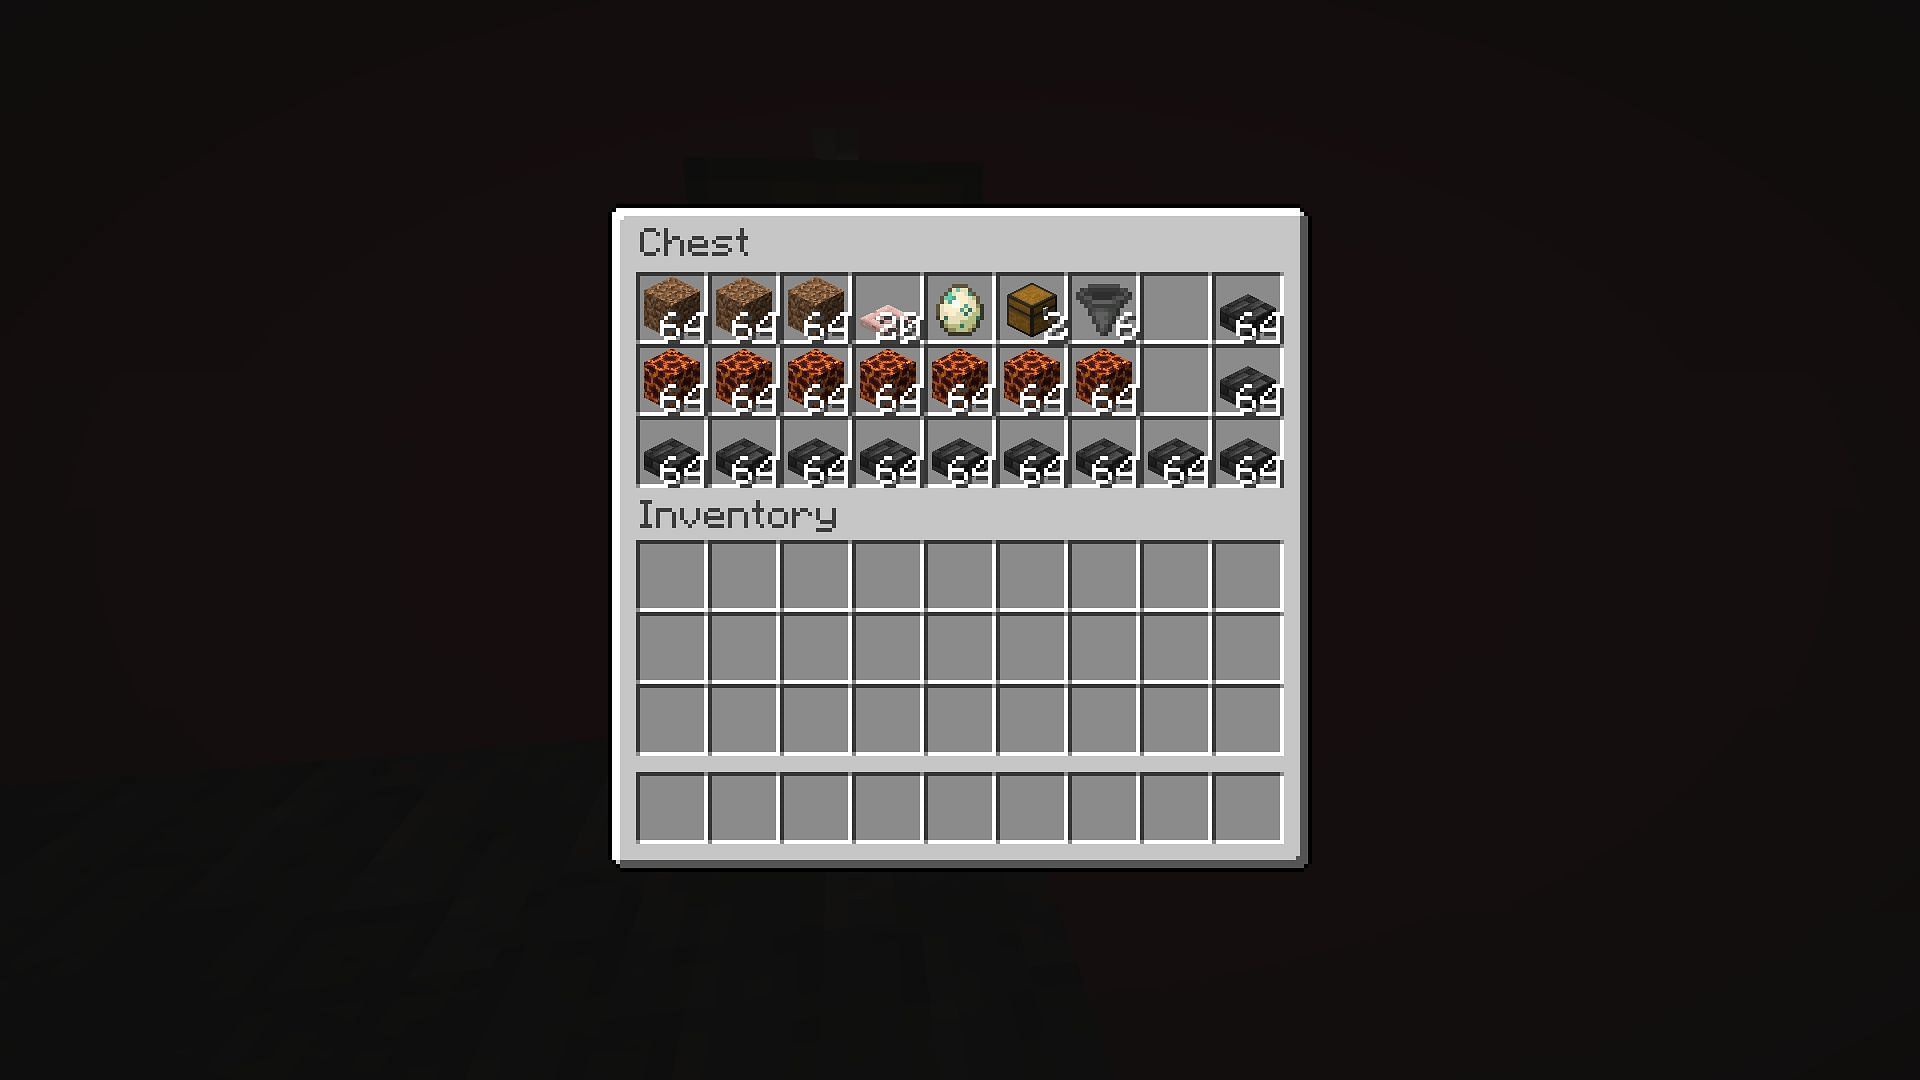
Chart New Territories with the ultimate Minecraft Seed Generator!
Thankfully, this is quite a cheap Minecraft farm to construct, as its expandable nature means you can build a single layer to have a functional farm in the short term and worry about expansion in the future.
The total blocks, items, and resources you will need to create this starter gold farm are three stacks of temporary blocks, twenty trapdoors, a turtle egg, two chests, six Minecraft hoppers, seven stacks of magma blocks, and 11 stacks of non-spawnable blocks, to your preference.
Lastly comes the pre-build setup. While you could build this in the normal nether, massive spawn locations will mean the farm has a slow output. Thankfully, players can get on top of Minecraft's nether dimension and build up so far that the only viable spawns will be in the farm, ensuring rates stay high.
How to build a Minecraft starter gold farm
1) The start point

The first thing you will need to do after getting on top of the nether is build your way up to Y=253. This will be the eventual first layer of the farm, so placing it correctly now will allow for future expansion and maximum efficiency.
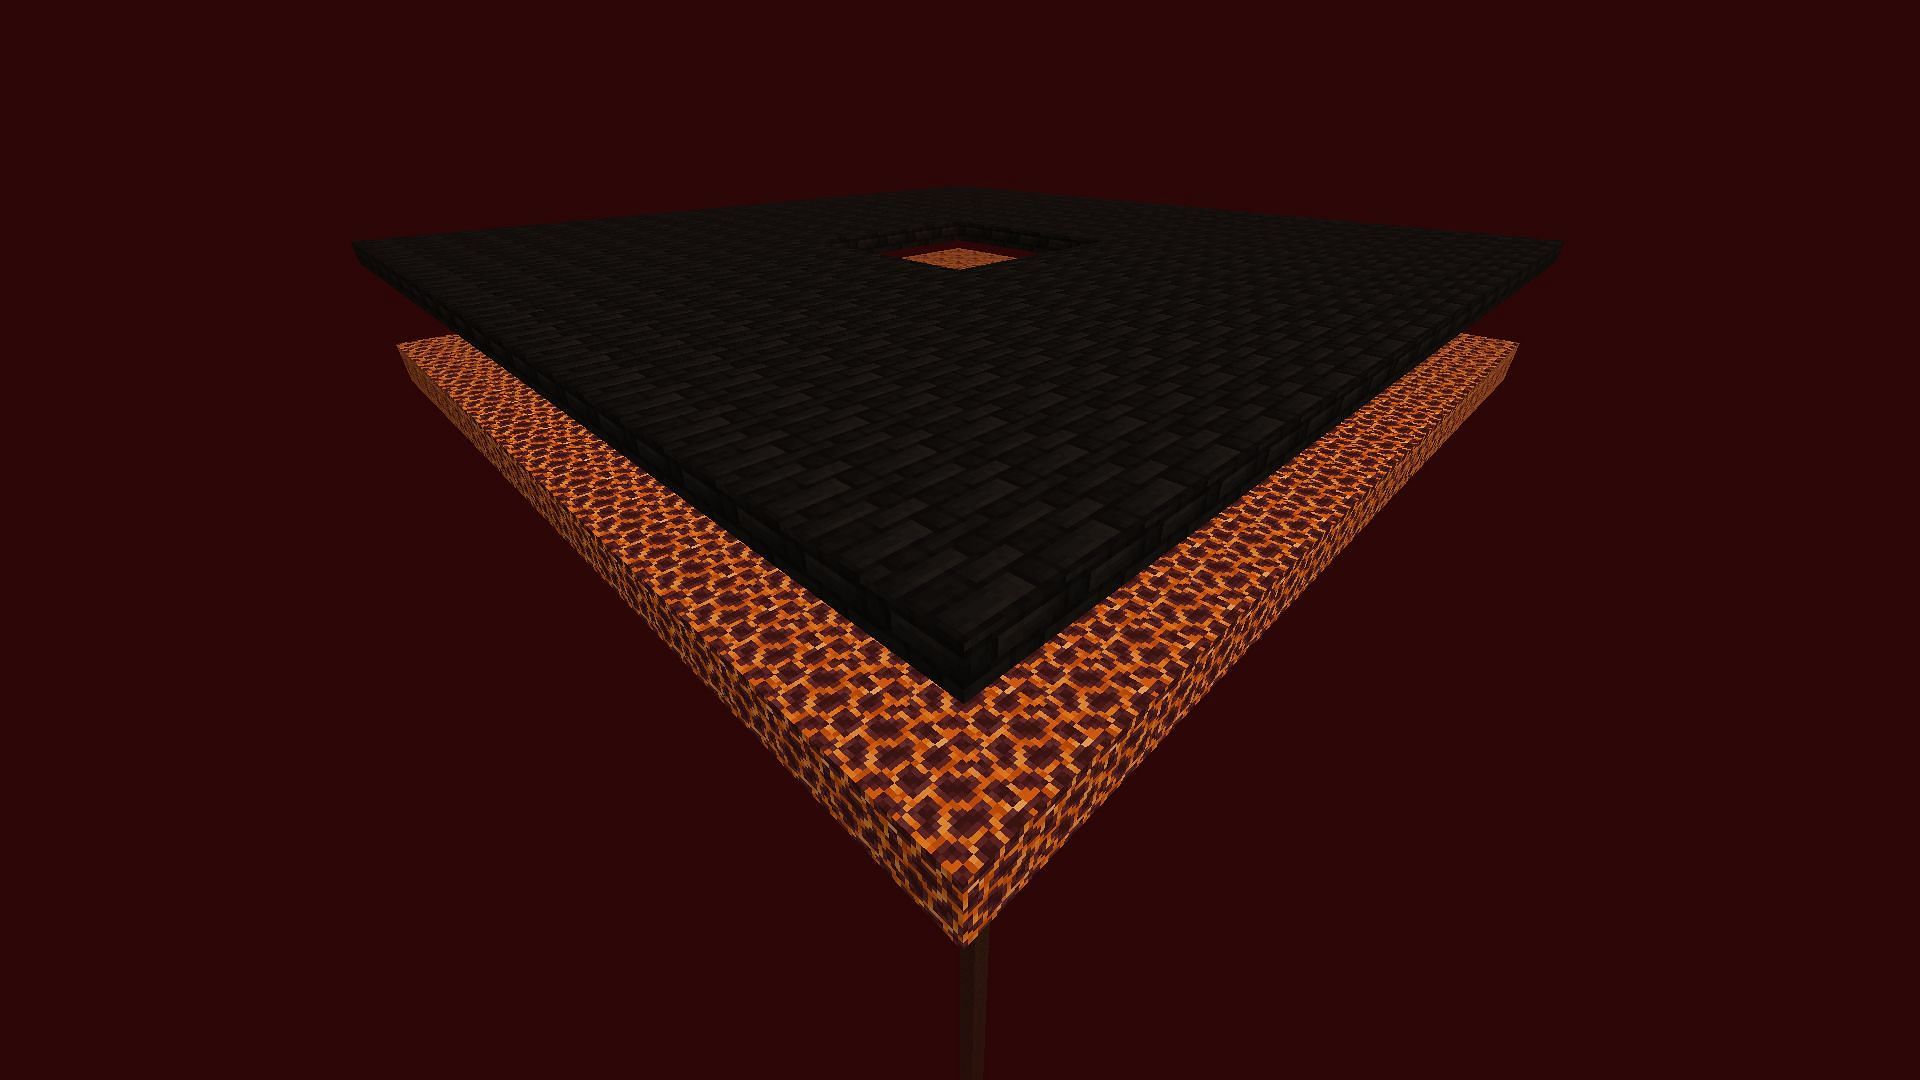
2) Mark out the inner bounds of the floor and roof

Using this pillar as a starting point, you will want to place a block in any direction. This block is in the middle of the farm. Build two blocks out in each cardinal direction from this new middle block.
This means you will only need to place one block in the direction of the pillar. Place a Minecraft magma block at the end of each of these extensions. This is the start of the farm's spawning platform.
Place two temporary blocks from each magma block and then a half slab. These slabs will eventually make up the roof of the farm, keeping anything from spawning on top.
3) Build the roof and spawn layers
The next thing you will need to do is build out the roof and initial spawn layer. To do this, you will need to build a ring of half slabs, connecting and covering each of the placed magma blocks from the last step.
Then, from the middle of each side of this square, build out seven additional slabs. Then, fill this area in. Do the same with magma blocks for the spawn platform below.
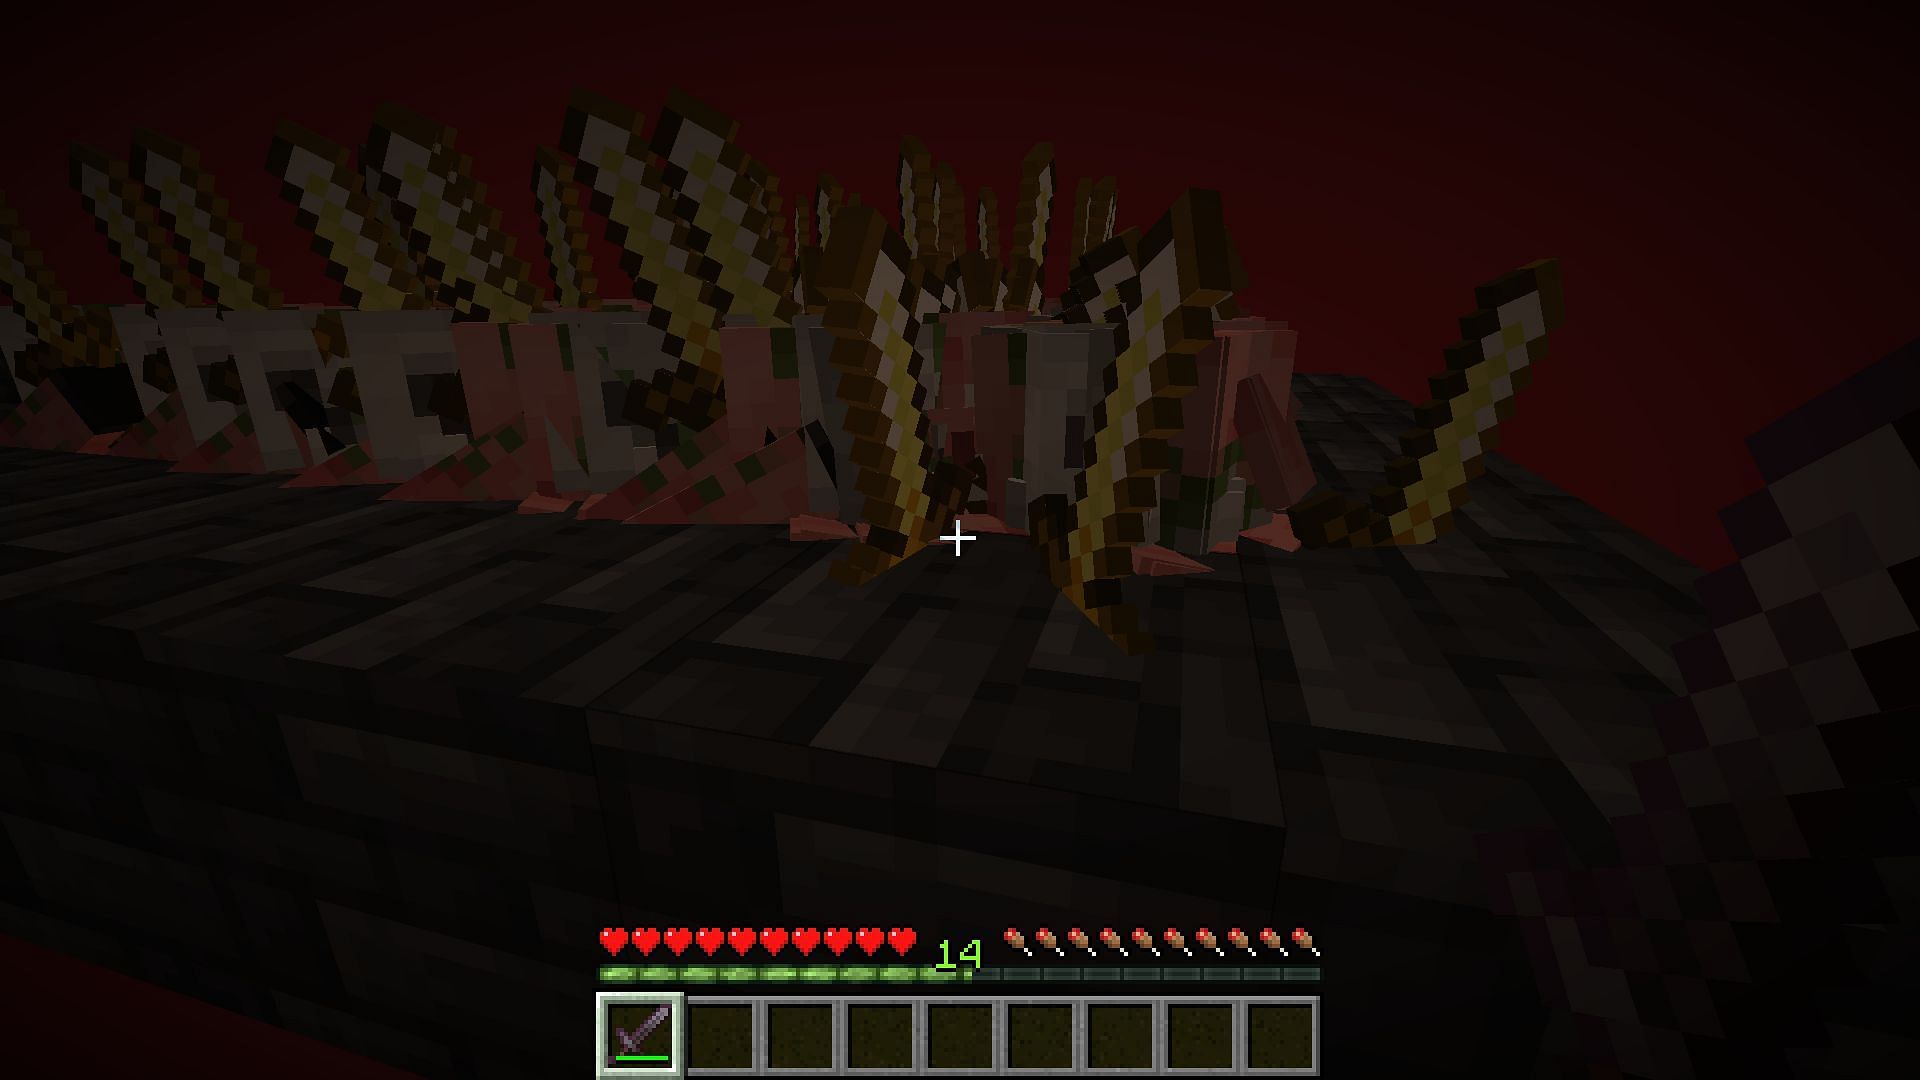
4) Build the bait
From the center of the gap in the middle layer, which should still be your initial building blocks, place three trapdoors on top of each other in each cardinal direction.
This will form a wall of trapdoors that will protect our Minecraft turtle egg bait while still being transparent to mobs in terms of aggro. Place a turtle egg in this center block and close all the trap doors to seal it in safely.
Next, you must replace the initial set of temporary blocks with alternatively facing trapdoors. These Minecraft trapdoors can be made of any material. This will trick the piglins into thinking that they can reach the turtle eggs when, in reality, they are going to walk into a pit. This will drop them into the kill and collection area of the farm.
5) Create the collection platform
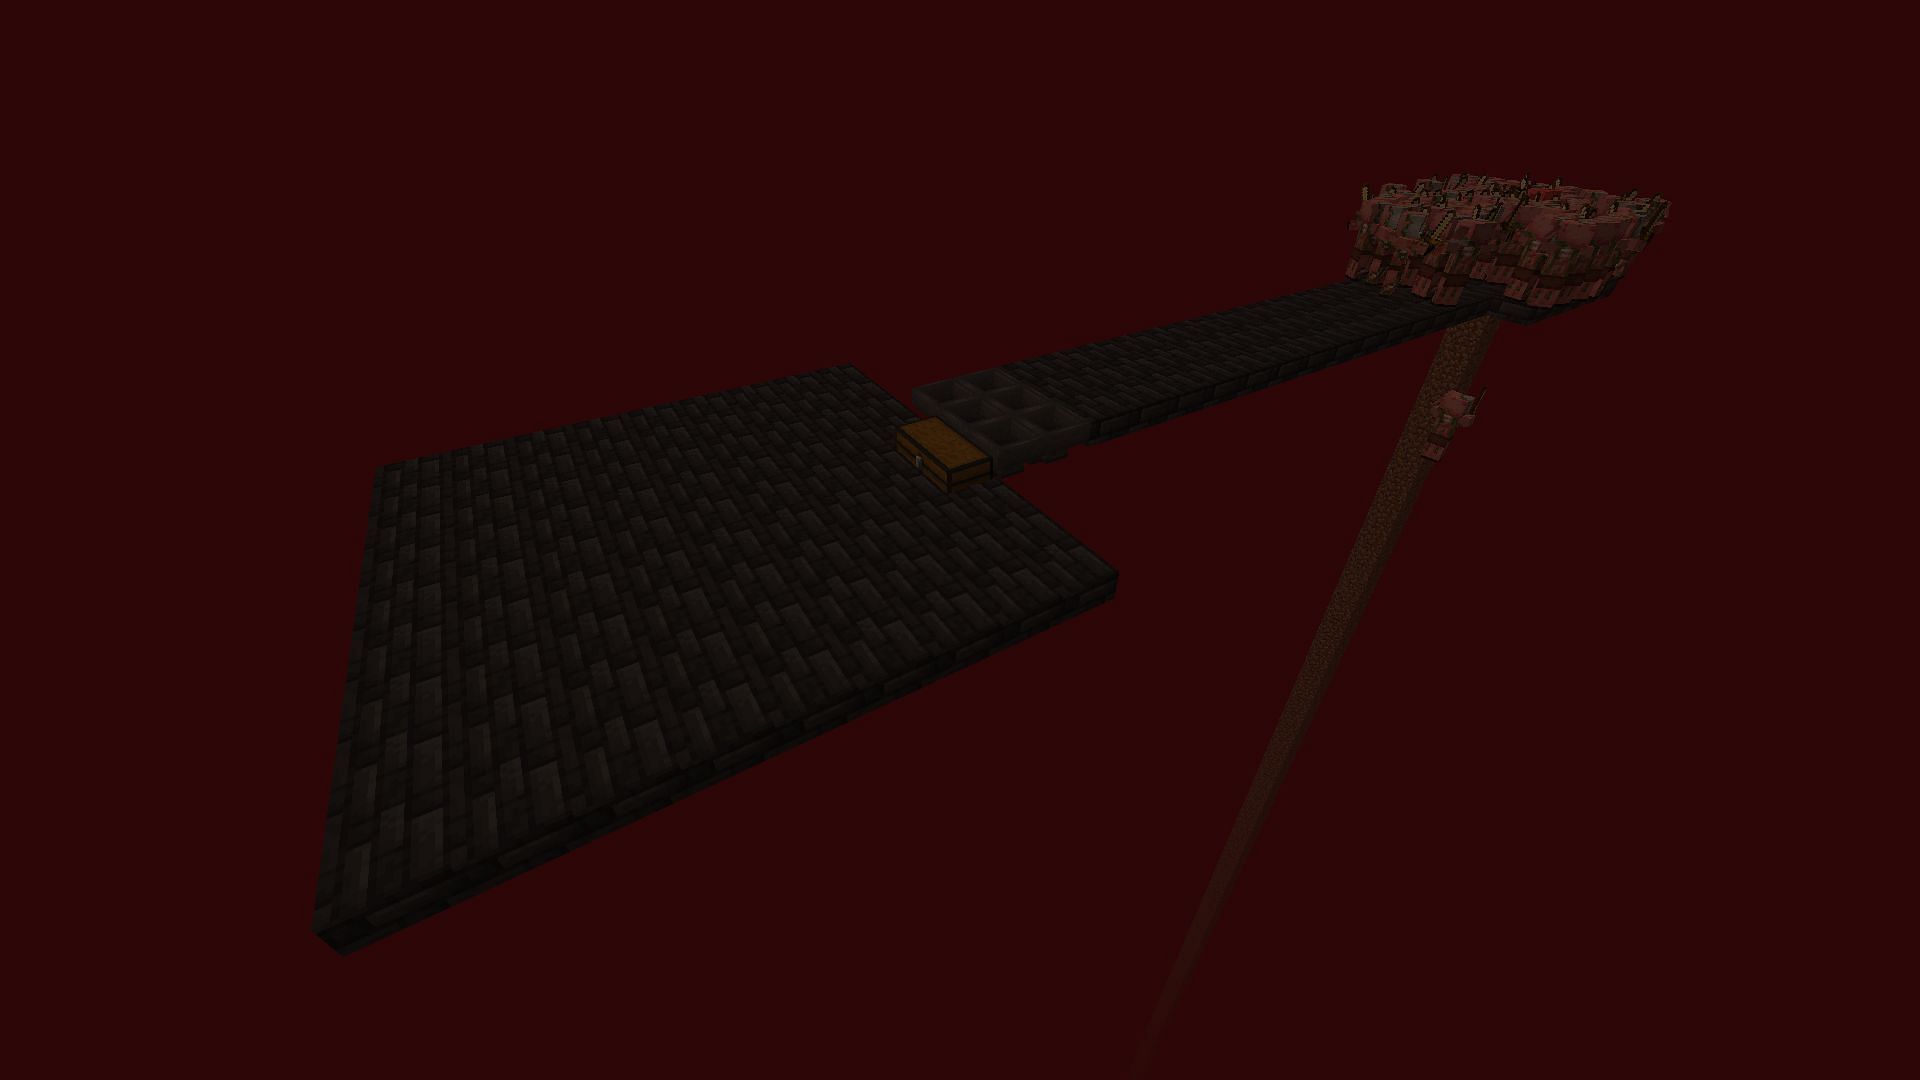
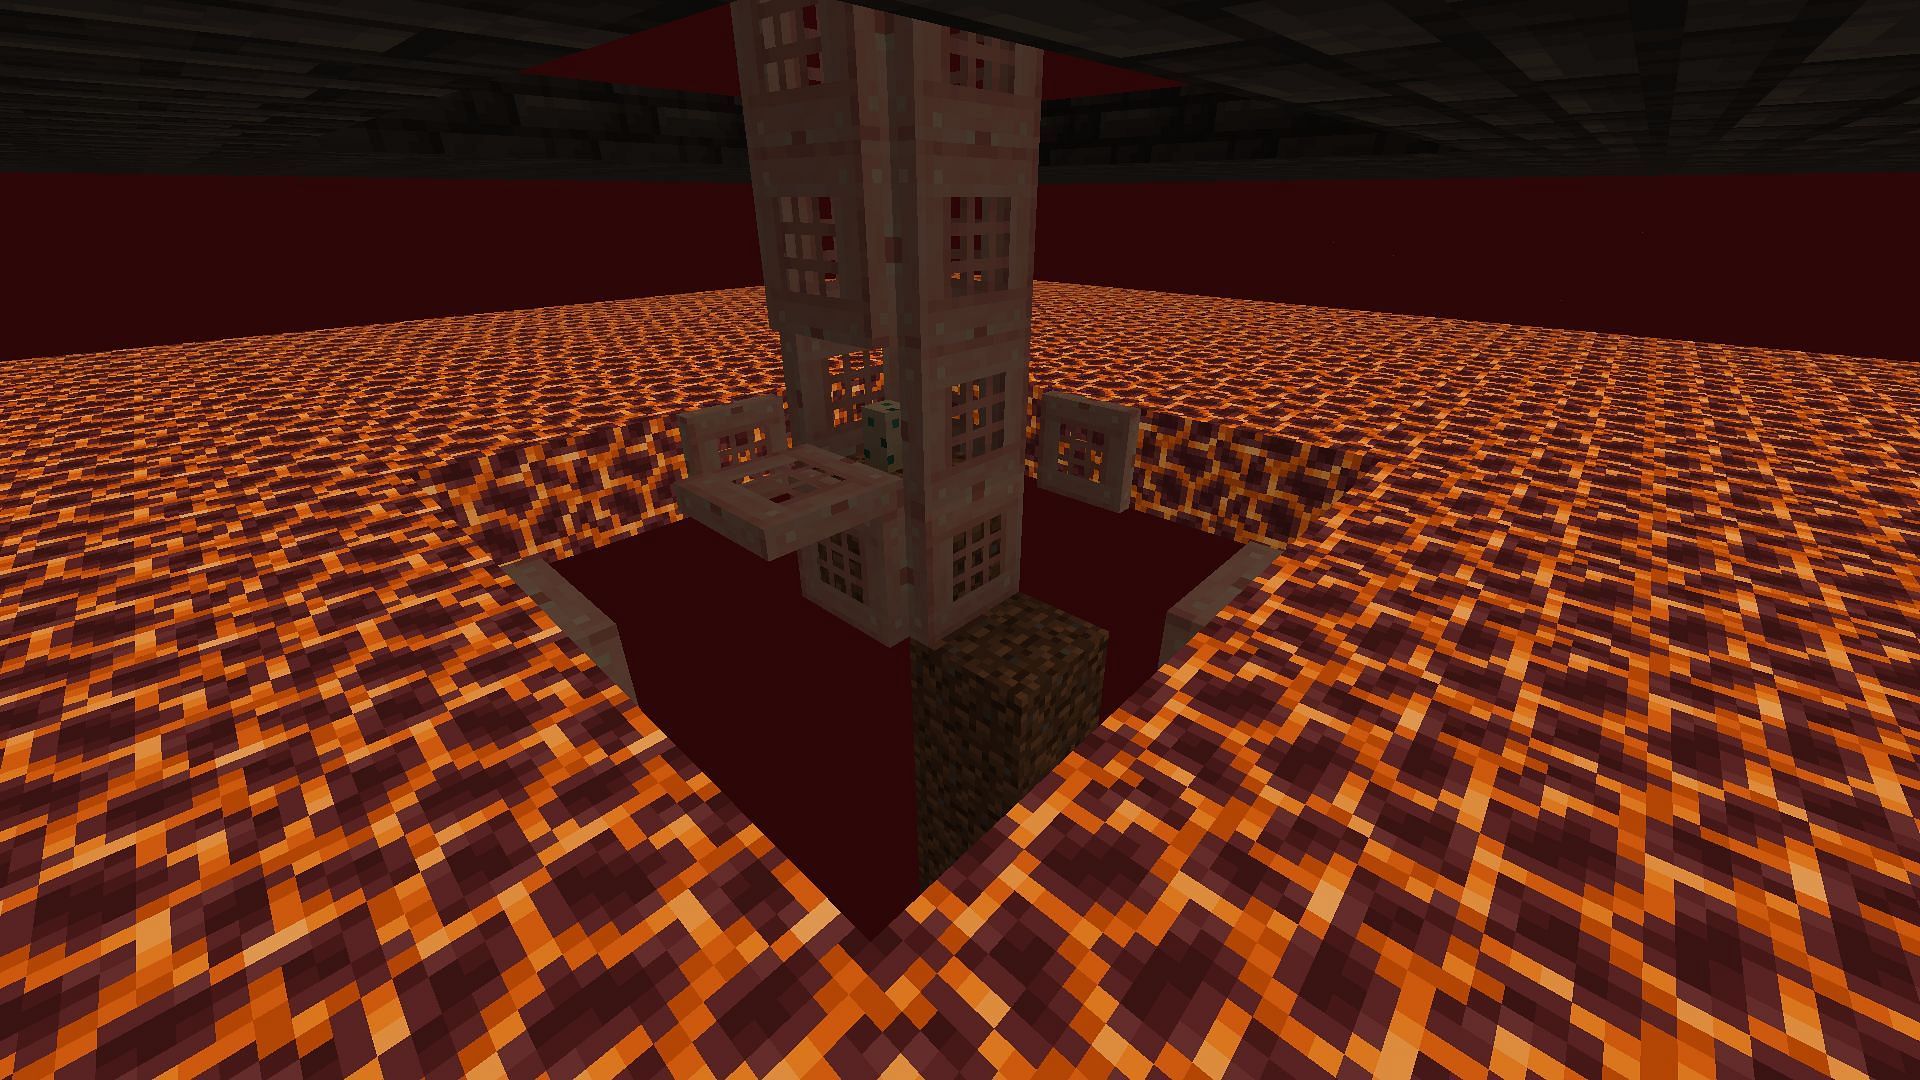
The next piece of the farm to create is the collection platform and output area. You will need to return to the initial pillar and dig down to Y=231.
From here, take your non-spawnable blocks, in this example, the always useful and sometimes broken Minecraft slab, and build a five-by-five block square centered underneath the turtle egg above.
Then, build out 14 blocks from the center of any side, with this extension also being three blocks wide. From the back of this extension, create a six-hopper collection platform leading into a double chest. Switching back to your spawnproof blocks, build a small room around the chest on the other side of the hoppers.
6) Collecting more bait
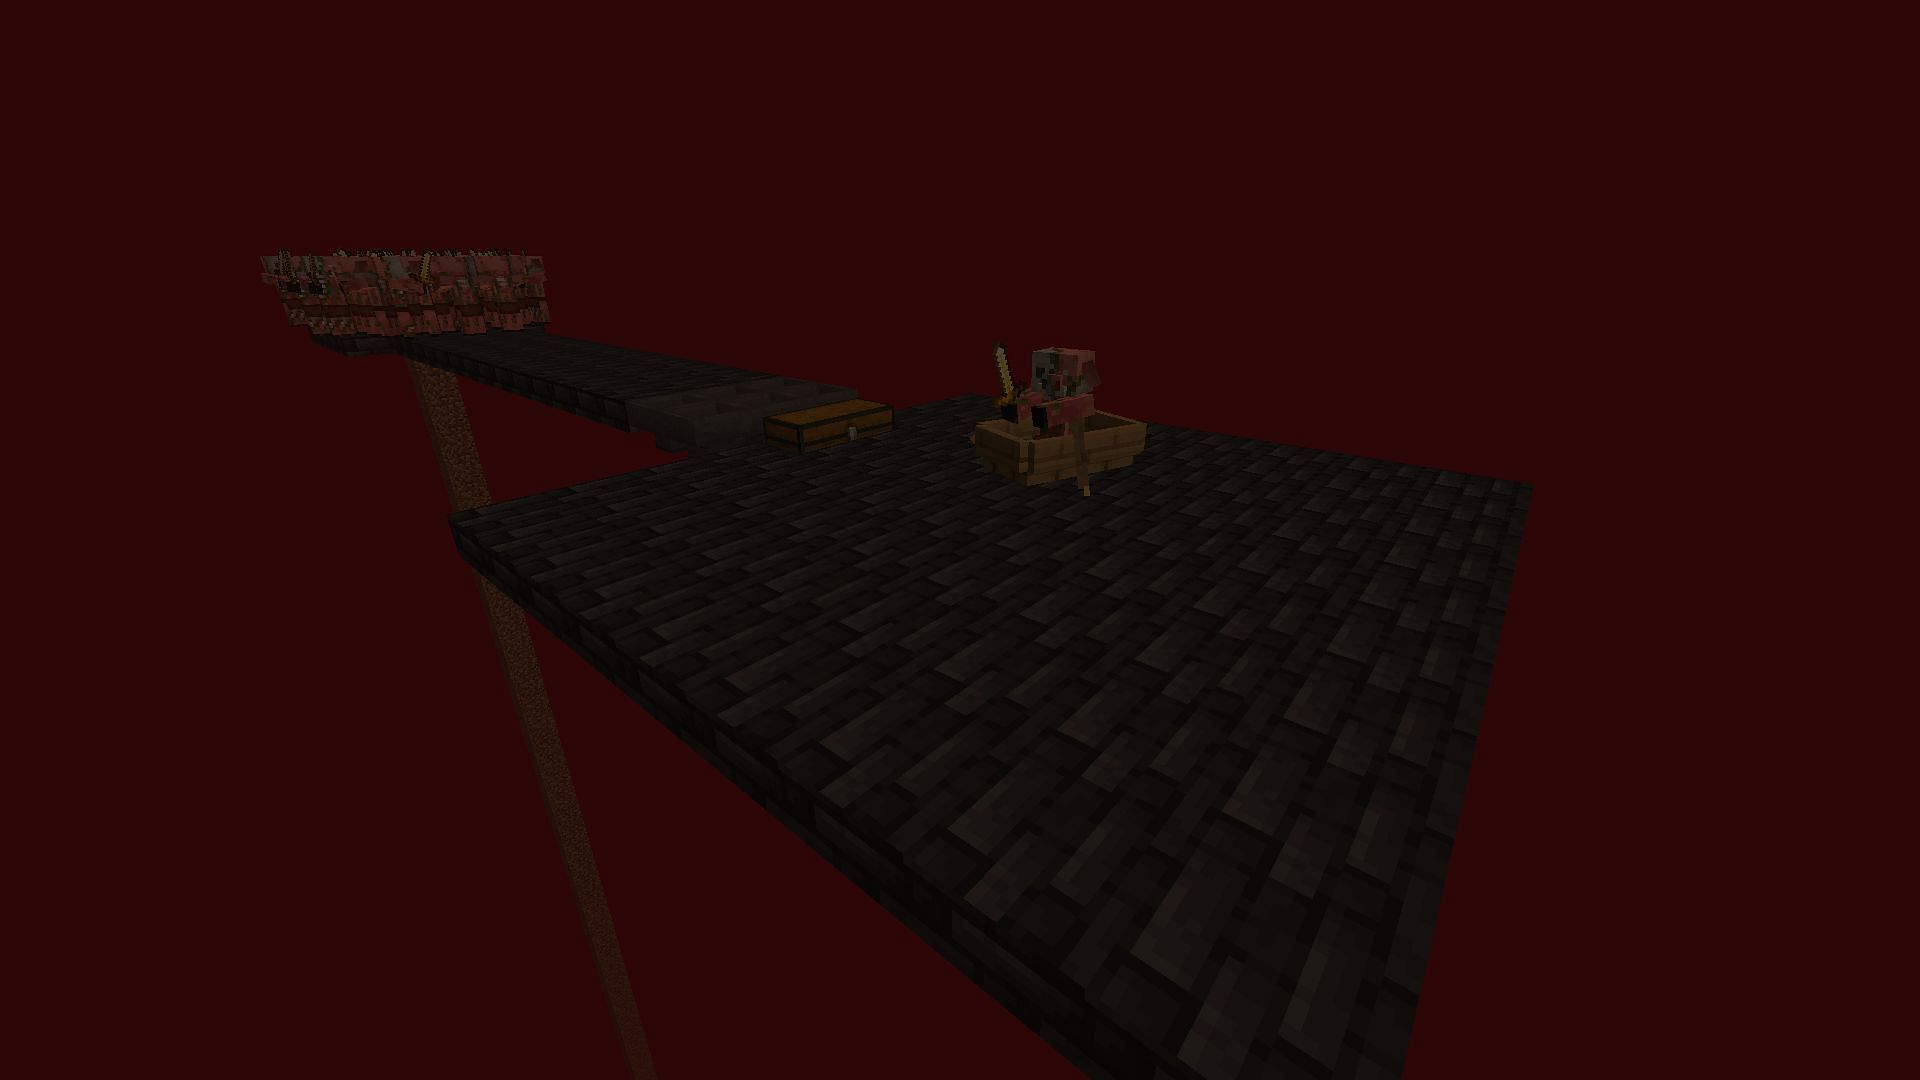
The last piece of the farm that is annoying to set up is the second piece of bait. You will need a way to draw the stream of piglins over to you, and the best way to do this is to keep a Minecraft zombie piglin outside the farm that remains aggressive towards you.
This will draw the falling piglins in as backup, where you can kill them over the hoppers.
7) Create the final protective ring and use the farm

From your collection chest, place a temporary block. On either side of the top half of this block, place a half slab. Break the temporary block and place another slab.
Build up a row of slabs, flanking the extension out from the piglin drop platform and placing a second layer of slabs on top of the first. This places the final resting spot on a half-block, meaning mobs cannot spawn on them.
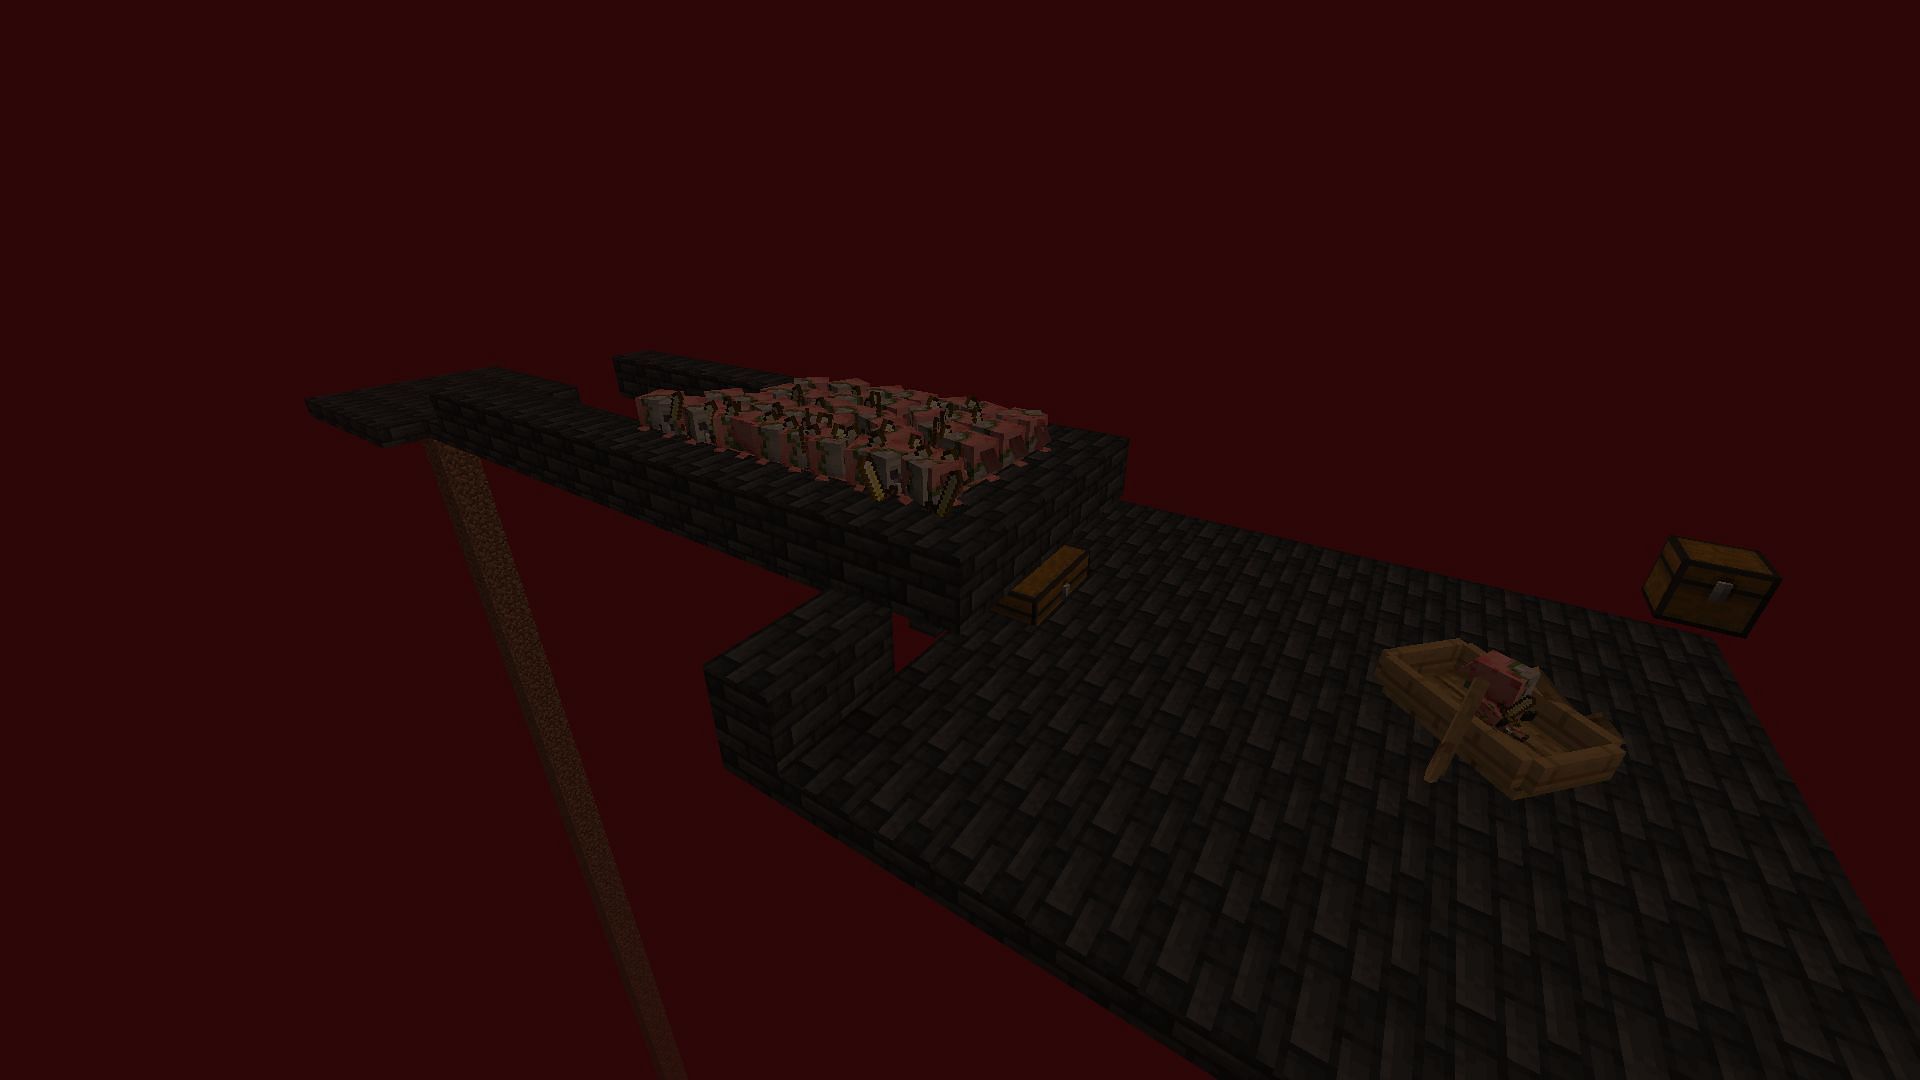
With the farm now complete, players will have easy access to moderate amounts of gold, allowing for simple Minecraft villager trading discount setups. This design can be iterated by adding additional layers beneath the first spawn platform. This will require players to rebuild the collection area of the farm, but it might be necessary if the player uses too much gold while building.

Uncover new worlds with our Minecraft Seed Generator!